-
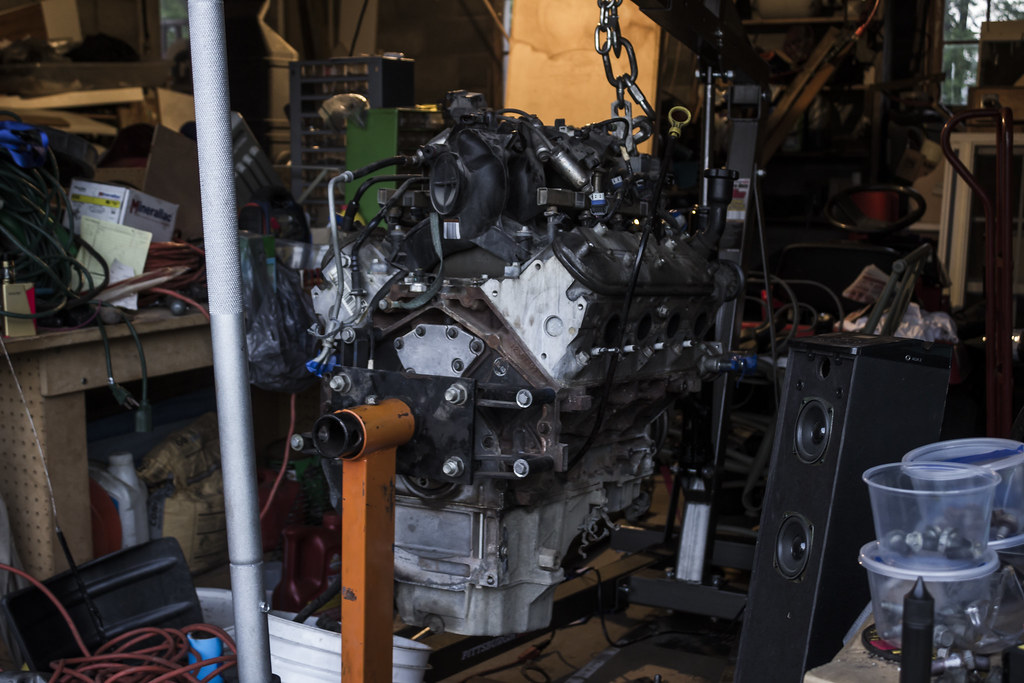
Little bit of progress yesterday, got the intake manifold pulled off and some other accessories, then painted the block black.
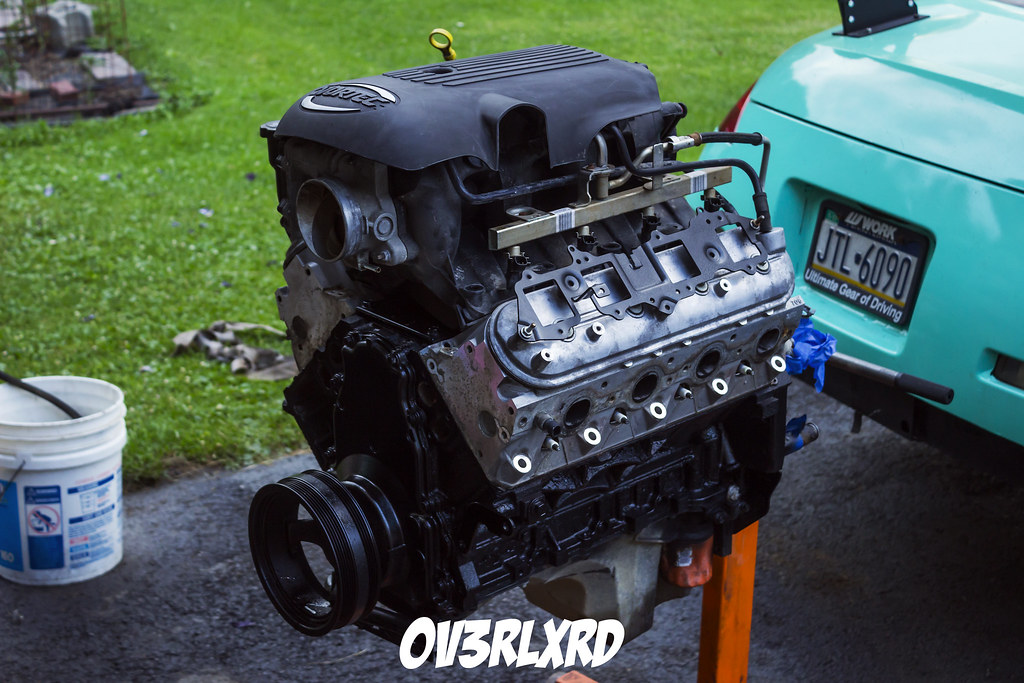 LSX Z33 by kyrinbingaman, on Flickr
Leave a comment:
-
Hey guys! Been a while since I last updated this, I'm horrible at doing it, I know.
So I ended up wrapping the car Tiffany Blue (*scene kid intensifies*) along with a small raise in height and that wing.
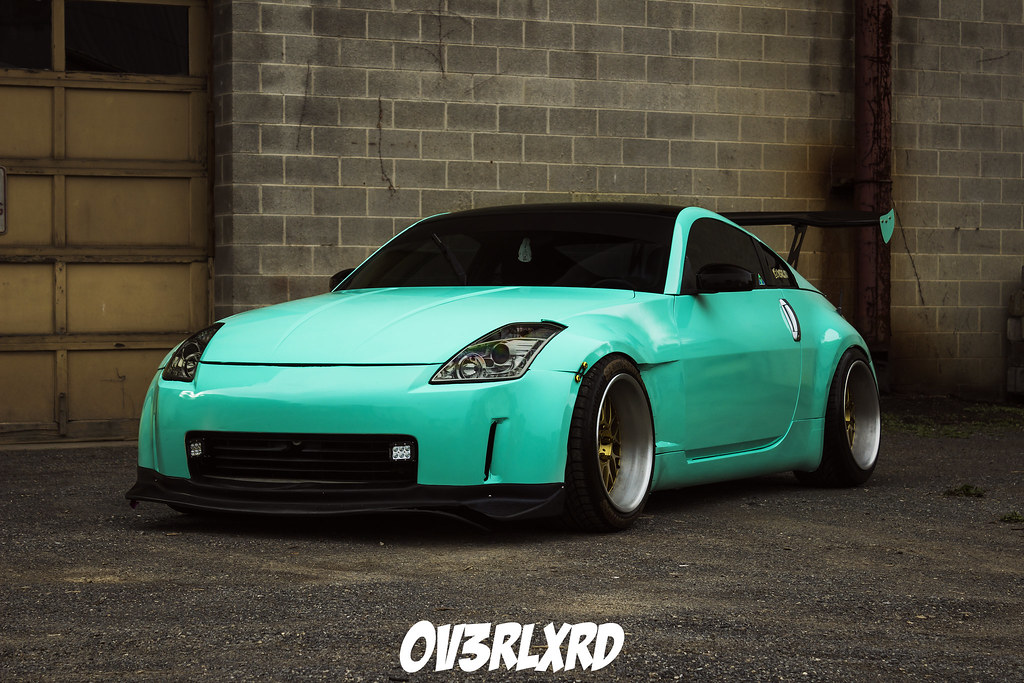 Tiffany Blue 350Z by kyrinbingaman, on Flickr
And I also got a polarizing filter which really helped my photos.
Then, the motor broke, again lol.
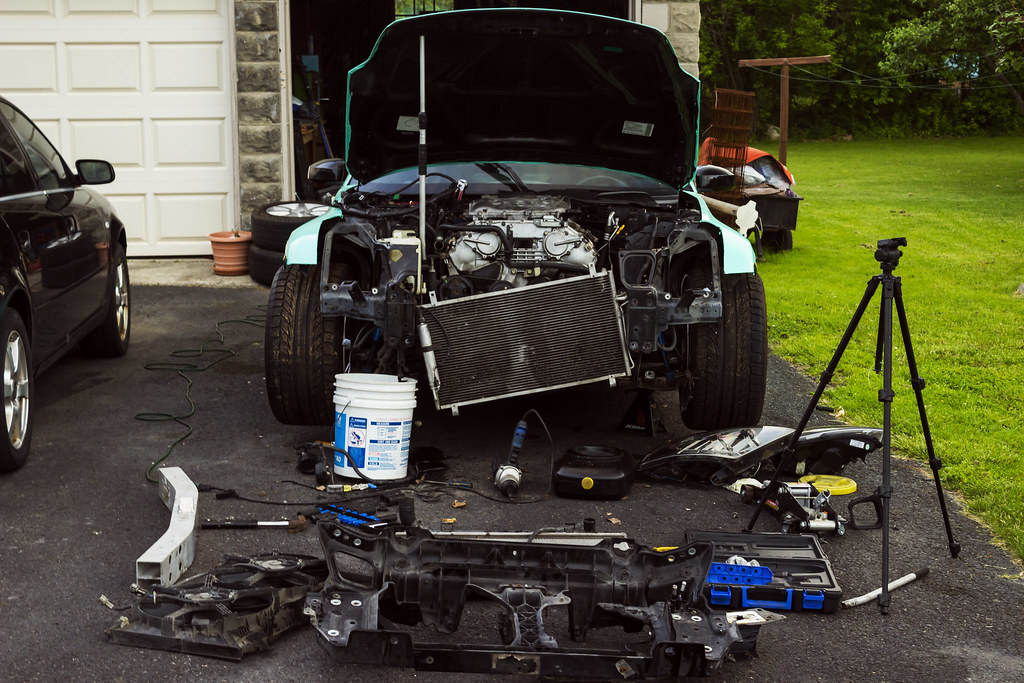 669 by kyrinbingaman, on Flickr
Started tearing another junk VQ out.
 IMG_3283 by kyrinbingaman, on Flickr
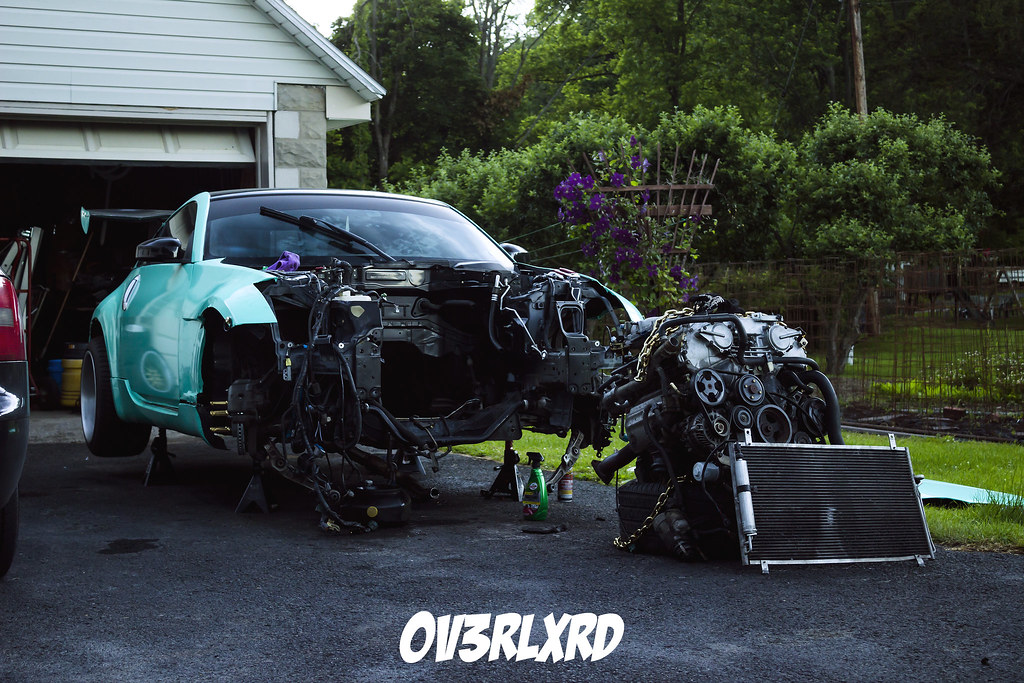
Motor out, I took a few weeks to decide what direction I wanted to take the car, as far as building a VQ then boosting it, but for the reliability of this thing (at least the luck I've had) compared to what I could have, I opted for something different.
 LSX 350z by kyrinbingaman, on Flickr
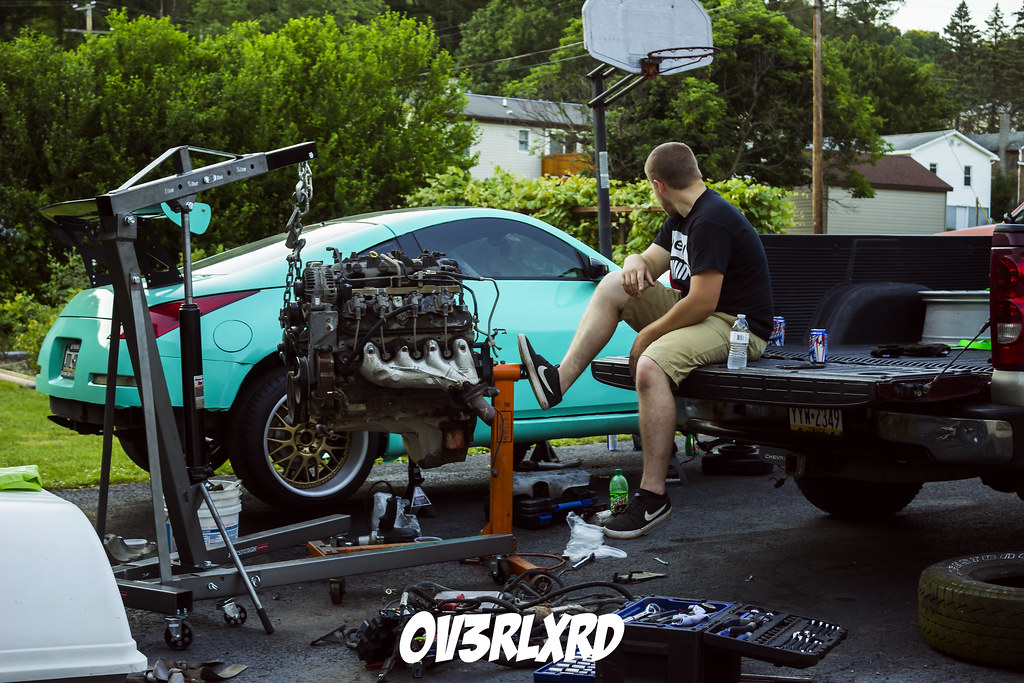
Picked up an LM7 (cast iron block 5.3) out of a rear ended 2005 Chevrolet Silverado
 LSX Z33 by kyrinbingaman, on Flickr
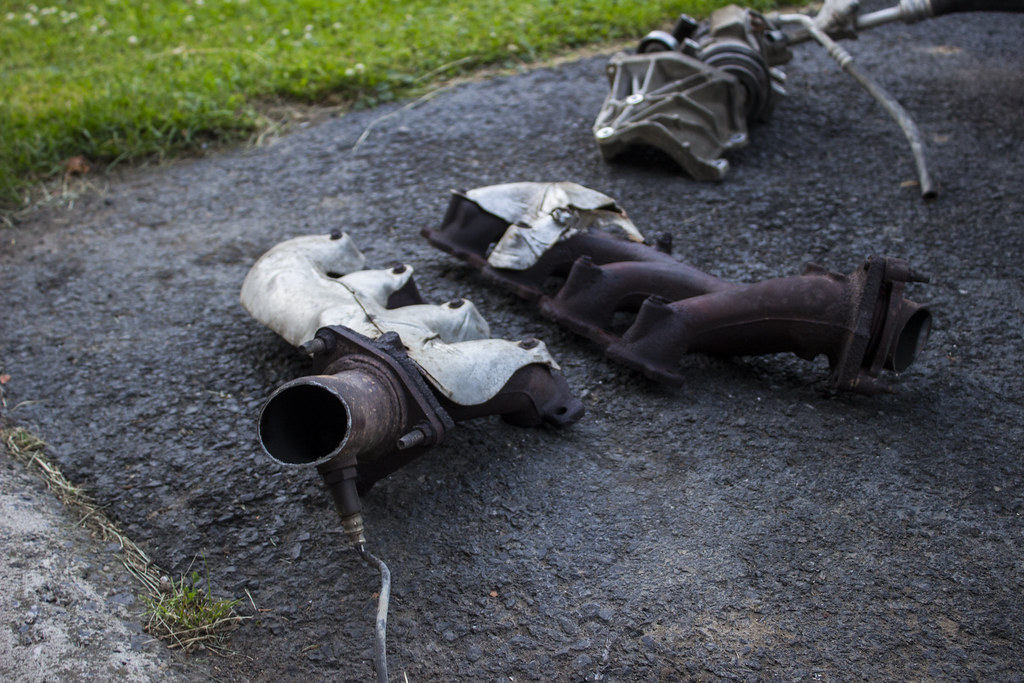
Pulled off the OEM exhaust manifolds
 LSX Z33 by kyrinbingaman, on Flickr
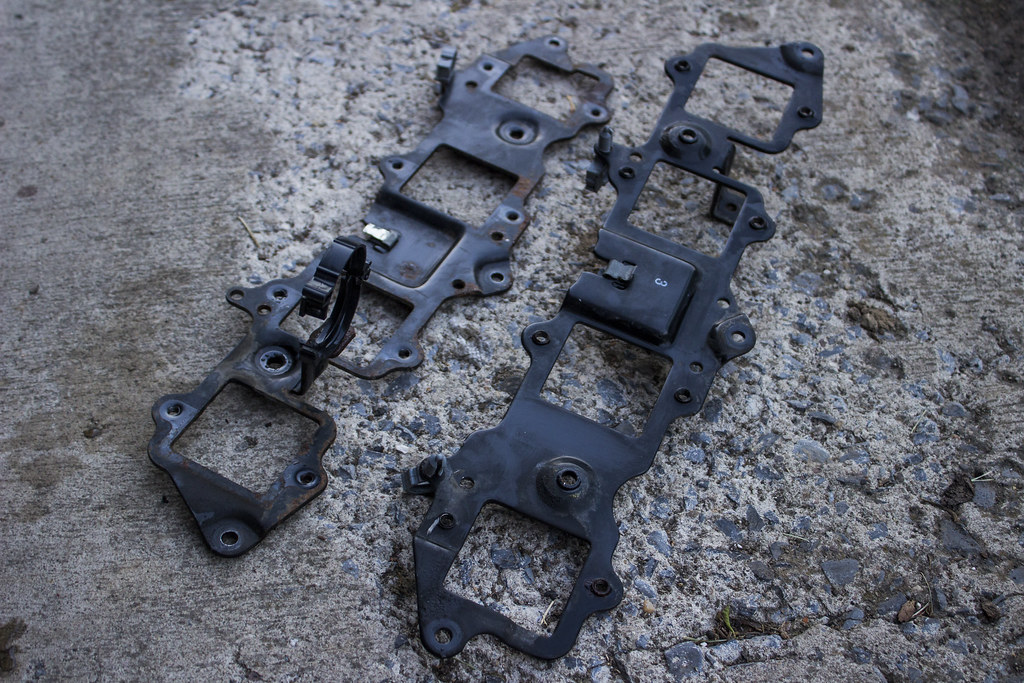
As well as these things, they hold the coil packs but I'm not sure of the exact name for them haha.
 LSX Z33 by kyrinbingaman, on Flickr
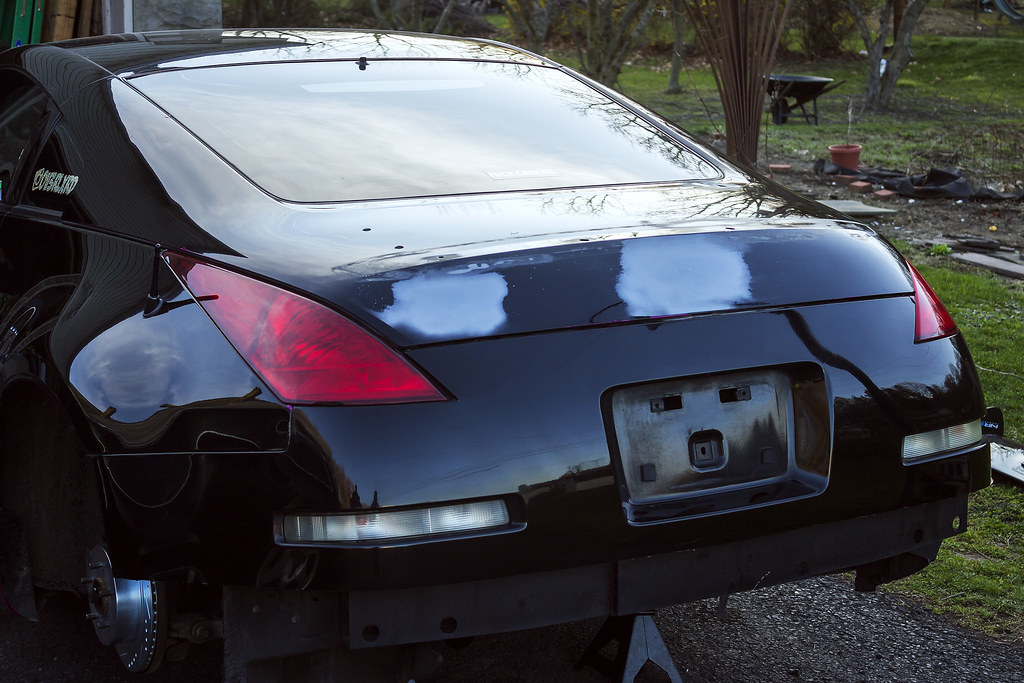
As the engine currently sits. Headers and wiring harness pulled off.
Also, does anyone know how to change the thread title? I'm no longer in high school and this thing is less about stance and more about power now haha. Thanks!Leave a comment:
-
So some progress:
 350Z Build Thread by kyrinbingaman, on Flickr
More of the wrap pulled off, working on refinishing the rears.
 350z Build Thread by kyrinbingaman, on Flickr
Rear emblems removed and holes filled in (Please note this is my first time ever using any sort of body filler, I have little to no clue what I'm doing here haha)
 350z Build Thread by kyrinbingaman, on Flickr
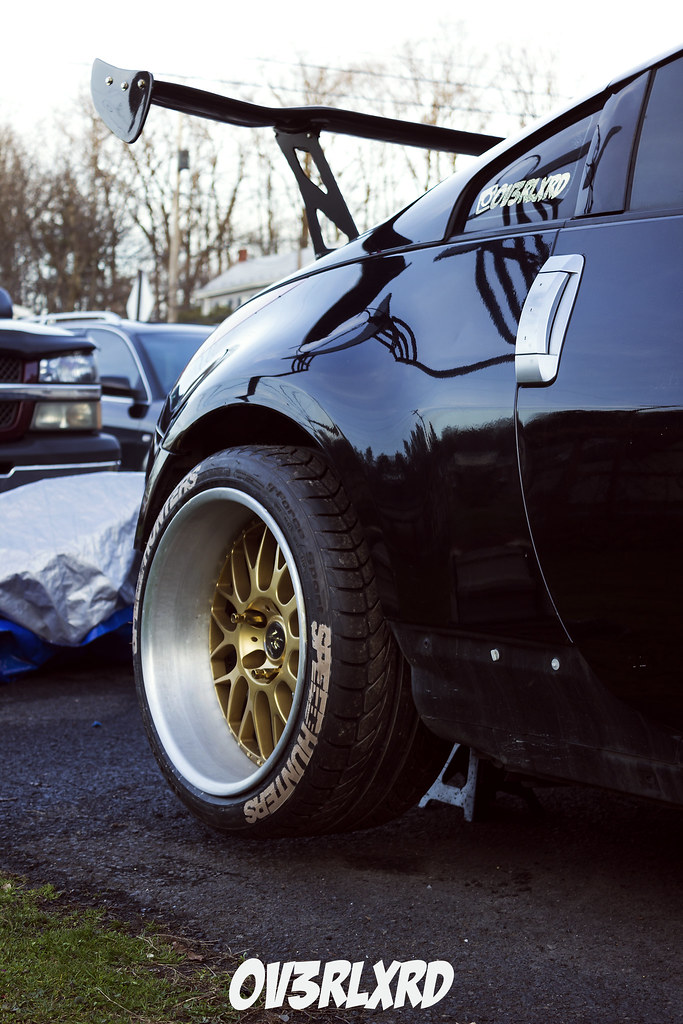
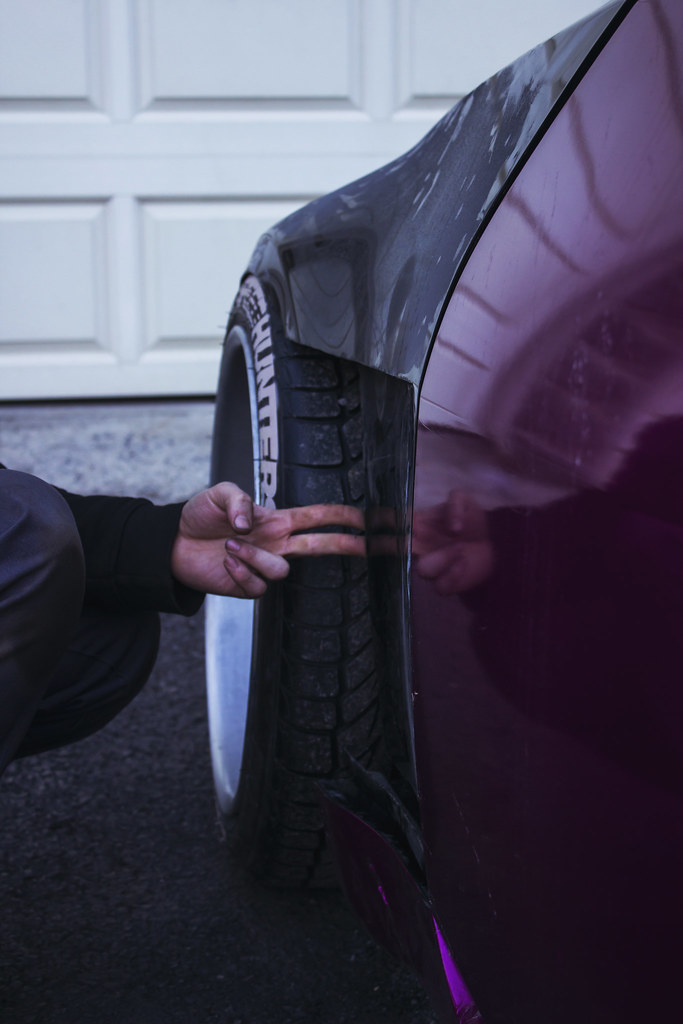
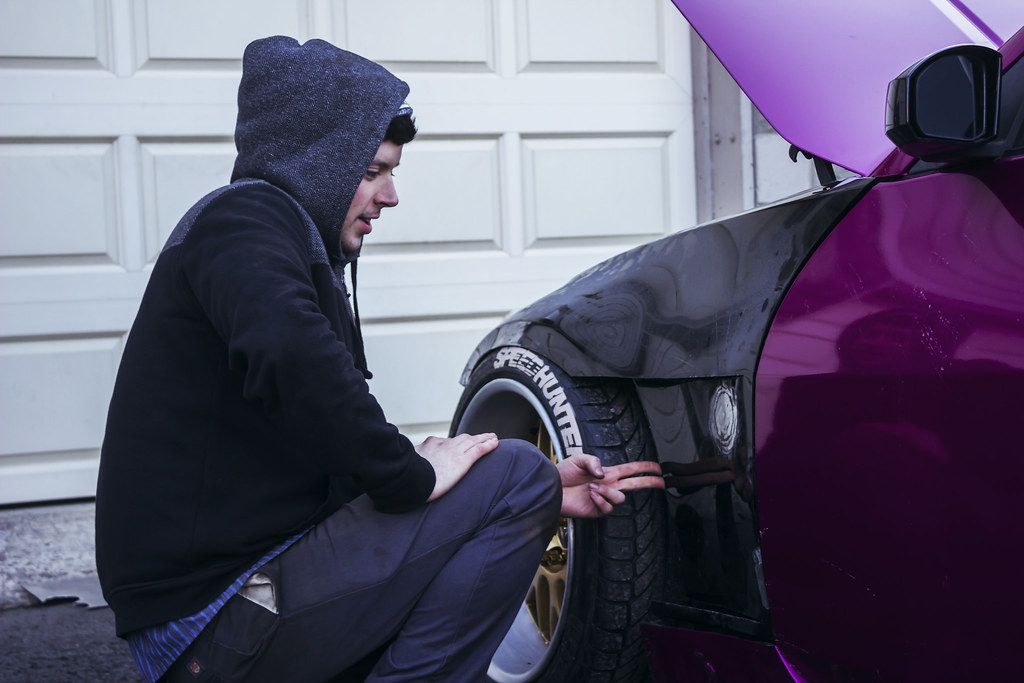
and in releasing my inner scene kid, I bought a used wing local. This photo was to get an idea of how much poke there will be with 0 camber.
My flares should be arriving at the end of this week, along with my friend completing the front fenders. Rear camber arms, rear tires and wrap should be here next week!Leave a comment:
-
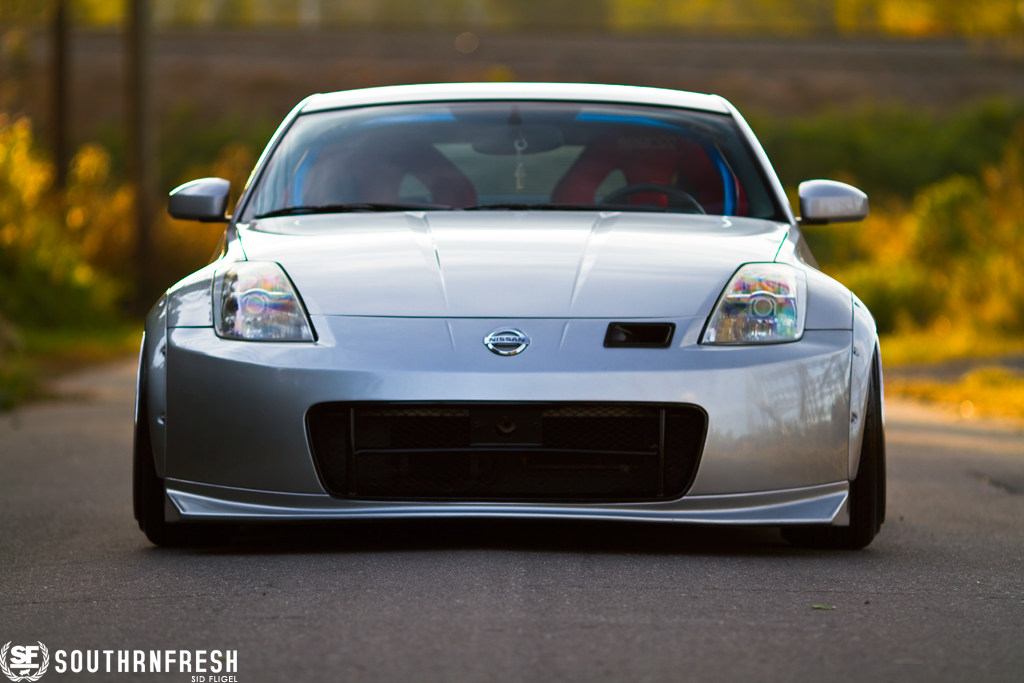
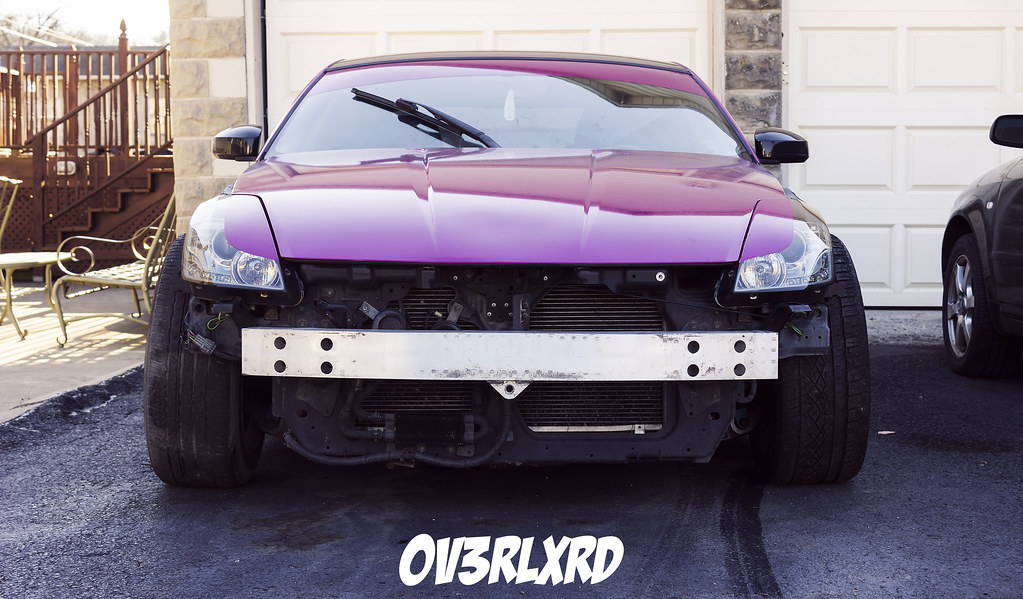
Front fenders and wheels are looking good still not feeling the color of the car.Leave a comment:
-
Hey guys! Been a little bit since I last posted, the new job (car salesman, super stoked on it) has cut me back on a bit of my free time, but I'm making more money to dump into this thing! haha!
 629 by kyrinbingaman, on Flickr
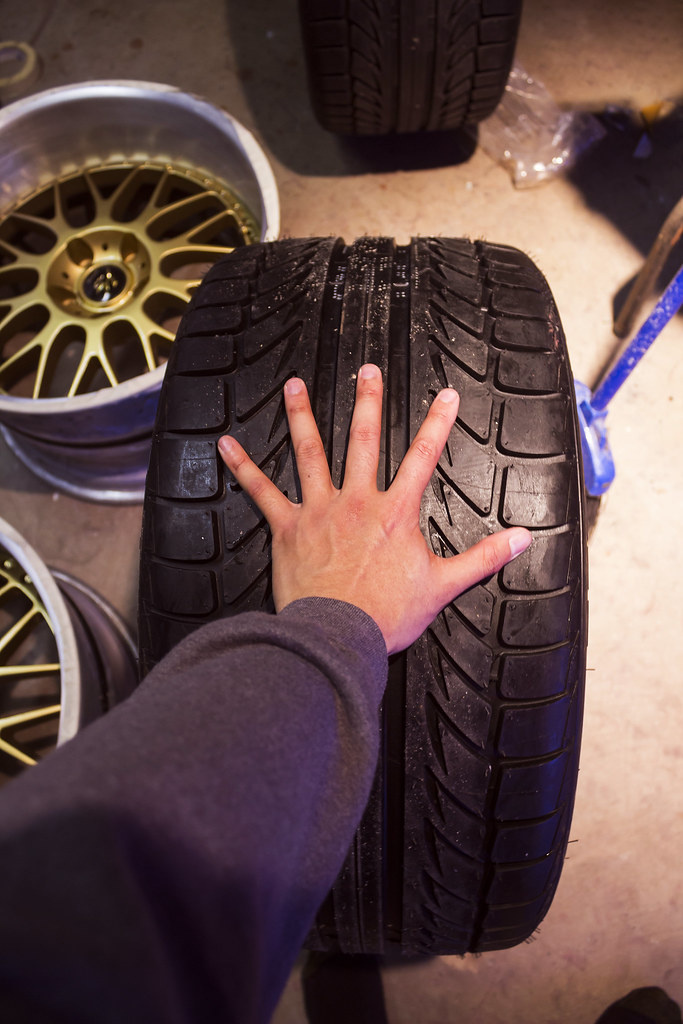
continuing with the work on the fronts, I decided last season that after debeading two tires in a week I was done with stretch. 285/35 on an 18x10.5
 636 by kyrinbingaman, on Flickr
Like I said before I had the front fenders off to give to a friend who is going to be doing dive fenders for me
 Build Thread by kyrinbingaman, on Flickr
here he is marking the metal piece he will be welding in to support the dive
 Build Thread by kyrinbingaman, on Flickr
super stoked on this!
 Build Thread by kyrinbingaman, on Flickr
I also ordered ZG flares for the Z this week. Plan on leaving rivets exposed in the front (in case I change front bumpers, I've really been eyeing up a Nismo V3)
Plus, I've always liked how Porsche GT3s have an exposed front fender with seamless rear fenders

Leave a comment:
-
So being the lazy prick I am, I decided to go with a semi gloss gold face instead of attempting to brush them all haha.
 IMG_2876 by kyrinbingaman, on Flickr
This is currently how the car sits, I'm giving the front fenders to a friend to do some dive in / vents(if that's the proper term)
 Sad State by kyrinbingaman, on Flickr
Please excuse the jenk headlight wiring lol

The fenders will look similar to this, without the lip on the dive in portionLeave a comment:
-
Honestly I'm not sure yet. I let you know once their finished!Originally posted by myron View Post
That makes two of us, I didn't realize how ugly it looked until I stepped back and just soaked it all in haha.Originally posted by 190Evan View Post
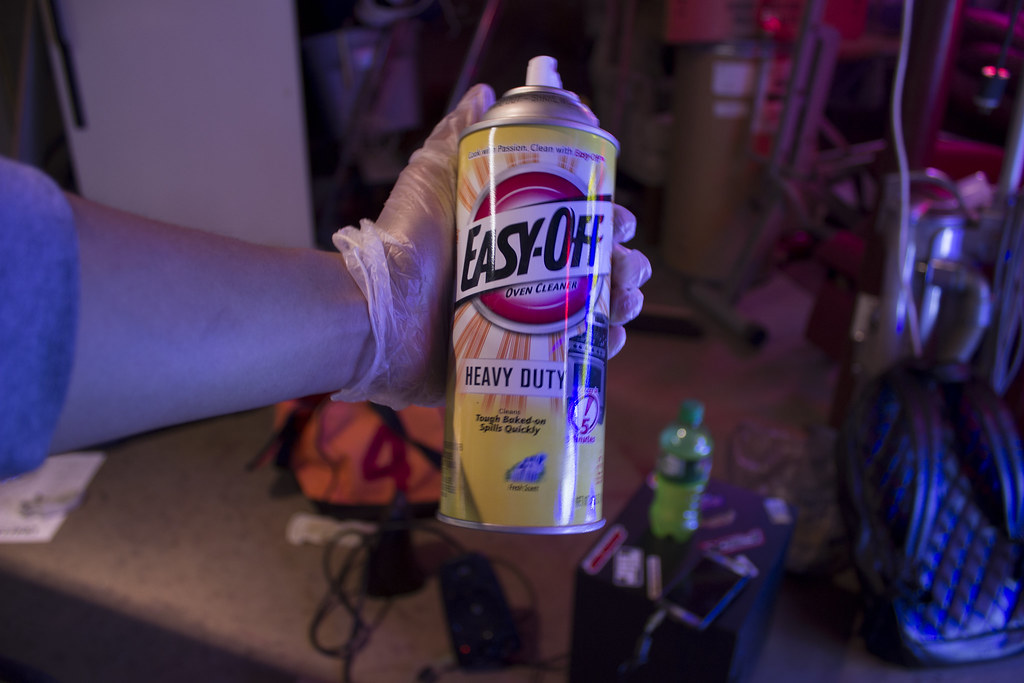
So on a recommendation from a friend, I decided to use heavy duty oven cleaner to try and strip the powdercoat!
 build thread by kyrinbingaman, on Flickr
Bought at Walmart for a little less than $4 a can
 build thread by kyrinbingaman, on Flickr
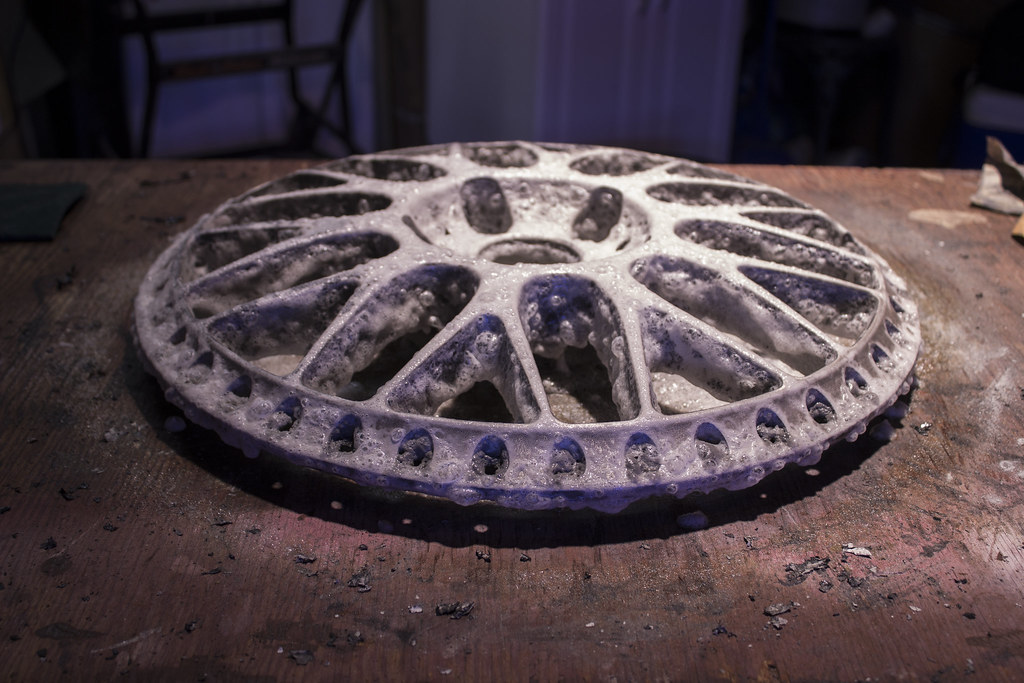
Sprayed a pretty heavy coat on. It was a lot more effective on the windows compared to the aircraft stripper.
 build thread by kyrinbingaman, on Flickr
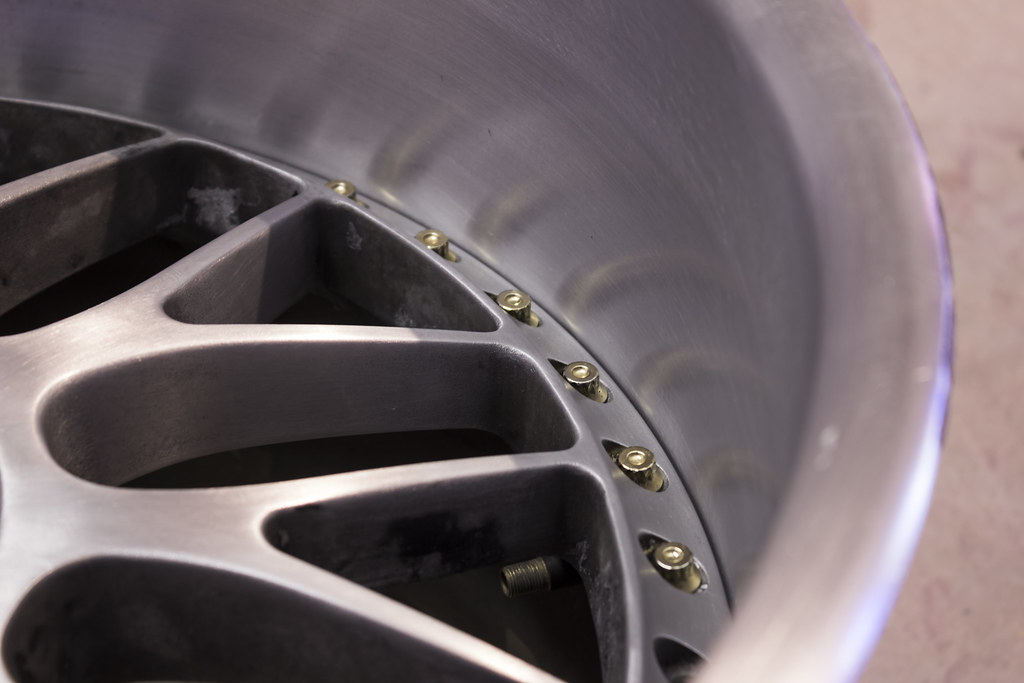
The windows are to the point now where I am able to sand the remaining powder off pretty easily, I decided to toss in a few bolts to see what its going to become! Of course there's still a lot of work to do, I'm still on my first wheel.
 build thread by kyrinbingaman, on Flickr
Leave a comment:
-
Glad the old wheel color is going. Full clear will look a lot better especially with the purple.Leave a comment:
-
what clear coat are you going to go with over the brushed aluminum? I am looking for something to do my wheels with and I can't find any concrete answers as to what actually works and what people think worksLeave a comment:
-
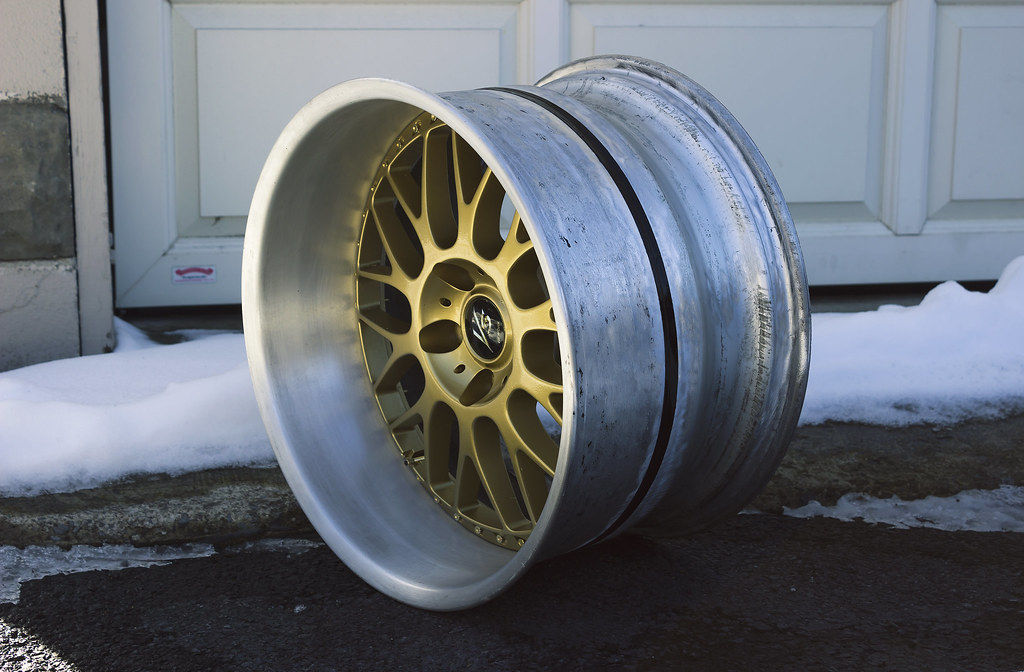
I hope everyone's winter is a bit more mild than PA's! Had an ice storm yesterday, and its supposed to be snowing or something tomorrow. Anyway, I've been planning what I want to do to the car over winter to change things up and/or make it look more presentable. One of the first things that came to mind was the wheels, the powdercoating was starting to chip and fade, so that had to be addressed!
 wheel rebuild by kyrinbingaman, on Flickr
Stripping the face using aircraft stripper. In the past I used paint stripper to try and get it off but had little luck with it, this stuff works a lot better!
 wheel rebuild by kyrinbingaman, on Flickr
One of the four lips are almost done, I just need to get some areas that are a bit more stubborn, along with doing another coat of aircraft stripper on the faces. The plan is to go full hand brushed finish with a clear coat on top and gold hardware again. This is very time consuming, I probably spent about four or five hours on these two pieces aloneLeave a comment:
Leave a comment: