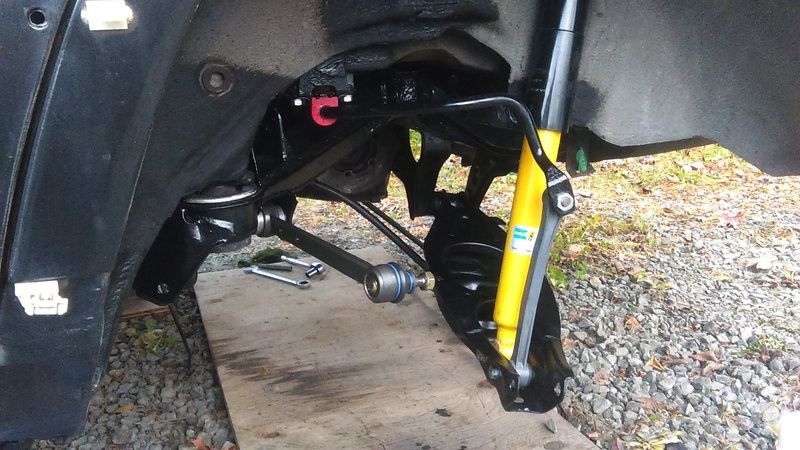
Announcement

Collapse
No announcement yet.

Daily 190E

Collapse
X
 
  • Filter
  • Time
  • Show
Clear All
new posts

  • #31
    "Custom" springs.


    Looks legit
    Mint green Mk2 build
    Daily 190E build

    Comment


    • #32
      Obviously this car isn't done yet and I'm not dailying it like I said I would. Here's what's happening:

      I thought it would be a great idea to pull the rear subframe out and change all 10 control arms, change the noisy wheel bearings, fix the half-functionning handbrake, redo the brake lines etc. I thought it would be a fairly straighforward job. Wrong. Very wrong. One of the bushings ended up being seized on the threaded spigot on the body of the car. I had to drill a million holes in the bushing to get it out. And now I still have 1/2 bushing stuck on the car. Nothing will get that thing out. Anyways, here's the car with the subframe out:


      Then, with the help of my landlord, we carried it to my shop in the basement:


      That poor thing is rustier than the Titanic and every single bushing and bolt is seized. But at least it is not perforated and I will be able to refinish it.


      On one of the control arms, the bushing was pressing itself out. It only needed 2-3 hammer blows to pop it out.


      The diff's axle seals are obviously shot. So is the joint for the rear cover. Needs to be redone. Also, the drain plug was so seized that I couldn't drain the thing while the diff was in the car because of the lack of leverage.


      Last summer I changed the ebrake cables and shoes and re-did the mechanism in the wheels. Still, the handbrake was constantly dragging in the released position and wouldn't lock the wheels when actuated. Found out why, that thing was frozen solid:


      Someone told me that vinegar removes rust. After a week in the vinegar bath and subsequent lubrication, the thing was working again:


      While in there, I re-did the swaybar since it's the first piece to go in.


      Obviously the bushings were unobtainium, so after a bit of measuring I found out that a Prothane kit for a 99-00 Civic fits with slight modifications to the brackets.


      Then I hit every surface rust spot in the back of the car with a grinder and POR-15. I also removed the rusty old brake lines and ran some new ones.


      Fun fact: see that copper tee where the 3 lines meet? The guy at NAPA told me that part doesn't exist and that I shouldn't be modifying brake systems...

      Now for the sad part:

      Back when I bought the car, there were rust holes in the floor on both sides of the car. I patched the holes with metal glued to the floors with POR-Patch in one afternoon because I was in a hurry. Then I forgot about it because I couldn't see rust anywhere. Here's why you should not do this and not hack shit up when it comes to rust repair.

      After 2 years, I found out that another hole appeared:

      You can see my patch in this picture.

      I did not remove the side skirt when I did this. Today I removed it to see how bad the damage was.


      Then I started cutting the part around the jacking point (which is still solid because of the inner structure of the rocker panel). I popped the old patch with a screwdriver. Turns out POR-Patch isn't quite a body adhesive. It has other uses though.


      From the inside of the car... Those wires going throught the rocker are cumbersome. I don't know what they are for.


      Rust got in the rocker too


      And on the passenger side. Not all ground down but the damage will probably be less.


      Now why is that rust there? This is the inside of the side skirt. The drain holes were completely shut. Moisture was trapped in there. And also, the floors were wet for some reason...


      Perfect excuse to buy a welder.
      Mint green Mk2 build
      Daily 190E build

      Comment


      • #33
        Wow this makes me appreciative to live inland California with no salty roads. These Northern threads always do.

        Keep kicking ass dude, that's a slick looking Merc

        Comment


        • #34
          This makes me scared that there may be more than just a little bit of rust on my 190E. Living in Utah isn't very great for cars since they salt the shit out of the roads here in the winter.
          1992 Mercedes 190 E | 2002 DTM Inspired IS300 | IG @ DAAR_CREATIVE

          Comment


          • #35
            Great job attacking the rust! It's gonna be so mint once done.

            - Renato
            TWMPerformance.com | TWMShiftKnobs.com | GodSaveTheManuals.com
            sigpic

            Comment


            • #36
              Originally posted by JDMexican View Post
              This makes me scared that there may be more than just a little bit of rust on my 190E. Living in Utah isn't very great for cars since they salt the shit out of the roads here in the winter.
              Better remove those side panels and hit the thing with a wire brush. Treat it now or cry later! You might be surprised and find only surface rust!

              Could someone with a W201 or W124 olease PM me a picture of what the area around the jack point is supposed to look like? I'm trying to see if I can get away with fabricated patches or if I need to shell out 200$ for replacement panels. Thanks!
              Mint green Mk2 build
              Daily 190E build

              Comment


              • #37
                What kind of salt do you Canadians use ey? Looks more like acid than salt to me
                Lucas
                Daily: 2004 Pontiac GTO. . . . . . . . . Daily Econobox: 2009 Mini Clubman Cooper
                Originally posted by LCG
                High 21! It's like a high 5 but includes both hands, both feet and a boner.

                Comment


                • #38
                  I got lucky and the week after I found all that rust there was a sale at Canadian Tire and I got a Mastercraft 110V Mig/flux core welder with a helmet and gloves for 260$. I thought of parting the car and selling my daily S70 to get something like a 1st gen S60R but I can't give up on something, so I did this the hard way!

                  Before that, i got my handbrake thing all good to go:
                  View post on imgur.com


                  Then I started cutting the passenger side:
                  View post on imgur.com


                  The best part in this project was fabricating patches. This was the first one. I needed a rectangle hole in it to pass the wires from the floorboard to the doors:
                  View post on imgur.com


                  I didn't take actual pictures during the welding but I got one of this side all rebuilt and sealed:
                  View post on imgur.com

                  View post on imgur.com

                  I was still a novice at this point and I did not grind my welds down and used way too much sealer for what I was doing. Still, I think it will be okay.

                  Then I did the driver's side in one weekend. It was very long to do because the rust damaged the floorpan, both sides of the rocker panel, the jack point and a part of the frame rail. I carefully cut all that and welded back some fresh metal. On that one I ground down everything and used less sealer...
                  View post on imgur.com


                  I also found out that the rear passenger side jacking point was also rusty (all the W201 and W124 Mercs seem to have a problem with rust around the jack points. This one was easier because the rust was minimal and I caught it on time. Here is it when I found it:
                  View post on imgur.com


                  Then I wire brushed the thing to see what was surface rust and what was real rust:
                  View post on imgur.com


                  Since most of it was damaged, I cut a square and made a real patch.
                  View post on imgur.com

                  View post on imgur.com


                  Then I hit it with sealer and Por-15
                  View post on imgur.com


                  All the rust is gone now, my car is rust free! Yesterday I sealed and por-15'd everything. I'm glad I did this instead of giving up. Buy a welder kids, it's worth it! The rear subframe is also stripped from all the rust it had, it's ready for por-15 + paint and it's C36 AMG bushings.
                  Mint green Mk2 build
                  Daily 190E build

                  Comment


                  • #39
                    Refinished subframe:


                    A couple of weeks ago, I managed to put it back in the car:


                    Other new parts; Re-sealed diff, refinished rear LCA's and cleaned up axles


                    Then, this weekend I lifted the diff inside the car by myself, not an easy job!


                    I like how the silver back cover looks like from behind the car!


                    And today I installed a couple more links and called it a day. I think I can make the car run next weekend!

                    Mint green Mk2 build
                    Daily 190E build

                    Comment


                    • #40
                      Oh boy do I love seeing this, W201's surely don't have any pep in their step especially the m102's lol but they still manage to be super fun cars. I miss mine so much and this thread makes me so happy. Any news on that turbo manifolds you were designing?


                      Originally posted by Stupid Kid
                      I need the weed in advance i can't ride my bmx across the ocean unless im high

                      Comment

                      Working...
                      X