Announcement

Collapse
No announcement yet.

Who The Fuck Is Harry Potter?

Collapse
X
 
  • Filter
  • Time
  • Show
Clear All
new posts

  • #16
    This is amazing!
    Quite a title too.

    Comment


    • #17
      Fuck. Me. Where did the last two months go? A good portion of it was spent doing an engine and gearbox conversion on my daily. I can't tell you how much better it is shifting your own gears and having a silky smooth six pot, up front.

      Enough of that jibber jabber, onto some Anglia progress!
      Holes drilled for the backing plates. These support the closing panel for the chassis rail.

      Untitled by nellydragracer, on Flickr

      Supports welded in.

      Untitled by nellydragracer, on Flickr

      Back side of chassis closing panel sprayed with zinc primer.

      Untitled by nellydragracer, on Flickr

      All welded up.

      Untitled by nellydragracer, on Flickr

      Welds cleaned up and primed.

      Untitled by nellydragracer, on Flickr

      Inner wing repair panel, held in place prior to welding.

      Anglia 105e project by nellydragracer, on Flickr

      Repair panel welded in place. What an absolute twat it was to do. The left hand vertical seam, and the top seam were really difficult to weld, as the the old steel was very inconsistent. I've left the biggest holes for when the turret section is ready to go in, once that is covering the inner wing part, I can weld up the parts that blew through, without a problem.

      Anglia 105e project by nellydragracer, on Flickr

      Cleaned up.

      Anglia 105e project by nellydragracer, on Flickr

      Painted up, to protect the bare welds.

      Anglia 105e project by nellydragracer, on Flickr
      To be continued.
      Originally posted by MommysLittleMonster
      Internet high five for you.

      Comment


      • #18
        I really like Anglias, there's a blue one in my town. Looks like fun small cars. What are your thoughts on the colour choice?
        E34 build, Futuras included.

        Comment


        • #19
          I love Anglias and can't wait to see what you do with this one. Looks like you're off to a great start.

          Comment


          • #20
            Originally posted by BigBjarne View Post
            I really like Anglias, there's a blue one in my town. Looks like fun small cars. What are your thoughts on the colour choice?
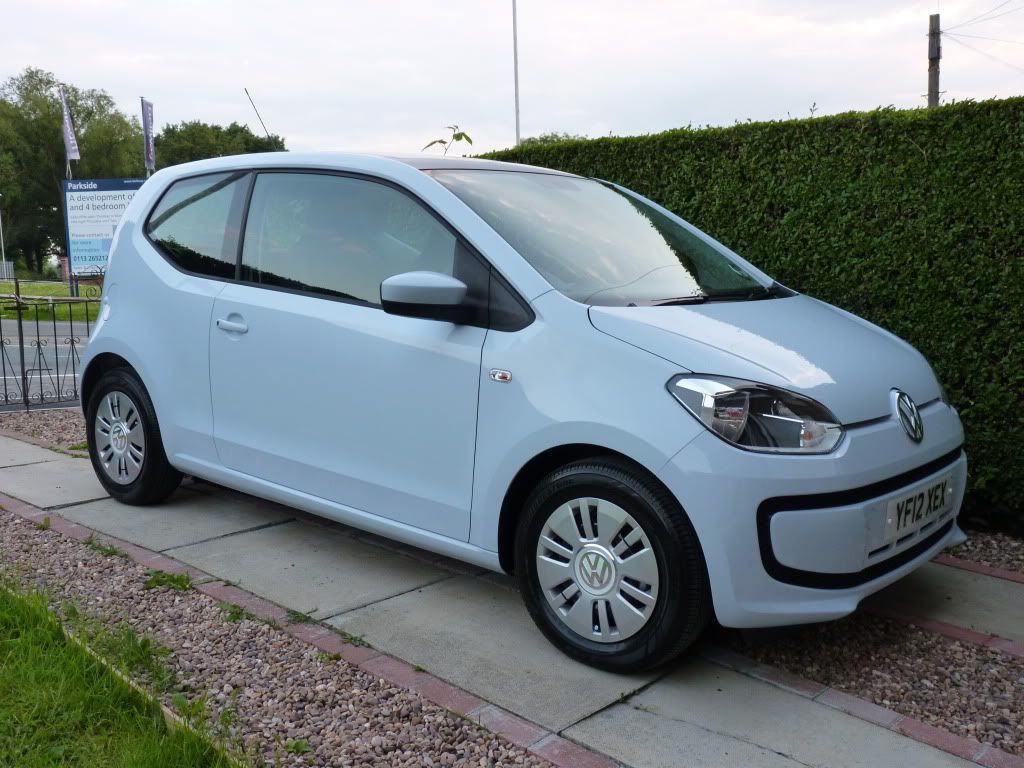
            I always got the biggest smile, whilst driving it. At first I was dead set on re-painting it the original Imperial Maroon, but I've been having second thoughts, recently. I really the pastel blue that you can get on the VW Up.


            Originally posted by Rally View Post
            I love Anglias and can't wait to see what you do with this one. Looks like you're off to a great start.
            Thanks, Andrew.
            Originally posted by MommysLittleMonster
            Internet high five for you.

            Comment


            • #21
              A brief update, today, It's been a long day, and I'm tired. I got the turret section welded in. The photos should be fairly self-explanatory.

              Anglia project progress. by nellydragracer, on Flickr

              Anglia project progress. by nellydragracer, on Flickr

              Anglia project progress. by nellydragracer, on Flickr

              Anglia project progress. by nellydragracer, on Flickr

              Anglia project progress. by nellydragracer, on Flickr

              To be continued.
              Originally posted by MommysLittleMonster
              Internet high five for you.

              Comment


              • #22
                Wow, you're making quite the progress. You should stitch weld it while you're at it for some extra rigidity.

                𝔣𝔬𝔩𝔩𝔬𝔴 𝔪𝔢
                @𝔳𝔦𝔳𝔢_𝔪𝔢𝔪𝔬𝔯_𝔩𝔢𝔱𝔦

                Comment


                • #23
                  First things first, Royal Blood released their album today, so all is well with the world. I've not been this excited about an album release since The Arctic Monkeys' debut.


                  Originally posted by rice4life View Post
                  Wow, you're making quite the progress. You should stitch weld it while you're at it for some extra rigidity.
                  Thanks, man. I did weld up the edges eventually, mainly to seal up the two layers.
                  I also welded on the subframe mounting re-enforcement gusset

                  Anglia 105e project by nellydragracer, on Flickr

                  Anglia 105e project by nellydragracer, on Flickr

                  I then made a start on the drivers side sill...

                  Anglia 105e project by nellydragracer, on Flickr

                  Talk about opening up a can of worms.

                  Anglia 105e project by nellydragracer, on Flickr

                  I gave up on that, as I didn't want to remove to much material until I had all the repair panels I need. So I removed the now redundant battery tray.

                  Anglia 105e project by nellydragracer, on Flickr

                  And while I was in the engine bay with the cutting disc, I made a start on the upper turret repair. I didn't necessarily need to cut that big of a hole, but I thought I'd kill two birds with one stone and remove a couple of unwanted holes.

                  Anglia 105e project by nellydragracer, on Flickr

                  Rust removed and primered up ready for the plate to be welded in.

                  Anglia 105e project by nellydragracer, on Flickr

                  Next it was the passenger side chassis/lower turret repair, all cut out and rust removed.

                  Anglia 105e project by nellydragracer, on Flickr

                  Painted with the obligatory por15.

                  Anglia 105e project by nellydragracer, on Flickr

                  Panels made and drying off, after being coated in zinc primer.

                  Anglia 105e project by nellydragracer, on Flickr

                  The first part welded in and ground back, just need to plug a few pin pricks, and then the outer panel can go on.

                  Anglia 105e project by nellydragracer, on Flickr

                  And that my friends, brings you right up to date. Most of that occurred over a three day weekend. I'm just waiting on an e-mail back from the panel supplier, to see how long it'll take for the A pillar repair sections to be made.

                  Laters.
                  Originally posted by MommysLittleMonster
                  Internet high five for you.

                  Comment


                  • #24
                    Dude that is some impressive work!
                    Ol Dirty Bastard - RIP

                    Photo by Alex Dooley
                    2016 Ducati Scrambler, 2015 Subaru Impreza

                    Comment


                    • #25
                      Originally posted by theseeker411 View Post
                      Dude that is some impressive work!
                      Thanks, man. There's plenty more to come, it might take a while though, lol.

                      A brief update, today. I'm having laptop issues at the moment, and I can't upload photos the I would like. I had a little play with the new time lapse feature on the iPhone and came up with this neat video, it doesn't really show much but I'm pleased with it all the same.


                      I'll probably upload some photos next week, once I get my laptop sorted.

                      Peace.
                      Originally posted by MommysLittleMonster
                      Internet high five for you.

                      Comment


                      • #26
                        Waaa gwaaaaan?

                        Don't worry, I haven't slacked off on the build, I just couldn't be arsed with updating this

                        Okie doke, first up I got the turret repair on and the subframe reinforcement thingy all welded up.

                        Anglia project progress by nellydragracer, on Flickr

                        Anglia project progress by nellydragracer, on Flickr

                        Anglia project progress by nellydragracer, on Flickr

                        Also tidied up the drivers side welding.

                        Anglia project progress by nellydragracer, on Flickr

                        Anglia project progress by nellydragracer, on Flickr

                        And got the engine bay piece welded in. That was quite a challenge as the steel wasn't very consistent, but I got there in the end.

                        Anglia project progress by nellydragracer, on Flickr

                        I got bored of spending loads of time grinding shit up, so I decided I'd have a go at fitting the new subframe... what a fucking joke that was. The brackets that mount it to the chassis didn't fit between the chassis rails, I'm talking 5mm per side. So out came the B.F.H.

                        Anglia project progress by nellydragracer, on Flickr

                        After that episode I fitted up the struts and the adjustable lower arms. Now, when I ordered the rack conversion kit the guy asked me what struts I was using and I told him I wanted to use the original Anglia ones, 'No problem', he said. No problem? It must've been a fucking problem, because they didn't fucking fit... Turns out he'd built the kit to be used with Capri struts, I could make the Anglia struts work, but it'd involve more custom machining work than I can afford. But, I just so happened to have some MK3 Capri 2.8i Bilstein jobbys propping up another project of mine (don't ask). For some reason I wasn't too Steve McKeen to use them as I wanted to keep as much Anglia stuff on there as possible, but then I thought to myself, I'm the fucking chopping bulkhead out of it for fucks sake, yes it's annoying (seeing as I'd already converted the Anglia struts) but it solved the braking problem, as the original struts required a conversion kit to run disc whereas the Capri struts had vented discs as standard. A no brainer really.

                        Anglia struts fitted... in a fashion.

                        Anglia project progress by nellydragracer, on Flickr

                        I needed to make some collars to bolt the Capri struts up properly, these are obviously temporary as they look fucking awful.

                        Project progress by nellydragracer, on Flickr

                        I didn't get many photos of the Capri struts. Here I'm trying to work out where to mount the rear arm tabs, by jacking the wheel up to somewhere near ride height and moving the strut forward to get the caster to a base setting.

                        Project progress by nellydragracer, on Flickr

                        Project progress by nellydragracer, on Flickr

                        Once I'd worked out a position for the arm mounts I prepared the chassis, on both sides.

                        Project progress by nellydragracer, on Flickr

                        Project progress by nellydragracer, on Flickr

                        Mounts welded on surprisingly well, considering how much thicker the plate is and how inconsistent the original steel can be.

                        Project progress by nellydragracer, on Flickr

                        Project progress by nellydragracer, on Flickr

                        Once I got that done I stuck the dummy engine in, and see how much of the bulkhead I'd need to cut out. Looks like quite a bit, but I'm going to re-use the old bulkhead and kind of chop it about to try and make it look original, most people just cut the whole lot out and then weld in a box... it looks fucking awful.

                        Anglia project progress by nellydragracer, on Flickr

                        That's pretty much it, for now.
                        Originally posted by MommysLittleMonster
                        Internet high five for you.

                        Comment


                        • #27
                          Can't be another update, surely? It is, and don't call me Shirley.

                          What's been rocking my world musically this week? Genesis, that's right, fucking Genesis.


                          Made some good progress today, it doesn't seem like much but I was a bit daunted about tackling this particular part.

                          I decided I'd have a go at this potential cluster fuck of several years of bad repairs.

                          Project progress. by nellydragracer, on Flickr

                          Project progress. by nellydragracer, on Flickr

                          Project progress. by nellydragracer, on Flickr

                          Welp only one thing to do, and that was to set to it with the cutting disc. The part that's left behind is part of the upper turret.

                          Project progress. by nellydragracer, on Flickr

                          I cut that piece out (no pics as I'm a forgetful twat) and then got the repair piece made up.

                          Project progress. by nellydragracer, on Flickr

                          In place.

                          Project progress. by nellydragracer, on Flickr

                          Welded in, things got a bit funky on the bottom edge, so I went over that weld again. In hindsight I should've ground it back before re-welding it, but shit stinks.

                          Project progress. by nellydragracer, on Flickr

                          Ground back...

                          Project progress. by nellydragracer, on Flickr

                          Aaaaannnnddd in primer.

                          Project progress. by nellydragracer, on Flickr

                          I also got the piece that fill that gap up (it goes over it) welded in, but was running short on time so didn't get any photos, I'll uploads those next week.
                          Originally posted by MommysLittleMonster
                          Internet high five for you.

                          Comment


                          • #28
                            Update time.

                            Much the same as last week with the upper turret/inner wing repair.

                            Pieces cut out

                            S7303473 by nellydragracer, on Flickr

                            First repair section made.

                            S7303474 by nellydragracer, on Flickr

                            Welded in. I'm quite pleased with those welds.

                            S7303475 by nellydragracer, on Flickr

                            Cleaned back and coated in weld-thru primer.

                            S7303476 by nellydragracer, on Flickr

                            Second repair section welded in.

                            S7303478 by nellydragracer, on Flickr

                            Other than cleaning back a few welds and laying down some primer, on the bare steel, I can't carry on with the repair work until I get enough money together for the remaining repair panels I need. Even then it'll take about a month or so for them to arrive.

                            So next weeks update my well contain bulkhead removal content.
                            Originally posted by MommysLittleMonster
                            Internet high five for you.

                            Comment


                            • #29
                              Originally posted by nellydragracer View Post
                              So next weeks update my well contain bulkhead removal content.
                              Well that was a big fucking lie...

                              I set to the bulkhead with a wire brush, I found a few more areas that needed attention, and thought it better to add put some strength back in to the shell, rather then cutting more away.

                              With the intention of putting said strength back in to the shell, I made a start on the A pillars...

                              Project progress by nellydragracer, on Flickr

                              Investigative cutting revealed yet more of the Anglias steel returning back to its natural form.
                              Project progress by nellydragracer, on Flickr

                              Project progress by nellydragracer, on Flickr

                              To the other side.

                              Project progress by nellydragracer, on Flickr

                              Bit of s shit photo this, but I'll include it anyway, I got carried away and forgot to take more photos of this side.

                              Project progress by nellydragracer, on Flickr

                              I cut the lip off entirely, because, well I might as well, right?

                              Project progress by nellydragracer, on Flickr

                              I cut some slots so I could form a 90 degree lip, and went ahead and welded those.

                              Project progress by nellydragracer, on Flickr

                              I was losing momentum on the project, so I started to make a repair piece for the panel forward of the A pillar. After a day of messing around with a sheet of steel, bending it all kinds of ways, it was still nowhere near looking like what I wanted it to, so I gave up. I came to the conclusion that this was never meant to be a concourse restoration, and I figured that I should keep things simple.

                              One problem that I had in this build was the fact that with the bulkhead mods needed, I'd be losing the heater and I want to be able to drive this car whenever I want, so the need to be able to demist the front screen (and for me to be comfortable) was imperative. That's when I had the idea of placing the a pair of small radiators (one for each side (no shit)) in a void I would be creating by extending the area forward of the A pillars to meet the inside of the front wings, but that meant digging the one piece front end out of storage, so I could know how much space I had to play with. That wasn't going to be easy as there were body moulds of a Mk3 supra drag car draped over it.

                              At the same time a long project came in the workshop (An Alfa GTV6 for a new gearbox and brake re-build) that needed to be stored in the workspace where I have the Anglia, and my boss had brought the body back for his race car back from the chassis builder. That left with no way of being able to work on the car at all, then it got too cold to do do anything on it (that place is like a fucking freezer, in winter).

                              Fast forward a couple of months and here we are.

                              Now in possession of the front end, I could make a start with getting it fitted, sort of. The first step to getting the front end mounted was to modify the A pillars to gain more clearance, as the fibreglass is much thicker then its steel counterpart, first I trimmed the A pillar back as much as I could, I couldn't go too far because I was limited by the hinges.

                              Also, before I cut out the rest of the pillar, I welded in a strengthening bar.

                              Project progress by nellydragracer, on Flickr

                              Project progress by nellydragracer, on Flickr

                              Project progress by nellydragracer, on Flickr

                              A pillar re-made.

                              Project progress by nellydragracer, on Flickr

                              Project progress by nellydragracer, on Flickr

                              Front end sat in a very rough position.

                              Project progress by nellydragracer, on Flickr

                              Even at this stage it's nowhere near fitting properly.

                              Project progress by nellydragracer, on Flickr

                              Much cutting, sanding and tweaking later it started to get somewhere near.

                              Project progress by nellydragracer, on Flickr

                              Now it was somewhere near, I needed a solid reference before I could get it mounted solidly, so I through on the front suspension, let down from the jack. The car isn't sat on the front suspension yet, as I don't have any springs for it.

                              Project progress by nellydragracer, on Flickr

                              That's not going to be the final ride height by the way

                              Project progress by nellydragracer, on Flickr


                              More soon, maybe.
                              Originally posted by MommysLittleMonster
                              Internet high five for you.

                              Comment


                              • #30
                                Right then. With the front sat in position (sort of) I could make a start on getting it mounted. I wanted to make it a flip front, but I was apprehensive, mainly because the trailing edge of the front wings is so close to the front edge of the doors. I was worried about the wings trashing the paint on the doors every time I opened up the front end. After a bit of research I'd learned that so long as the pivot point is lower than the lowest part of the wings, as the front end is lifted up the wings would always be moving forwards away from the door. But I was still unsure, cue a sketch and some of what I could still remember from GCSE Graphic Design...

                                Project progress by nellydragracer, on Flickr

                                Using the now redundant anti-roll bar mounts as the pivot point and removing a small section at the lower edge of the wing (this will be made up by extending this sills) brought the pivot point just below the lowest edge of the wing. So according to my hastily drawn diagram it should work.

                                And now for the fabrication!

                                This will fit in the void left by the anti-roll bar.

                                Project progress by nellydragracer, on Flickr

                                Like so.

                                Project progress by nellydragracer, on Flickr

                                Slotted it for the first mounting plate.

                                Project progress by nellydragracer, on Flickr

                                With everything bolted and welded up, here's what I ended up with.

                                Project progress by nellydragracer, on Flickr

                                Another view.

                                Project progress by nellydragracer, on Flickr

                                It's bolted in at the moment but will be fibre glassed in at a later date, as I'm going to incorporate some bumper mounts and a radiator duct which should stiffen up the vertical mounting plates, as there is some flex in the area that bends around the opening (mouth, if you will)

                                Project progress by nellydragracer, on Flickr

                                And now, for you viewing pleasure. A video!

                                Originally posted by MommysLittleMonster
                                Internet high five for you.

                                Comment

                                Working...
                                X