 Tweet
Tweet
I have previous threads on Edition 38 and SWdubs, but have recently joined you guys and thought id share what I've been up too over the last year or so with the car, please excuse me if some parts of the thread suddenly jump to others, as I've copied and pasted from various sources  my name is Aaron, I'm 22 from Glastonbury, UK
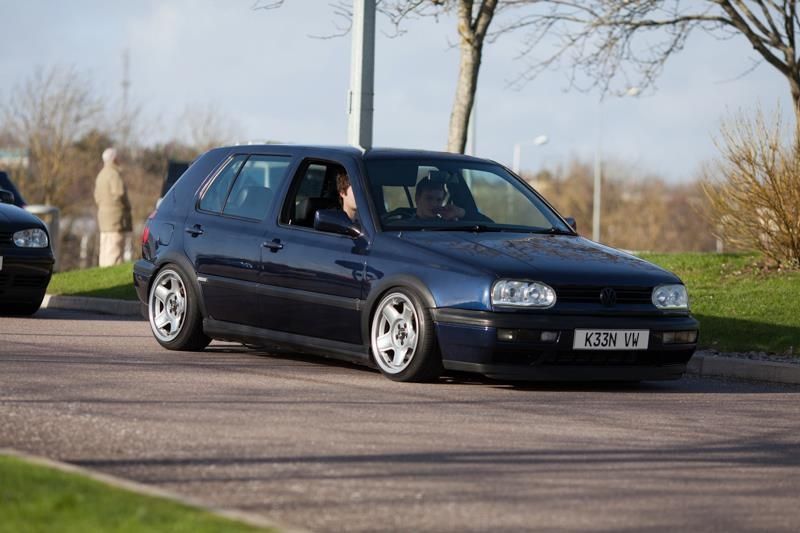
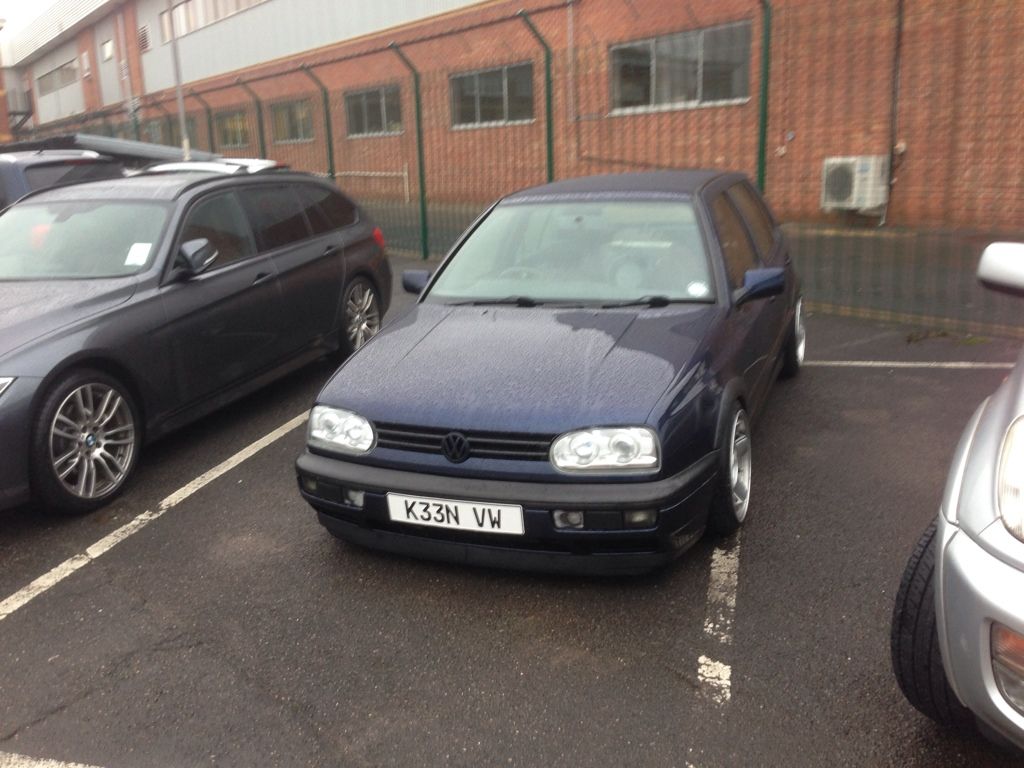
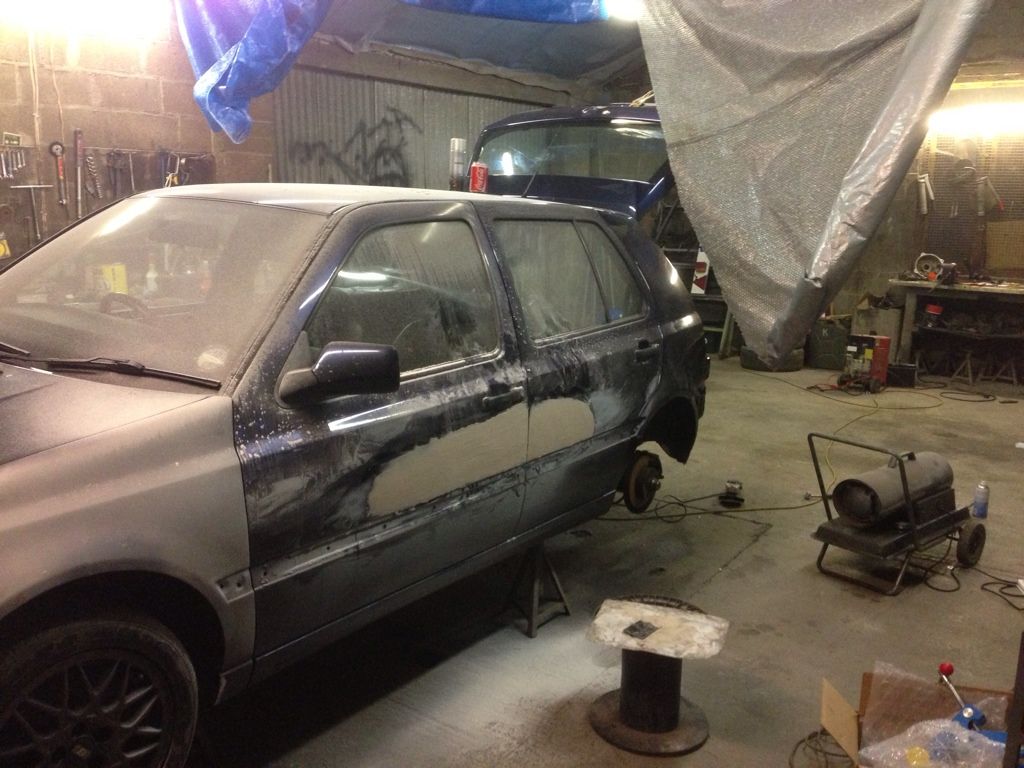
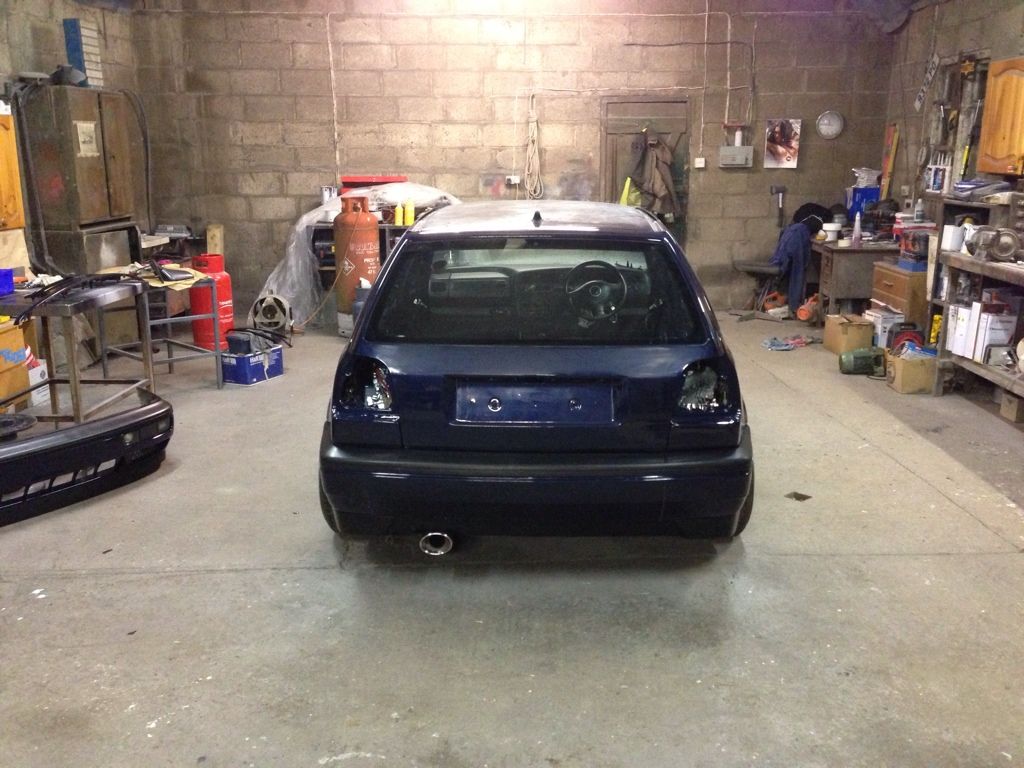
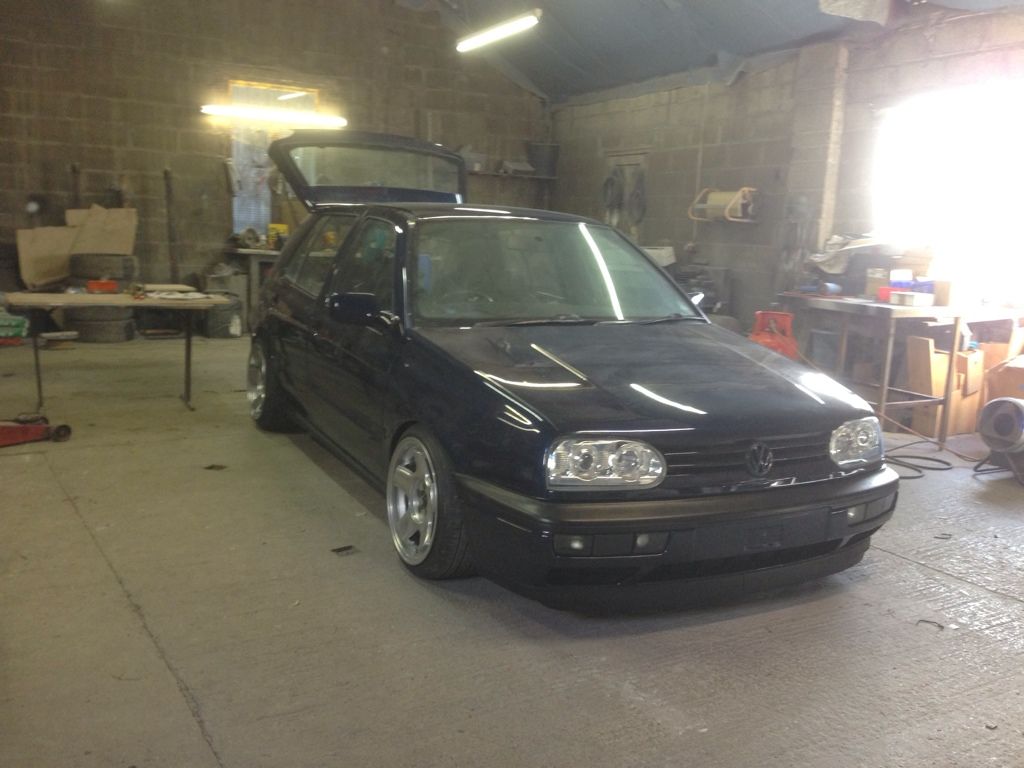
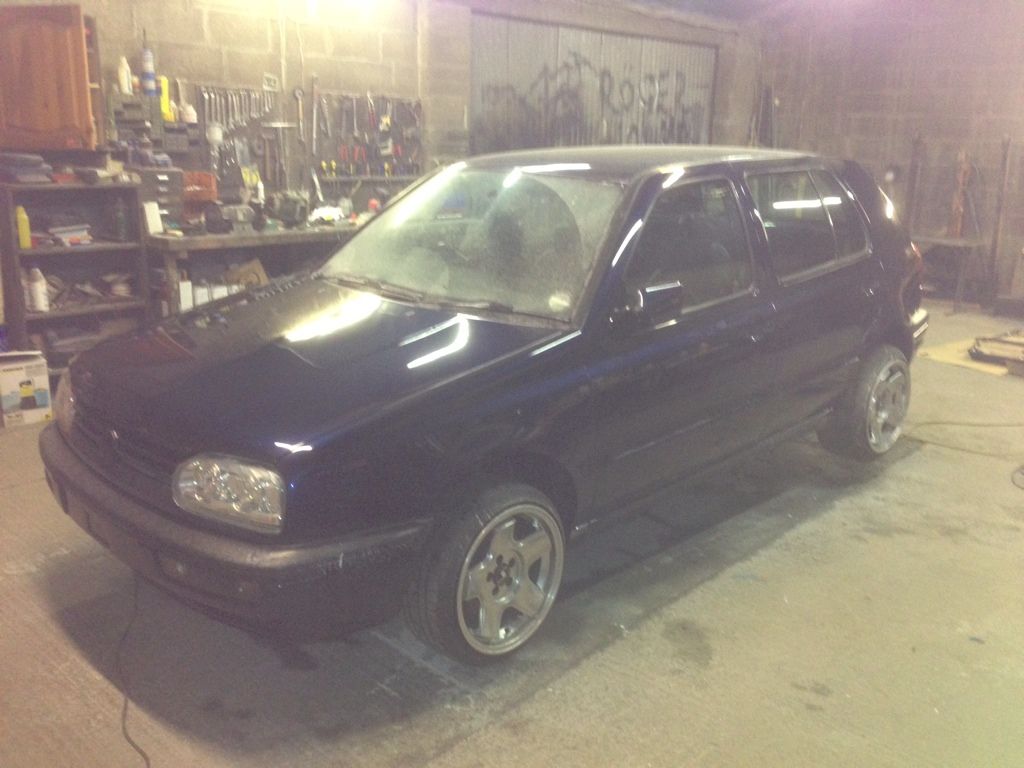
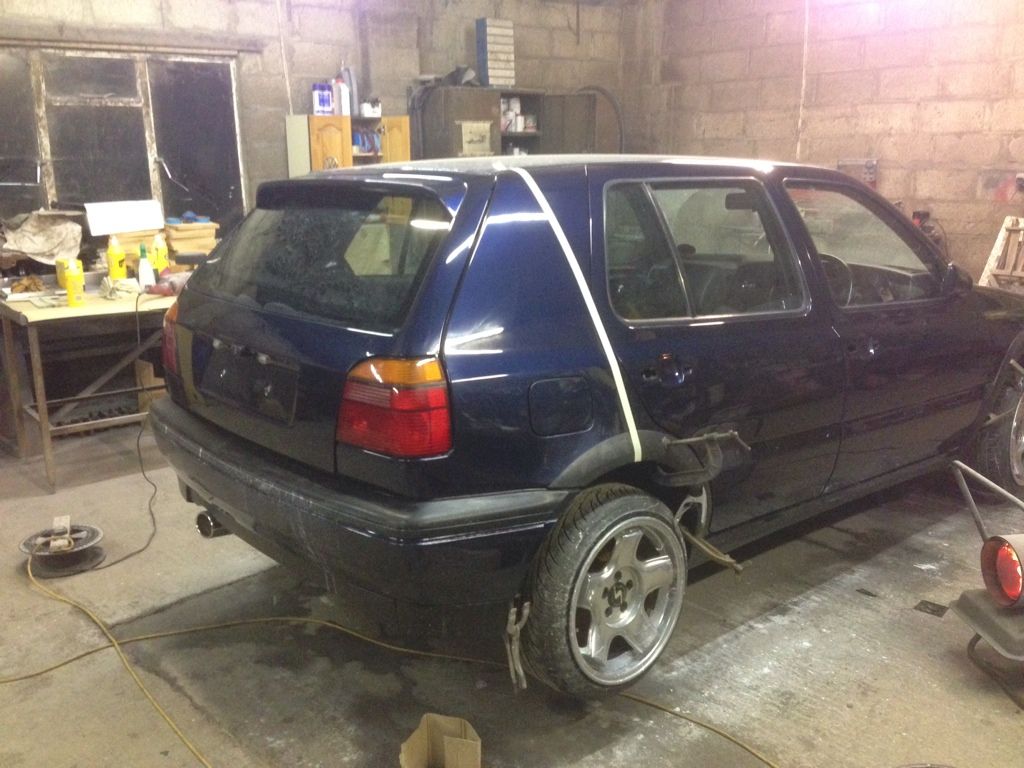
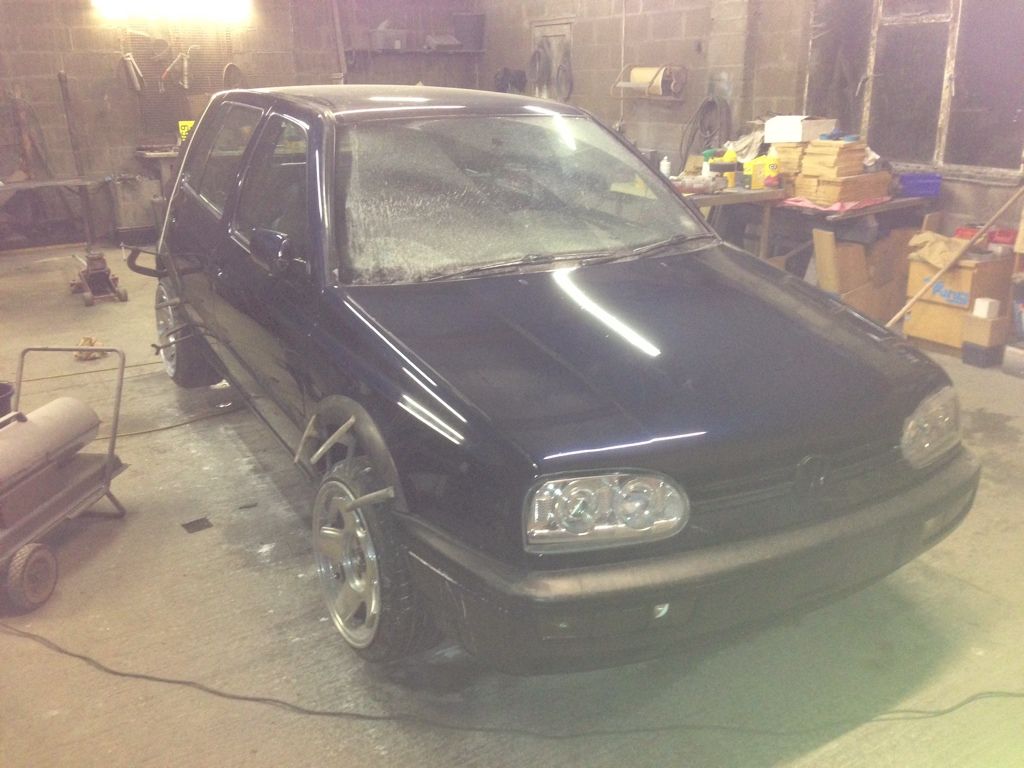
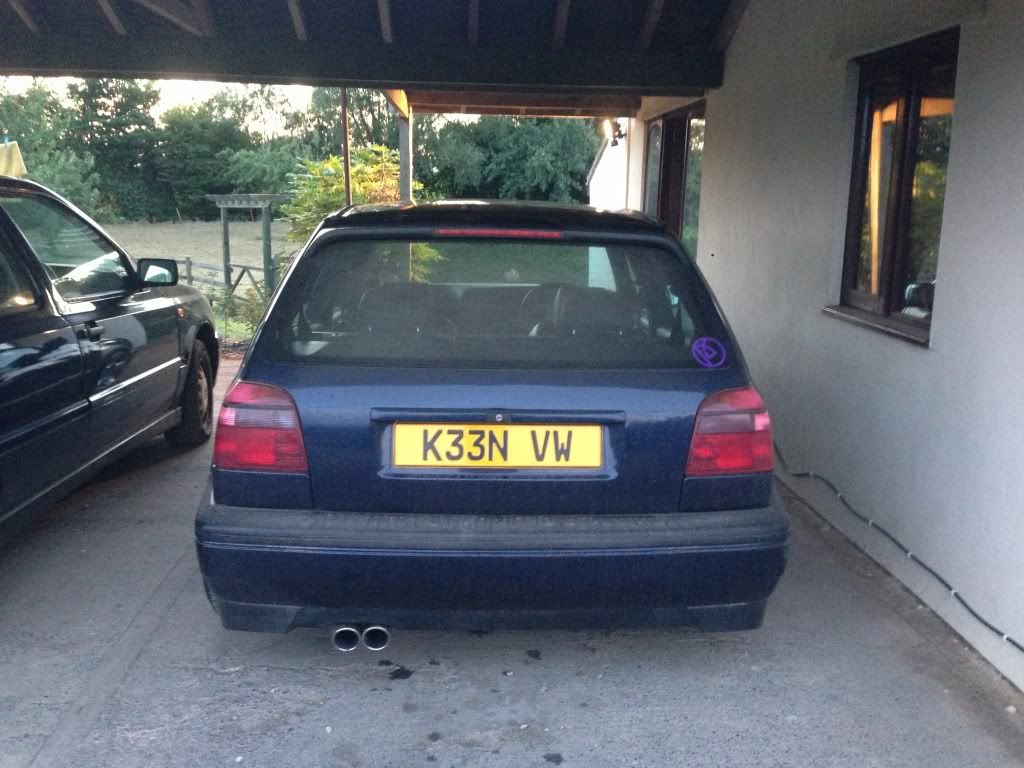
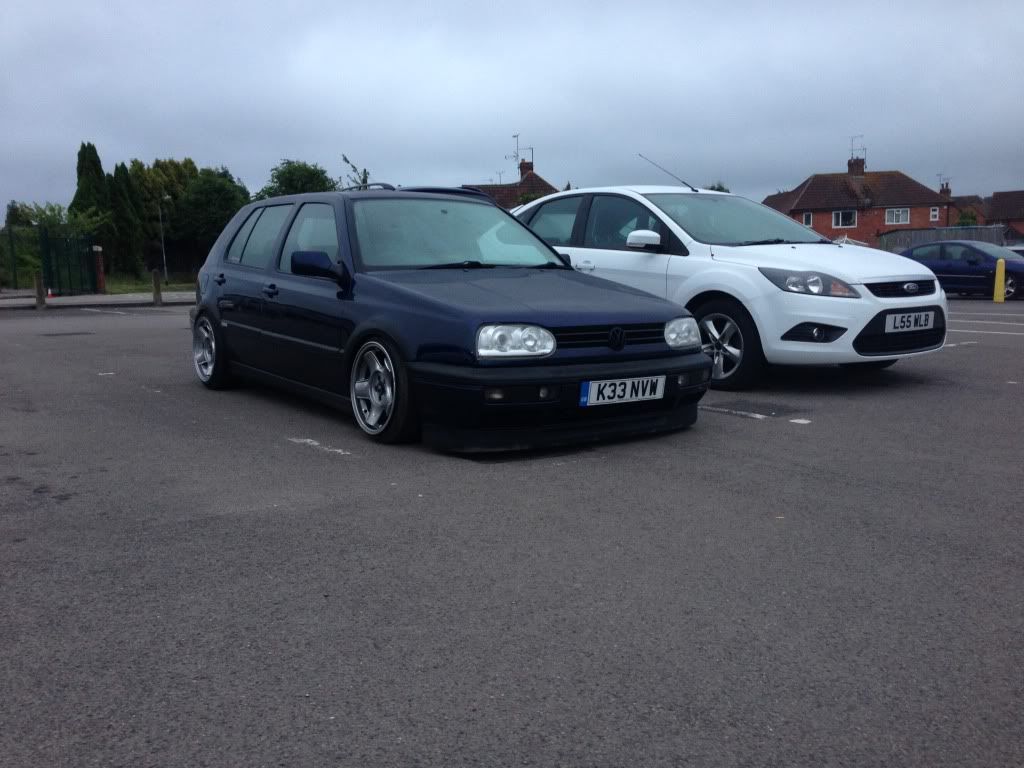
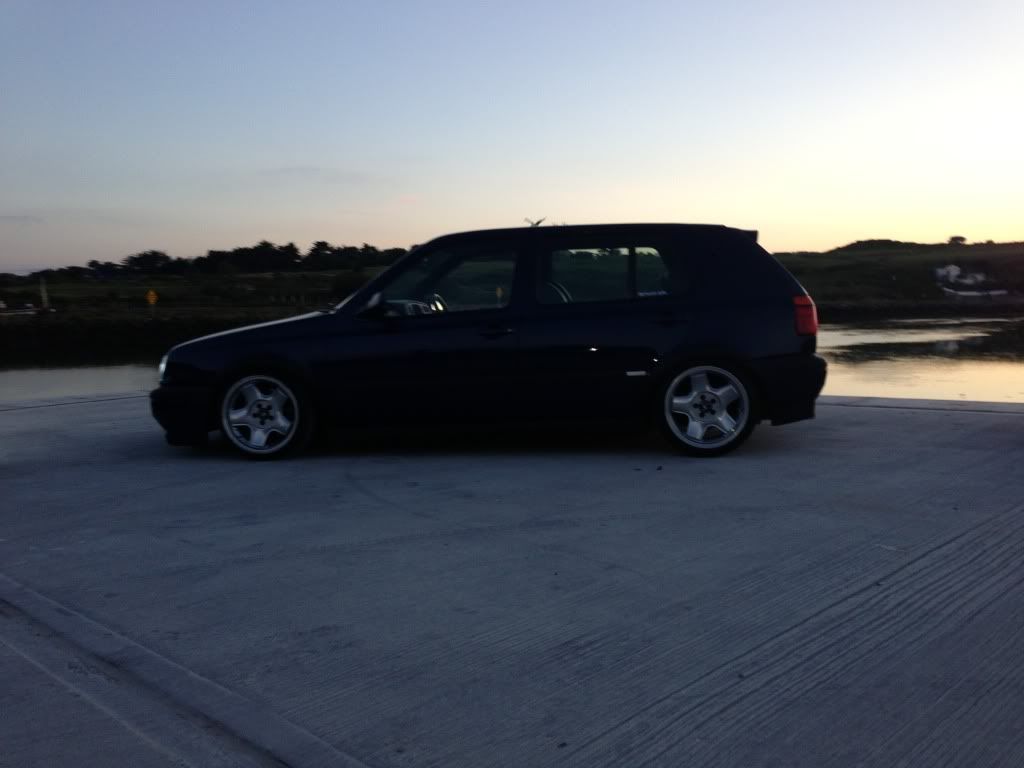
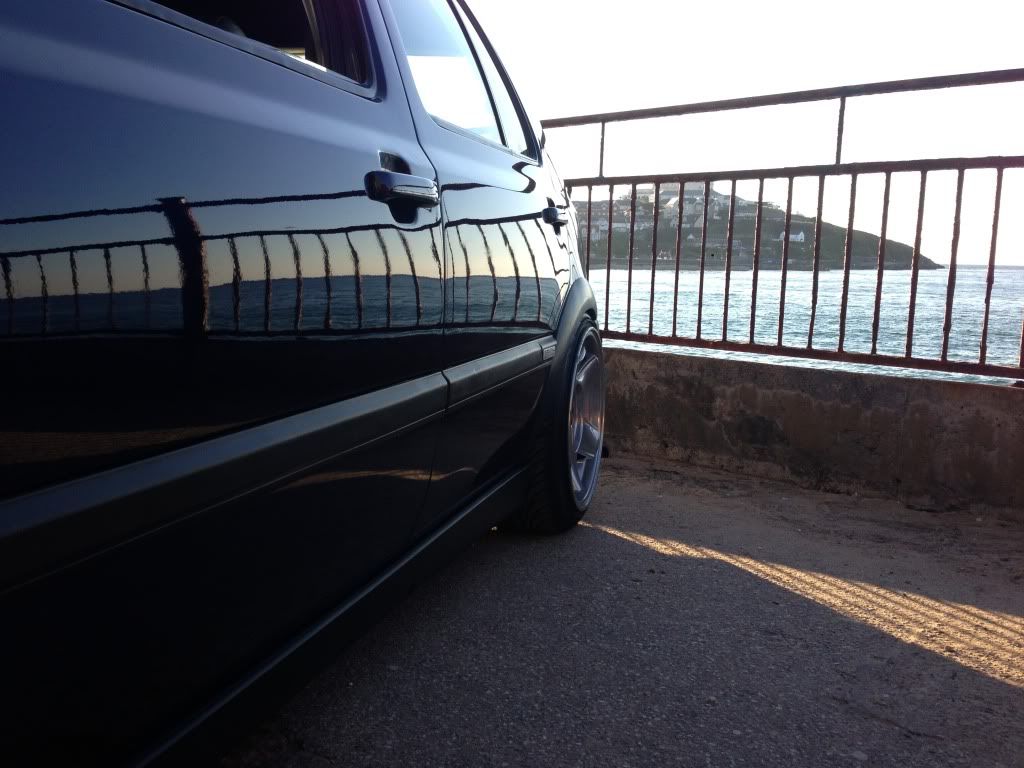
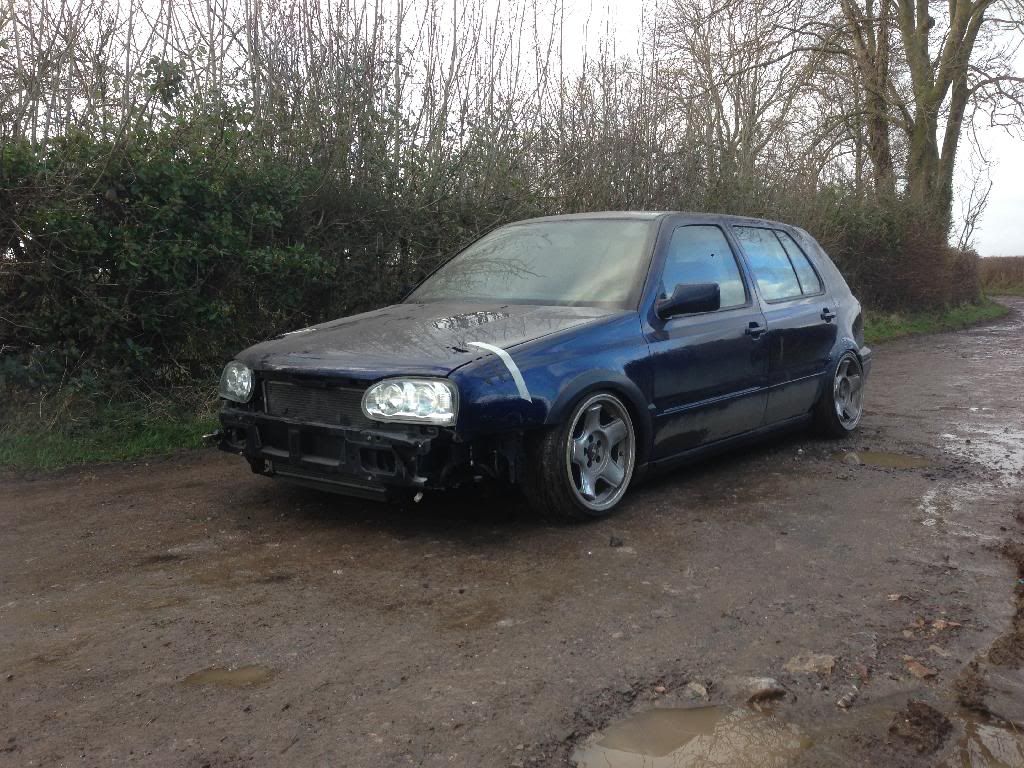
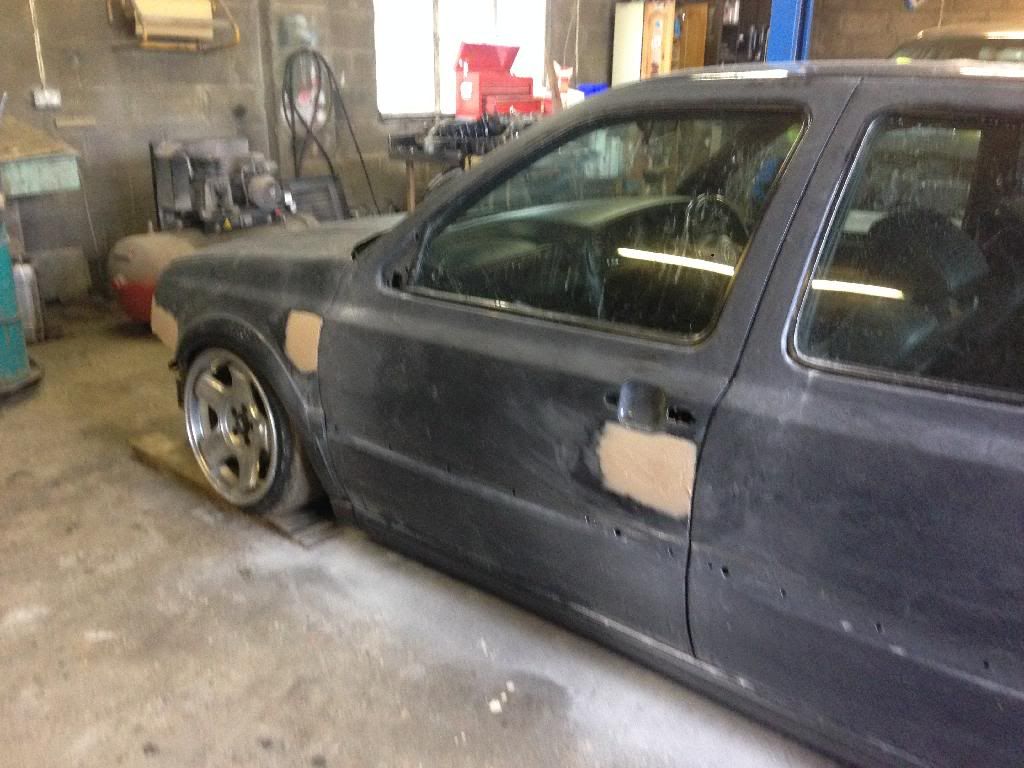
The cars spec and a little bit of history: 1997 GTi 8V in LZ5T Europa blue, with A/C No sunroof and all the other bits and bobs. I picked the car up for the grand price of �330 through an ebay auction, the car was local, but It was tatty and needed work doing, had been sat for a year. but ran sweet - just what I was looking for. Here's a few shots of how it stands now, I Will follow with photos and captions on progress throughout various stages over the last Few weeks.
Exterior
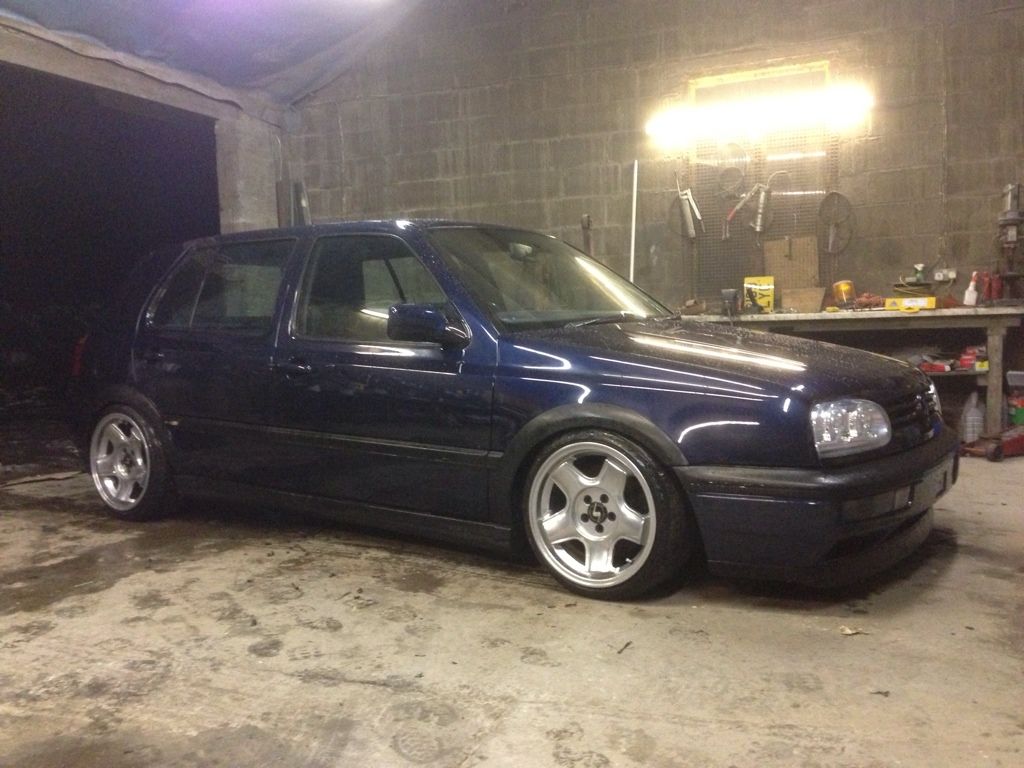
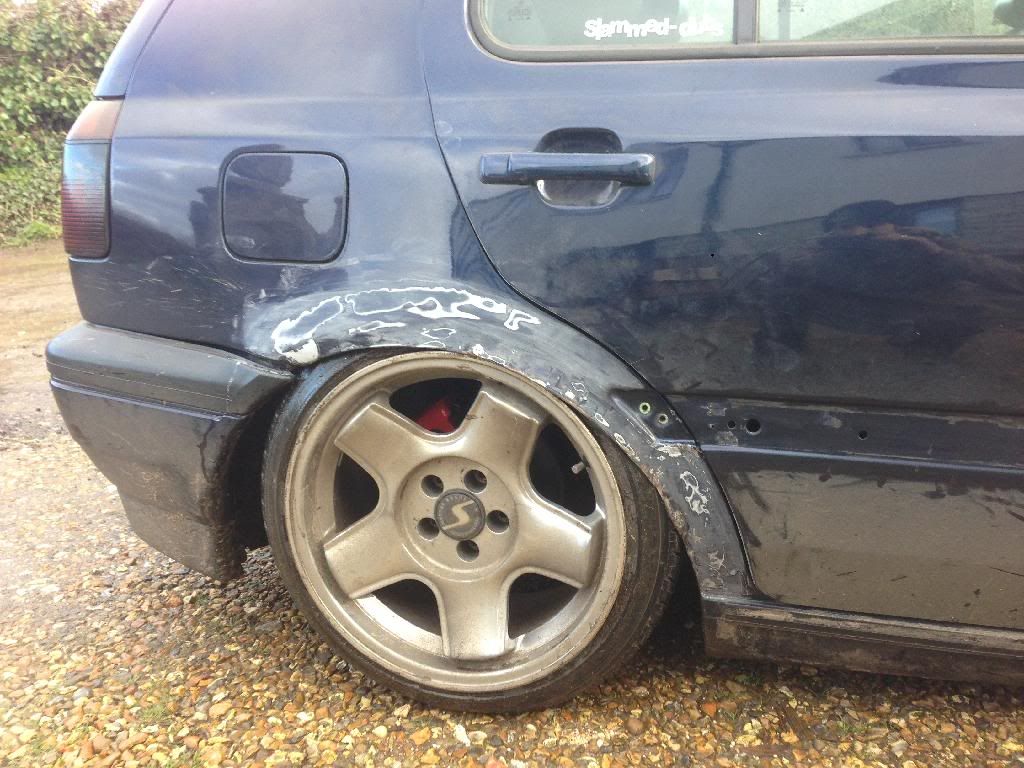
Schmidt Modernlines in Platinum Chrome 16x9J ET15 all round
Arches Rolled pulled and sealed
FK Street coilovers modified for extra camber up front
Full respray in LZ5T Europa Blue
Underbody and all 4 arches fully cleaned and Schultz'd
Roof Aerial Deleted
Side Repeaters Deleted
Rear Badge Deleted
Rear Wiper Deleted
Rear box sections welded and smoothed
Full OEM Gti Trim Spec
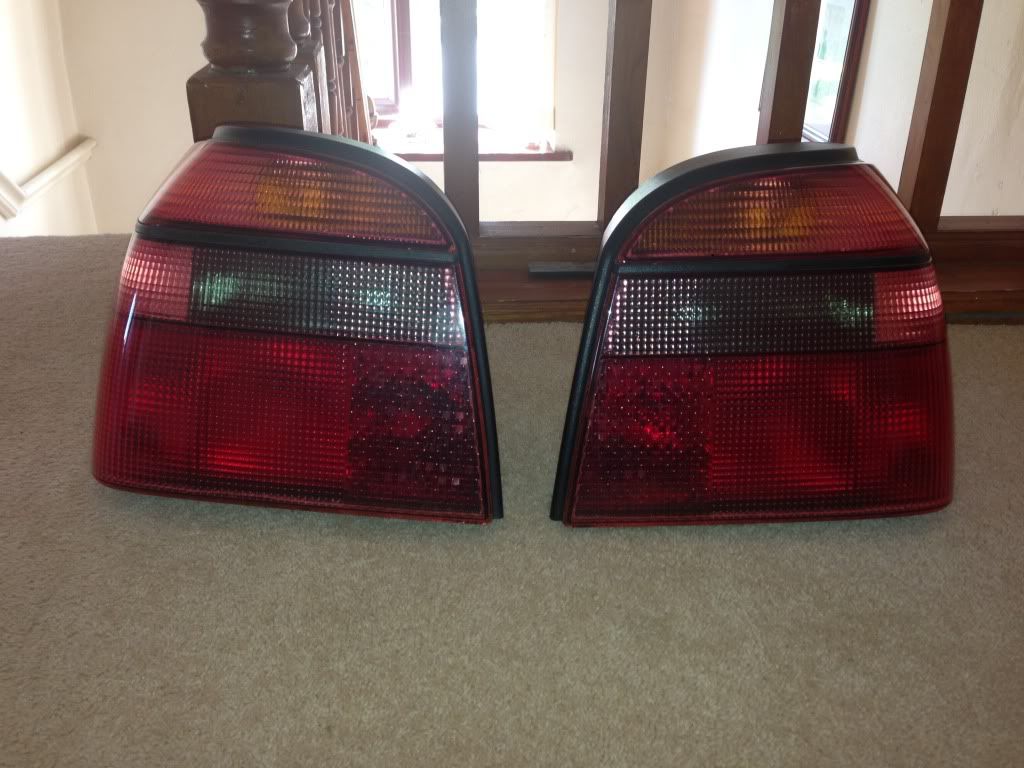
Hella Red/smoke/red Tail lights
Hella Celis Headlights
US spec Rear spoiler with Brake light
OEM smoked indicators/blanks/fog lights
Polo 6N door handles colour coded
Black Magic Wiper arms
Black magic mirror bases
Black magic rear side window dividers
Black magic Front grille
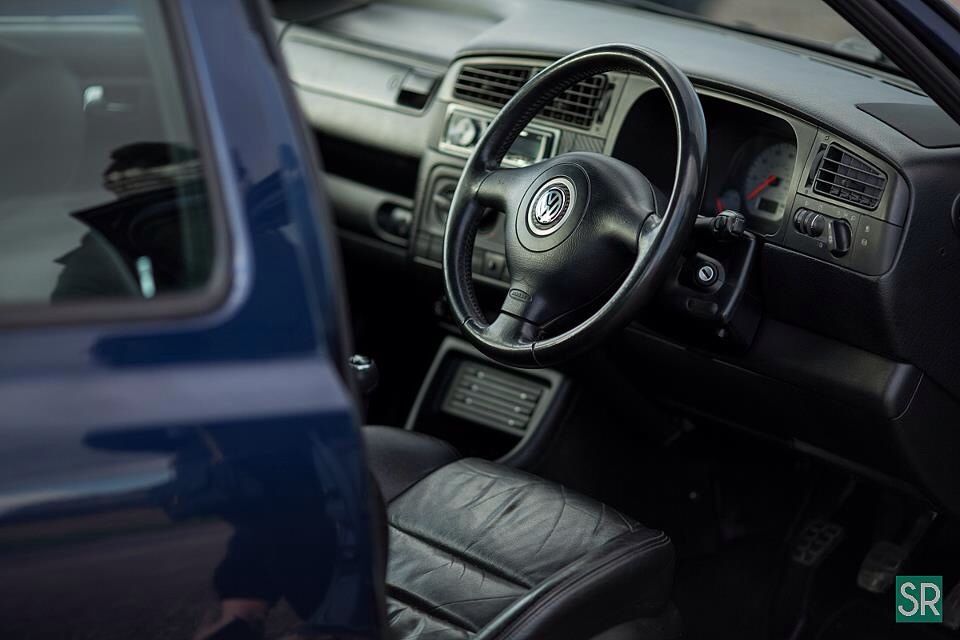
Interior
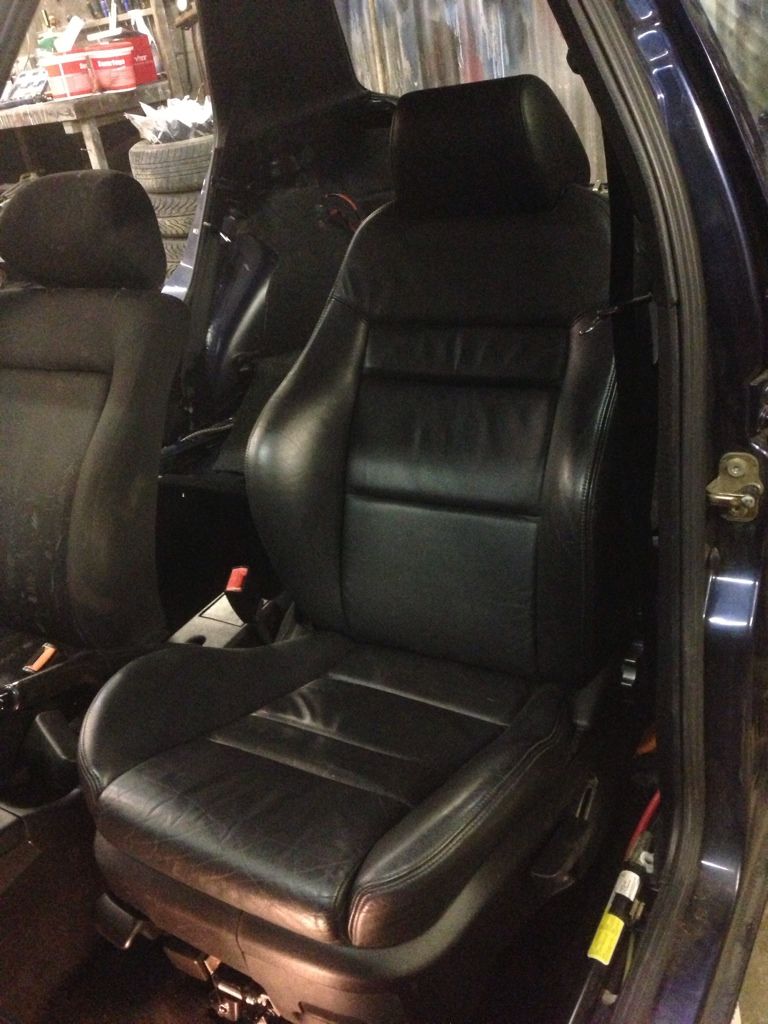
Audi A3 8L Leather Seats Front & rear
Colour Concept Black ABC pillars
Black retrimmed headlining
Passat B3 Black Grab handles
3.5 cabrio BlackSun visors
Corrado Black dome light with W8 style red LED mood lighting
Highline Leather Door cards fully sound deadened
Carbon wrapped mirror blanks with tweeters Bonded in
Cabrio 3.5 Door Pull triggers
Highline Door pocket inserts
Mk4 GTi steering wheel
Cabrio 3.5/Anniversary Hybrid Clocks
Early vento Glovebox
VR6 lower glovebox
Fischer CD holder
3.5 cabrio centre pocket Rubber
Centre console cubby hole red LED mood lighting
Mk4 Gear knob
US spec centre console
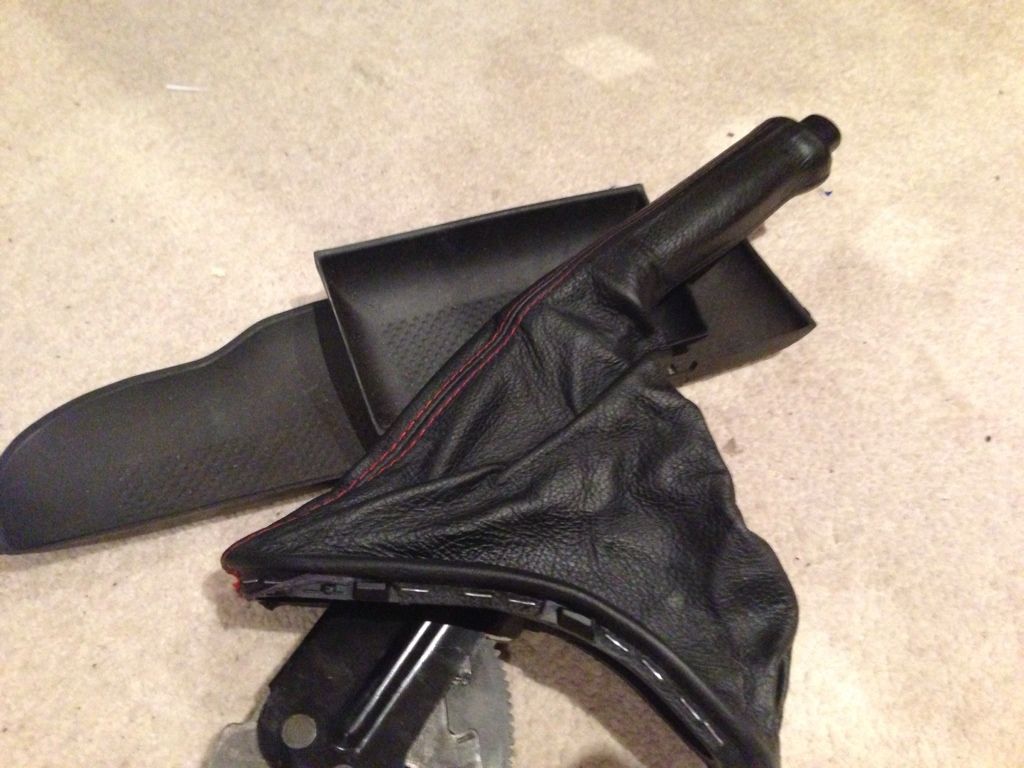
US spec drivers editon handbrake
Full red LED switch conversion
White LED footwell lighting
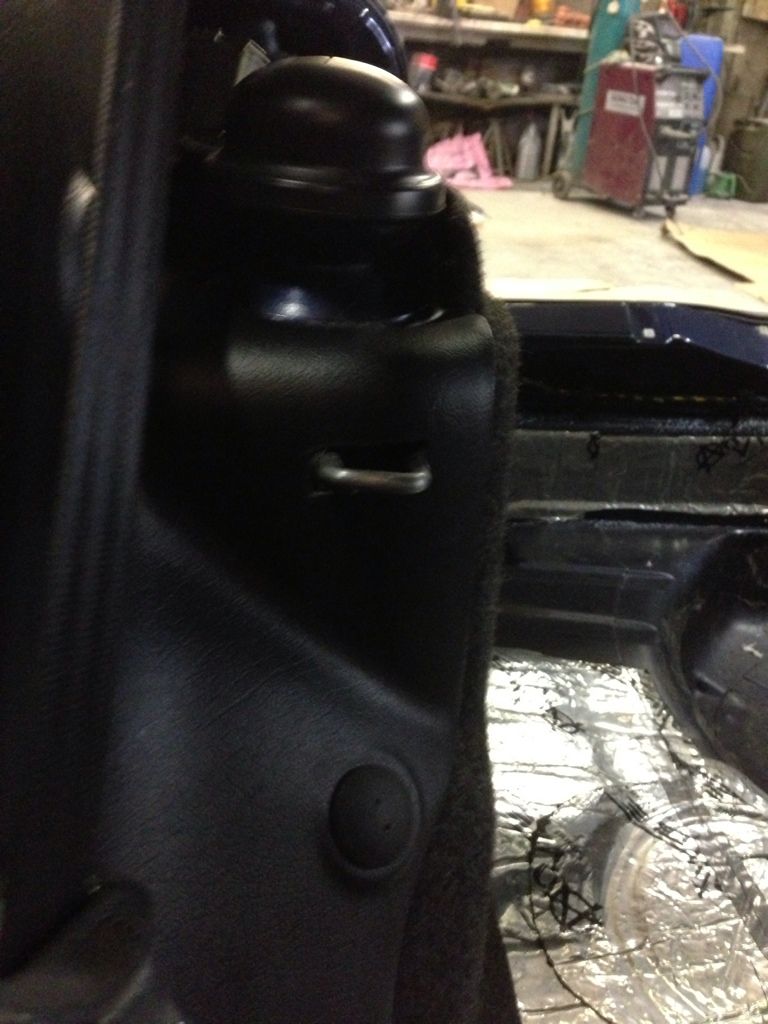
Mk4 Door puddle lights
False alarm LED
+12V power outlet in glovebox
iPod connection in glovebox
Spare wheel delete, tyre weld added
Fire extinguisher in boot
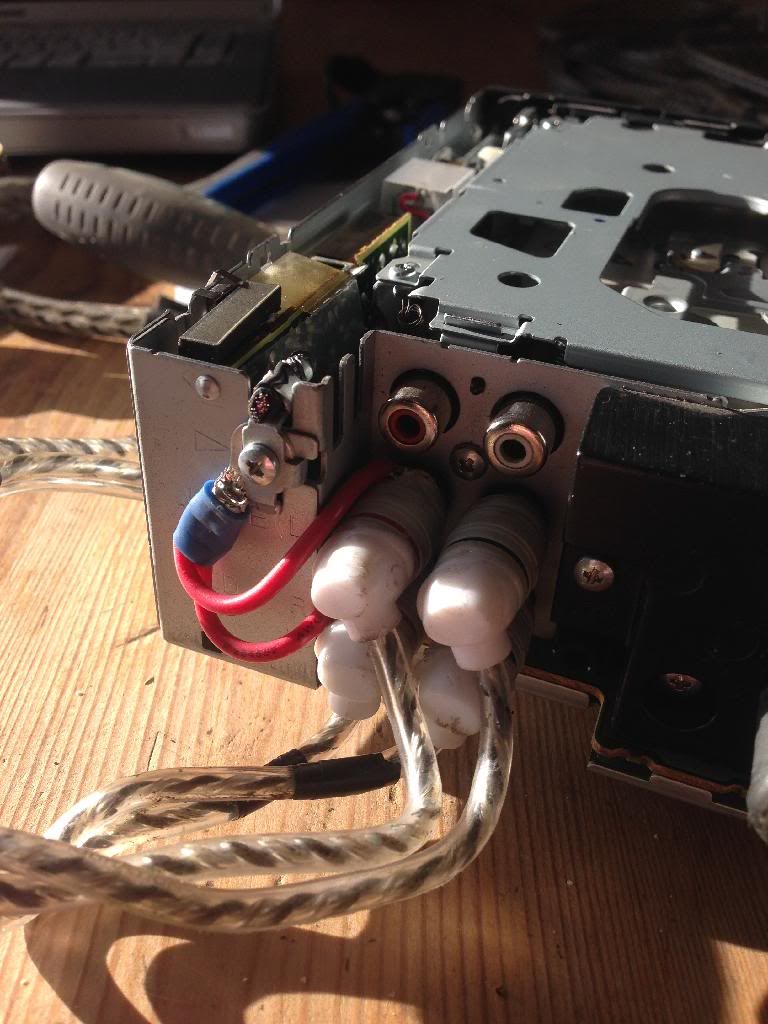
Pioneer old Skool head unit
2x pioneer Components in front doors
2x pioneer coaxials 3 way in rear doors
2x pioneer 2 way 4" speakers in dash
Vibe black box mounted to carpeted false side in Boot
Dynamat throughout Car
Engine
Colour coded rocker cover
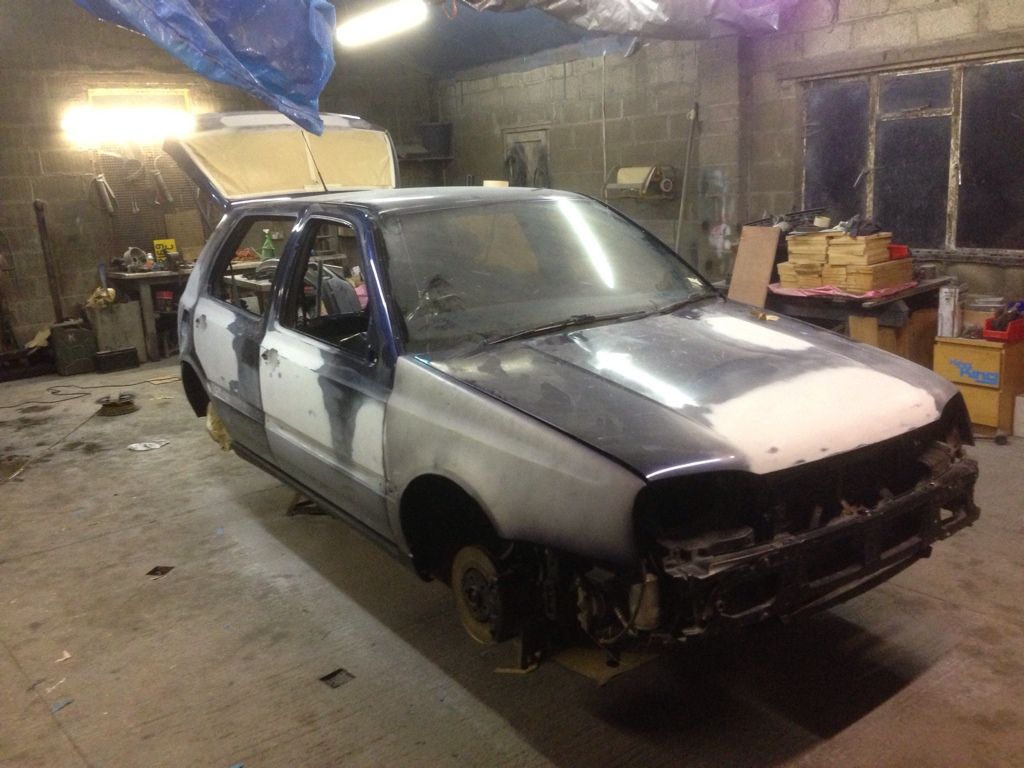
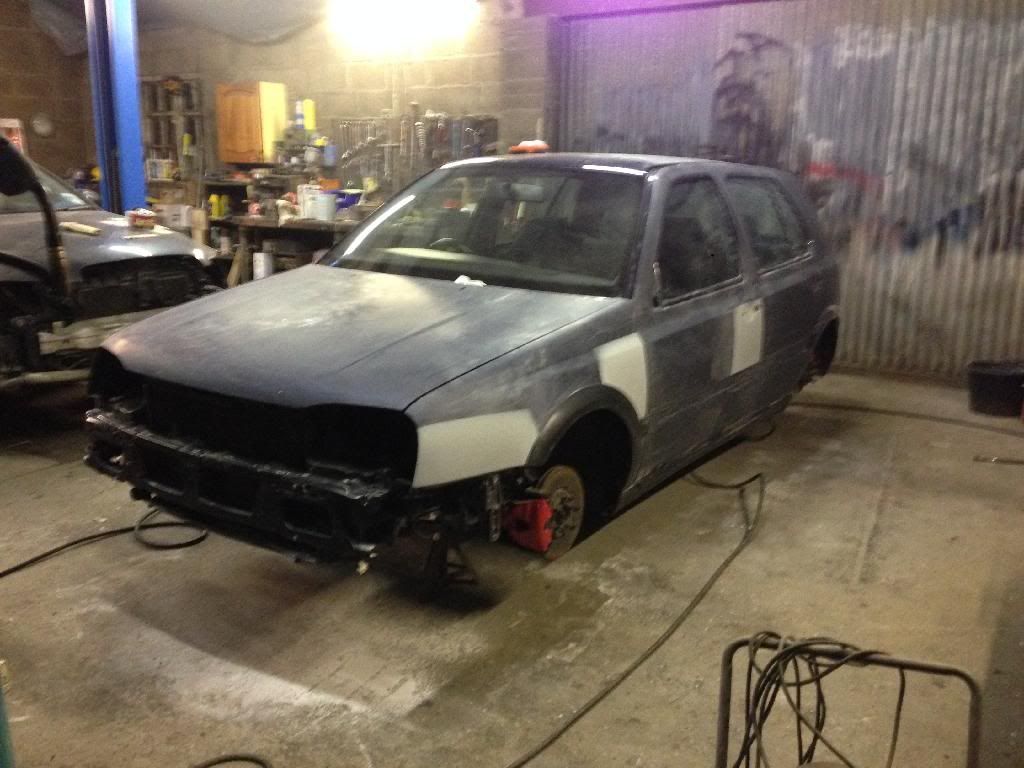
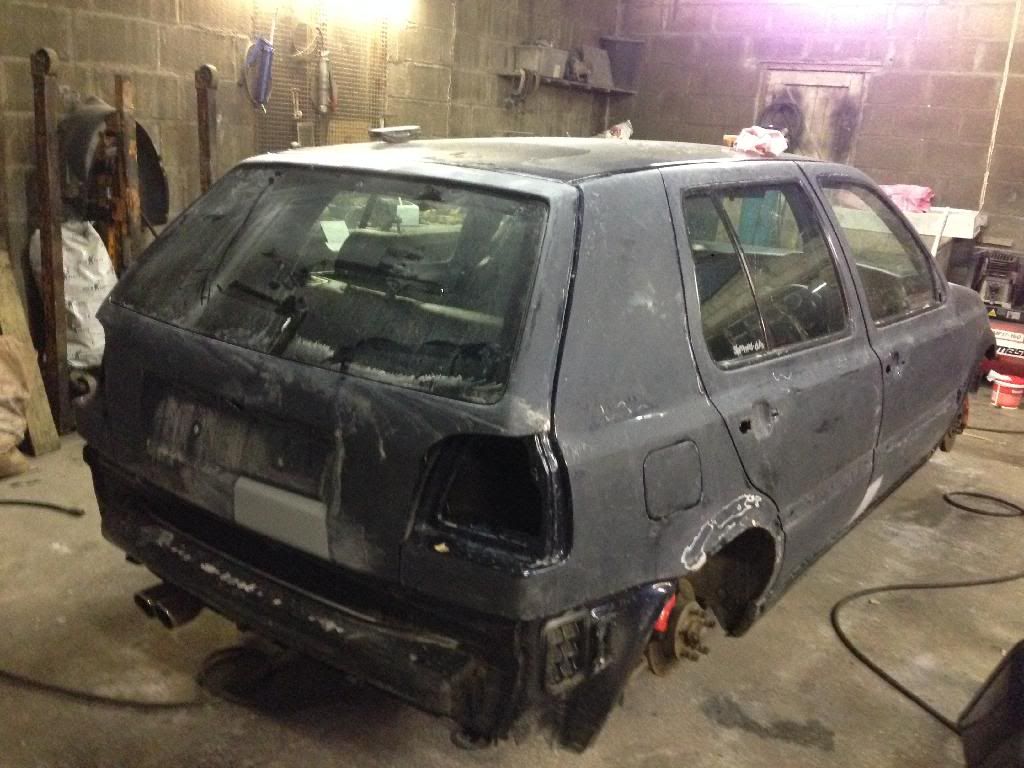
Heres how she stood before I started work, wings in primer, dents and rust everywhere, I have just re-trimmed the headlining in black headliner material From ASTrim, I would recommend them for anyone wanting to do custom interior trimming stuff.
Test fitting the modernlines one morning before work, arch work is defiantly needed.
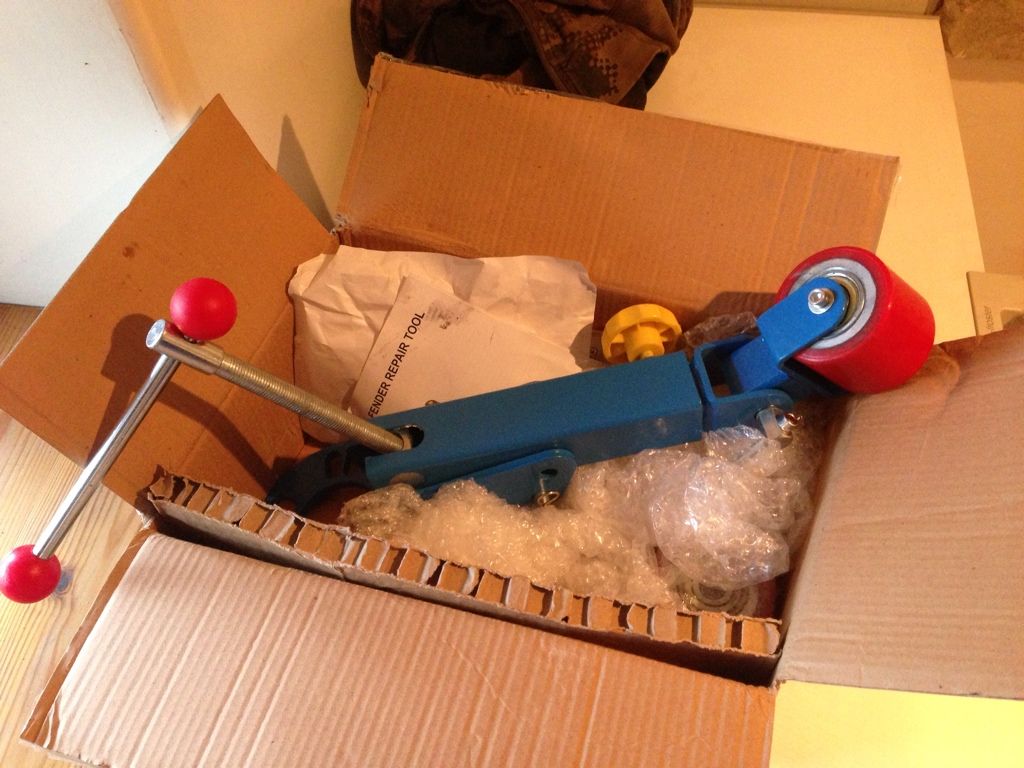
The postman brought something that I needed quite badly a couple of days later:
I then set about rolling the arches, digging all the seam sealer out and cleaning the lips right out, then giving them a few coats of Alu-Zinc for peace of mind. The roll didnt go as well as I hoped due to previous spot weld bodges, never the less I got there in the end, re primed everything and heavily Seam sealed the rolled lips so they don't rust back out:
Heres a shot of Test fitting the schmidts again after Rolling with arch trims in place, I have decided this was The only way to pull these wheels off on a 5DR, happy with the clearance now and hopefully the old Bill will be too .. Haha
I Started fitting up the A3 seats, half an inch had to be hacked off the bottom of the subframe, Rollers skimmed and spaced out with washers. and the bracket was cut and modified in the car to accept the New seats. The rears needed a custom mount making and welding in offset to the mk3 mount for the centre and two tabs welded to each turret to secure the seats back properly, took almost two days of tinkering to get them right:
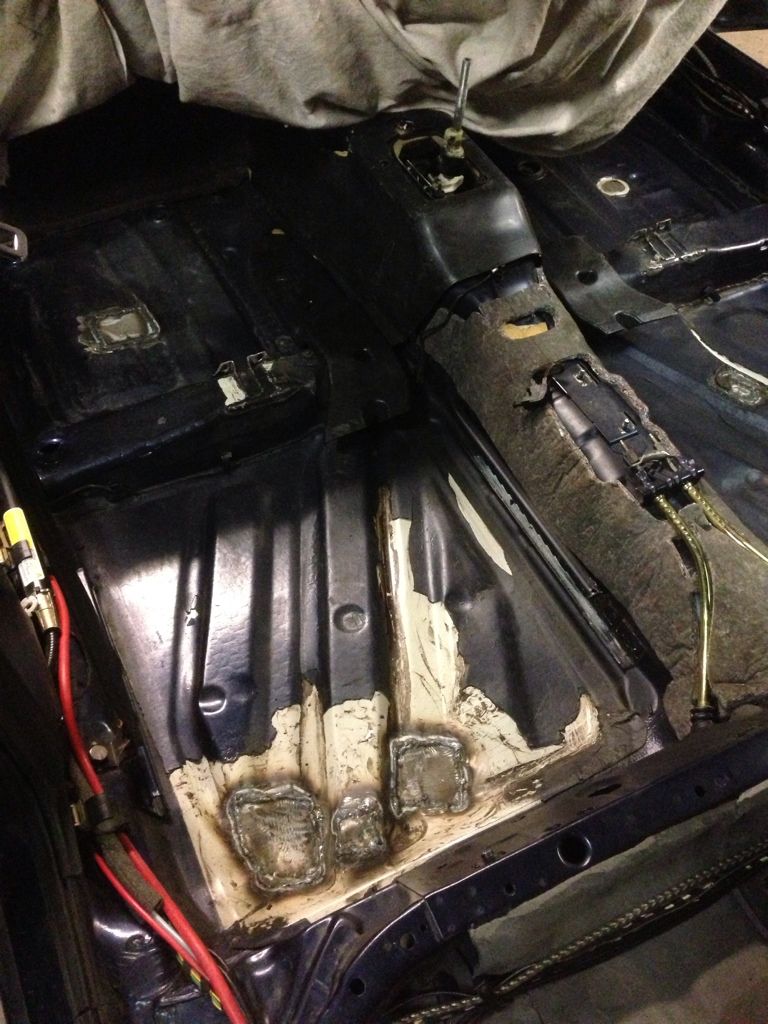
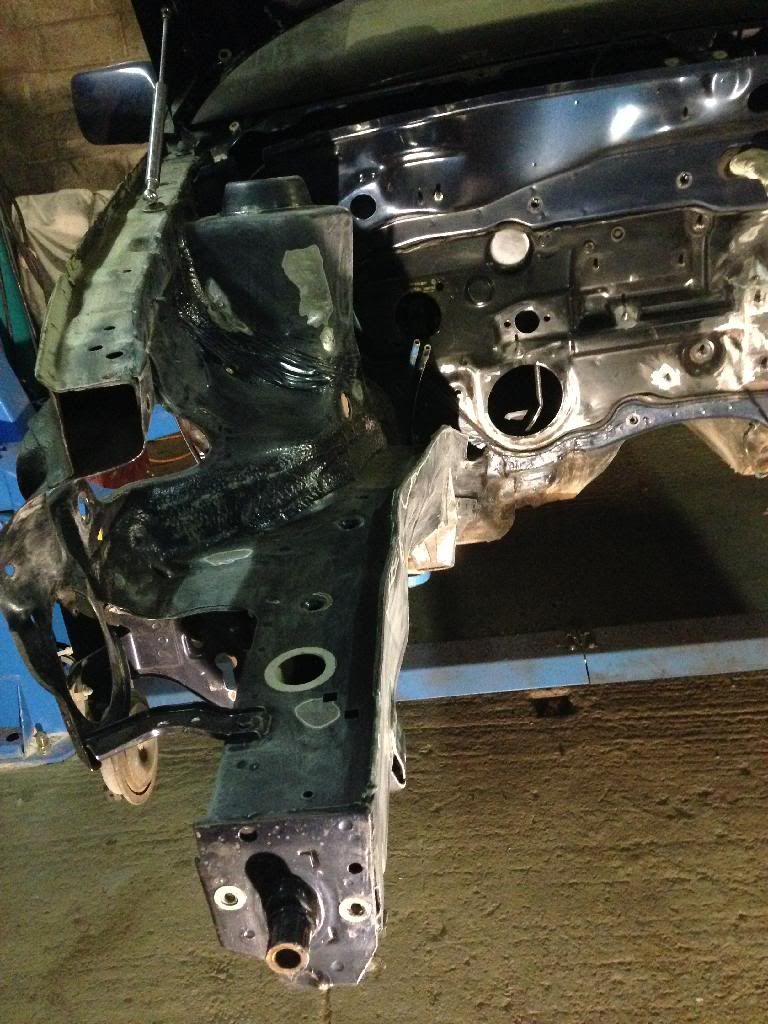
Next up was to Address the dreaded Tinworm I have been avoiding for months - I stripped the interior and started poking around with a screwdriver, finding 9 areas in total that needed Cutting out and plating, All But two Grommets, Fuel line Clips, brake Line Clips, you name it, it was rusty! Oh the joys of owning a mk3! everything was then primed and seam sealed again to keep moisture out in future.
With all the welding work done on the Floor, and a couple of plates on the underside of the sills, I set about re-Schultzing the entire Floor of the car and all four wheel arches. This was probably the worst bit of the rebuild, I spent two days just cleaning all the old crap off and Zinc priming any bare metal that was on show, from the front of the car right the way to the Back, I made sure I didn't miss anything! Here's a few shots after I Schultz'd everything, got through 4 cans of 3M stuff in total!
Next Job was to start On the bodywork, Welding the Badge and wiper hole up, and welding the box sections underneath the lights, I've always had a problem with that annoying OEM seam line the Mk3s have, so it had to go! The dents down each side and on the bonnet were filled then skimmed with polyester putty to ensure a smooth pimple free finish that will be slightly flexible. All went smoothly and I was impressed with the results:
[IMG]http://i1276.photobucket.com/albums/y480/aaron1492/43975C7C-1875-4FC1-BCC1-578BA4E6CCC4-1543-
000001A4CD232E52_zps99dbd70e.jpg[/IMG]
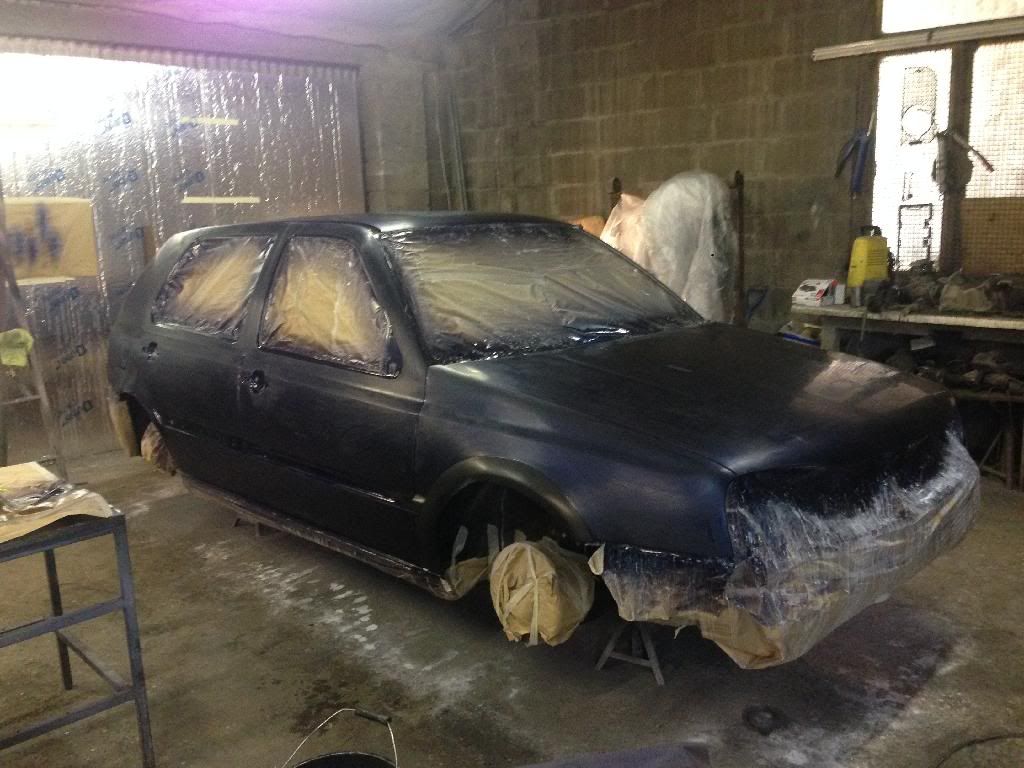
After rubbing it all back and scuffing up the whole car I removed all four windows and seals, The roof seals, door handles Etc and any other plastic or rubber trims that would get in the way, and I wanted to minimise hard Lines as much as possible, so masking up the windows was a definite No go area - I wanted a proper finish and was prepared to go the extra way to achieve this. I didn't bother removing the doors and doing the door shuts as its only a Daily, and the shuts were in good nick anyway, I bought Norton soft body Foam for all the doors to eliminate hard lines when spraying.
Next up I began masking the car up for Primer, my mate Will came over for the weekend and we managed to waste the best part of a day just masking everything up, i Didnt want any primer to Find its way where it shoudnt so a thorough job was completed. The Roof was masked as this will be painted afterwards when the Car is on the ground, I had planned a black magic roof but didnt have enough paint to do it properly so opted for a blue roof
The Next day was Primer day, the workshop was brushed and washed out, to remove as much dust as possible. I used a standard 2:1 primer By MaxMayer, three coats in total were needed for the desired finish:
When the primer was fully dried a day later, a guide coat was laid ready for flatting back:
Polo 6N handles test fitted:
Heres some pictures of the shell all flatted back with 600G after guide coating, spot putty was used on all imperfections found in the surface of the panels, Not a Job I would like to do everyday! :P

I also did some work on the Bumpers, door handles, and grille, filling all imperfections and flatting them back ready for paint:
Next up was a Ground coat. I had some "outrageous" Black ground coat in the cabinet and decided this would be put on prior to paint, really pleased I did this as it has complimented the colour really well and made it alot Deeper than The colour over Primer. The guide coat was left for 15 minutes to go tacky before the Base colour was Laid on. I was using one heating oil burner and one Gas space heater in the workshop to get it nice and hot in there, not ideal But hey I Don't have a booth nor oven!:
Then straight on with the Colour. PPG Paint, mixed with Mayer Thinner and a little Bit of U-Pol Rocket to speed the Drying process up, sprayed through a standard issue Sealey Gravity fed gun with a 1.8mm needle, as you can see in the photos the air is rather hazy after a few coats, it got to the extent of not being able to see anything!
The paint was left for 20 minutes and I went and Got some Air, had to open the workshop Doors much to my discust to clear the dense haze of paint thinner in the air! I was Wearing a new 3M 4279 mask and a pair of goggles, and a one piece white suit then it was straight on with the lacquer, I opted for the cheaper HB body auto Clear 2:1 as everything else was mega money! This was also mixed with rocket and tested on the bonnet first! Disaster struck!! silicones started to fisheye on the bonnet, so i very swiftly mixed a dash of MaxMayer anti silicone in with the lacquer and re applied the coat - it seemed to do the trick, panic over and a big sign of relief, the imperfections will be polished out afterwards with the mop. The rest of the car and bits was a joy, no funny reactions luckily. Three heavy coats of lacquer were applied to hopefully achieve a deep glassy Finish In the panels:

That was enough for Today, I left the space heater on till around 10PM to ensure the paint and lacquer had all begun to set properly. I'm really impressed with the results, not doing alot of paintwork in the Past I'd say I'm a natural! Found two tiny runs on the whole car, and more annoyingly a mosquito fossilised into the bonnet - typical!!
The car wasn't touched for a few days to let it all harden off, even after three days it was still tacky! Here's a shot of the car ready to be fitted back up with my mate in the background, hands in pockets as usual!!
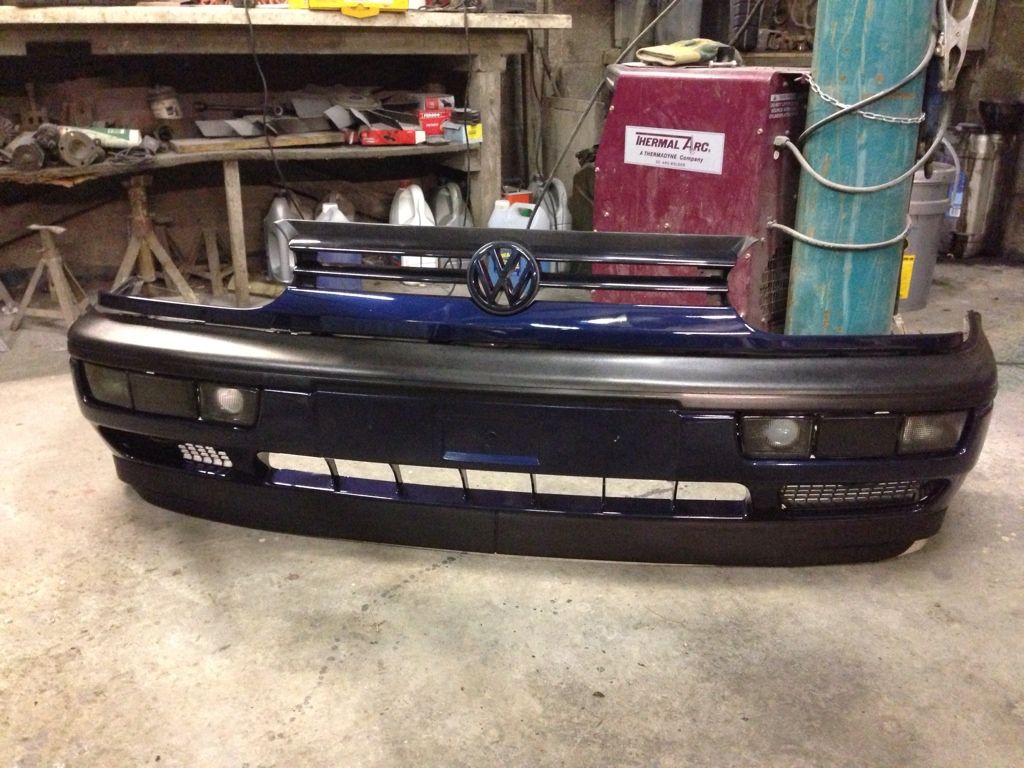
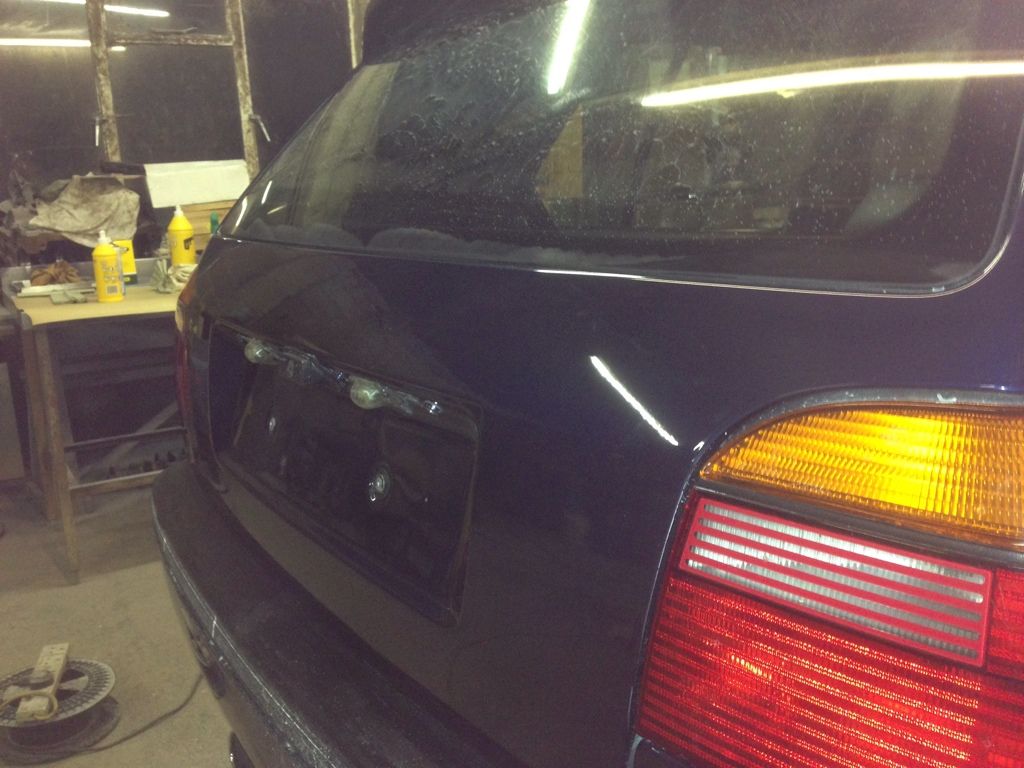
And a shot of the front bumper built back up with brand new smoked indicators/reflectors, and a pair of Home brew smoked foglights. A badgeless grille will be purchased and painted in the near future.
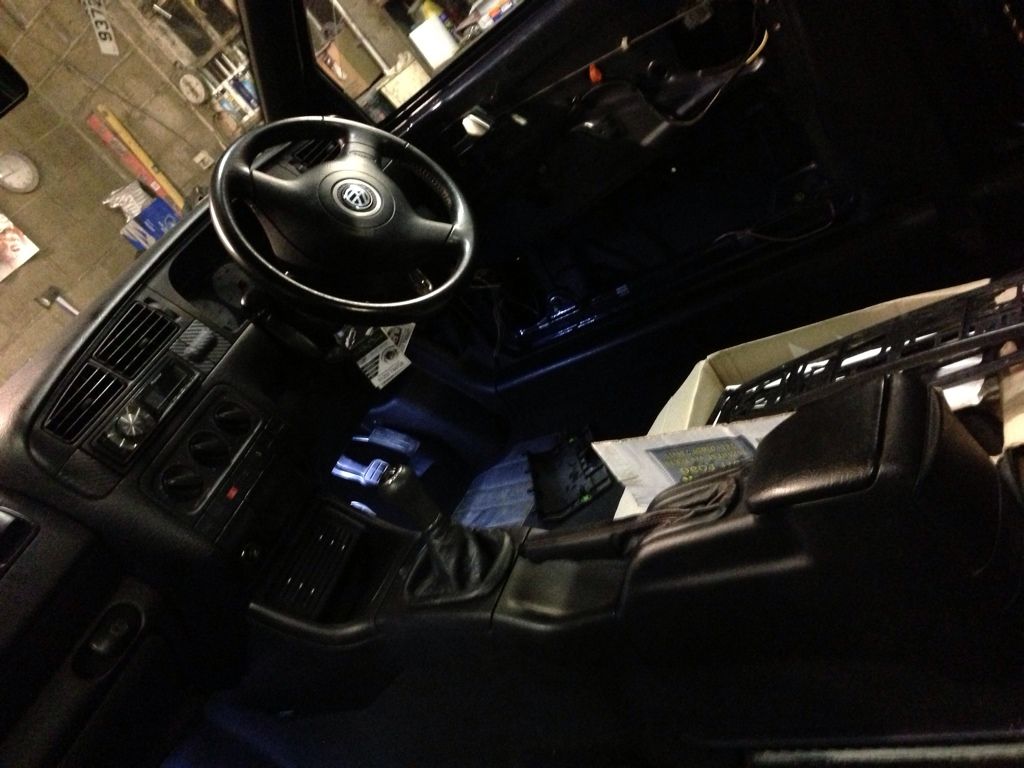
A shot of the interior beginning to come together, with a US console and E-brake fitted up:
The windows and seals were all cleaned and re-fitted before flatting off:
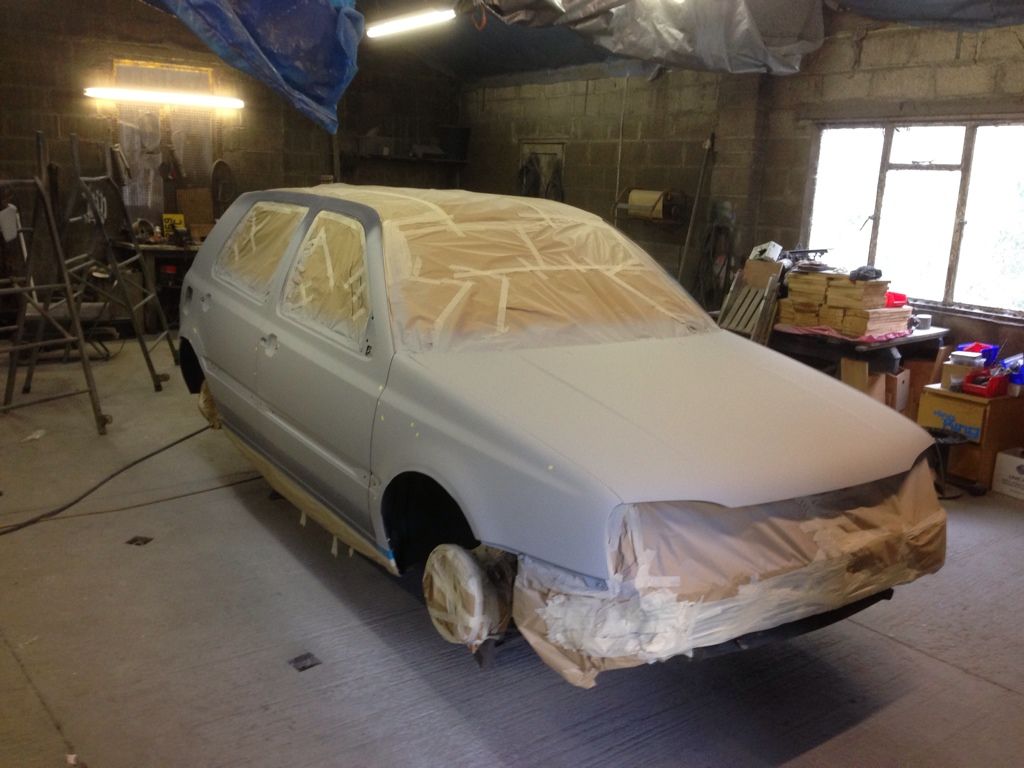
After a Week of Drying time I hit into the paintwork with 2000G, flatting the whole car off ready for machine polishing. The couple of runs were flatted out as was that bloody mosquito:
After flatting the car was washed thoroughly with a light fairy liquid solution ready for machine polishing. I used a Sealey rotary Polisher, farcela G-mop pads, and Farcela G3, G3 fine, then G3 finish for the final gloss. I was really impressed with the results but still not 100% due to the lacquer still being really soft I had to go careful in certain areas, here's a few shots of it after polishing
This photo really bugs me as it makes the car look so odd with the GTi splitter. Good Job I have a US version sat here waiting!
No photos of this stage unfortunately but the Roof was masked off, aerial welded, roof primed then painted before the Roof seals were refitted.
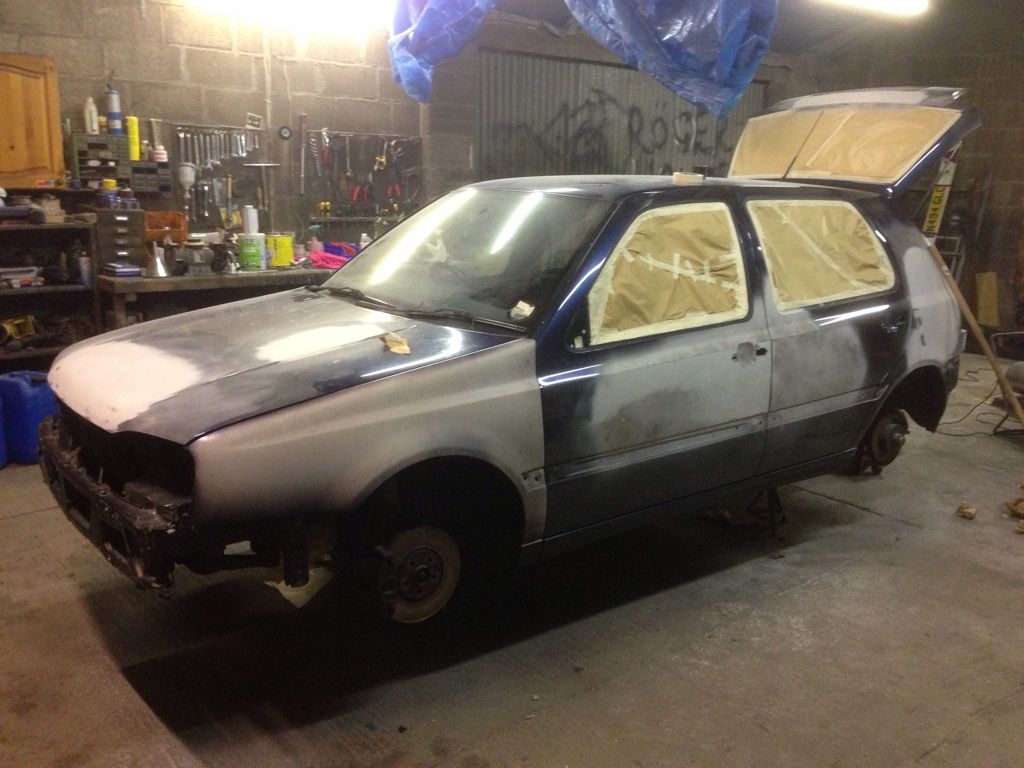
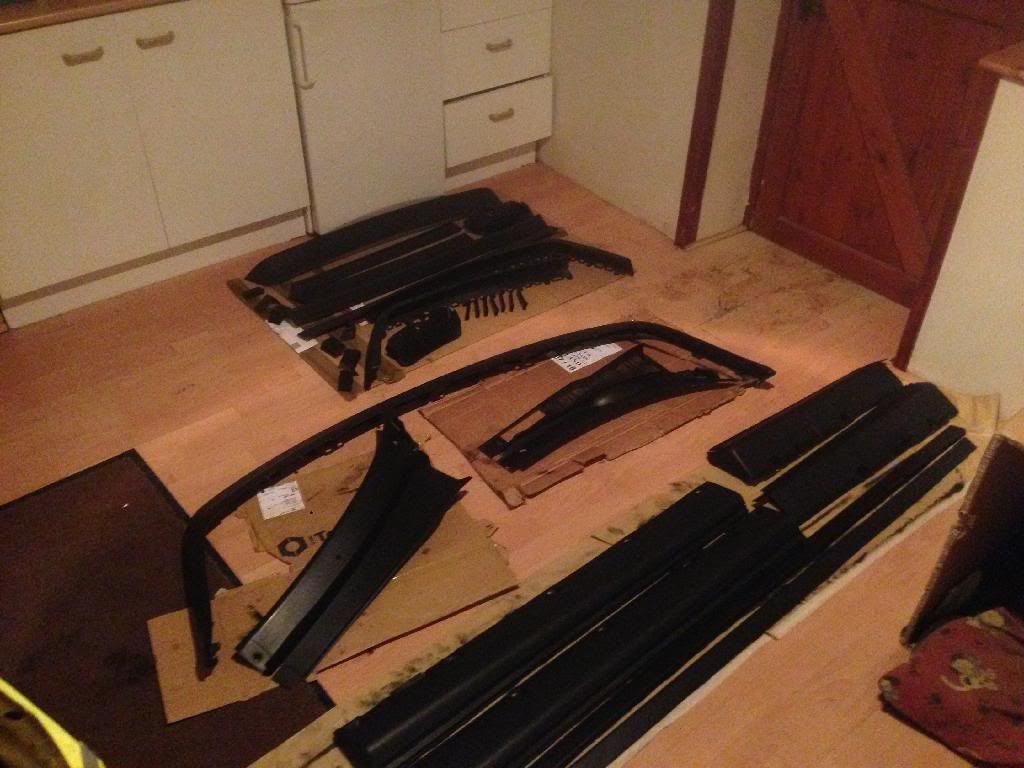
The GTi arch trims were then Trimmed and Bonded on with PU silicone adhesive, and held with a selection of mole grips and clamps and left to set for 24 hours. The car looks so much better with these on when sat on the ML's!
A few bits and Bobs that happened along the way:
I was slacking in photos at this point as I just wanted to crack on and get everything cleaned, modified if needs be them Re-fitted.
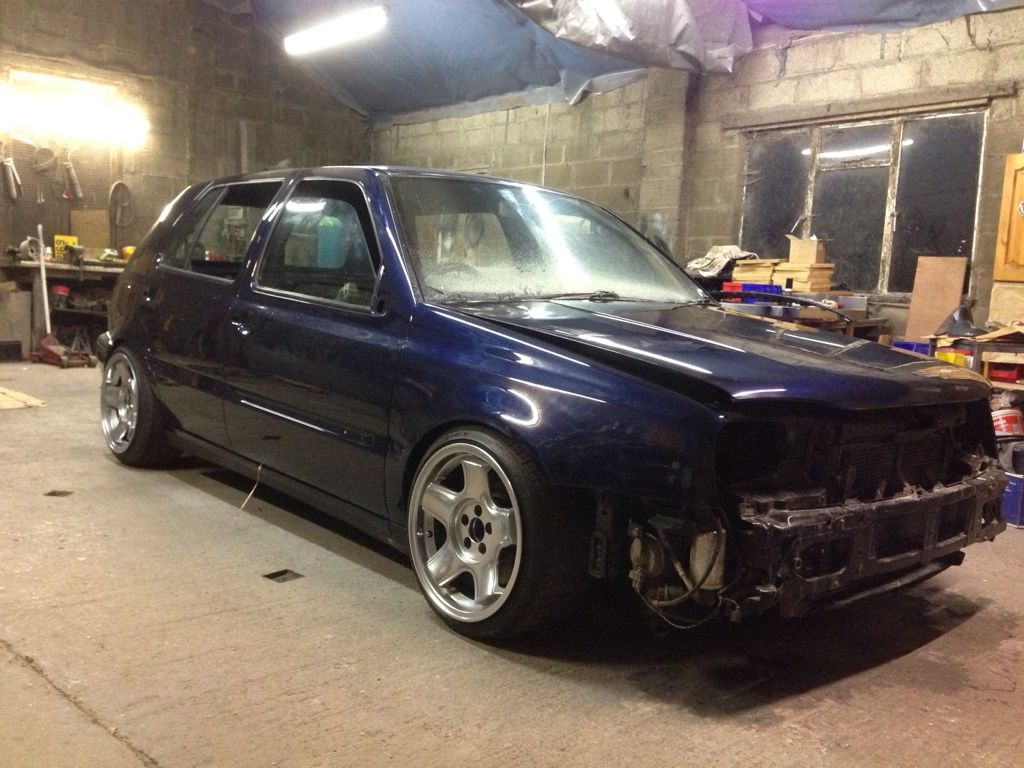
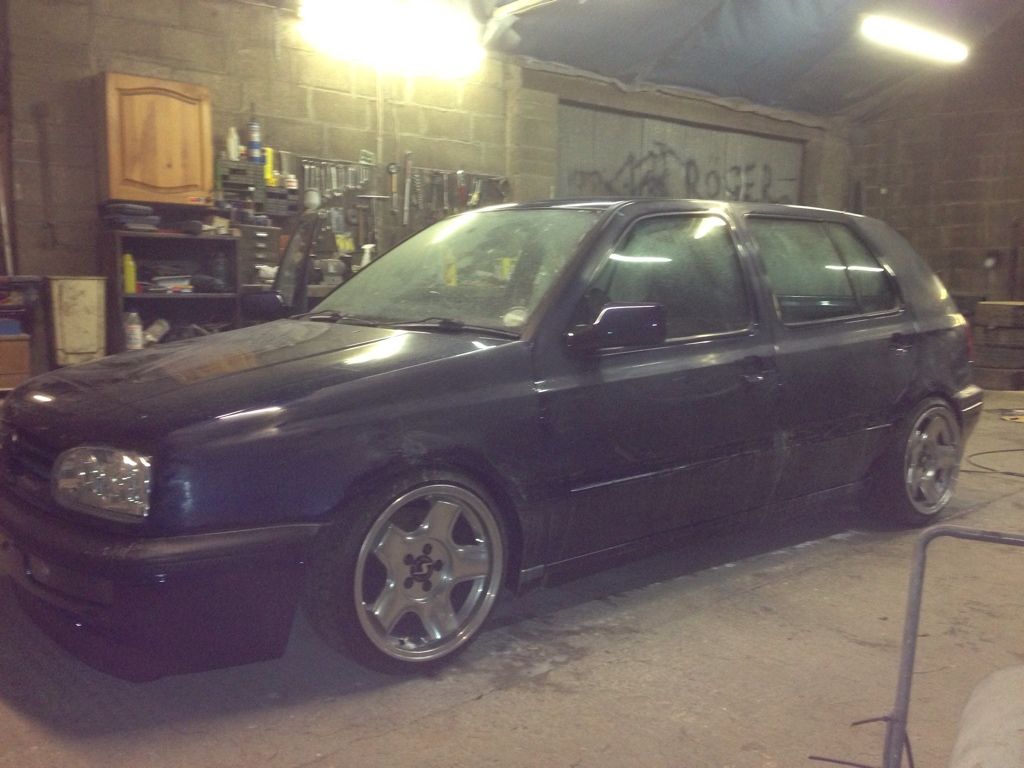
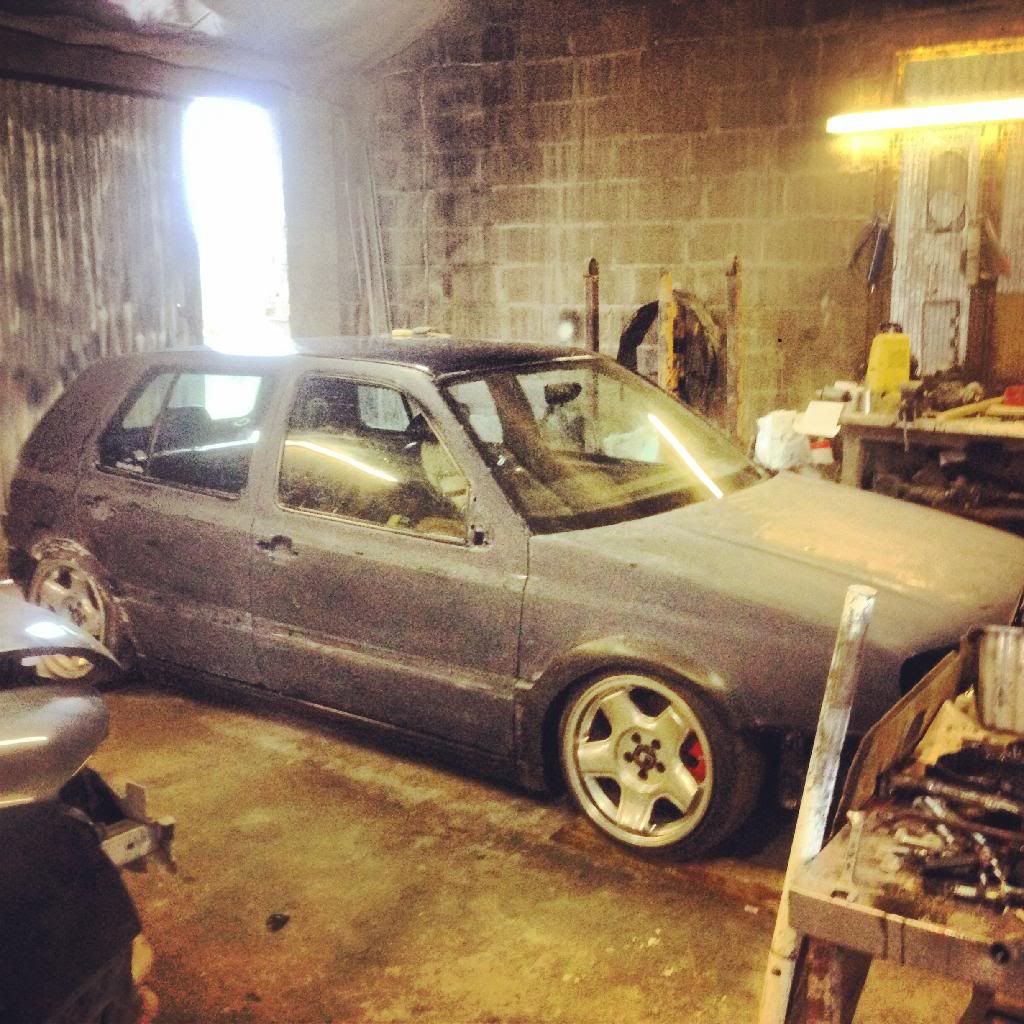
A few days later she was on the Ground all fitted back up looking like a different car
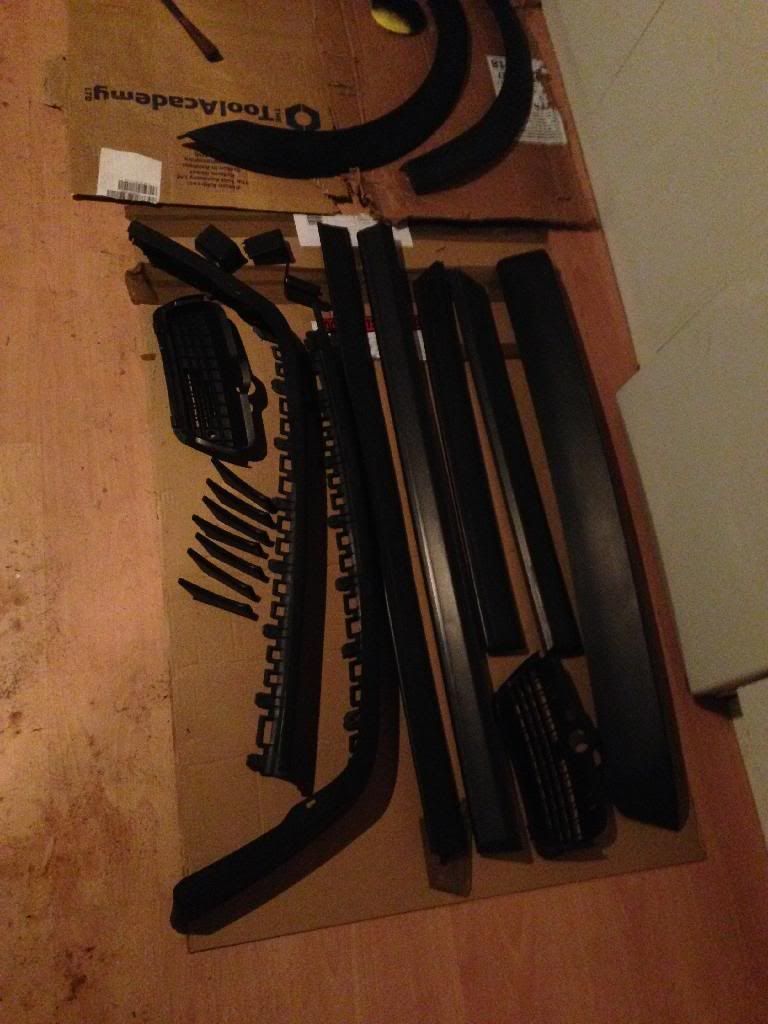
New lower sill mouldings were purchased from VW at the massive sum of almost �90, as the ones I had were bubbly and horrible!
All Trims were forever Black'd when everything was back together to complement the fresh paint. I also fitted a 6K hid kit totally inside my hella celis headlights, these lights are for practicality not looking scene, it's a daily that's used mostly at hours of darkness.
More pictures of exterior/Interior coming when I clean it next if anyone is interested, hope you have enjoyed the read!
So the VR6 has been taking the biscuit, has only been out a handful of times this Year and all it seems to do is want money spent on it, so I've been focusing my efforts on the real woman of my life recently, she takes what's given and doesn't moan nor throw her toys out of the pram
I started off by sourcing a set of near mint hella all reds at long last for a reasonable price via Facebook, which seems a great means of picking up cheap bits at the moment! Was really happy with the results and such an improvement on the CLs I had been running for months.
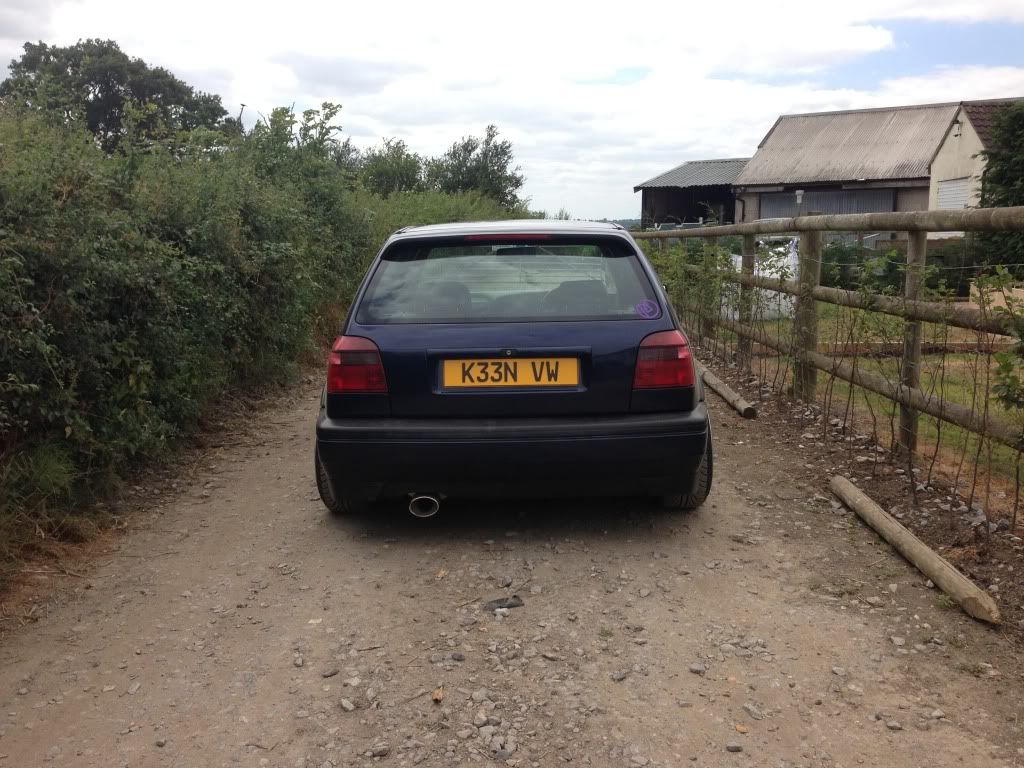
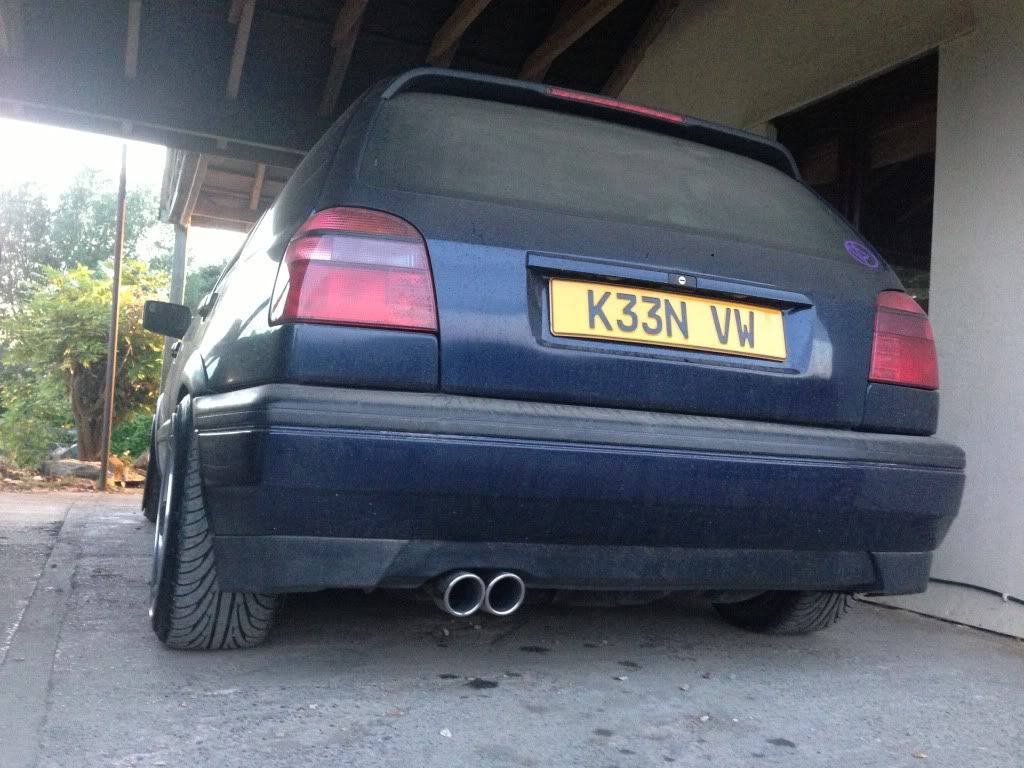
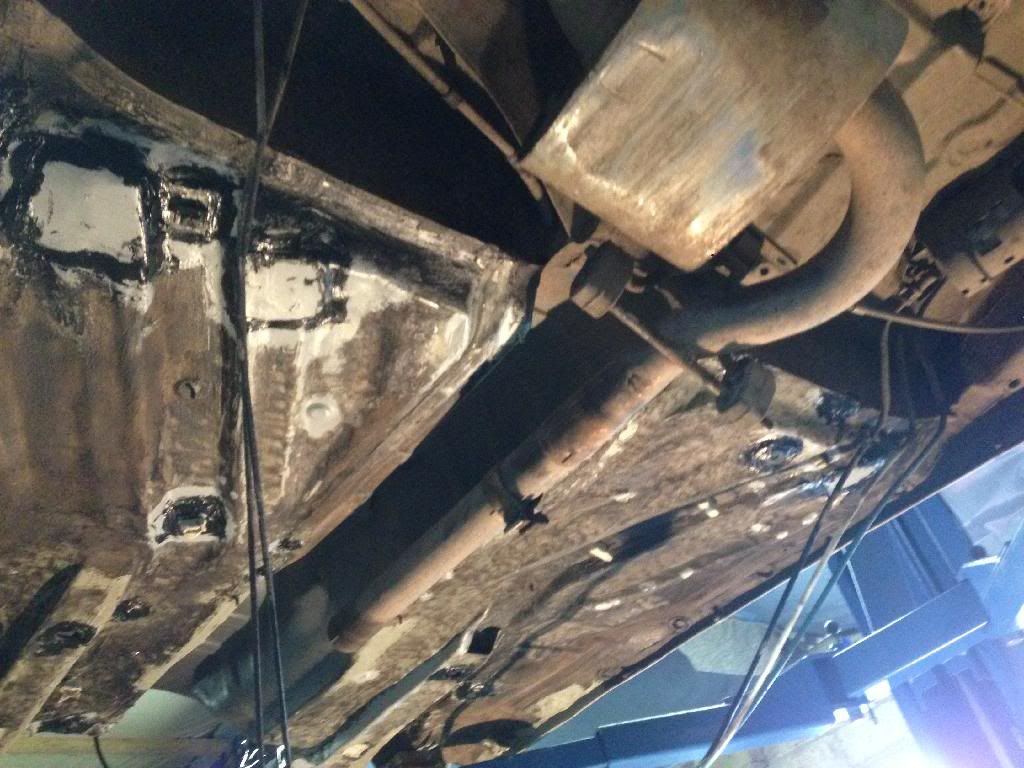
Next up I swapped my milltek oval For a Twin exit which I had lying in the garage from a highline I acquired a few months ago, the oval sounded really throaty but didn't fit in the recess as much as I'd like. Much more comfortable with the Fitment of the twin exit, excuse the dirty car :P
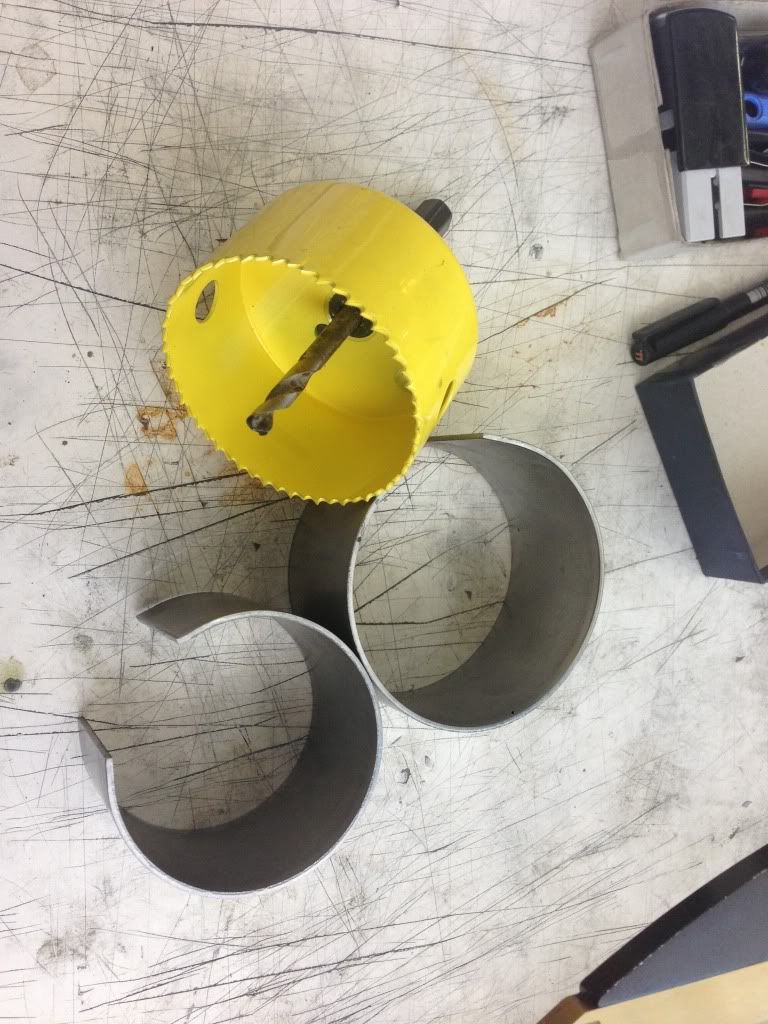
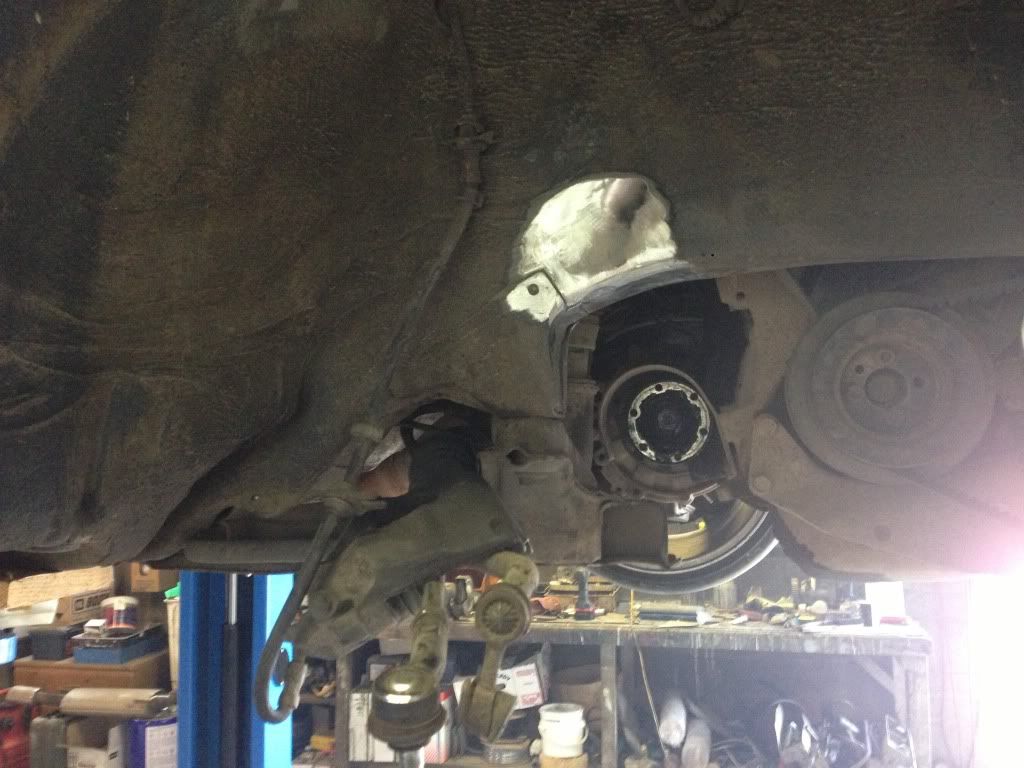
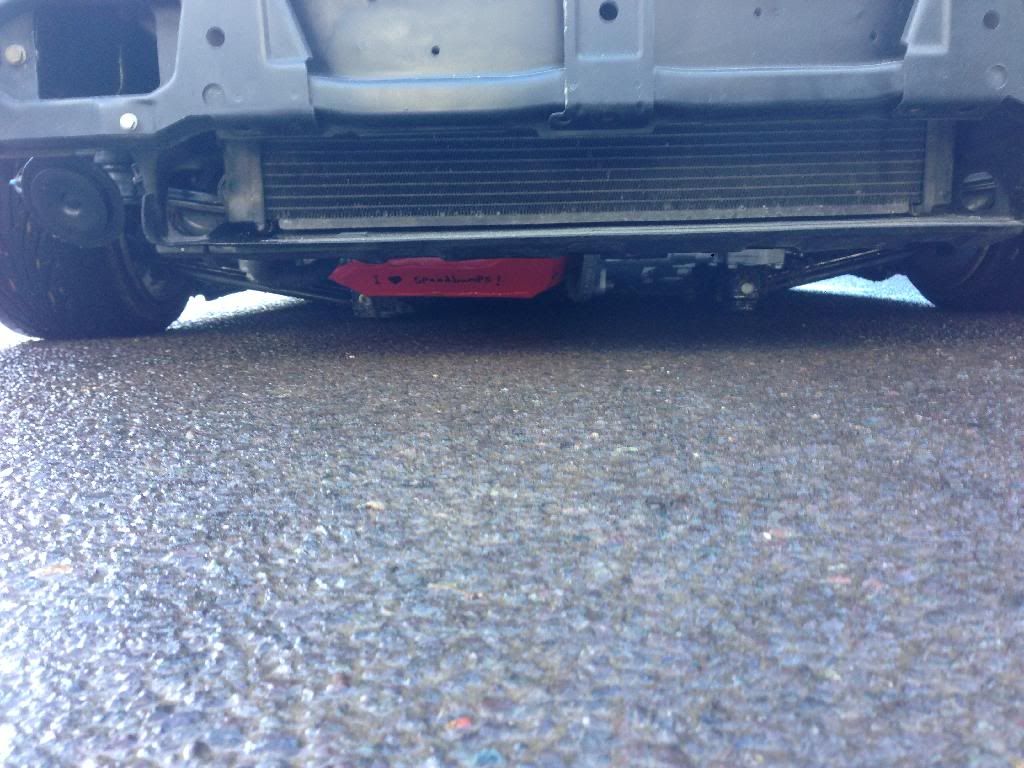
With the bling addressed I moved onto more serious matters, drivability. With my current "stance" I was incurring a lot of driveshaft to chassis leg action which needed sorting, and of course I couldn't raise it back up ..... So a chassis notch was on the cards. Luckily we installed a two post Ramp last week, so jobs like this are now a lot more pleasurable than before!
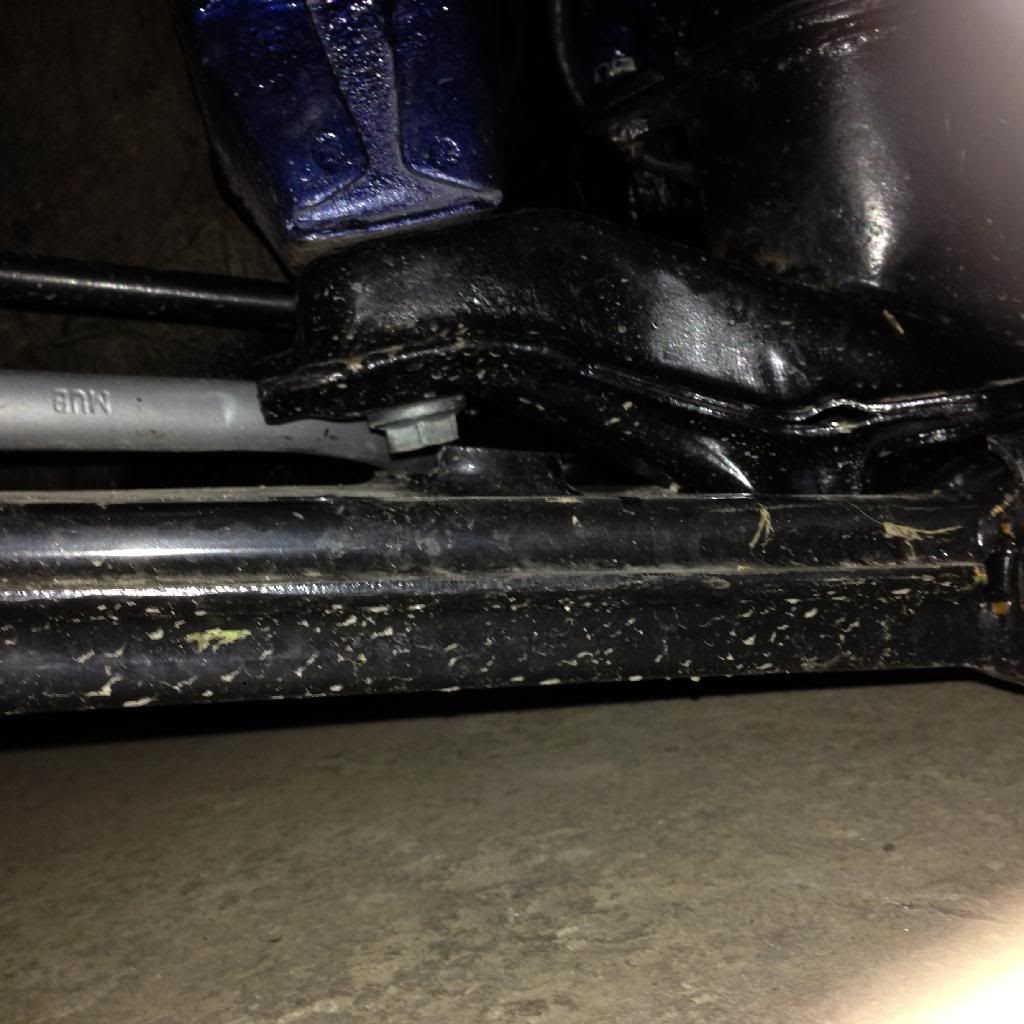
I picked up a 3" holesaw, cutting fluid and had a 3" peice of 5mm steel rolled at work as opposed to using a piece of cut piping. Mainly because the sheet will still be workable if needs be once being mated with the chassis leg, didn't get many photos of this but here's a few:
Holesaw & sheet metal:
Area cleaned up and parts removed:
Let's get more lows!
Driving to work this morning was beautiful, was up till 12:30am putting it back together then alarm went off at 5am for work, so not hearing one dodgy noise up front the whole drive was worth every minute!
Oh the other day I refaced the lips on the Schmidts as they had been powdercoated and were getting near being 50% chipped, looked shocking. Did this by grinding the powdercoat back, getting the car off the deck and plonking it in 2nd gear haha. Went from 80G to 1500 then polished up.
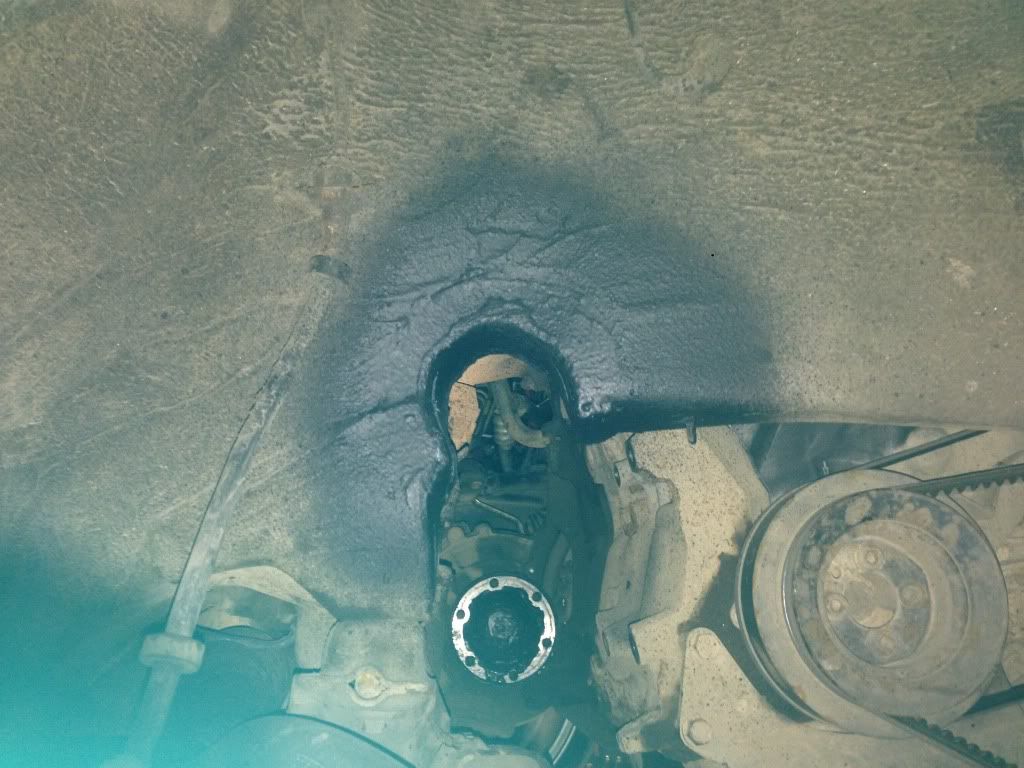
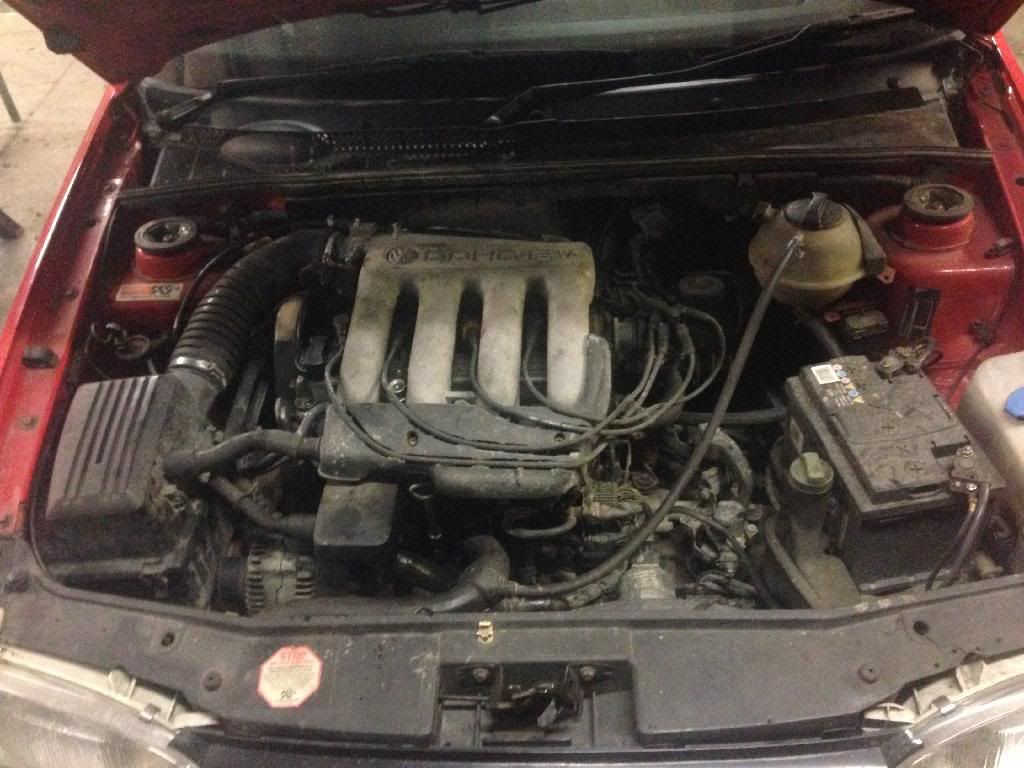
Also the dirty old engine bay got some TLC, a full degrease and steam clean, I hadn't touched it under there with any products for a good 6 months. if only the bottom end wasn't so rusty it might look half decent...*might* 8V cough cough haha
[IMG]http://i1276.photobucket.com/albums/y480/aaron1492/null_zpsd88f0179.jpg[/IMG
Sump needs replacing or reinforcing ... Lol
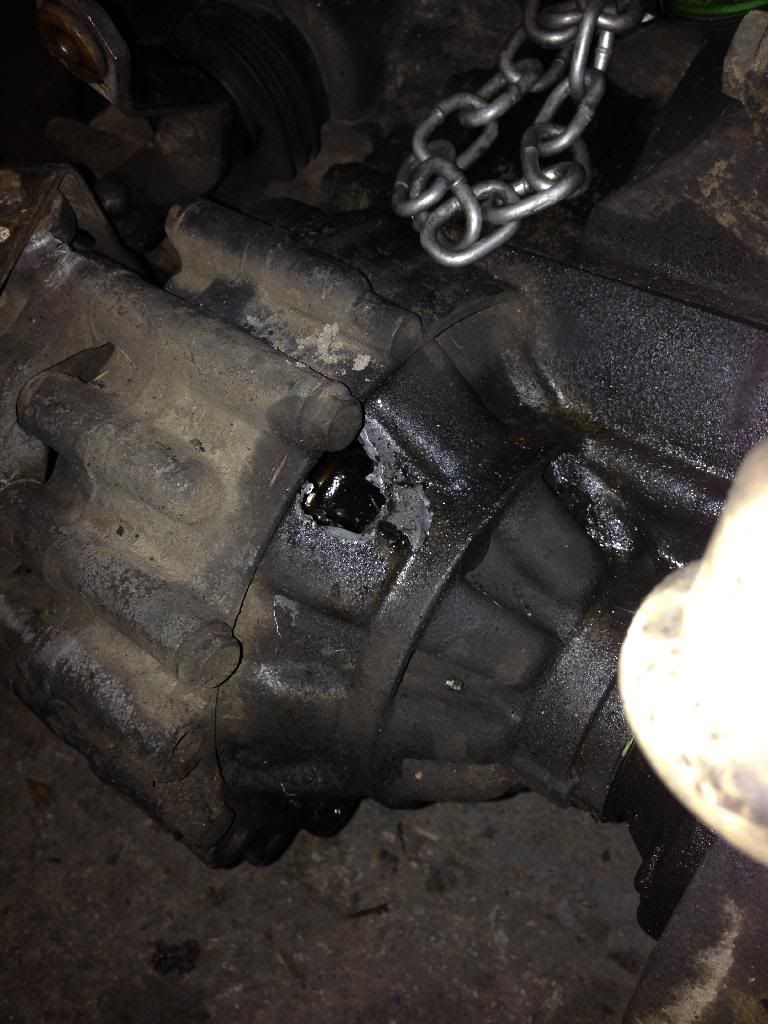
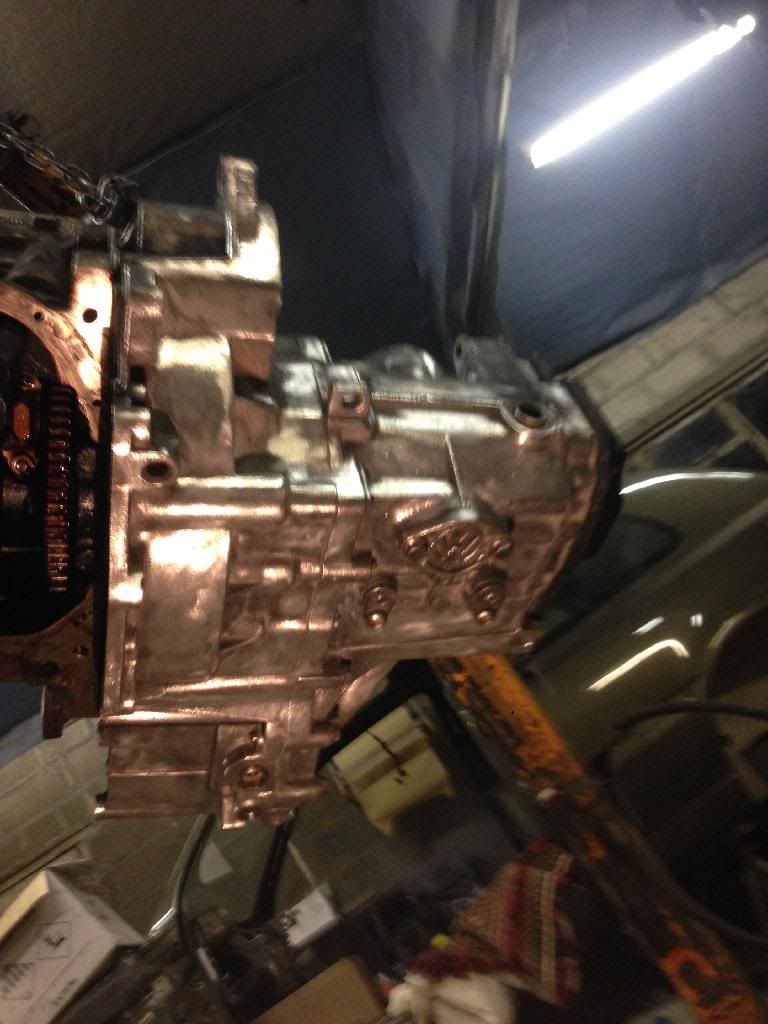
So a sad but inevitable day has come, the 020 Gearbox has finally gave way, in style too. Four holes smashed in different places due to the all too common Volkswagen diff rivets, just what we needed a few days before Christmas!
As some of you may have seen I was doing up a red 16v MK3 to sell that I got on the cheap. however as more and more rust was uncovered, using the car as a donor was now looking ever more appealing. I could have done a vr6 conversion as everything is here, but much prefer how a 2.0 Handles and uses juice!
To start things off, here's the damage incurred on the 8V box, almost textbook looking at other people's boxes that have done the same!
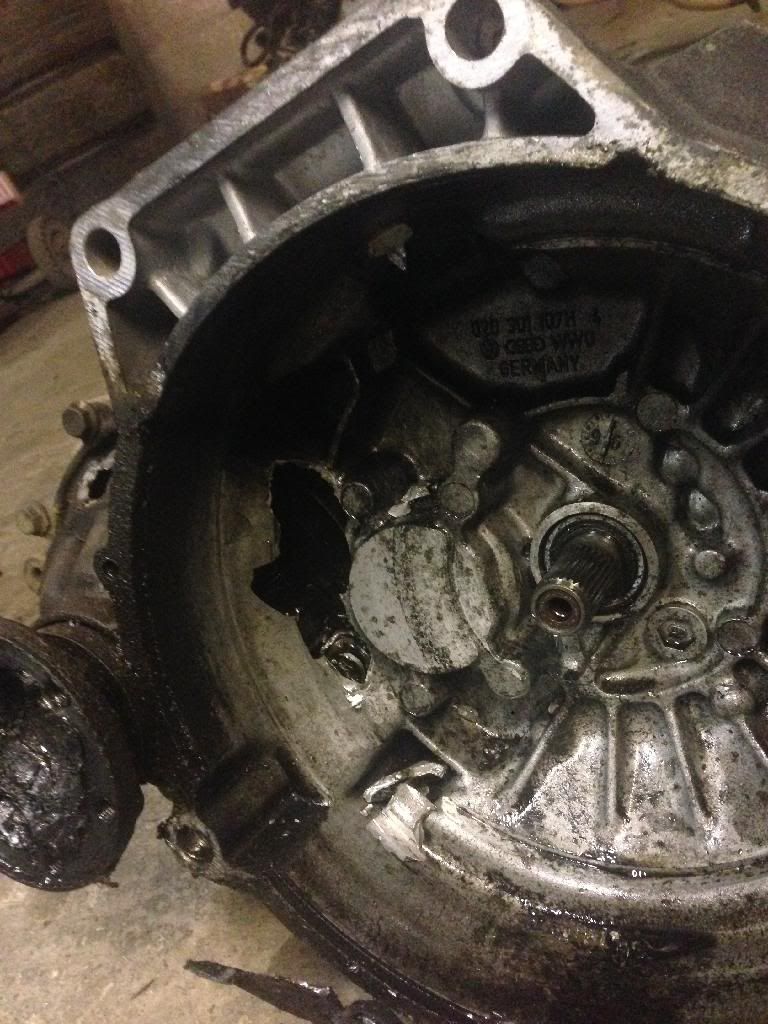
Well impressed the 020 held up to almost three years of daily abuse, she must have been a good'un!
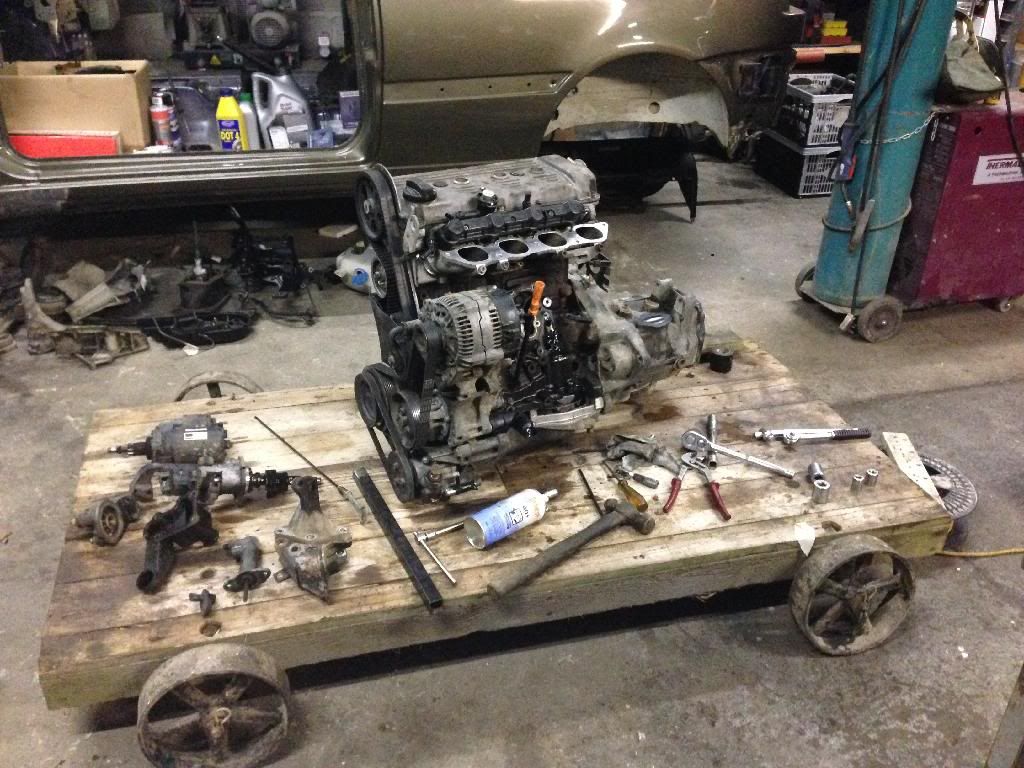
anyhow, back to it, here is the donor engine in question of you havnt seen it in the other thread, here we have one rough old ABF.
Then a few hours and beverages later, a engine bay to frown at has been revealed, and an ABF engine requiring a lot of TLC is on the workshop floor!
Because dirt is the new deleting.
ABF beginning to be stripped down for paint and external overhaul
With the ABF out of the Red one I focused the next day on stripping it to a shell, boxing all the parts for sale and getting it out of the door so the Daily could come in. Here's how the red one ended up, serves it right for having rotten chassis legs
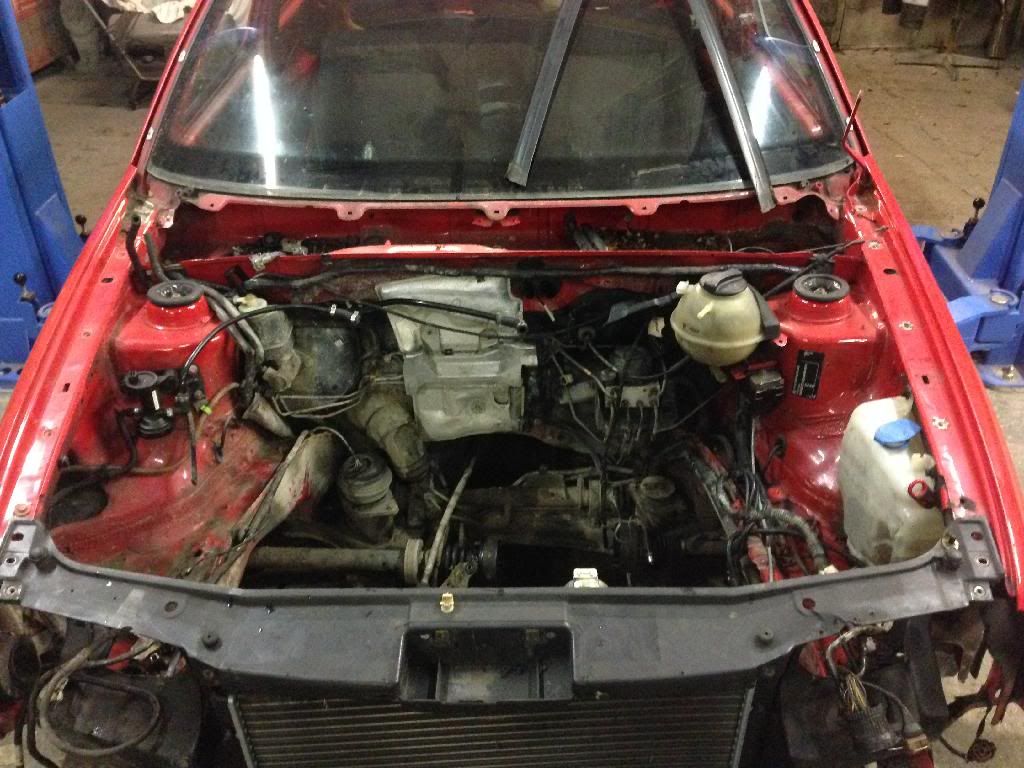
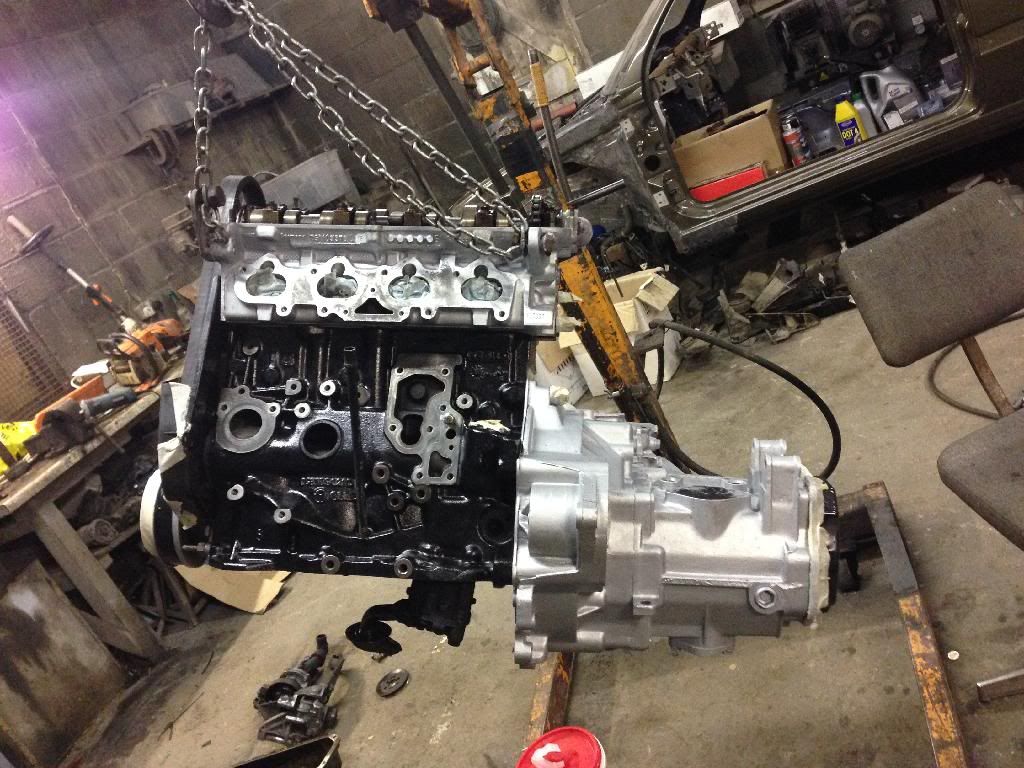
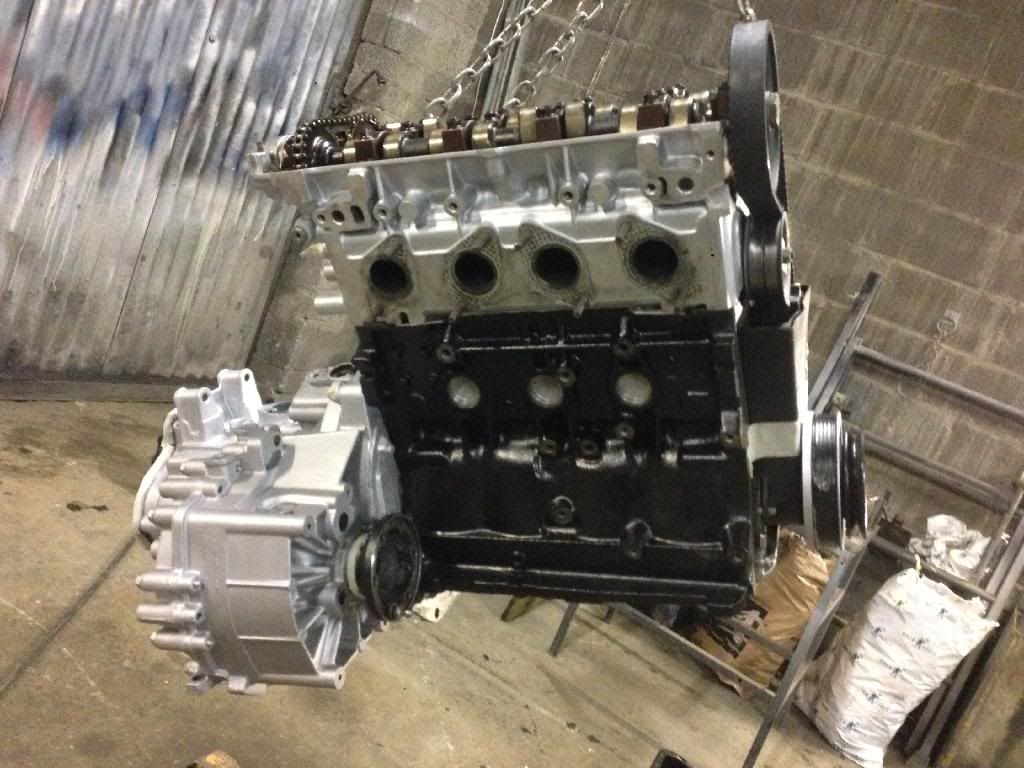
With that pile out of the way, in comes the 8V to have a new heart, after a lot of swearing beaching it on the ramp and having four guys push it off, low is even more awkward when you can't go back or forward.
Then another evening and few beverages turned this out, I'm getting good at this engine removal game.
To reveal a bay that is probably even more dirty than the ABF, a sight like this makes me cringe. The joys of living in the countryside, my steering rack was piled high with mud!
to top things off, I've found where the sound proofing from the bonnet has been disappearing! A field mouse has made a den by my ECU by pulling it from the bonnet and taking it back under the skuttle haha.
More to come tomorrow 👍
The engine was stripped of all ancillaries, taken outside and given a thorough wash to clean numerous leaks and oil deposits away, its fair to say it didn't look much better afterwards :lol:
I Found the block breather pipe was split causing alot of the mess
And as you can see even after jizer, wire brushes and 20 minutes with the pressure washer there's still a long way to go.
Then using a wire twist knot wheel on a grinder, a screwdriver and wire brush I scraped back all the old black paint and rust from the block, and began grinding the corrosion from the gearbox ready for paint, this turned out to be even more tedious than bare metalling an engine bay!
At this point I had started on the block and gearbox, still a long way to go
And then some hours later, the gearbox and block were ready for paint!
[URL=http://s1276.photobucket.com/user/aaron1492/media/GTi/BF20977F-B25F-4A92-B5B8-82B1C73DEED0_zpstg9rvx0f.jpg.html]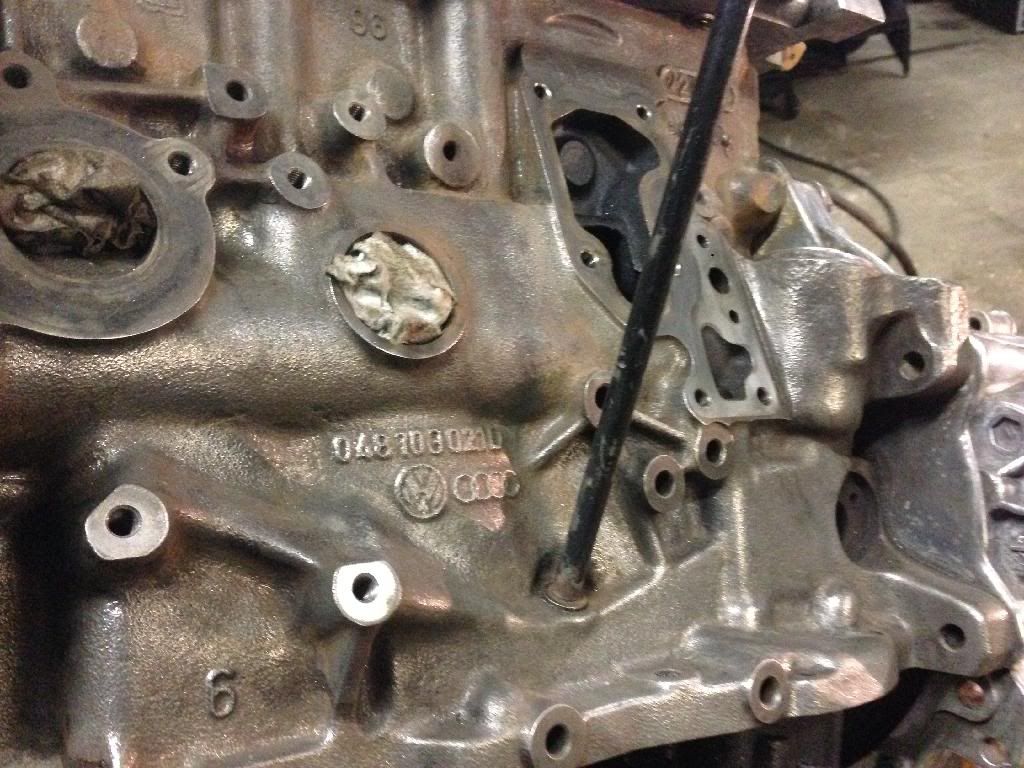 [/URL
[/URL
For paint I decided to use cheap and cheerful Toolstation Brushable metal paint with a decent VOC Content, will do as good a job as any engine enamel but is half the price. Looks pretty smart if I don't say so myself!
With the block & box Drying off I turned my attention to the ancillaries, which in true abf fashion were covered in oil and dirt too. Out came the pressure washer and jizer again as with a freshly painted block I couldn't be bolting dirty parts back on it!
All of this was then hit with the wire twist wheel and thinners heavily to clean it back as much as I could without a sand blaster, which would have been a godsend at this point.
I then focused on getting everything painted up so it could be during while I get on with other bits.
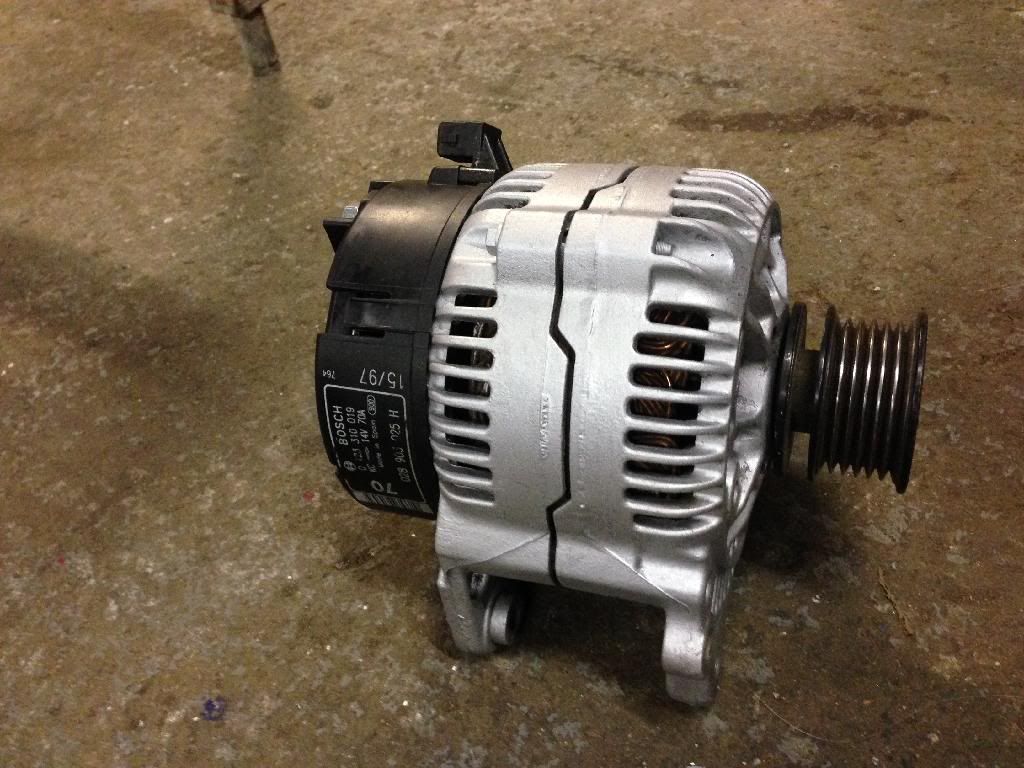
freshly painted alternator, which may I add was done by hand with a tiny brush, even in all the vanes
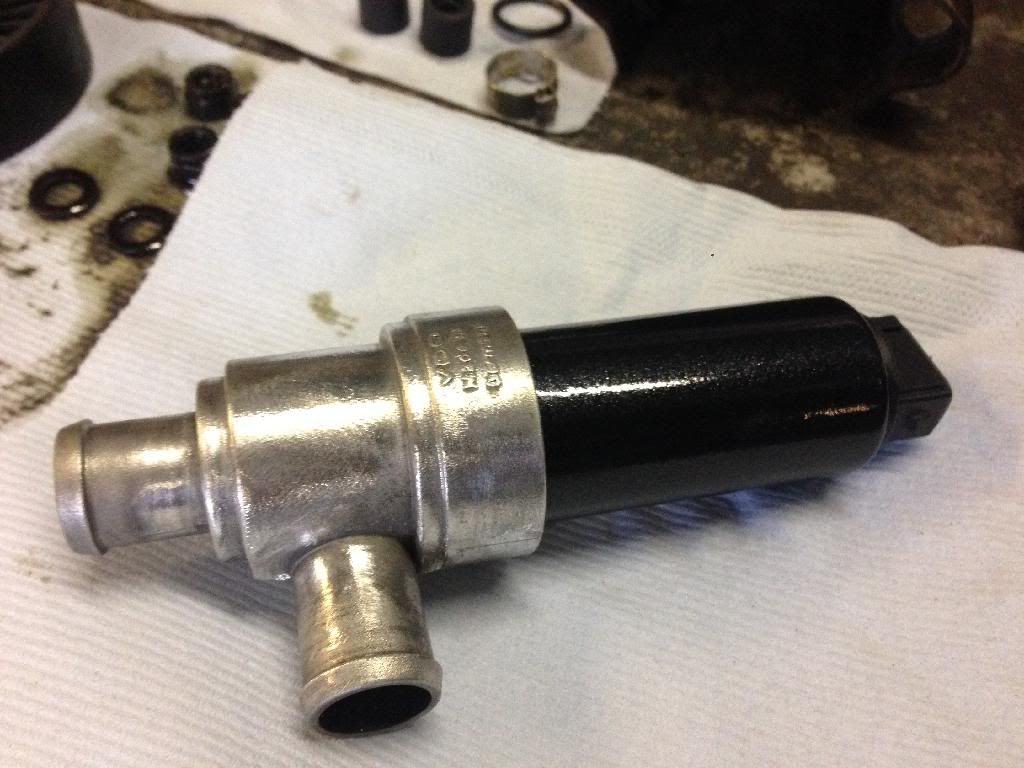
The idle valve will probably be covered by the spark plug lead guide , however if this didn't happen I would want something shiny on show, so it was polished and sprayed In Black magic.
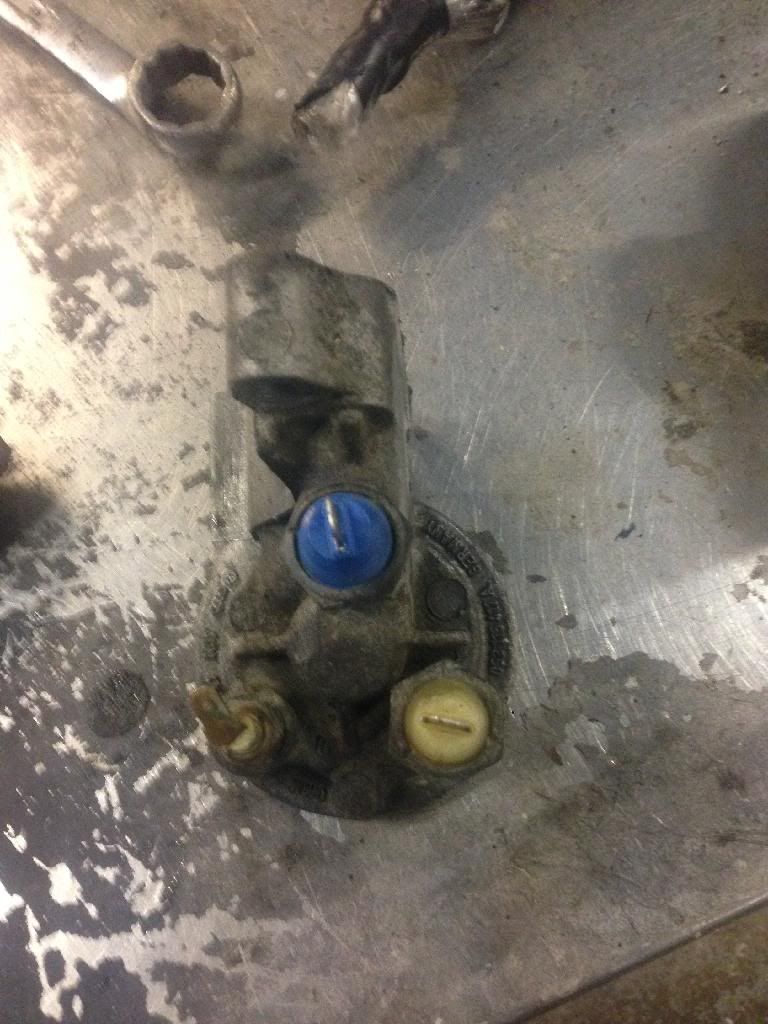
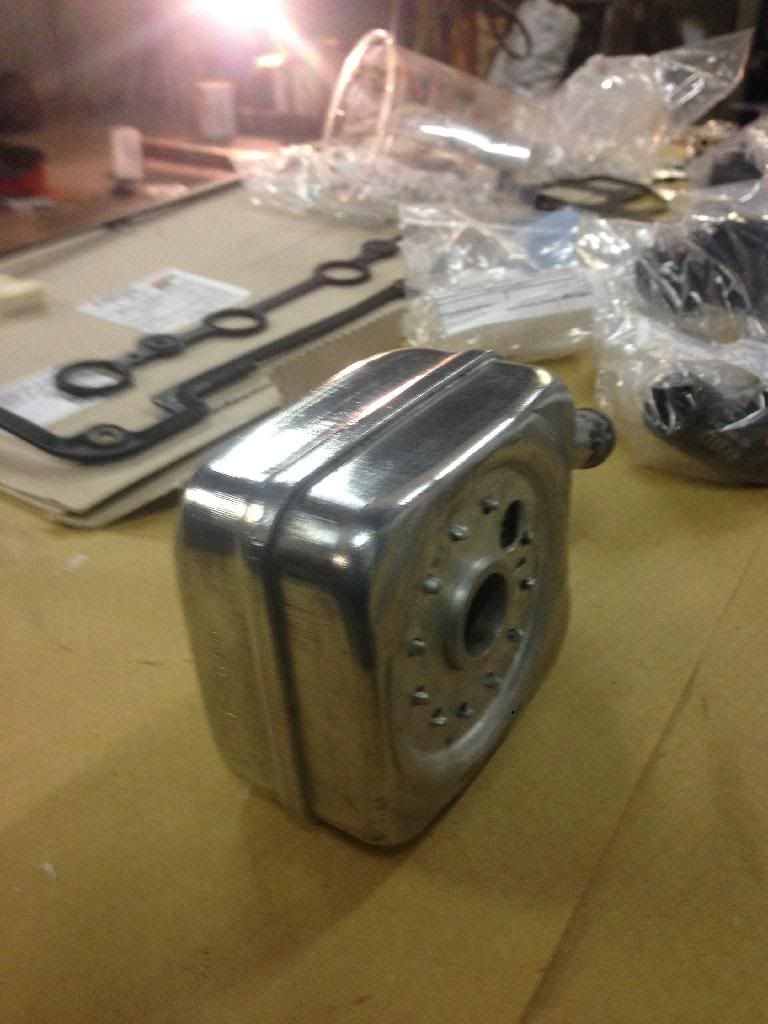
The Oil cooler housing was minging, couldn't even tell it was silver barley. Here's a before:
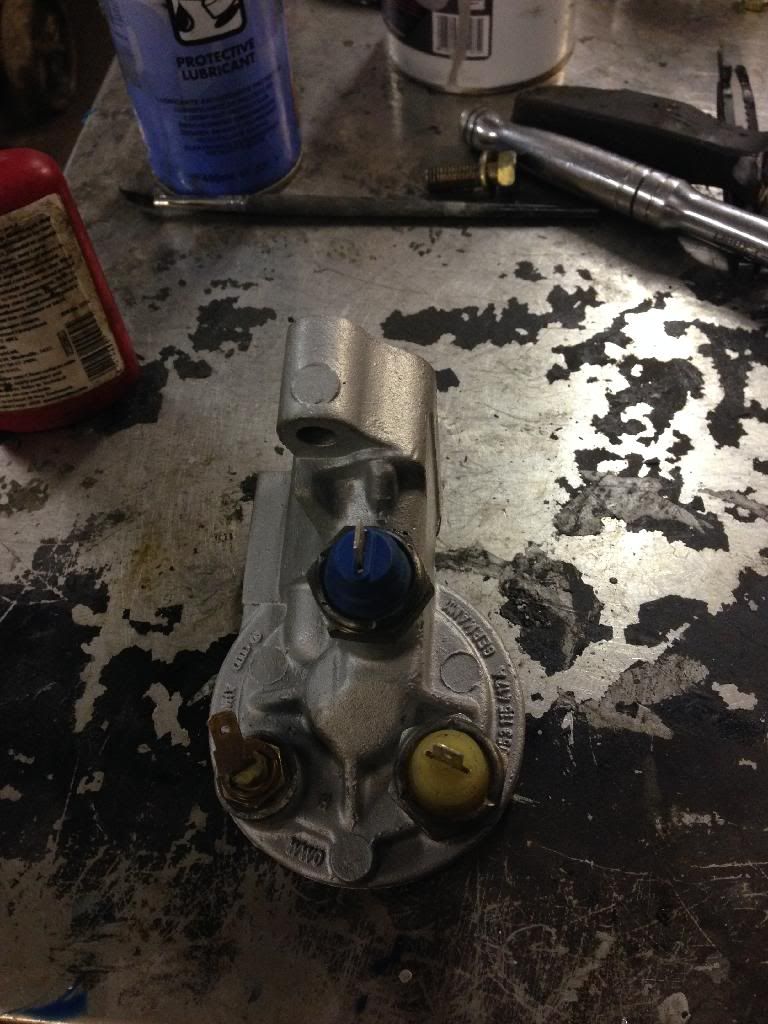
And after cleaning and painting, polishing sensors and refitting
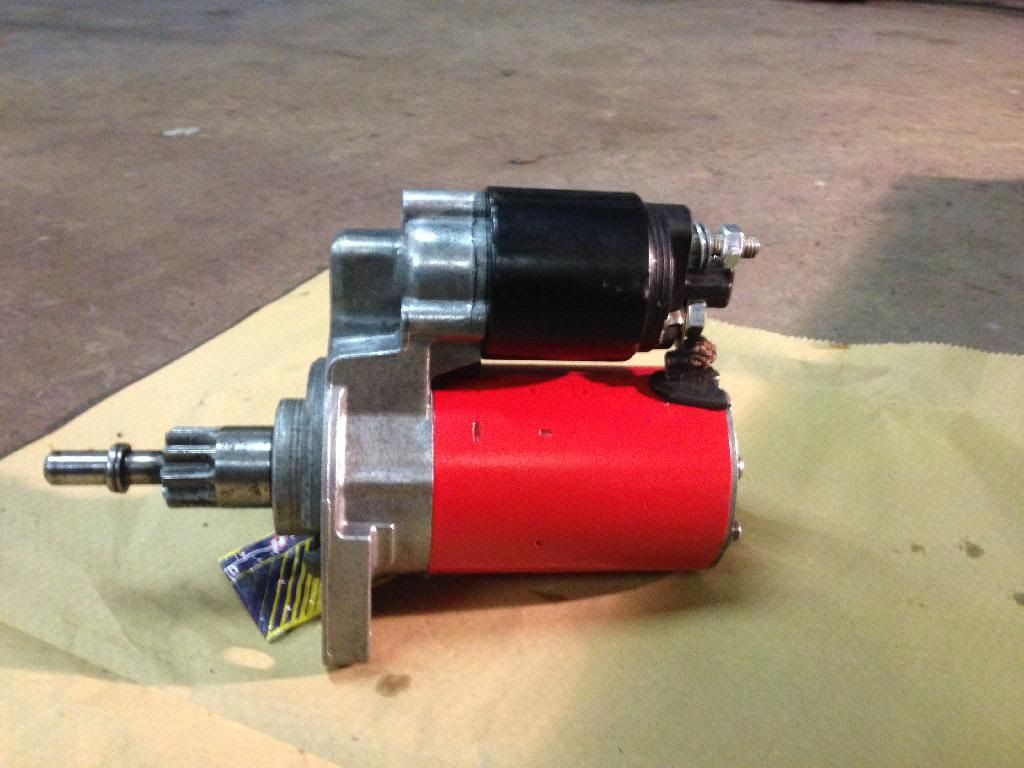
Then The starter motor was also stripped down, checked everything was okay, cleaned & greased then painted in Post box red & Black magic with silver detailing!
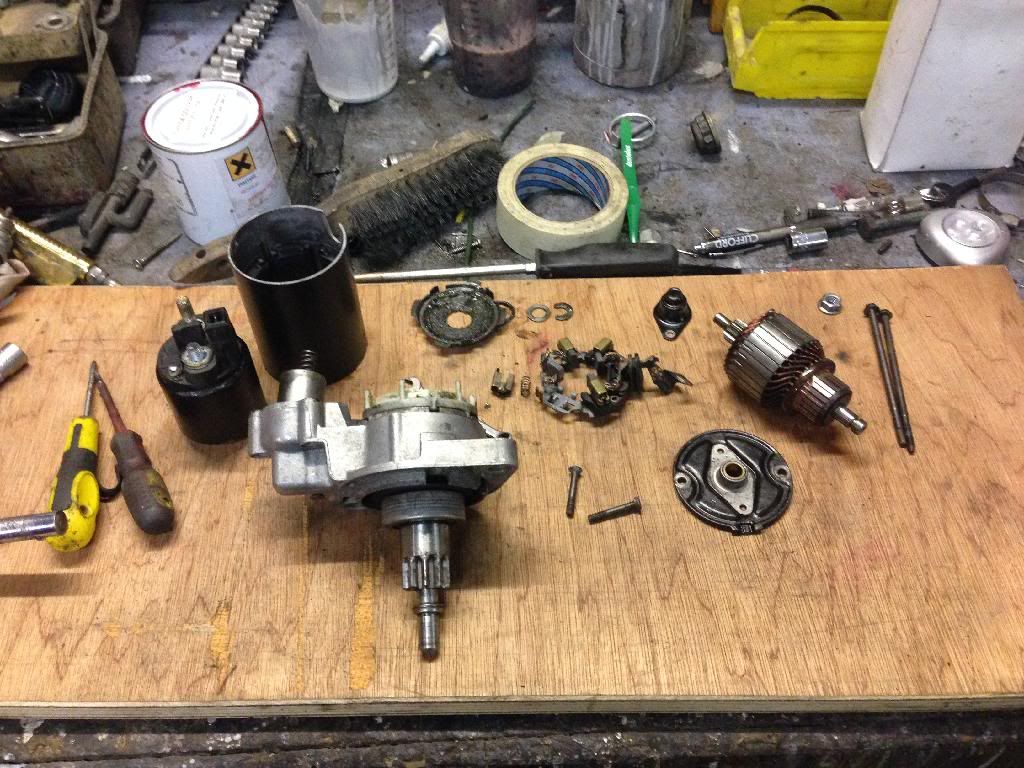
Here is the Starter motor and a few other bits being painted black magic & post box red
Not a bad finish on the starter motor considering it came from a rattle can in a 5 degree workshop!

After leaving to harden off overnight I built the alternator back up, and made a cheeky time saving tool to slide the contacts back over the coil without needing to be called Ganesh, I simply took a small 20ml bottle, cut the bottom out and slid the assembly on the bottle, then offered this to the coil and slid the assembly down onto it, no pics but do I make sense?
Getting hacked off with painting everything I thought i would whip the autosol out and polish up the oil cooler/Filter housing
Moving Onto pipework, I noticed my PAS lines were quite heavily corroded in some areas, so these were swapped out with a pair on better condition, then stripped back to bare metal and primed. I also did the same to the Metal coolant pipe, and coated it all in black magic paint and lacquer again for good measure. It's all about the details
Before and after cleaning the corrosion back:
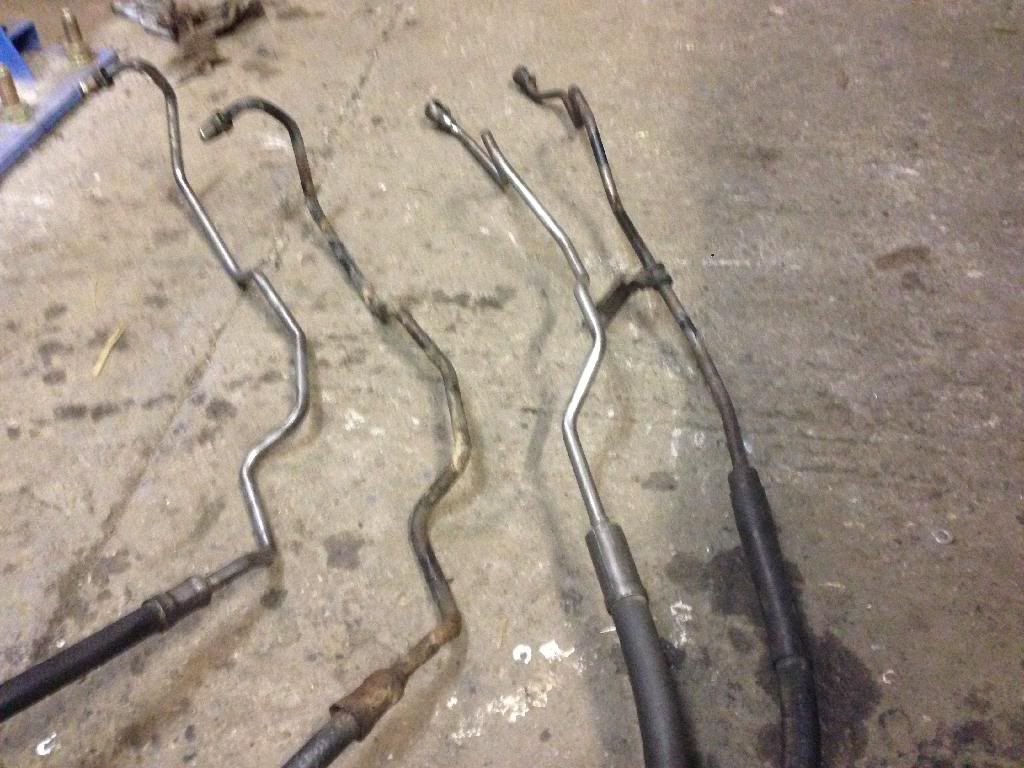
Coolant pipe stripped back and all corrosion removed:
PAS Pipes & coolant pipe in primer waiting for paint
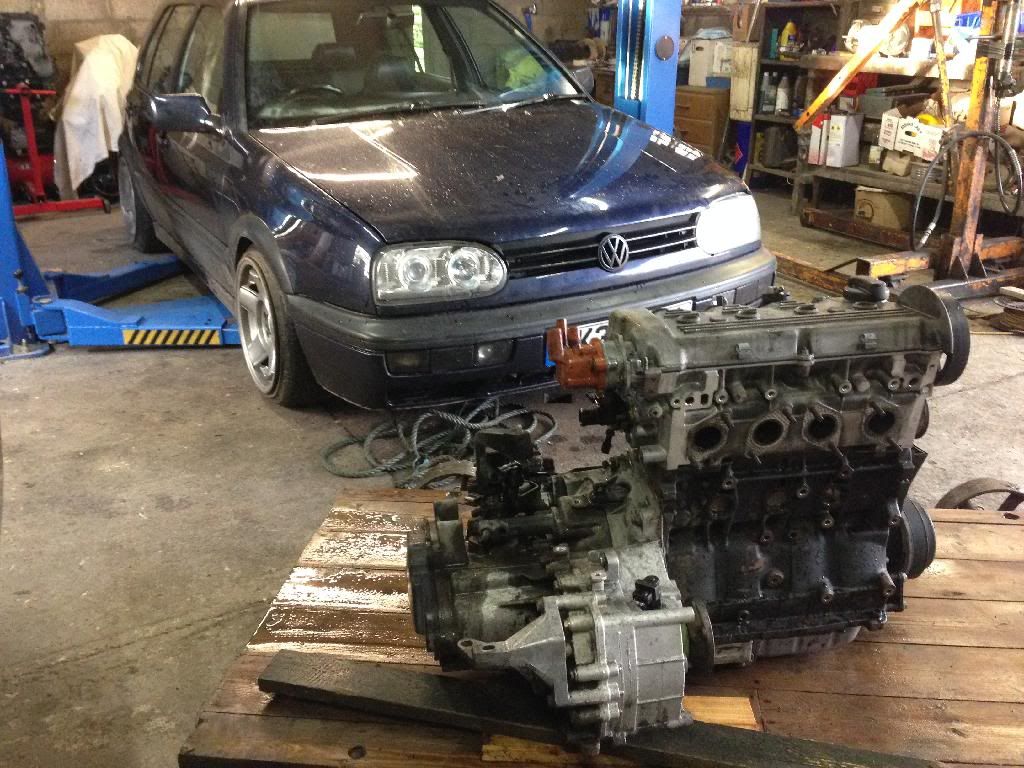
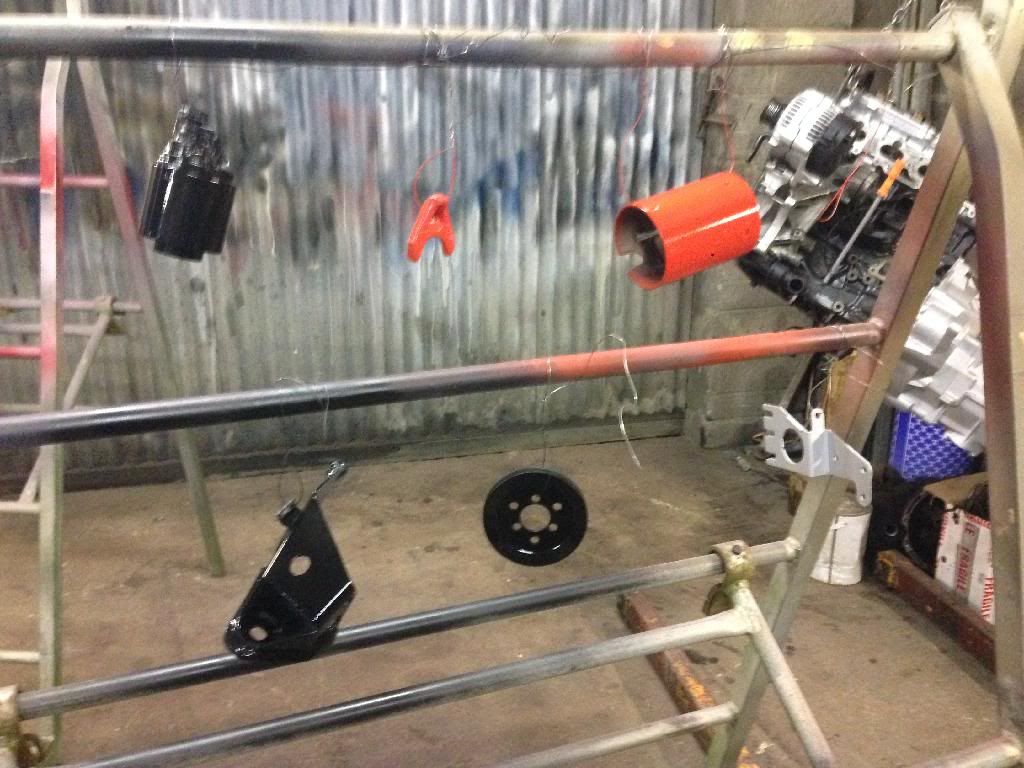
Now that most of the removable engine parts had been painted or polished i could put it all to one side and admire the 4 branch that turned up that morning, surprisingly it fits the head perfectly, although I havnt tried it in relation to the bulk head and steering rack so we will have to see.
[URL=http://s1276.photobucket.com/user/aaron1492/media/GTi/42967279-132E-4AAE-B24F-FFB64A6B9A85_zpslcxagawz.jpg.html]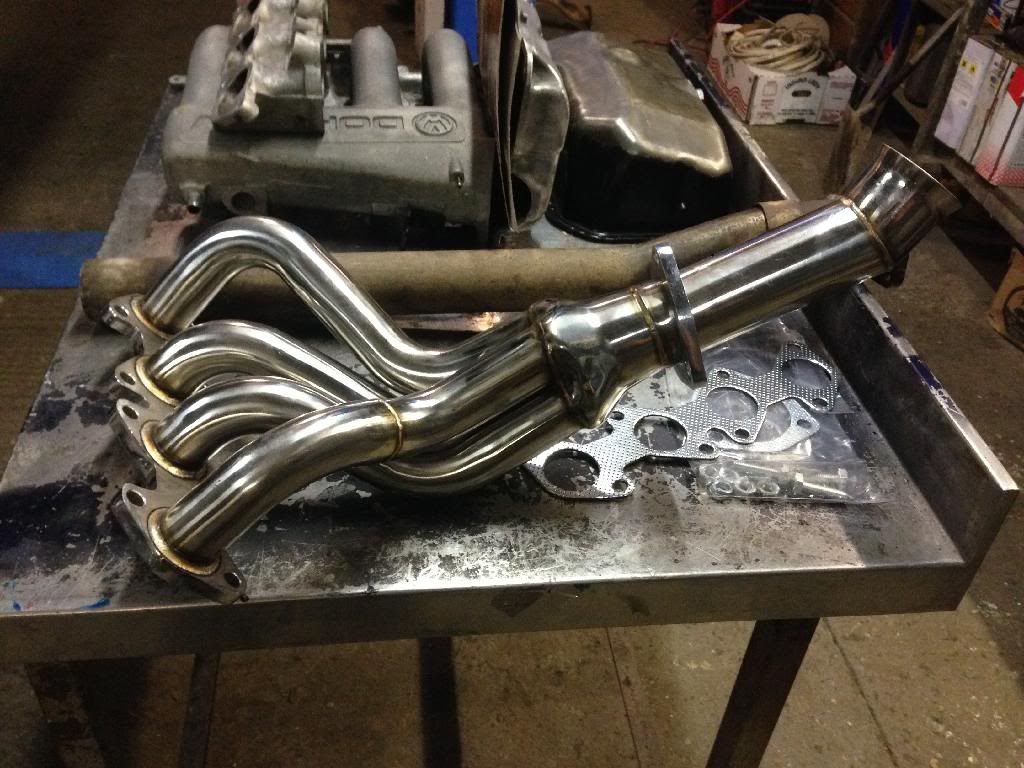 [/UR
[/UR
With the car being a daily and fairly low on 16's, the sump on the 8v was battered, and the last hit it took resulted in the sump plug being welded on place to hold oil :lol:
After pulling the ABF sump off and realising it was aluminium there was no way I'm running that, so a cheap pattern steel pan was purchased for the mere price of �20 posted, with a gasket too! Admittedly the tin quality reflects in the price, but this wasn't a big issue as it's going to be beefed up.
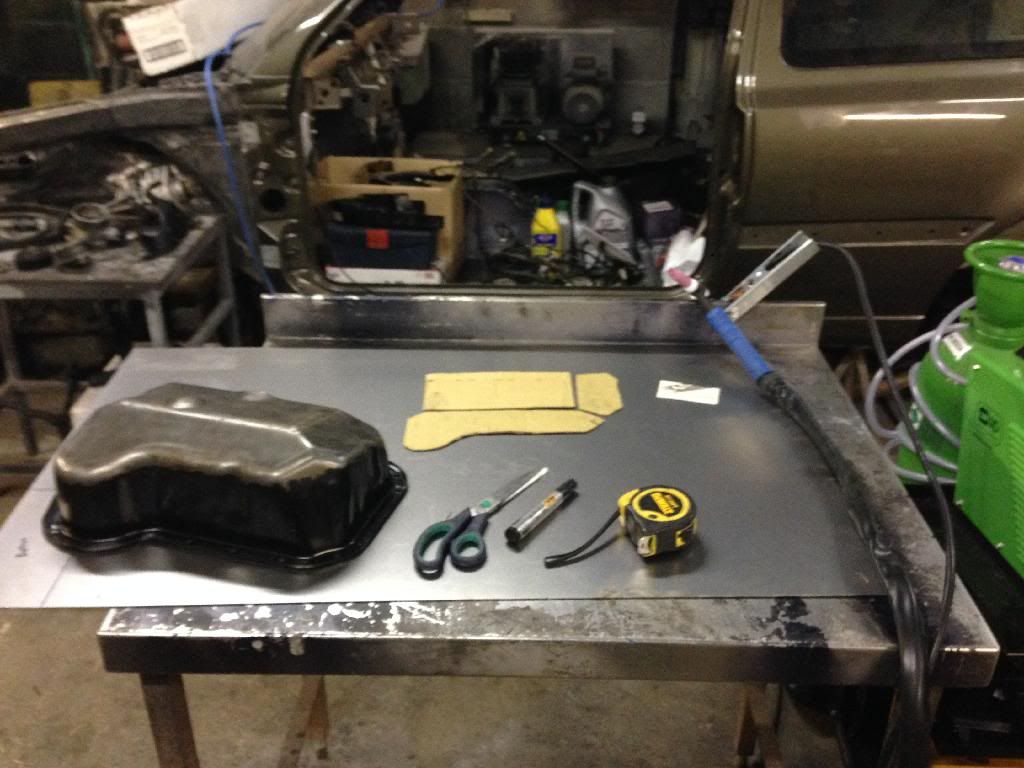
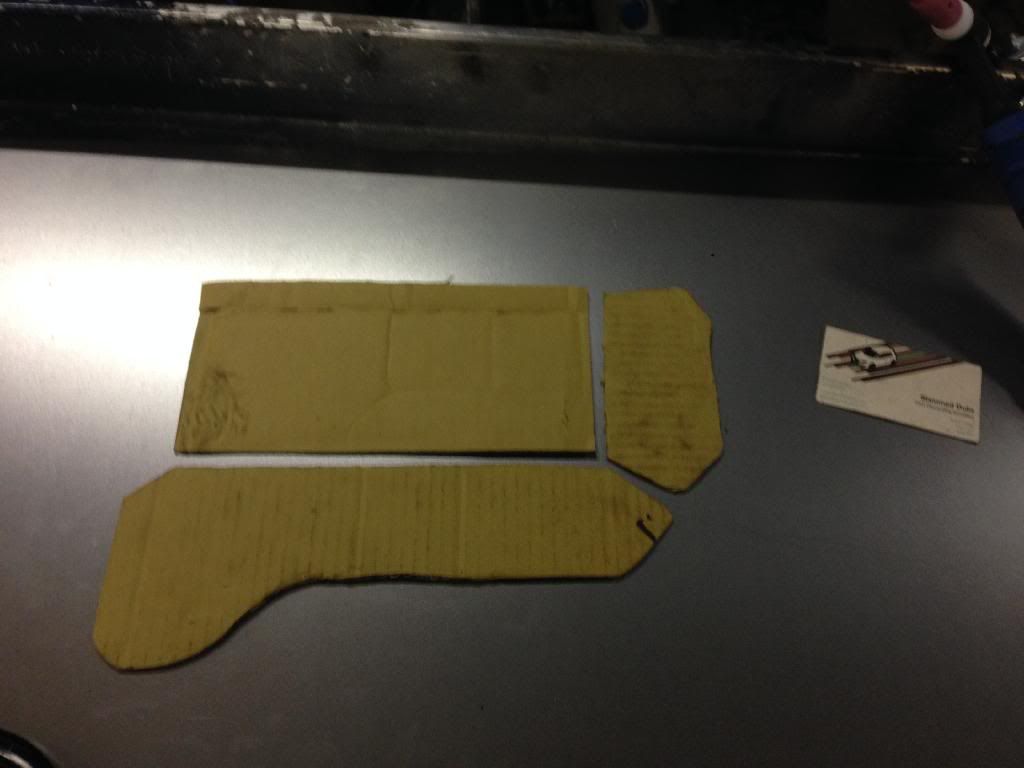
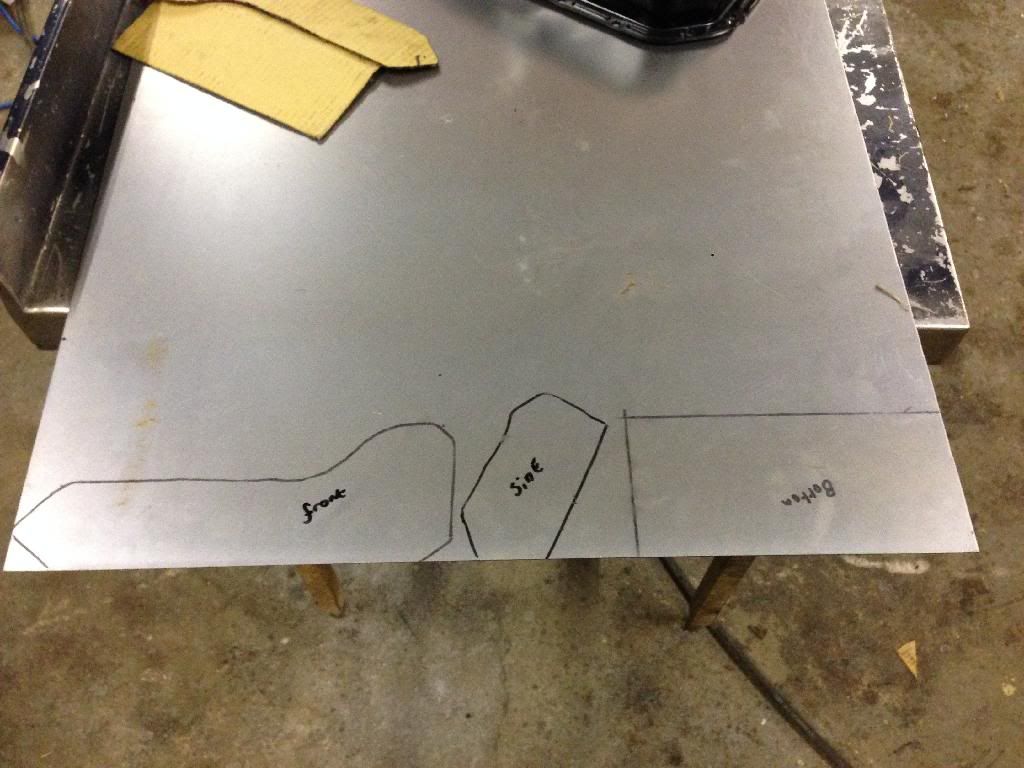
Using cardboard templates, I made three pieces of 2mm sheet to use as the base layer, cut out with a plasma then ground to size, and another 3mm plate which will sit directly on the bottom, covering the sump plug rear lump and the oil pickup circle.
Cardboard templates of the plates that will be welded to the sump
Then Marked out onto the sheet steel that will be used
Then the pieces were cut out with the plasma and rough shaped with a grinder

Then this happened, all welded up with the mig
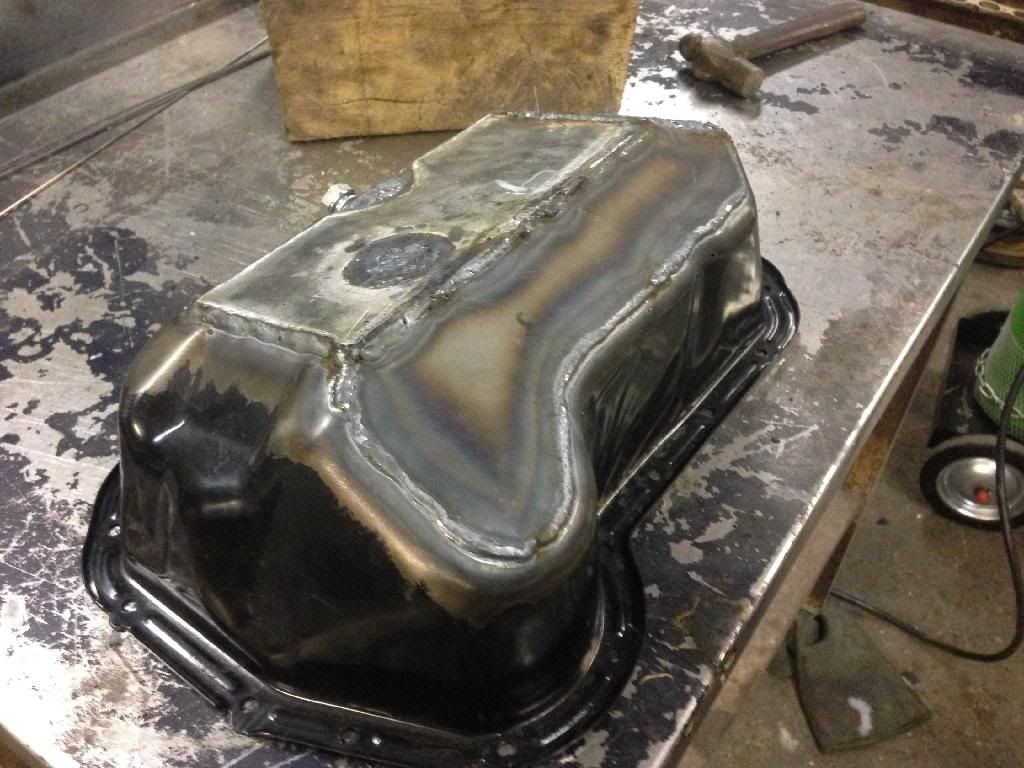
A couple of areas inside were also filled with weld for good measure
Welds All ground back and scuffed up ready for paint in a silly colour :P
As you can see, the top plate sits higher than the bottom of the sump plug recess area, and I have fully filled the void from the oil pickup area then ground it back flush, it doesn't look perfect but will be getting hammered down the road, so Asthetics wasn't my no.1 priority.
A few coats of Postbox red before lacquer
And finally, the finished product all lacquered up
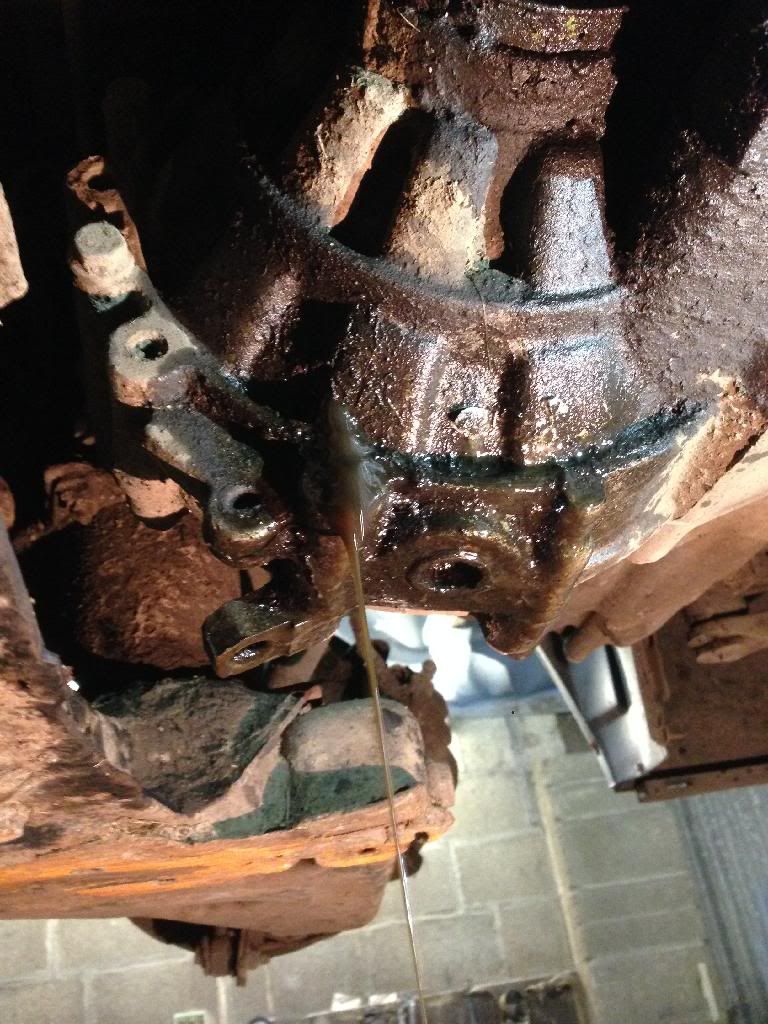
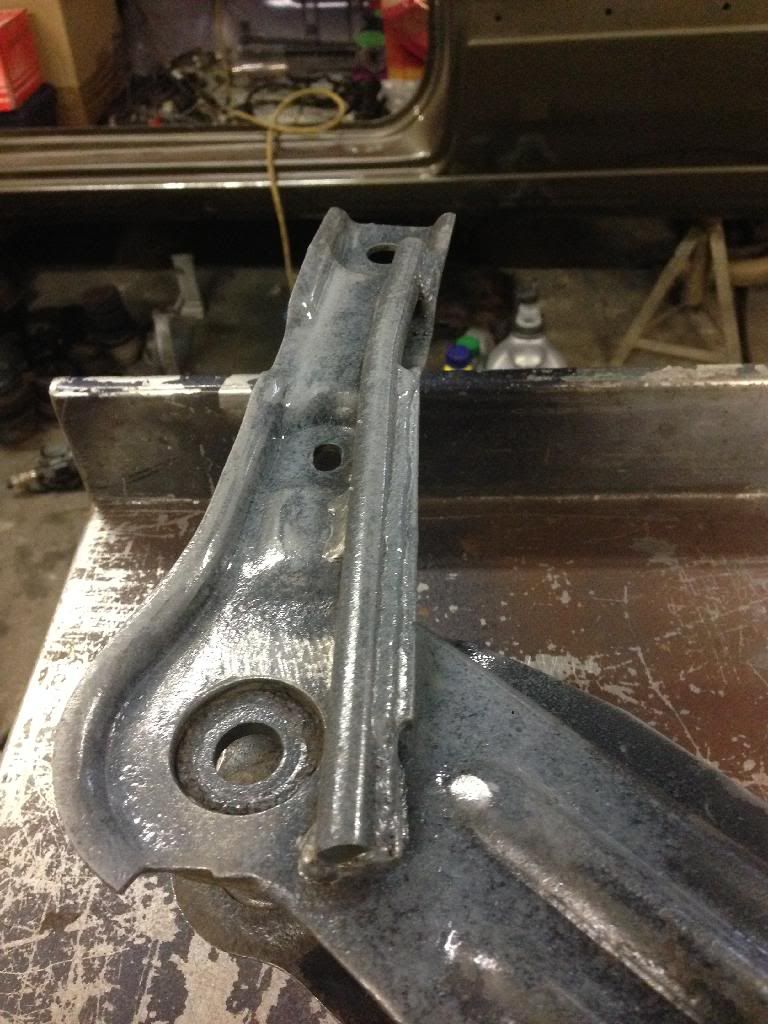
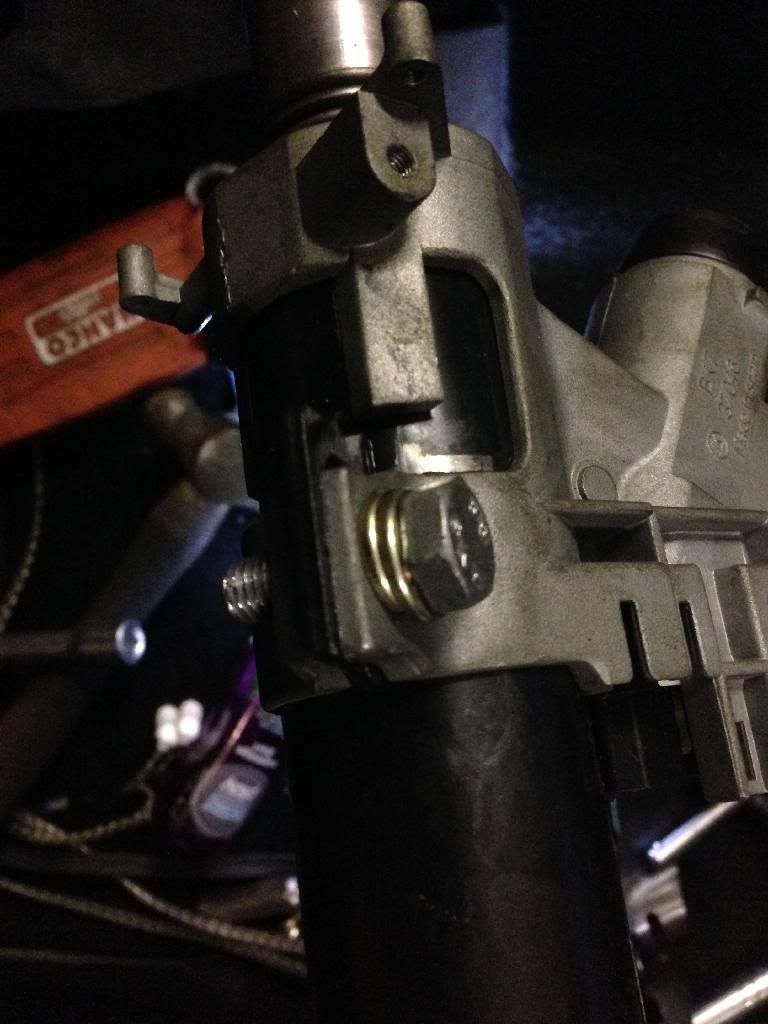
My subframe was far past its best, and ground a fresh pair of wishbones to the bushing on the bottom edge within a couple of months, so as the engine was out its time to swap it over, and add a custom touch along the way
Here is my old subframe, VS my new subframe for picture reference.
Old
New
And what happened in between... Hardened steel skid bars to protect the wishbones and Subrame bolts. I used 8mm bar, and welded lengths along the rear sections then smaller pieces around the wishbone location area up front. Then decided this added way too much meat underneath, and I would be forever laying frame. So the bars were ground back to the same level as the subframe so I don't get stuck everywhere!
Bars welded on before grinding:

Then it looked like this after attacking them with the angle grinder for some hours:
Not great photos at all as the details are all blurry but you get the picture!
I'm getting slightly behind with the posts, but more has happened since the last. I laid another coat of paint and lacquer on the subframe after grinding the skid bars back.
Then stripped the steering rack back to bare metal, and re painted this Black too.
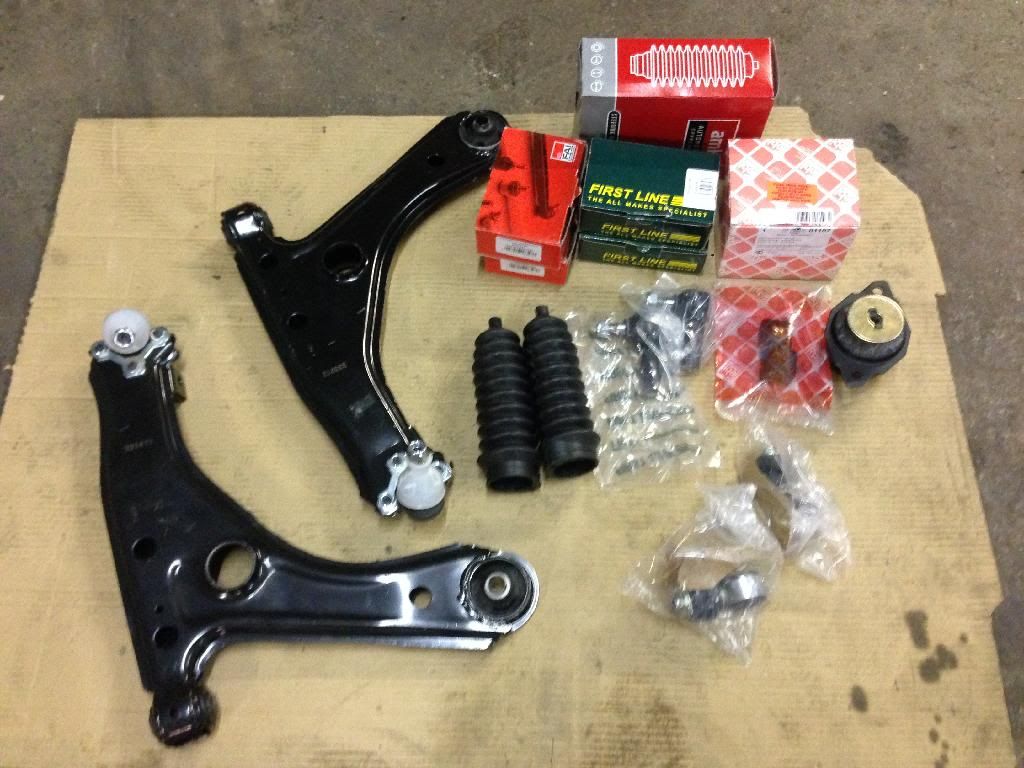
Lots of parts have arrived at TPS and my local motor factors, all genuine engine seals and gaskets have been bought, the only thing I couldn't get hold of was a lower to upper inlet manifold gasket, luckily the brown card the rocker gasket came packaged in was perfect for the task also the coolant top hose was obselete, so this was ordered from France.
The Tps haul, well some of it :lol:
And from the motor factors Here's a little list of control parts waiting to be bolted up to the fresh frame.
�Firstline Wishbones & ball joints
�Febi Tie rod ends
�Febi ARB bushes
�Febi Gearbox mounting
�Febi steering rack bush
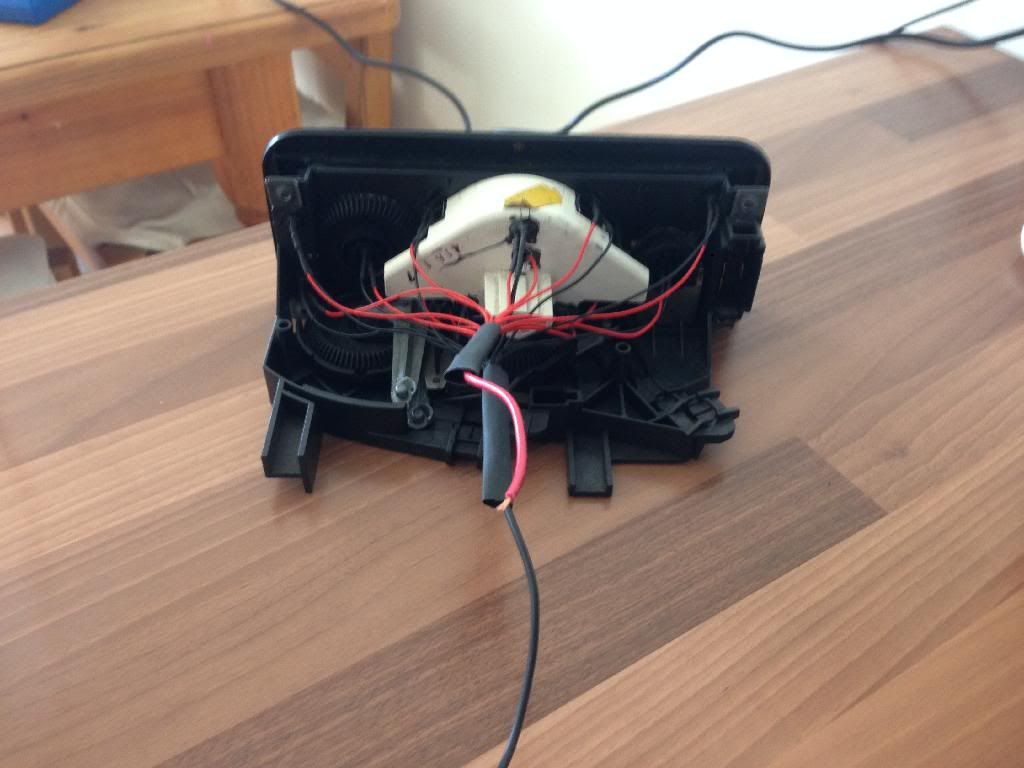
Next up was a task I wasn't looking foward too, patching up looms with a soldering iron. The engine loom had 7 splits in total, making the wires brittle so it was all cut out, and re soldered in using patch wires from a spare engine loom I had lying around, OEM+ FTW!
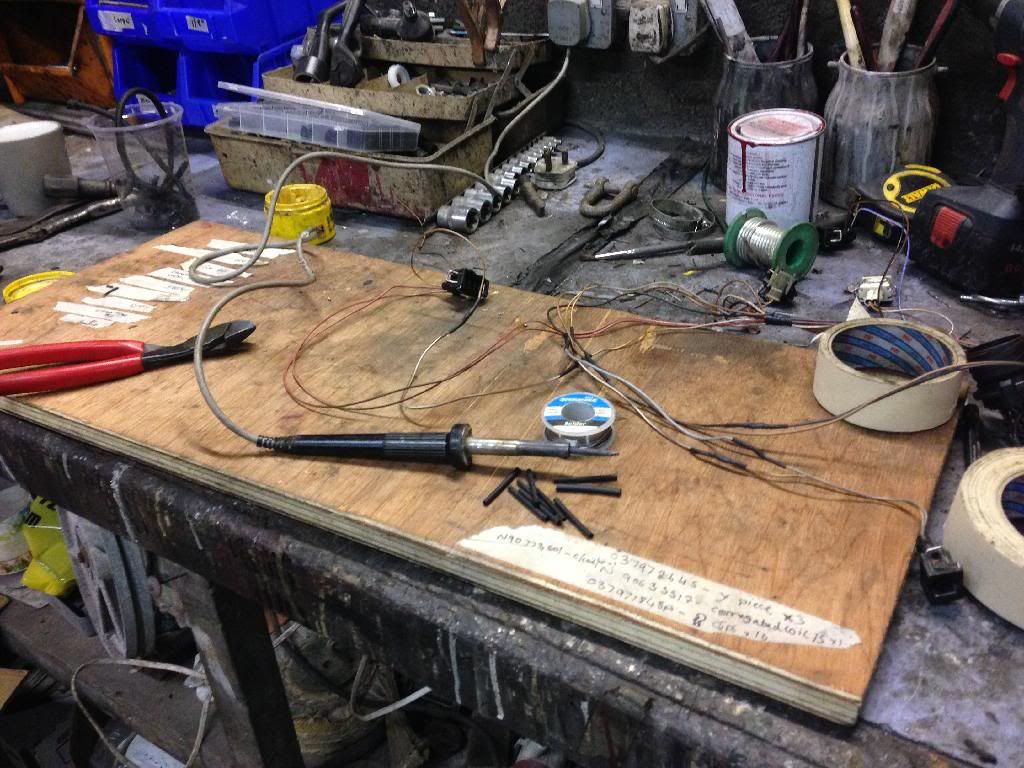
The Front ABS plugs on my loom both has a snapped wire, making my ABS technically obselete. However, have no fear - a spare loom is here...soldered new ends on & double shrink wrap as I havnt got time to take the whole loom out to replace.
Much better!
As the air conditioning wasn't making an appearance in the fresh engine bay, a blanking plate was cut out with the plasma and filed to size.
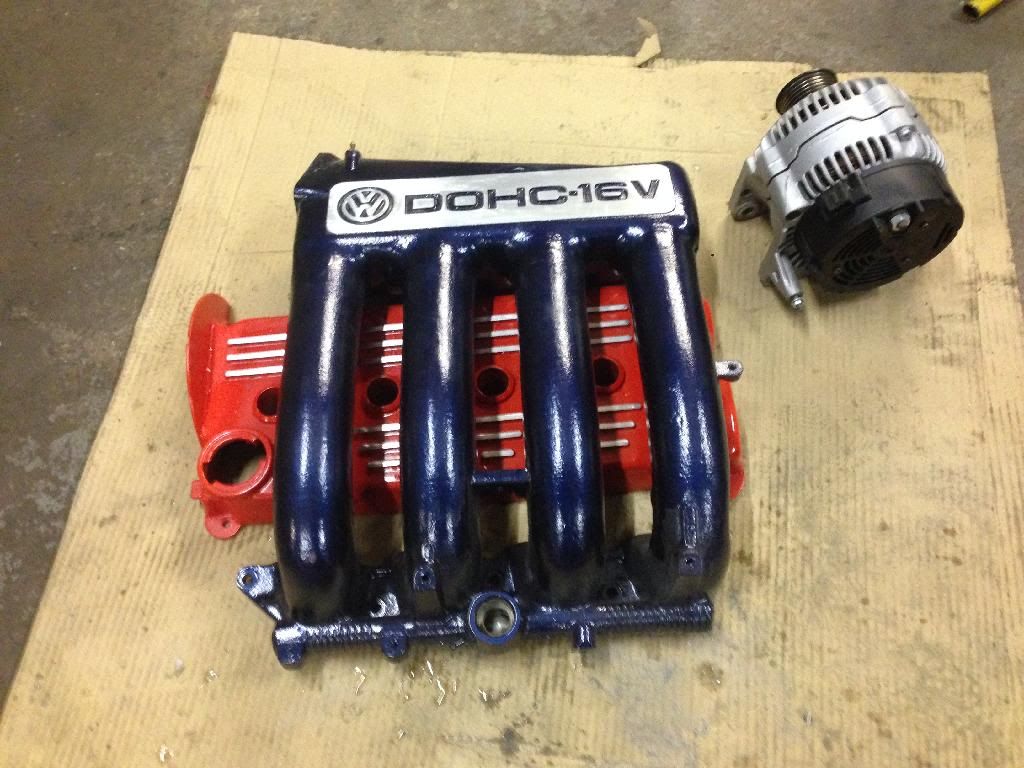
The rocker cover and inlet manifolds have been given a coat of paint and lacquer, a spot of polishing detail then re lacquered. The deep blue looks epic against the bright red. Can't wait to see it all built up in the car

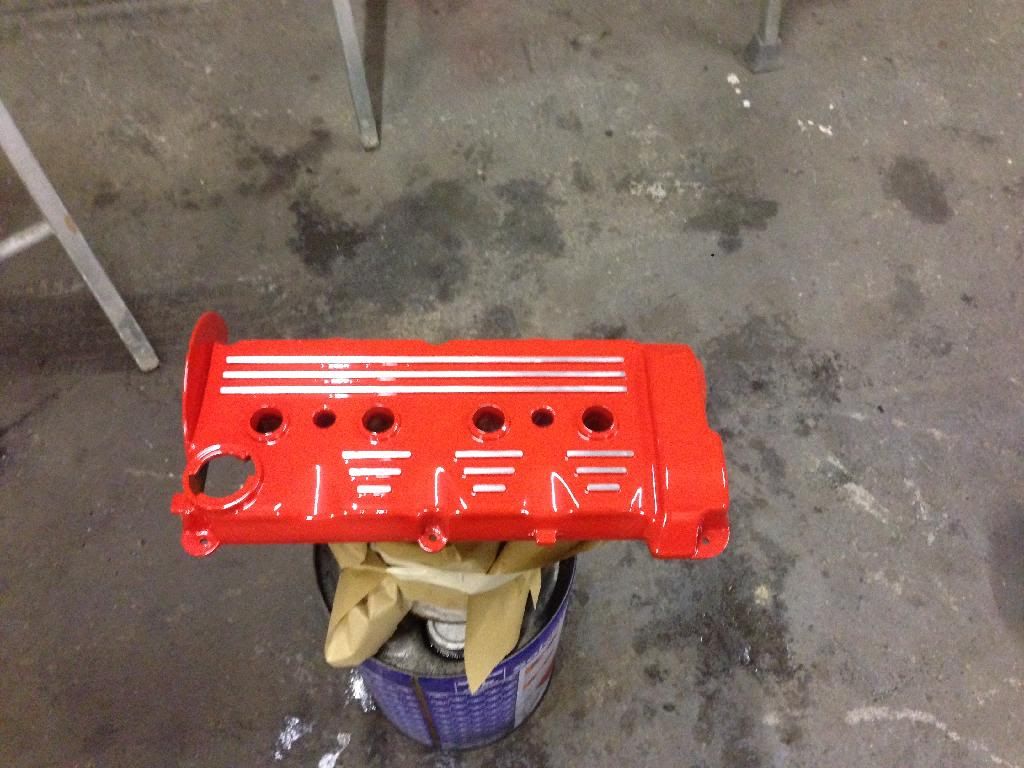
Stage one before red 16v logo
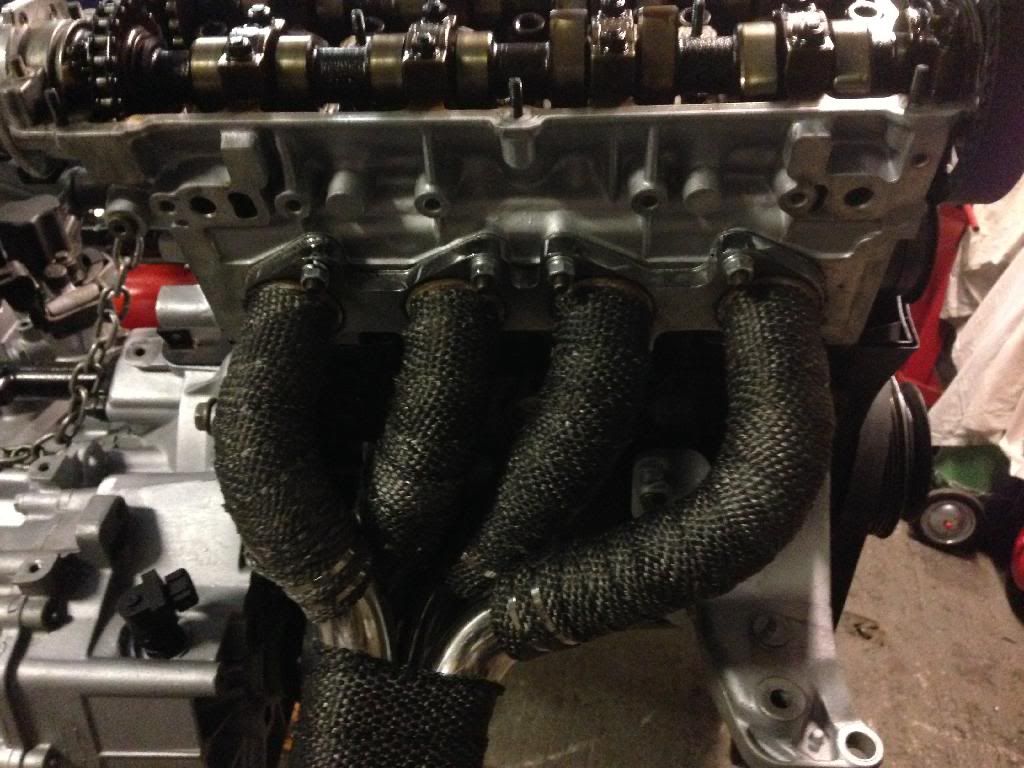
The Heat wrapping tape turned up for the 4 branch, word of warning wear thick gloves when handling this, it's like fibreglass and gets right into your skin, horrible stuff.
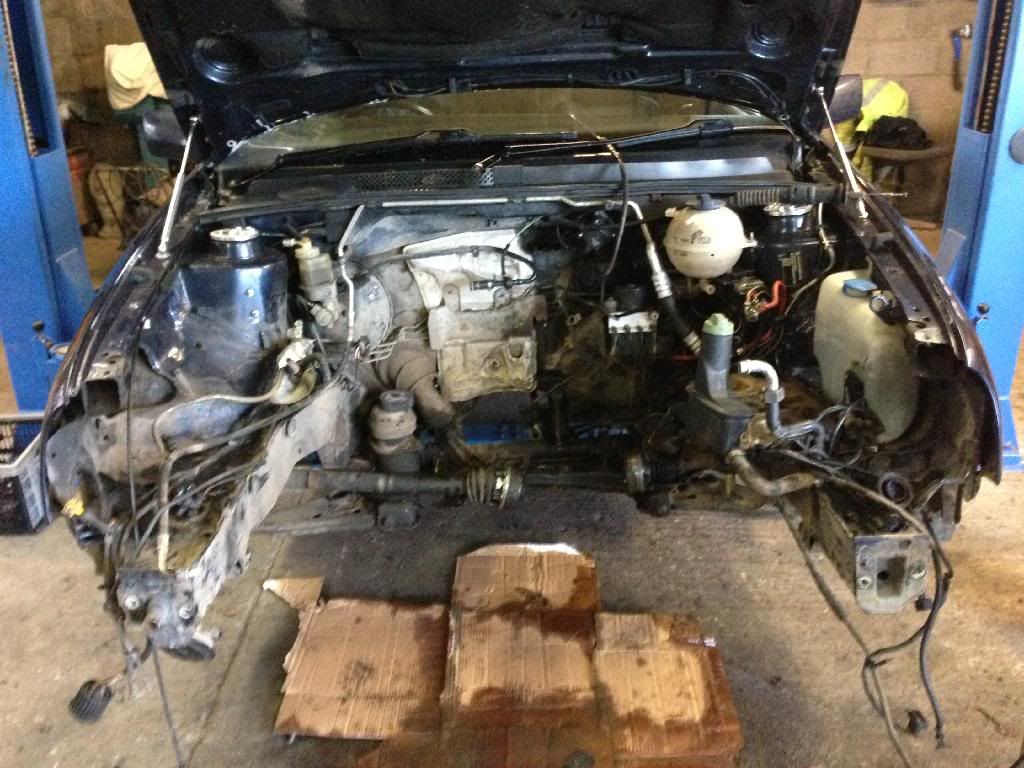
The more I looked at that dull, oem LZ5T Engine bay the more I ***** it, and with a good amount of paint lying around from last year I decided to give it a once over, in true fashion I then got carried away and cut off pretty much all the locating tabs on the chassis legs and turrets lol!
Before shot:
Work In progress, here I was grinding off tabs & rust, smoothing the chassis notch and flatting areas back to smooth metal for a good priming surface and end result.
Unfortunately in true iphone fashion, my phone died during the primer stage so I have no progress shots of the bay in zinc primer, but here's what she looks like after a lick from the ol' spray gun
I am so chuffed with how the bay has turned out, yeah sure I know people are going to **** because I havnt removed seam sealer or plated the holes up, I wouldn't remove seam sealer without smoothing the bay, and didn't have time for that, so it was pointless doing so however, it still looks awesome. I'll call it lazy oem +
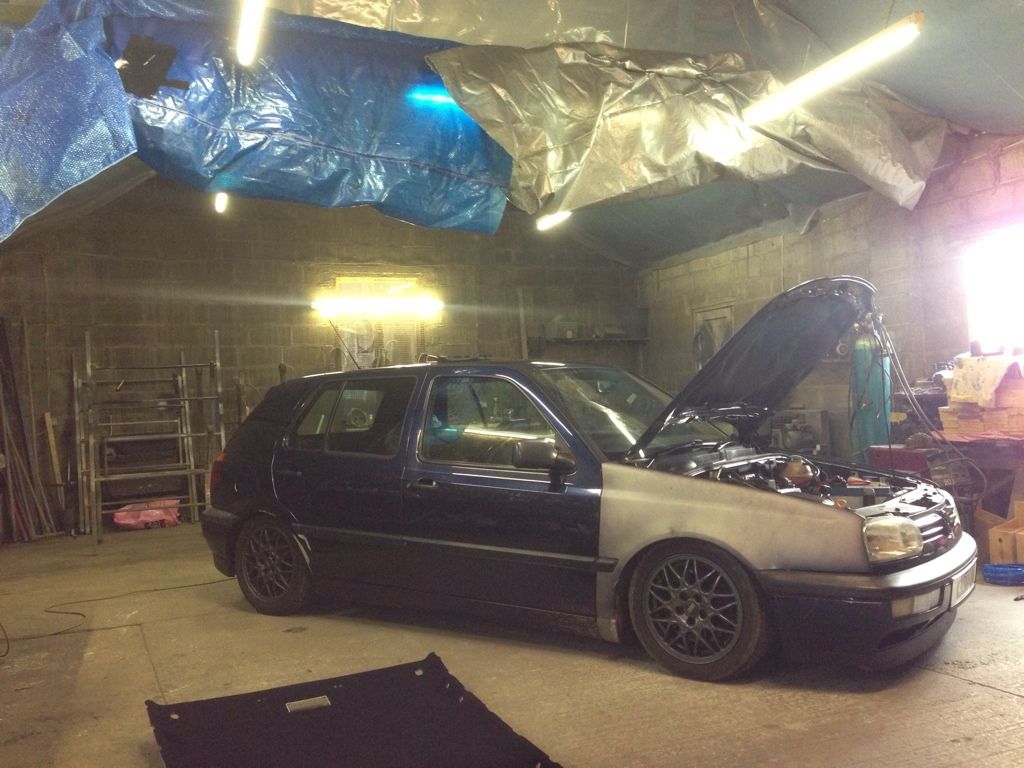
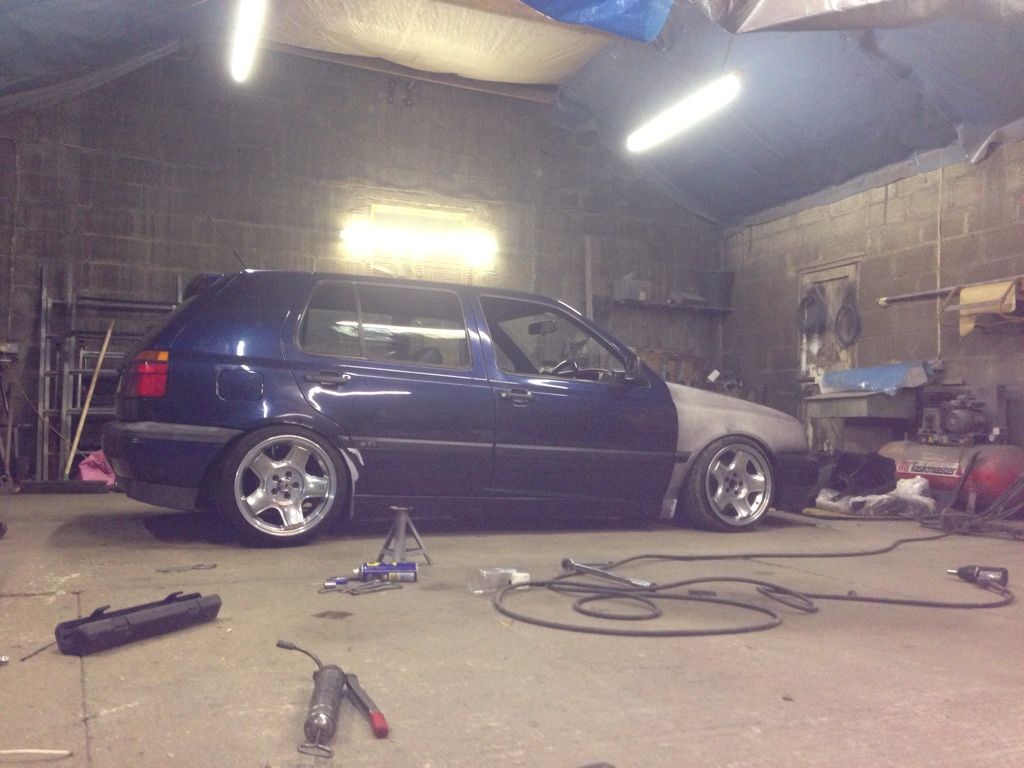
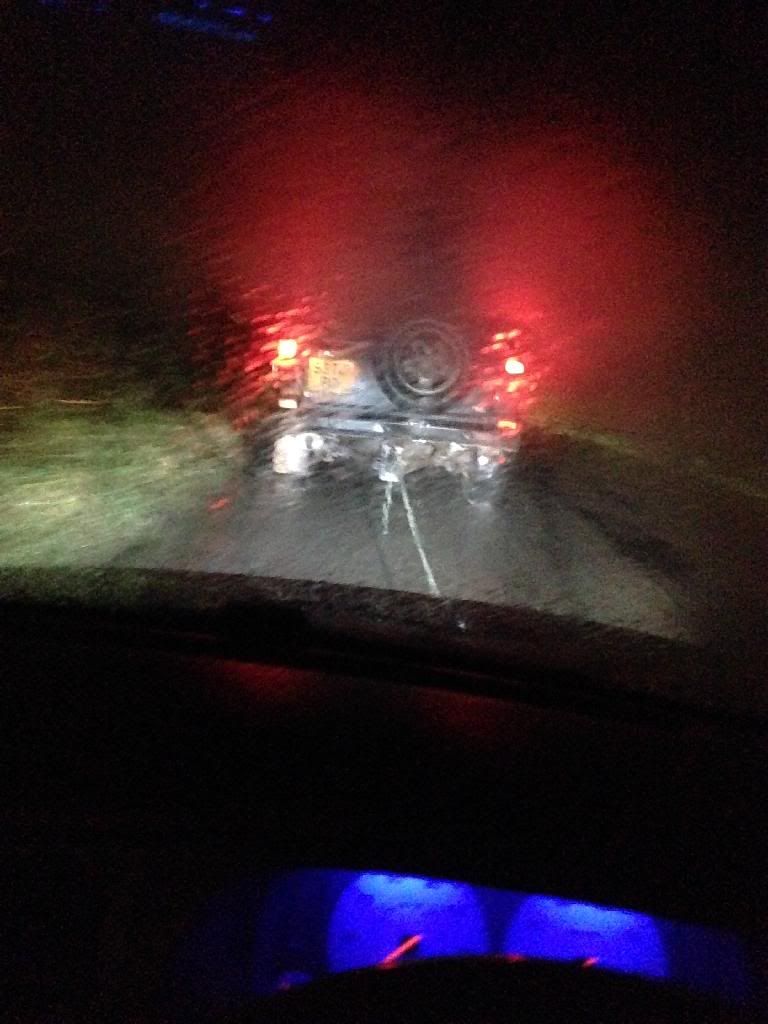
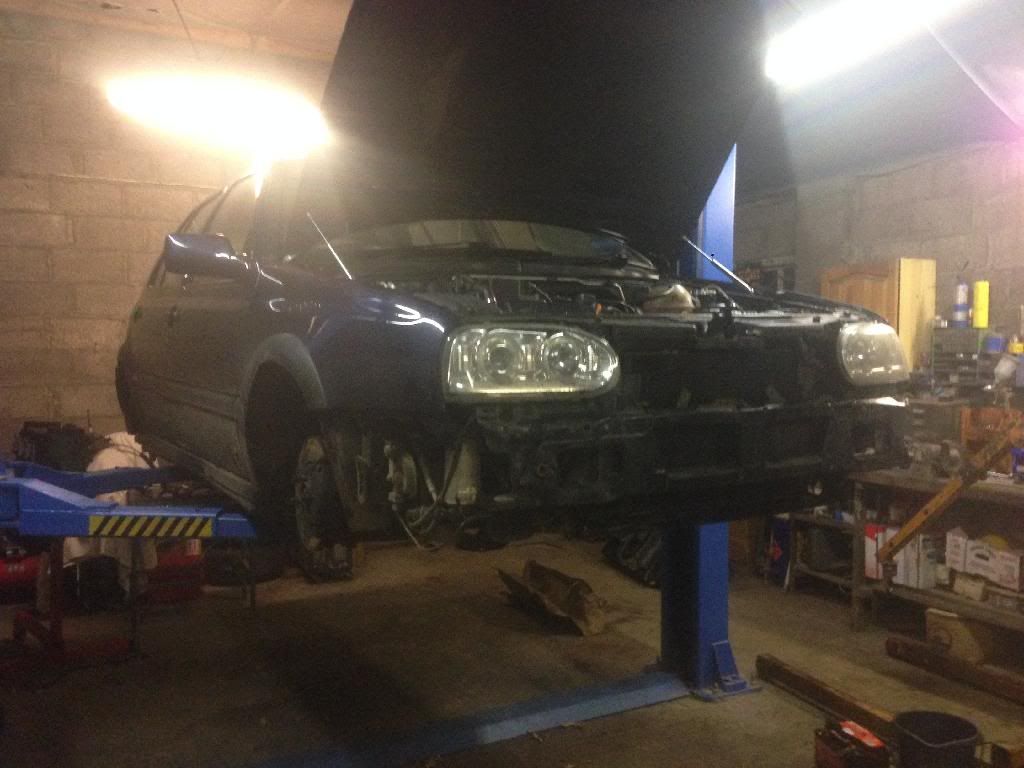
I have been slacking with the updates in the last week, trying to get the engine back in as soon as possible as driving a TDi isn't fun, despite the excellent economy!
On closer inspection of the floorpan, the gearbox oil had spread all the way down each chassis leg, turning the schultz to a sticky mess, absolute nightmare. So I set about scraping it all back
In preparation for a Fresh layer.
the chassis rails were back to bare metal and primed again, as rust was beginning to form due to the old subframe providing little protection to the rails as it was quite worn. The welding work I completed during the paint stage last winter to the floorpan was also scraped back, seam sealer removed as it wasn't doing its job, and any dodgy bits re primed, then coated in a generous layer of up adhesive, a much better alternative to seam sealer I've now learnt!
And in true mk3 fashion, no poking around could go without having to get the welder out again ... Yet another brake line clip bites the dust!
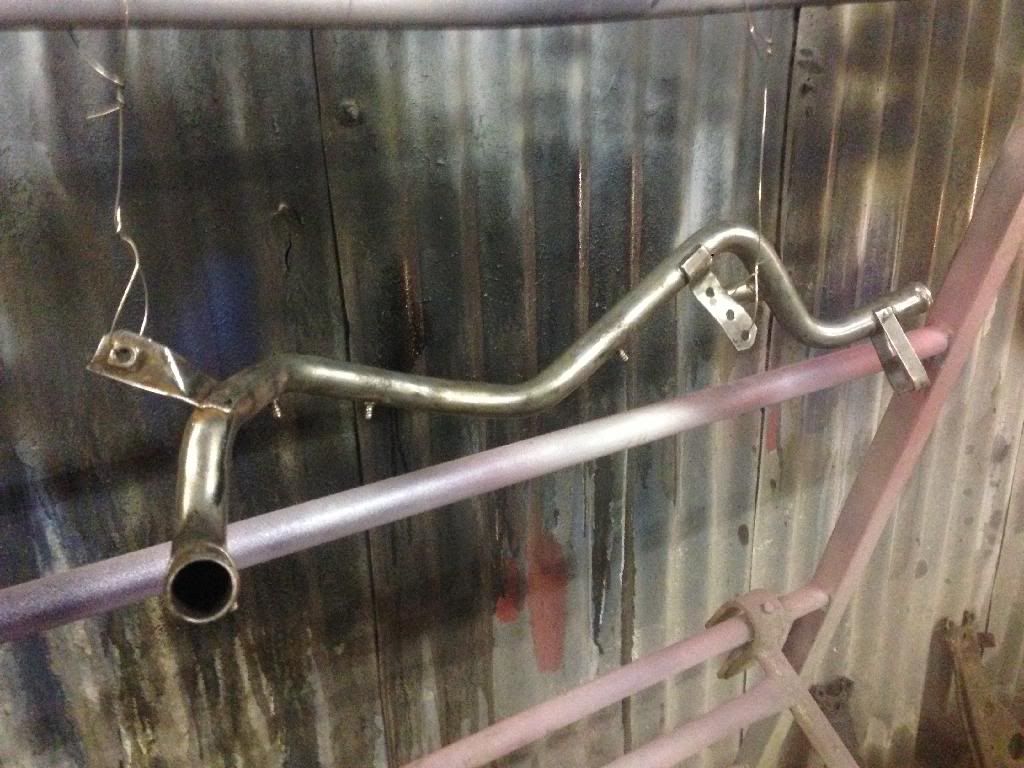
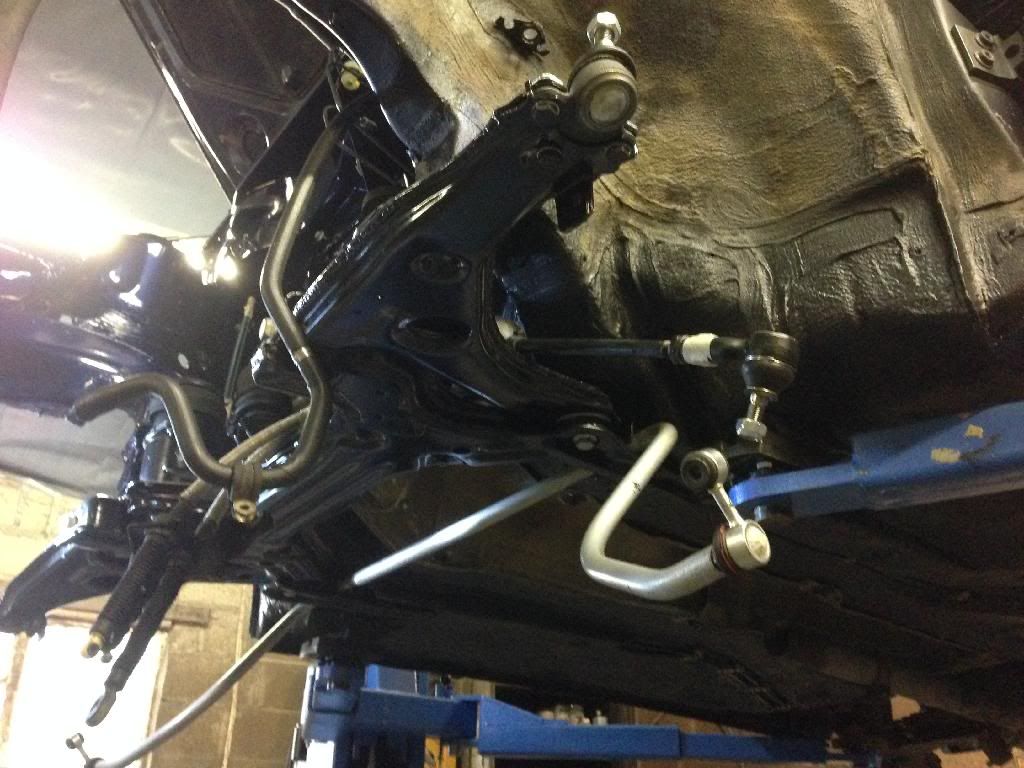
I also ground some clearance for the ARB and tie rods, as both had marked the chassis so must have been touching.
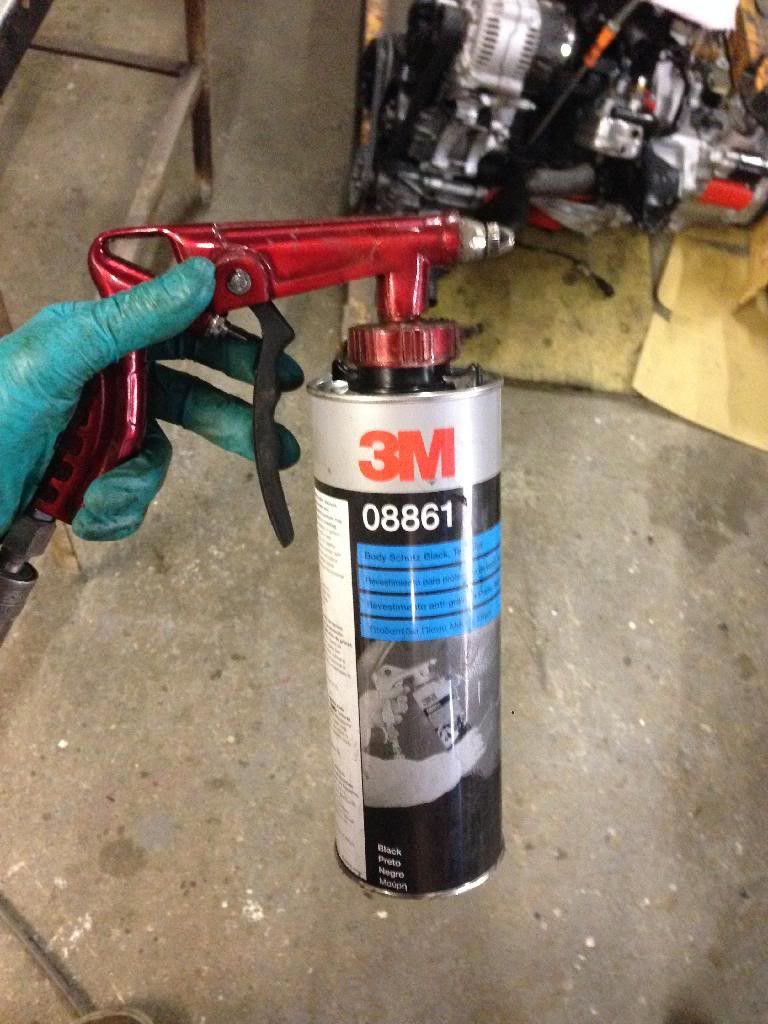
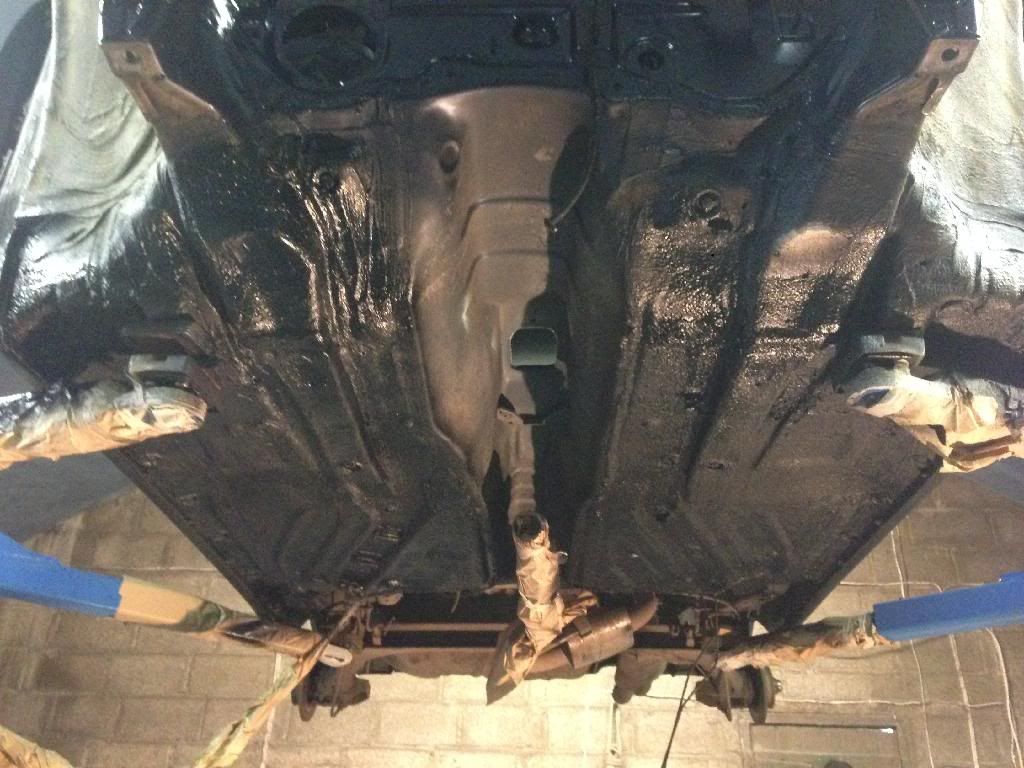
Then some hours, a few showers, and lots of swearing finally led to more schultz applied to the underside and sills.
Horrible stuff, but its on there already so only time efficient option I have!
Boom!
With the floorpan nailed I could then build my subframe up ready for fitting. All new bushes bearings and mounts were used for good measure.
Black magic Metallic PAS lines, everything else in black & silver.
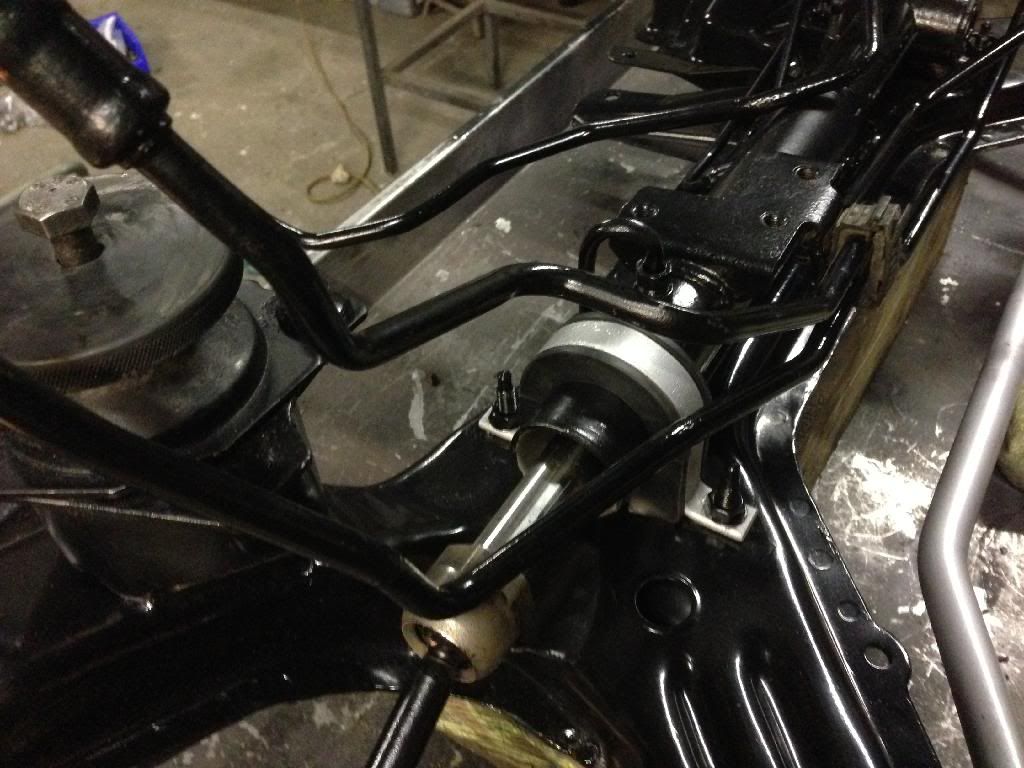
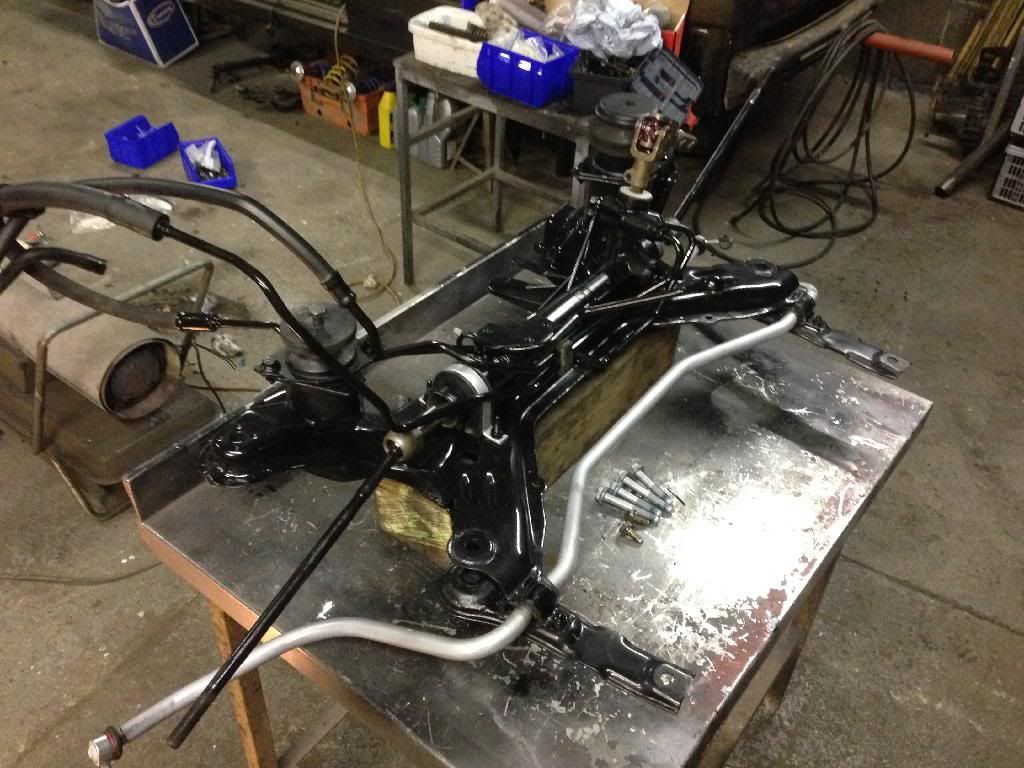
Replacing the brake servo clip was the next job on the list, I ended up ripping the pedal box out and pressing the clip on a vice, due to breaking a brand new one trying to fit it in situ. God knows how anyone has ever achieved such a task, this spring had to sit in the clip ..
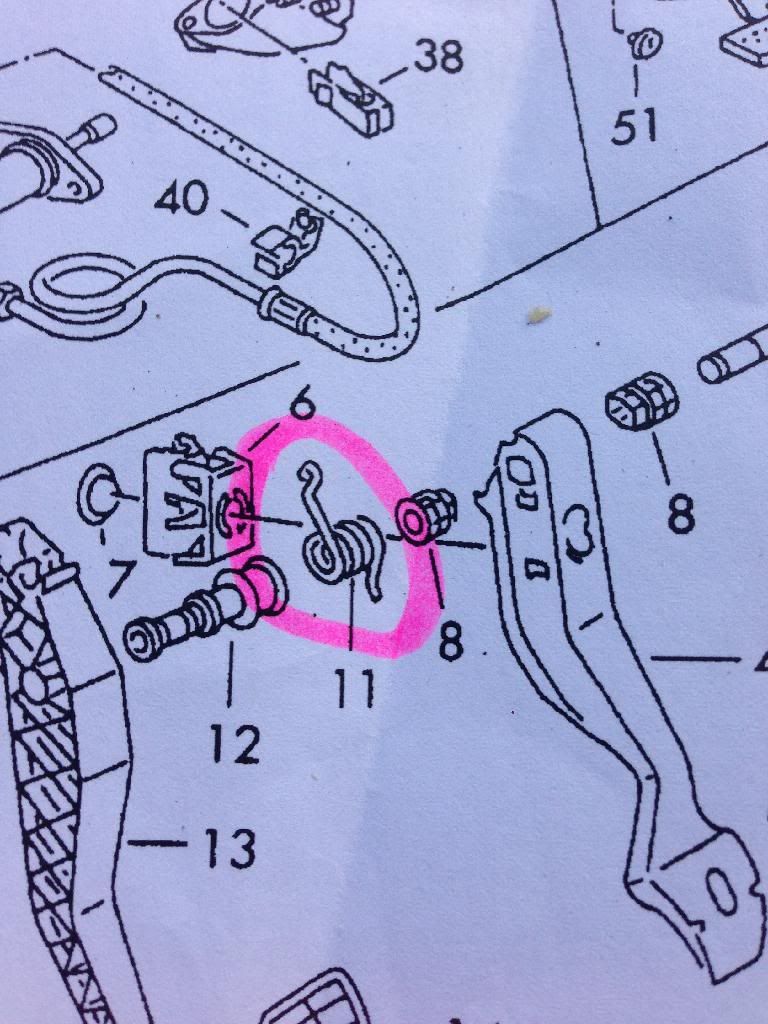
Success
Good job I removed the pedal box, the headless bolt on the column was loose, no wounder my steering wheel didn't ever feel tight. Replaced with a nut and bolt for good measure!
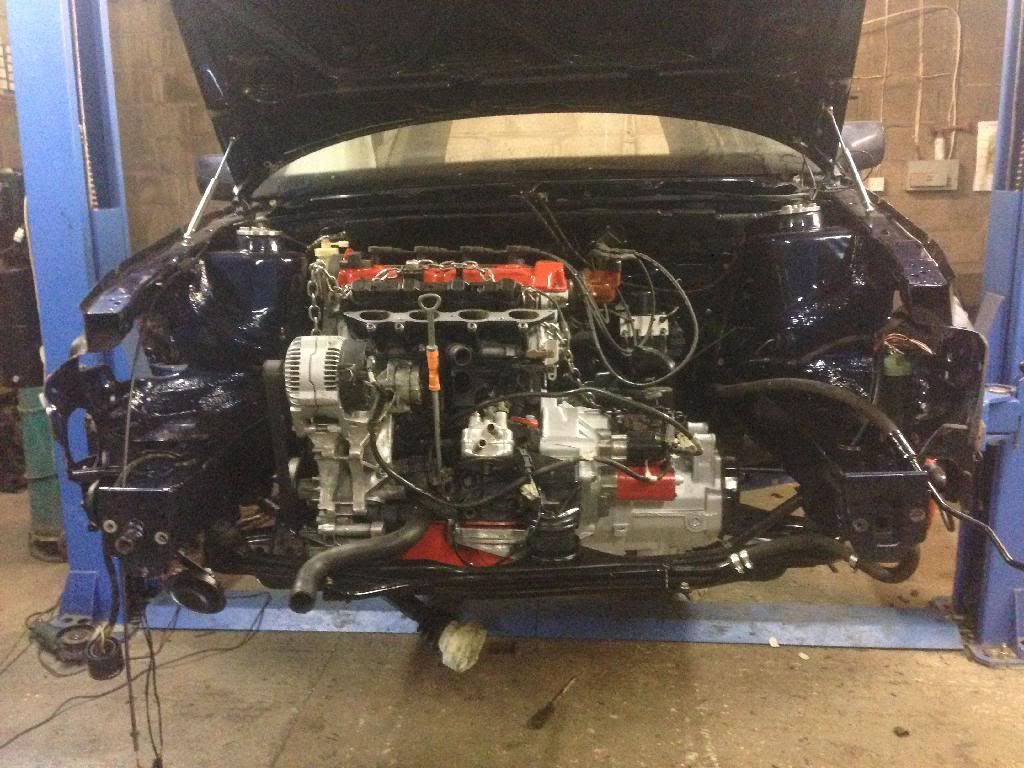
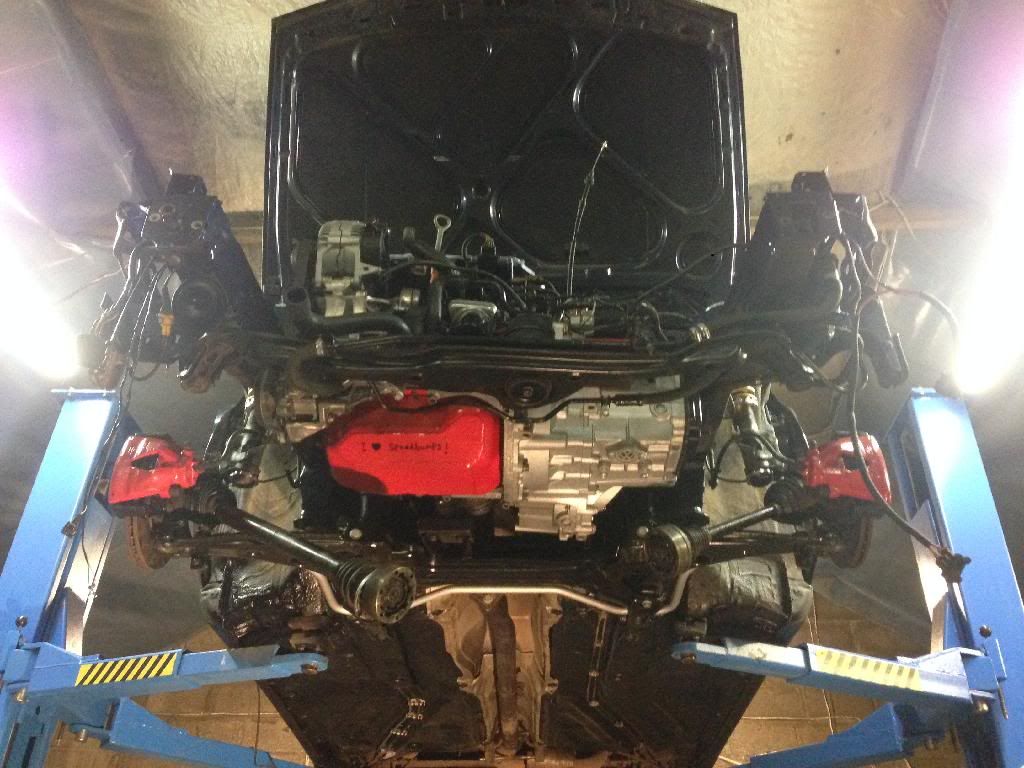
Subframe fitted back up, things are finally starting to take shape!
More wiring time, guess some of you will know where this is heading
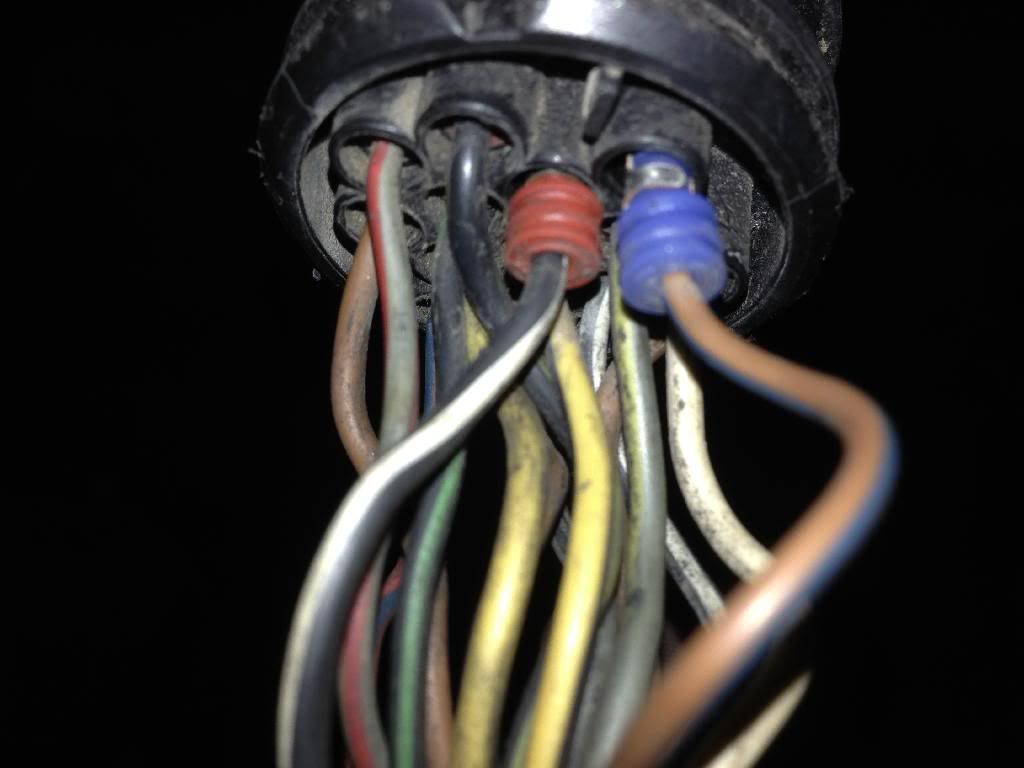
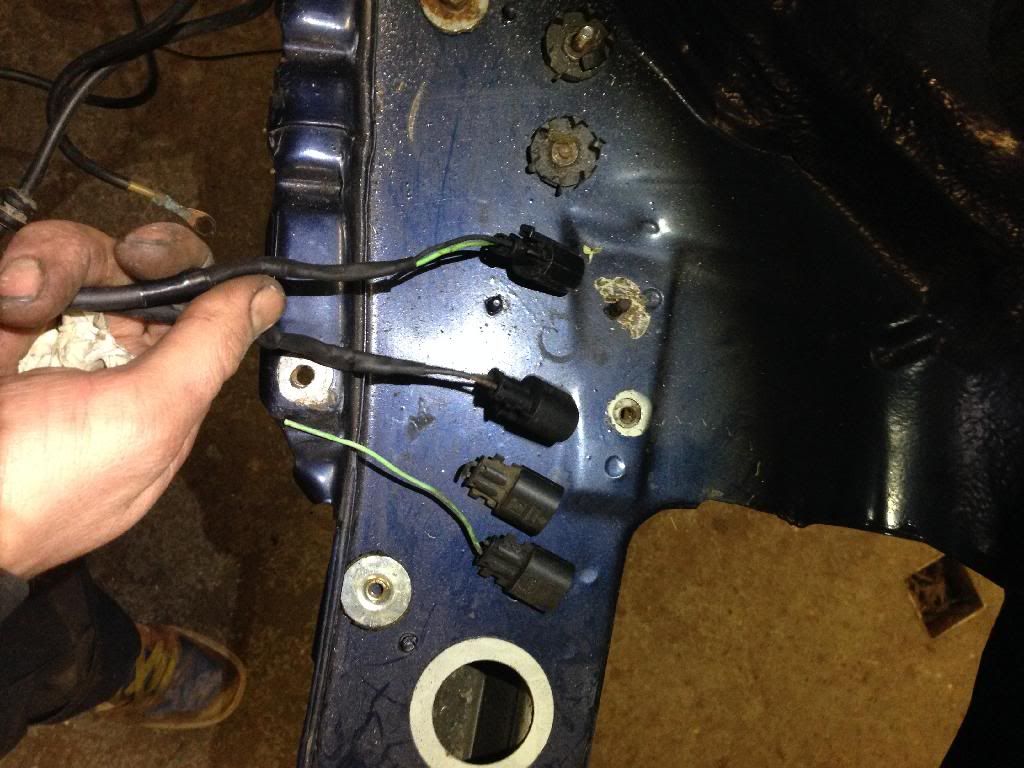
Dodgy ABS plugs cut and replaced with fresh lengths of wire off a spare loom that was knackered
Fan switch cheekily relocated to the skuttle tray along with a few other bits and bobs to keep the engine bay tidy. Don't have any photos of how I modified the engine loom, but lots of soldering heat wrap and electric tape was involved
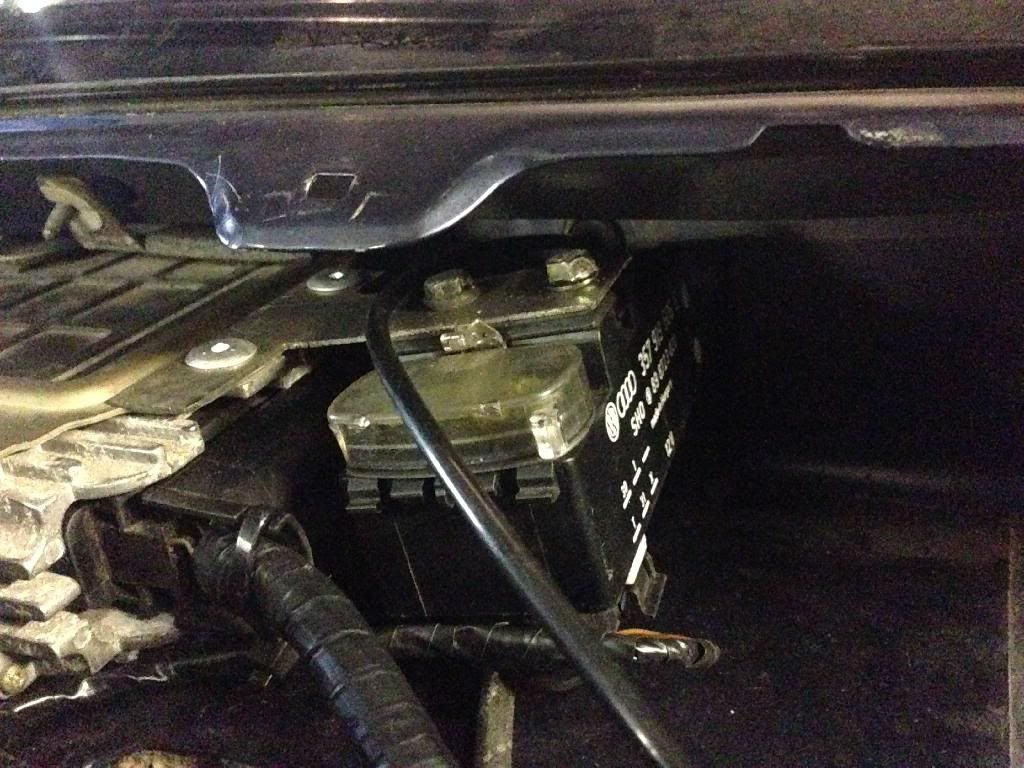
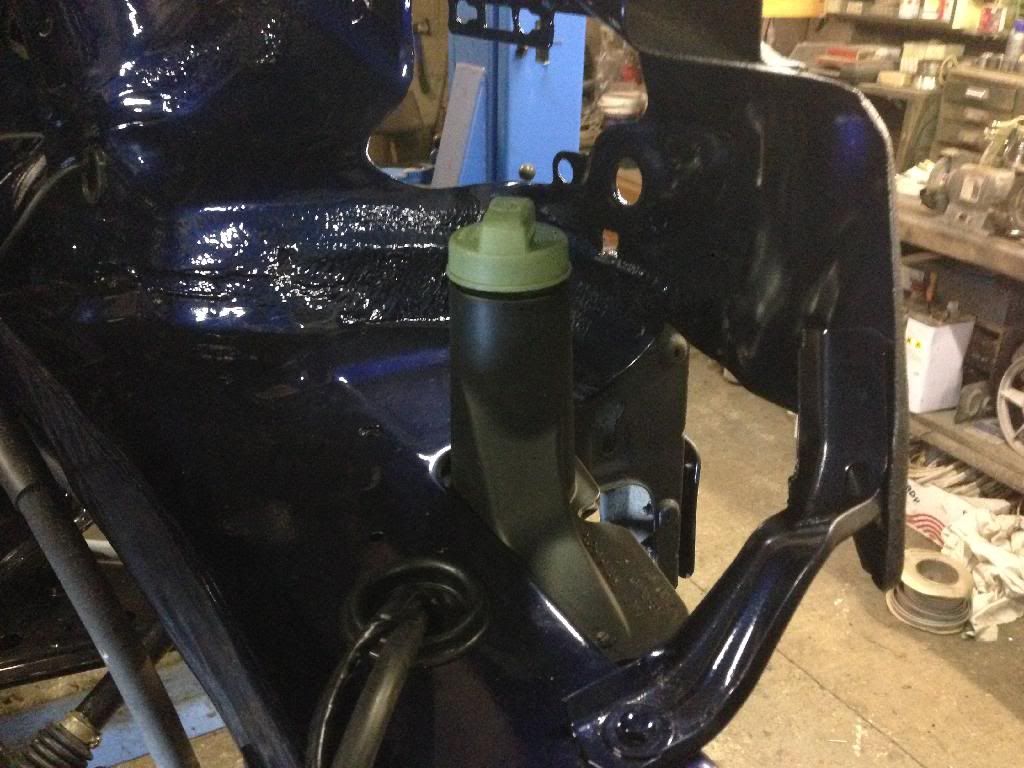
Power steering bottle has also got a new slightly more discreet location, and the main power cable & fan wiring run through the chassis leg.
I also Tucked the headlight loom and other wires in the drivers side chassis leg, some wires needed extending as I'll be running the airbox sensor near the headlight.
The Front crossmember got forgotten about, so I flatted it back and coated it up in black paint for good measure
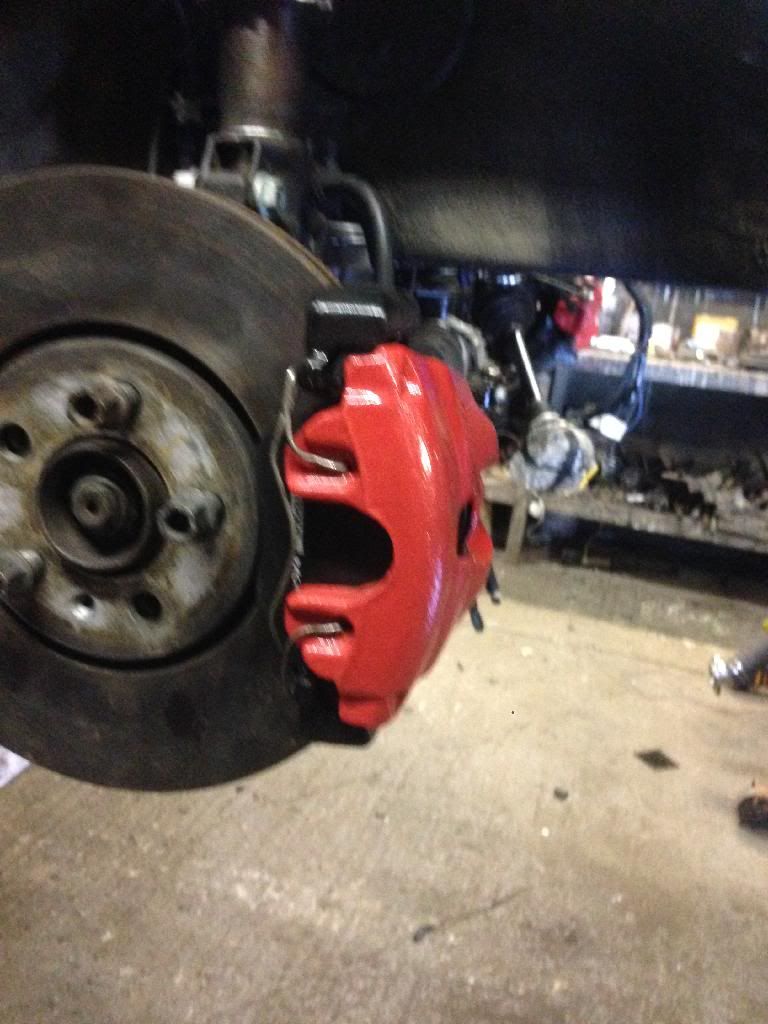
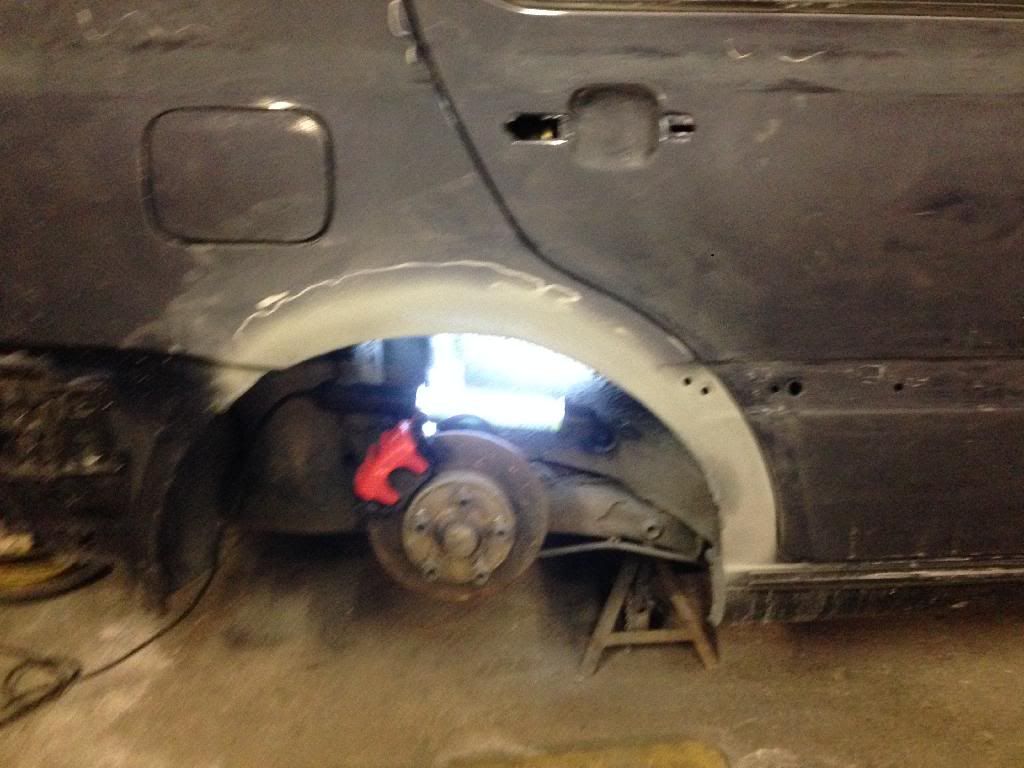
With the car already running 288s up front it's more than enough for what I need, so fresh meaty disks and padsI had lying around from a VR I broke were fitted, the calipers painted fully in good old hammerite red, and carriers gloss black. Simple yet effective
Upon closer inspection of the new wishbones I was unsure on the raised circle fouling the subframe bolt, so I dug the old ones out to see of they were hitting, sure thing they were, so the grinder came out and notched 50% off the circle, didn't take any photos but it was just a half moon shape chopped out.
Oops!
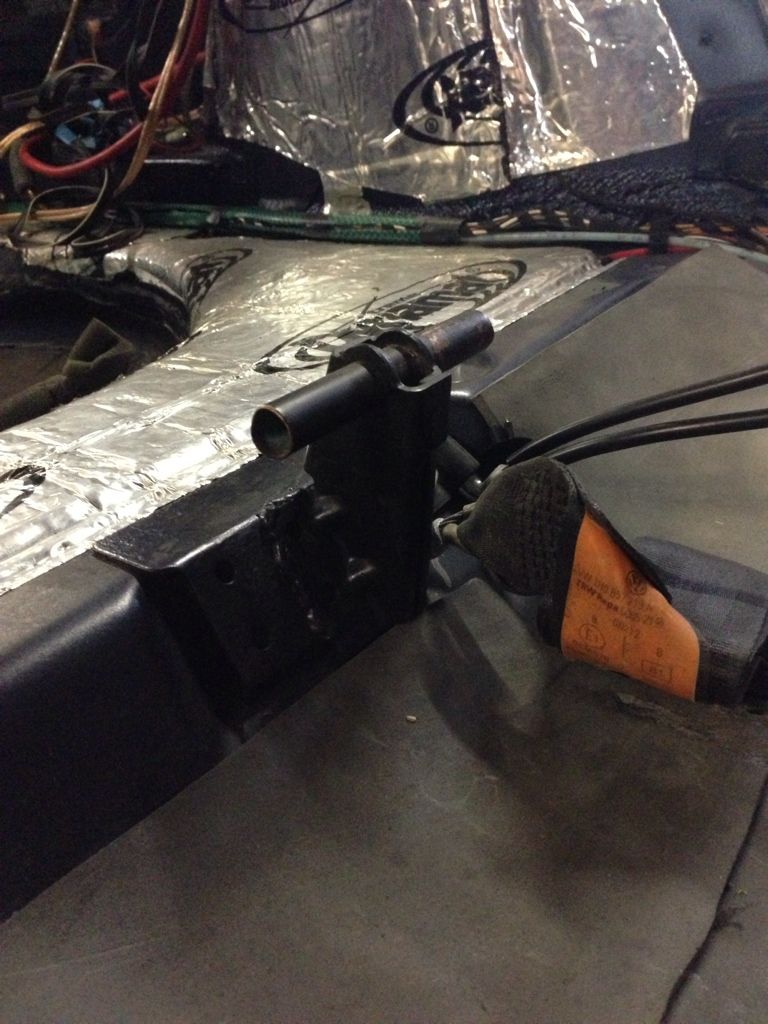
Moving back to the interior, a while ago I chopped and drilled the mk3 mounts to accept mk4 seats as I couldn't Weld to save my life, however these were crap and my seats wobbled around lots at the front, so a new bracket was made up, old one chopped out and new one welded in, saftey first for once
16v lump sat in the bay now, only issue being the 4 branch hits the heat sheild, so I can't raise the rear of the engine atall. Goodbye freshly plated sump ... However I Will raise the engine at the front by 1" to help the downpipe angle and pas bracket, and swap out the Swiss cheese rear mount for hockey pucks.
 w
w
All the wiring sorted, power steering lines plumbed in and exhaust now fitting like a glove after a little manipulation of the heat sheild, and one puck at the front, stiffened mounts front and rear with a few pucks and one soft rubber bushing below so my dash doesn't vibrate to Mexico.
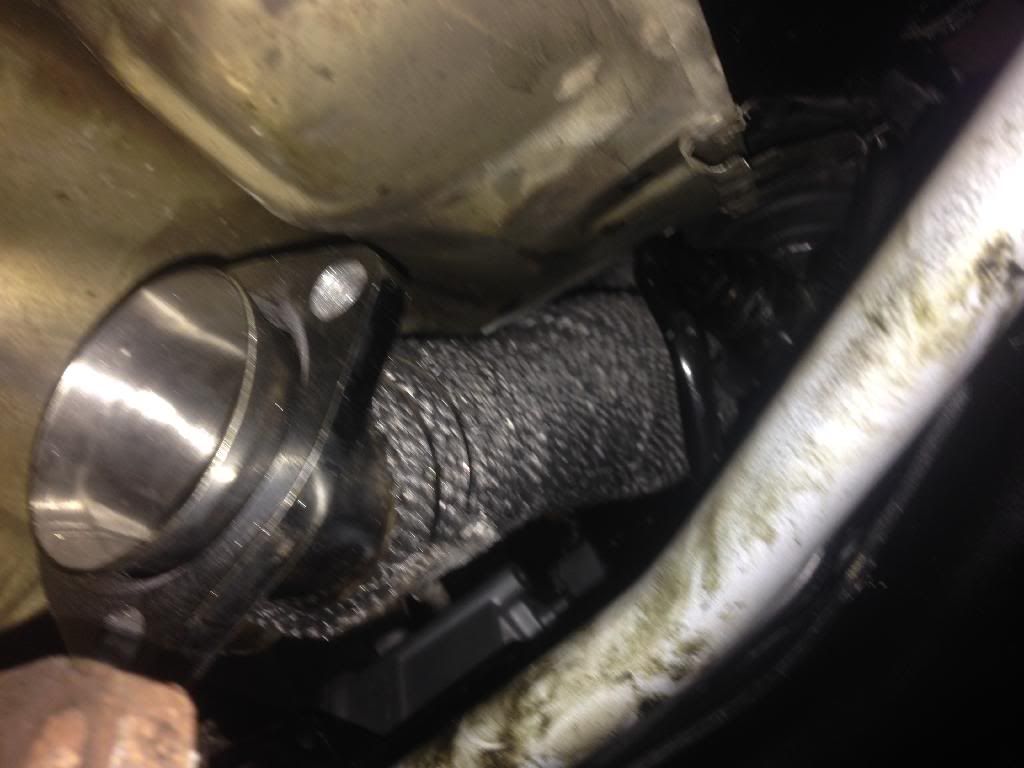
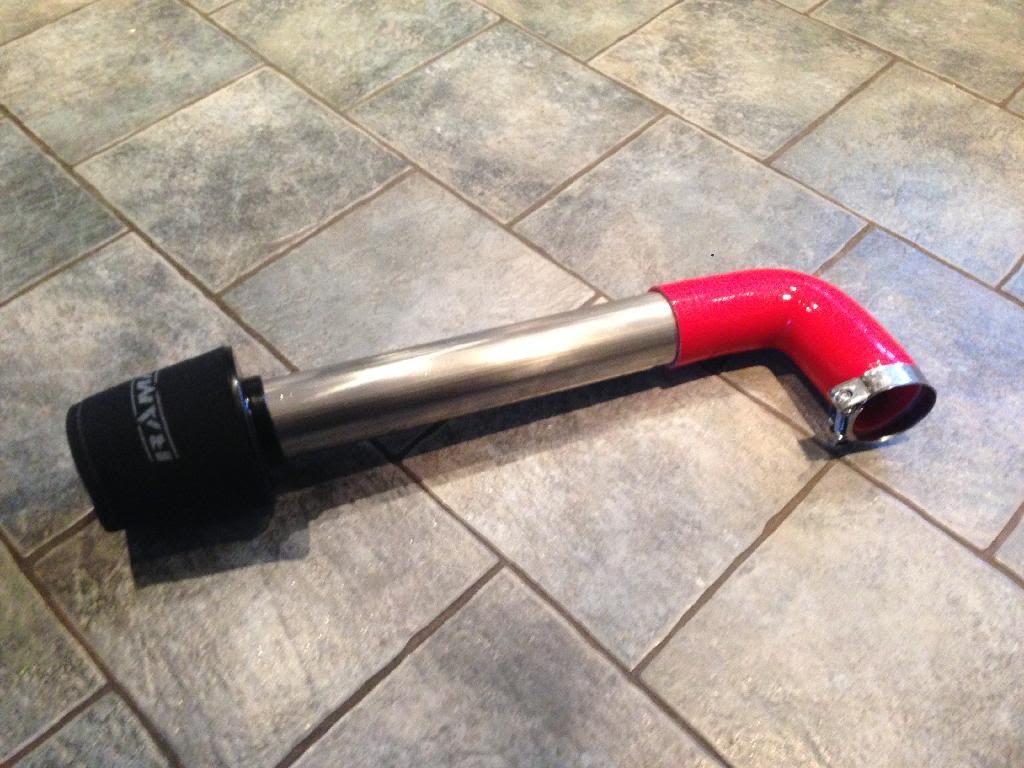
I ordered up some bits for a Home brew CAI - ramair filter, 3" stainless Tube and a 90 degree silicone bend to suit the TB. If you're wondering where the air flow sensor will go, I have a trick up my sleeve
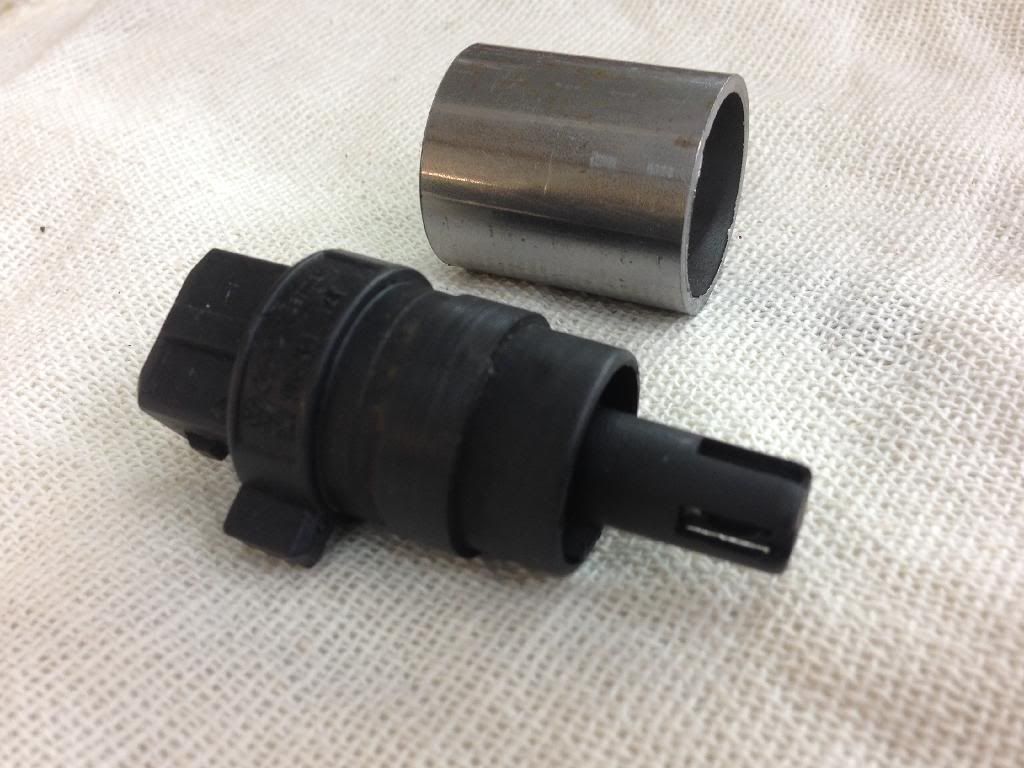
I Sourced a small length of stainless tube as close to the diameter of the sensor, then skimmed 3mm off the body of the sensor until it slid Into the tube on a lathe. There was lots of extra meat on it, so this was easy.
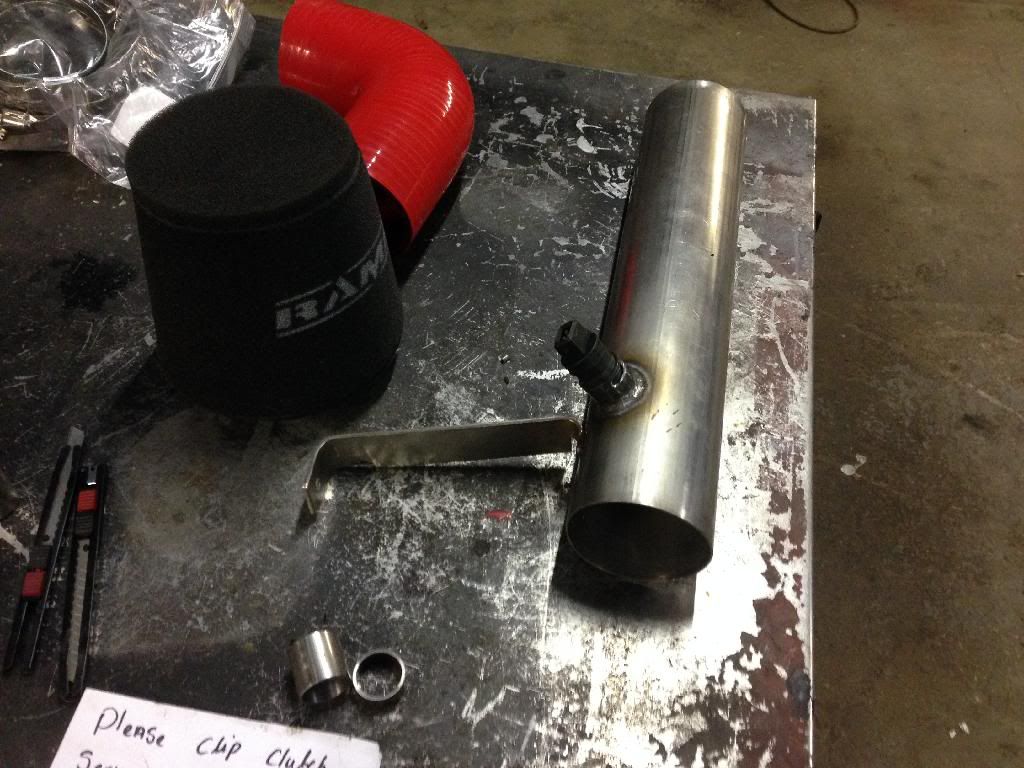
the housing needs Tig welding to the 3" intake pipe, and a couple of slots cut in for the clip to slide into and secure the sensor in place, unsure wether to put it near the front or back of the tube, but for Asthetics it will most probably go at the front, along with a stainless L shaped bracket to support the Pipework.
Should be ready to fire up later, fingers crossed
Been slacking big time on the forum posts, too much to do in too little time, but following on where I left off:
Intake pipe tig welded up, air temp sensor housing is on there now and also a bracket to secure it to the chassis leg

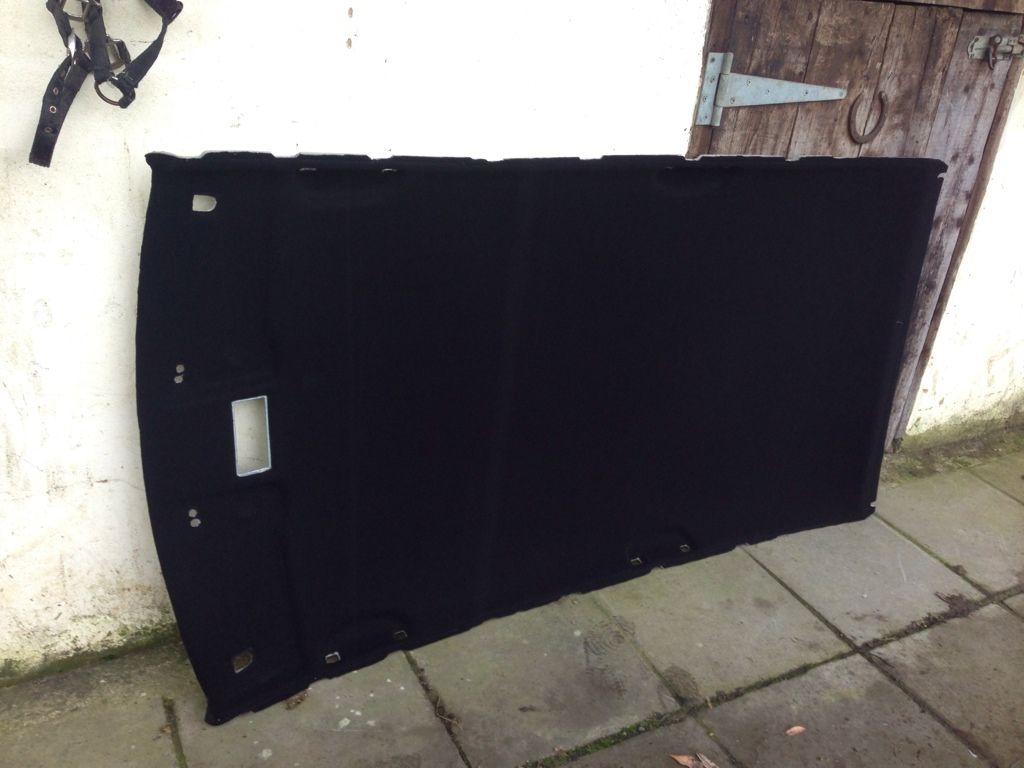
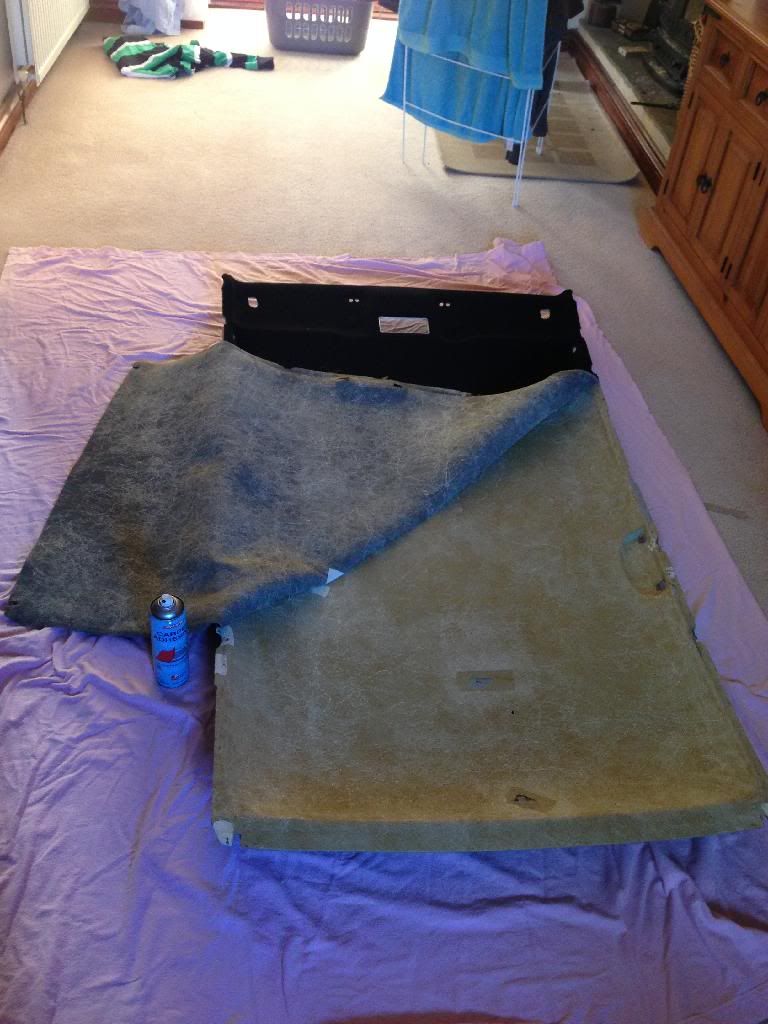
The headlining that I retrimmed last year properly using AS trims Kit had sagged badly from that hot weather we had, so I took it out pulled it all back and used Evo stick carpet adhesive instead, then refitted.
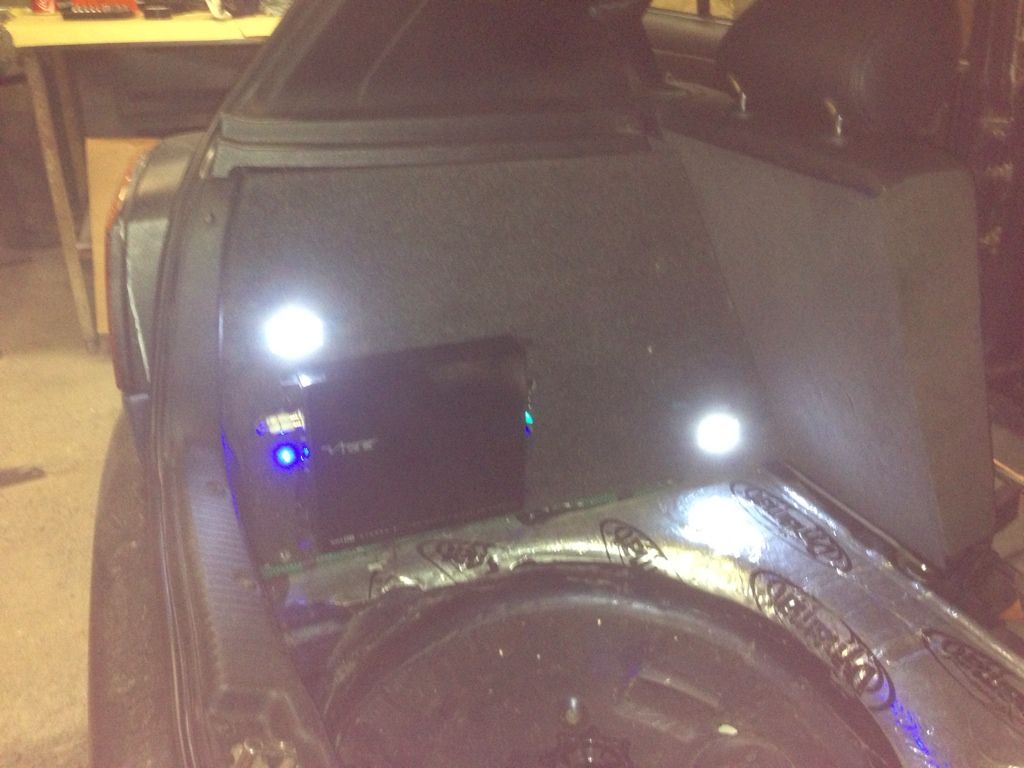
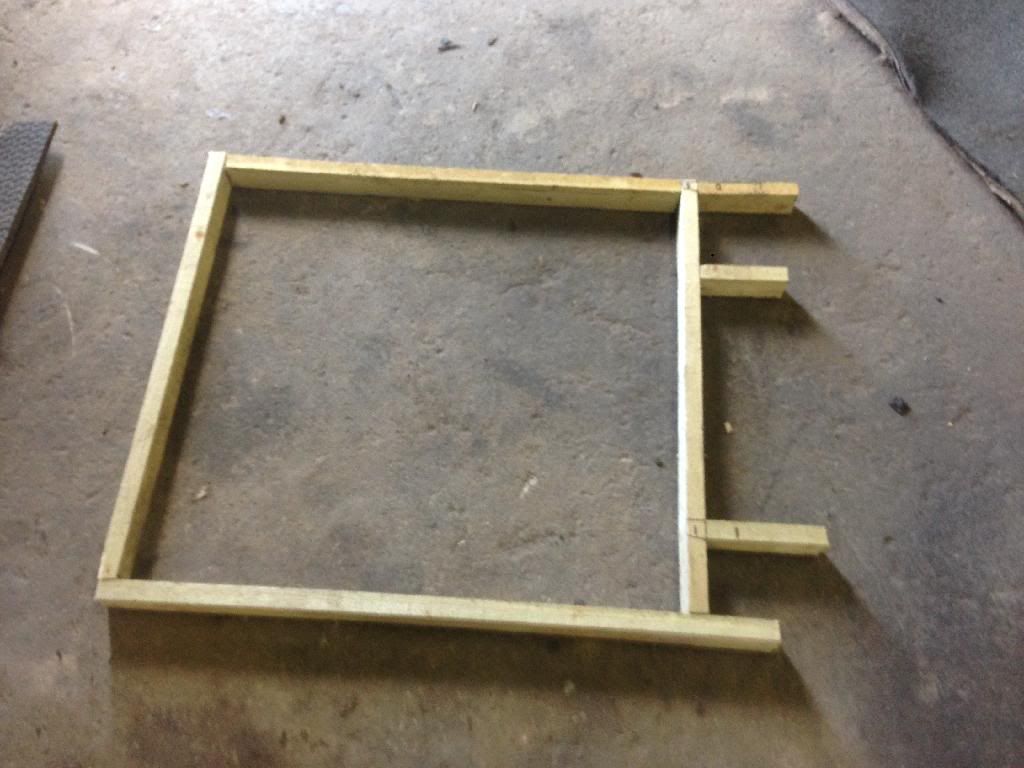
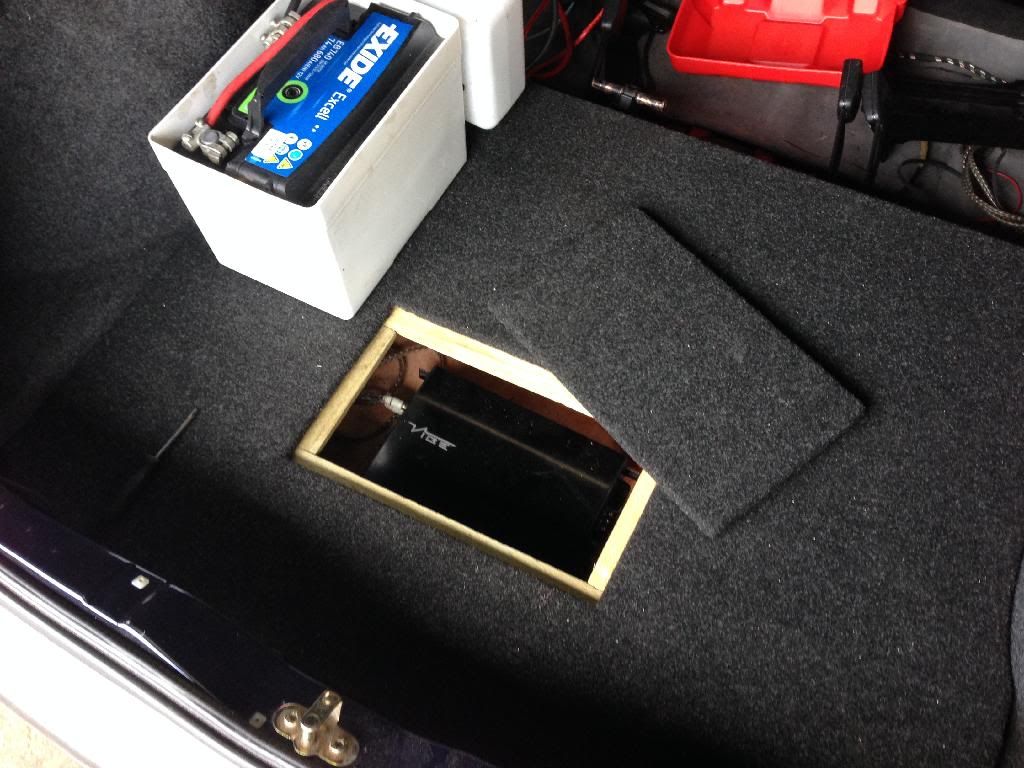
A false floor was made up and a frame for it to sit on. The frame was stuck down to the boot floor with PU adhesive and screwed together. I will be hiding my Amp in the spare wheel well, as unfortunately a battery is too tall
Framework (2X1")
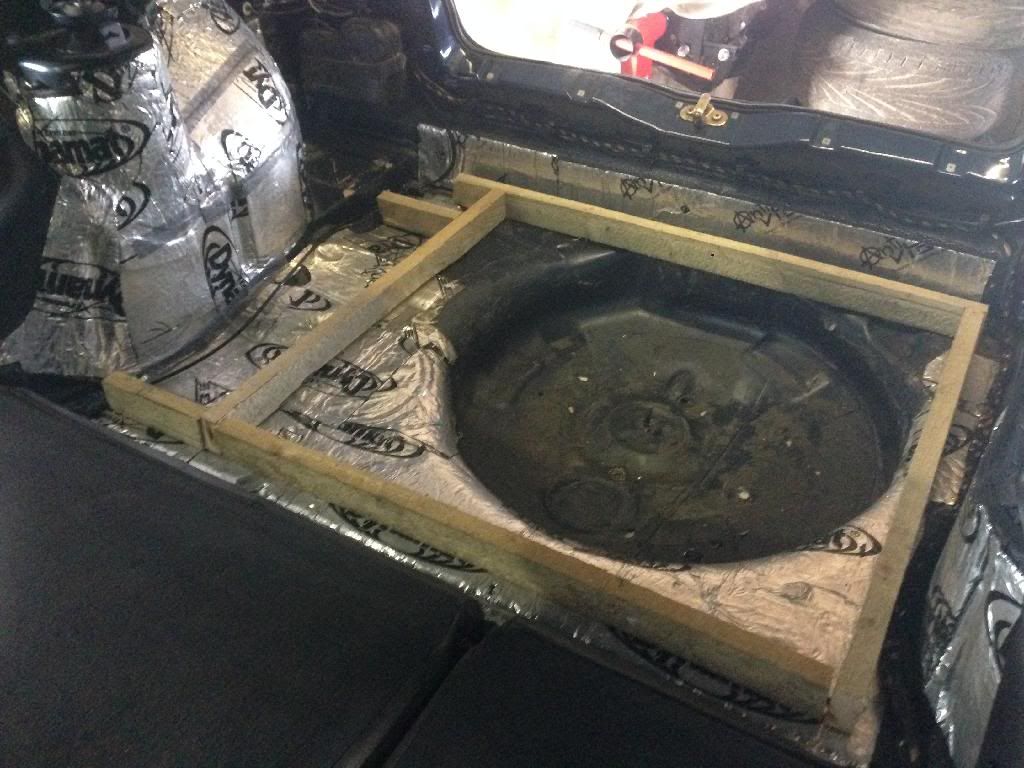
False floor from 9mm MDF as that's all I had lying around in the right size, and is fairly lightweight.
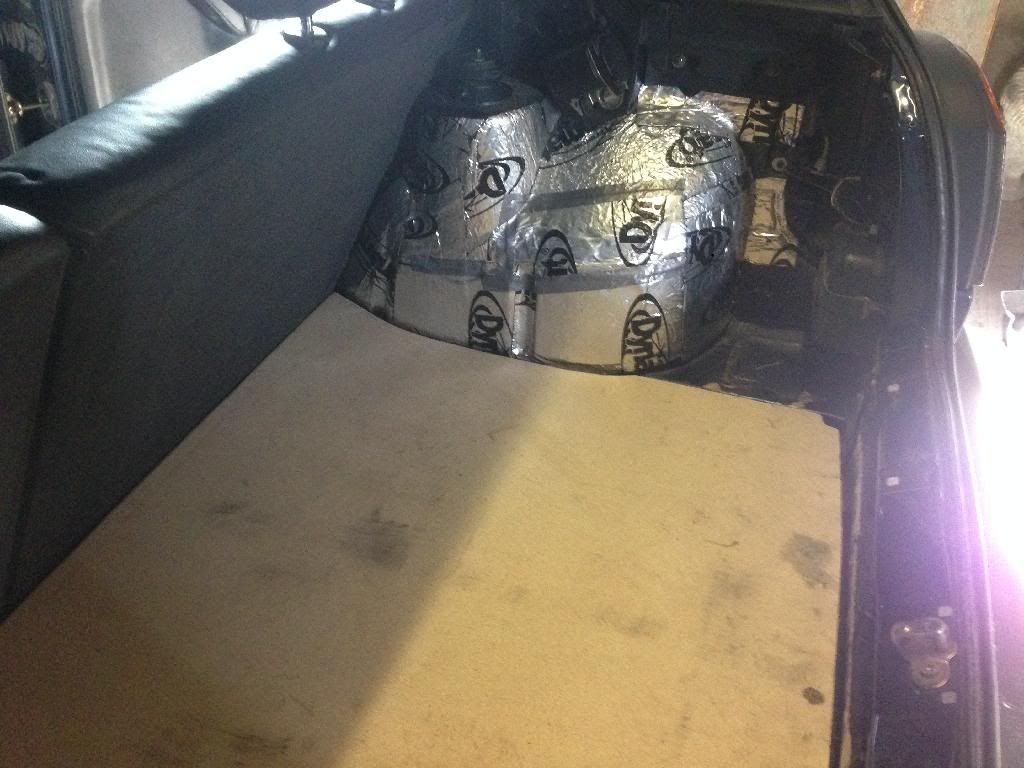
Trimmed with OE look fabric, as I will be keeping the standard turret carpets in place. Cheeky little hatch cut out for tweaking the amplifier too
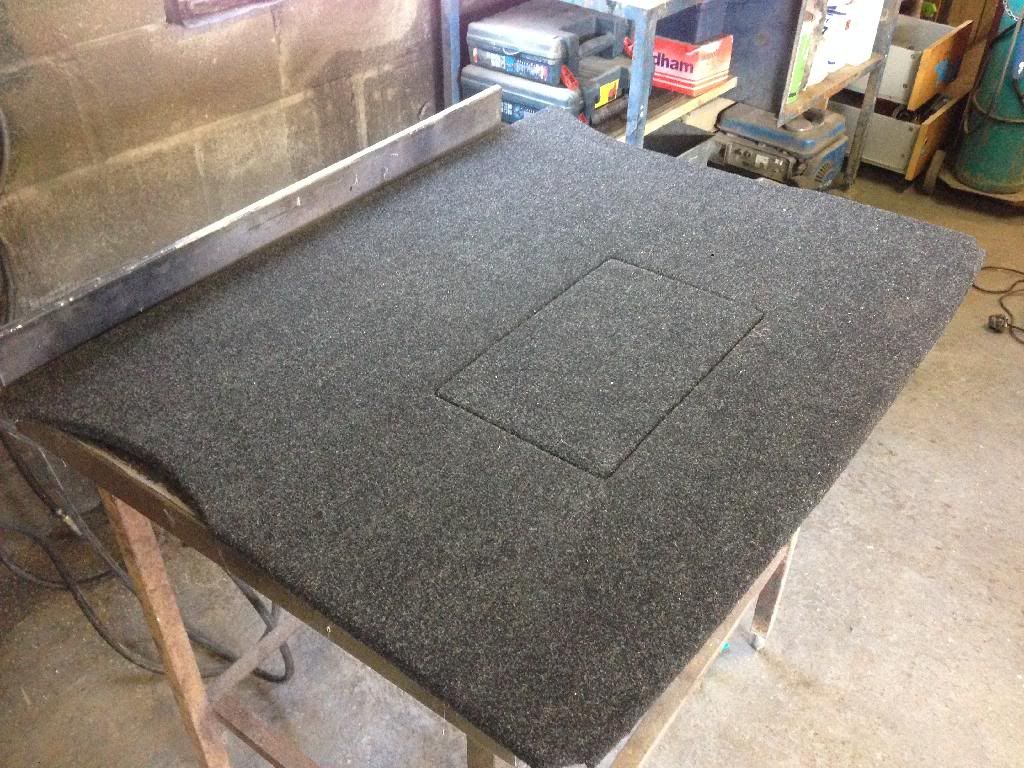
Test fitted in the boot with amplifier and battery box, which I sourced from a local marine store for a great price. It's now painted black, as are the pieces of wood on show and amp floor 👍
Then it was test drive time , just a blast down the village and back to play things safe with no front bumper and missing various other bits!
Two problems -
1. the car will not hold idle from a cold start and idles very low on tickover, a rant didn't help this. Can't source the root cause without learning vag com language, I'll get there!
2. The reinforced subframe is considerably lower that my old worn out one, so it hits pretty much everything, upsetting pedestrians left right and centre.
The notches for the subframe bolts and ARB are doing their job though
Ripped the rear trims off and left a right mess, sealant 1 Aaron 0. Polo rear coilovers fitted, this is pretty much full lift on them!
Upon re installing the audio I had shocking interference through the rcas, turned out to be the ground fuse inside my head unit (pioneer) he blown, so this was bypassed with a couple of lengths of wire and a soldering iron
Then this happened .. UD prep
With only 9 days go im cutting it very fine, as I organised the club stand for ukmk3s mine is booked to be inside along with four others, and six outside. Fingers crossed all goes to plan ...
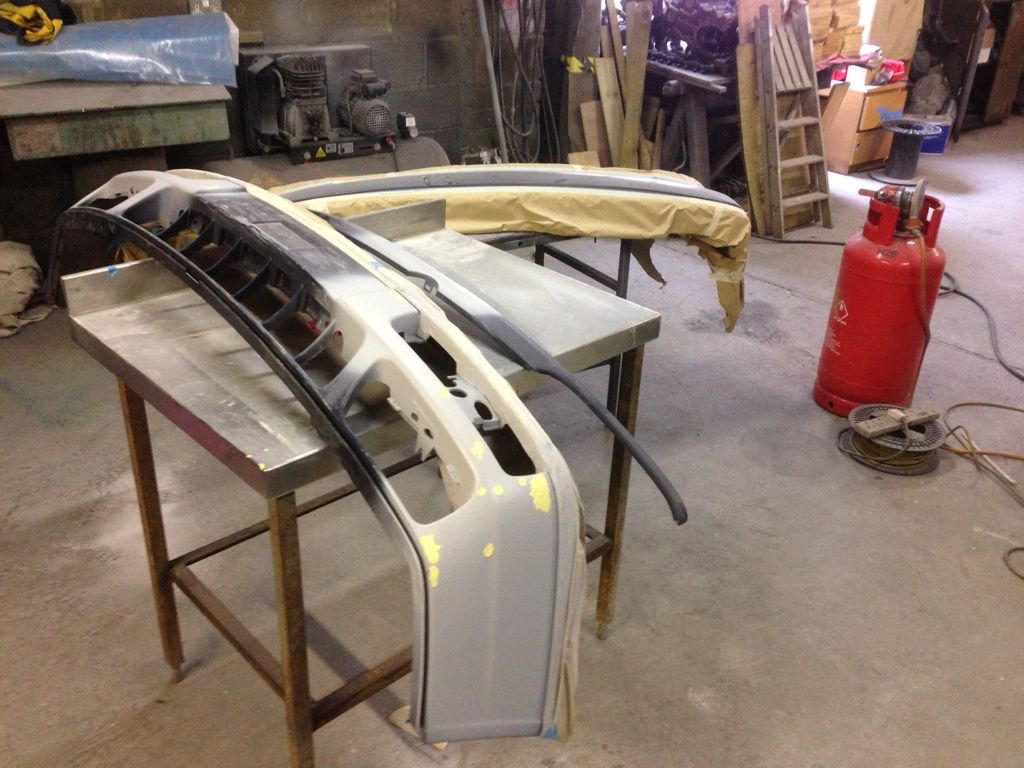
Filler cracks ground out of my original bumper and re skimmed with polyester putty, I couldn't find a good condition texture top local so it had to do!
Managed to source a rear texture top last night in mint condition, despite having a good few layers of jazz blue paint on it.
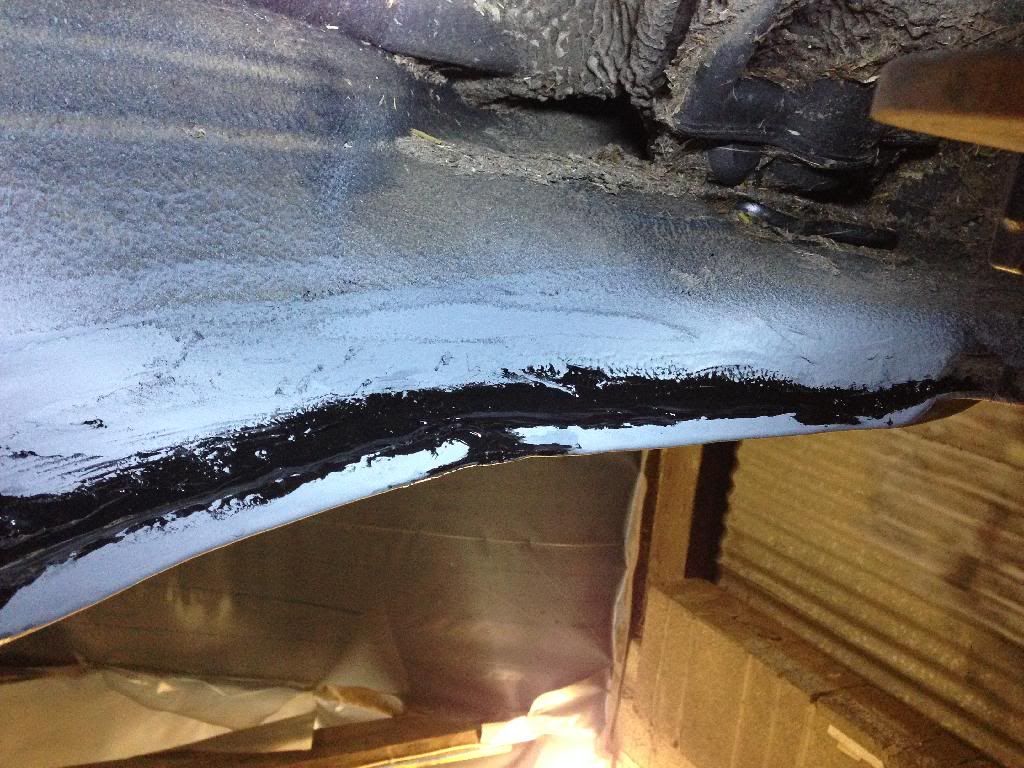
As the rear arches were looking rough I dug out the seam sealer that was applied last year, bare metalled the folds and outer areas, re primed and sealed with pu adhesive instead. The trims will be going back on, but this is just for peace of mind
More to follow ....
Primer was laid on the bumpers and other bits and pieces Saturday, and another coat dusted patches on the car for good measure, then sanded back later on that day. Luckily the sun was out so I used my natural oven
Later on that day The windows were removed from the doors, and I began to mask up in preparation for painting, after trying to seal the workshop from the outside elements as much as I could with insulation boards and rags shoved in gaps to keep the cold air out lol!
Then early Sunday morning I fired up the propane gas heater and diesel burner and got the temperature up in there in preparation for laying some colour down. After a few last minute touch ups on areas that were missed the spray gun came out
Resulting in a very large headache especially after the lacquer phase. I Used PPG paint & thinner, Laid on top with Maxmayer 0200 clear, mixed with a healthy dose of polar hardener and UPol Rocket to speed up the drying process.
Trip to the Zwo anyone?
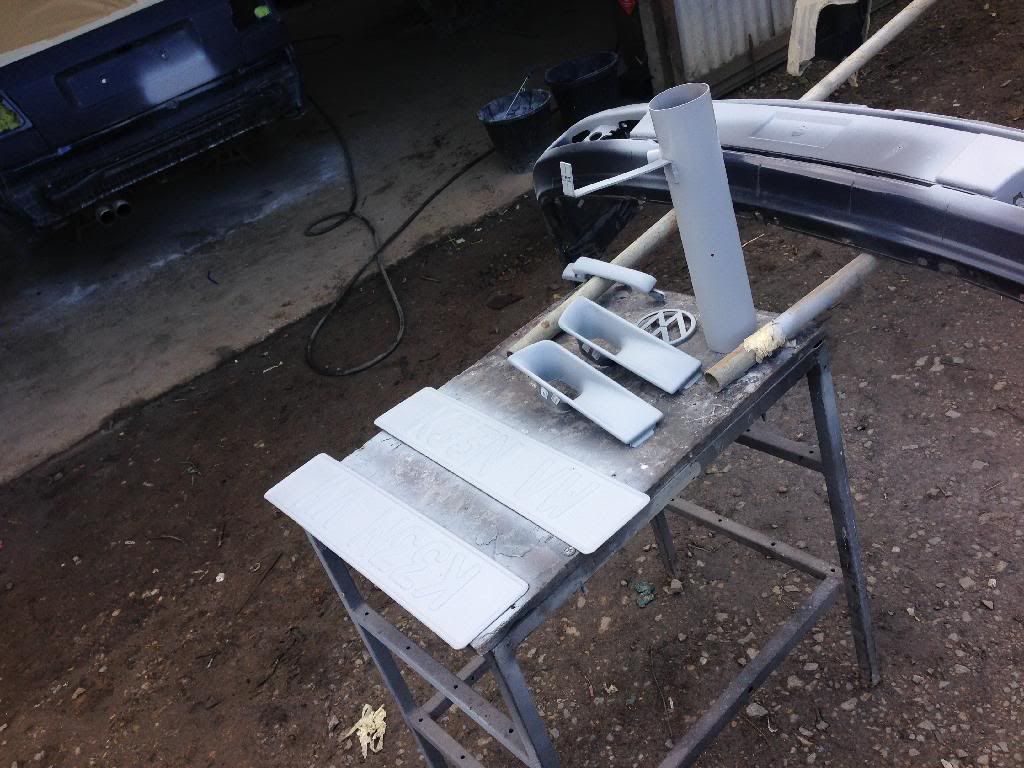
While waiting for the paint to dry I made up my heater panel with red LEDs and treated all exterior plastics to a good dose of Plasticare trim dye
Monday morning consisted of fannying around finding all the bits I needed to put it back together, and Tuesday morning before work flatting the whole car back with 1500/2000 grit, removing 95% of the fish eyes, dust nibs and a couple of mosquitoes that had thought wet lacquer was a great place to land :/
Then this morning (Wednesday) I hit it with the polishing stick, using the farcela G3 system twinned with 3m foams. Cut the whole car back carefully this morning as it's still not fully hard, using G3 ultra and a 3M green foam on a 3m soft backing pad. Took a good 6 hours, and managed to move up to G3 fine with a yellow waffle on the roof and bonnet before work.

Paint finish on the bonnet, near perfect under the fluros, not bad for a garage respray
Lhu
my name is Aaron, I'm 22 from Glastonbury, UK The cars spec and a little bit of history: 1997 GTi 8V in LZ5T Europa blue, with A/C No sunroof and all the other bits and bobs. I picked the car up for the grand price of �330 through an ebay auction, the car was local, but It was tatty and needed work doing, had been sat for a year. but ran sweet - just what I was looking for. Here's a few shots of how it stands now, I Will follow with photos and captions on progress throughout various stages over the last Few weeks.
Exterior
Schmidt Modernlines in Platinum Chrome 16x9J ET15 all round
Arches Rolled pulled and sealed
FK Street coilovers modified for extra camber up front
Full respray in LZ5T Europa Blue
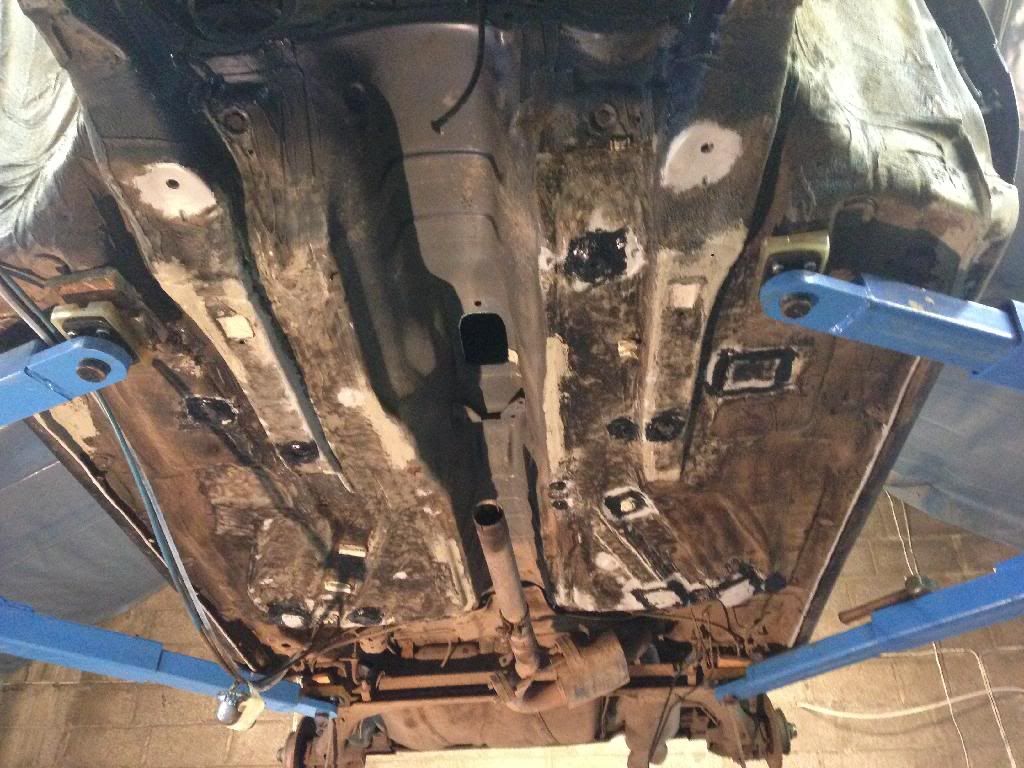
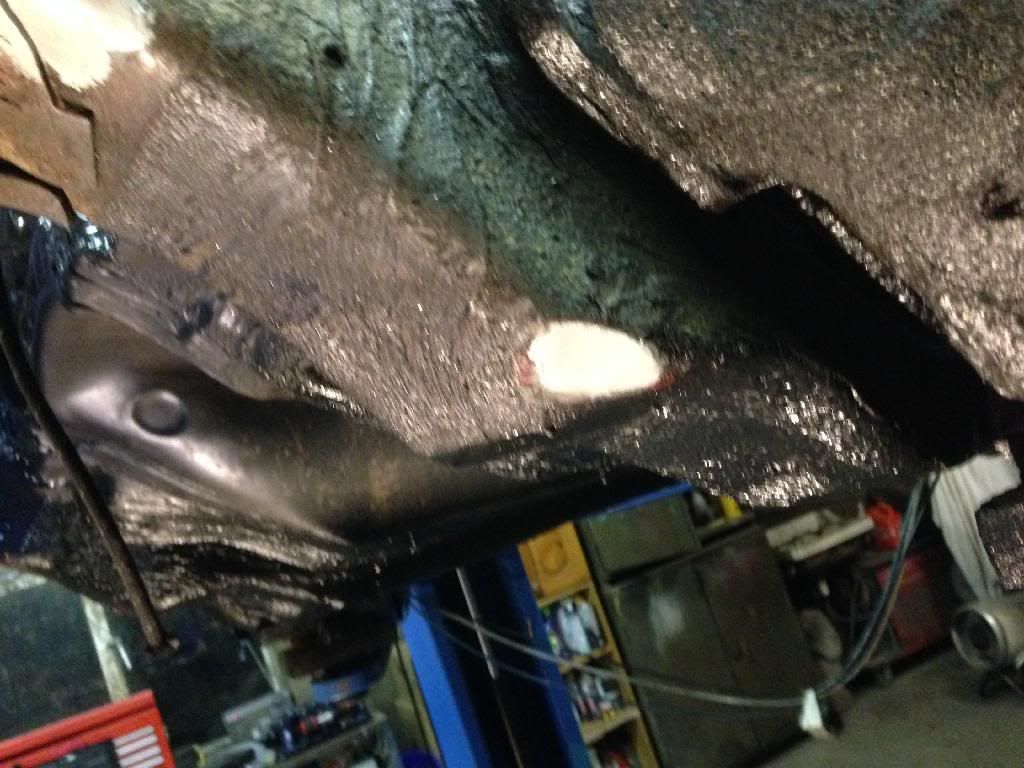
Underbody and all 4 arches fully cleaned and Schultz'd
Roof Aerial Deleted
Side Repeaters Deleted
Rear Badge Deleted
Rear Wiper Deleted
Rear box sections welded and smoothed
Full OEM Gti Trim Spec
Hella Red/smoke/red Tail lights
Hella Celis Headlights
US spec Rear spoiler with Brake light
OEM smoked indicators/blanks/fog lights
Polo 6N door handles colour coded
Black Magic Wiper arms
Black magic mirror bases
Black magic rear side window dividers
Black magic Front grille
Interior
Audi A3 8L Leather Seats Front & rear
Colour Concept Black ABC pillars
Black retrimmed headlining
Passat B3 Black Grab handles
3.5 cabrio BlackSun visors
Corrado Black dome light with W8 style red LED mood lighting
Highline Leather Door cards fully sound deadened
Carbon wrapped mirror blanks with tweeters Bonded in
Cabrio 3.5 Door Pull triggers
Highline Door pocket inserts
Mk4 GTi steering wheel
Cabrio 3.5/Anniversary Hybrid Clocks
Early vento Glovebox
VR6 lower glovebox
Fischer CD holder
3.5 cabrio centre pocket Rubber
Centre console cubby hole red LED mood lighting
Mk4 Gear knob
US spec centre console
US spec drivers editon handbrake
Full red LED switch conversion
White LED footwell lighting
Mk4 Door puddle lights
False alarm LED
+12V power outlet in glovebox
iPod connection in glovebox
Spare wheel delete, tyre weld added
Fire extinguisher in boot
Pioneer old Skool head unit
2x pioneer Components in front doors
2x pioneer coaxials 3 way in rear doors
2x pioneer 2 way 4" speakers in dash
Vibe black box mounted to carpeted false side in Boot
Dynamat throughout Car
Engine
Colour coded rocker cover
Heres how she stood before I started work, wings in primer, dents and rust everywhere, I have just re-trimmed the headlining in black headliner material From ASTrim, I would recommend them for anyone wanting to do custom interior trimming stuff.
Test fitting the modernlines one morning before work, arch work is defiantly needed.
The postman brought something that I needed quite badly a couple of days later:
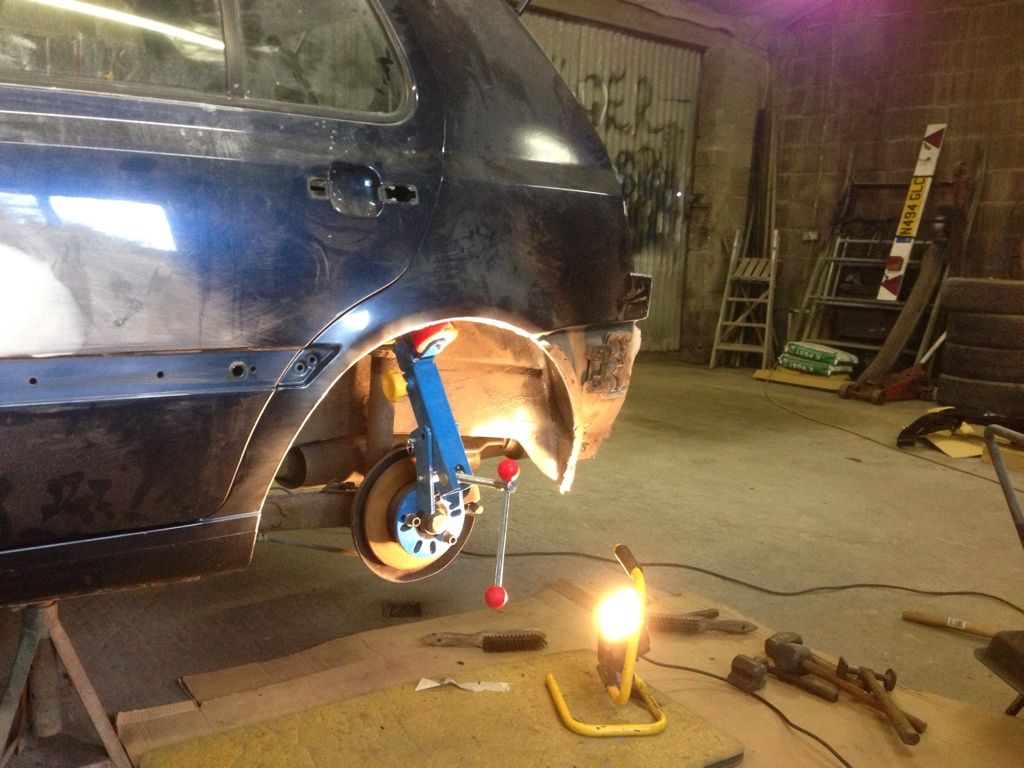
I then set about rolling the arches, digging all the seam sealer out and cleaning the lips right out, then giving them a few coats of Alu-Zinc for peace of mind. The roll didnt go as well as I hoped due to previous spot weld bodges, never the less I got there in the end, re primed everything and heavily Seam sealed the rolled lips so they don't rust back out:
Heres a shot of Test fitting the schmidts again after Rolling with arch trims in place, I have decided this was The only way to pull these wheels off on a 5DR, happy with the clearance now and hopefully the old Bill will be too .. Haha
I Started fitting up the A3 seats, half an inch had to be hacked off the bottom of the subframe, Rollers skimmed and spaced out with washers. and the bracket was cut and modified in the car to accept the New seats. The rears needed a custom mount making and welding in offset to the mk3 mount for the centre and two tabs welded to each turret to secure the seats back properly, took almost two days of tinkering to get them right:
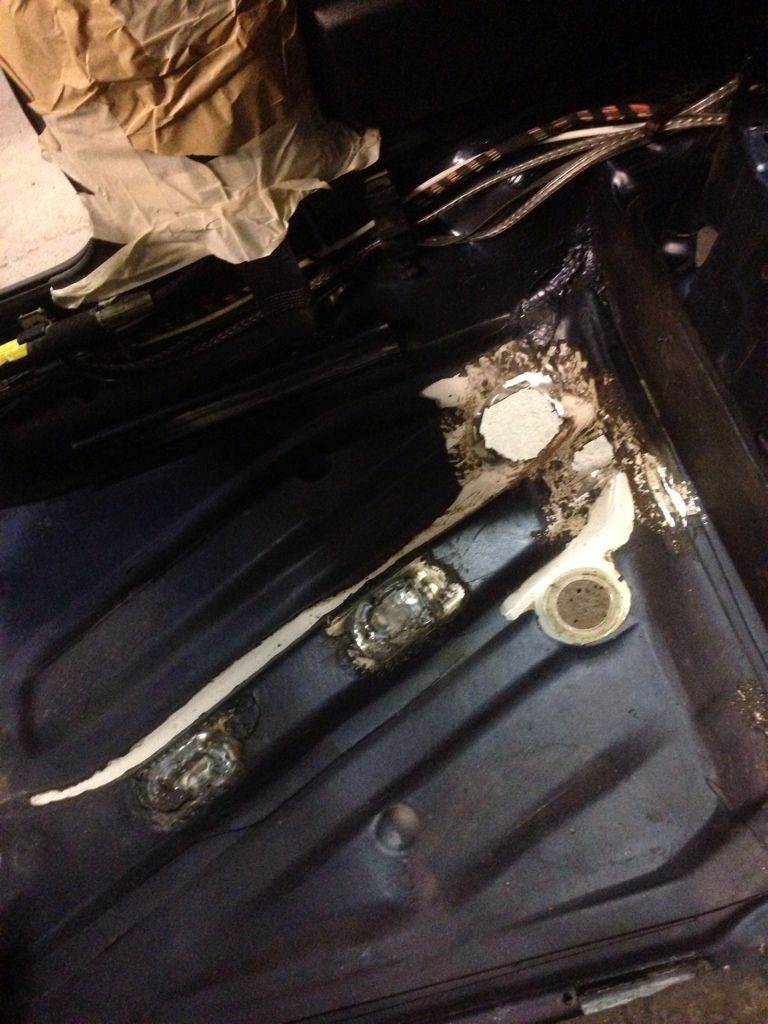
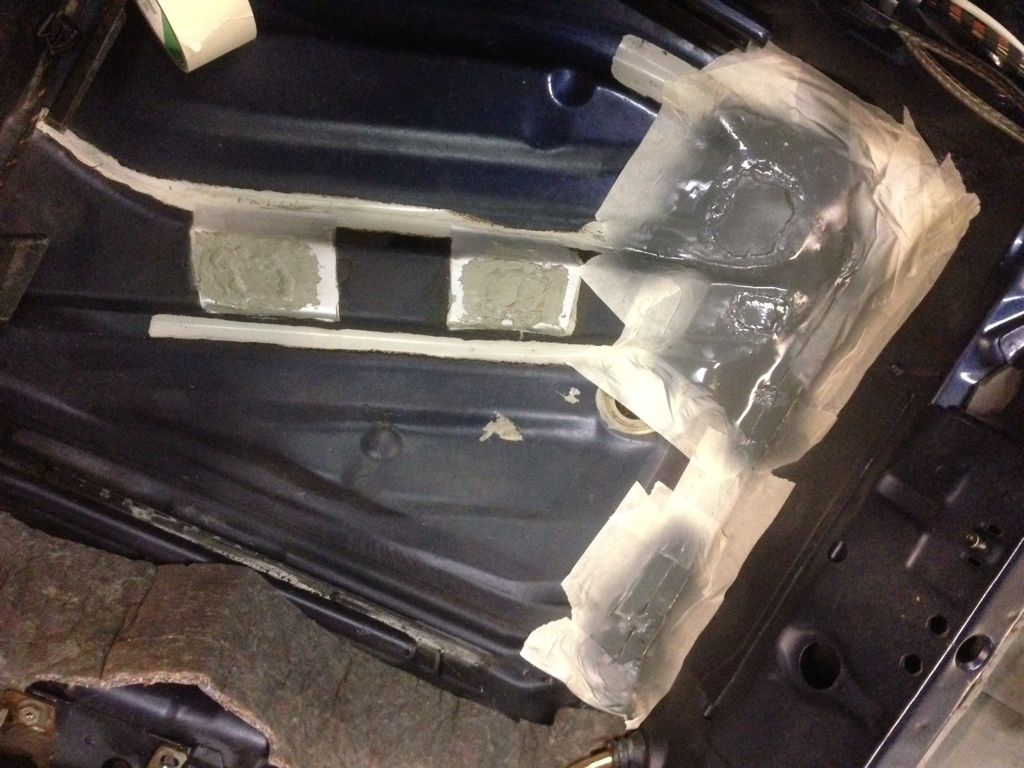
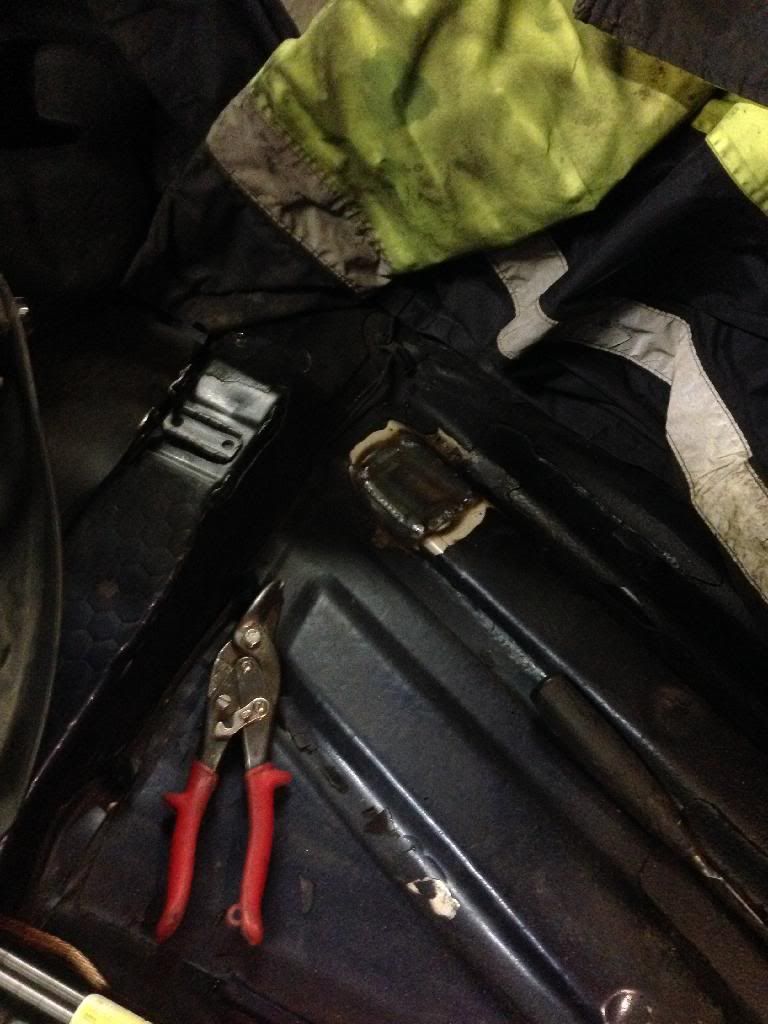
Next up was to Address the dreaded Tinworm I have been avoiding for months - I stripped the interior and started poking around with a screwdriver, finding 9 areas in total that needed Cutting out and plating, All But two Grommets, Fuel line Clips, brake Line Clips, you name it, it was rusty! Oh the joys of owning a mk3! everything was then primed and seam sealed again to keep moisture out in future.
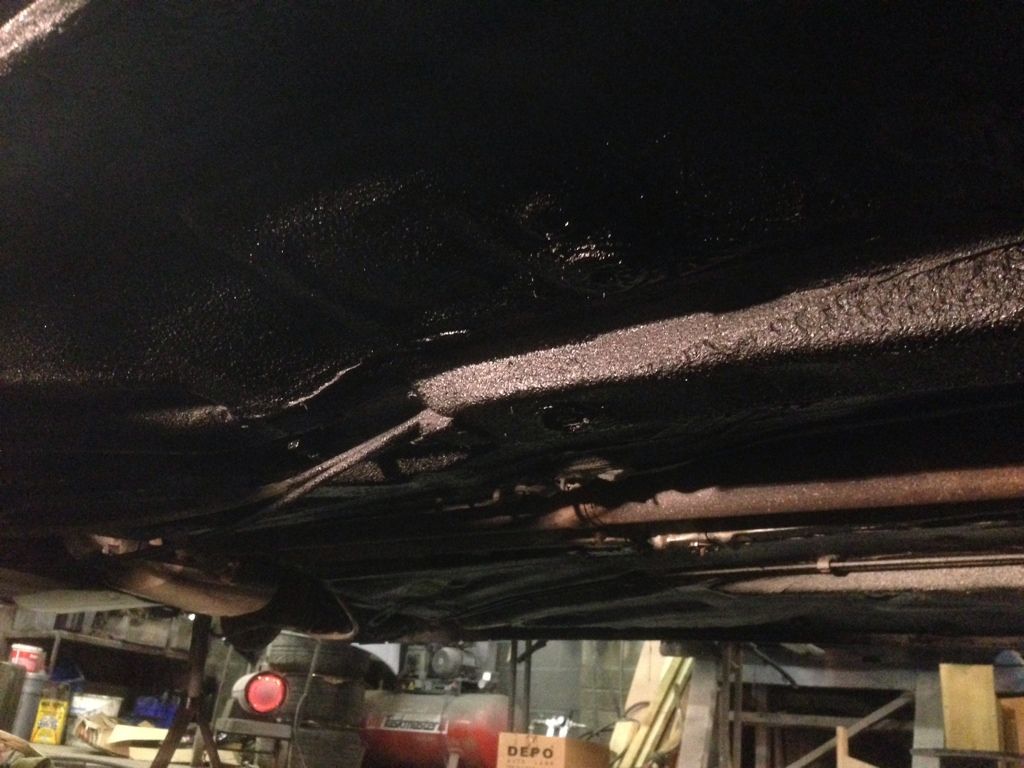
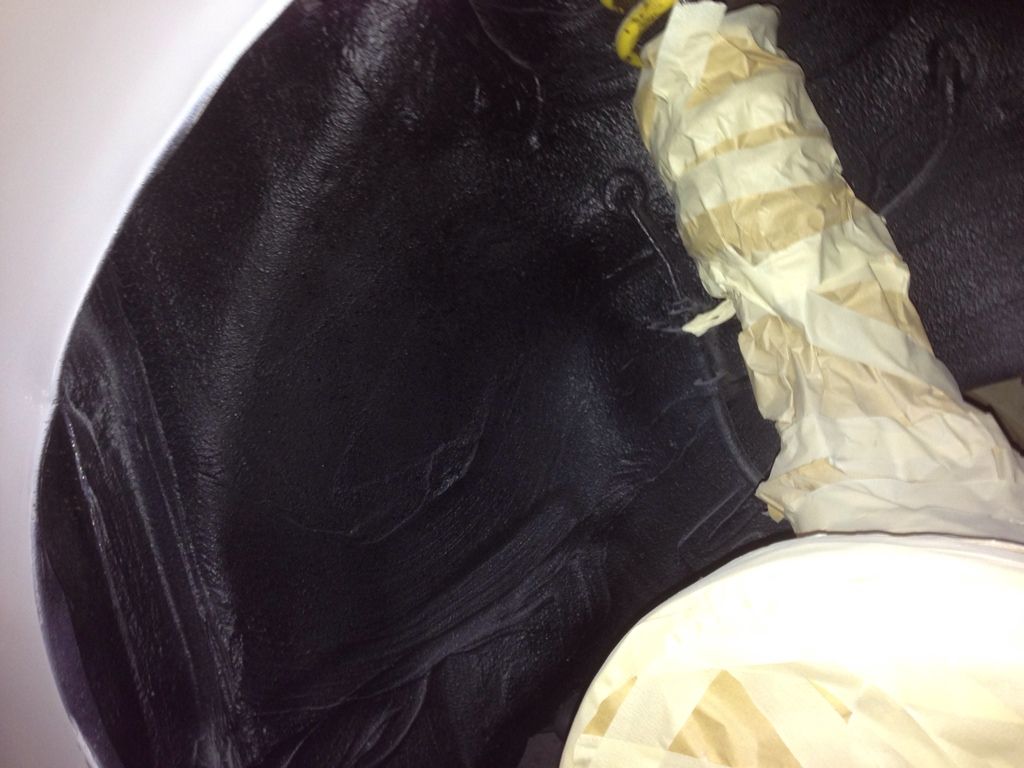
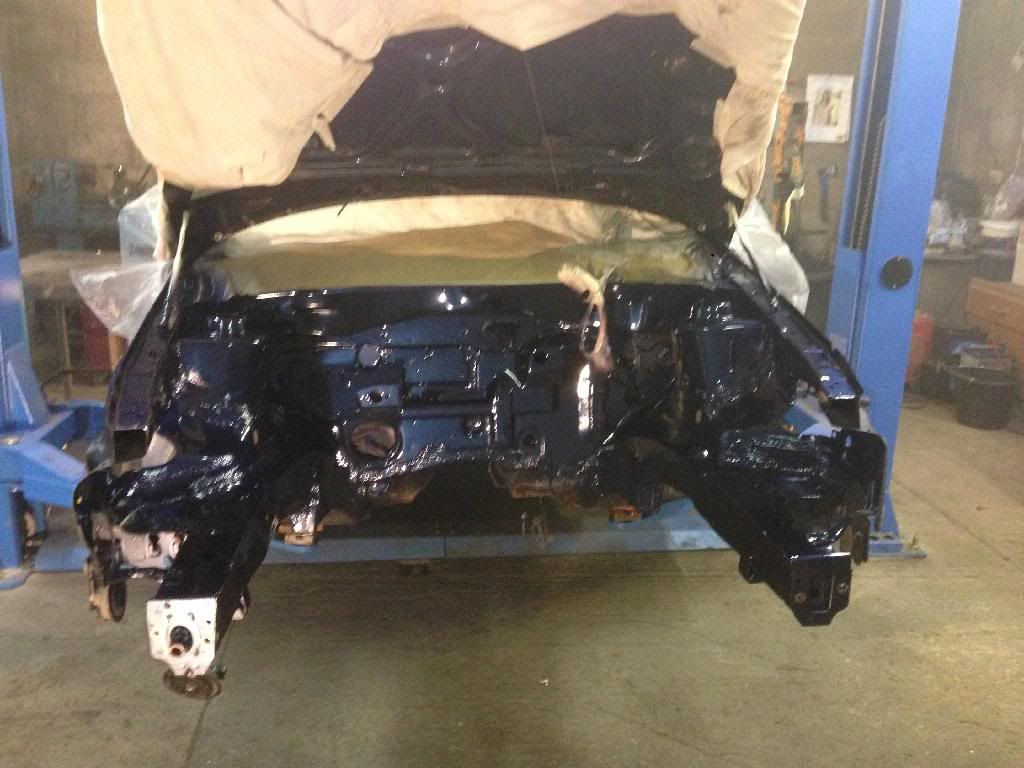
With all the welding work done on the Floor, and a couple of plates on the underside of the sills, I set about re-Schultzing the entire Floor of the car and all four wheel arches. This was probably the worst bit of the rebuild, I spent two days just cleaning all the old crap off and Zinc priming any bare metal that was on show, from the front of the car right the way to the Back, I made sure I didn't miss anything! Here's a few shots after I Schultz'd everything, got through 4 cans of 3M stuff in total!
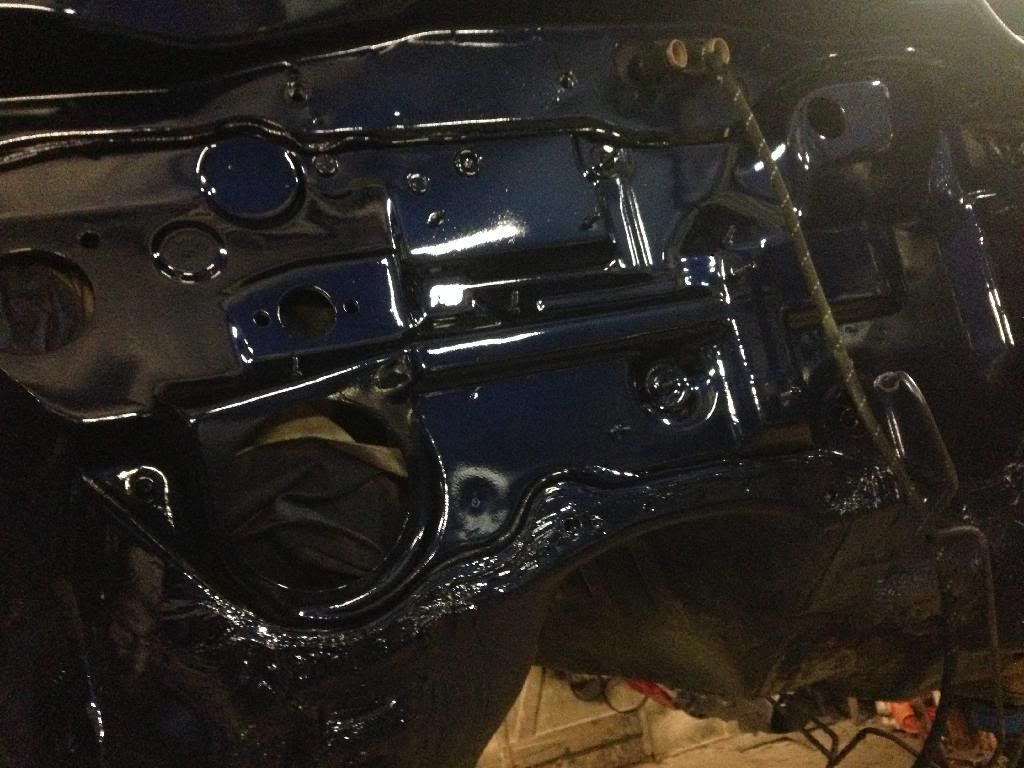
Next Job was to start On the bodywork, Welding the Badge and wiper hole up, and welding the box sections underneath the lights, I've always had a problem with that annoying OEM seam line the Mk3s have, so it had to go! The dents down each side and on the bonnet were filled then skimmed with polyester putty to ensure a smooth pimple free finish that will be slightly flexible. All went smoothly and I was impressed with the results:
[IMG]http://i1276.photobucket.com/albums/y480/aaron1492/43975C7C-1875-4FC1-BCC1-578BA4E6CCC4-1543-
000001A4CD232E52_zps99dbd70e.jpg[/IMG]
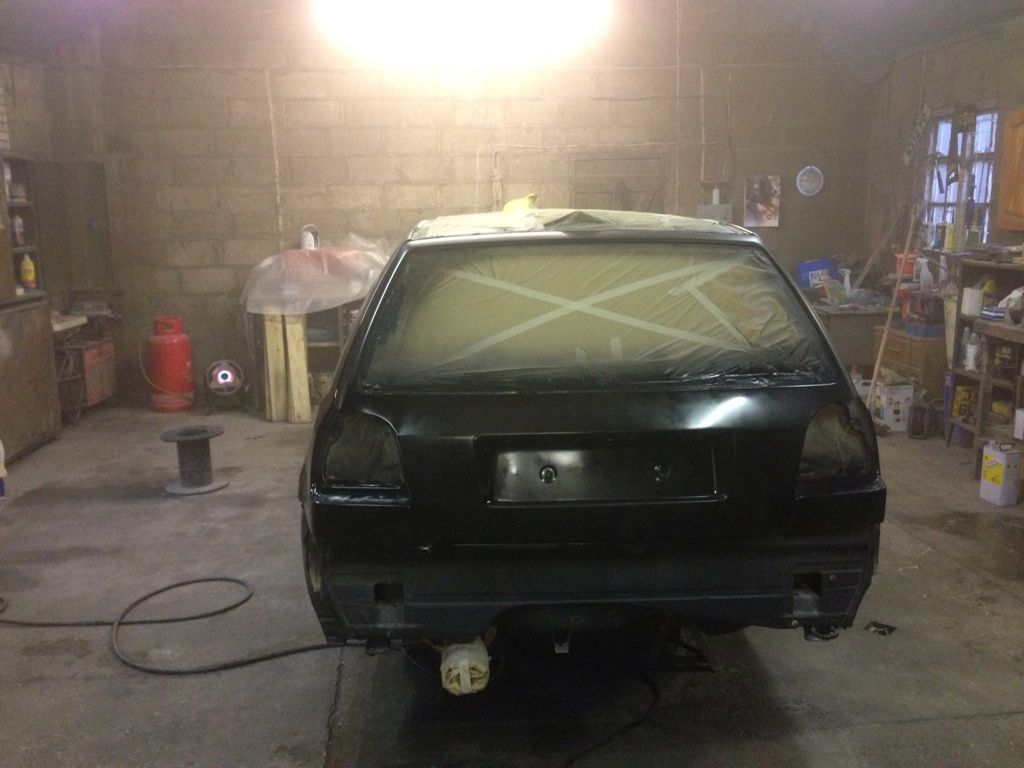
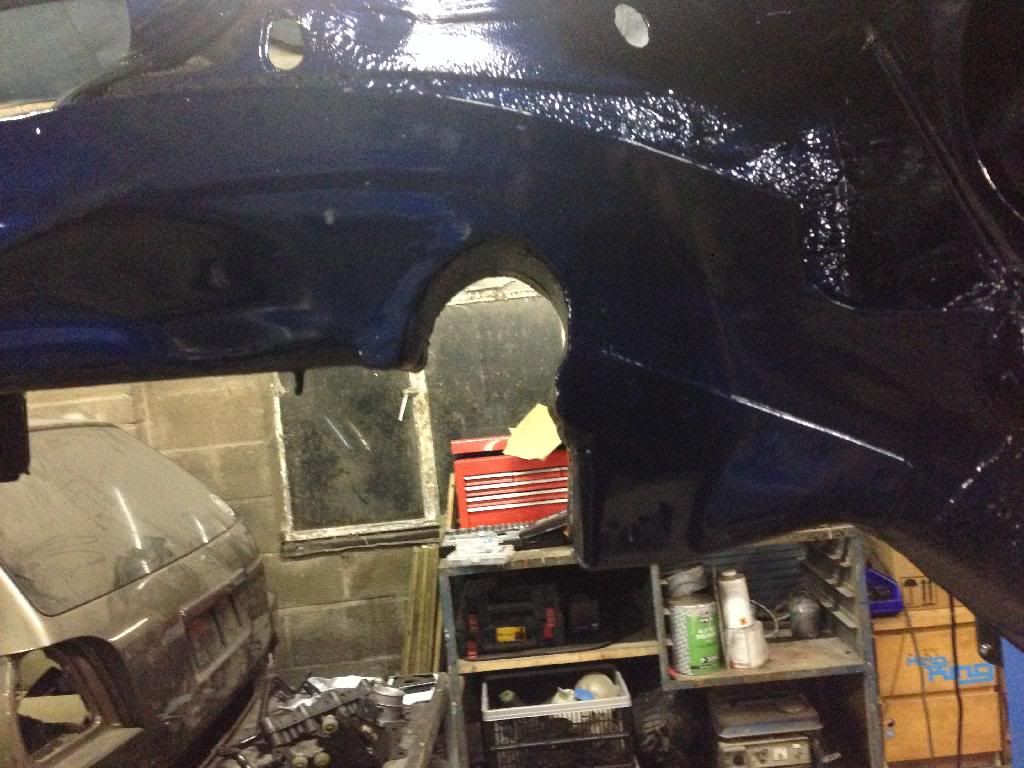
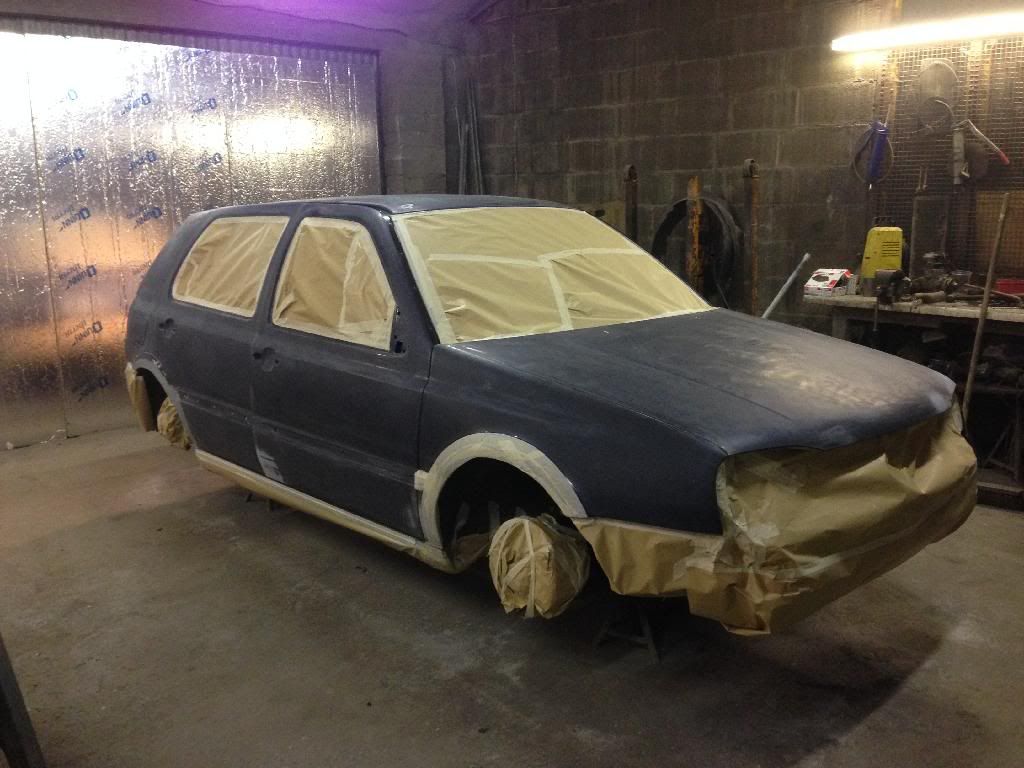
After rubbing it all back and scuffing up the whole car I removed all four windows and seals, The roof seals, door handles Etc and any other plastic or rubber trims that would get in the way, and I wanted to minimise hard Lines as much as possible, so masking up the windows was a definite No go area - I wanted a proper finish and was prepared to go the extra way to achieve this. I didn't bother removing the doors and doing the door shuts as its only a Daily, and the shuts were in good nick anyway, I bought Norton soft body Foam for all the doors to eliminate hard lines when spraying.
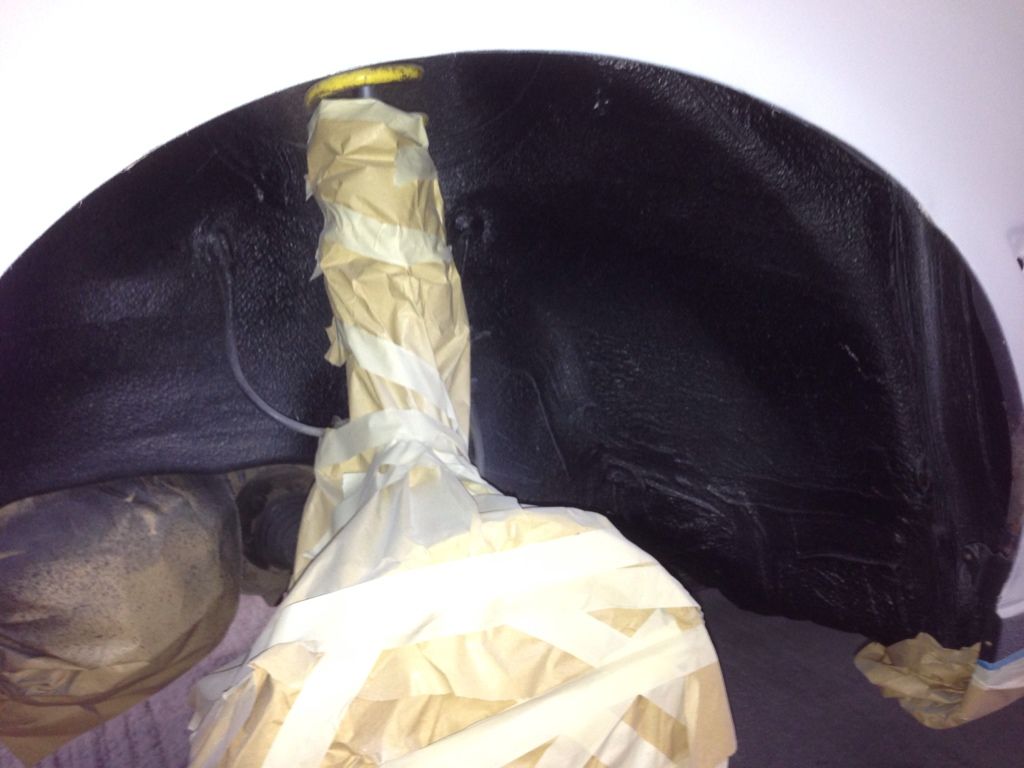
Next up I began masking the car up for Primer, my mate Will came over for the weekend and we managed to waste the best part of a day just masking everything up, i Didnt want any primer to Find its way where it shoudnt so a thorough job was completed. The Roof was masked as this will be painted afterwards when the Car is on the ground, I had planned a black magic roof but didnt have enough paint to do it properly so opted for a blue roof
The Next day was Primer day, the workshop was brushed and washed out, to remove as much dust as possible. I used a standard 2:1 primer By MaxMayer, three coats in total were needed for the desired finish:
When the primer was fully dried a day later, a guide coat was laid ready for flatting back:
Polo 6N handles test fitted:
Heres some pictures of the shell all flatted back with 600G after guide coating, spot putty was used on all imperfections found in the surface of the panels, Not a Job I would like to do everyday! :P
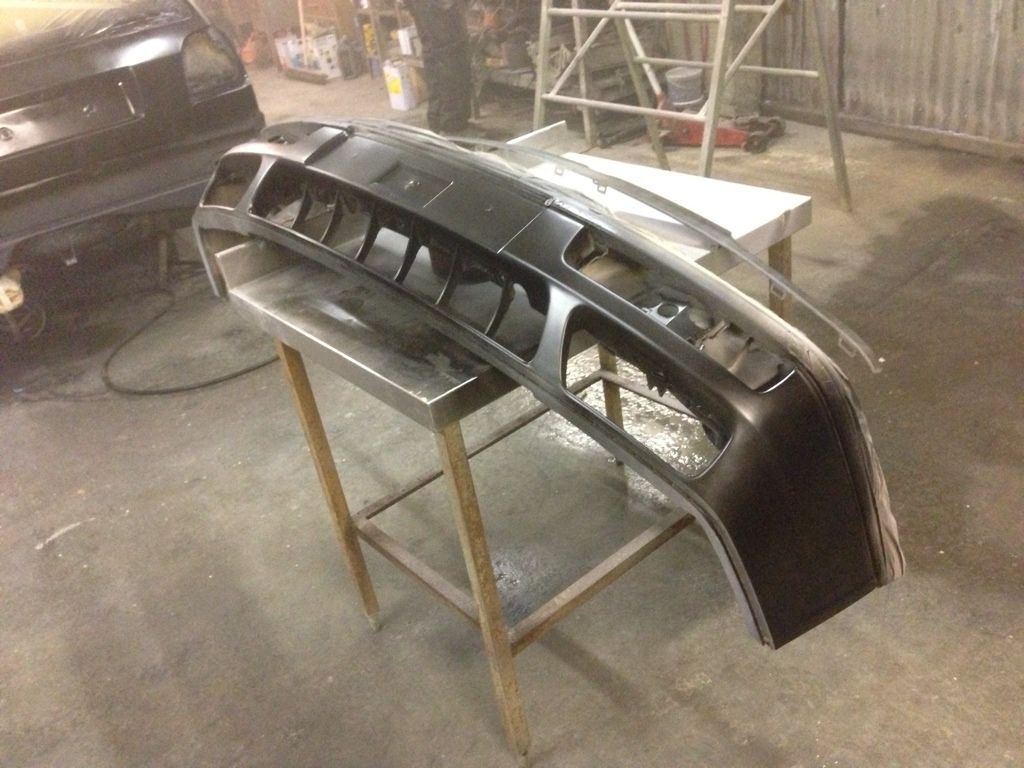
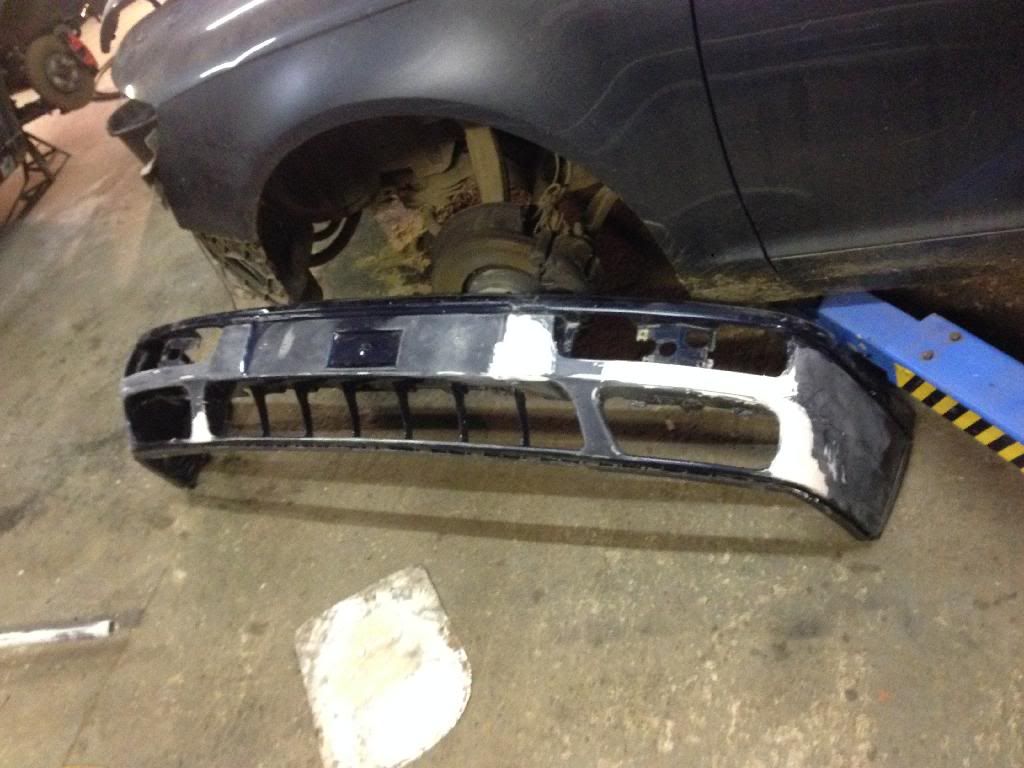
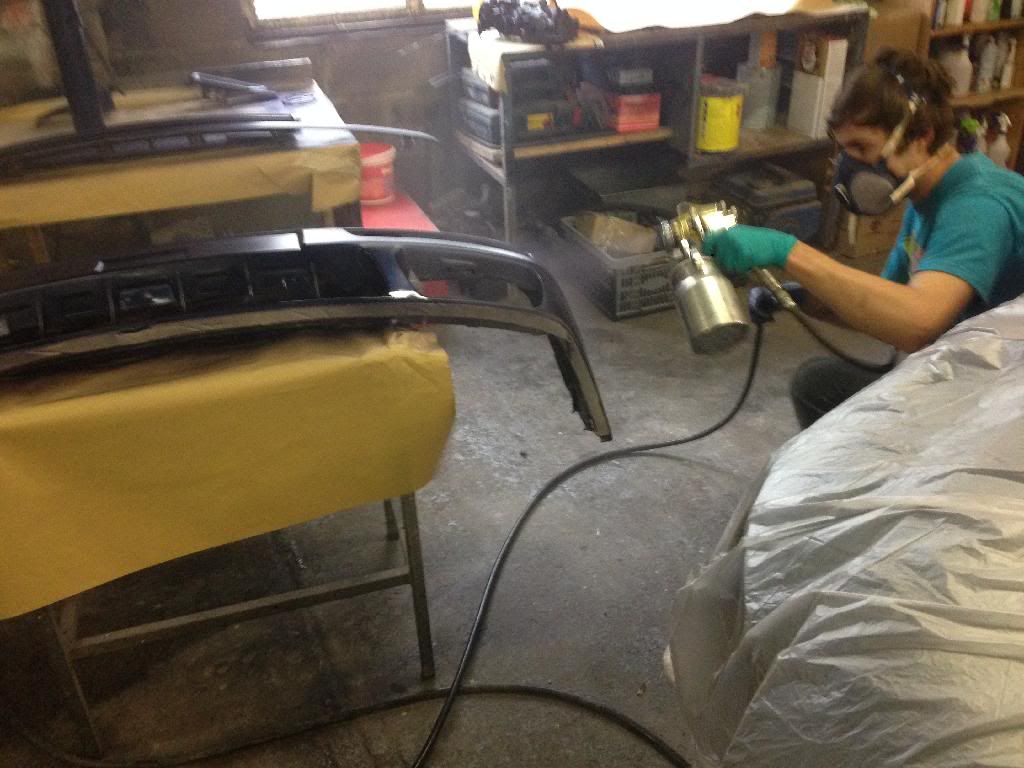
I also did some work on the Bumpers, door handles, and grille, filling all imperfections and flatting them back ready for paint:
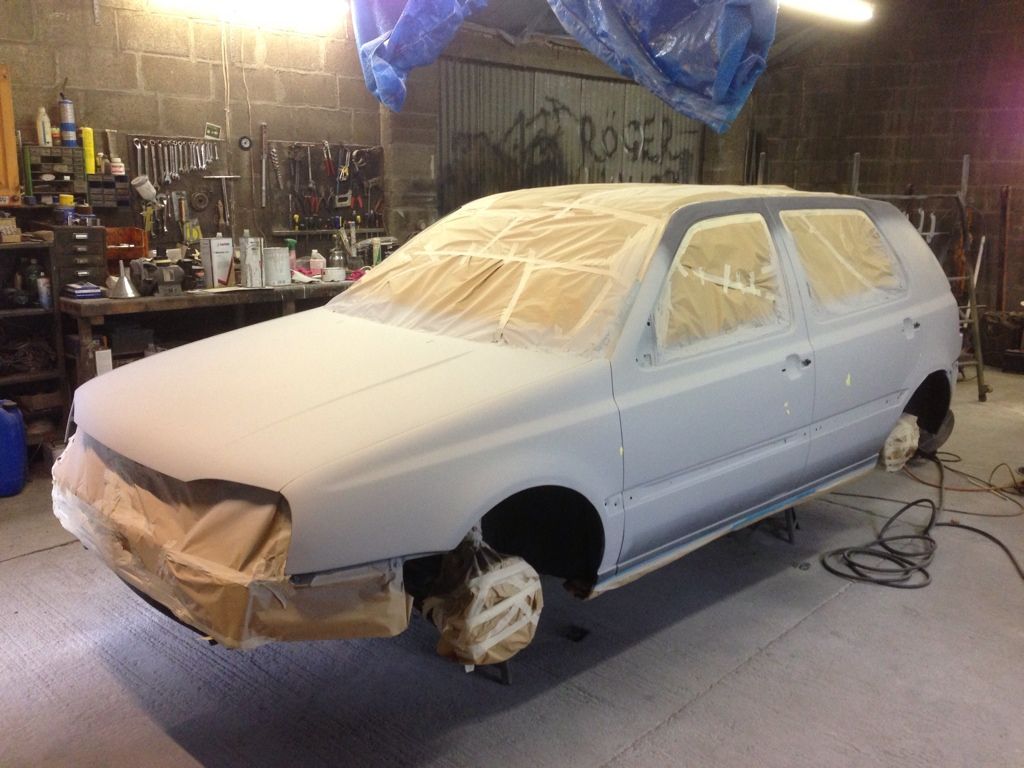
Next up was a Ground coat. I had some "outrageous" Black ground coat in the cabinet and decided this would be put on prior to paint, really pleased I did this as it has complimented the colour really well and made it alot Deeper than The colour over Primer. The guide coat was left for 15 minutes to go tacky before the Base colour was Laid on. I was using one heating oil burner and one Gas space heater in the workshop to get it nice and hot in there, not ideal But hey I Don't have a booth nor oven!:
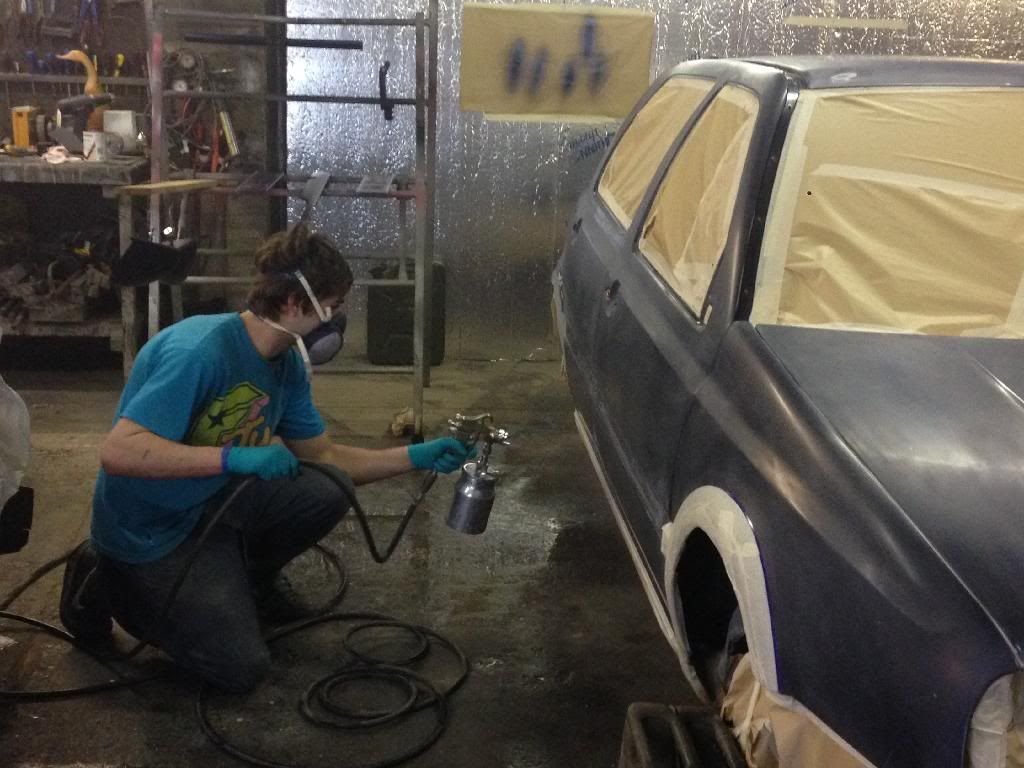
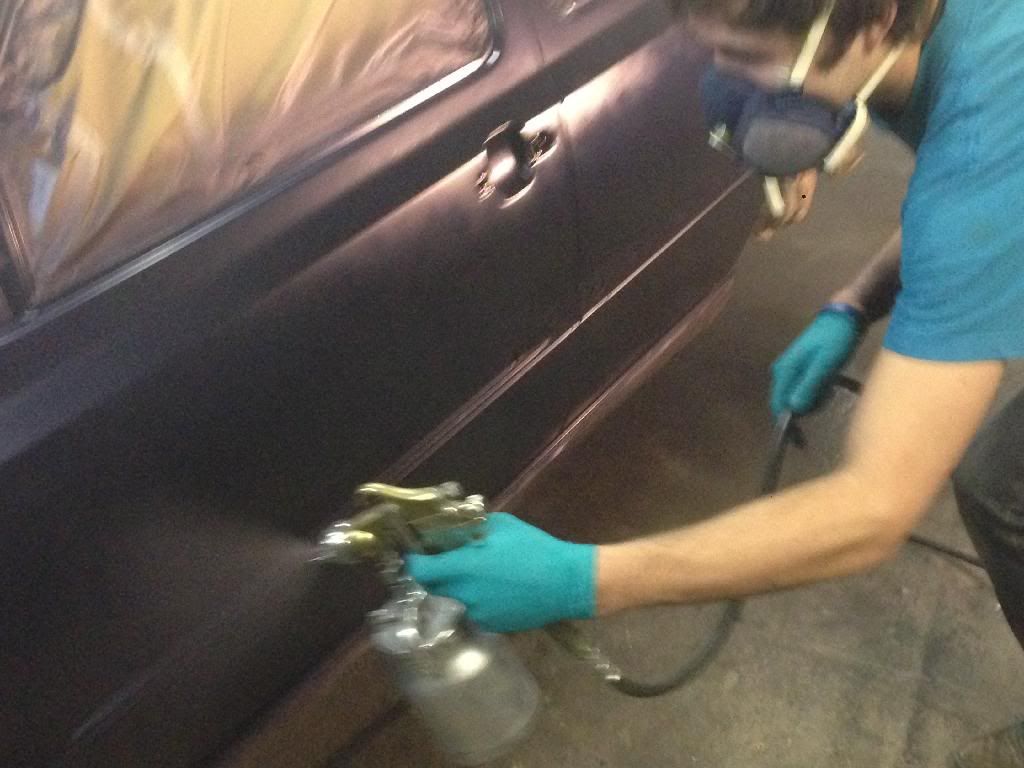
Then straight on with the Colour. PPG Paint, mixed with Mayer Thinner and a little Bit of U-Pol Rocket to speed the Drying process up, sprayed through a standard issue Sealey Gravity fed gun with a 1.8mm needle, as you can see in the photos the air is rather hazy after a few coats, it got to the extent of not being able to see anything!
The paint was left for 20 minutes and I went and Got some Air, had to open the workshop Doors much to my discust to clear the dense haze of paint thinner in the air! I was Wearing a new 3M 4279 mask and a pair of goggles, and a one piece white suit
then it was straight on with the lacquer, I opted for the cheaper HB body auto Clear 2:1 as everything else was mega money! This was also mixed with rocket and tested on the bonnet first! Disaster struck!! silicones started to fisheye on the bonnet, so i very swiftly mixed a dash of MaxMayer anti silicone in with the lacquer and re applied the coat - it seemed to do the trick, panic over and a big sign of relief, the imperfections will be polished out afterwards with the mop. The rest of the car and bits was a joy, no funny reactions luckily. Three heavy coats of lacquer were applied to hopefully achieve a deep glassy Finish In the panels:That was enough for Today, I left the space heater on till around 10PM to ensure the paint and lacquer had all begun to set properly. I'm really impressed with the results, not doing alot of paintwork in the Past I'd say I'm a natural! Found two tiny runs on the whole car, and more annoyingly a mosquito fossilised into the bonnet - typical!!
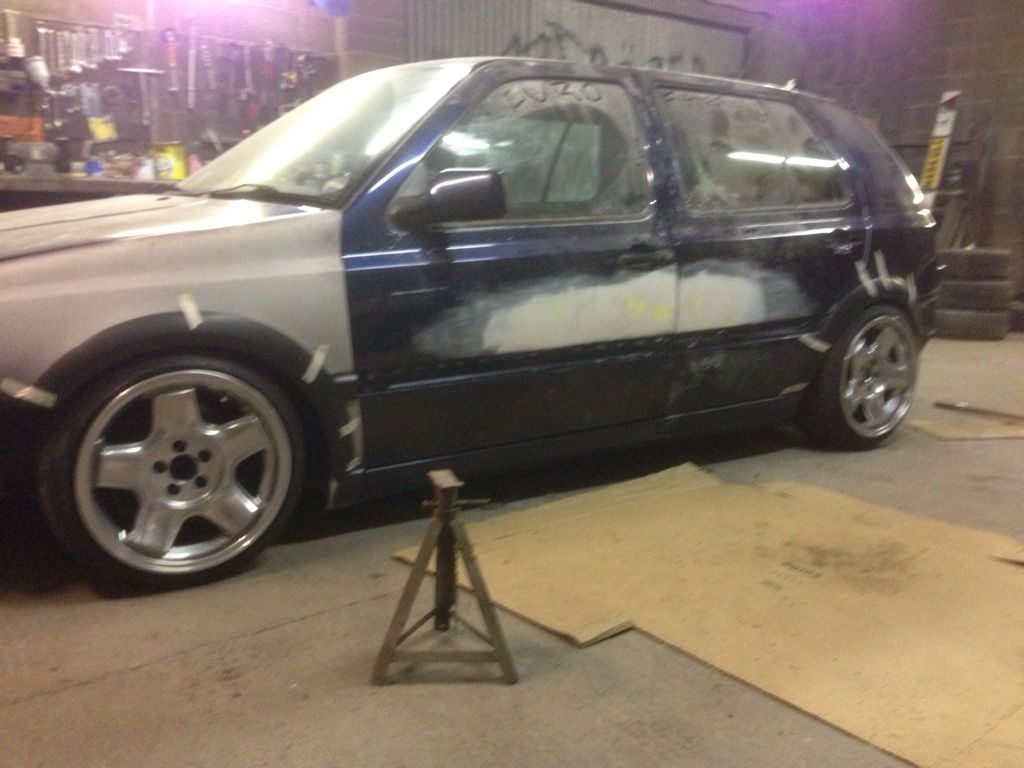
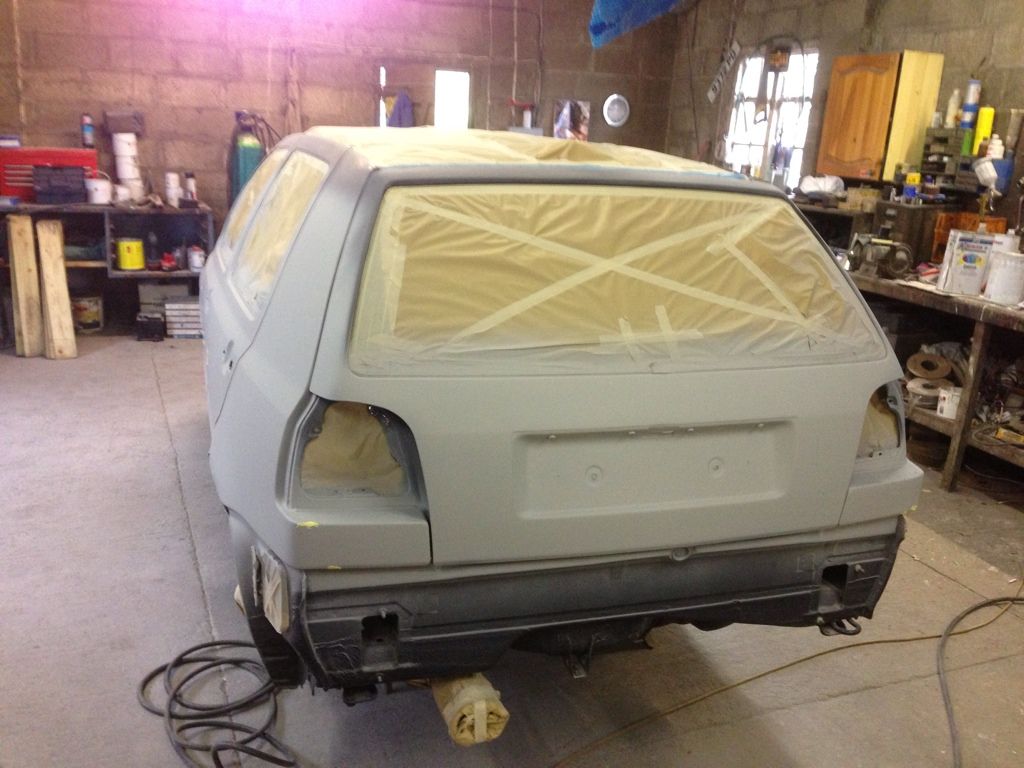
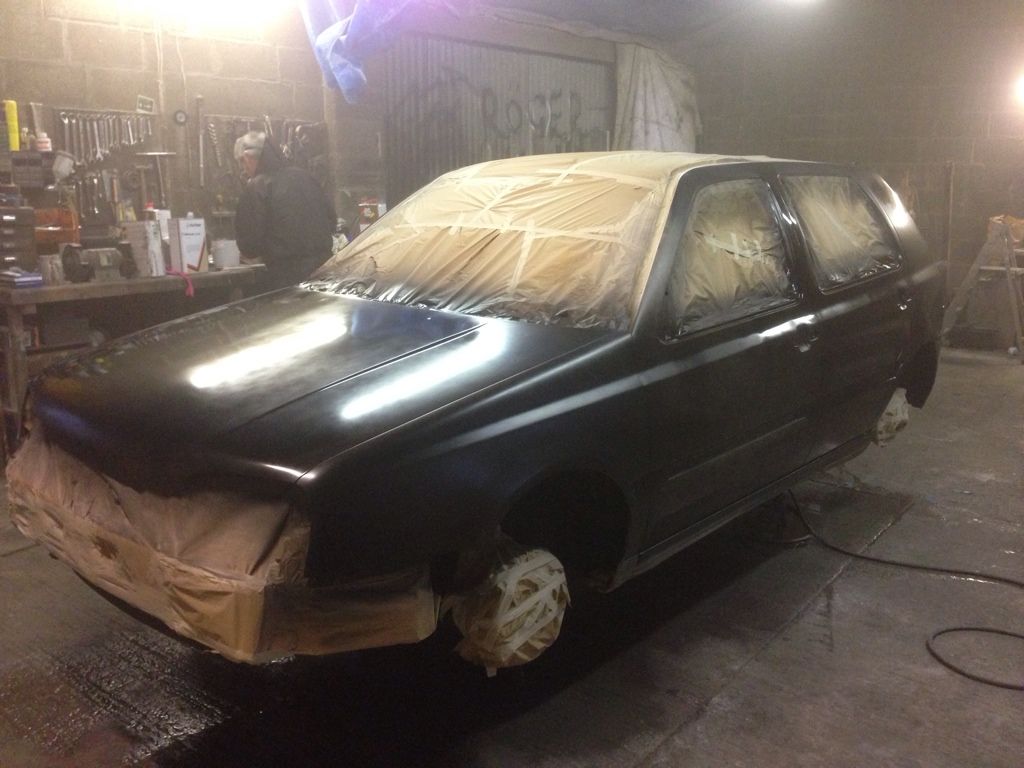
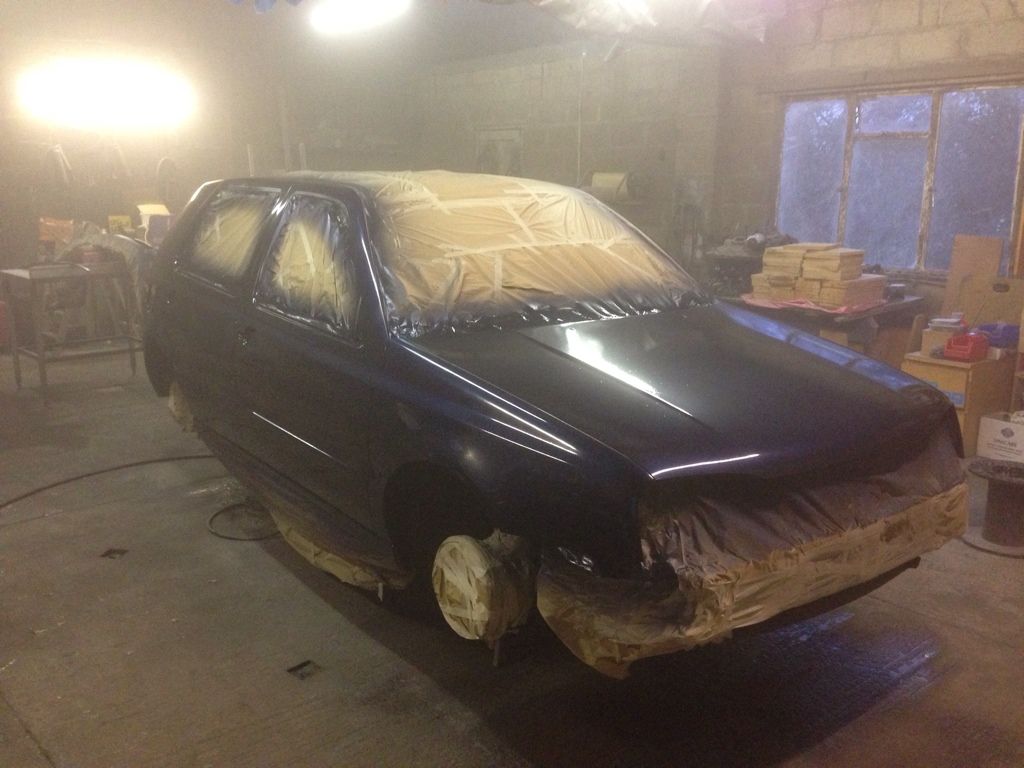
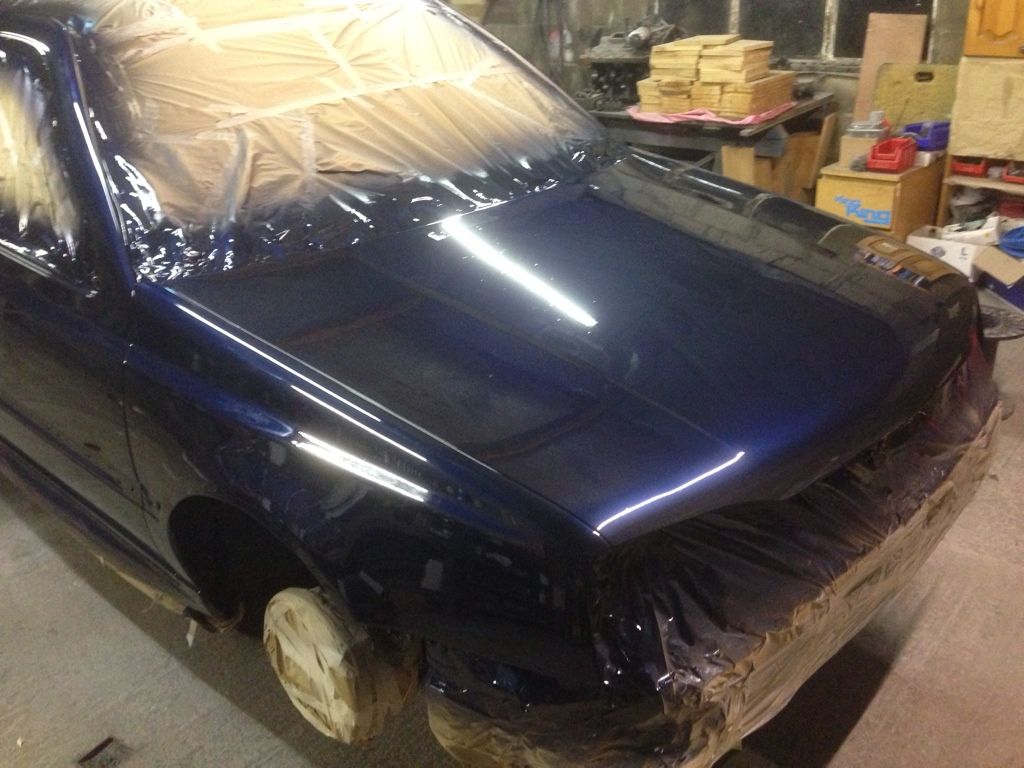
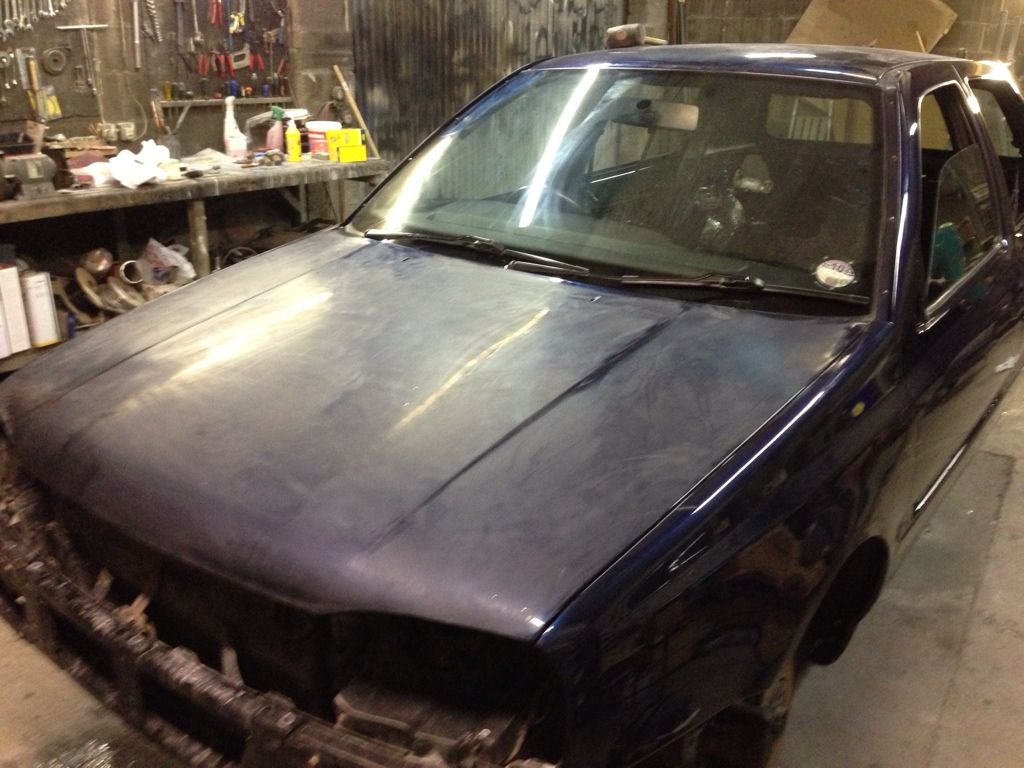
The car wasn't touched for a few days to let it all harden off, even after three days it was still tacky! Here's a shot of the car ready to be fitted back up with my mate in the background, hands in pockets as usual!!
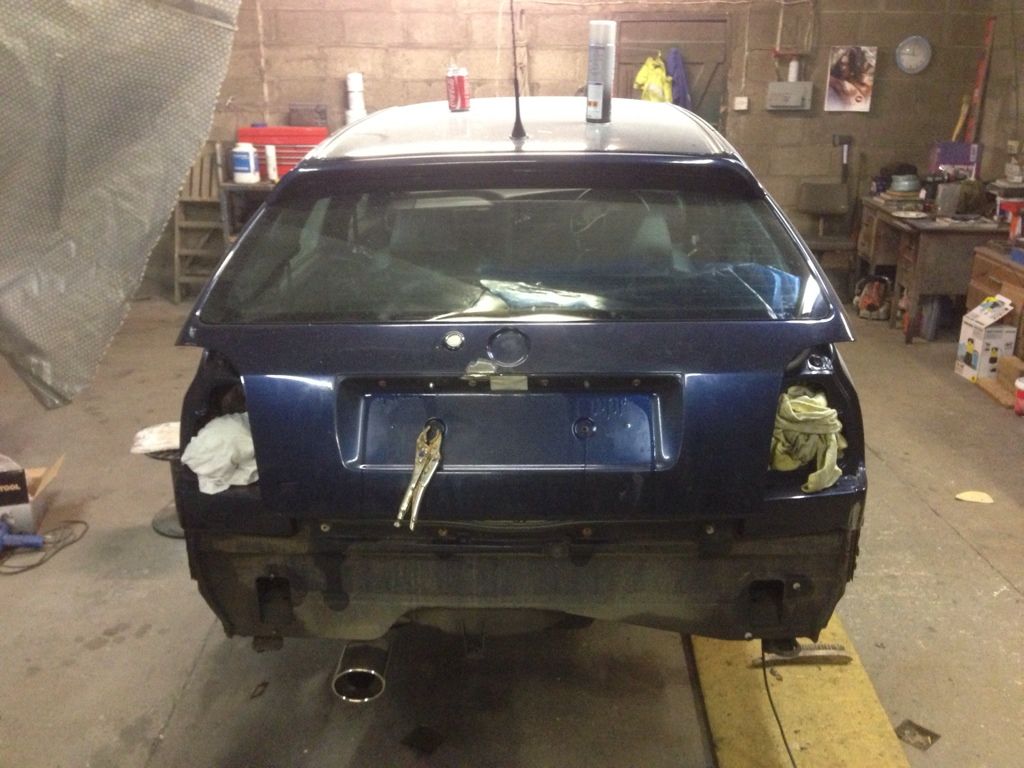
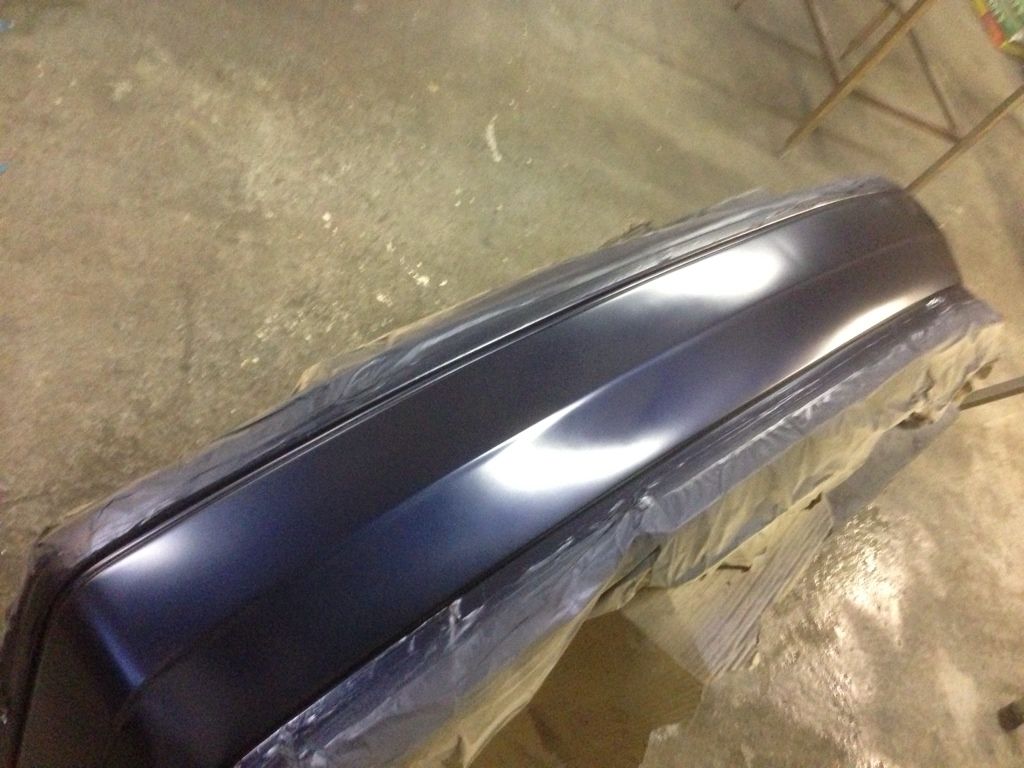
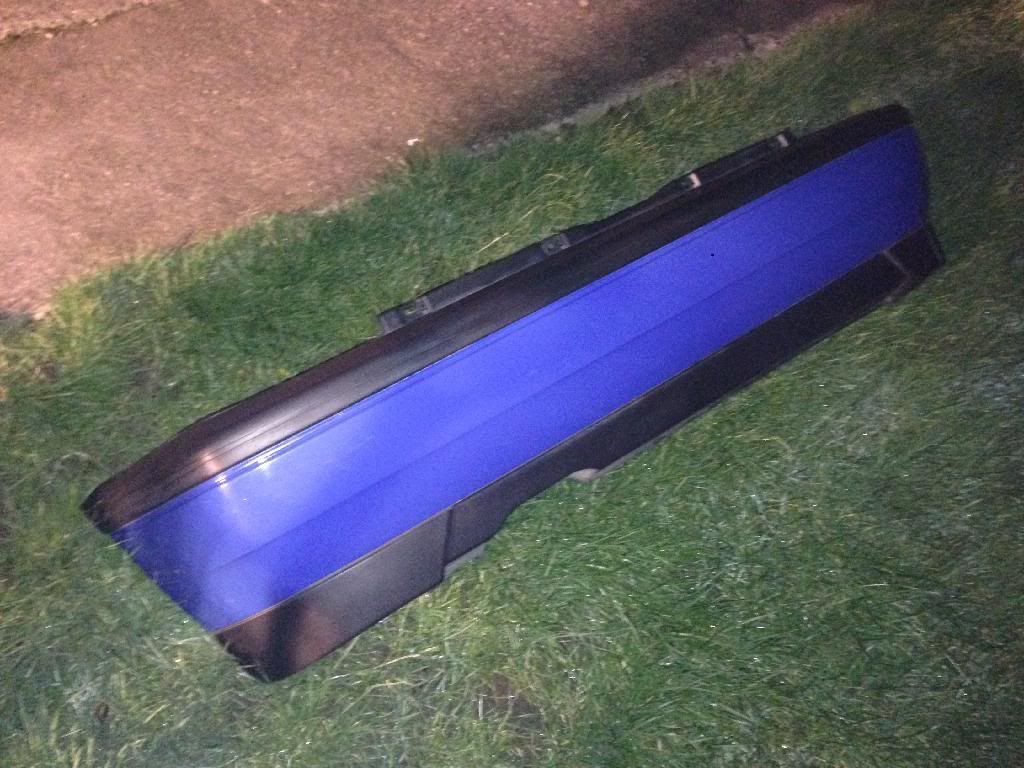
And a shot of the front bumper built back up with brand new smoked indicators/reflectors, and a pair of Home brew smoked foglights. A badgeless grille will be purchased and painted in the near future.
A shot of the interior beginning to come together, with a US console and E-brake fitted up:
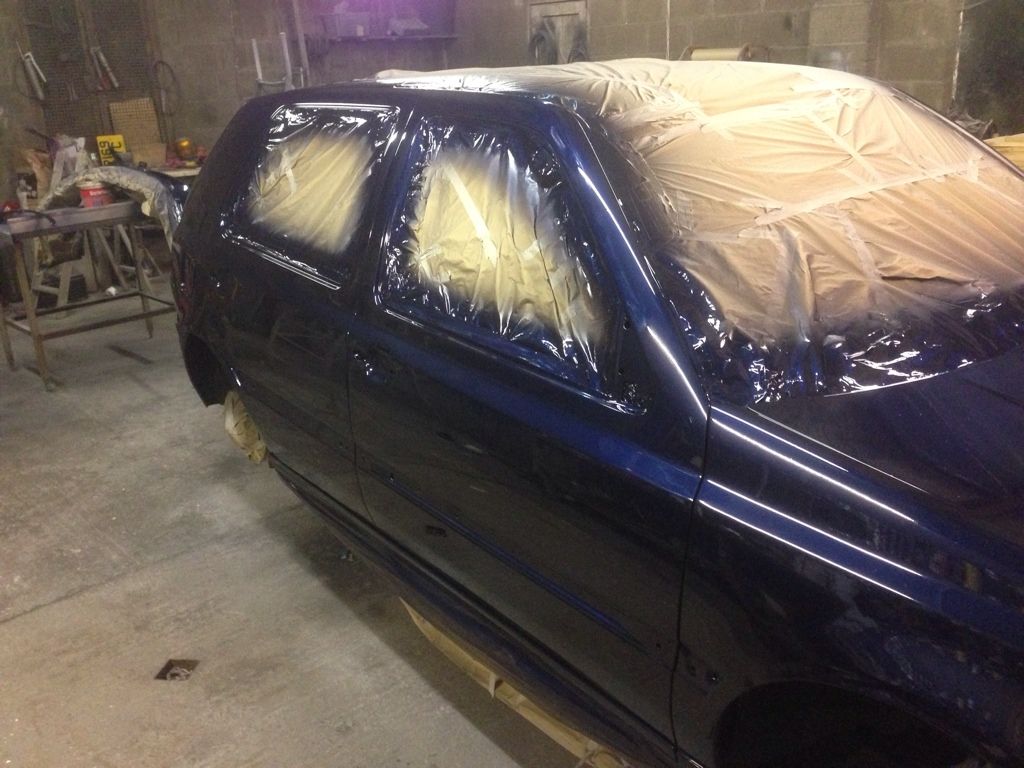
The windows and seals were all cleaned and re-fitted before flatting off:
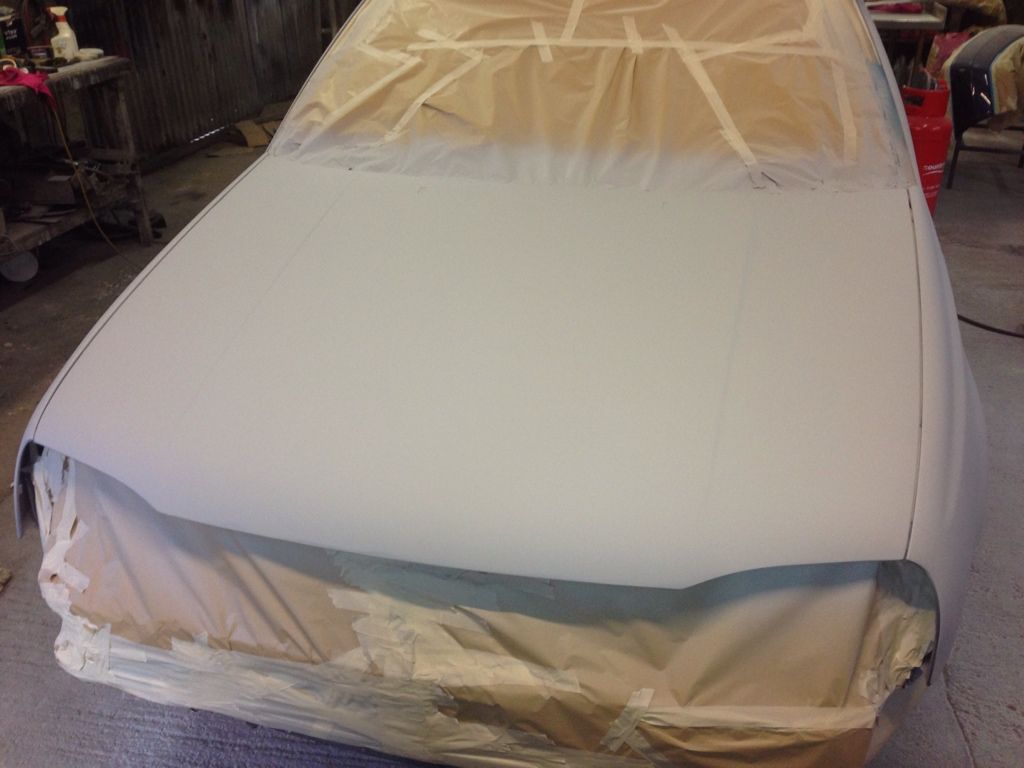
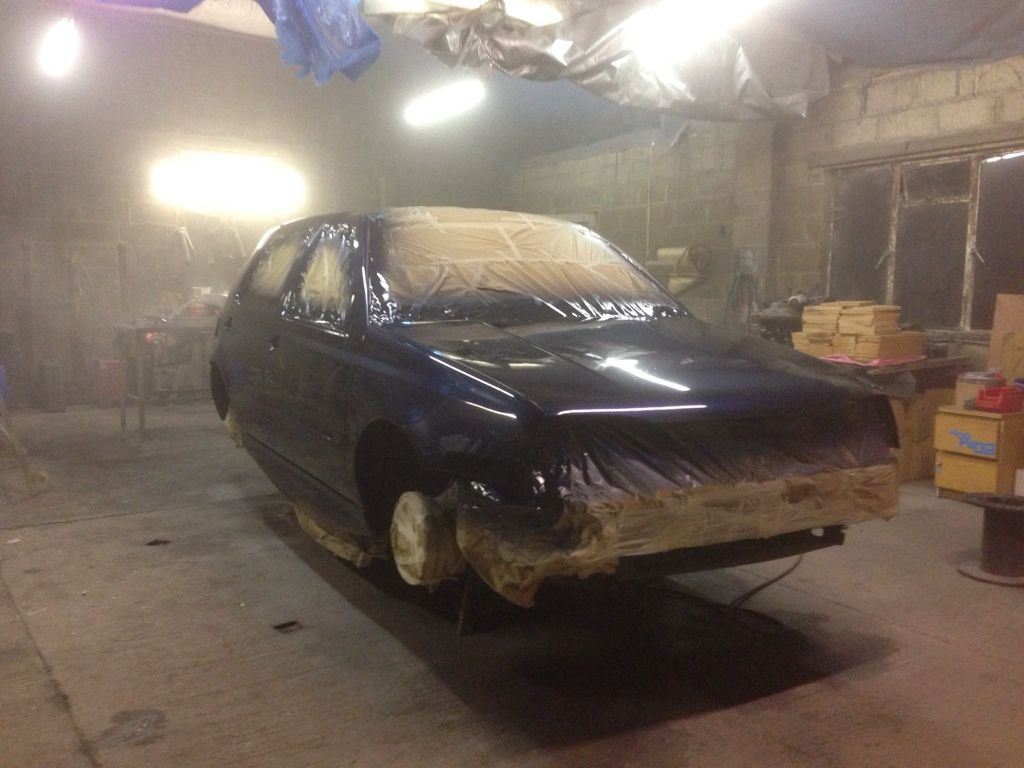
After a Week of Drying time I hit into the paintwork with 2000G, flatting the whole car off ready for machine polishing. The couple of runs were flatted out as was that bloody mosquito:
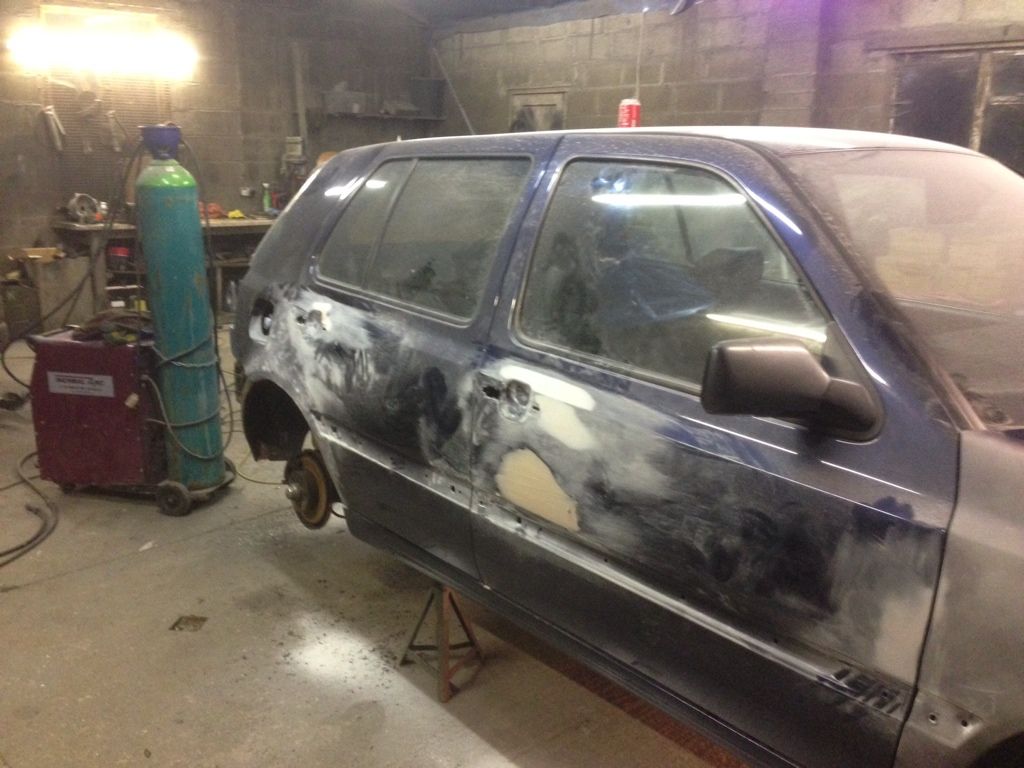
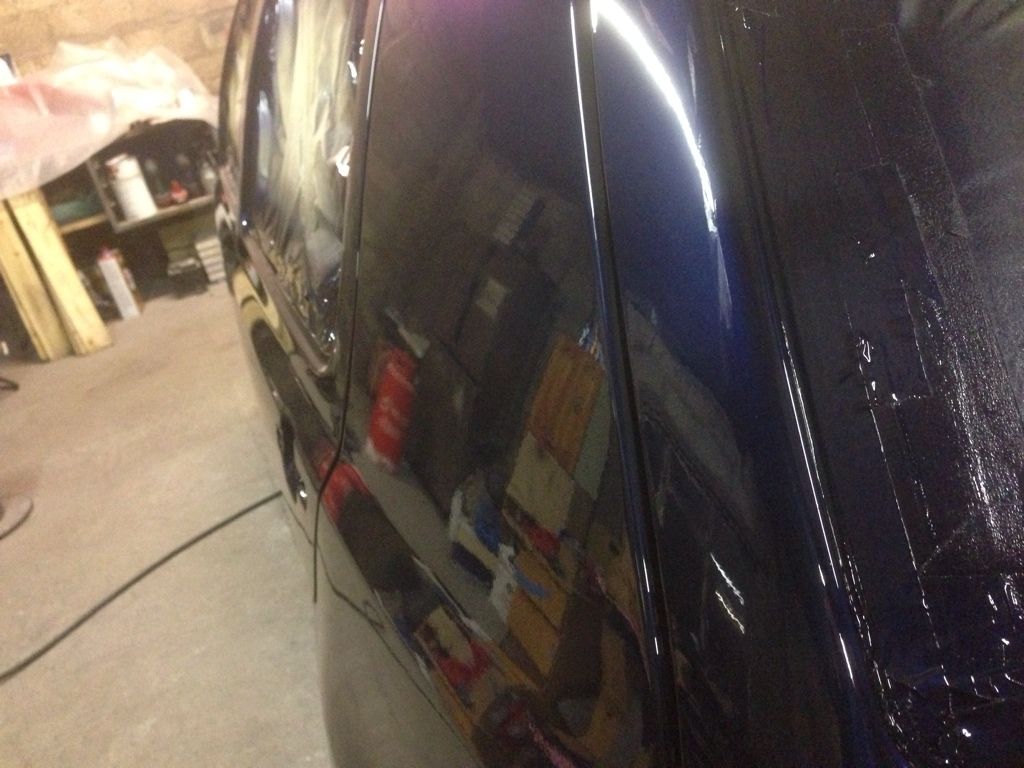
After flatting the car was washed thoroughly with a light fairy liquid solution ready for machine polishing. I used a Sealey rotary Polisher, farcela G-mop pads, and Farcela G3, G3 fine, then G3 finish for the final gloss. I was really impressed with the results but still not 100% due to the lacquer still being really soft I had to go careful in certain areas, here's a few shots of it after polishing
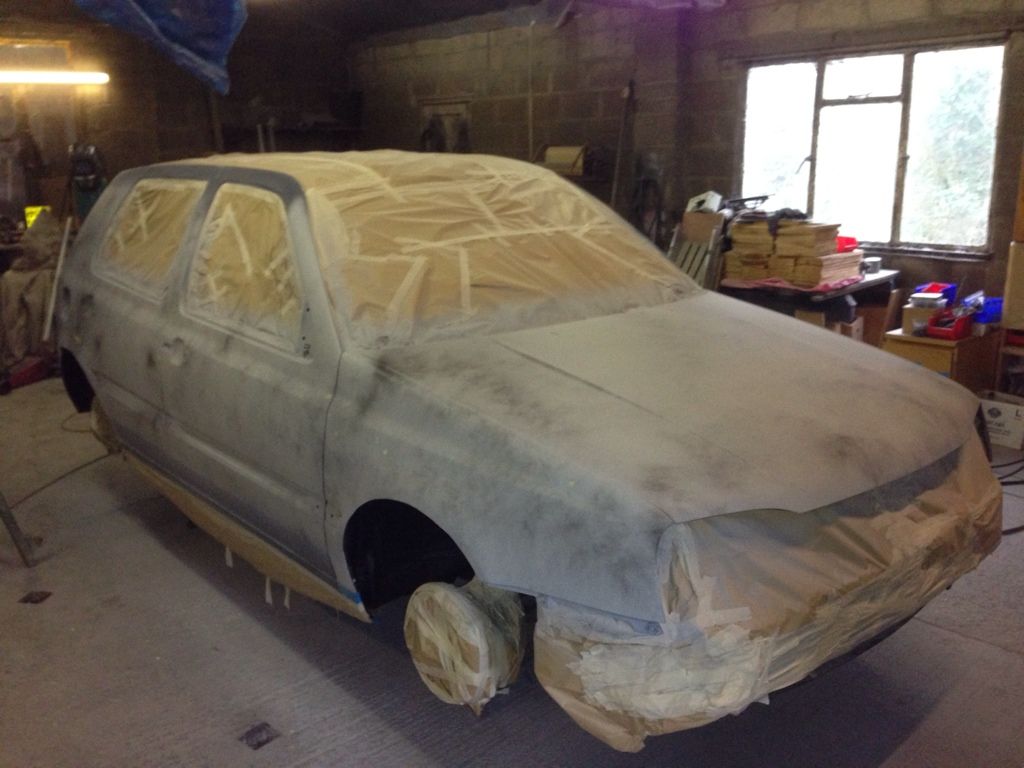
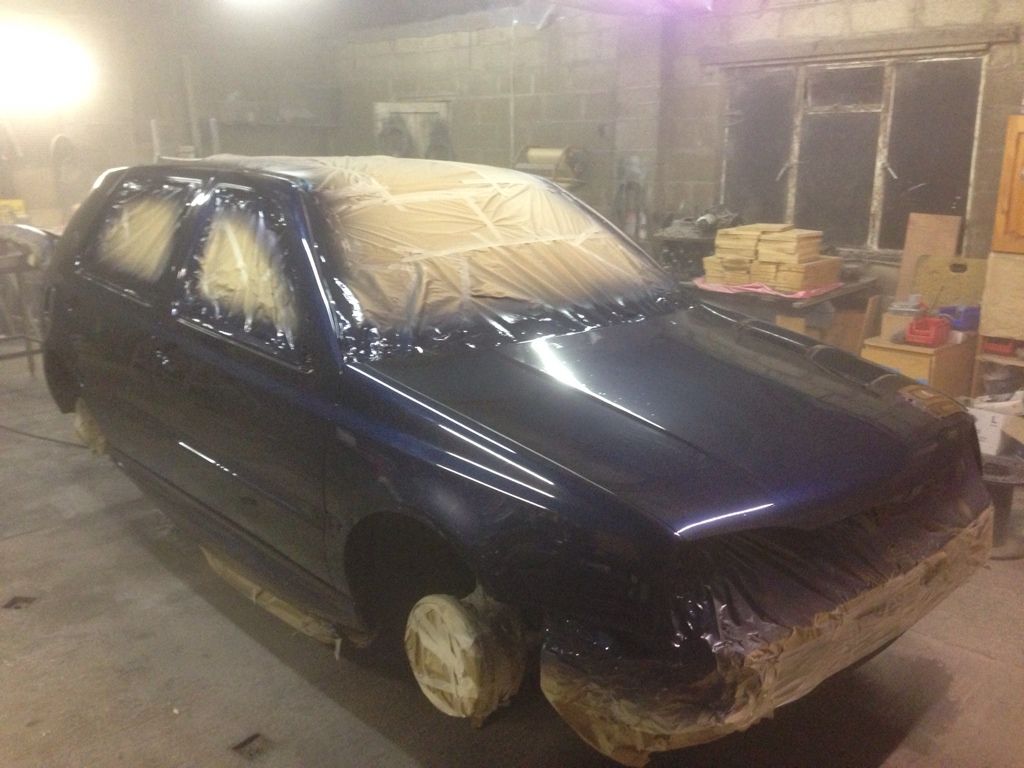
This photo really bugs me as it makes the car look so odd with the GTi splitter. Good Job I have a US version sat here waiting!
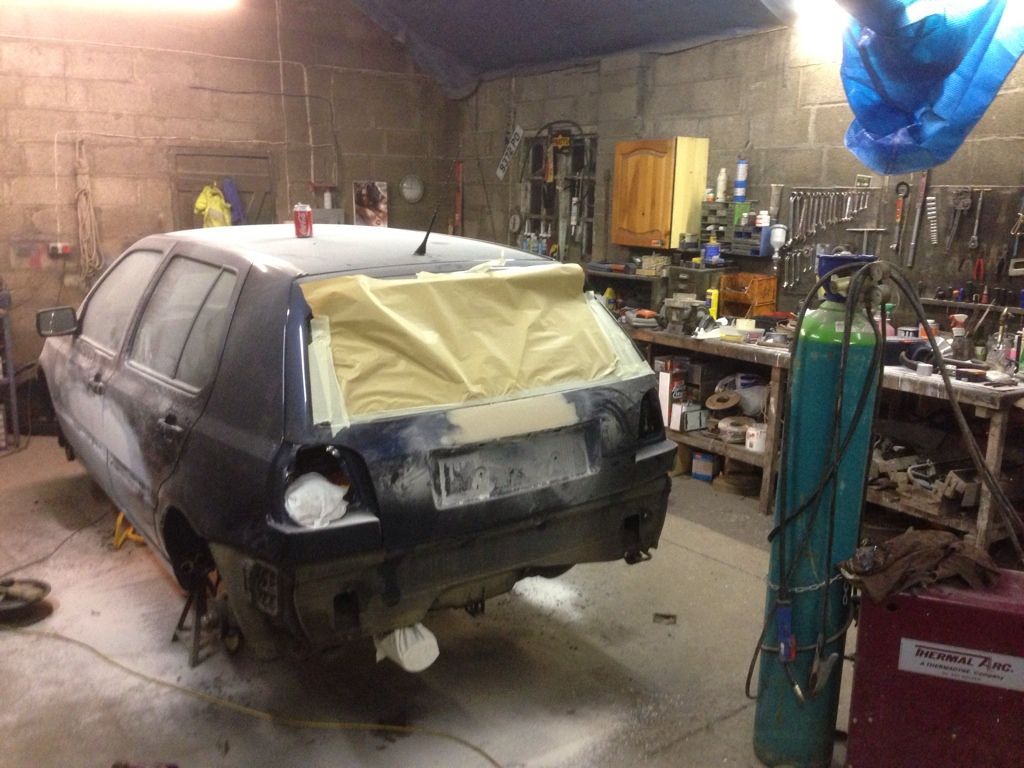
No photos of this stage unfortunately but the Roof was masked off, aerial welded, roof primed then painted before the Roof seals were refitted.
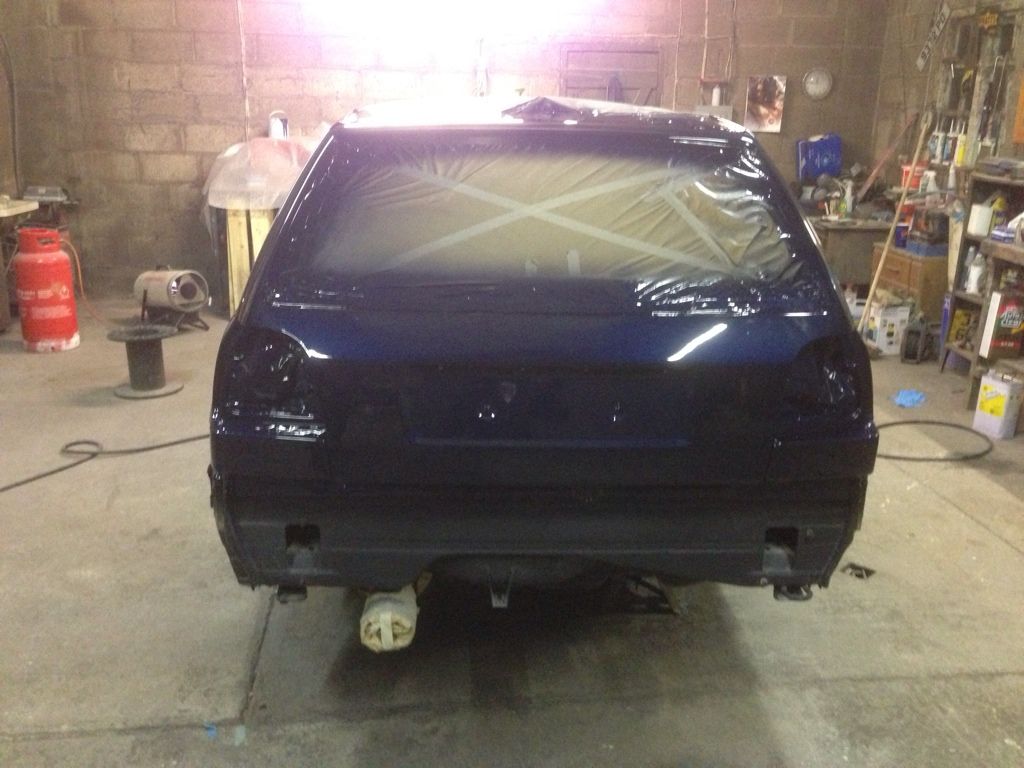
The GTi arch trims were then Trimmed and Bonded on with PU silicone adhesive, and held with a selection of mole grips and clamps and left to set for 24 hours. The car looks so much better with these on when sat on the ML's!
A few bits and Bobs that happened along the way:
I was slacking in photos at this point as I just wanted to crack on and get everything cleaned, modified if needs be them Re-fitted.
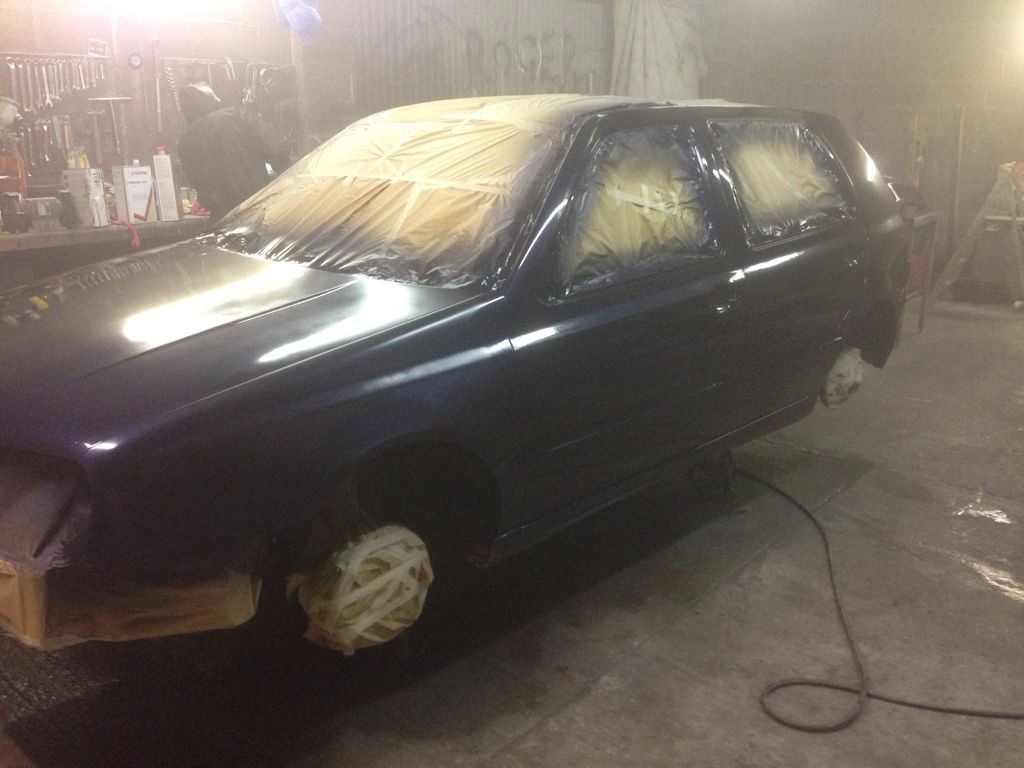
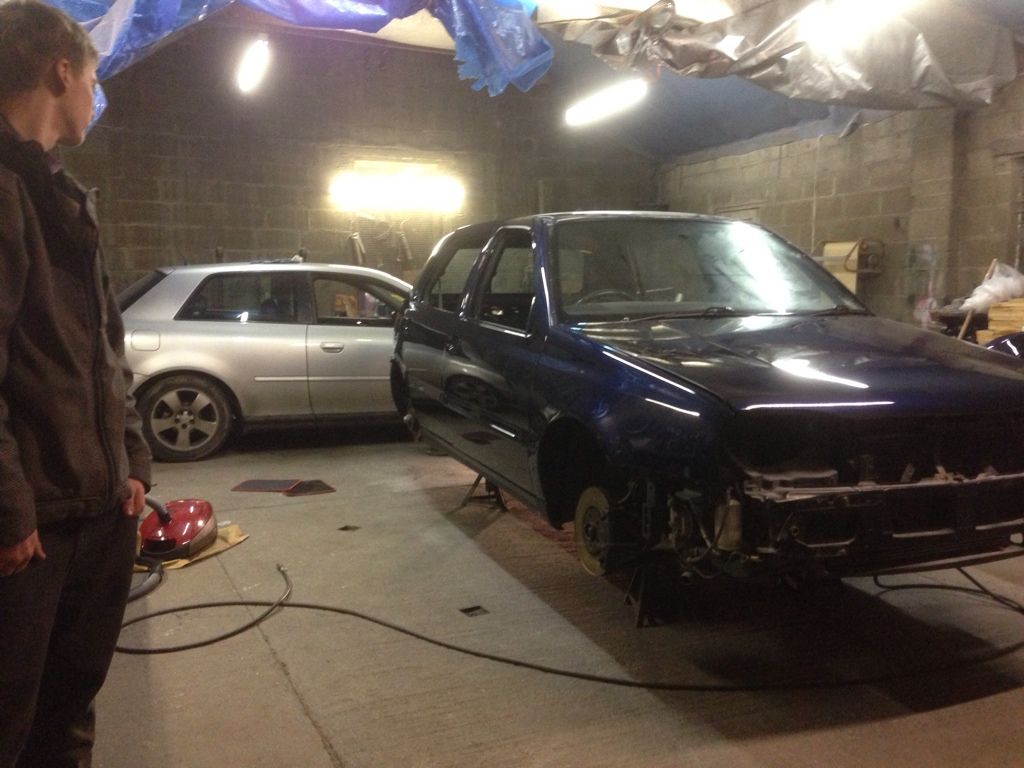
A few days later she was on the Ground all fitted back up looking like a different car
New lower sill mouldings were purchased from VW at the massive sum of almost �90, as the ones I had were bubbly and horrible!
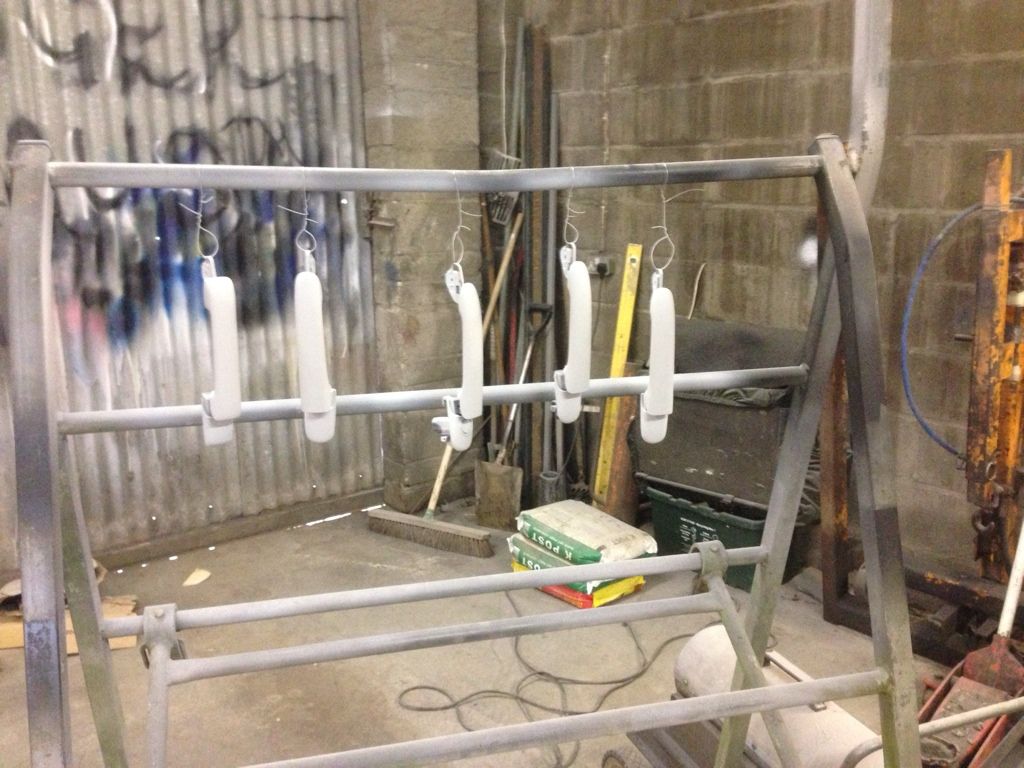
All Trims were forever Black'd when everything was back together to complement the fresh paint. I also fitted a 6K hid kit totally inside my hella celis headlights, these lights are for practicality not looking scene, it's a daily that's used mostly at hours of darkness.
More pictures of exterior/Interior coming when I clean it next if anyone is interested, hope you have enjoyed the read!
So the VR6 has been taking the biscuit, has only been out a handful of times this Year and all it seems to do is want money spent on it, so I've been focusing my efforts on the real woman of my life recently, she takes what's given and doesn't moan nor throw her toys out of the pram
I started off by sourcing a set of near mint hella all reds at long last for a reasonable price via Facebook, which seems a great means of picking up cheap bits at the moment! Was really happy with the results and such an improvement on the CLs I had been running for months.
Next up I swapped my milltek oval For a Twin exit which I had lying in the garage from a highline I acquired a few months ago, the oval sounded really throaty but didn't fit in the recess as much as I'd like. Much more comfortable with the Fitment of the twin exit, excuse the dirty car :P
With the bling addressed I moved onto more serious matters, drivability. With my current "stance" I was incurring a lot of driveshaft to chassis leg action which needed sorting, and of course I couldn't raise it back up ..... So a chassis notch was on the cards. Luckily we installed a two post Ramp last week, so jobs like this are now a lot more pleasurable than before!
I picked up a 3" holesaw, cutting fluid and had a 3" peice of 5mm steel rolled at work as opposed to using a piece of cut piping. Mainly because the sheet will still be workable if needs be once being mated with the chassis leg, didn't get many photos of this but here's a few:
Holesaw & sheet metal:
Area cleaned up and parts removed:
Let's get more lows!
Driving to work this morning was beautiful, was up till 12:30am putting it back together then alarm went off at 5am for work, so not hearing one dodgy noise up front the whole drive was worth every minute!
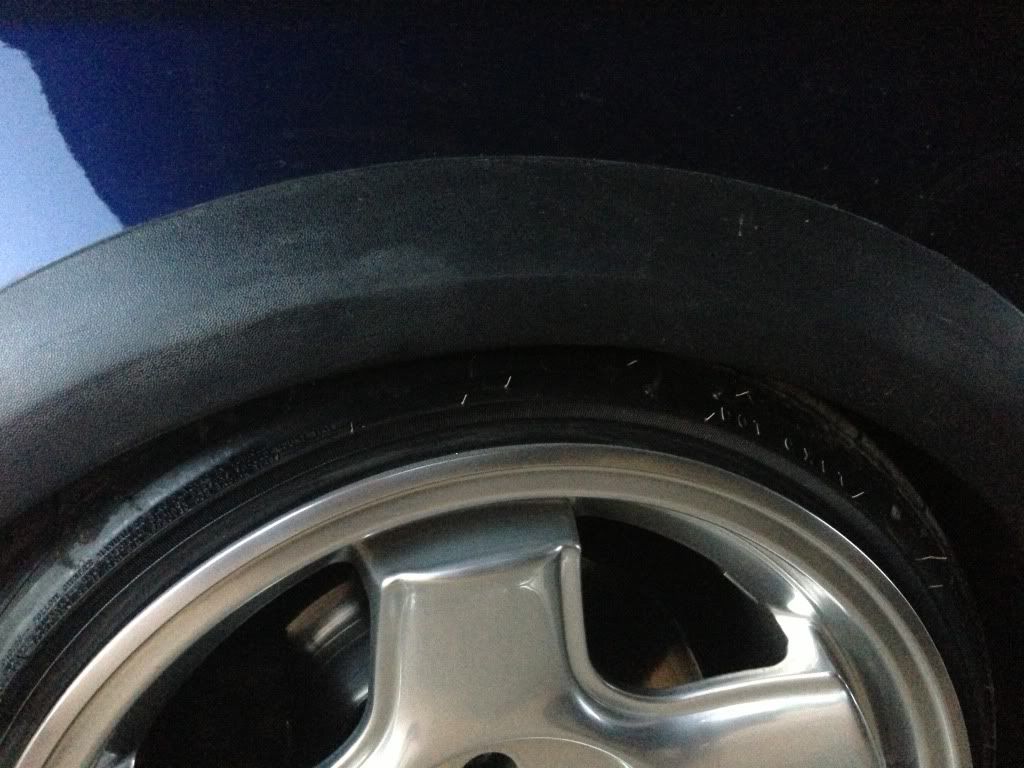
Oh the other day I refaced the lips on the Schmidts as they had been powdercoated and were getting near being 50% chipped, looked shocking. Did this by grinding the powdercoat back, getting the car off the deck and plonking it in 2nd gear haha. Went from 80G to 1500 then polished up.
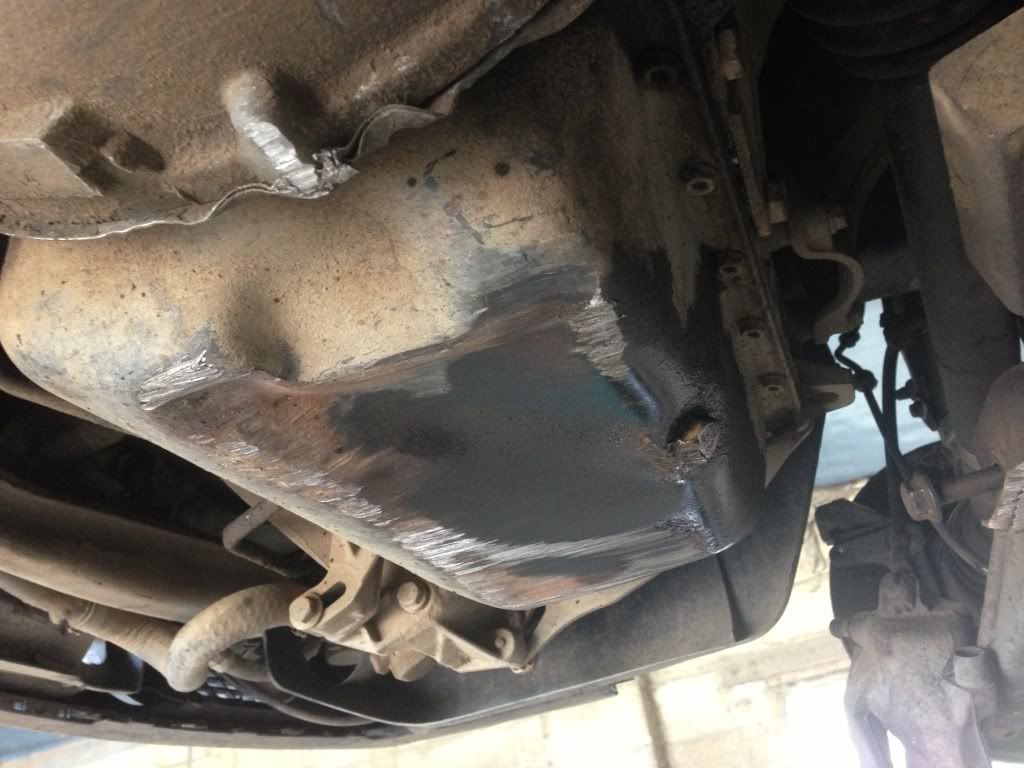
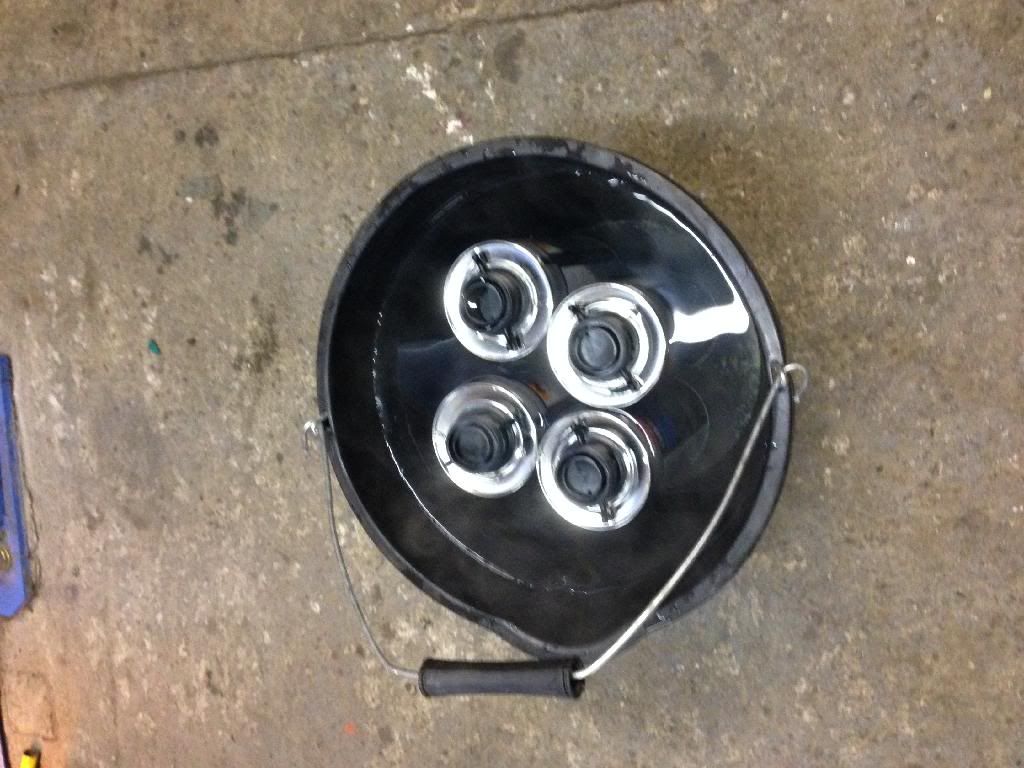
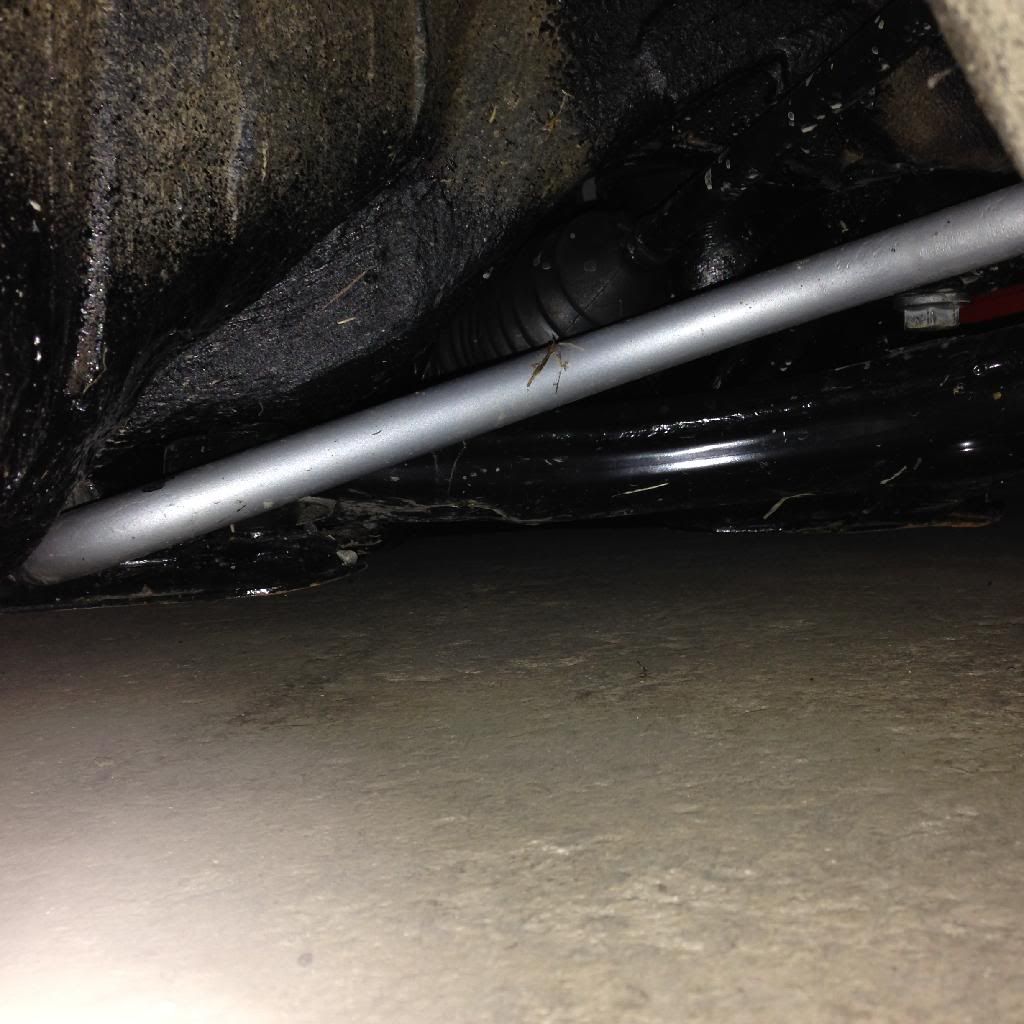
Also the dirty old engine bay got some TLC, a full degrease and steam clean, I hadn't touched it under there with any products for a good 6 months. if only the bottom end wasn't so rusty it might look half decent...*might* 8V cough cough haha
[IMG]http://i1276.photobucket.com/albums/y480/aaron1492/null_zpsd88f0179.jpg[/IMG
Sump needs replacing or reinforcing ... Lol

So a sad but inevitable day has come, the 020 Gearbox has finally gave way, in style too. Four holes smashed in different places due to the all too common Volkswagen diff rivets, just what we needed a few days before Christmas!
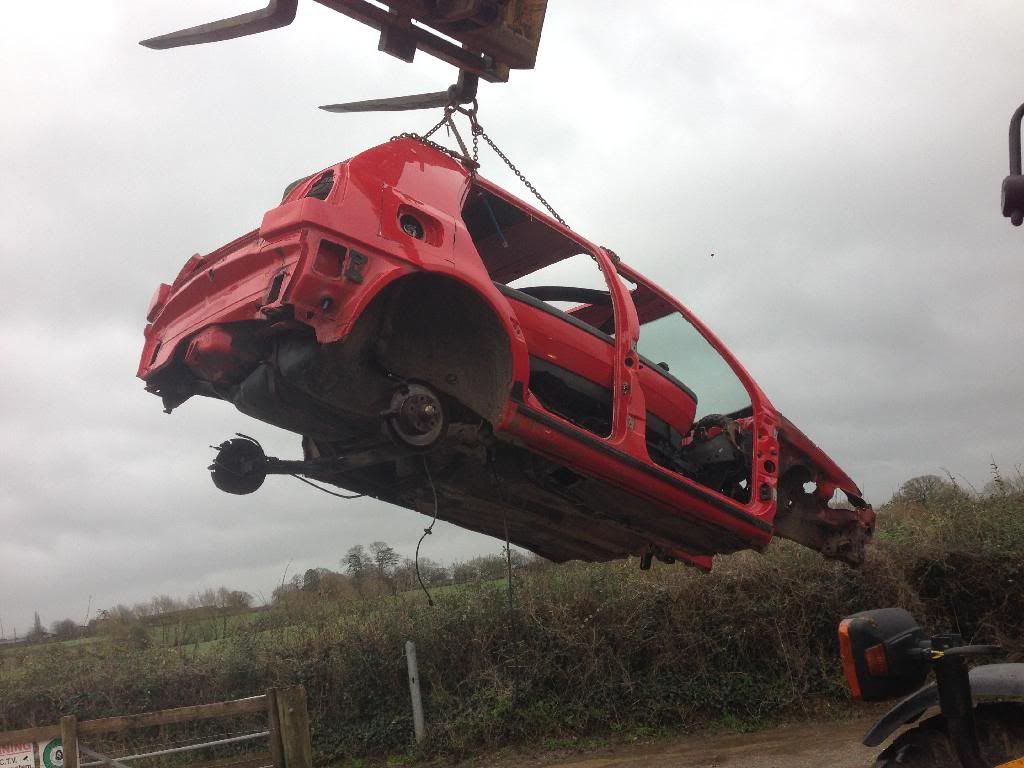
As some of you may have seen I was doing up a red 16v MK3 to sell that I got on the cheap. however as more and more rust was uncovered, using the car as a donor was now looking ever more appealing. I could have done a vr6 conversion as everything is here, but much prefer how a 2.0 Handles and uses juice!
To start things off, here's the damage incurred on the 8V box, almost textbook looking at other people's boxes that have done the same!


Well impressed the 020 held up to almost three years of daily abuse, she must have been a good'un!
anyhow, back to it, here is the donor engine in question of you havnt seen it in the other thread, here we have one rough old ABF.

Then a few hours and beverages later, a engine bay to frown at has been revealed, and an ABF engine requiring a lot of TLC is on the workshop floor!
Because dirt is the new deleting.

ABF beginning to be stripped down for paint and external overhaul

With the ABF out of the Red one I focused the next day on stripping it to a shell, boxing all the parts for sale and getting it out of the door so the Daily could come in. Here's how the red one ended up, serves it right for having rotten chassis legs

With that pile out of the way, in comes the 8V to have a new heart, after a lot of swearing beaching it on the ramp and having four guys push it off, low is even more awkward when you can't go back or forward.

Then another evening and few beverages turned this out, I'm getting good at this engine removal game.

To reveal a bay that is probably even more dirty than the ABF, a sight like this makes me cringe. The joys of living in the countryside, my steering rack was piled high with mud!

to top things off, I've found where the sound proofing from the bonnet has been disappearing! A field mouse has made a den by my ECU by pulling it from the bonnet and taking it back under the skuttle haha.

More to come tomorrow 👍
The engine was stripped of all ancillaries, taken outside and given a thorough wash to clean numerous leaks and oil deposits away, its fair to say it didn't look much better afterwards :lol:
I Found the block breather pipe was split causing alot of the mess

And as you can see even after jizer, wire brushes and 20 minutes with the pressure washer there's still a long way to go.


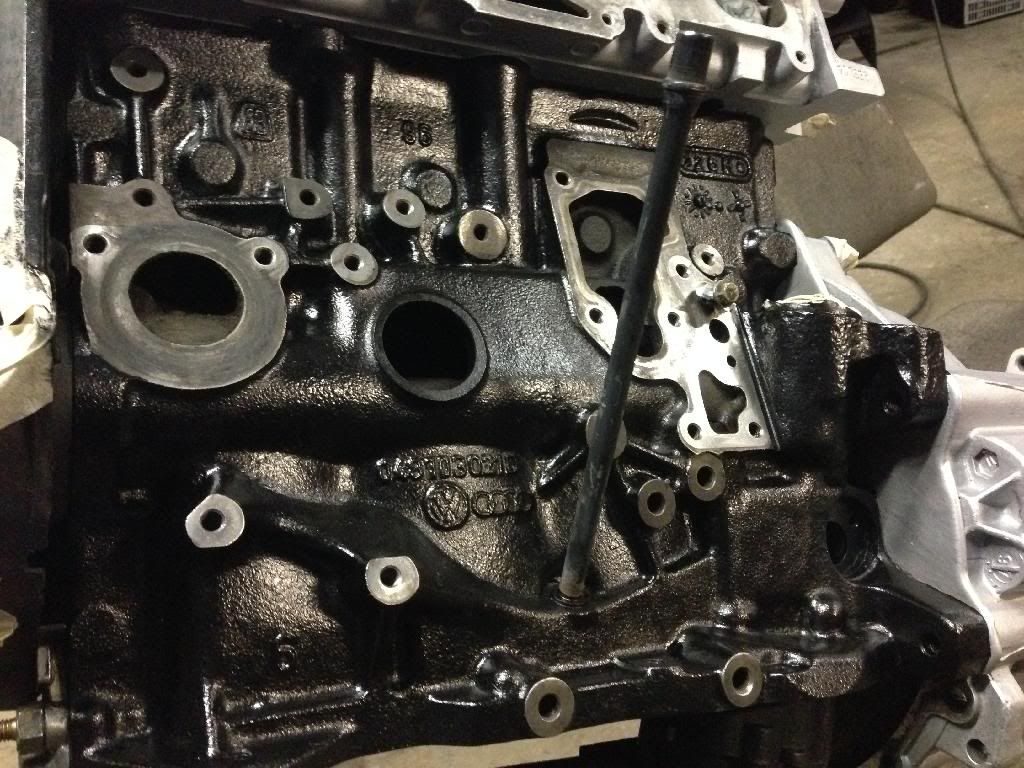
Then using a wire twist knot wheel on a grinder, a screwdriver and wire brush I scraped back all the old black paint and rust from the block, and began grinding the corrosion from the gearbox ready for paint, this turned out to be even more tedious than bare metalling an engine bay!
At this point I had started on the block and gearbox, still a long way to go

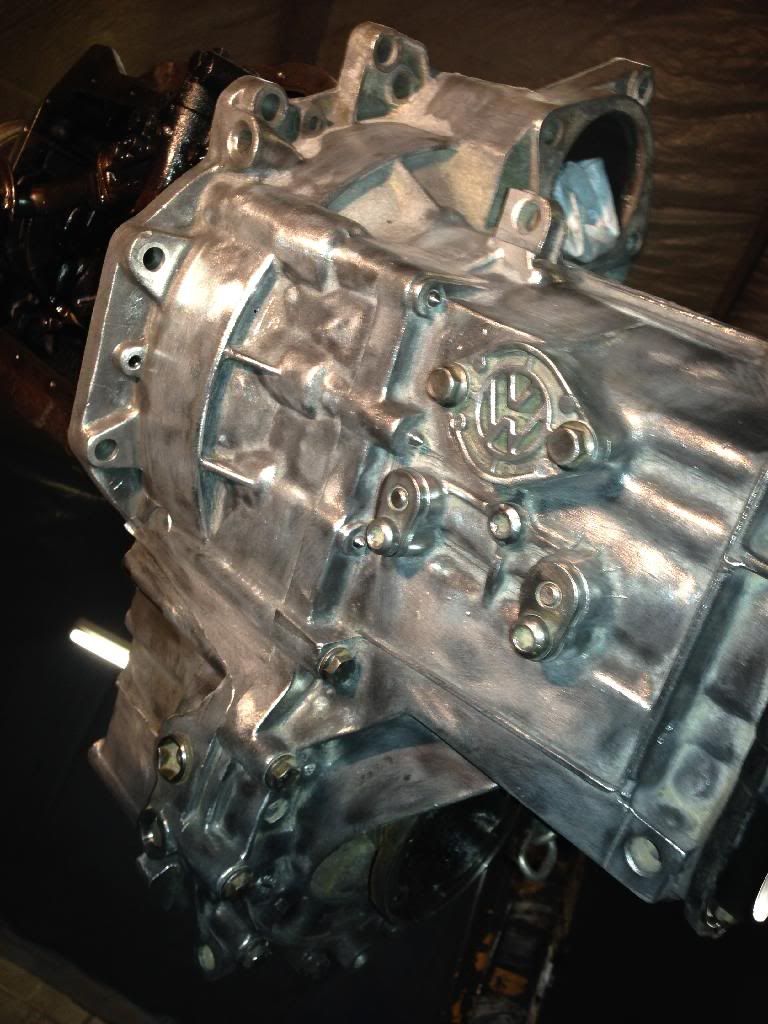
And then some hours later, the gearbox and block were ready for paint!

[URL=http://s1276.photobucket.com/user/aaron1492/media/GTi/BF20977F-B25F-4A92-B5B8-82B1C73DEED0_zpstg9rvx0f.jpg.html]
[/URLFor paint I decided to use cheap and cheerful Toolstation Brushable metal paint with a decent VOC Content, will do as good a job as any engine enamel but is half the price. Looks pretty smart if I don't say so myself!


With the block & box Drying off I turned my attention to the ancillaries, which in true abf fashion were covered in oil and dirt too. Out came the pressure washer and jizer again as with a freshly painted block I couldn't be bolting dirty parts back on it!

All of this was then hit with the wire twist wheel and thinners heavily to clean it back as much as I could without a sand blaster, which would have been a godsend at this point.
I then focused on getting everything painted up so it could be during while I get on with other bits.
freshly painted alternator, which may I add was done by hand with a tiny brush, even in all the vanes

The idle valve will probably be covered by the spark plug lead guide , however if this didn't happen I would want something shiny on show, so it was polished and sprayed In Black magic.

The Oil cooler housing was minging, couldn't even tell it was silver barley. Here's a before:

And after cleaning and painting, polishing sensors and refitting

Then The starter motor was also stripped down, checked everything was okay, cleaned & greased then painted in Post box red & Black magic with silver detailing!

Here is the Starter motor and a few other bits being painted black magic & post box red

Not a bad finish on the starter motor considering it came from a rattle can in a 5 degree workshop!

After leaving to harden off overnight I built the alternator back up, and made a cheeky time saving tool to slide the contacts back over the coil without needing to be called Ganesh, I simply took a small 20ml bottle, cut the bottom out and slid the assembly on the bottle, then offered this to the coil and slid the assembly down onto it, no pics but do I make sense?

Getting hacked off with painting everything I thought i would whip the autosol out and polish up the oil cooler/Filter housing

Moving Onto pipework, I noticed my PAS lines were quite heavily corroded in some areas, so these were swapped out with a pair on better condition, then stripped back to bare metal and primed. I also did the same to the Metal coolant pipe, and coated it all in black magic paint and lacquer again for good measure. It's all about the details
Before and after cleaning the corrosion back:

Coolant pipe stripped back and all corrosion removed:

PAS Pipes & coolant pipe in primer waiting for paint

Now that most of the removable engine parts had been painted or polished i could put it all to one side and admire the 4 branch that turned up that morning, surprisingly it fits the head perfectly, although I havnt tried it in relation to the bulk head and steering rack so we will have to see.
[URL=http://s1276.photobucket.com/user/aaron1492/media/GTi/42967279-132E-4AAE-B24F-FFB64A6B9A85_zpslcxagawz.jpg.html]
[/URWith the car being a daily and fairly low on 16's, the sump on the 8v was battered, and the last hit it took resulted in the sump plug being welded on place to hold oil :lol:
After pulling the ABF sump off and realising it was aluminium there was no way I'm running that, so a cheap pattern steel pan was purchased for the mere price of �20 posted, with a gasket too! Admittedly the tin quality reflects in the price, but this wasn't a big issue as it's going to be beefed up.

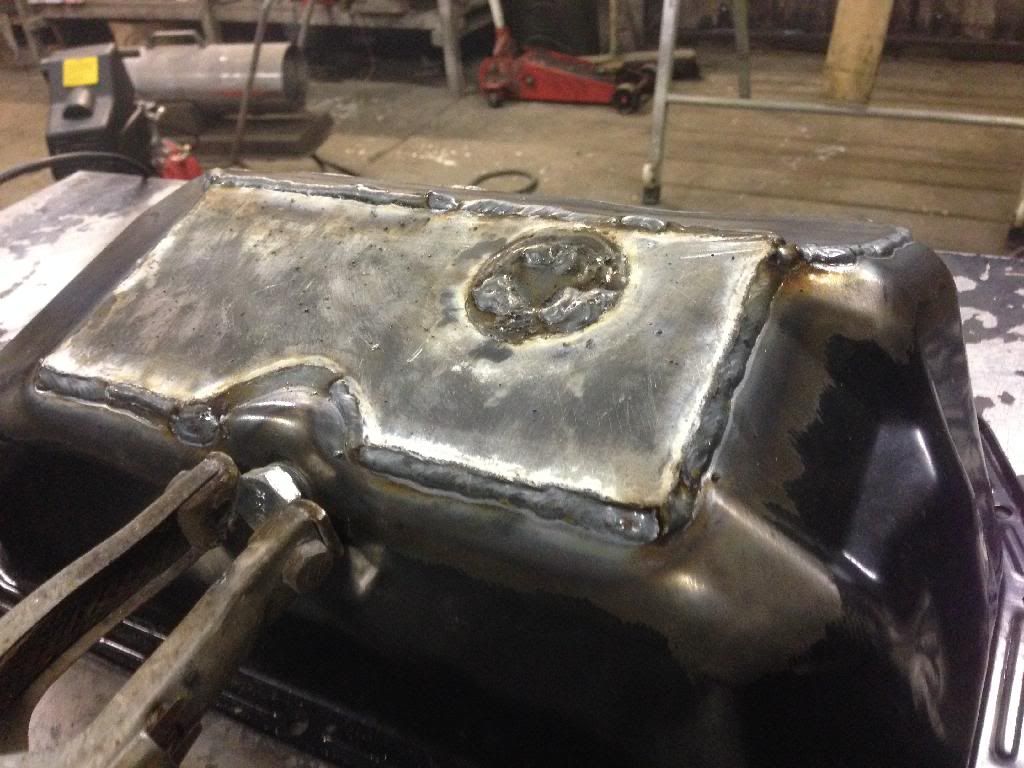
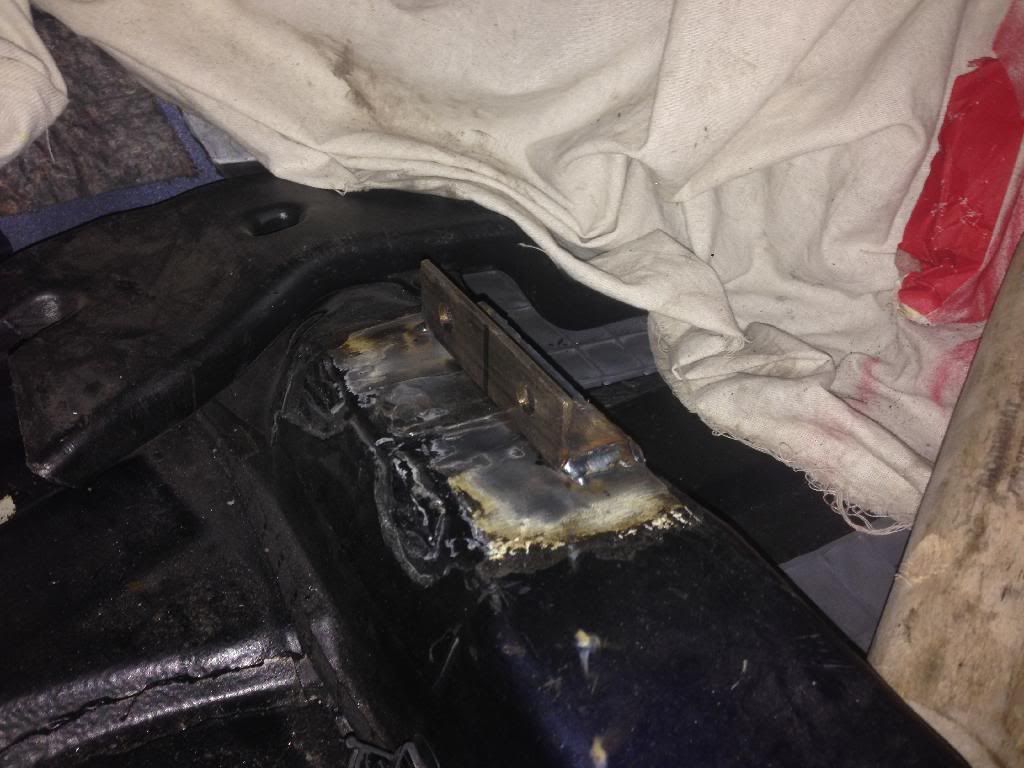
Using cardboard templates, I made three pieces of 2mm sheet to use as the base layer, cut out with a plasma then ground to size, and another 3mm plate which will sit directly on the bottom, covering the sump plug rear lump and the oil pickup circle.
Cardboard templates of the plates that will be welded to the sump

Then Marked out onto the sheet steel that will be used

Then the pieces were cut out with the plasma and rough shaped with a grinder

Then this happened, all welded up with the mig


A couple of areas inside were also filled with weld for good measure

Welds All ground back and scuffed up ready for paint in a silly colour :P
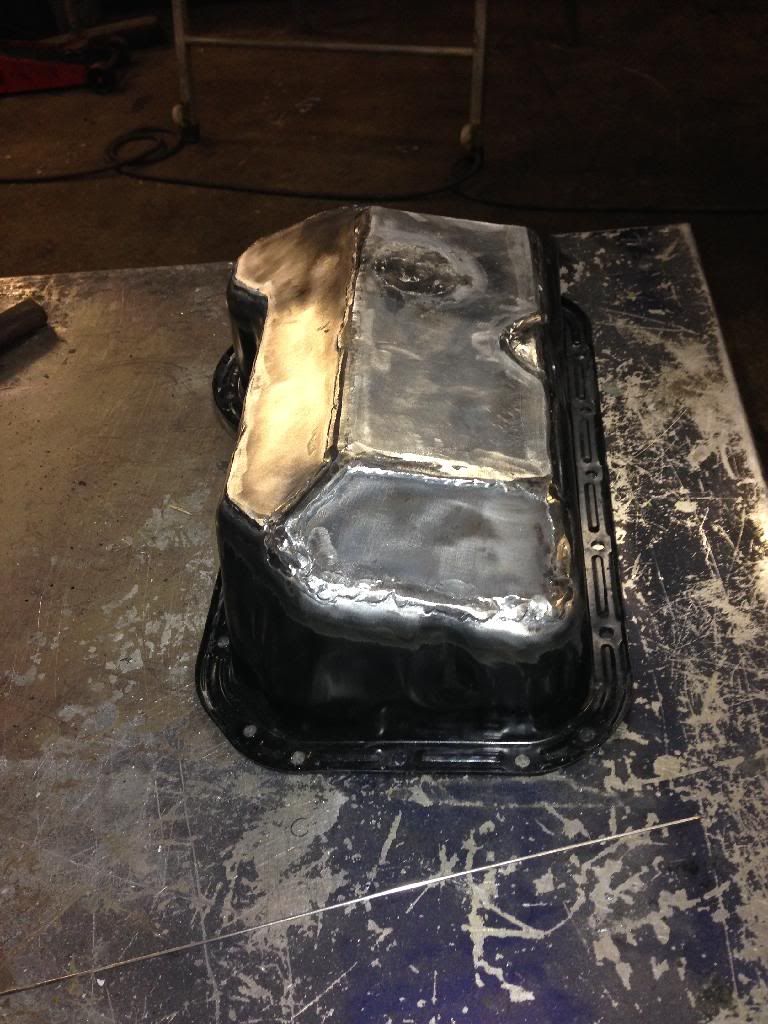
As you can see, the top plate sits higher than the bottom of the sump plug recess area, and I have fully filled the void from the oil pickup area then ground it back flush, it doesn't look perfect but will be getting hammered down the road, so Asthetics wasn't my no.1 priority.
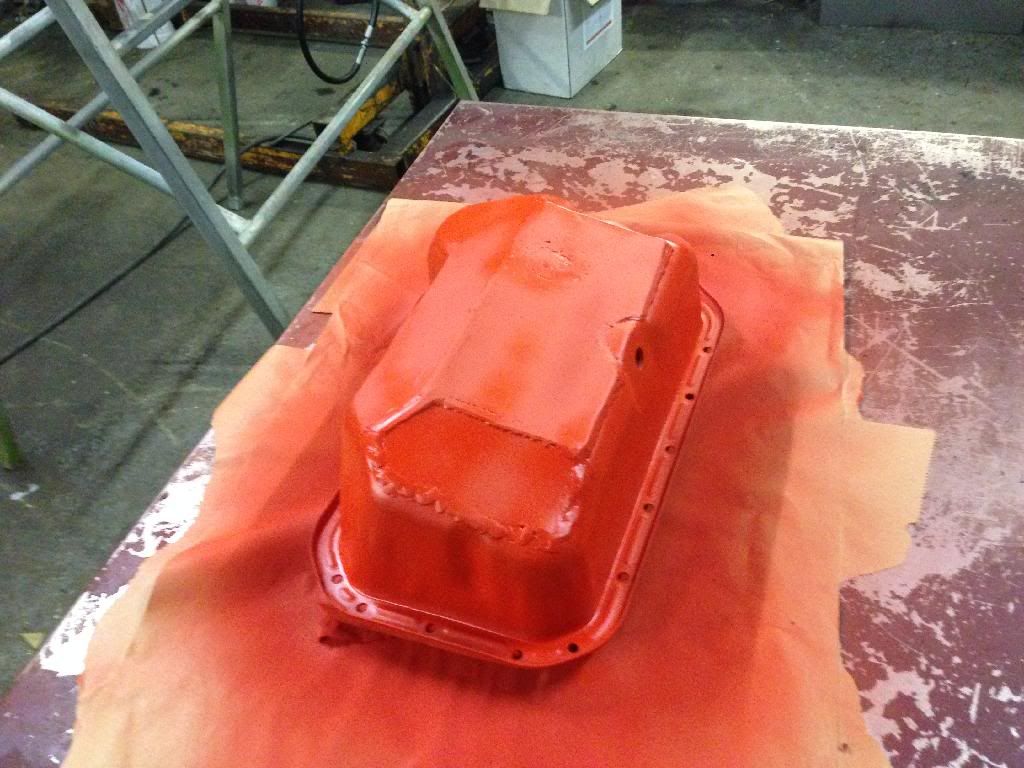
A few coats of Postbox red before lacquer

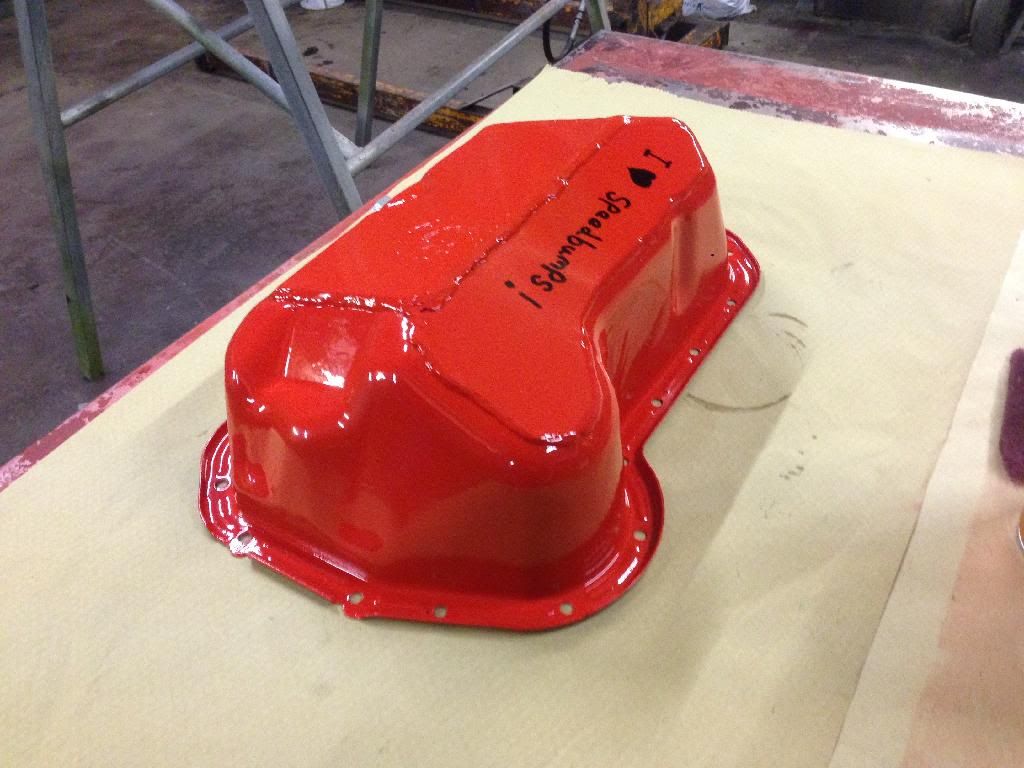
And finally, the finished product all lacquered up

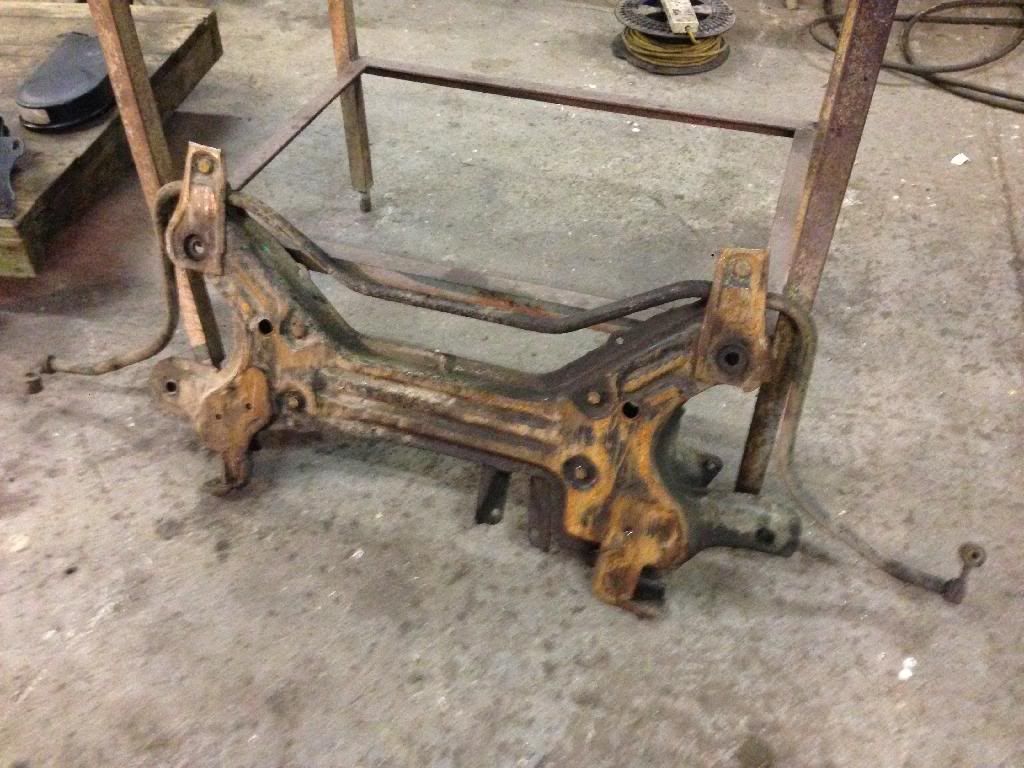
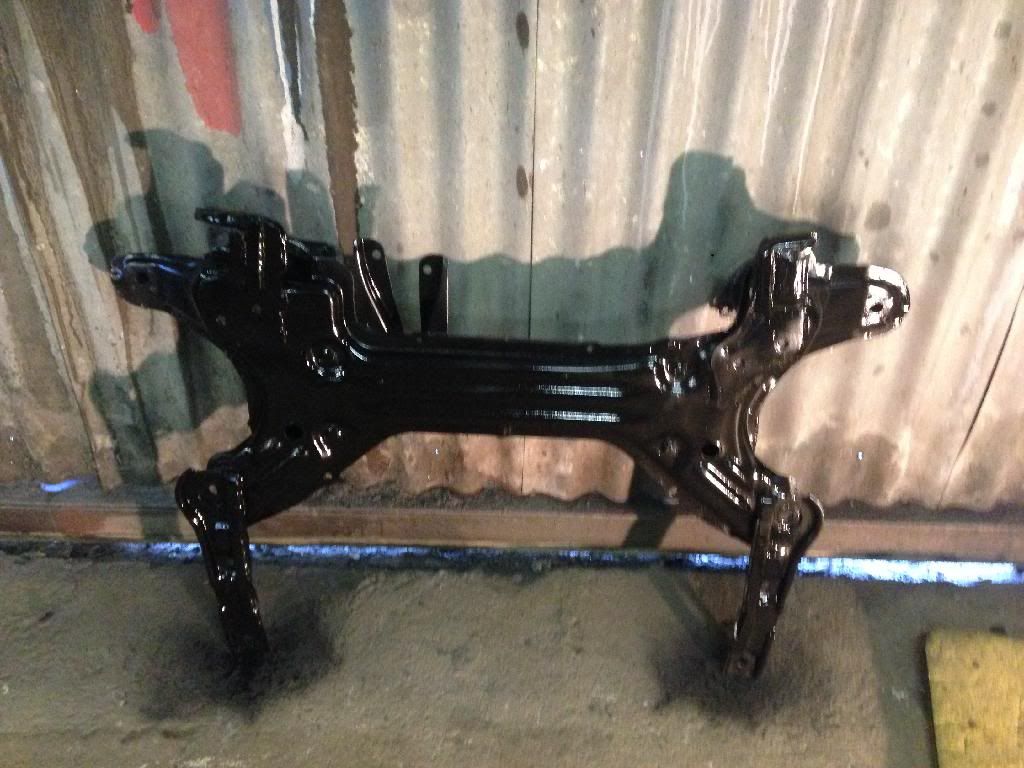
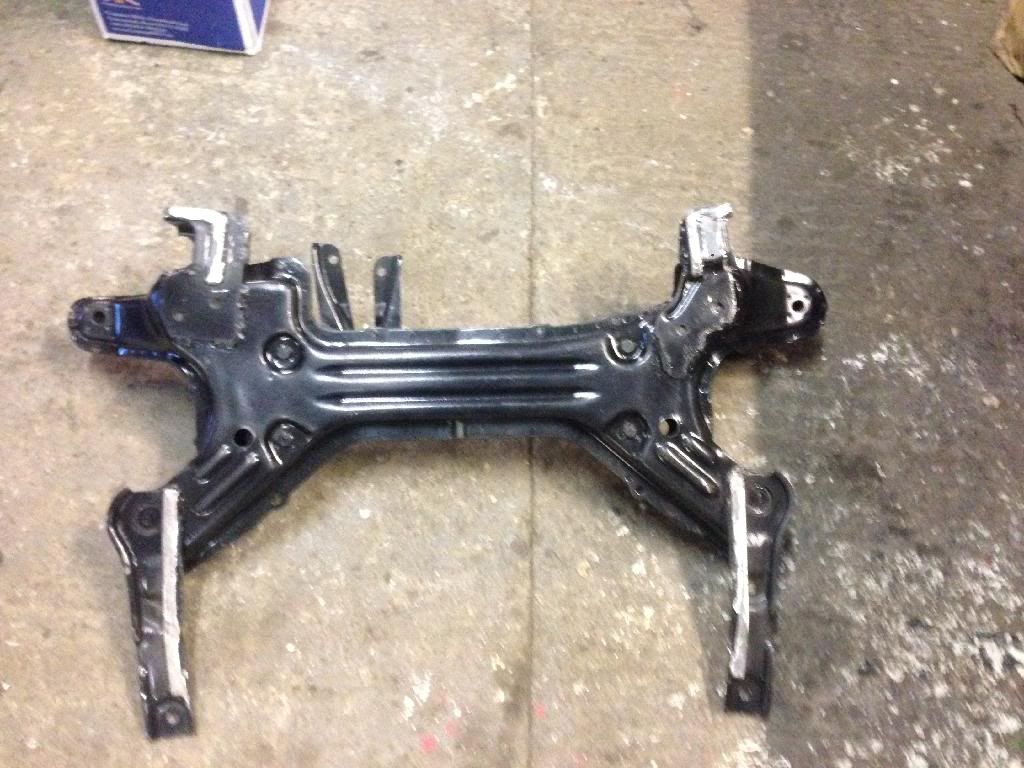
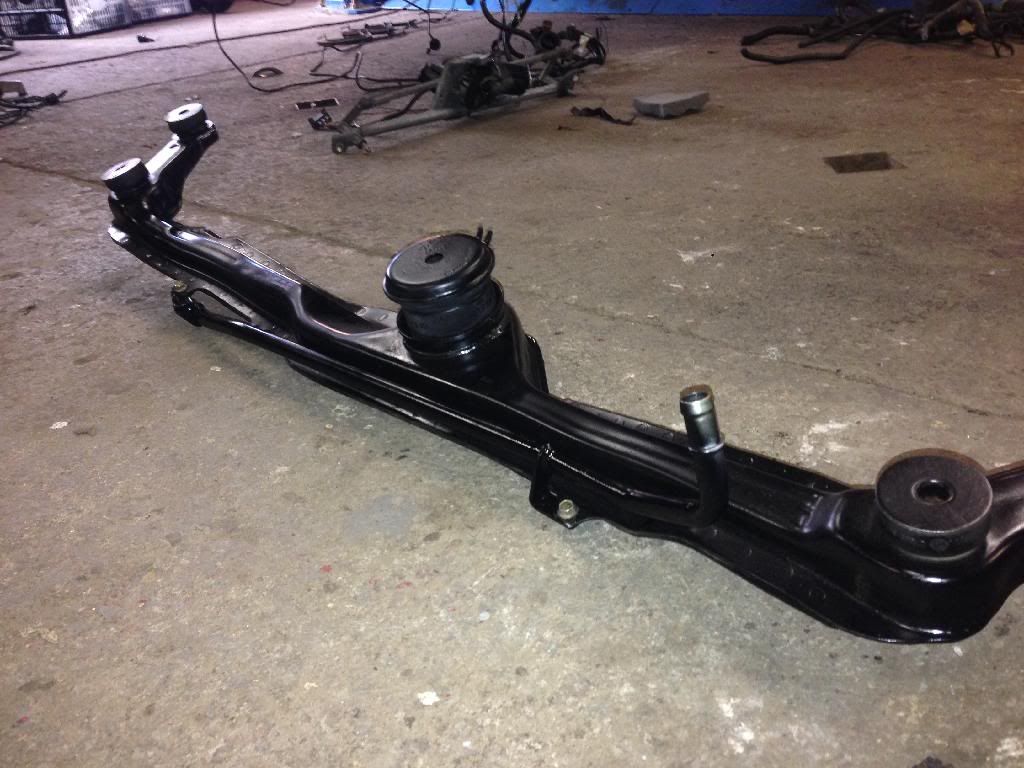
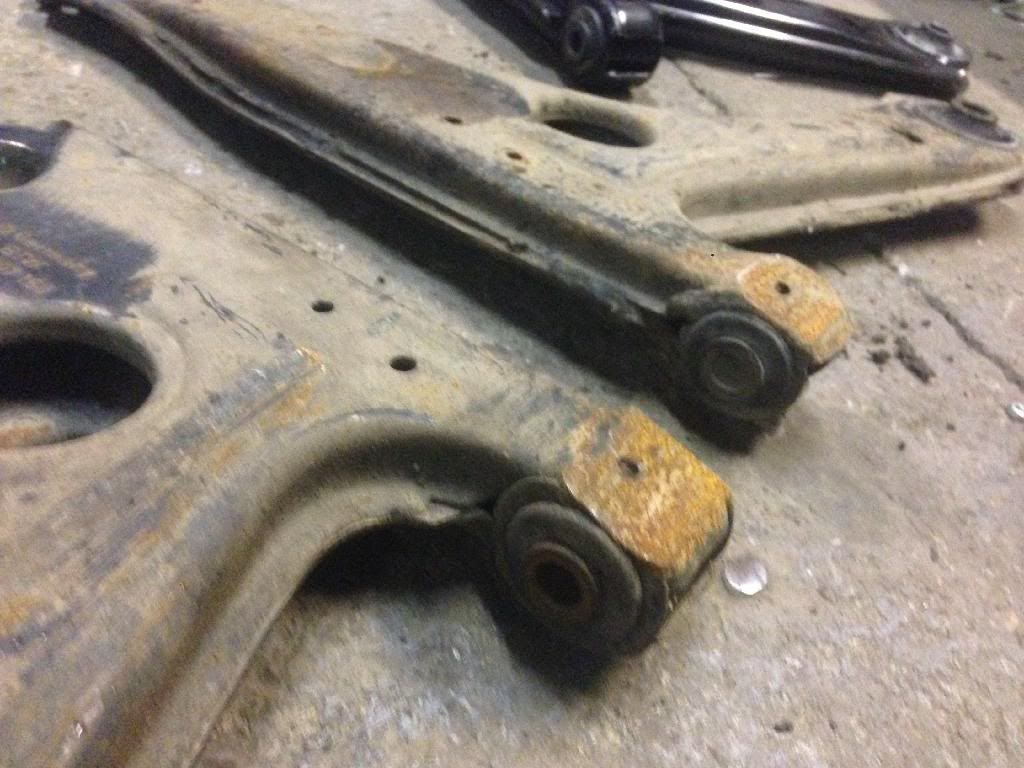
My subframe was far past its best, and ground a fresh pair of wishbones to the bushing on the bottom edge within a couple of months, so as the engine was out its time to swap it over, and add a custom touch along the way
Here is my old subframe, VS my new subframe for picture reference.
Old

New

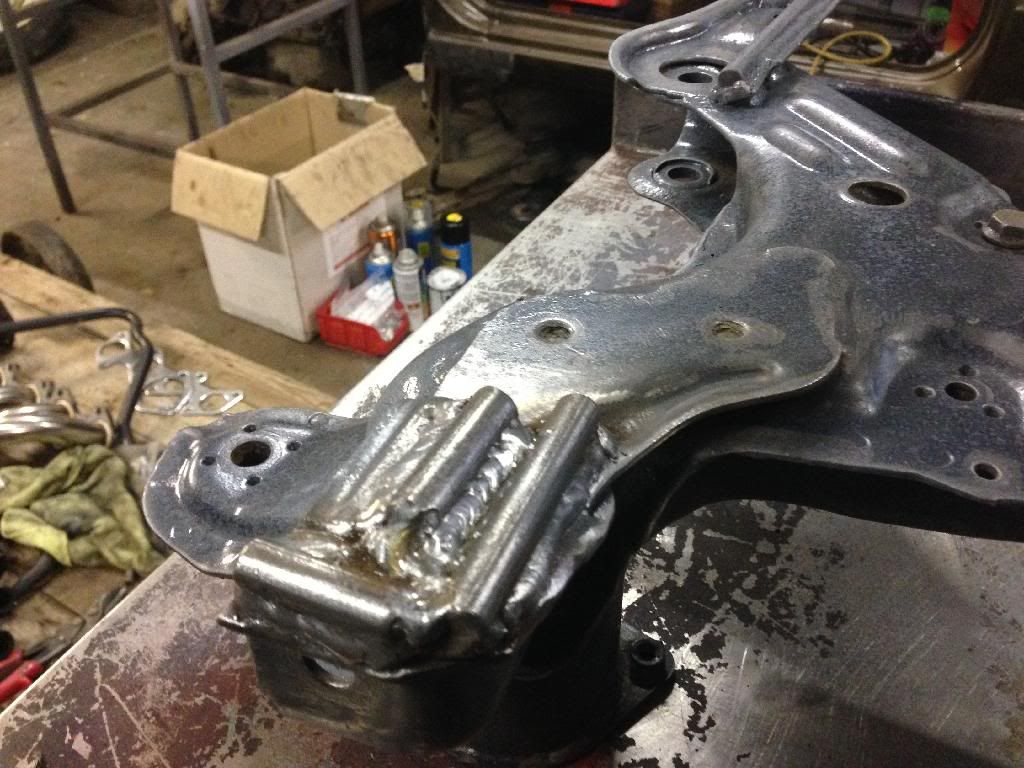
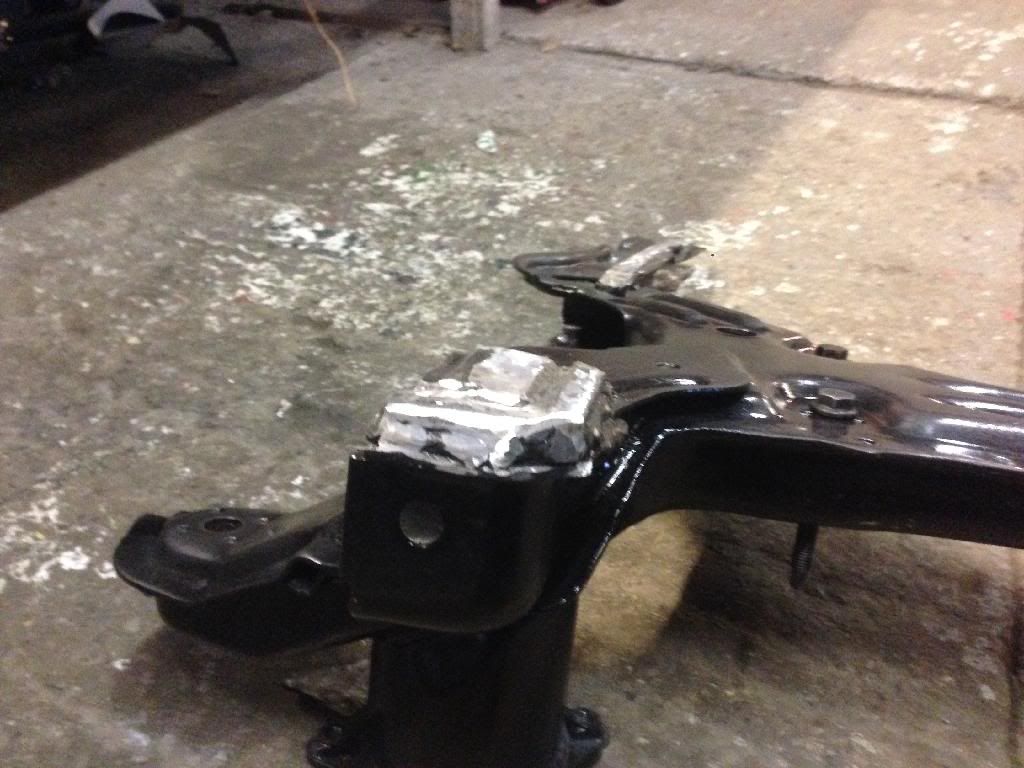
And what happened in between... Hardened steel skid bars to protect the wishbones and Subrame bolts. I used 8mm bar, and welded lengths along the rear sections then smaller pieces around the wishbone location area up front. Then decided this added way too much meat underneath, and I would be forever laying frame. So the bars were ground back to the same level as the subframe so I don't get stuck everywhere!
Bars welded on before grinding:


Then it looked like this after attacking them with the angle grinder for some hours:


Not great photos at all as the details are all blurry but you get the picture!
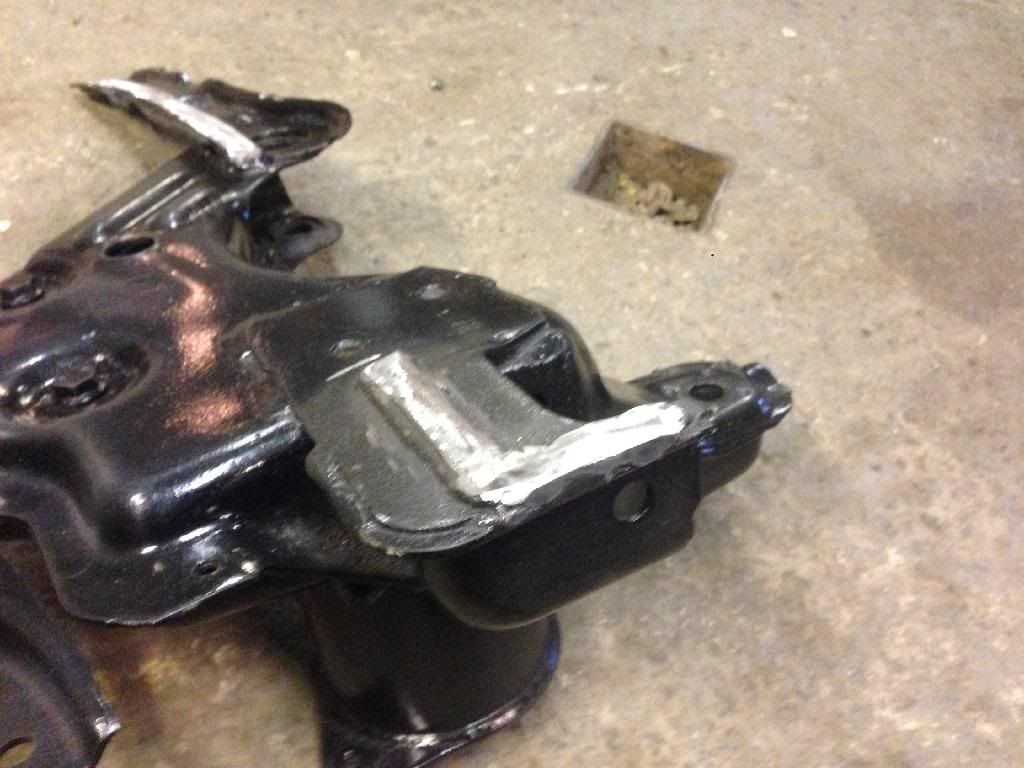
I'm getting slightly behind with the posts, but more has happened since the last. I laid another coat of paint and lacquer on the subframe after grinding the skid bars back.
Then stripped the steering rack back to bare metal, and re painted this Black too.
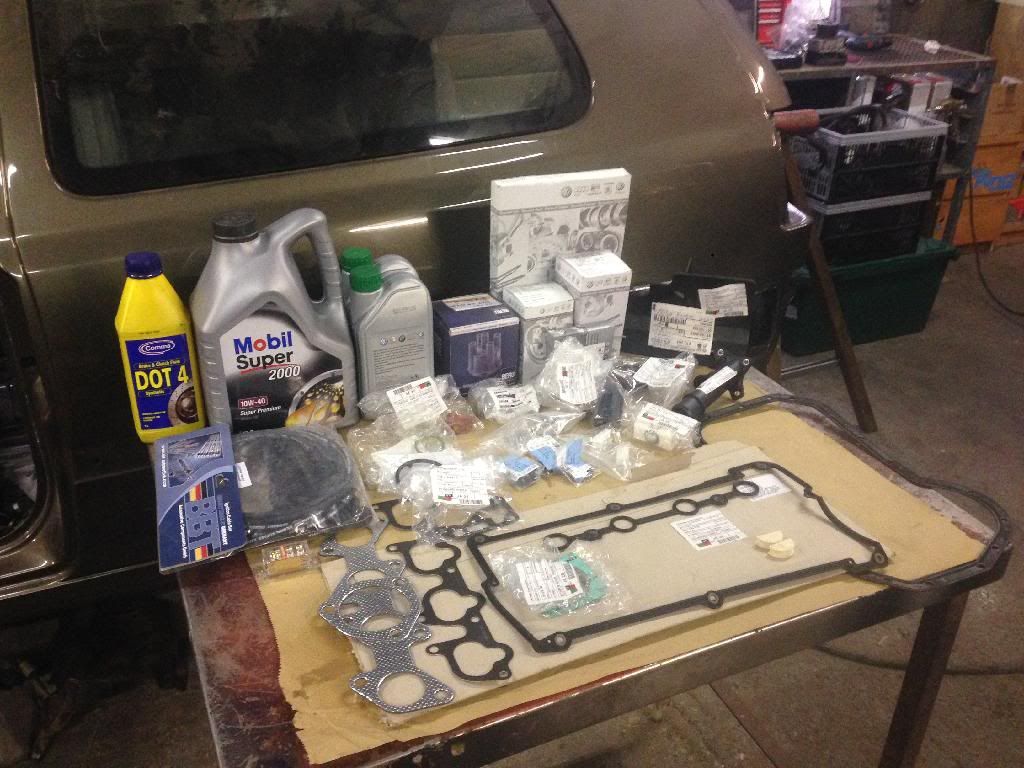
Lots of parts have arrived at TPS and my local motor factors, all genuine engine seals and gaskets have been bought, the only thing I couldn't get hold of was a lower to upper inlet manifold gasket, luckily the brown card the rocker gasket came packaged in was perfect for the task
also the coolant top hose was obselete, so this was ordered from France. The Tps haul, well some of it :lol:

And from the motor factors Here's a little list of control parts waiting to be bolted up to the fresh frame.
�Firstline Wishbones & ball joints
�Febi Tie rod ends
�Febi ARB bushes
�Febi Gearbox mounting
�Febi steering rack bush

Next up was a task I wasn't looking foward too, patching up looms with a soldering iron. The engine loom had 7 splits in total, making the wires brittle so it was all cut out, and re soldered in using patch wires from a spare engine loom I had lying around, OEM+ FTW!

The Front ABS plugs on my loom both has a snapped wire, making my ABS technically obselete. However, have no fear - a spare loom is here...soldered new ends on & double shrink wrap as I havnt got time to take the whole loom out to replace.
Much better!

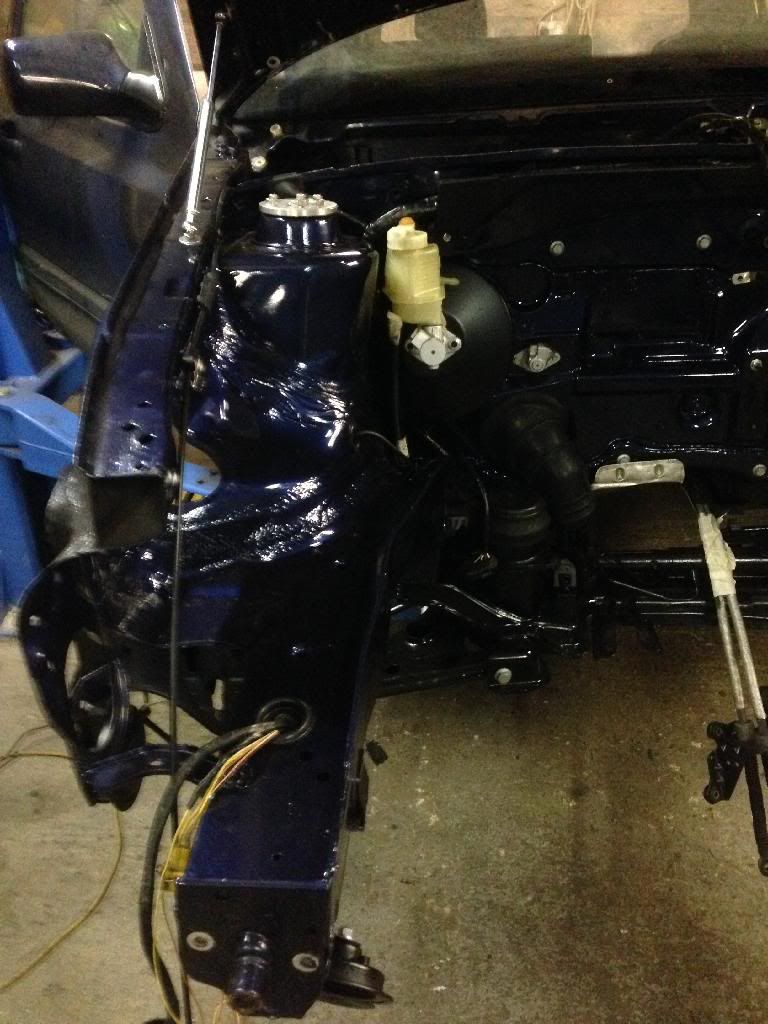
As the air conditioning wasn't making an appearance in the fresh engine bay, a blanking plate was cut out with the plasma and filed to size.
The rocker cover and inlet manifolds have been given a coat of paint and lacquer, a spot of polishing detail then re lacquered. The deep blue looks epic against the bright red. Can't wait to see it all built up in the car


Stage one before red 16v logo

The Heat wrapping tape turned up for the 4 branch, word of warning wear thick gloves when handling this, it's like fibreglass and gets right into your skin, horrible stuff.

The more I looked at that dull, oem LZ5T Engine bay the more I ***** it, and with a good amount of paint lying around from last year I decided to give it a once over, in true fashion I then got carried away and cut off pretty much all the locating tabs on the chassis legs and turrets lol!
Before shot:
Work In progress, here I was grinding off tabs & rust, smoothing the chassis notch and flatting areas back to smooth metal for a good priming surface and end result.


Unfortunately in true iphone fashion, my phone died during the primer stage so I have no progress shots of the bay in zinc primer, but here's what she looks like after a lick from the ol' spray gun


I am so chuffed with how the bay has turned out, yeah sure I know people are going to **** because I havnt removed seam sealer or plated the holes up, I wouldn't remove seam sealer without smoothing the bay, and didn't have time for that, so it was pointless doing so
however, it still looks awesome. I'll call it lazy oem + I have been slacking with the updates in the last week, trying to get the engine back in as soon as possible as driving a TDi isn't fun, despite the excellent economy!
On closer inspection of the floorpan, the gearbox oil had spread all the way down each chassis leg, turning the schultz to a sticky mess, absolute nightmare. So I set about scraping it all back
In preparation for a Fresh layer.

the chassis rails were back to bare metal and primed again, as rust was beginning to form due to the old subframe providing little protection to the rails as it was quite worn. The welding work I completed during the paint stage last winter to the floorpan was also scraped back, seam sealer removed as it wasn't doing its job, and any dodgy bits re primed, then coated in a generous layer of up adhesive, a much better alternative to seam sealer I've now learnt!

And in true mk3 fashion, no poking around could go without having to get the welder out again ... Yet another brake line clip bites the dust!

I also ground some clearance for the ARB and tie rods, as both had marked the chassis so must have been touching.


Then some hours, a few showers, and lots of swearing finally led to more schultz applied to the underside and sills.

Horrible stuff, but its on there already so only time efficient option I have!

Boom!

With the floorpan nailed I could then build my subframe up ready for fitting. All new bushes bearings and mounts were used for good measure.

Black magic Metallic PAS lines, everything else in black & silver.

Replacing the brake servo clip was the next job on the list, I ended up ripping the pedal box out and pressing the clip on a vice, due to breaking a brand new one trying to fit it in situ. God knows how anyone has ever achieved such a task, this spring had to sit in the clip ..

Success

Good job I removed the pedal box, the headless bolt on the column was loose, no wounder my steering wheel didn't ever feel tight. Replaced with a nut and bolt for good measure!

Subframe fitted back up, things are finally starting to take shape!


More wiring time, guess some of you will know where this is heading

Dodgy ABS plugs cut and replaced with fresh lengths of wire off a spare loom that was knackered
Fan switch cheekily relocated to the skuttle tray along with a few other bits and bobs to keep the engine bay tidy. Don't have any photos of how I modified the engine loom, but lots of soldering heat wrap and electric tape was involved

Power steering bottle has also got a new slightly more discreet location, and the main power cable & fan wiring run through the chassis leg.

I also Tucked the headlight loom and other wires in the drivers side chassis leg, some wires needed extending as I'll be running the airbox sensor near the headlight.


The Front crossmember got forgotten about, so I flatted it back and coated it up in black paint for good measure

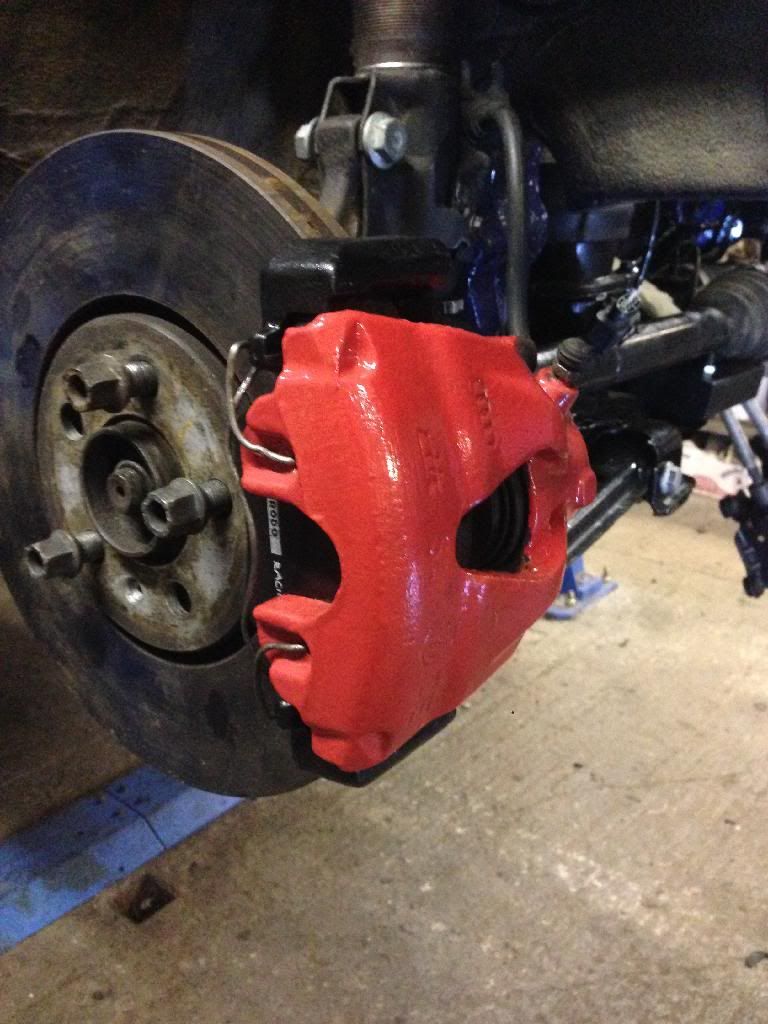
With the car already running 288s up front it's more than enough for what I need, so fresh meaty disks and padsI had lying around from a VR I broke were fitted, the calipers painted fully in good old hammerite red, and carriers gloss black. Simple yet effective

Upon closer inspection of the new wishbones I was unsure on the raised circle fouling the subframe bolt, so I dug the old ones out to see of they were hitting, sure thing they were, so the grinder came out and notched 50% off the circle, didn't take any photos but it was just a half moon shape chopped out.

Oops!

Moving back to the interior, a while ago I chopped and drilled the mk3 mounts to accept mk4 seats as I couldn't Weld to save my life, however these were crap and my seats wobbled around lots at the front, so a new bracket was made up, old one chopped out and new one welded in, saftey first for once

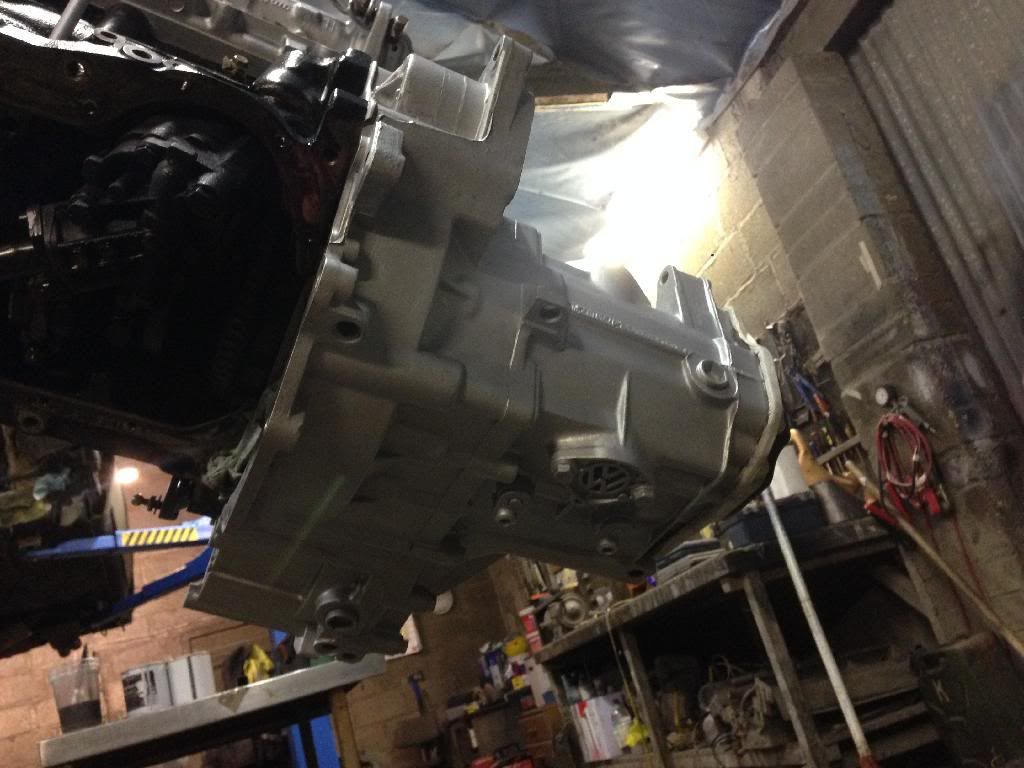
16v lump sat in the bay now, only issue being the 4 branch hits the heat sheild, so I can't raise the rear of the engine atall. Goodbye freshly plated sump ... However I Will raise the engine at the front by 1" to help the downpipe angle and pas bracket, and swap out the Swiss cheese rear mount for hockey pucks.

 w
wAll the wiring sorted, power steering lines plumbed in and exhaust now fitting like a glove after a little manipulation of the heat sheild, and one puck at the front, stiffened mounts front and rear with a few pucks and one soft rubber bushing below so my dash doesn't vibrate to Mexico.

I ordered up some bits for a Home brew CAI - ramair filter, 3" stainless Tube and a 90 degree silicone bend to suit the TB. If you're wondering where the air flow sensor will go, I have a trick up my sleeve

I Sourced a small length of stainless tube as close to the diameter of the sensor, then skimmed 3mm off the body of the sensor until it slid Into the tube on a lathe. There was lots of extra meat on it, so this was easy.

the housing needs Tig welding to the 3" intake pipe, and a couple of slots cut in for the clip to slide into and secure the sensor in place, unsure wether to put it near the front or back of the tube, but for Asthetics it will most probably go at the front, along with a stainless L shaped bracket to support the Pipework.
Should be ready to fire up later, fingers crossed
Been slacking big time on the forum posts, too much to do in too little time, but following on where I left off:
Intake pipe tig welded up, air temp sensor housing is on there now and also a bracket to secure it to the chassis leg


The headlining that I retrimmed last year properly using AS trims Kit had sagged badly from that hot weather we had, so I took it out pulled it all back and used Evo stick carpet adhesive instead, then refitted.

A false floor was made up and a frame for it to sit on. The frame was stuck down to the boot floor with PU adhesive and screwed together. I will be hiding my Amp in the spare wheel well, as unfortunately a battery is too tall
Framework (2X1")


False floor from 9mm MDF as that's all I had lying around in the right size, and is fairly lightweight.

Trimmed with OE look fabric, as I will be keeping the standard turret carpets in place. Cheeky little hatch cut out for tweaking the amplifier too

Test fitted in the boot with amplifier and battery box, which I sourced from a local marine store for a great price. It's now painted black, as are the pieces of wood on show and amp floor 👍

Then it was test drive time , just a blast down the village and back to play things safe with no front bumper and missing various other bits!

Two problems -
1. the car will not hold idle from a cold start and idles very low on tickover, a rant didn't help this. Can't source the root cause without learning vag com language, I'll get there!
2. The reinforced subframe is considerably lower that my old worn out one, so it hits pretty much everything, upsetting pedestrians left right and centre.

The notches for the subframe bolts and ARB are doing their job though


Ripped the rear trims off and left a right mess, sealant 1 Aaron 0. Polo rear coilovers fitted, this is pretty much full lift on them!

Upon re installing the audio I had shocking interference through the rcas, turned out to be the ground fuse inside my head unit (pioneer) he blown, so this was bypassed with a couple of lengths of wire and a soldering iron

Then this happened .. UD prep


With only 9 days go im cutting it very fine, as I organised the club stand for ukmk3s mine is booked to be inside along with four others, and six outside. Fingers crossed all goes to plan ...
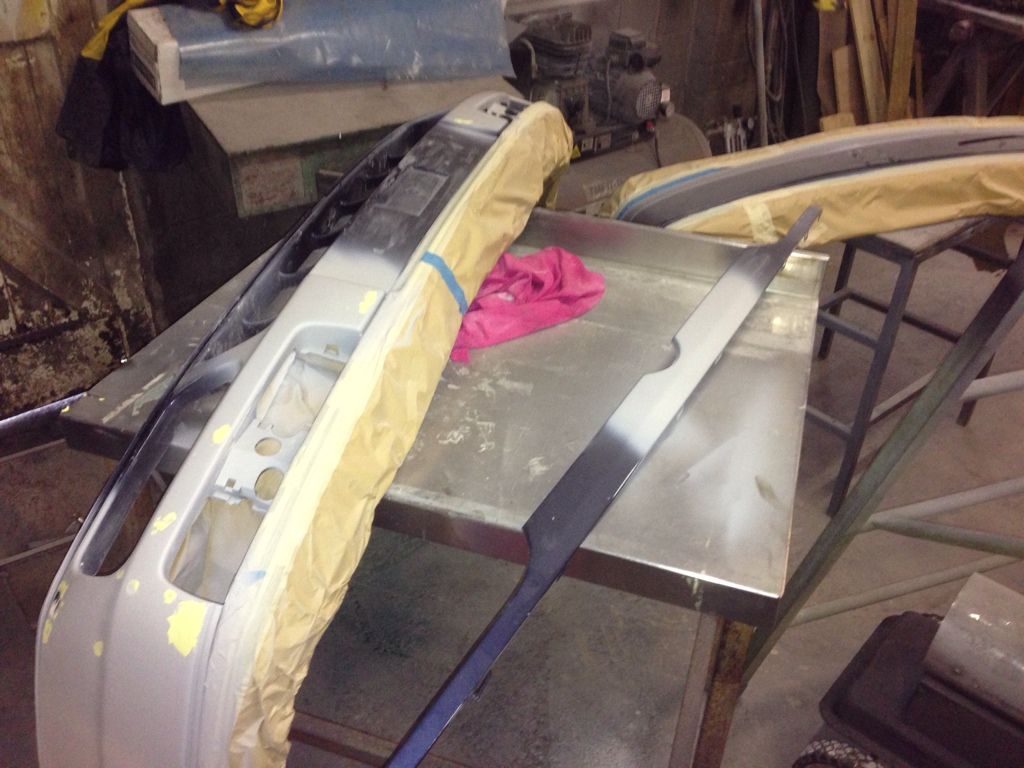
Filler cracks ground out of my original bumper and re skimmed with polyester putty, I couldn't find a good condition texture top local so it had to do!

Managed to source a rear texture top last night in mint condition, despite having a good few layers of jazz blue paint on it.

As the rear arches were looking rough I dug out the seam sealer that was applied last year, bare metalled the folds and outer areas, re primed and sealed with pu adhesive instead. The trims will be going back on, but this is just for peace of mind


More to follow ....
Primer was laid on the bumpers and other bits and pieces Saturday, and another coat dusted patches on the car for good measure, then sanded back later on that day. Luckily the sun was out so I used my natural oven

Later on that day The windows were removed from the doors, and I began to mask up in preparation for painting, after trying to seal the workshop from the outside elements as much as I could with insulation boards and rags shoved in gaps to keep the cold air out lol!

Then early Sunday morning I fired up the propane gas heater and diesel burner and got the temperature up in there in preparation for laying some colour down. After a few last minute touch ups on areas that were missed the spray gun came out


Resulting in a very large headache especially after the lacquer phase. I Used PPG paint & thinner, Laid on top with Maxmayer 0200 clear, mixed with a healthy dose of polar hardener and UPol Rocket to speed up the drying process.

Trip to the Zwo anyone?

While waiting for the paint to dry I made up my heater panel with red LEDs and treated all exterior plastics to a good dose of Plasticare trim dye


Monday morning consisted of fannying around finding all the bits I needed to put it back together, and Tuesday morning before work flatting the whole car back with 1500/2000 grit, removing 95% of the fish eyes, dust nibs and a couple of mosquitoes that had thought wet lacquer was a great place to land :/

Then this morning (Wednesday) I hit it with the polishing stick, using the farcela G3 system twinned with 3m foams. Cut the whole car back carefully this morning as it's still not fully hard, using G3 ultra and a 3M green foam on a 3m soft backing pad. Took a good 6 hours, and managed to move up to G3 fine with a yellow waffle on the roof and bonnet before work.

Paint finish on the bonnet, near perfect under the fluros, not bad for a garage respray

Lhu


Comment