Announcement

Collapse
No announcement yet.

Another FC 5.0 "race car" thread!

Collapse
X
 
  • Filter
  • Time
  • Show
Clear All
new posts

  • #31
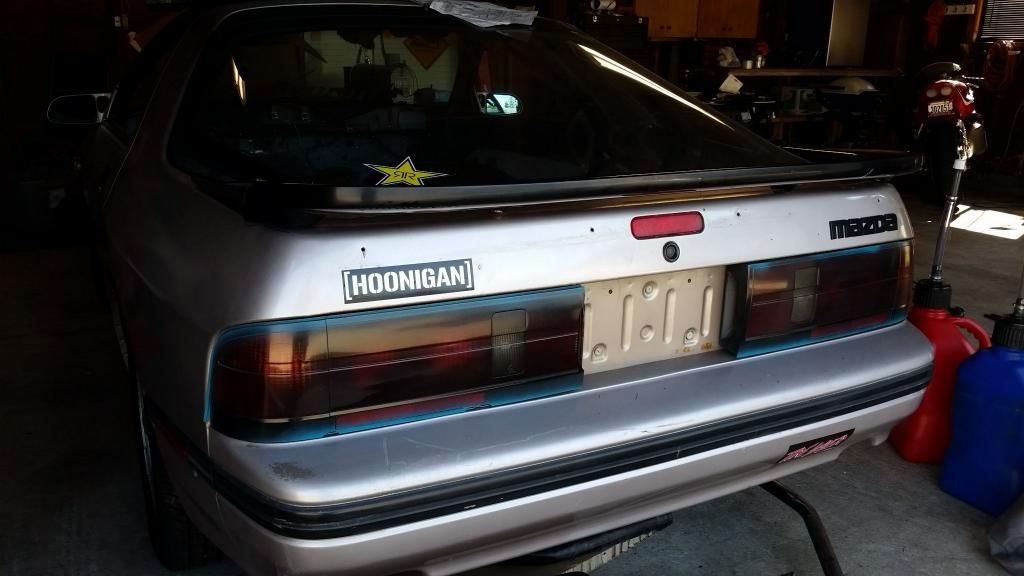
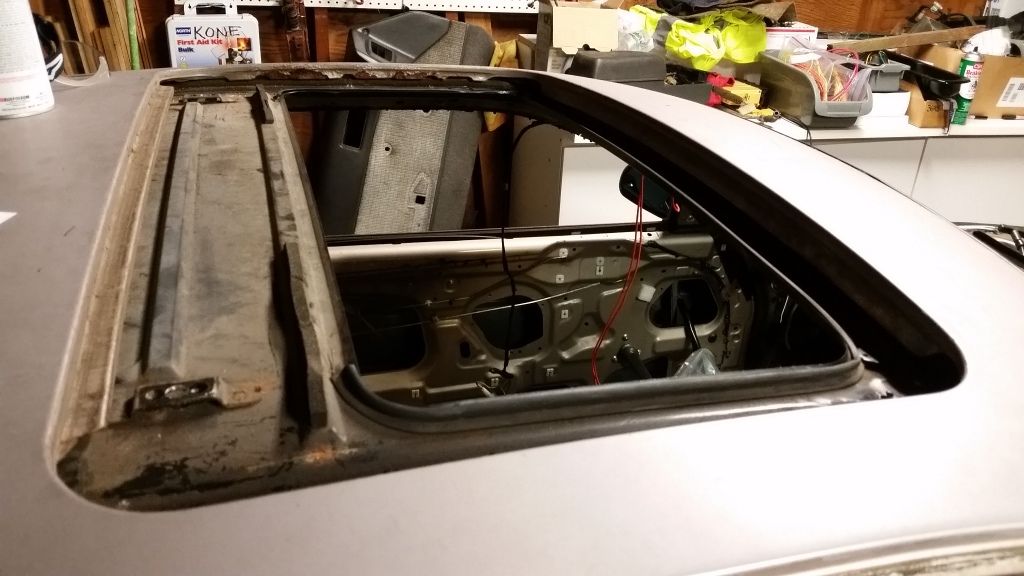
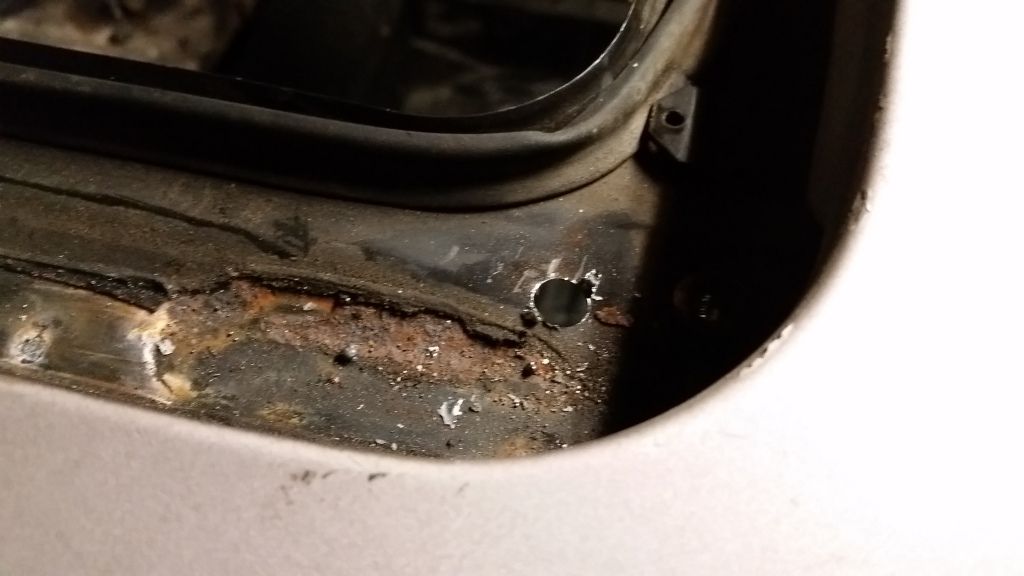
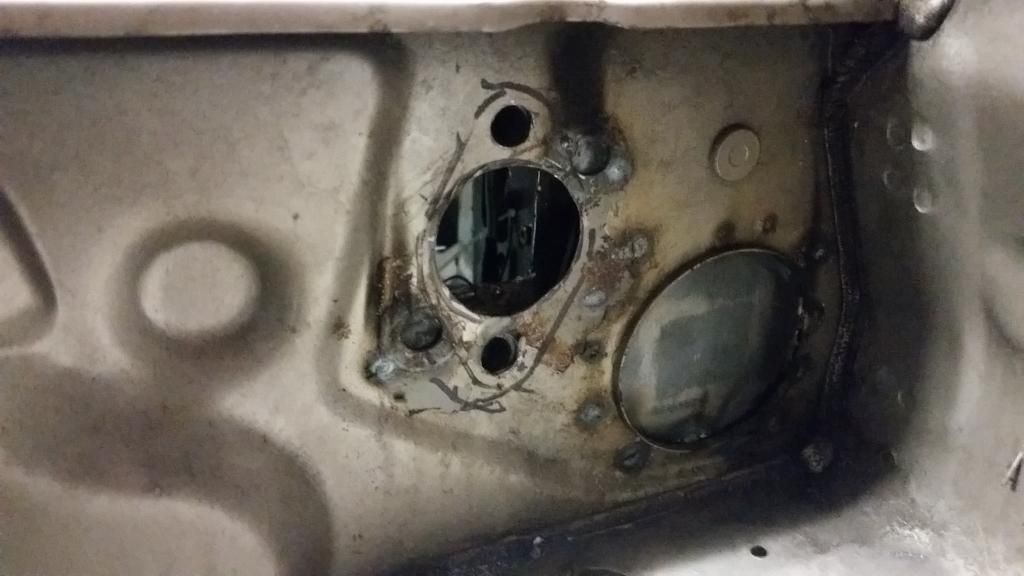
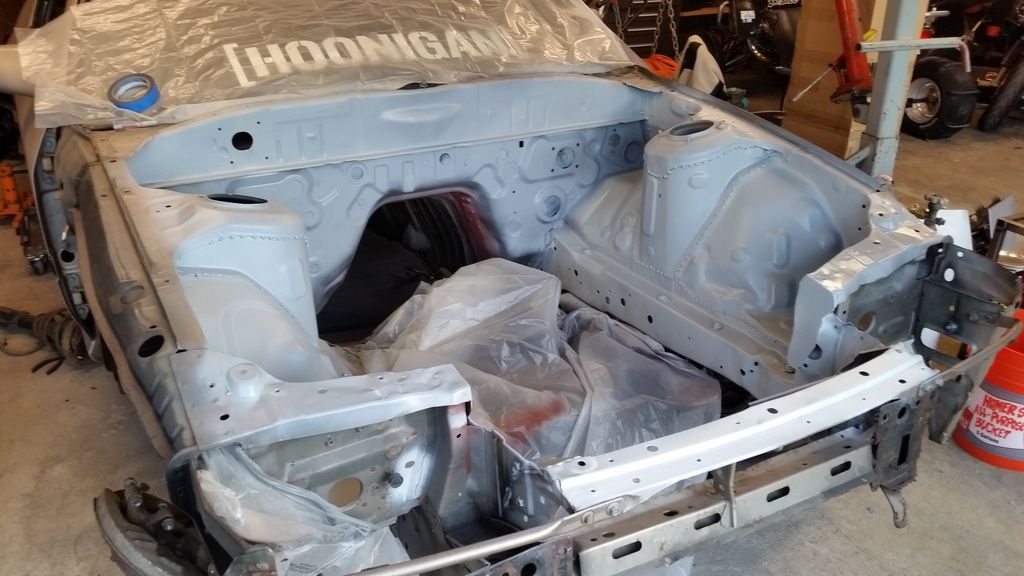
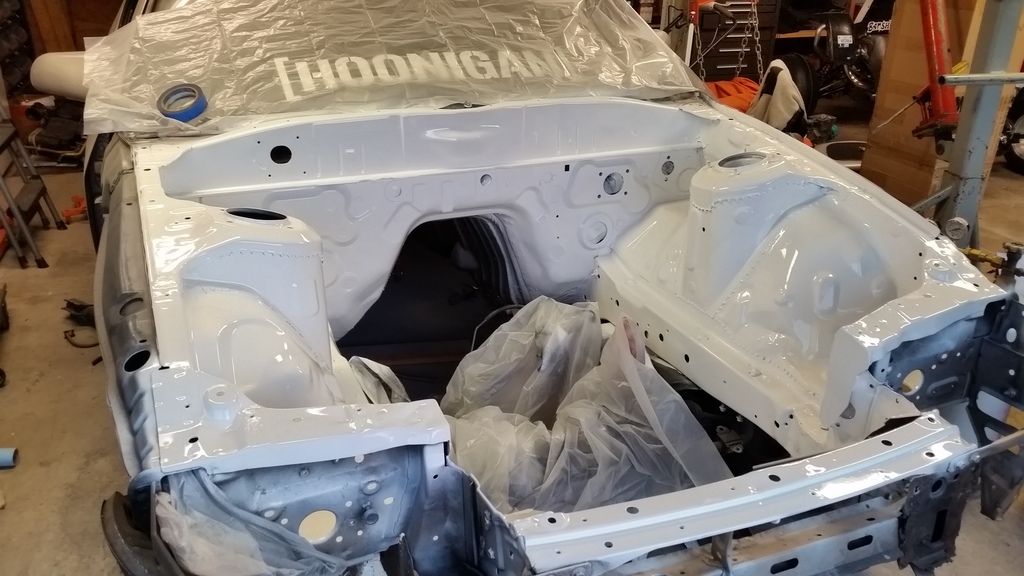
    Even after hacking off the top yours never did clear?? Damn I thought that that would be all I would have to do to clear!

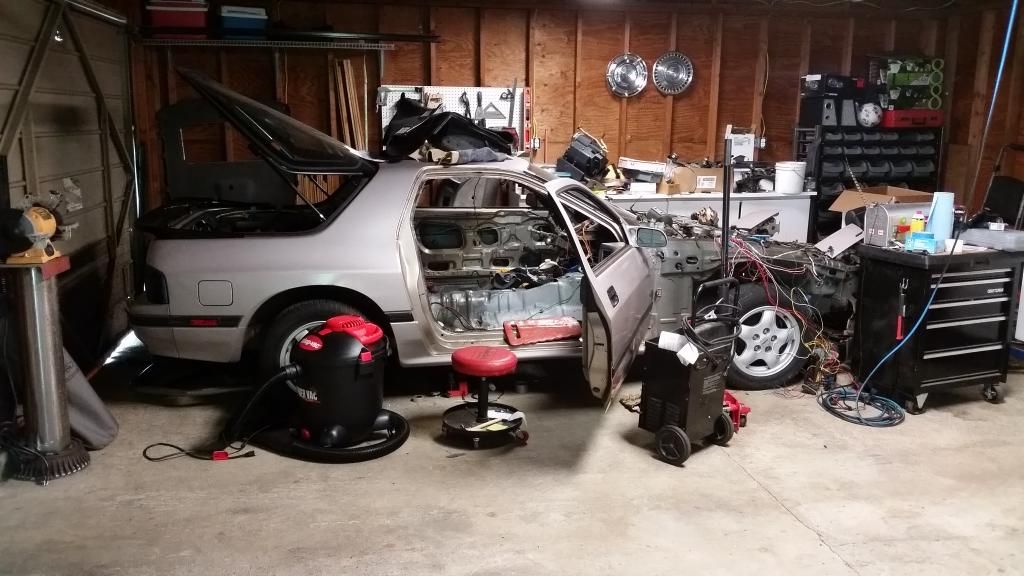
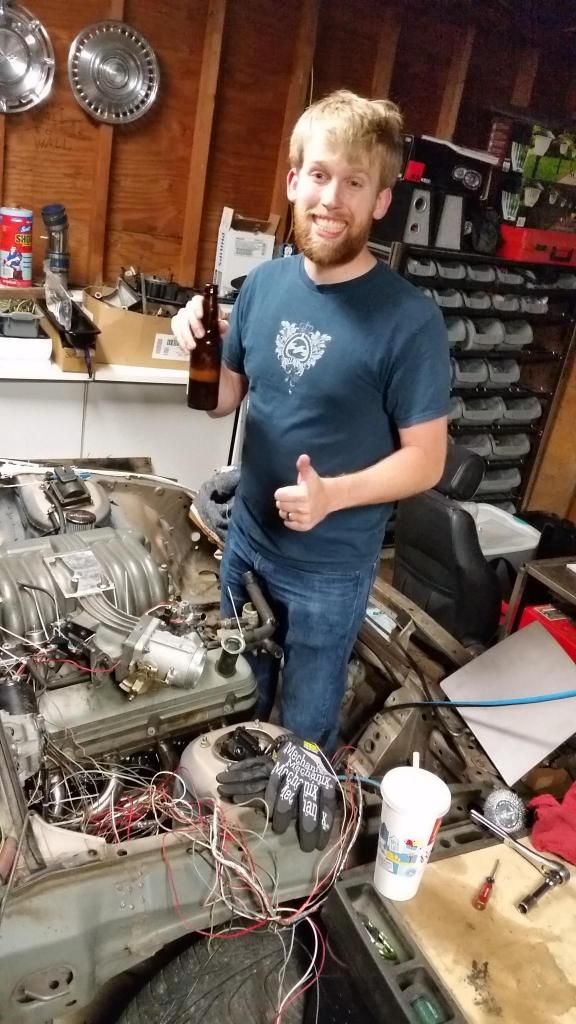
    I've got my R6 as prepped as it can be for its engine swap next weekend, so I'm hoping to plug away at the FC all week depending on how work goes.

    Comment


    • #32
      Welp, not much to update sadly on the FC. The build is changing direction though. Race car just isn't going to happen right now. I think it's pretty clear my focus on projects is questionable to say the least. So between spending my time and money doing this:


      and doing side projects like the R6 (CBR on the right is my wife's bike):


      I can't justify going full bore drift car on the FC. Occasional street driver is the new name of the game. It'll still be low and uncomfortable by nature, but that's okay with me! So instead of putting in a full cage I'll probably just throw in the bolt in 4 point that came with the car and build a harness bar for it. No extreme steering angle and I'll also probably forgo my dual rear caliper setup that I was piecing together. But I hope to still do a lot of the PBM solid bushings and such to get the suspension tuned up. I'll still at least fake the racecar look like everyone else when I can though

      Anyways, the car hasn't changed much but I am still slowly chipping away when I get a chance (not that often right now, sadly).


      I bought a standard S5 spoiler cause I personally am not a fan of the S4 sport spoiler. That'll be getting sold on the old CL when I get around to completely finishing mounting up the new S5 spoiler. It's a little haggard, but after I get done mocking up all the parts I've accumulated everything will be pulled back apart and cleaned up/restored.

      Hammered stock S5 spoiler - $20
      New total: $2384

      Updates will continue to be few and far between. Currently I've got the ECU mostly stripped down to the essentials. I'll probably be taking a break from that soon to focus on painting the interior up, but again progress will be slow


      Not worth a whole new post for this, but painted the awful and faded maroon dash. Turned out really good, much better than I anticipated
      Last edited by Zach Thomas; 09-01-2014, 04:05 PM.

      Comment


      • #33
        Another small update...slowly chipping away. First off, something that is actually related to the swap itself. I took the plunge on some chinese eBay stainless shorty headers and I have to say, for $100 shipped I think they'll work great 
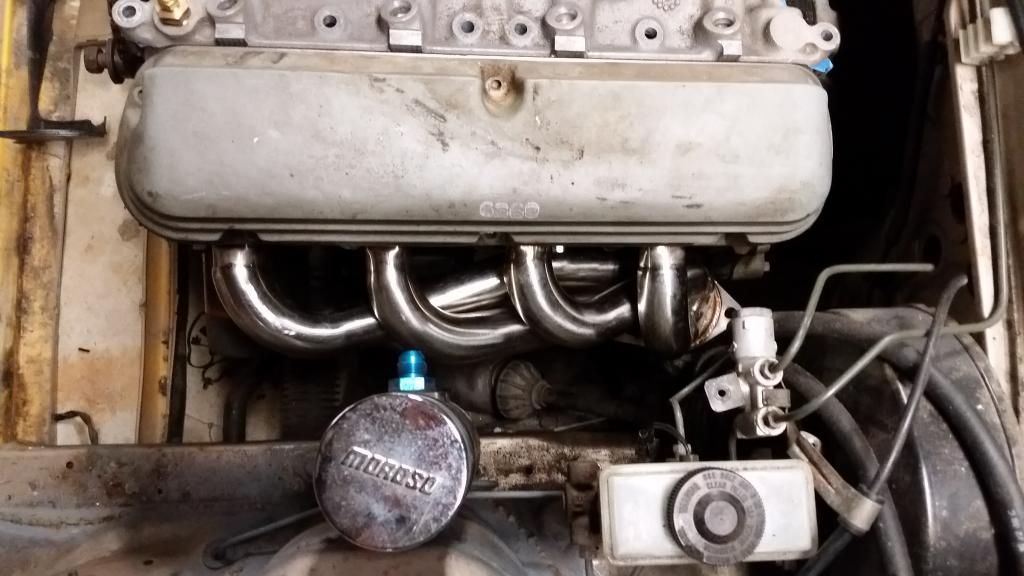
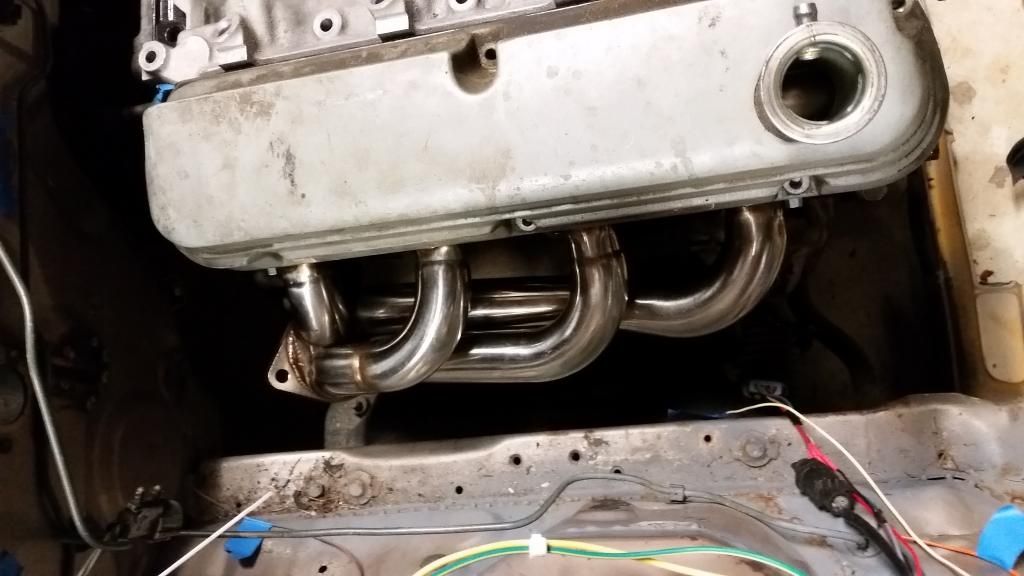
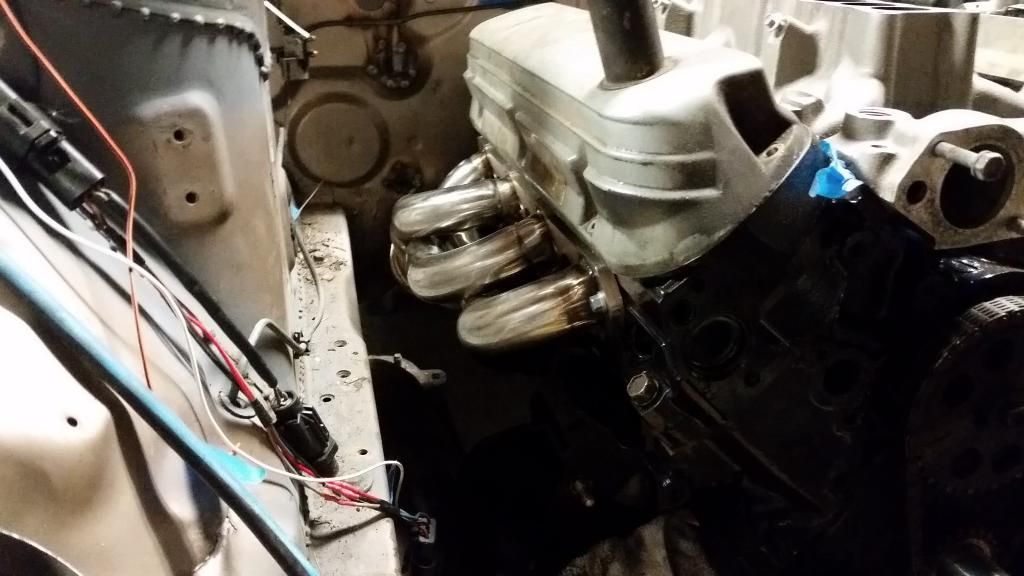
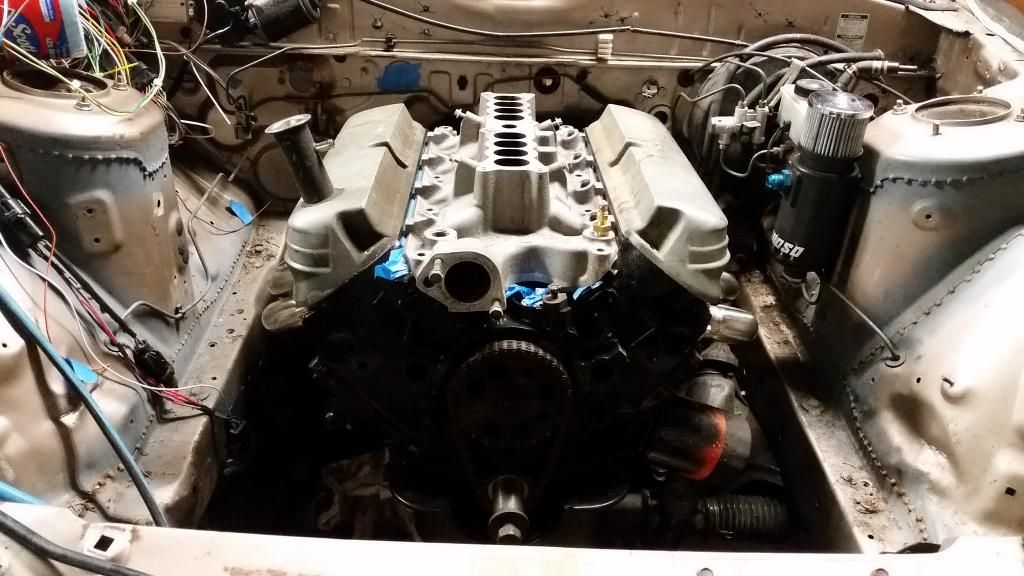
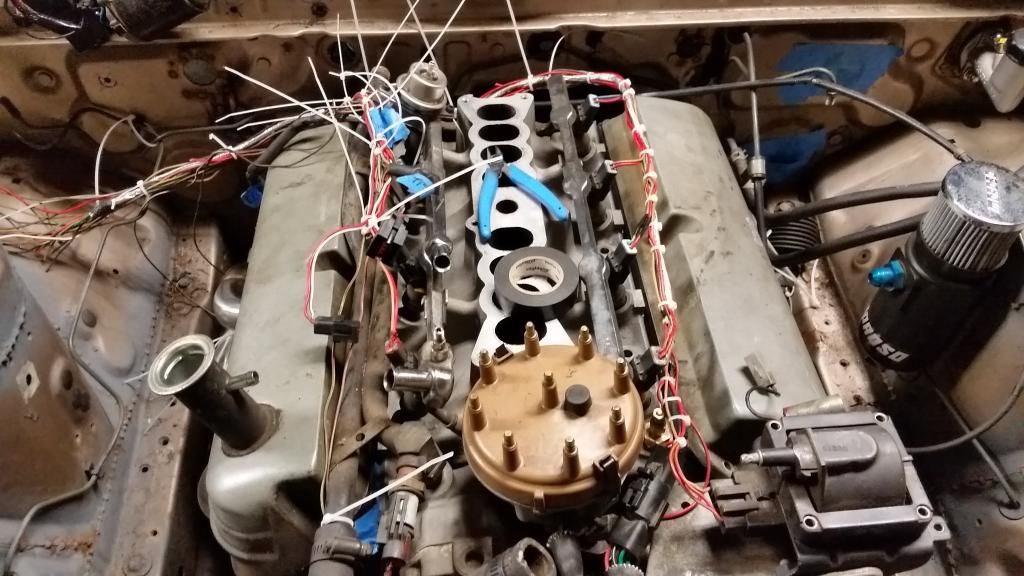
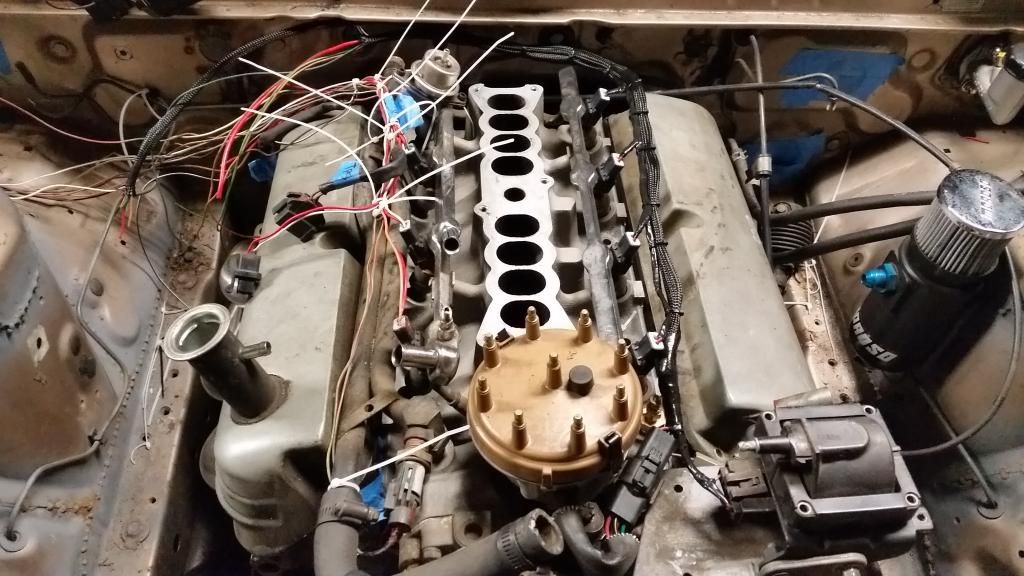
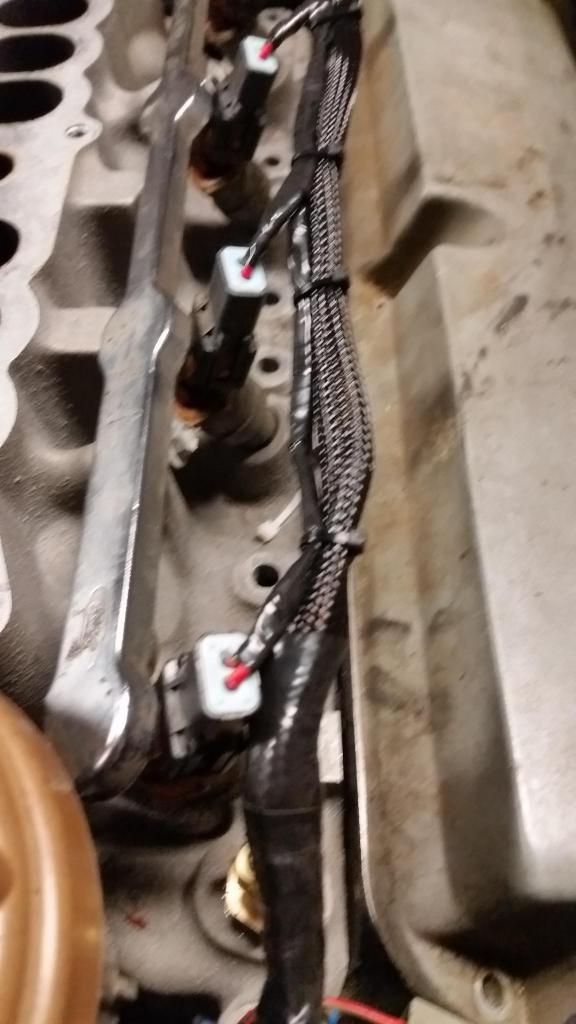
so long as everything seals okay, I'm perfectly happy with them. The weld quality is pretty good, the flanges are thick, the stainless itself looks pretty good and it comes with gaskets and hardware. I'm not positive I'll stick with the gaskets and hardware it came with in the long run, but to get me up and running I think they'll do just fine. Also notice the lack of EGR, these headers are meant for a fox body which doesn't have the EGR bung on the header. Gives a much cleaner look since I have no intention of running the EGR. Here's some pics of them temp installed on the engine:


        You'll notice how nice my factory lower intake manifold cleaned up. All thanks to oven cleaner, a brass scrub brush, simple green and pressure washer. You have to be careful with the oven cleaner cause it can leave stains. I have a few from it, but not bad at all for how well it cleaned it up!

        Also got the passenger half of the floor pans undercoated with some spray can rubberized undercoat. Turned out pretty good, I filled all the unused holes first with my mig welder.


        And did some wrinkle black on the timing chain cover. VHT really does make a nice wrinkle paint in my opinion. So long as you follow the directions it leaves a nice durable finish.


        Like I said, as usual I don't have a big update but things are still rolling along.

        Sweat shop built headers: $100
        Rubberized undercoating x2: $13
        Ducting behind dash for heater vents: $30

        New total: $2527
        Last edited by Zach Thomas; 10-05-2014, 12:29 PM.

        Comment


        • #34
          Minor update: figured out the manual sunroof conversion. I over thought it way too much trying to make sure it sealed like factory and finally decided I'm just gonna do it and deal with any problems with my "design" later. I think too much about this car without actually doing anything

          Here's the sunroof panel with 4 3/8" bolts welded to it:


          Welds look terrible as I'm still using flux core.


          Bare sunroof assembly:


          Drilled a couple holes in it, have yet to clean them up:


          And that's all there was to it except for some drilled and tapped knobs that will hold it in place from the inside. I didn't want to have to use the sunroof support assembly that bolts inside the roof but I figured it was my best shot of keeping the whole deal leak free.

          Also painted the rest of the floor:


          I have a Wilwood 3/4" clutch master on it's way, after I get that fitted to the stock pedal assembly I'll almost be ready to paint the bay. Feel like I've said I'd already be done painting the bay about a million times before...hmm

          Wilwood 3/4" master $50

          New total: $2575
          Last edited by Zach Thomas; 10-13-2014, 08:21 PM.

          Comment


          • #35
            Just dropping this in here for now. Motivation and time have been low lately. The 3/4" Wilwood clutch master cylinder has been mounted 
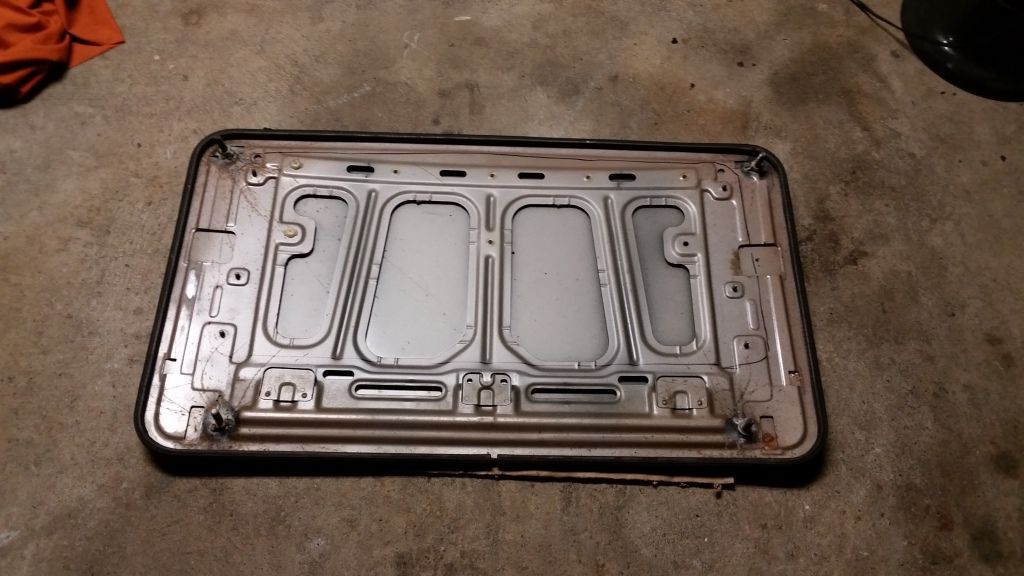
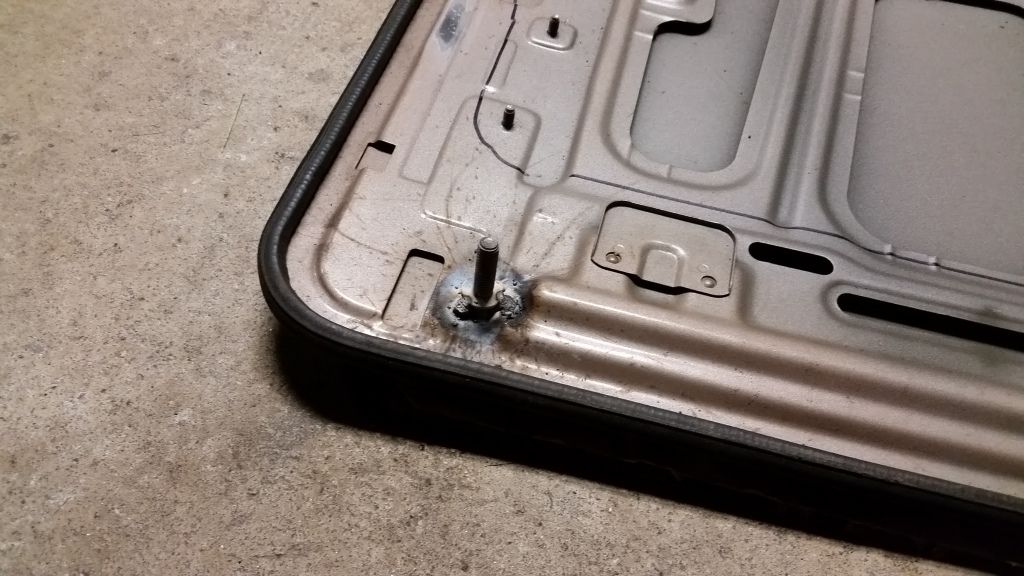
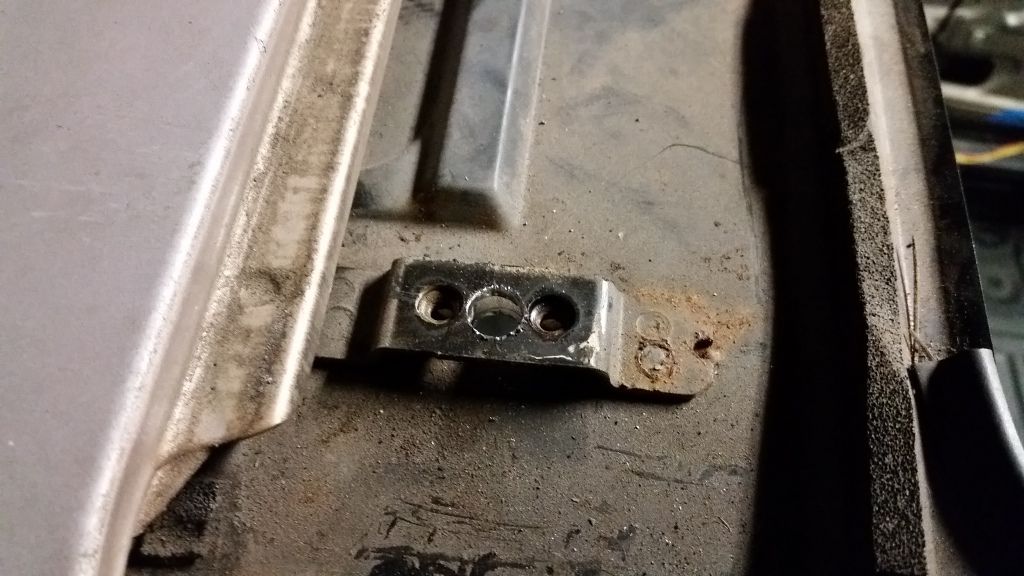
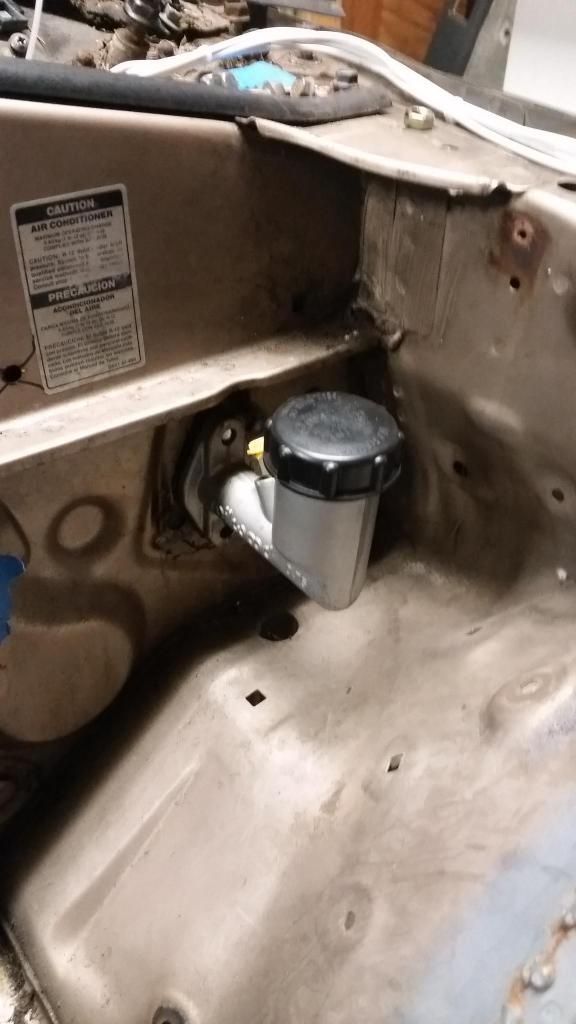
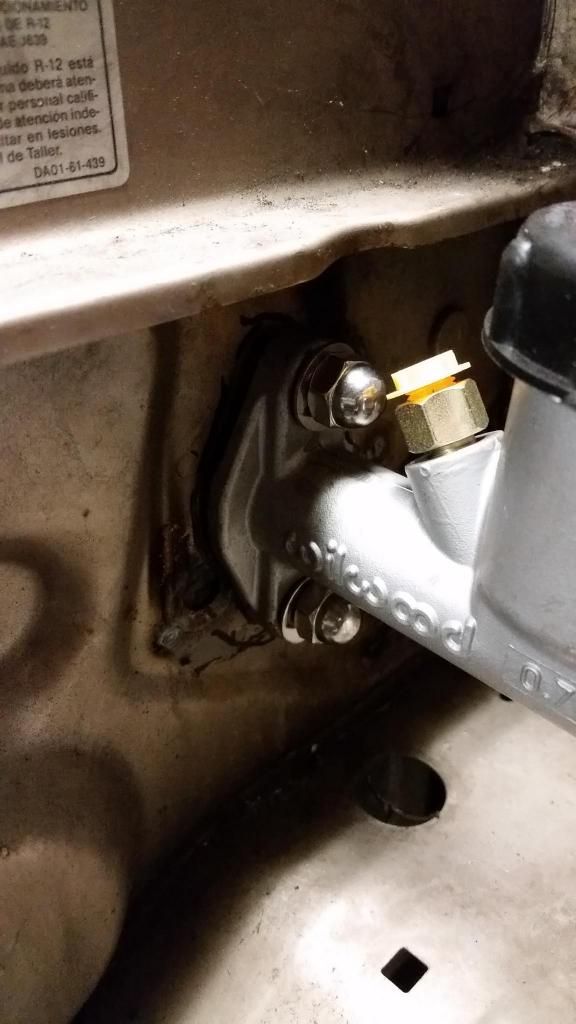
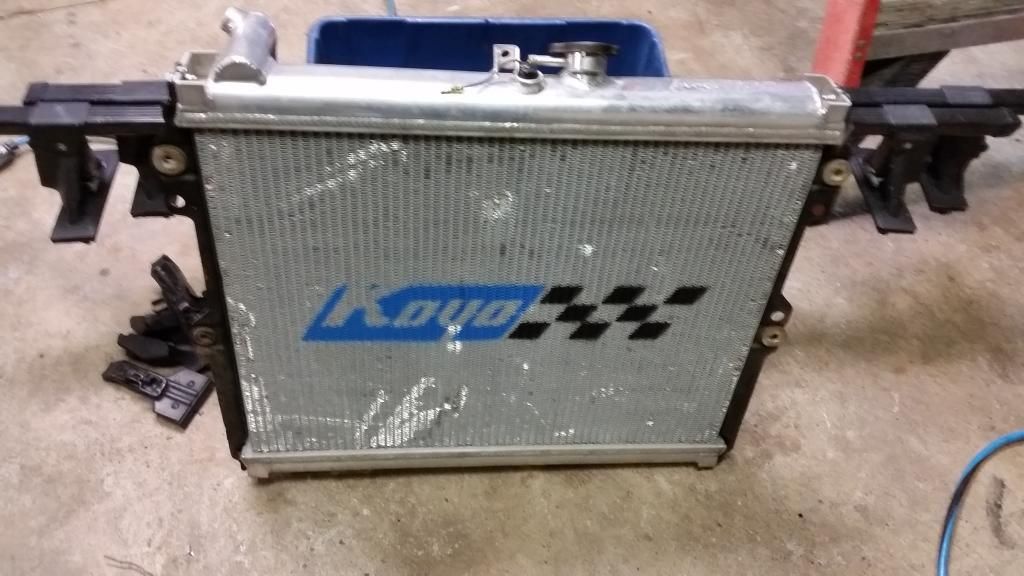
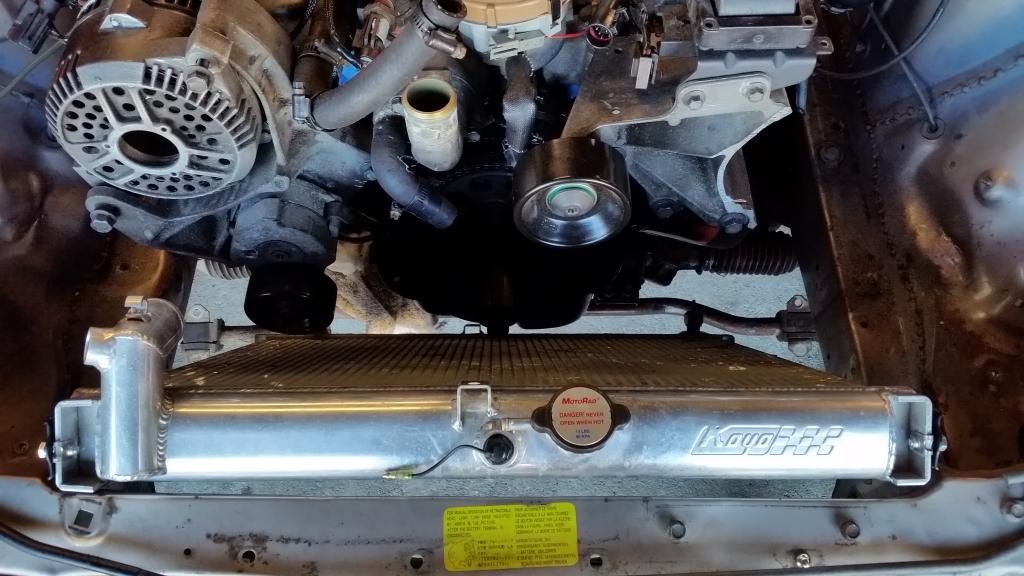
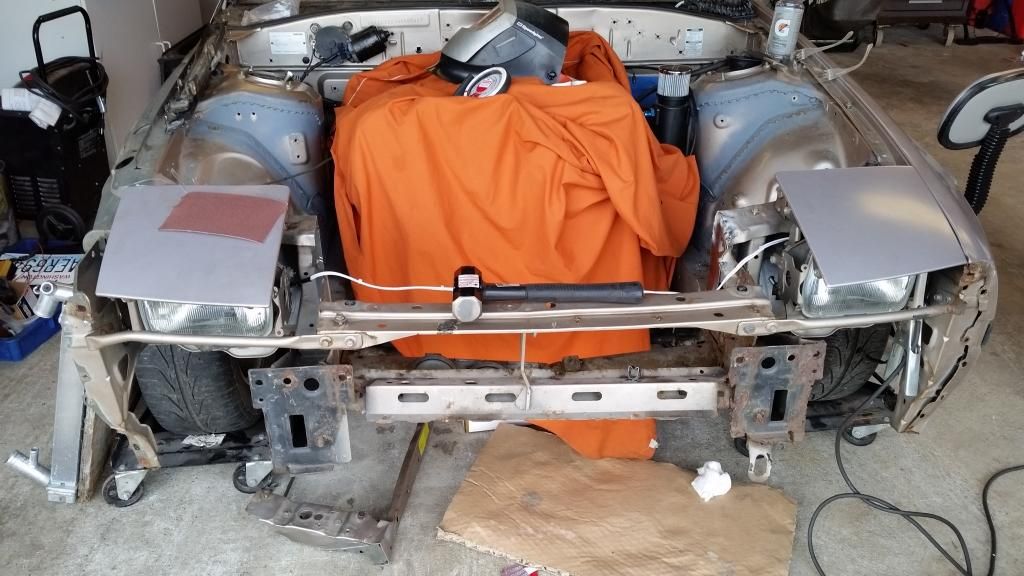
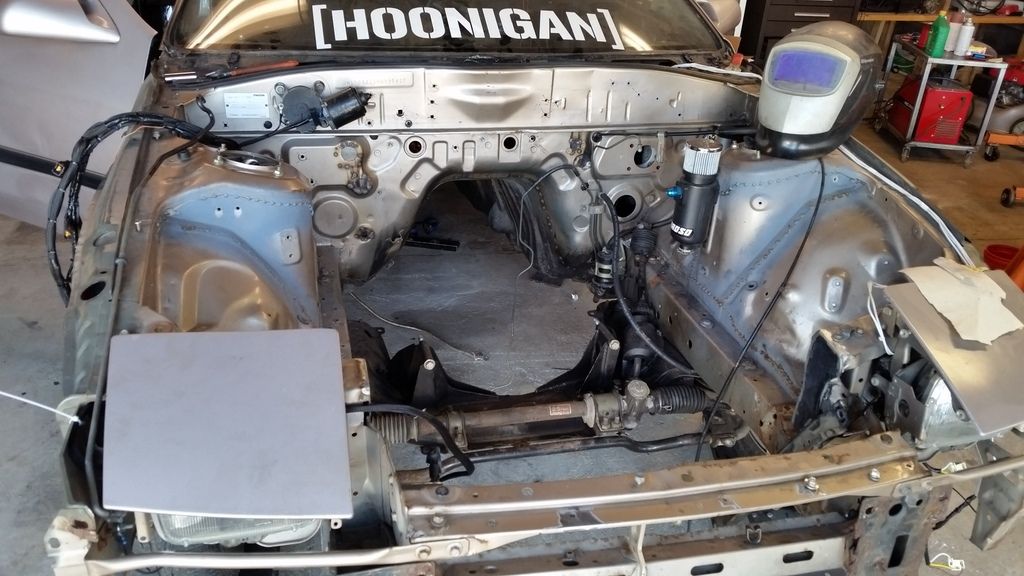
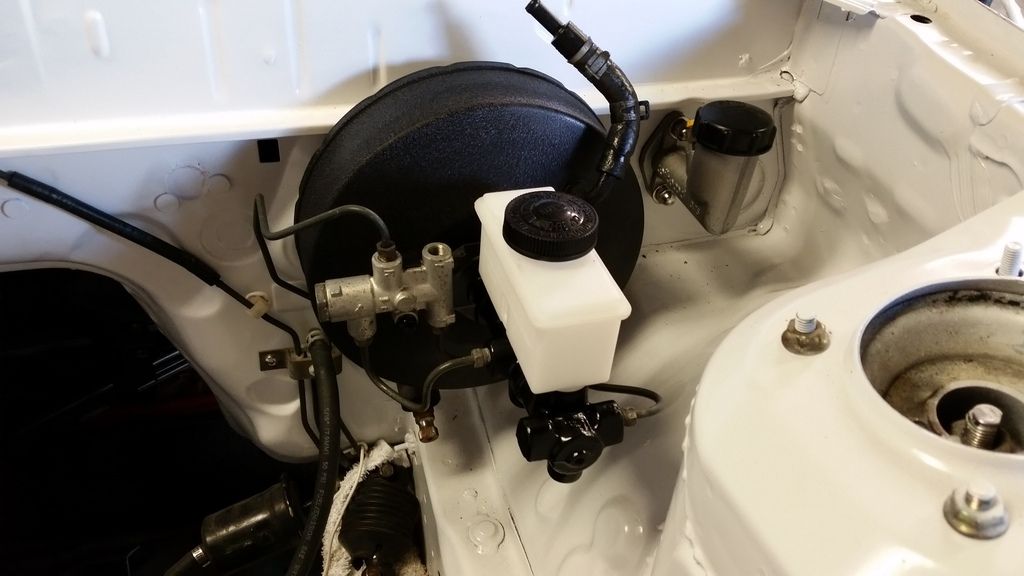
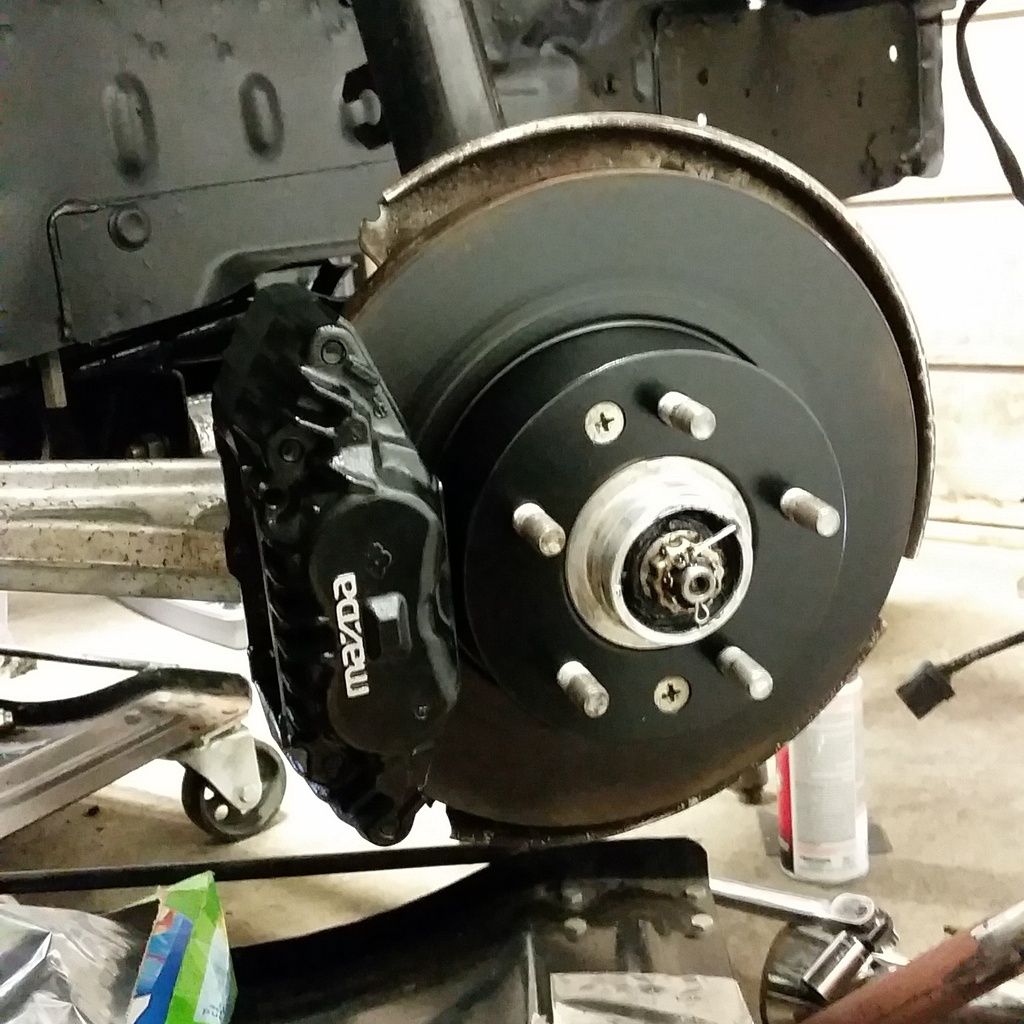
I tried to keep it as close to OEM mounting as possible.
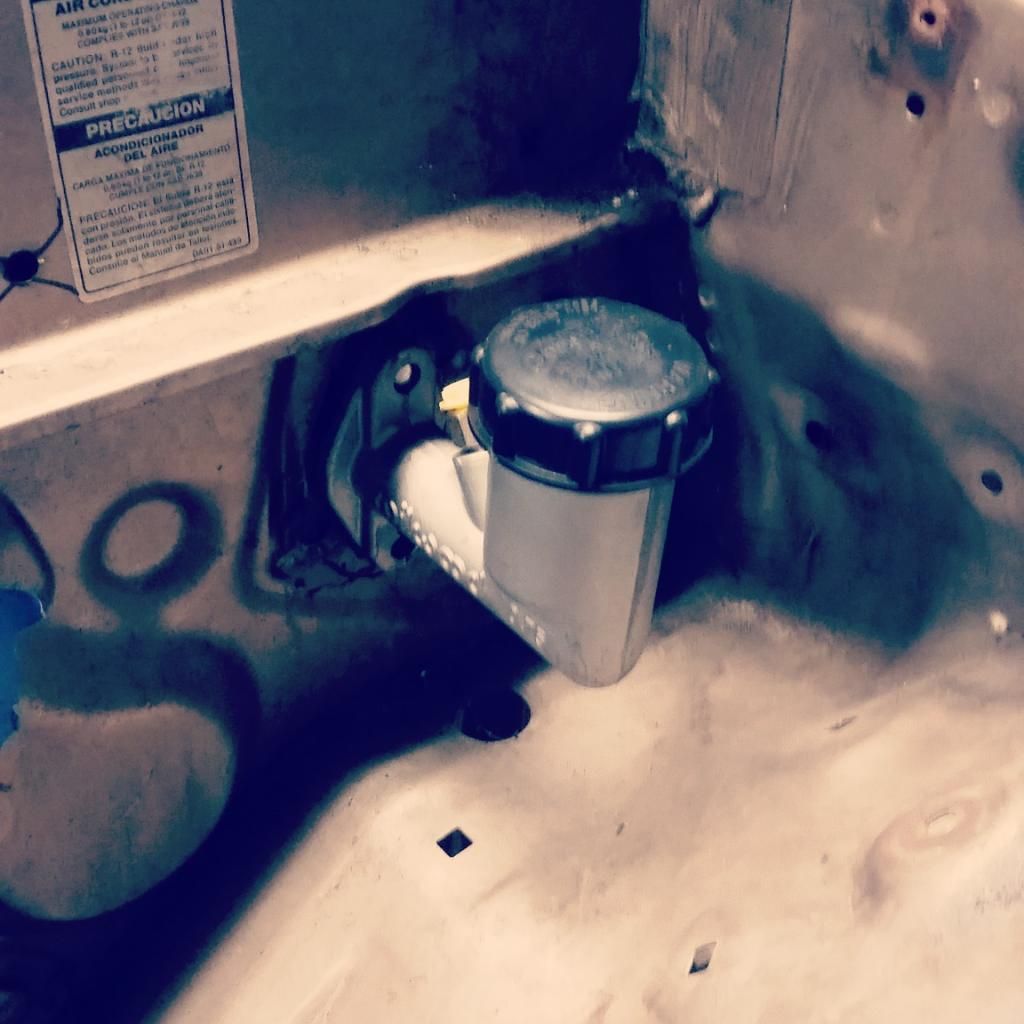


            More cleanup on the pedal cluster to come soon! Those unfamiliar with the stock setup might not notice but the stock clutch master mounting holes are tilted a bit from lining up with each other vertically. Those little support tubes had to be ground off and relocated to line up with the Wilwood holes. The hole in the firewall also had to be enlarged and the original holes filled and relocated. Also the square cutout in the pedal cluster was my doing to clear the Wilwood cylinder. All in all I'm pretty happy with how it turned out! Hopefully it actuates the Miata slave cylinder properly when I get to that point.

            EDIT: mind blowing moment was the 5/16-24 threads on the pushrod of the Wilwood clutch cylinder are so close to whatever metric size is used on the stock RX7 components that I could run a tap almost by hand through the clevis on the clutch pedal (where the pushrod attaches to) and the Wilwood unit screws right on! No need to weld a new nut onto the clevis or anything like that.

            EDIT AGAIN: so should've waited a day to post cause today I bought some fasteners that will work. Stainless acorn nuts to keep the engine bay classy lol


            Here's where it attaches to the stock pedal using the stock clevis:


            Grade 8 bolts (all they had in the size I needed haha), acorn nuts and washers: $5

            New total: $2600


            Side note for anyone reading: if you can plan ahead on fasteners you need, whether in bulk or not, buy online! Supporting local family hardware stores is nice in some respects, but the cost of bolts locally is obscene. I recommend boltdepot.com. Again, just a little tip for those that never realized how much it costs for nuts and bolts.
            Last edited by Zach Thomas; 10-23-2014, 03:45 PM.

            Comment


            • #36
              So this weekend I spent a lot of time in the garage to distract myself from the MPHS shooting (I went to high school there and live about 20 minutes away from it). I really didn't much done on the RX7 but it was still nice to have a distraction from the emotions for a bit.

              Finally doing some actual work on the engine harness haha. I've been avoiding doing any real surgery to it but I finally just decided to go for it.


              Thats me just hanging out in the engine bay, trying to convince my wife that I'm excited to be in there haha.


              First few steps...


              Driver's side done and passenger just routed, no wire sleeve yet.


              Close up, sorry for the blur I broke the screen on my phone (my only camera ) yesterday in the garage so it wasn't noticeable that it was blurry til I uploaded it.

              Some thoughts after doing this:

              -The wire sleeve I used is a massive pain because unlike split loom I can't put it on after the wires are all bundled together. But in my opinion it looks so much better so I had to go for it. It doesn't really protect the wires either but based on how awful a job Ford did from the get go I don't think the harness will need much protection!

              -The amount of time it took to loose route the wires and cover them (keep in mind I've only covered the driver's side at this point) took probably 2-3 hours. I'll admit, that includes me double checking every single connector next to a diagram and fixing any portions of the wiring that had the insulation worn off. That took a good bit of time as did cleaning everything before taping it.

              -There's a big bulkhead-like 42 pin (if I remember correctly) connector that connects the engine harness to a shorter harness coming off the ECU. After fighting the wires while trying to route them I finally just cut all the wires at the 42 pin connector. Ford did a good job of not duplicating wire colors so it really will just be a matter of matching up color to color. My advice to somebody doing something like this is to cut early. Make sure you know how to get it back together after, but don't fight the wires if they're all wrapped around each other and won't route the way you want/need them to.

              -Speaking of the 42 pin connector. I went back and forth on whether I wanted to shorten all the wires to it because where I placed my ECU I have a foot or two of extra length on the wires. I finally realized that for my intended goals, I'm going to completely eliminate the bulky connector and hardwire everything to the ECU harness. More to come on that later.
              Last edited by Zach Thomas; 10-27-2014, 01:59 PM.

              Comment


              • #37
                thats rad, 5.0s are awesome. my buddy has one in his e30, thing absolutely tears on the track.

                fourth gear heavy sliding through corners G.

                Log into Facebook to start sharing and connecting with your friends, family, and people you know.


                not a game
                FUEL INJECTED SUICIDE MACHINE

                Comment


                • #38
                  Thanks Devocat! I love me an e30, that thing looks like way too much fun!

                  Comment


                  • #39
                    3 months and no update....oops. As always I've only made some small progress. I've been distracted with another new side project, a second quad. It's another Banshee that's a bit of a heap. That will be receiving all the extra time/funds for a little bit until it's ready to ride.

                    Anyways, picked up a Koyo radiator and radiator brackets for $150 from a guy who turned out lived not even 2 blocks away! It's not mint, but it'll do I think.


                    Which allowed me to start mocking it up. It's a stock FC radiator, but the 5.0 doesn't allow you to keep it in the stock location. So I started cutting away some metal....

                    No room to spare, even with no crank pulley or rad fan


                    So I started cutting


                    Here's what it looked like after cutting (driver side was similar, just shaped differently)


                    And then I started cleaning it up


                    Here it is all cut out


                    So next chance I get I will be finishing off the panel I tacked in, then do the same for the other side. Then I can actually reweld on the radiator mounts. I'm probably spending significantly longer on it than necessary, but I really don't want to just slam it together since I'm hoping to properly paint up the bay before I do the final assembly of this car. We'll see if it actually turns out OK or not.


                    So not the biggest update but I'm just knocking out some of the small things that have been sitting waiting to be done. After the new quad project gets completed I'll hopefully be back at it on the FC. And I have been (and still will) be doing lots of tinkering that's not update worthy. Which in the end is really all the little things that get this car closer and closer to completion.


                    Koyo radiator + brackets $150

                    New total $2750

                    Comment


                    • #40
                      Looks good I think I looked through your thread a long time ago but I can remember... You are still a bit ahead of me but I am leaving the interior stock for now witch saves a lot of time.

                      Its funny how fast the cost adds up don't it!
                      Instagram @Petrol360

                      88 RX7 FC 5.0
                      77 Yamaha XS400

                      Comment


                      • #41
                        Alright, this poor hacked up little RX7 is finally (albeit slowly) starting to look a little better. Just finished painting the bay today, got dat Teeson111 treatment with some shaved holes and gloss white rattlecan paint!

                        I spent all week after work welding up holes, grinding, finishing my radiator mounts, bondoing (what a stupid idea that was on my part), sanding, etc just to get the bay done. I'm happy with how it turned out, but I severely underestimated the amount of time I ended up spending on it. I also truck bed lined my inner fenders, which turned out very good in my opinion! Also bought a new in box full black carpet set, hopefully that will go in within a couple weeks.

                        First had to pull the engine back out, took all of 30 minutes since none of the bolts were more than hand tight


                        Then I was left staring at this


                        Before going any further I finished up my radiator mounts


                        Then after a number of hours that I would rather not disclose nor think about I got this


                        And theeeeeen all white and fresh (for now)


                        Also, the prepped the inner fender vs finished


                        Also, cause I'm a dork I noticed this on my VIN. Not quite "5.0 HO" but close


                        All in all I'm happy to be back to making some progress on this car. Hopefully within the next few months I can order up gaskets, oil pump and timing chain set for the engine plus the seals for the trans so that they can go back into the car. In the mean time I need to paint the subframe, steering rack and mounting kit. Hopefully it won't be long til the next update.


                        Old total: $2750

                        Carpet kit - $150
                        Rattle cans and seam sealer (bondo was on hand, free!) - $60

                        New total: $2810

                        EDIT: this $800 dilapidated CL special was what had stolen my time for the last few months. I bought it needing a full rebuild, so I kryloned everything and rebuilt the engine fully (first full rebuild, 2 strokes are easy though). It ran excellent down in Oregon a few weekends ago, I didn't have to touch a thing (knock on wood). Its still about as ugly as can be, but it was an awesome learning experience and the feeling of breaking in an engine that I rebuilt was amazing.

                        Last edited by Zach Thomas; 05-31-2015, 12:30 AM.

                        Comment


                        • #42
                          any updates?

                          87 RX7 5.0 (driftcar)

                          Comment


                          • #43
                            Looking good! Ready to get mine on the road and start with finishing touches! I need to try and get my sunroof working. Im going to wait and build a roll bar at the same time since I will have to take the headliner out of the car.
                            Instagram @Petrol360

                            88 RX7 FC 5.0
                            77 Yamaha XS400

                            Comment


                            • #44
                              Originally posted by Skervey View Post
                              Looking good! Ready to get mine on the road and start with finishing touches! I need to try and get my sunroof working. Im going to wait and build a roll bar at the same time since I will have to take the headliner out of the car.
                              Your car is looking good too! Have fun getting the sunroof working....I changed my mind on doing a manual one (realized my idea for it sucked and also realized I want to open it and close it while driving) and then bought a whole nother sunroof assembly since I trashed mine taking it apart. Soaked the cables in oil for a few days and they were still rusted stuck. Ended up breaking them You can't get the cables from Mazda either. Most FCs cables are rusted out, so just be careful when you start messing with it.


                              My update game is very weak, been busy on house projects and trying to make this POS miata a more solid daily: Miata. It burns oil like a 2 stroke and has some water leak inside the car that I have yet to track down. It's basically been consuming all my time in the garage but thanks to seeing the posts in this thread, and the fact that over the last week I've been itching to keep on with the FC I'm going to order a gasket set for the 302 this week along with a timing chain set. Also should be getting my welder back from a buddy this weekend so I can build my hydro clutch bracket finally. And by that I mean completely copy what Mr Teeson1111 has done!

                              Slow reassembly has begun in the last couple weeks


                              I'm so happy how the clutch master turned out, not that it was entirely difficult or fancy but I just like that it fit so easily to the firewall and mounts more or less like stock.


                              Went overboard and sprayed the centers of the rotors, completely unnecessary but figured why not when I already had the paint out. Also started rebuilding the calipers, this one is done. The rest are pulled apart waiting their turn. BTW, the caliper piston dust boots are a garbage design on FCs in my opinion. Or maybe its just the Centric parts I used, but they don't hold on very well. Hopefully I don't have to redo them anytime soon from losing a boot.

                              Also got rid of my 2 quads for one....you guys probably think I'm some serious rider or go out every weekend or something but really I'm a novice who just goes out when time allows lol. But this should require less of my attention than my Banshees did


                              I deleted my Rockauto order for the new master cylinder and caliper rebuild kits, but that combined with a few odds and ends was around $100 I believe. So the running total is up to $2910. Pretty sure I'll be into this for around 5k without paint (if I ever do end up doing that), probably without wheels (and I'm not ashamed to rock cheap wheels lol) and with a basically stock 5.0. But I'll be fast(ish) and low(ish) so oh well!

                              Comment


                              • #45
                                Haha "But I'll be fast(ish)" love it! I keep saying that to myself to! Took mine for a drive yesterday to check everything and make sure it was ready for the exhaust shop. It was fast but I have such short gears im always shifting (3000K rpm at 60...). A guy at work just finished a SR20DET swap into his 240. He is running a bigger turbo and other bolt on parts but it feels much faster then my RX7... But then again I really haven't gotten on my RX7, I don't want to blow it up yet. Trans only has about 3 miles on it so I need to let that break in first.
                                Instagram @Petrol360

                                88 RX7 FC 5.0
                                77 Yamaha XS400

                                Comment

                                Working...
                                X