 Tweet
Tweet
I love it when you update this... :drool:
-
-Christian.
'91 318iS AW2/blk slow garage queen/build...
'02 ///M3 carbonschwartz 6MT daily beast
'37 Chevy pickup-garagequeen... -
-
i need to be missing something here
this car is beautiful. the fab work is amazing. the time, effort and attention to detail put into this goes far beyond most show cars i see.
this is not a missile. awesome build and stuff but lets not throw that word around. makes everyone look silly.Comment
-
Fark. Much envy on all the fab work.
Comment
-
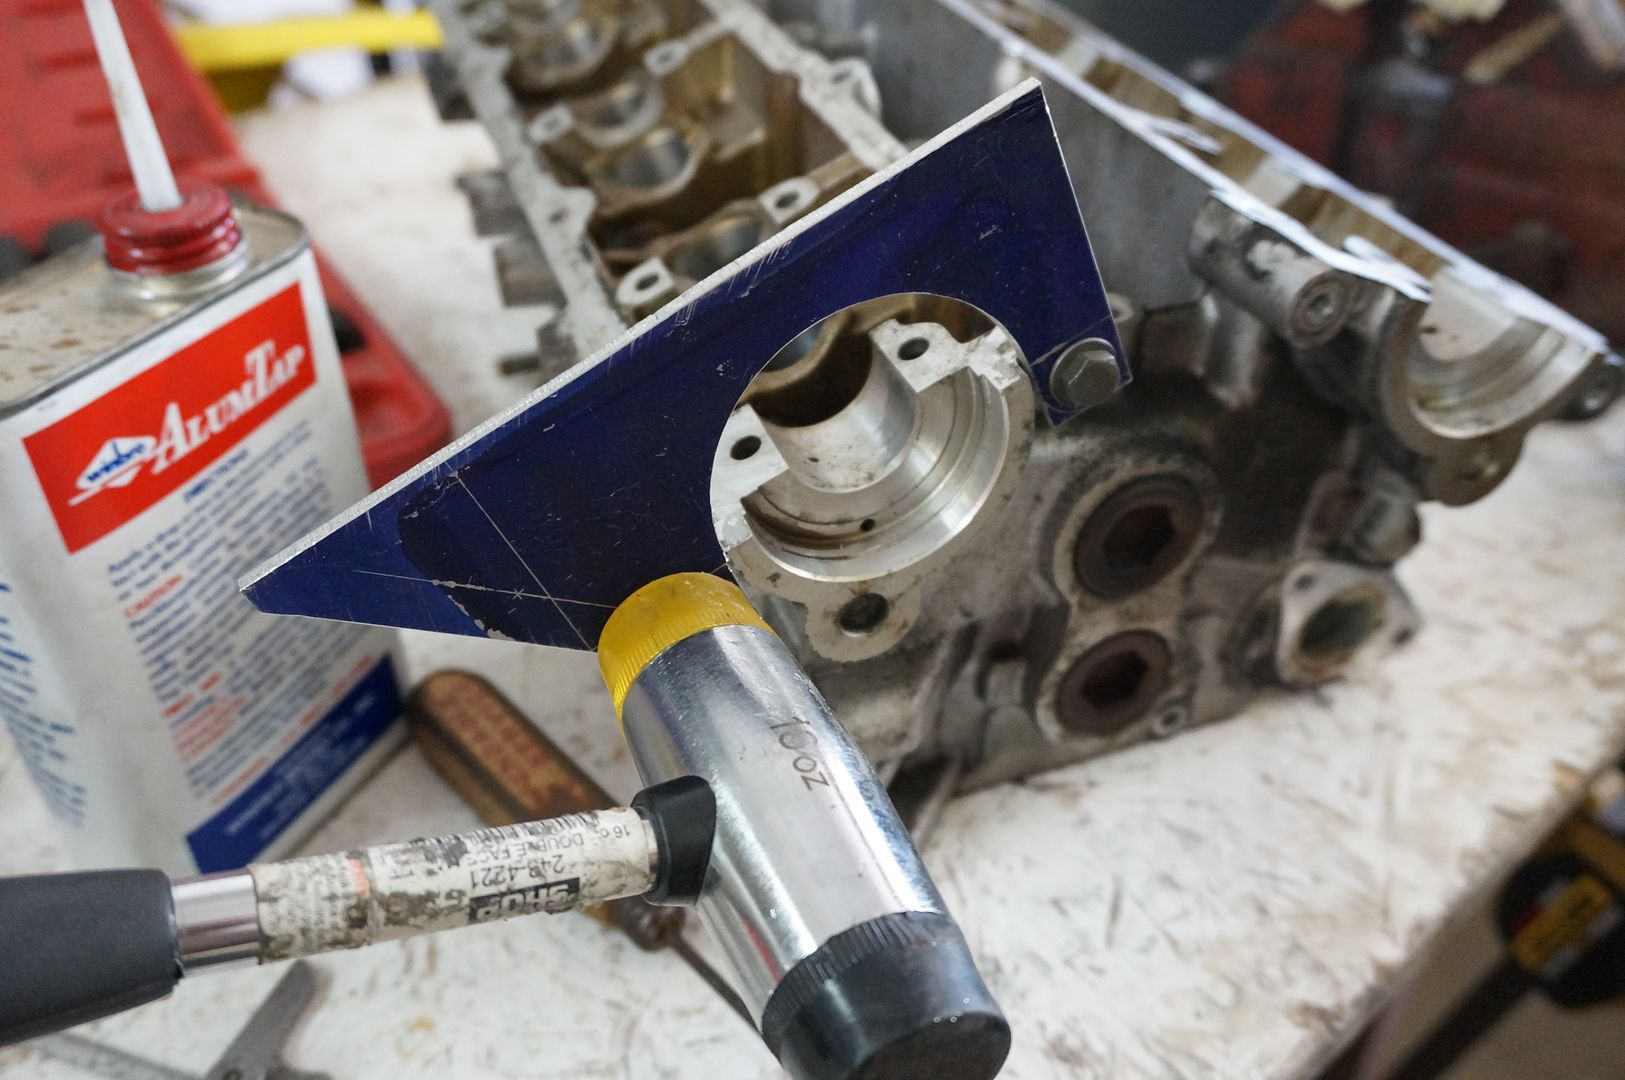
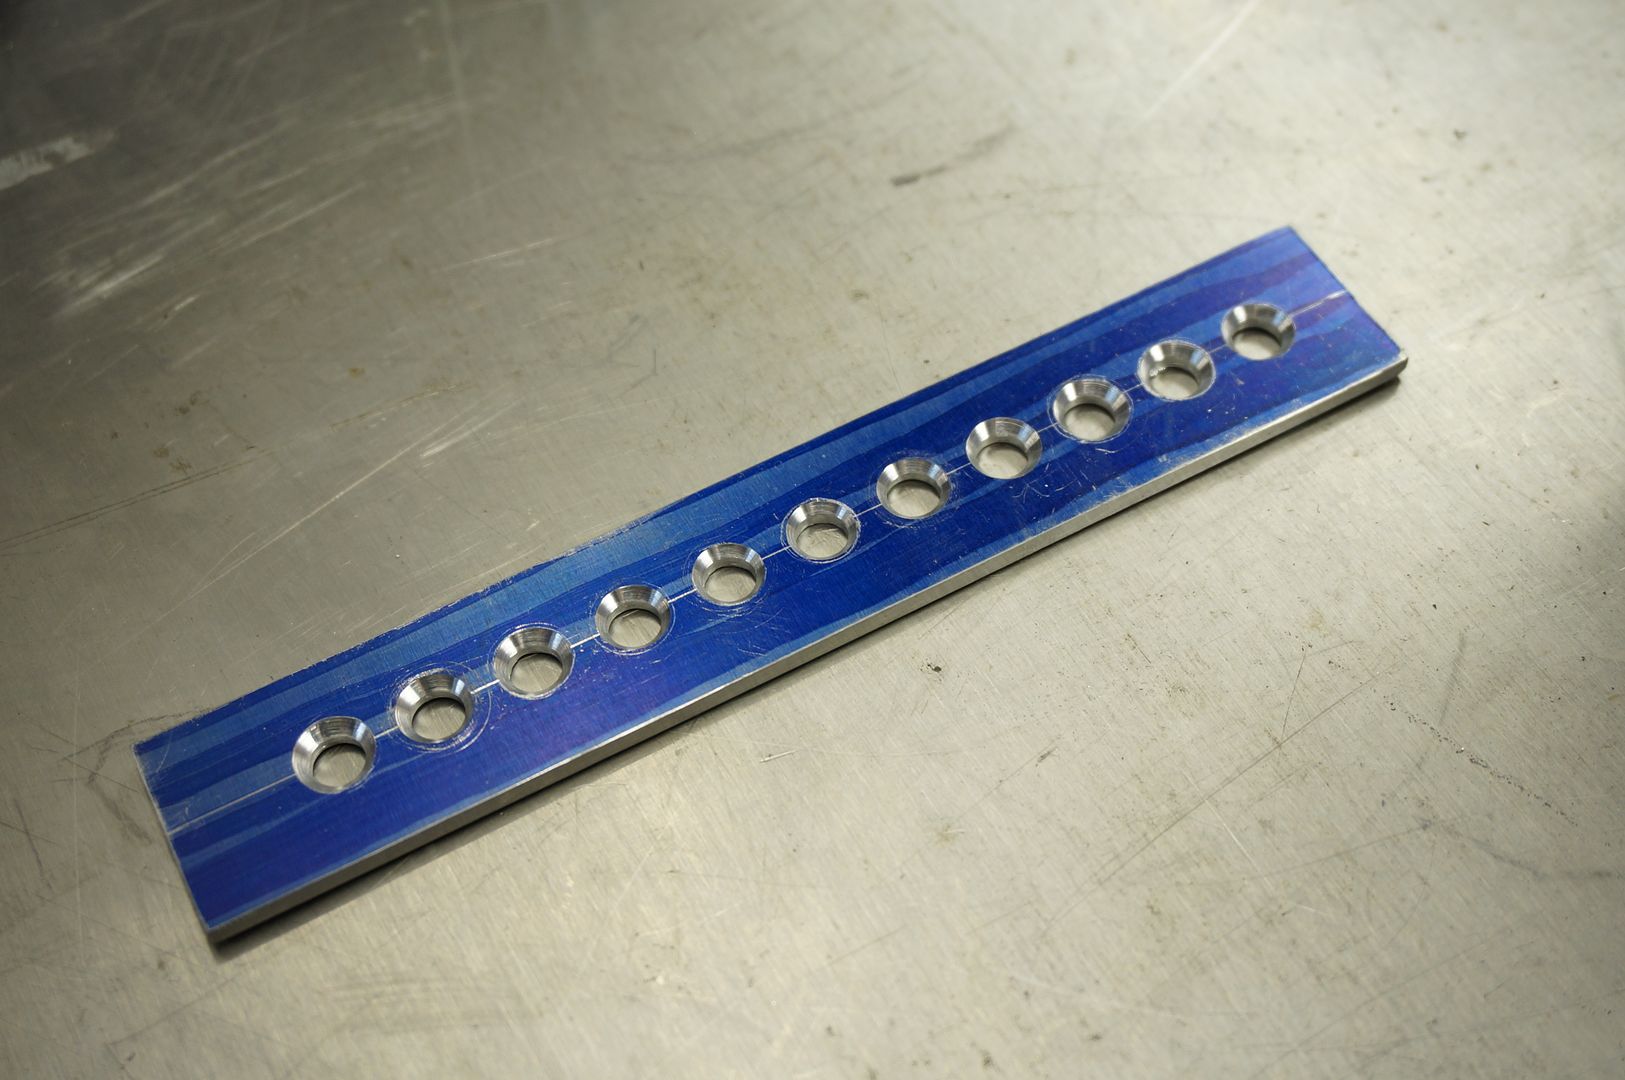
Now comes the bracing
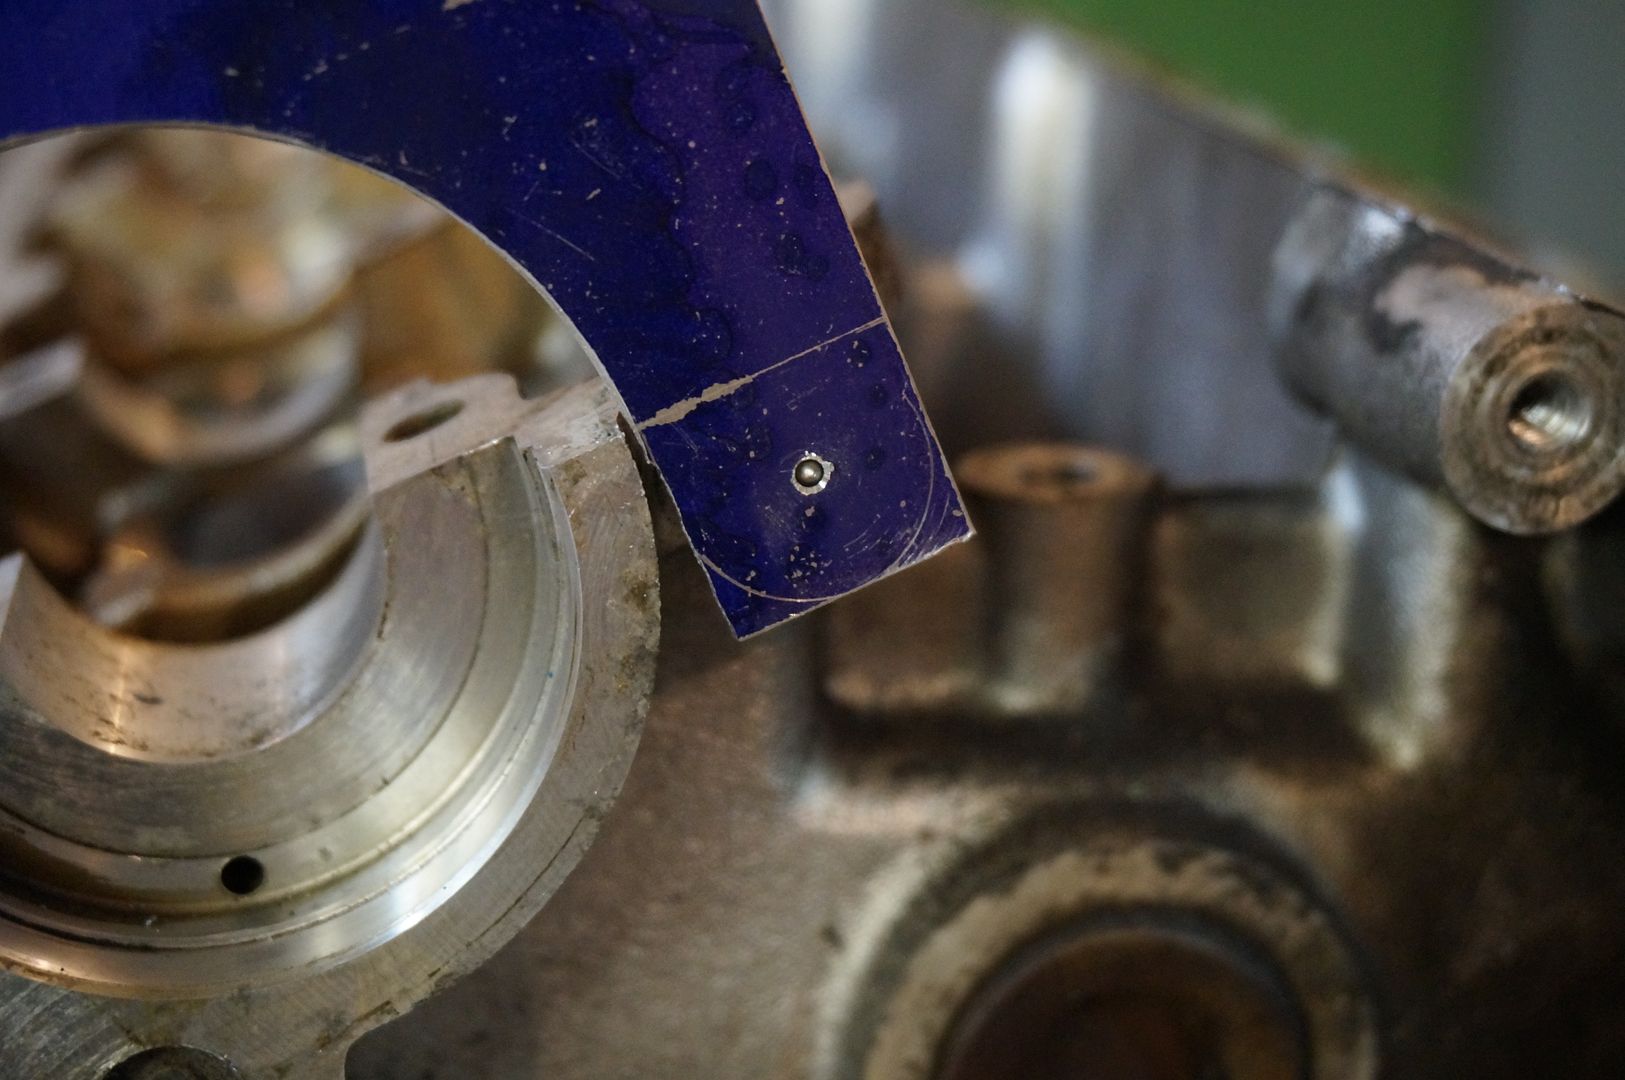
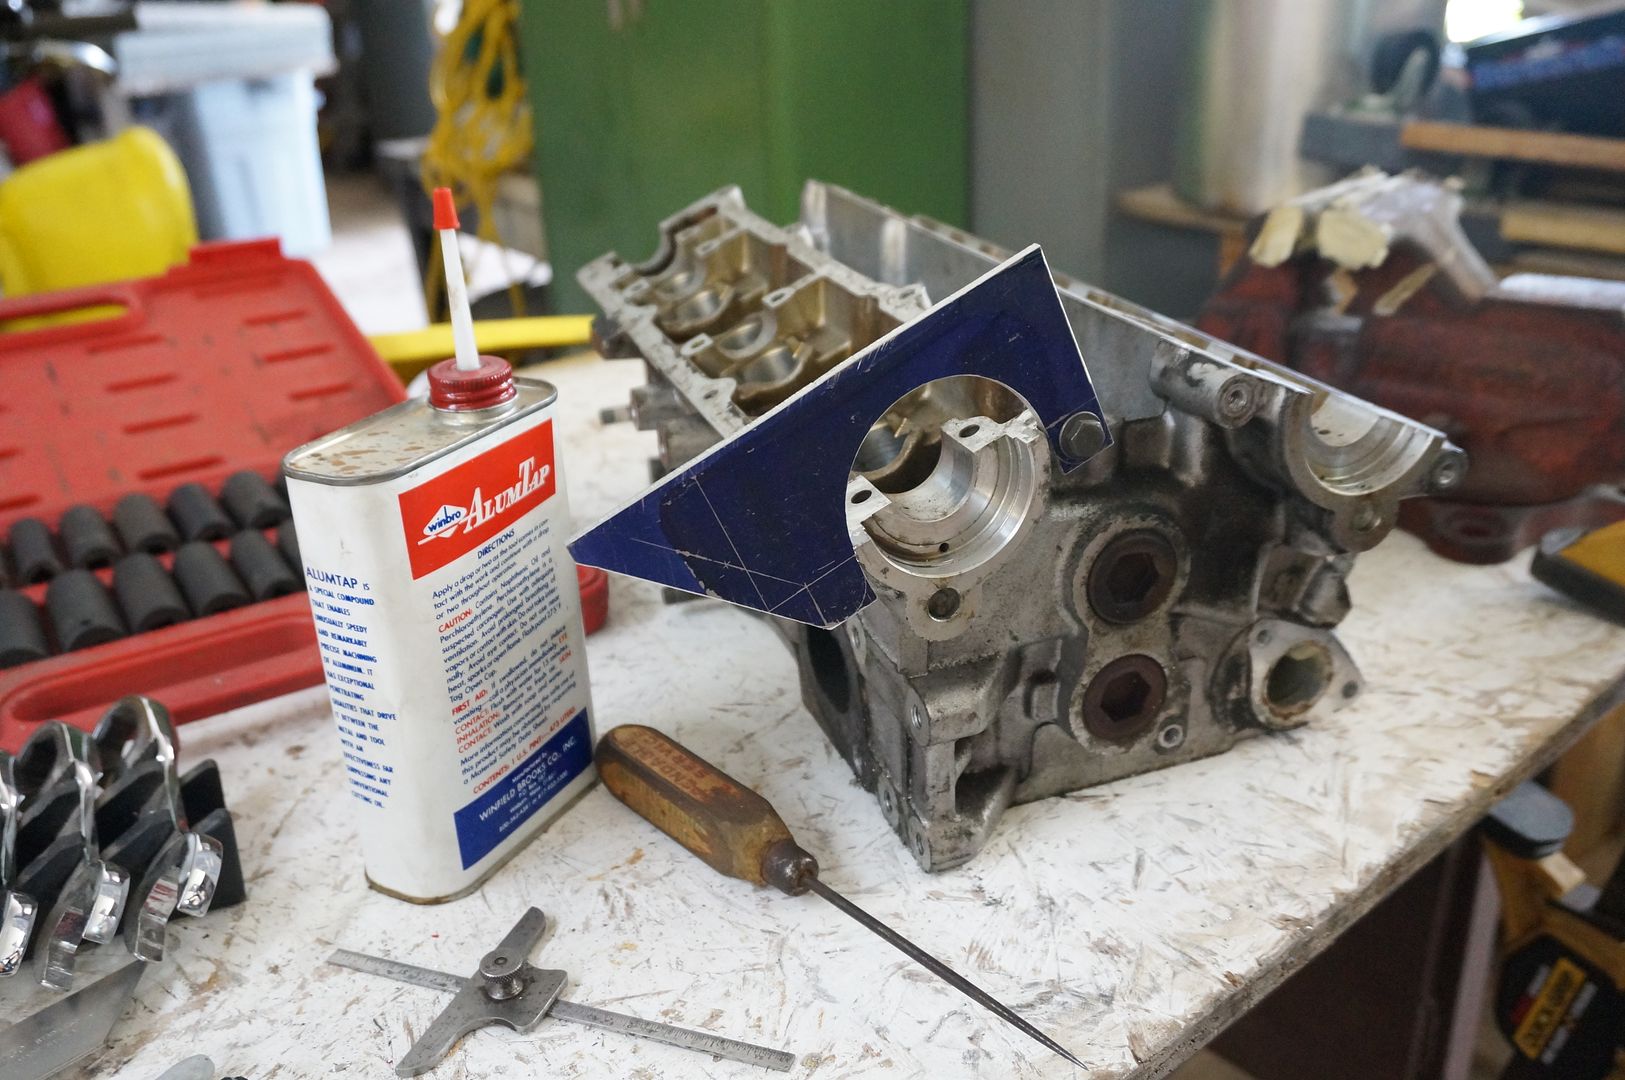
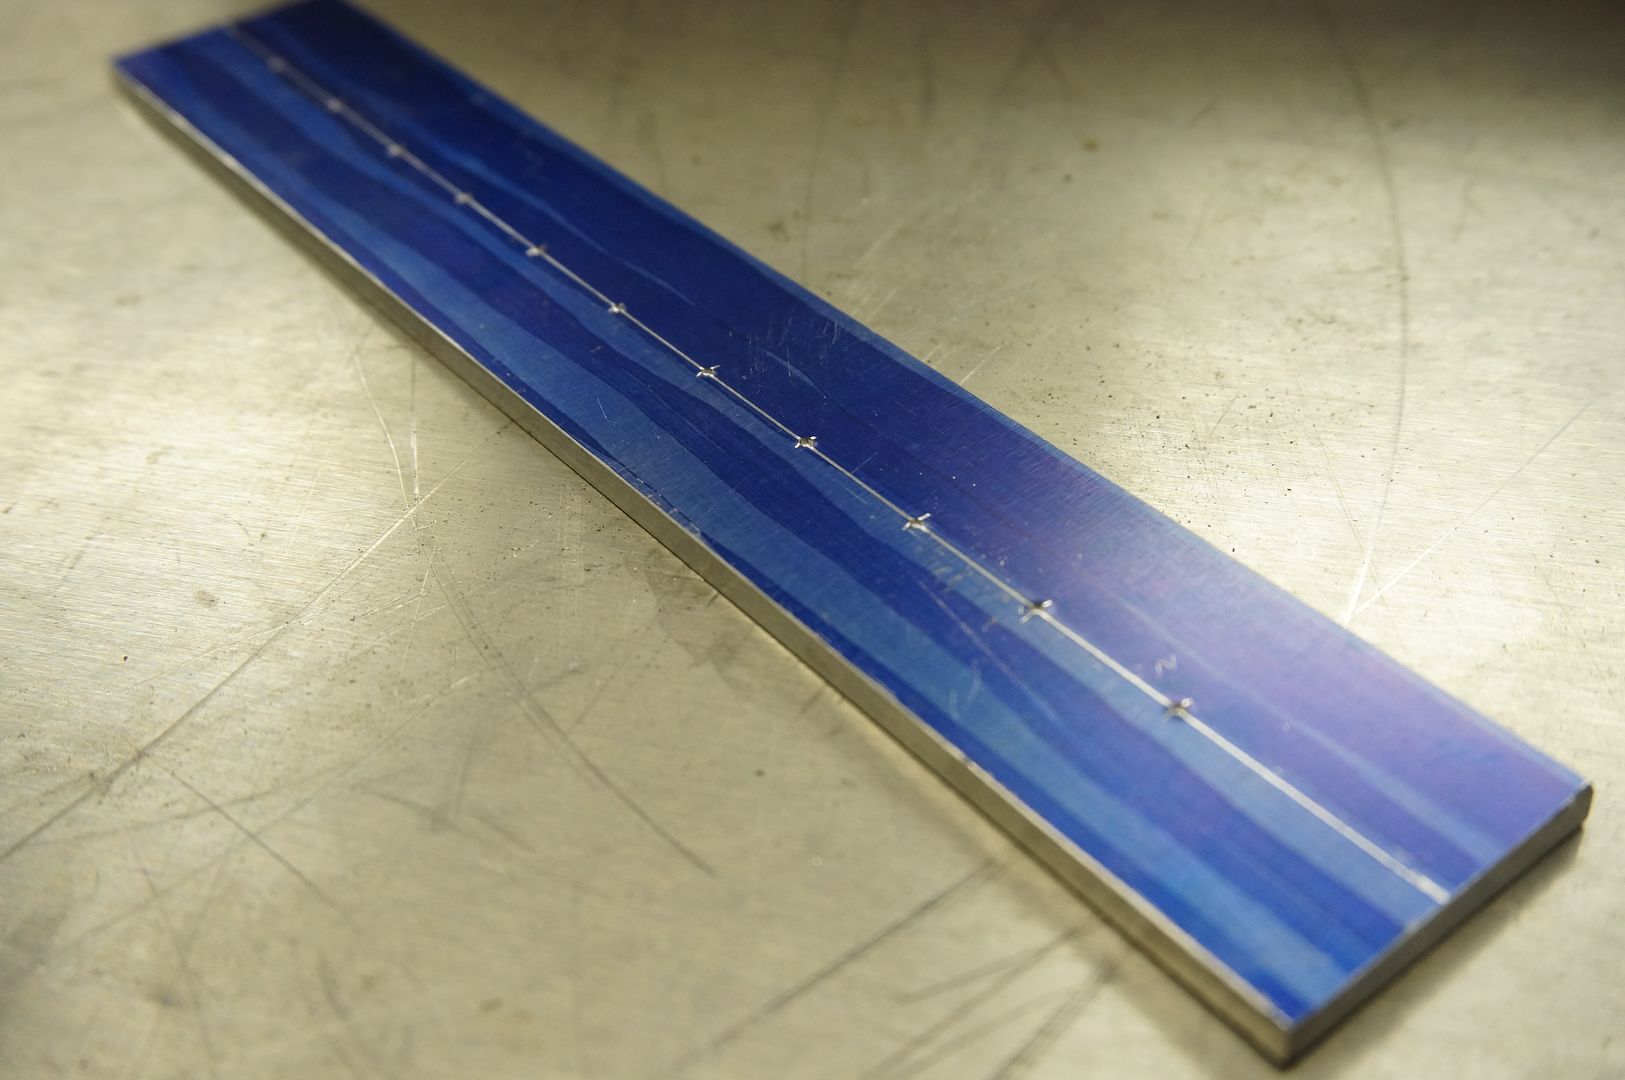
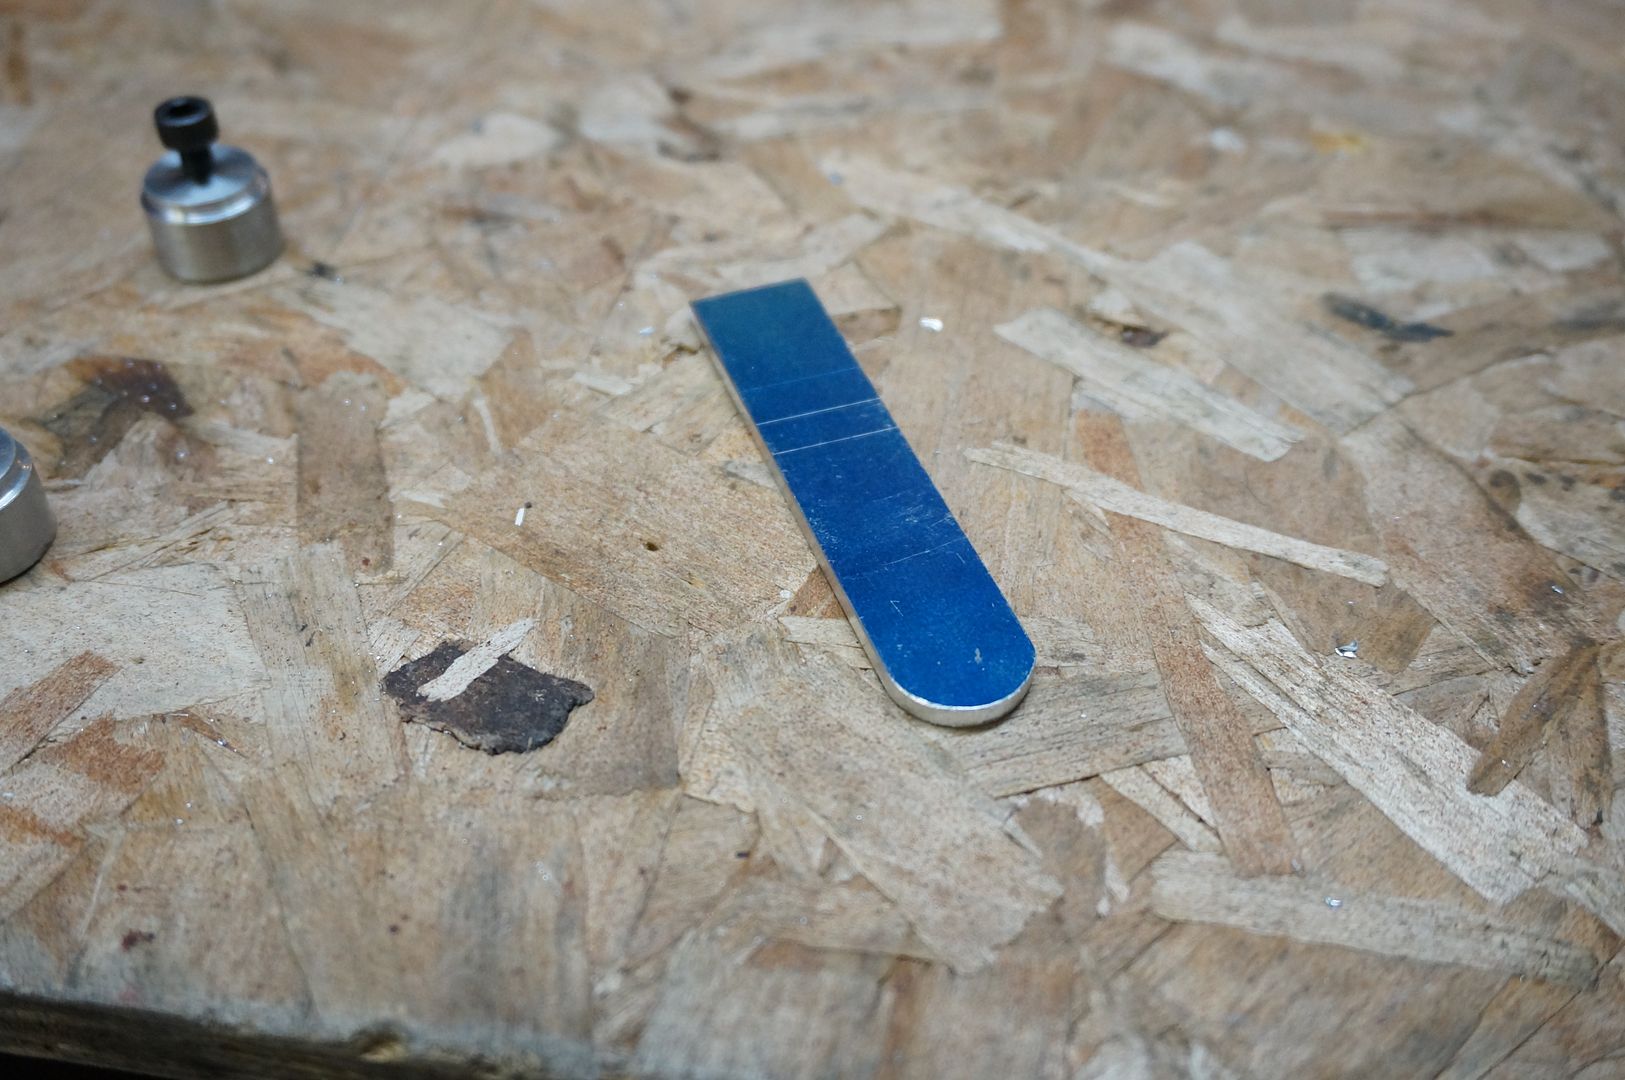
Dykem blueprint for lay out makes precise work very possible, I needed the spray can version the brush on type isn't meant for large areas like this.
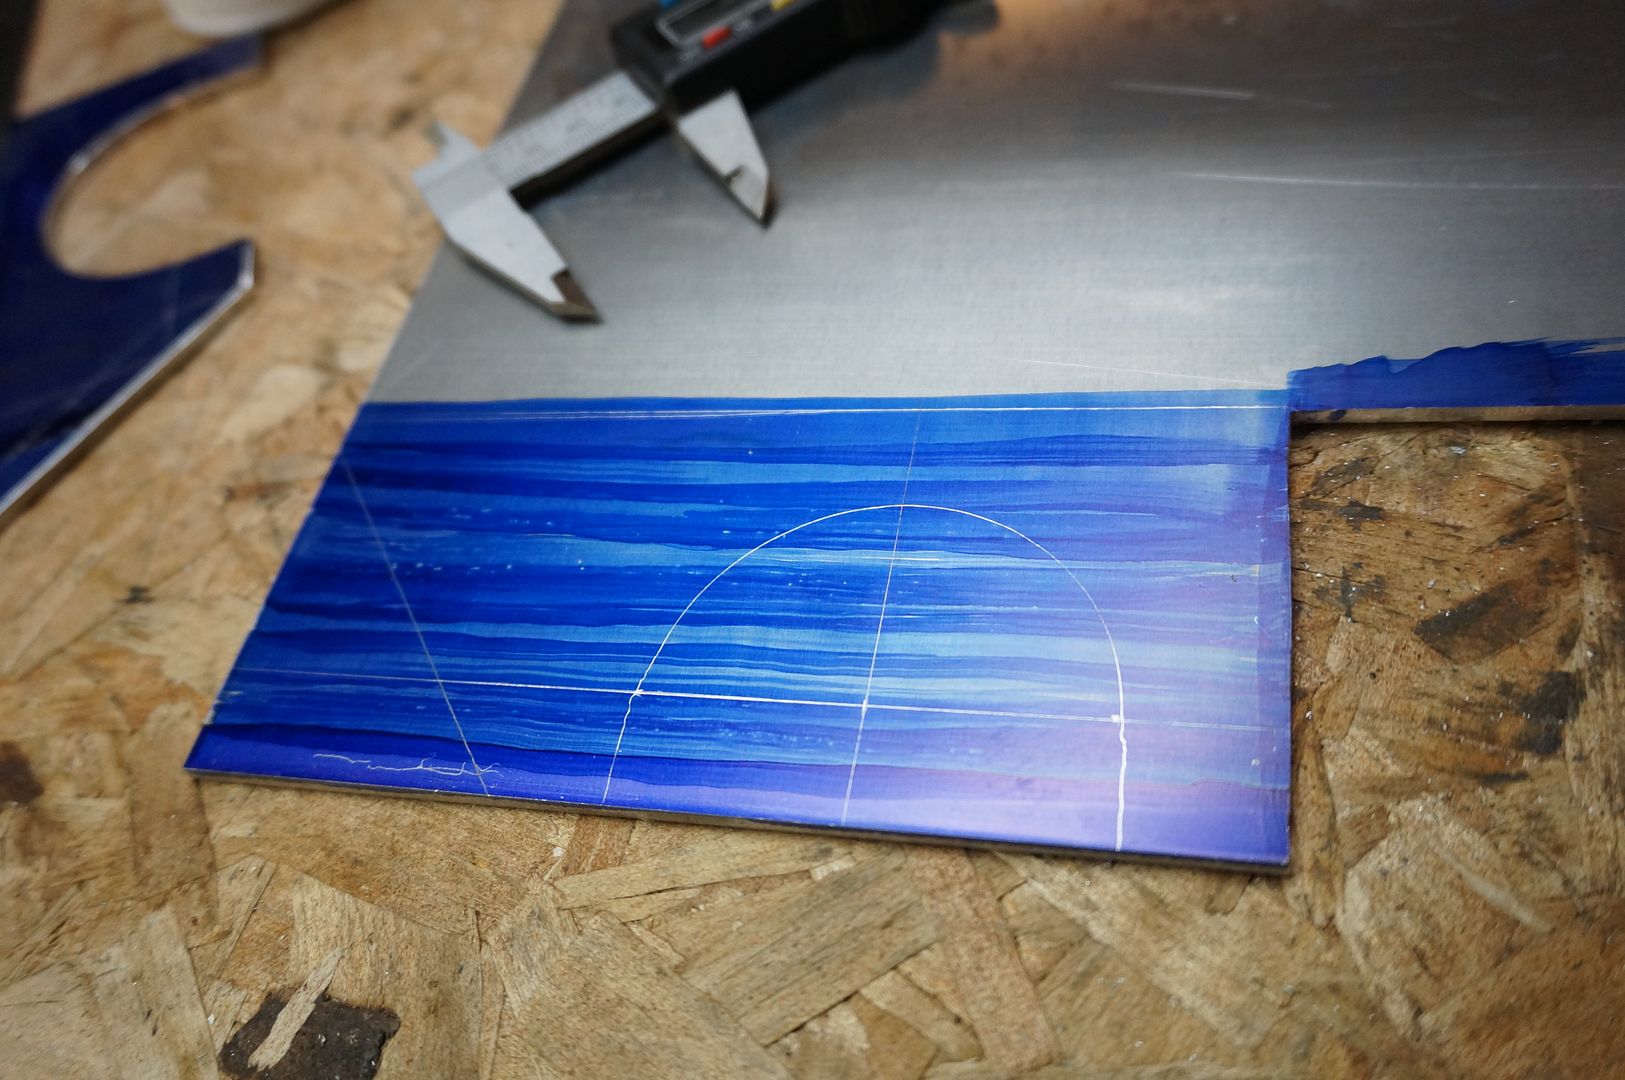
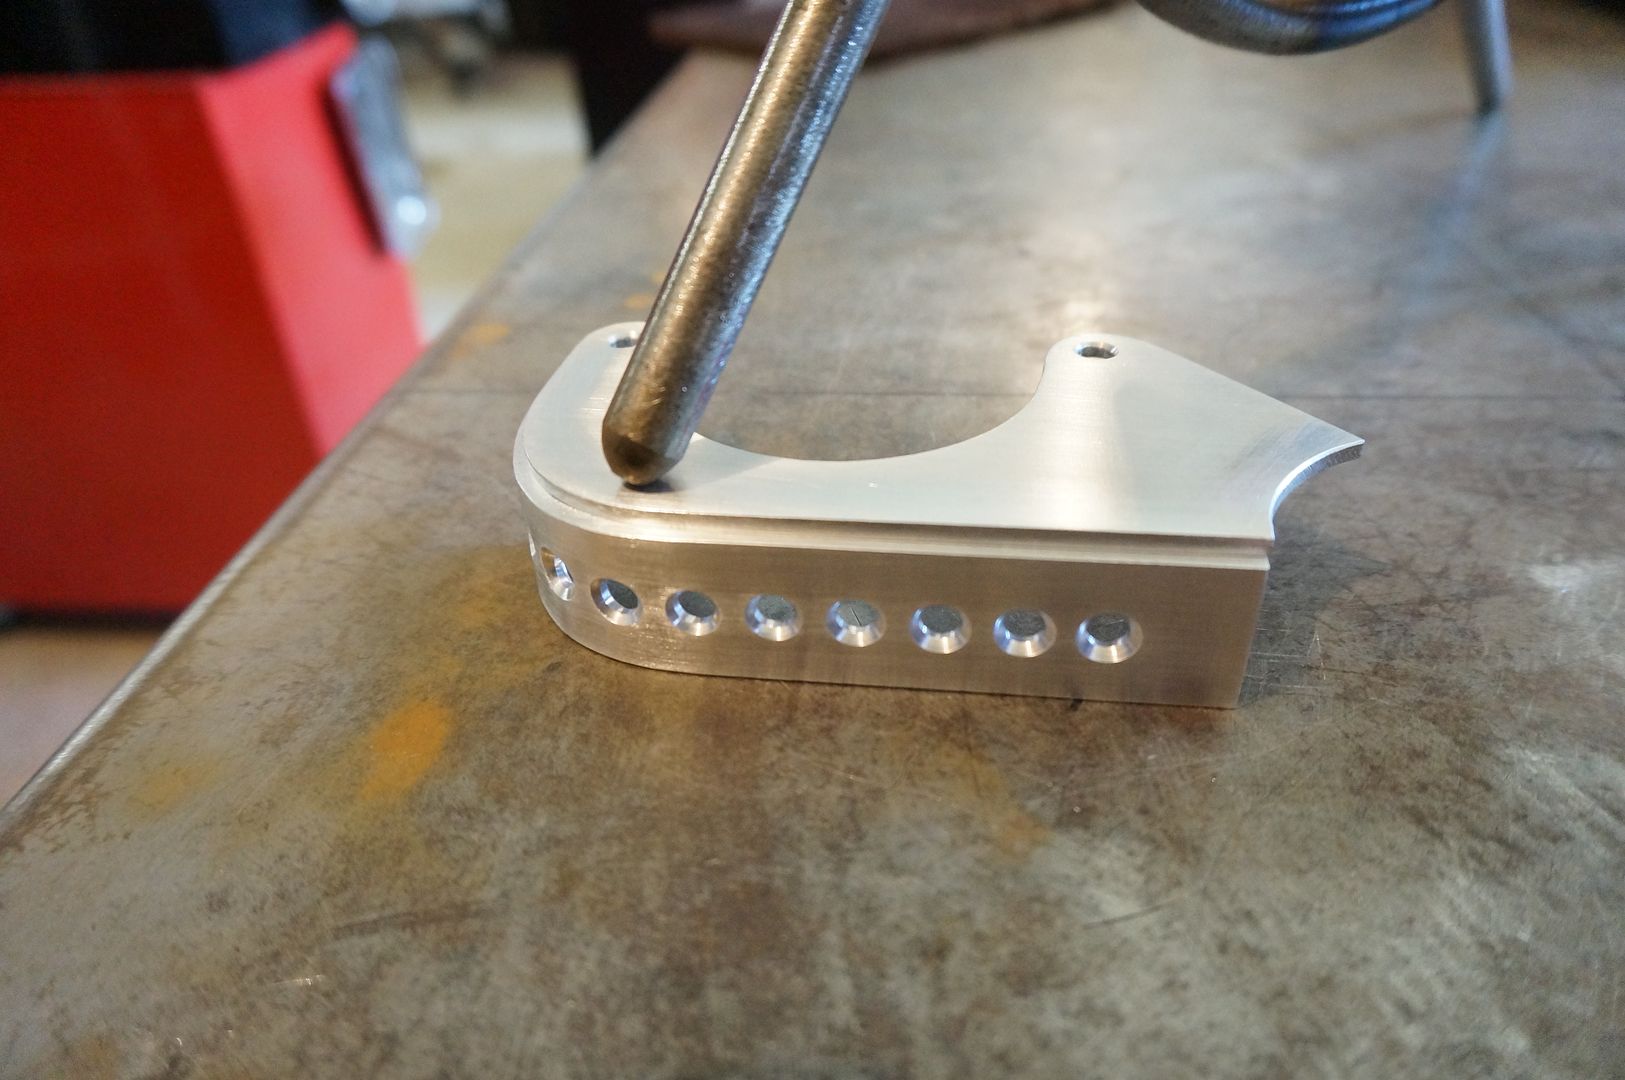
Using a spare head from my N/A motor
Mounting this behind the exhaust cam to where the original cam cover bolted to, added benefit is the coil wires will be covered and protected, its multipurpose.

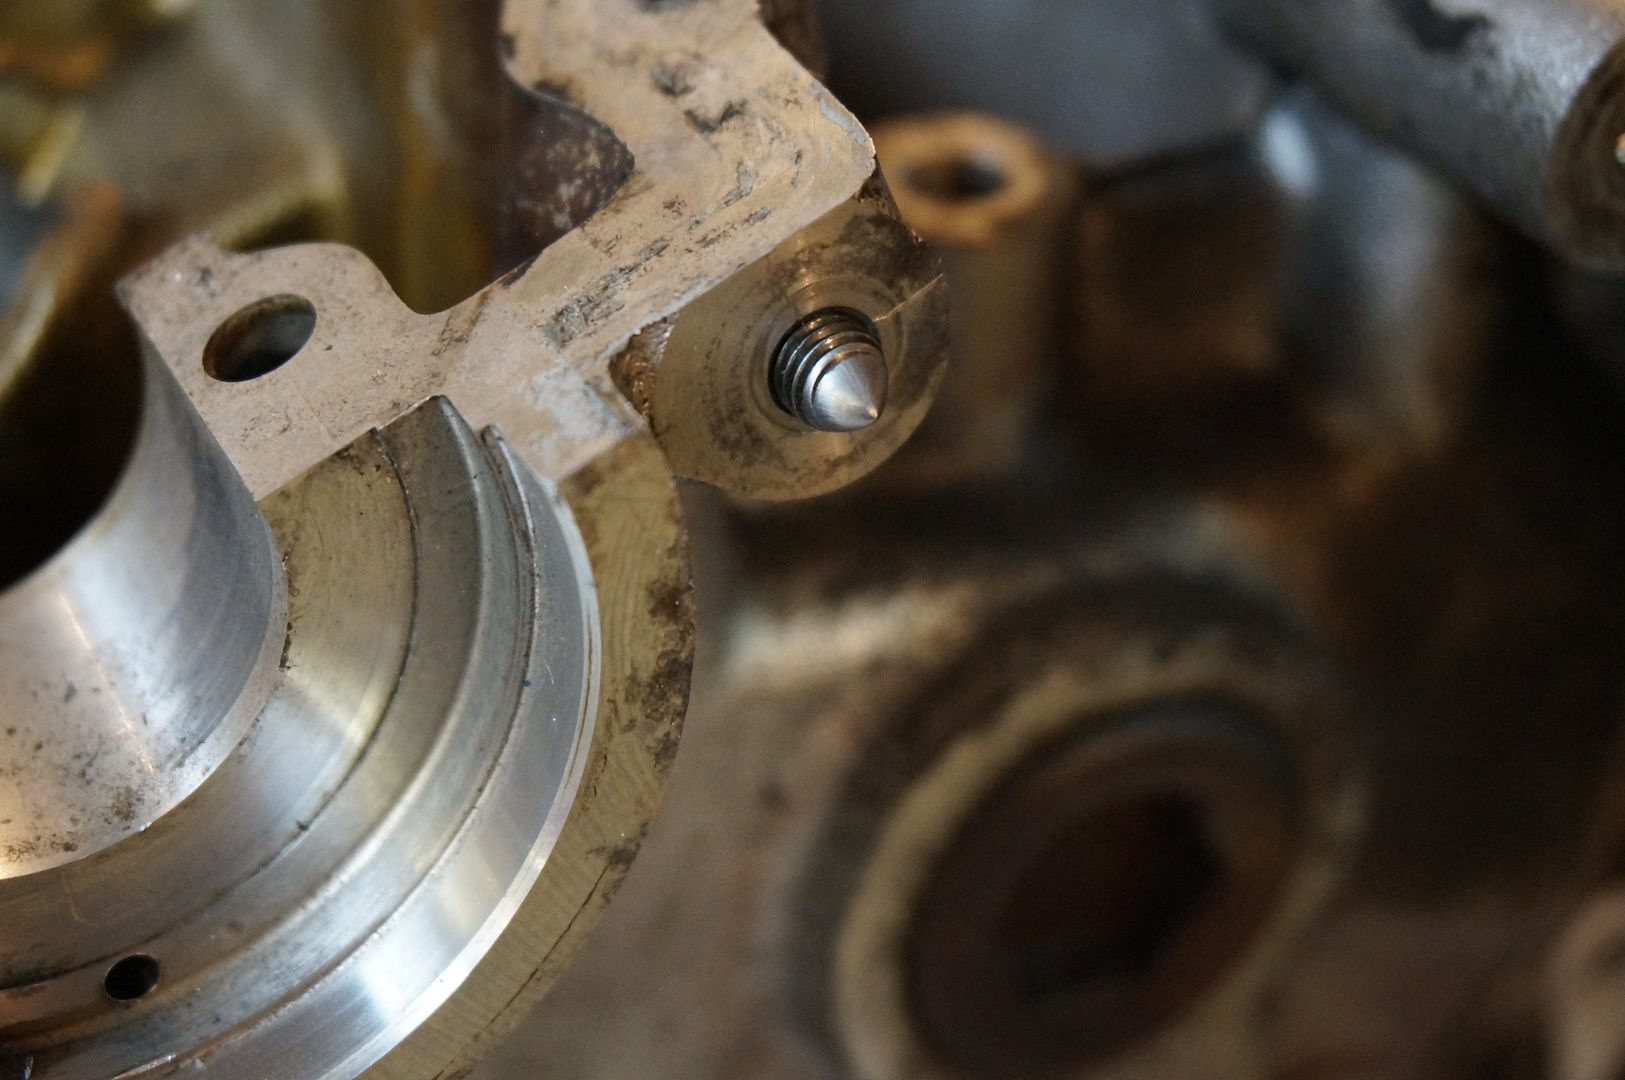
I like making these little bullet nose bolts for when you need to center punch a piece but have no reference point for the layout
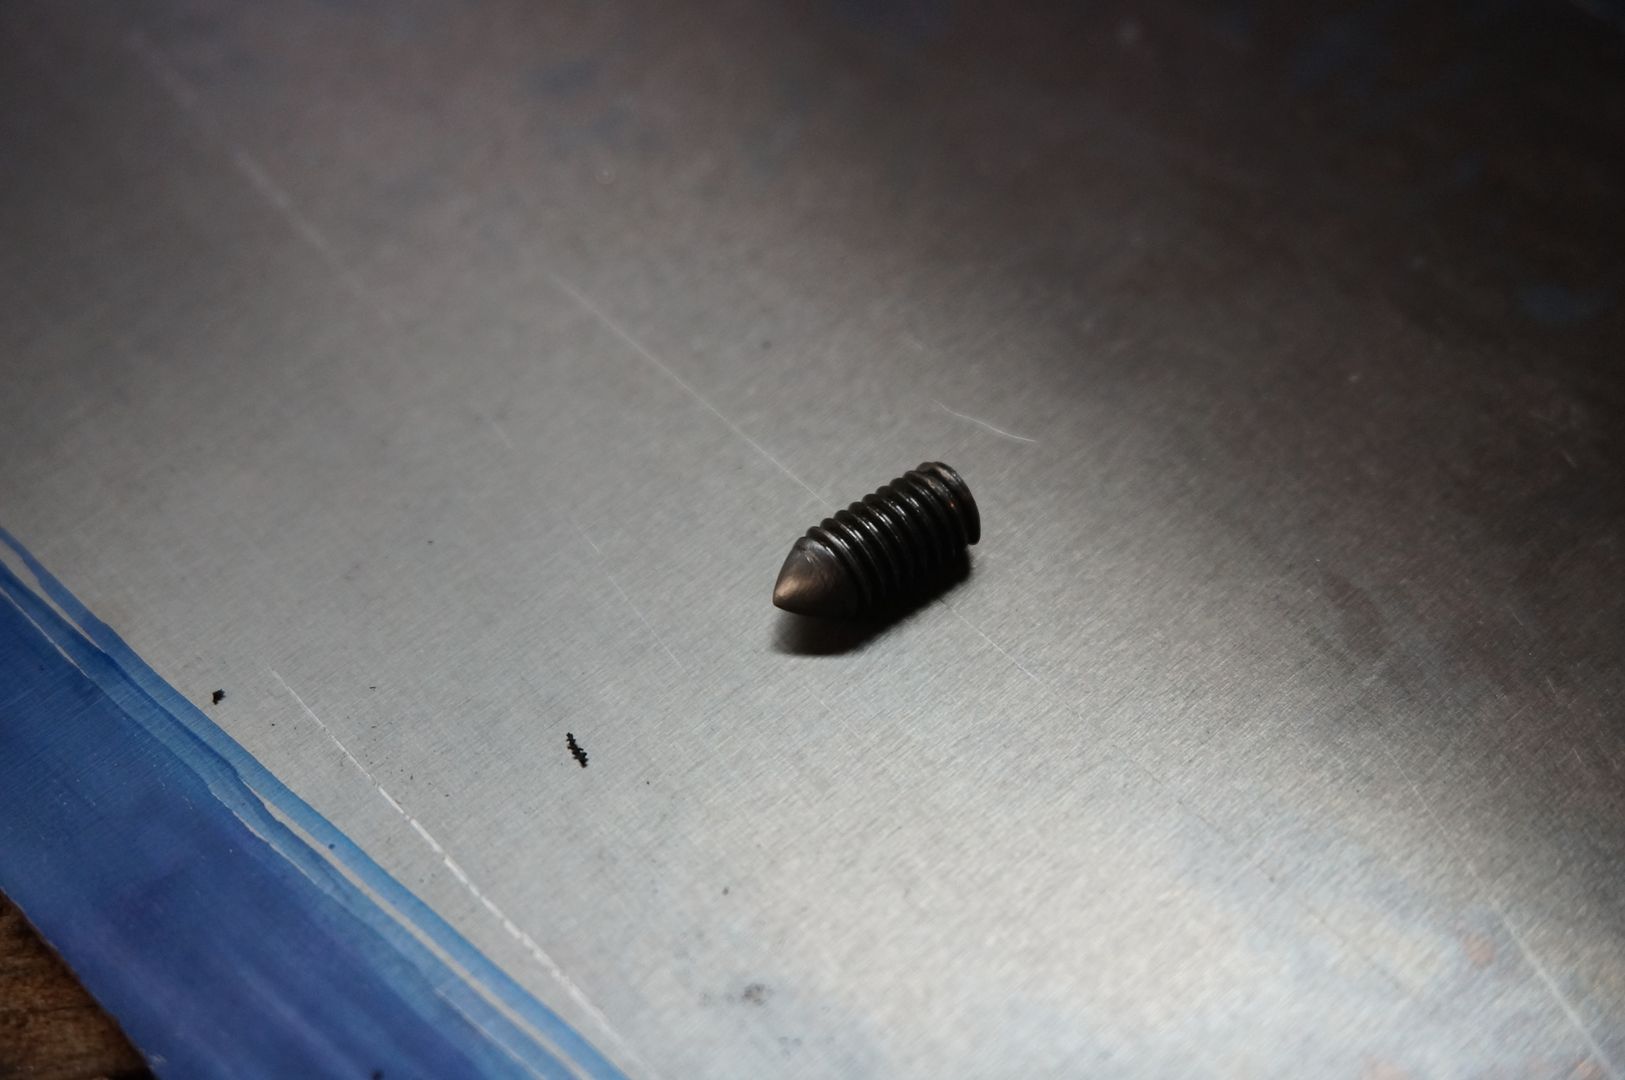
Now all you do is set your piece over the nose of the bolt where you want the hole to be and just tap it with your dead blow

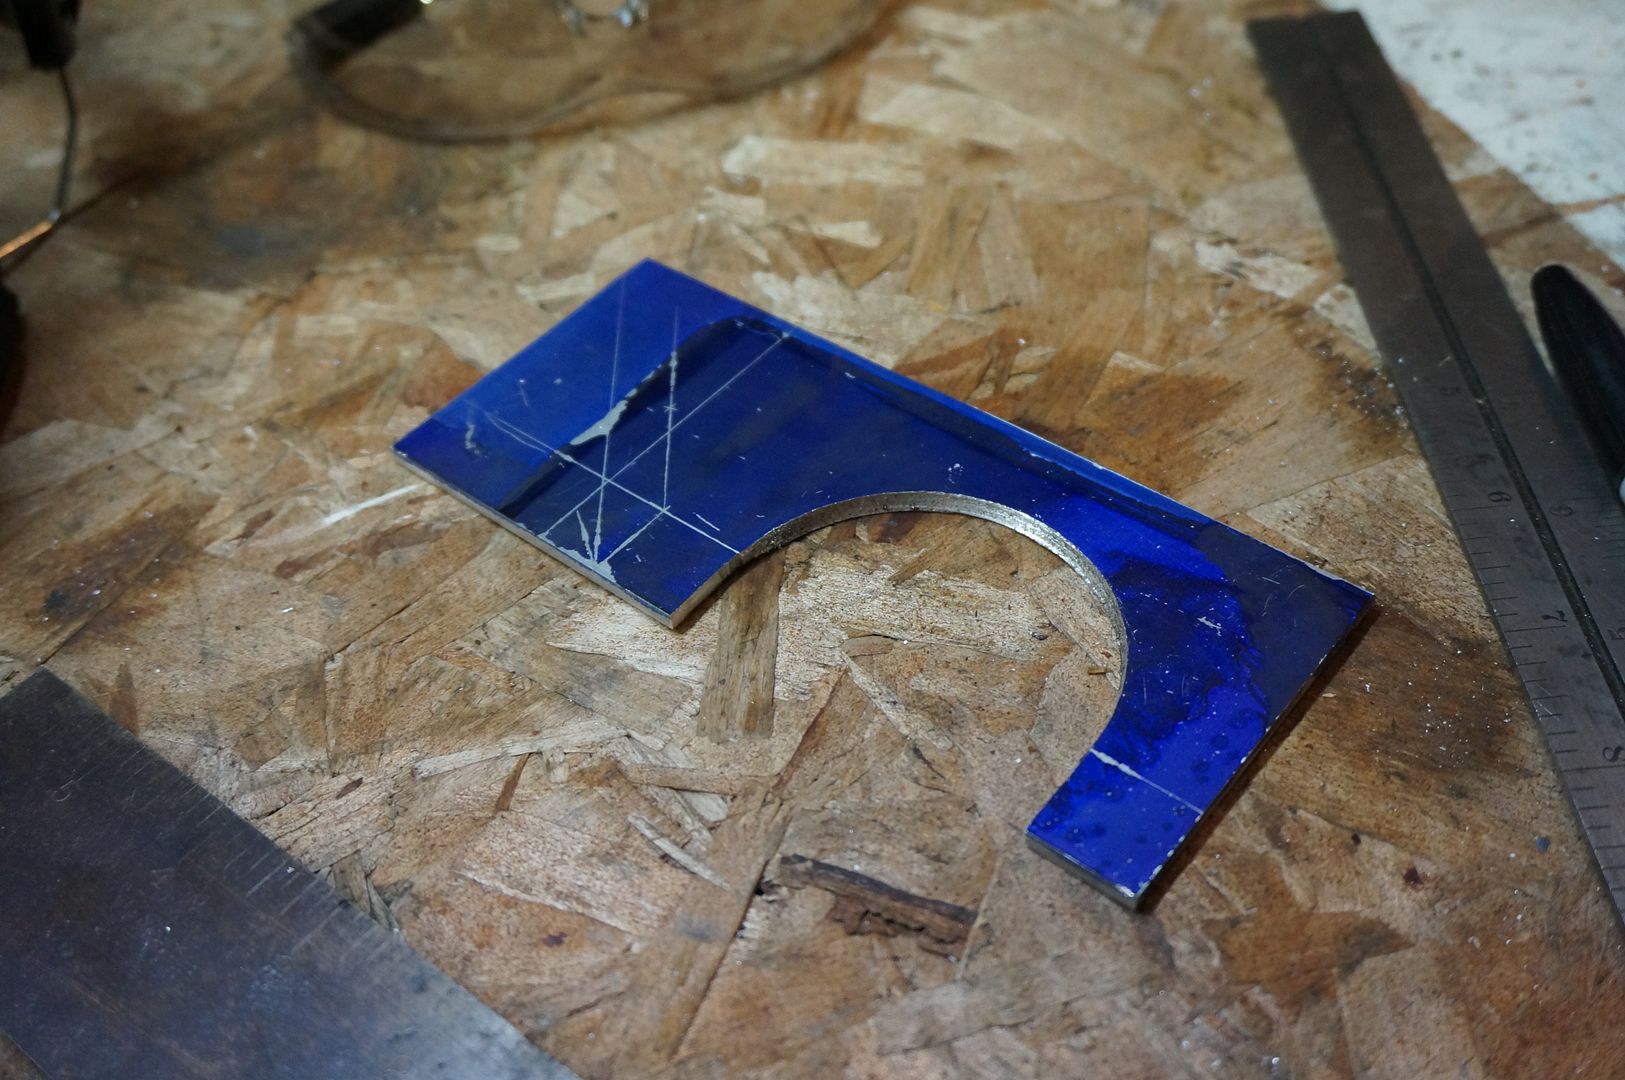
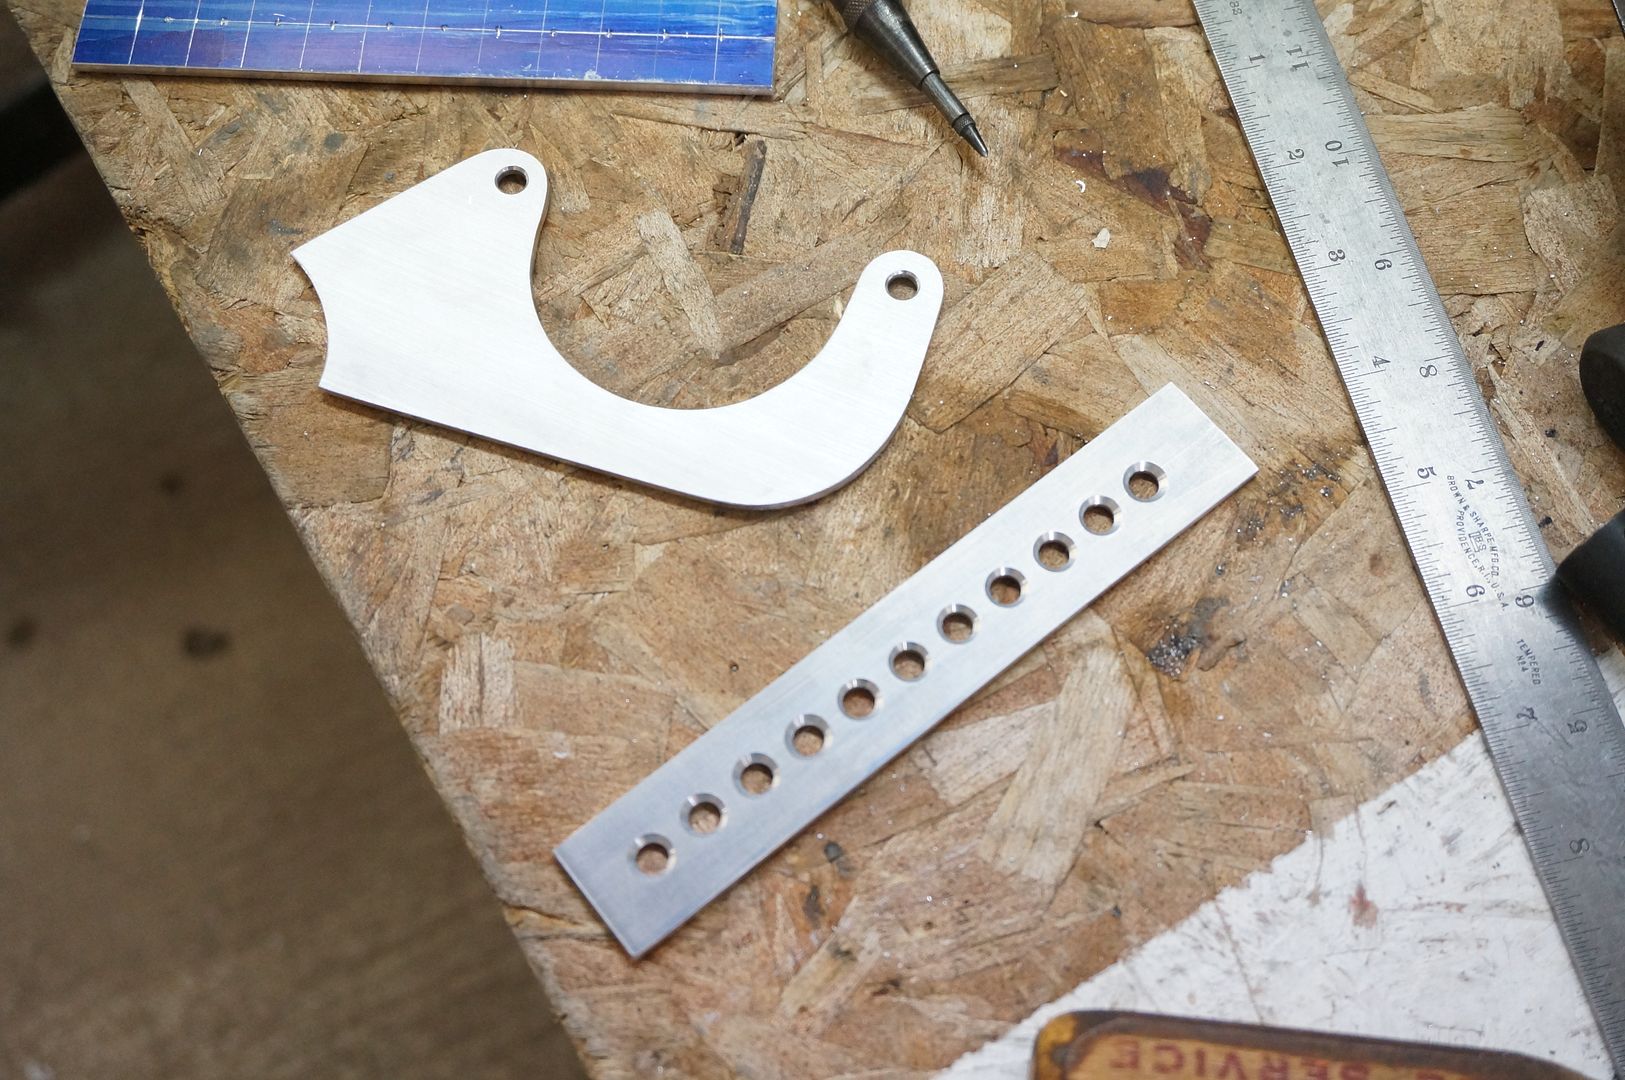
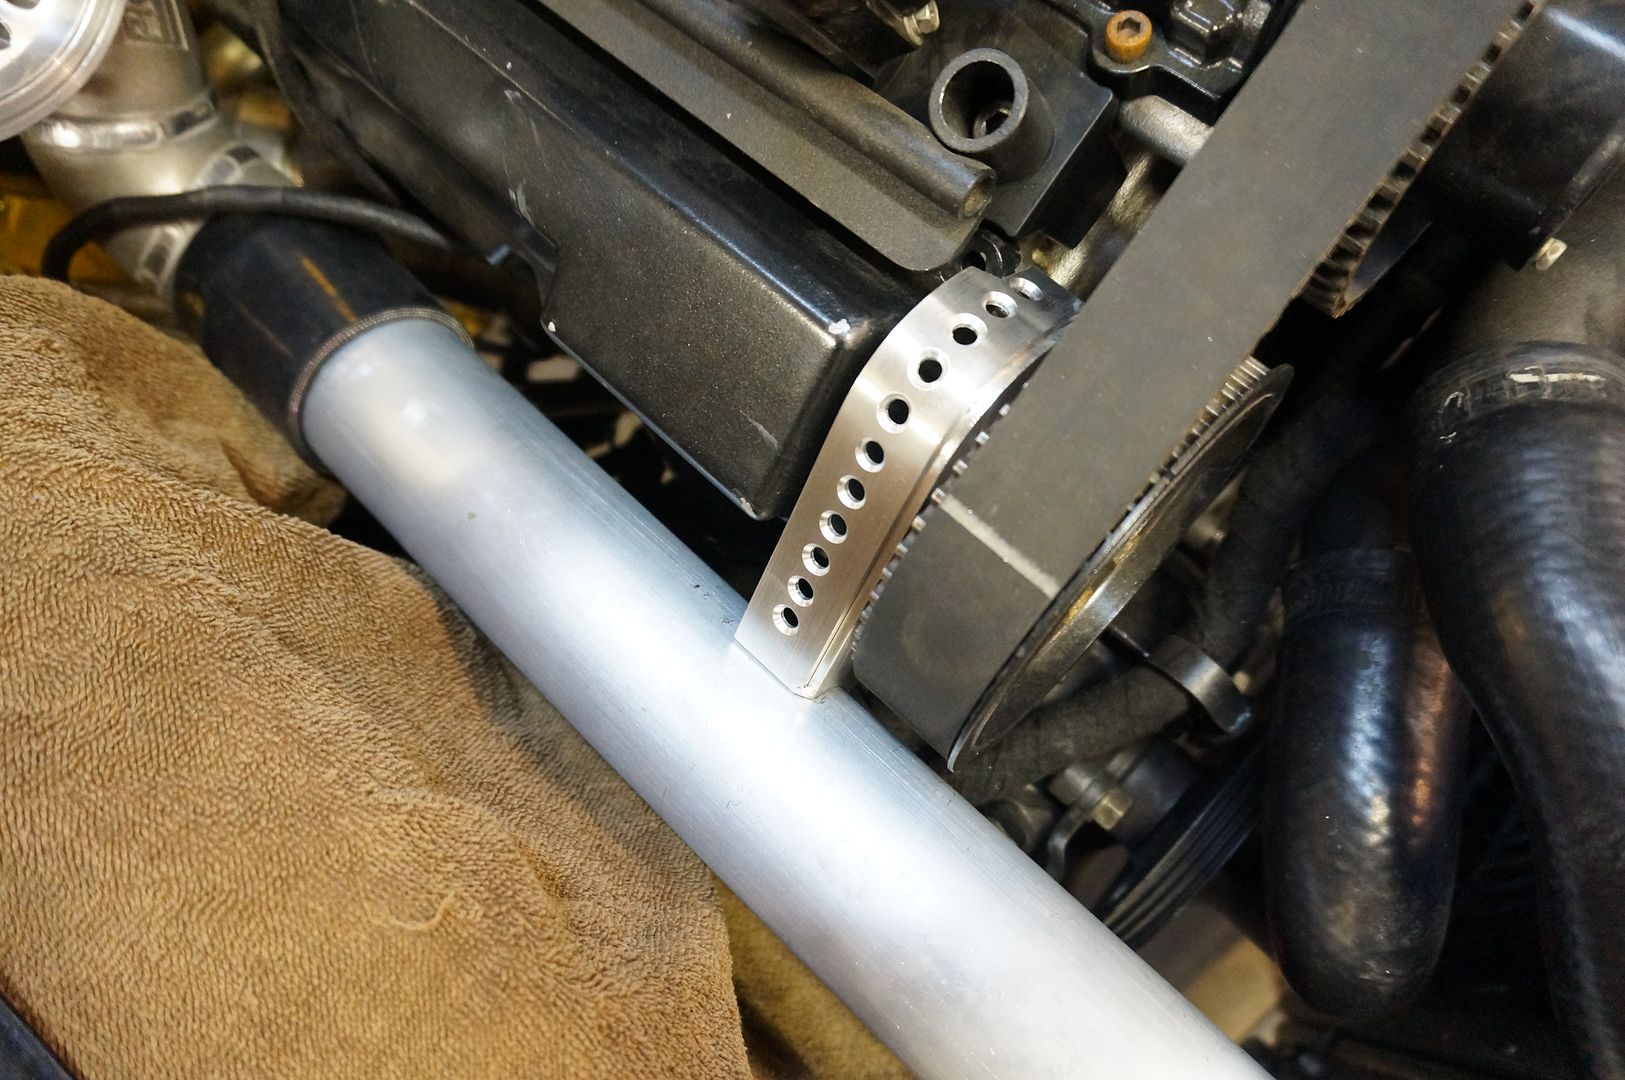
Starting to finesse the final shape
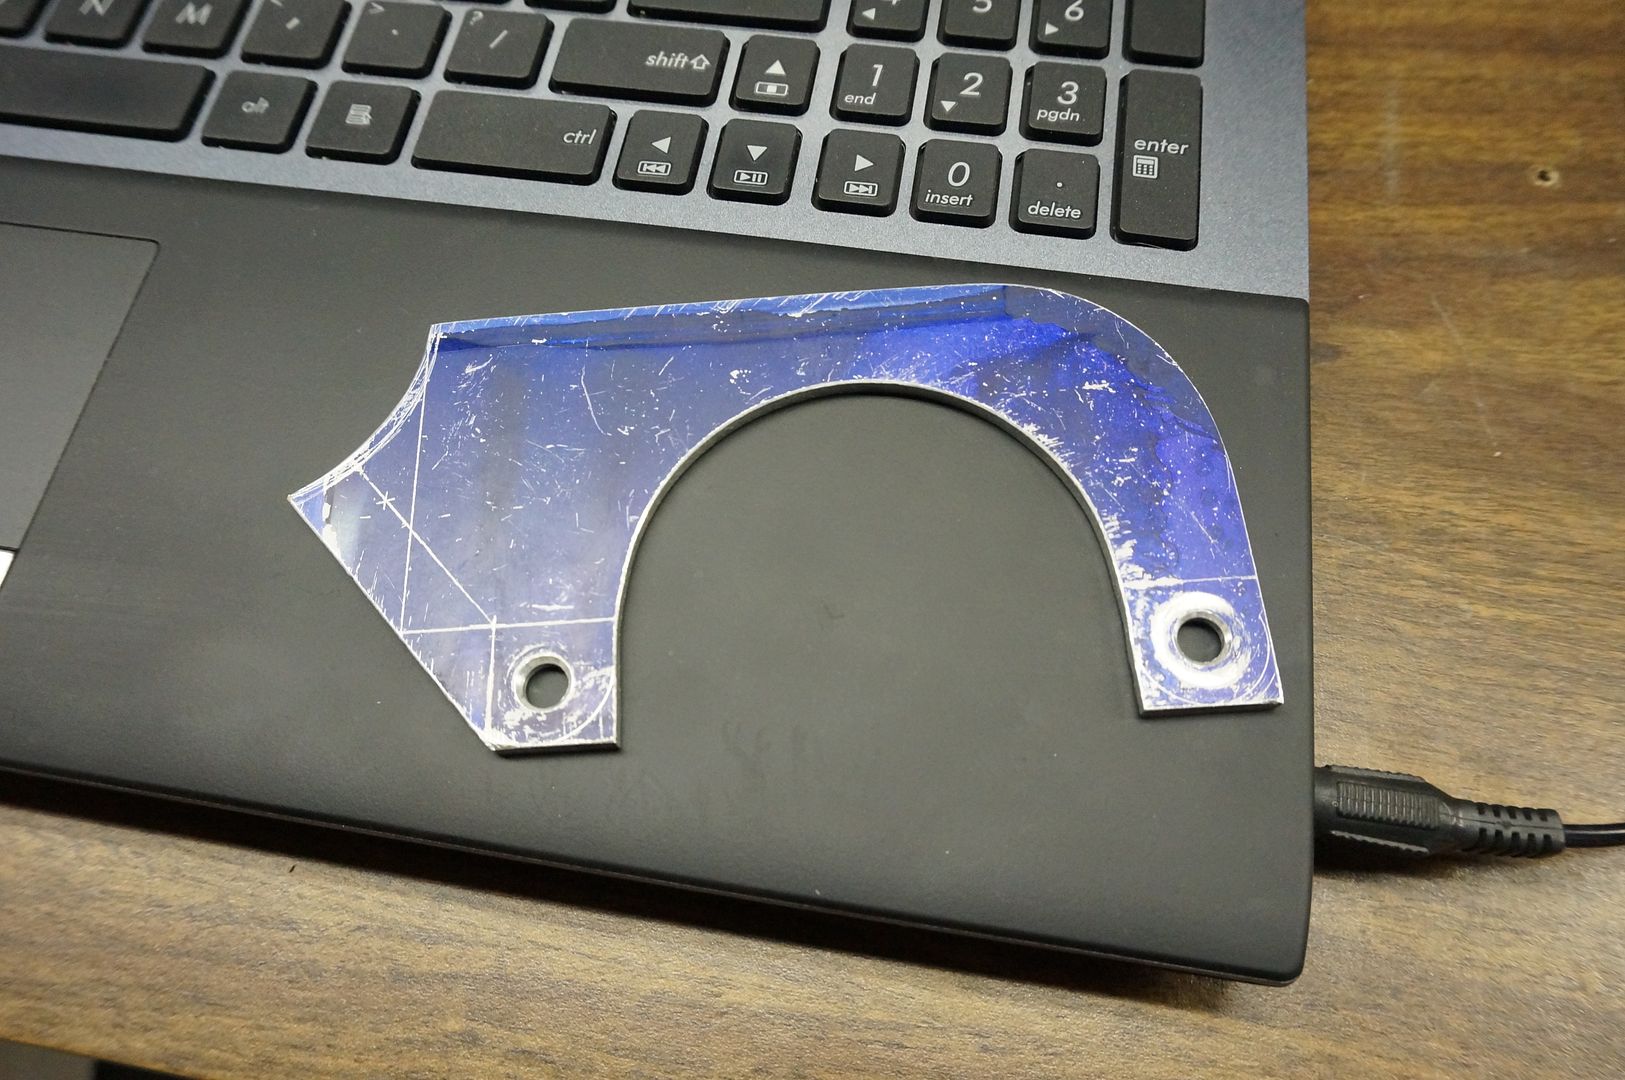
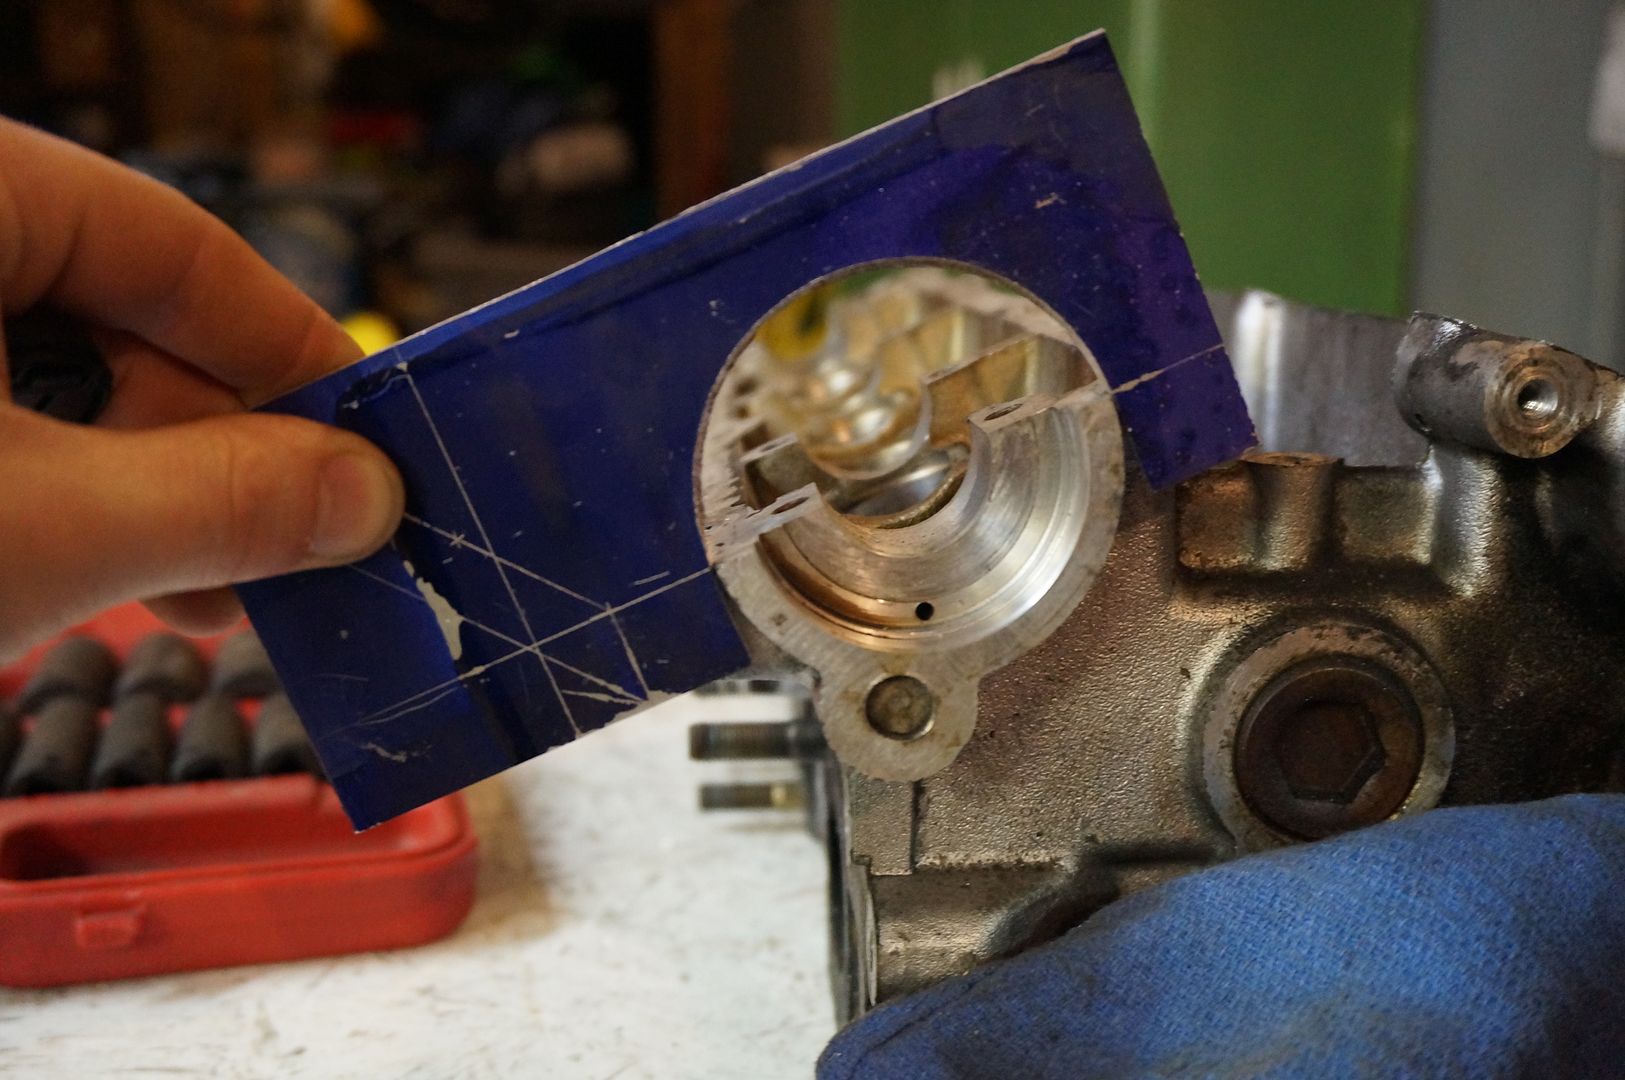
Dat fitment
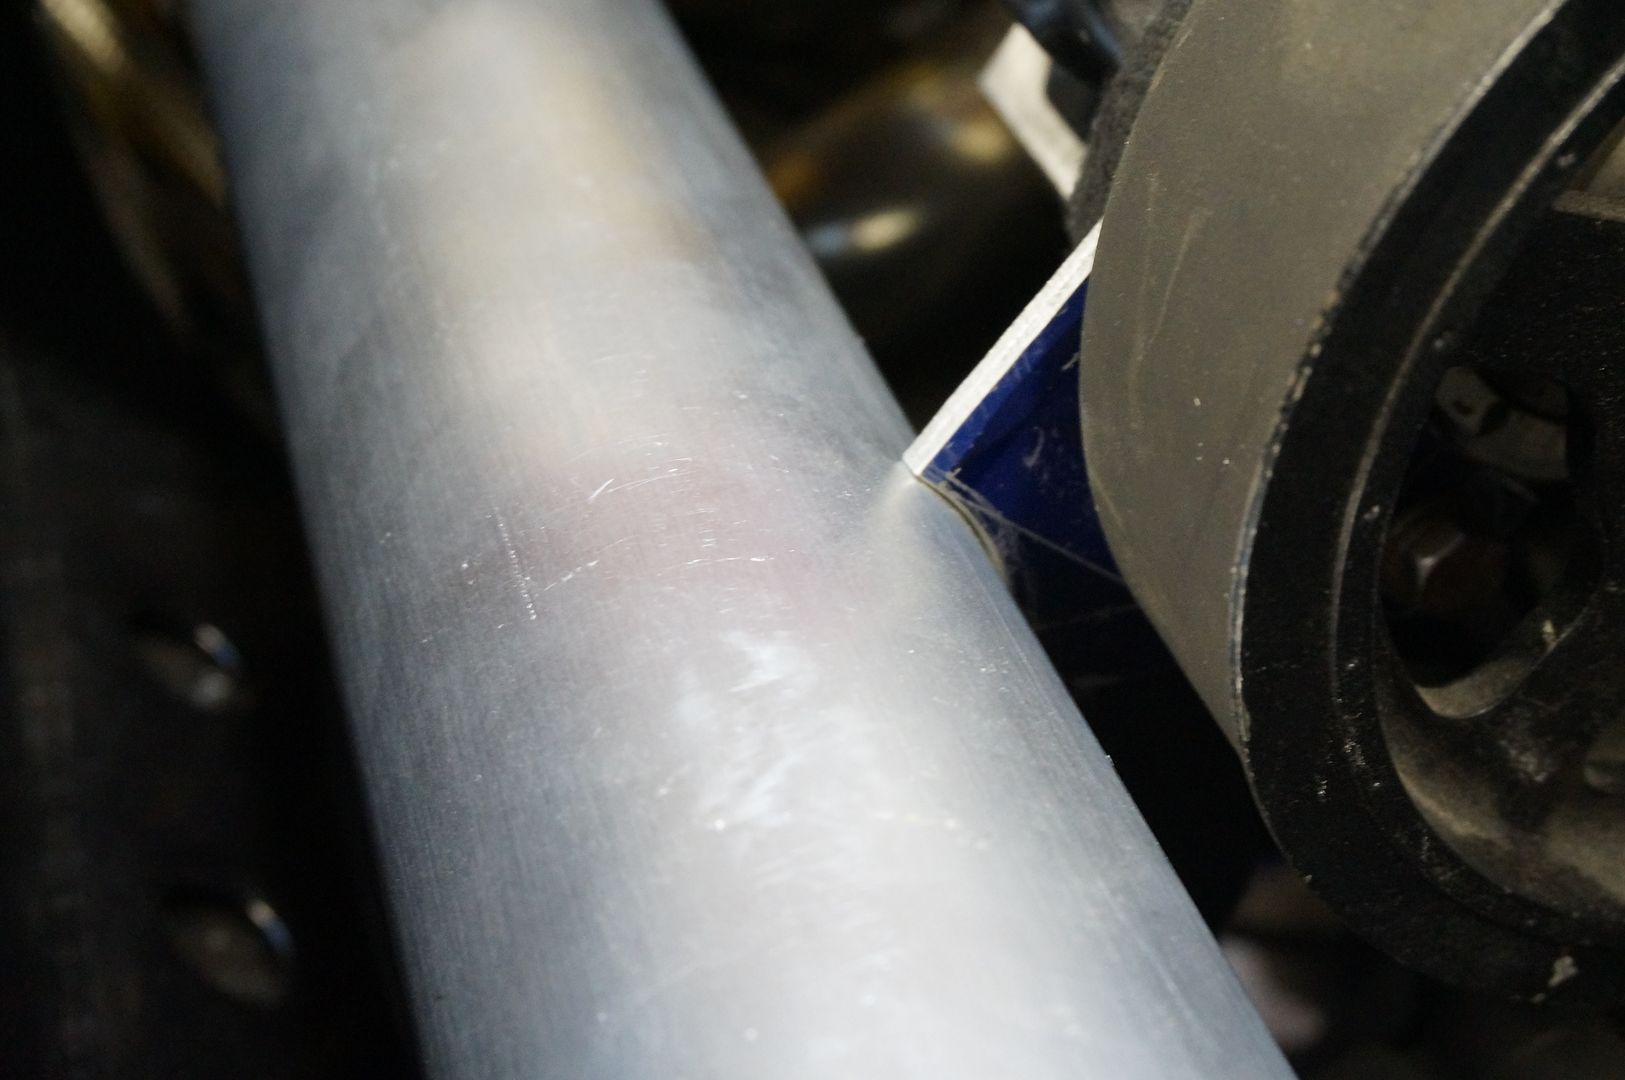
Some scuff pad
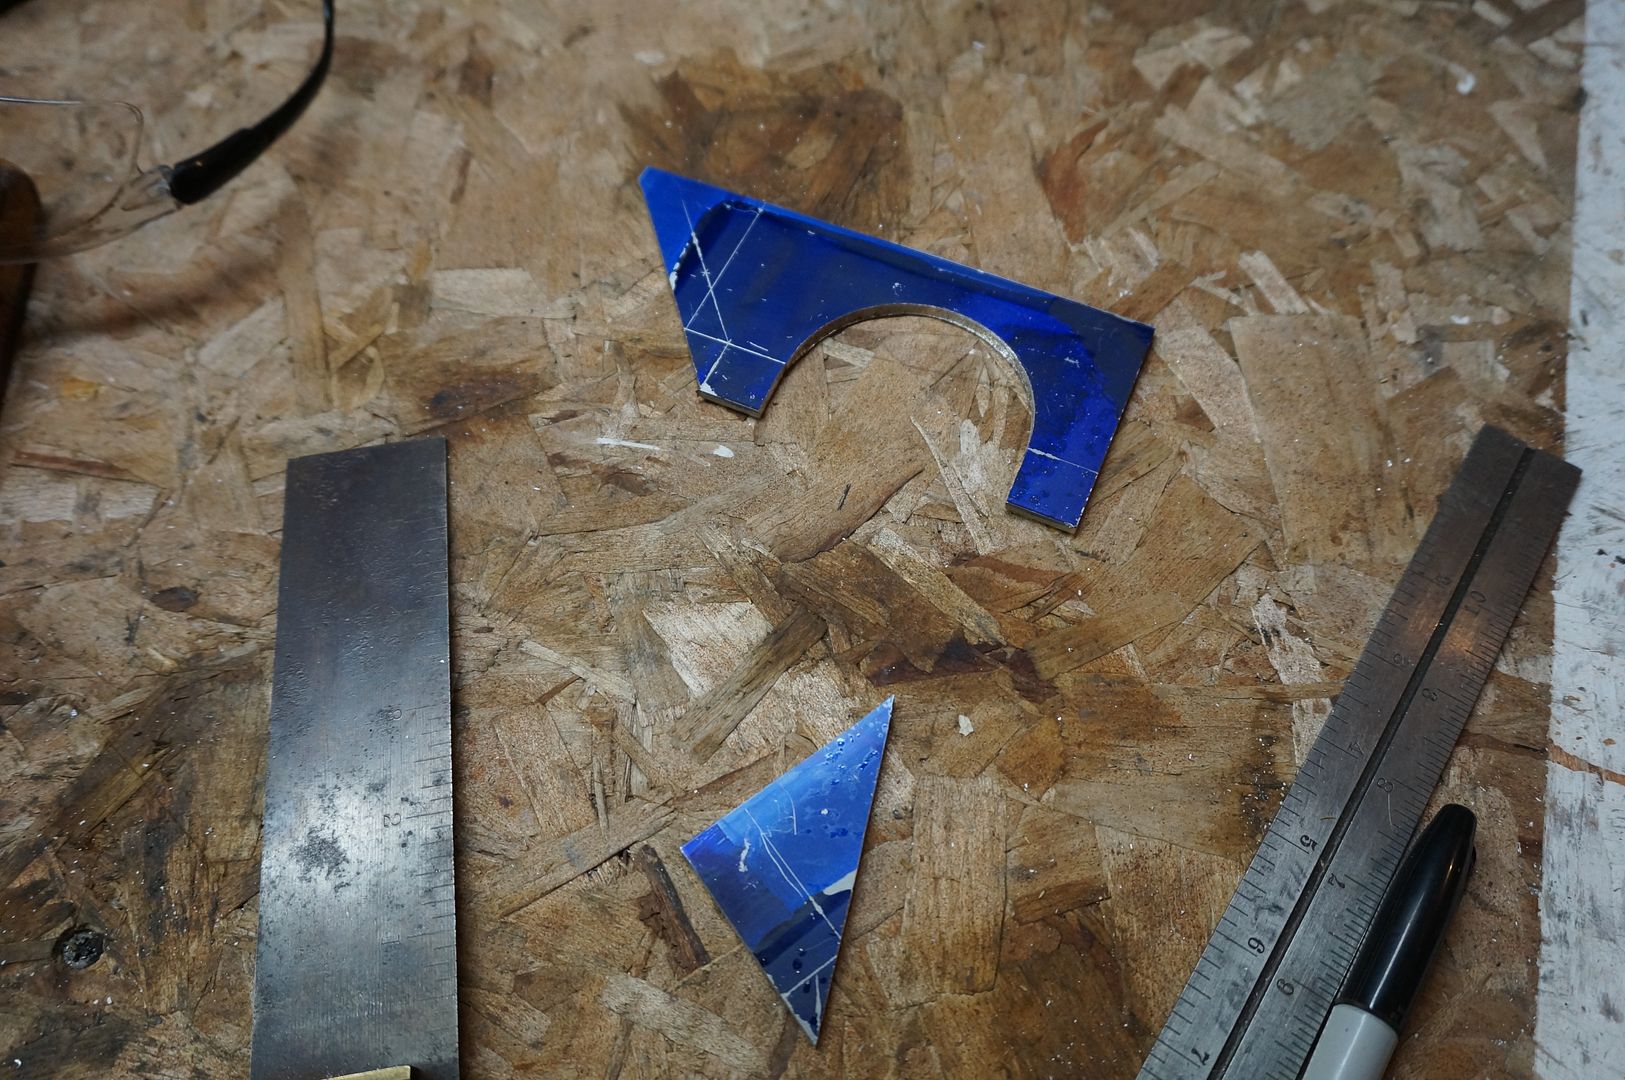
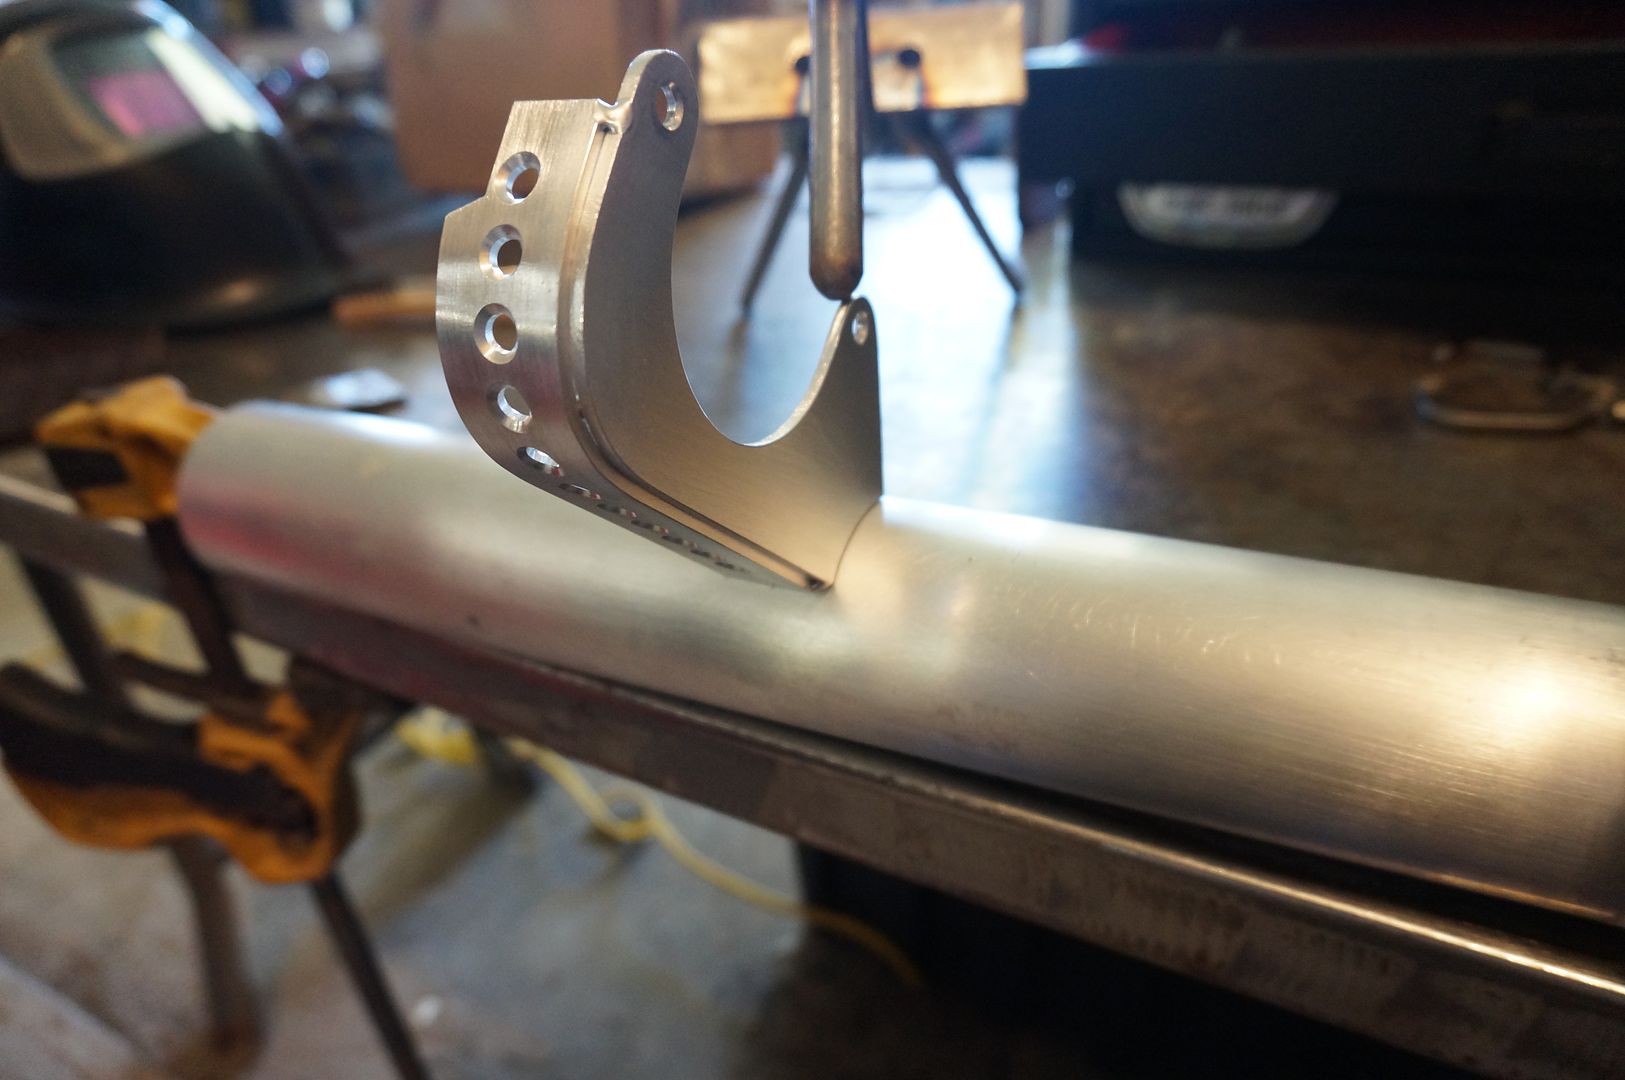
Now to triangulate
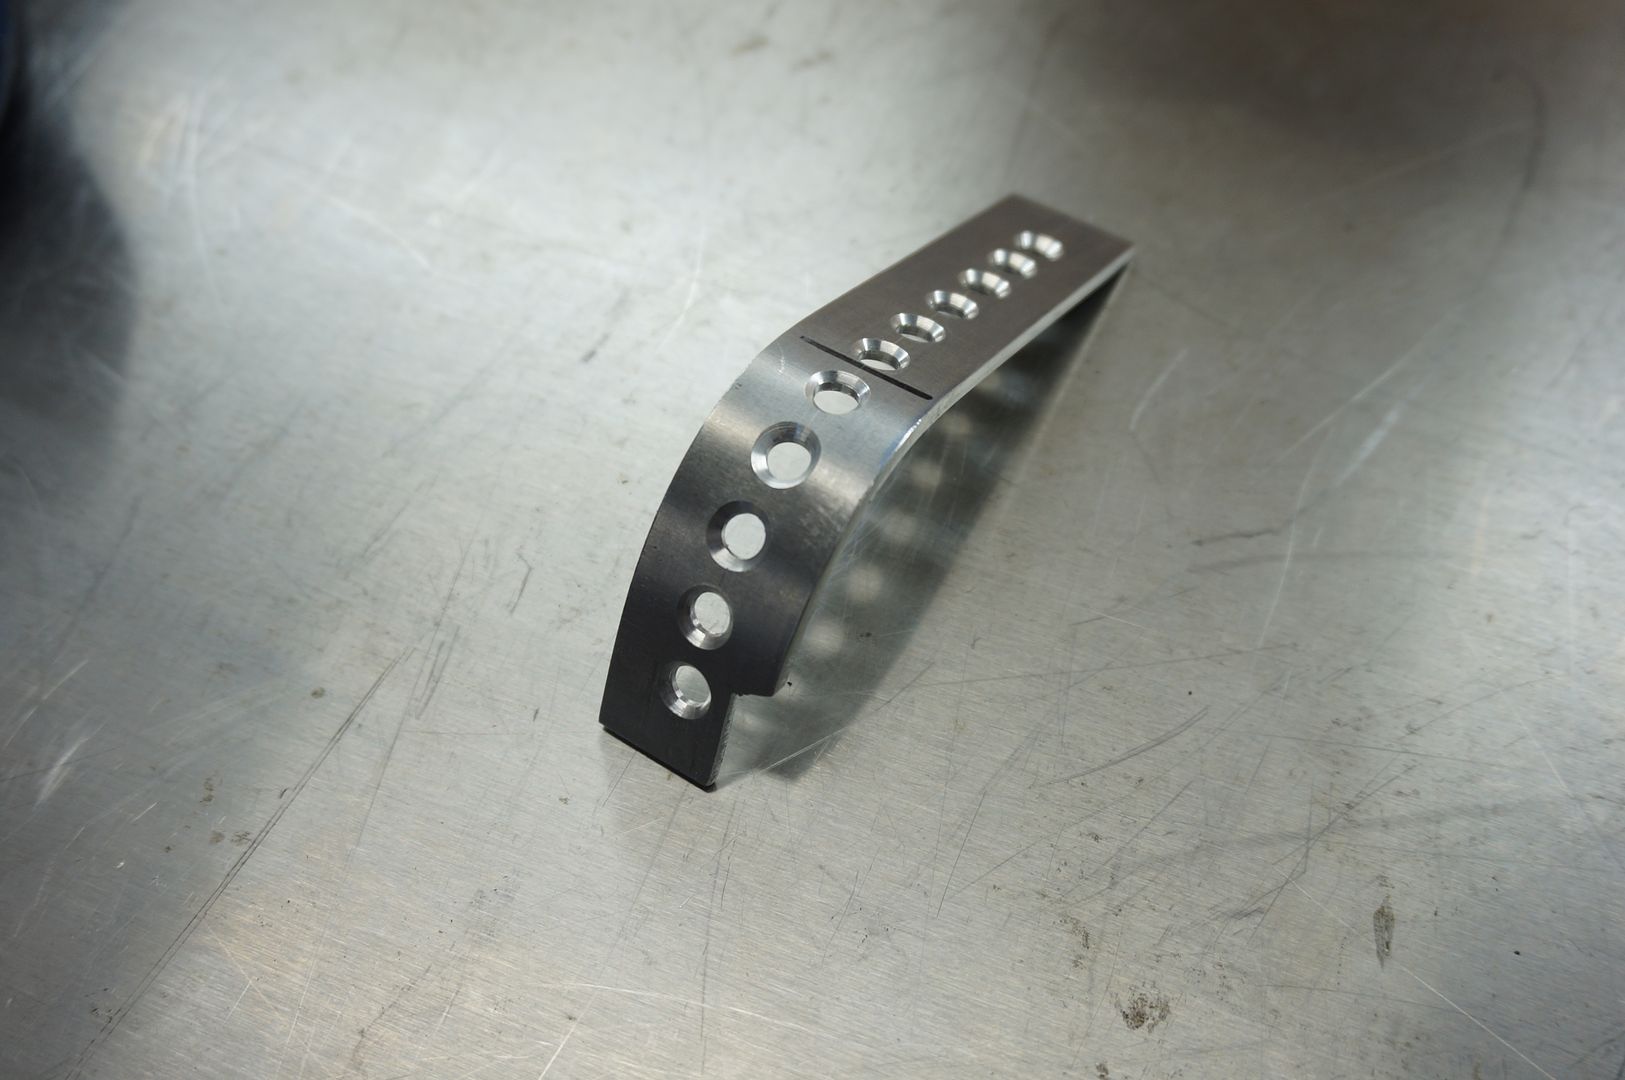
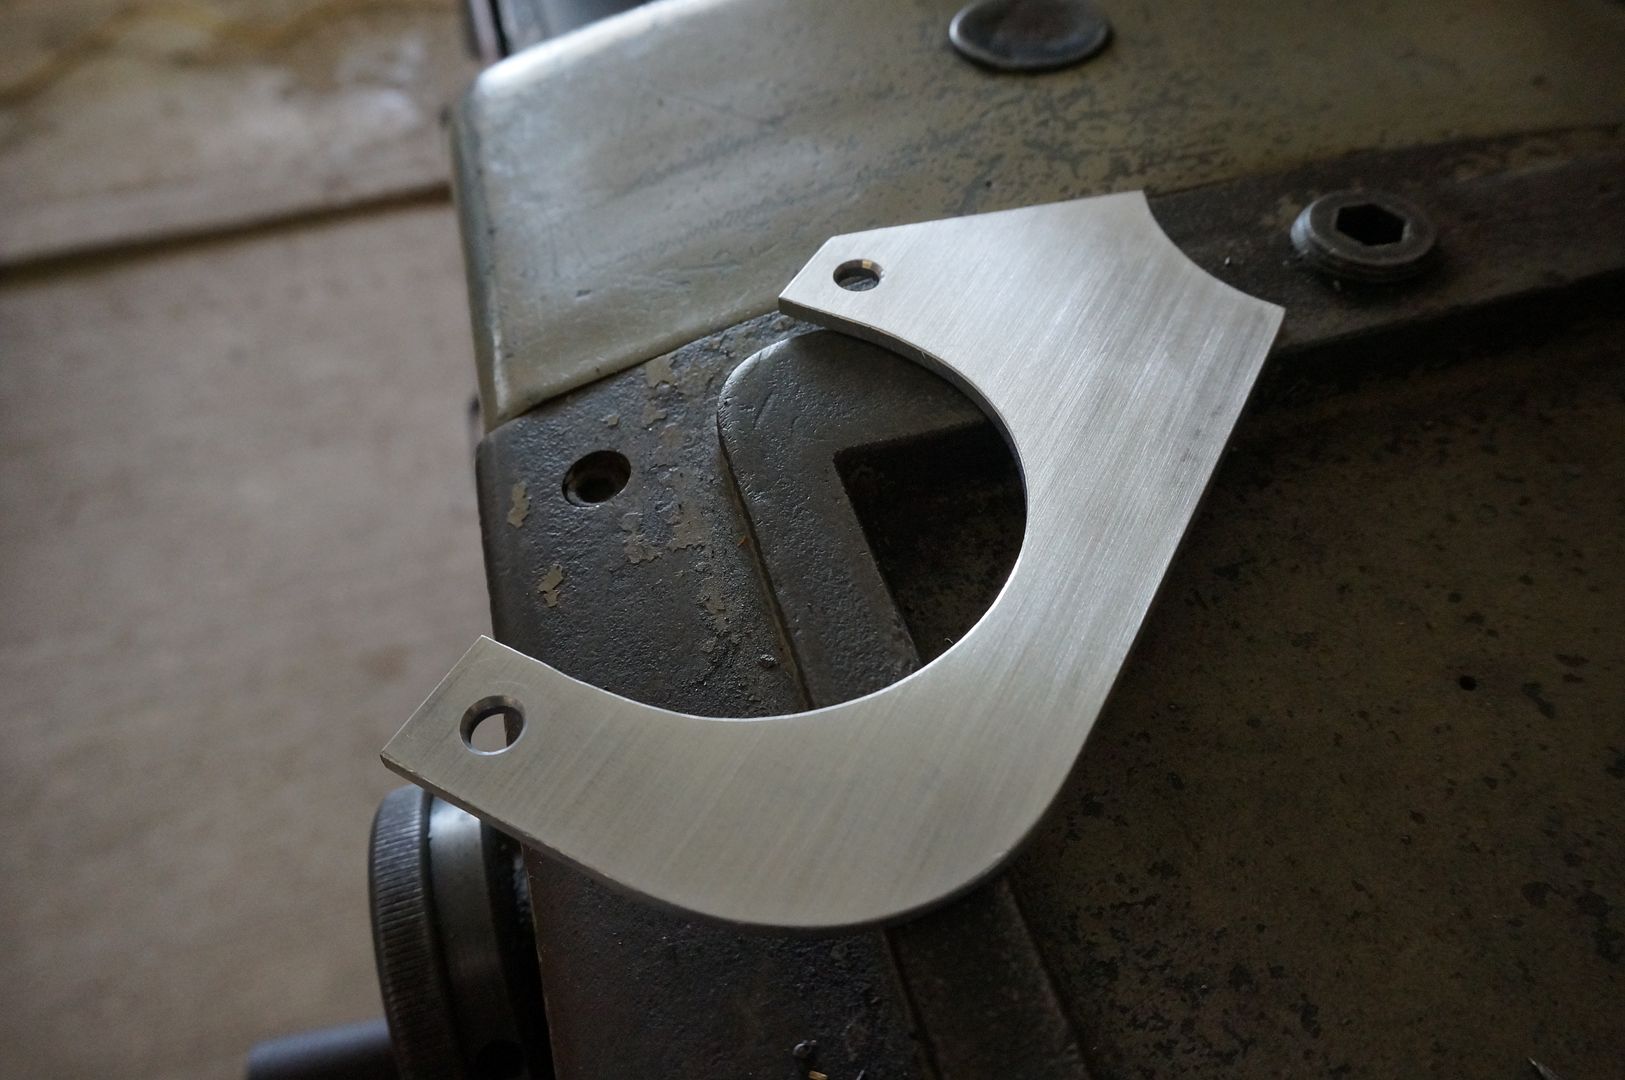
Fits so nice
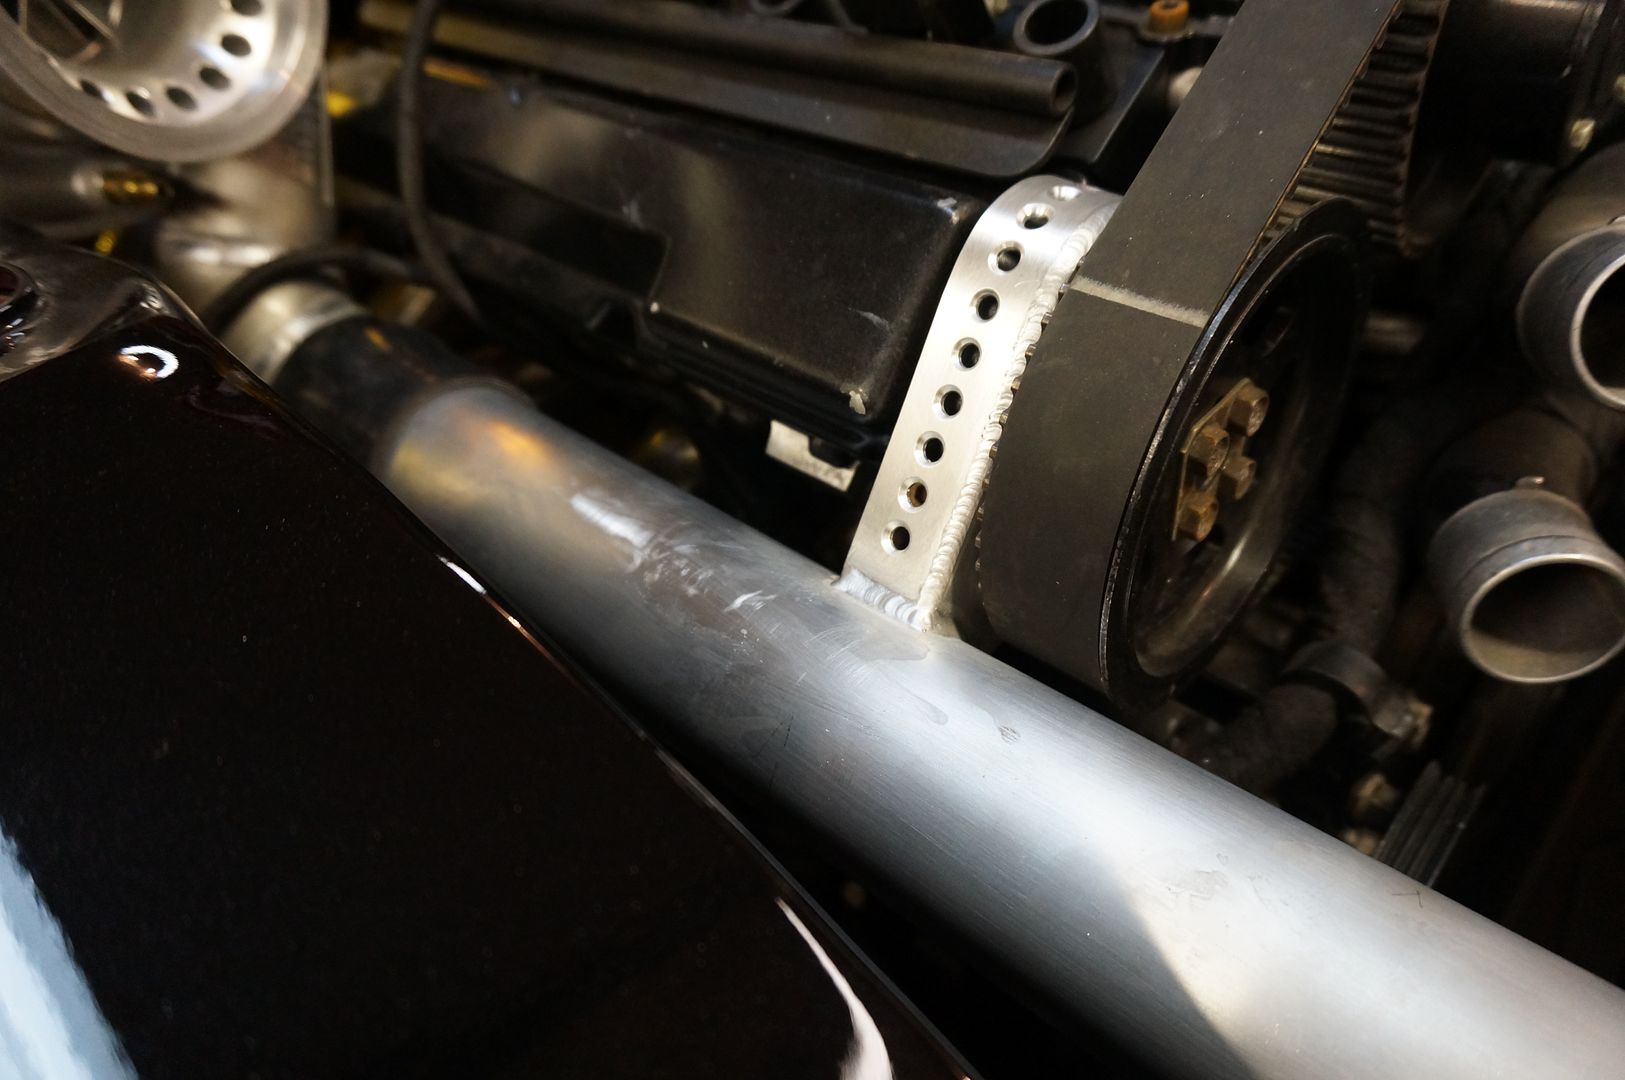
Weld it up
Done and done
 sigpic
Comment
-
Fucking.
Rad.Comment
-
-
Fantastic fab work, love that you're showing all the details and tools being used.
Comment
-
Dude amazing
Comment
-
 -Christian.
'91 318iS AW2/blk slow garage queen/build...
'02 ///M3 carbonschwartz 6MT daily beast
'37 Chevy pickup-garagequeen...Comment
-
I love how you added lightening holes and counter sunk them just because awesome.
I/G: DeltaAlpha9Comment
-
Love it love it love it. wish I had the time and the skills for the fab work. Some day some day but for right now I'll get along with my remove and replace skills lol..." You made your choice, I made my choice, at the end of the day if you don't like my choice it's your problem not mine"
New Z build
http://www.stanceworks.com/forums/sh...99#post1498599
New M3 DD build
http://www.stanceworks.com/forums/sh...65#post1498765

Comment
-
By the way if you don't have a rear brake kit yet. Get your hands on some SRT8 calipers they go for cheap and there is a bracket out for them already. I am running the SRT8 challenger brakes up front with a 370z rotor and they are great.
" You made your choice, I made my choice, at the end of the day if you don't like my choice it's your problem not mine"
New Z build
http://www.stanceworks.com/forums/sh...99#post1498599
New M3 DD build
http://www.stanceworks.com/forums/sh...65#post1498765
Comment
-
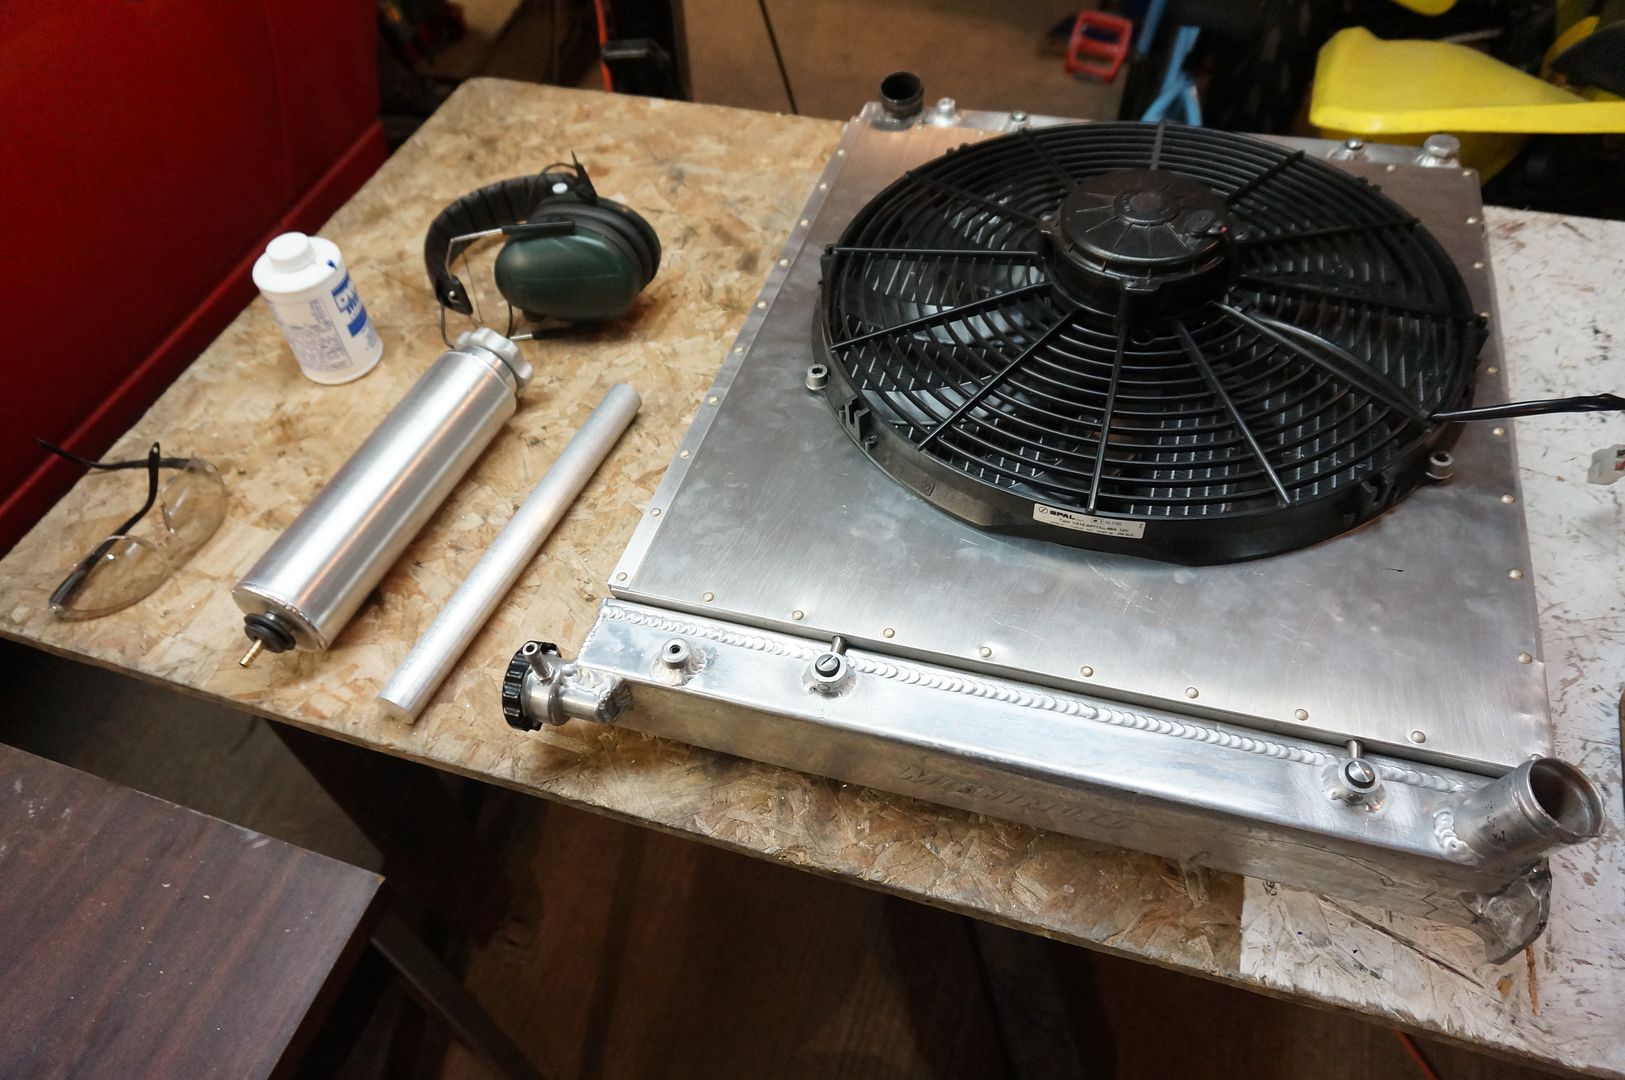
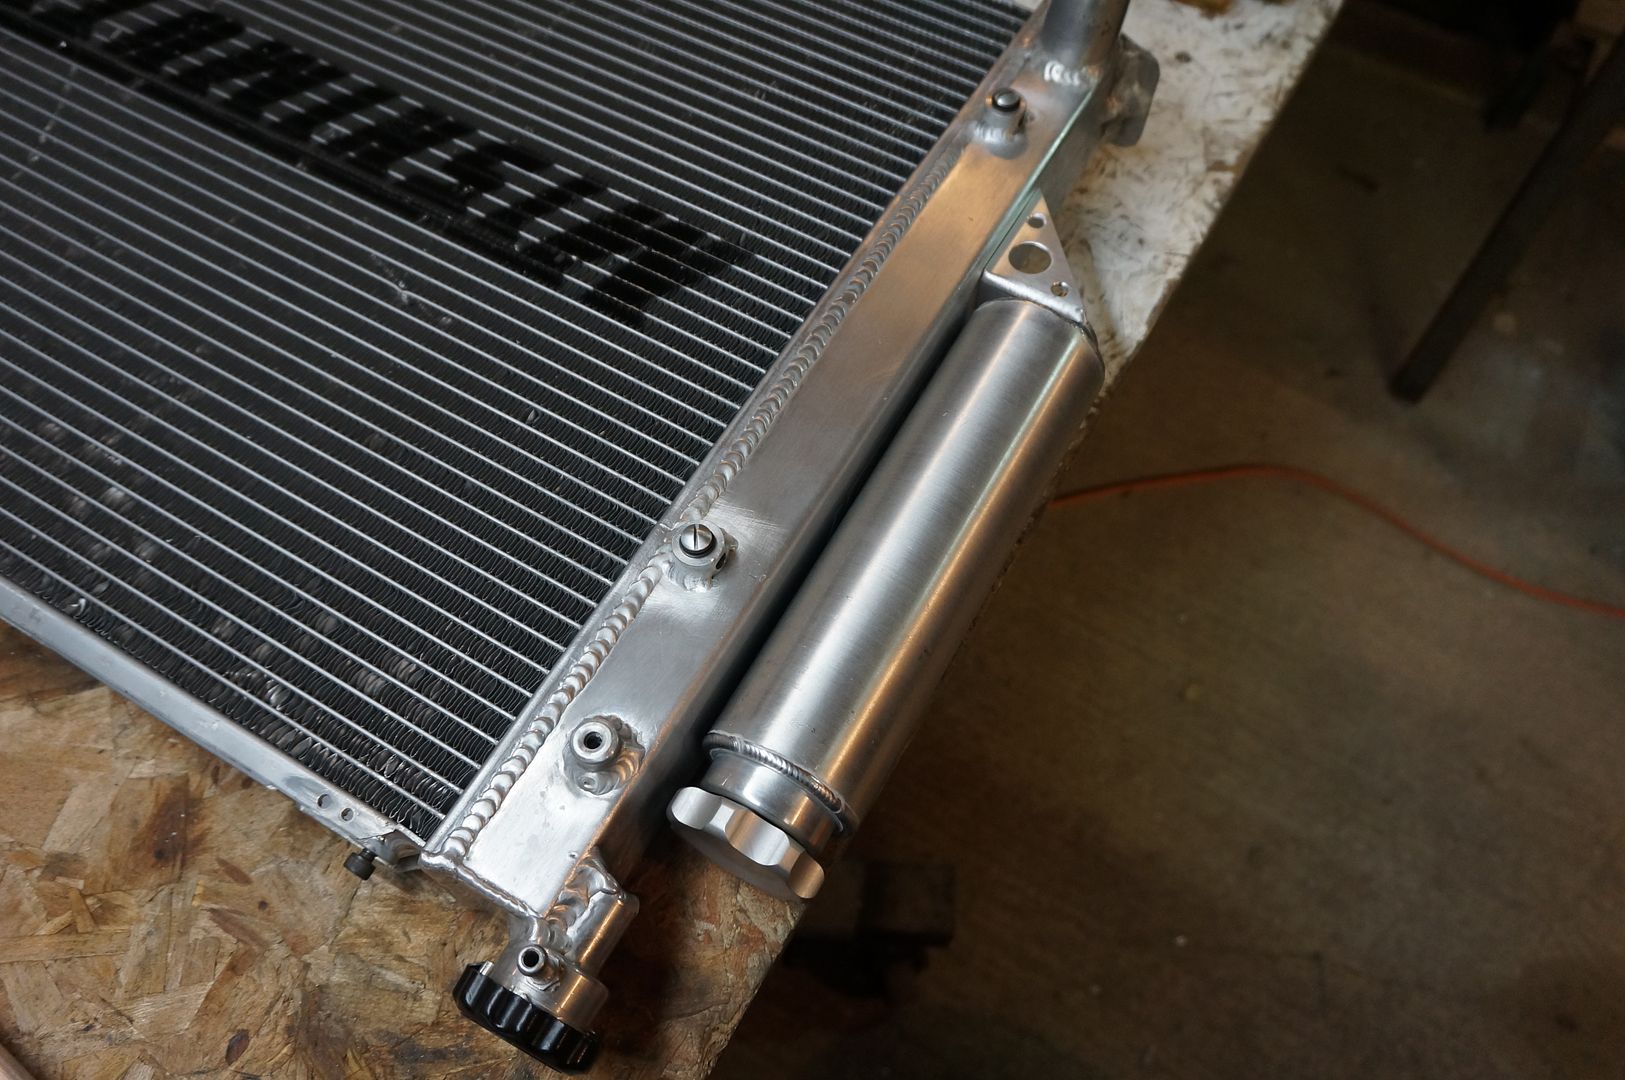
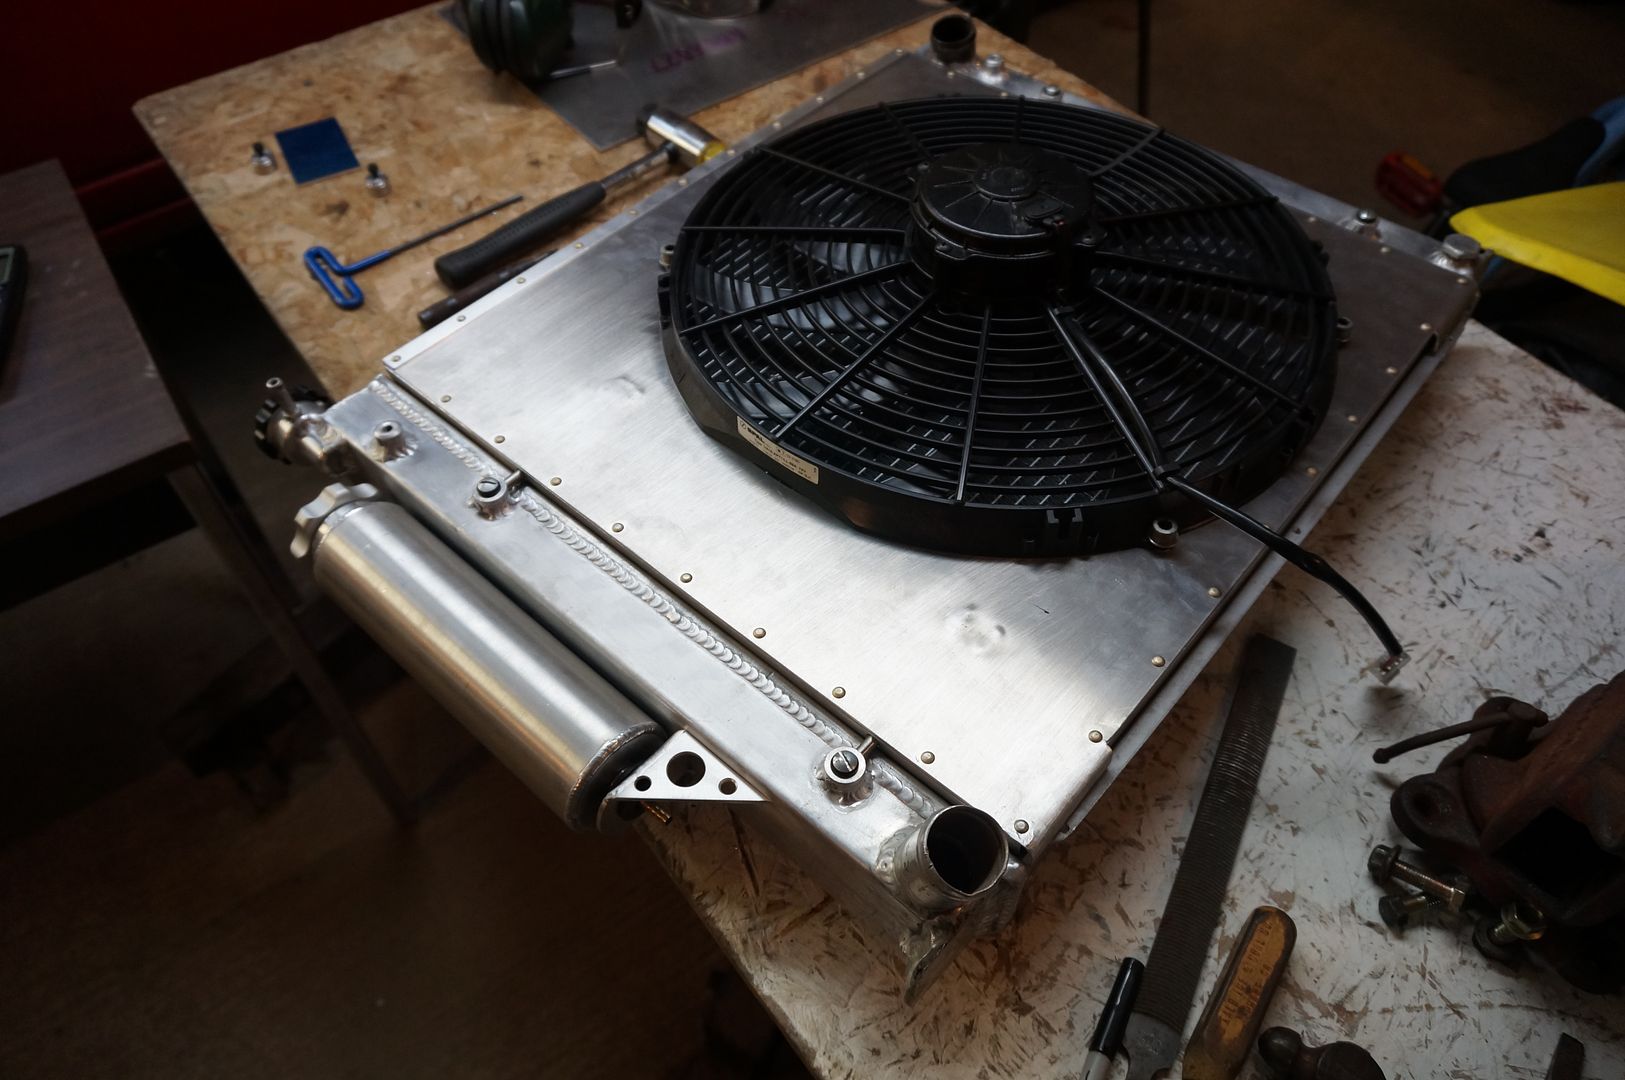
The radiator shroud came out well enough so I couldn't just use a lame plastic overflow tank.. I decided to make one, imagine that.
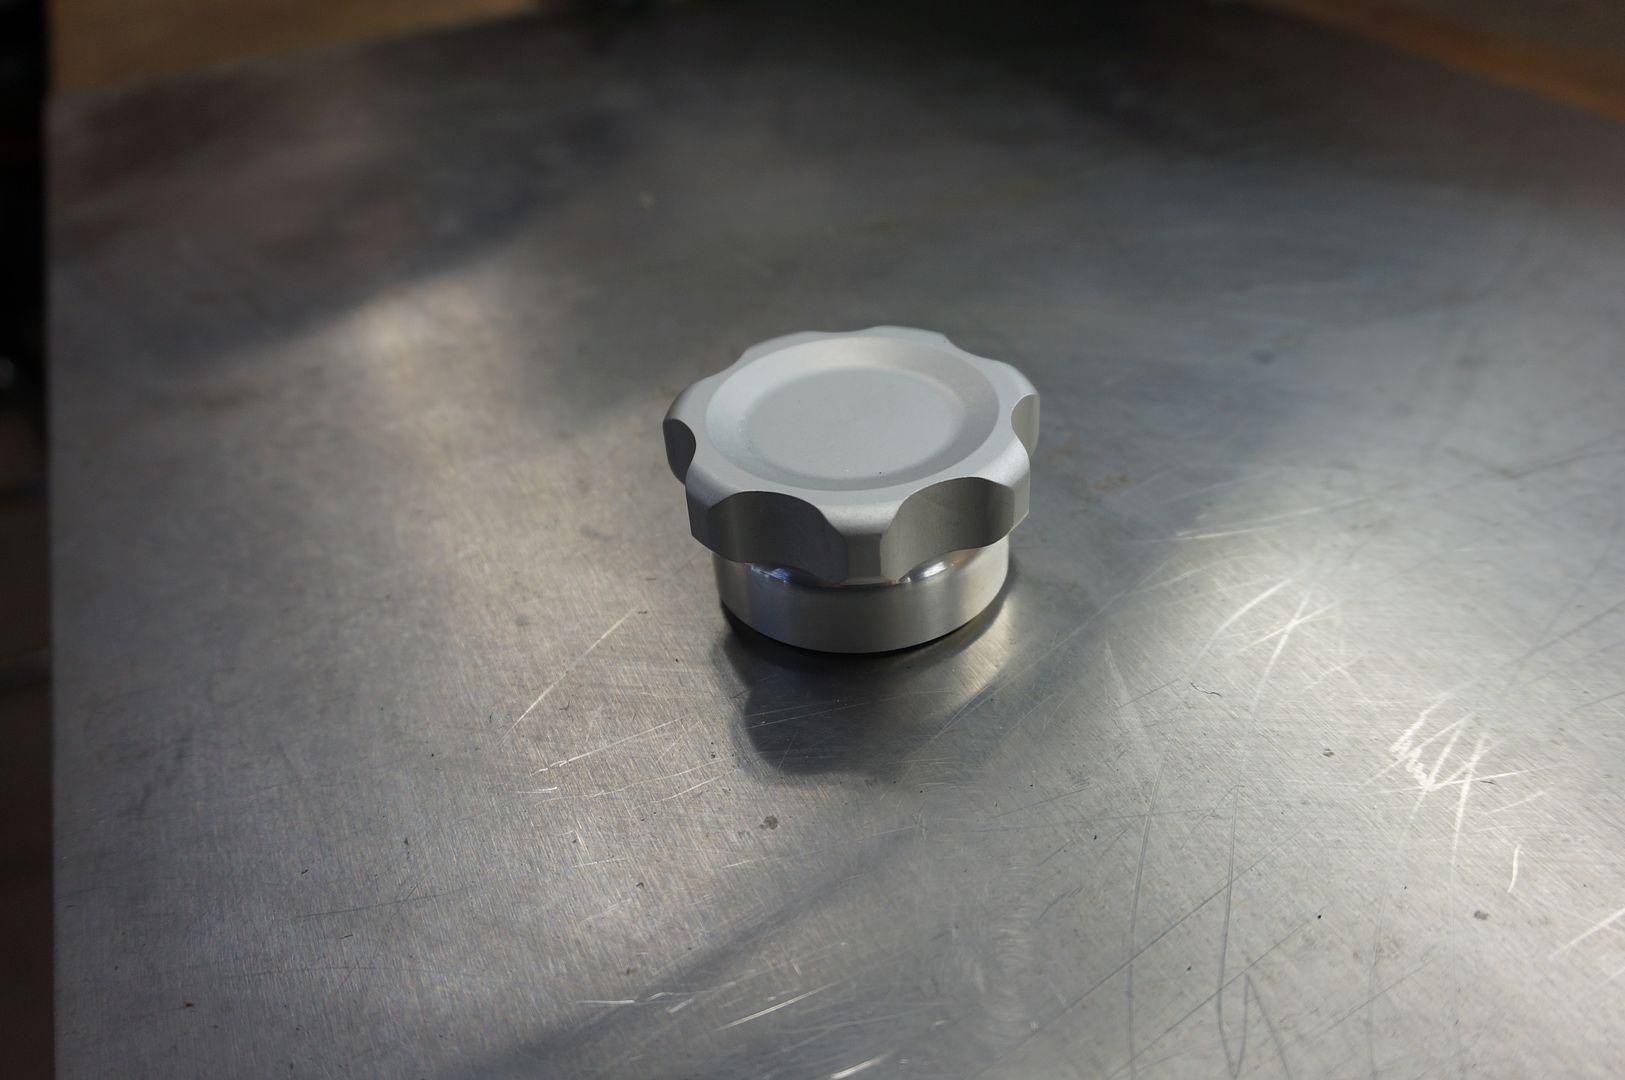
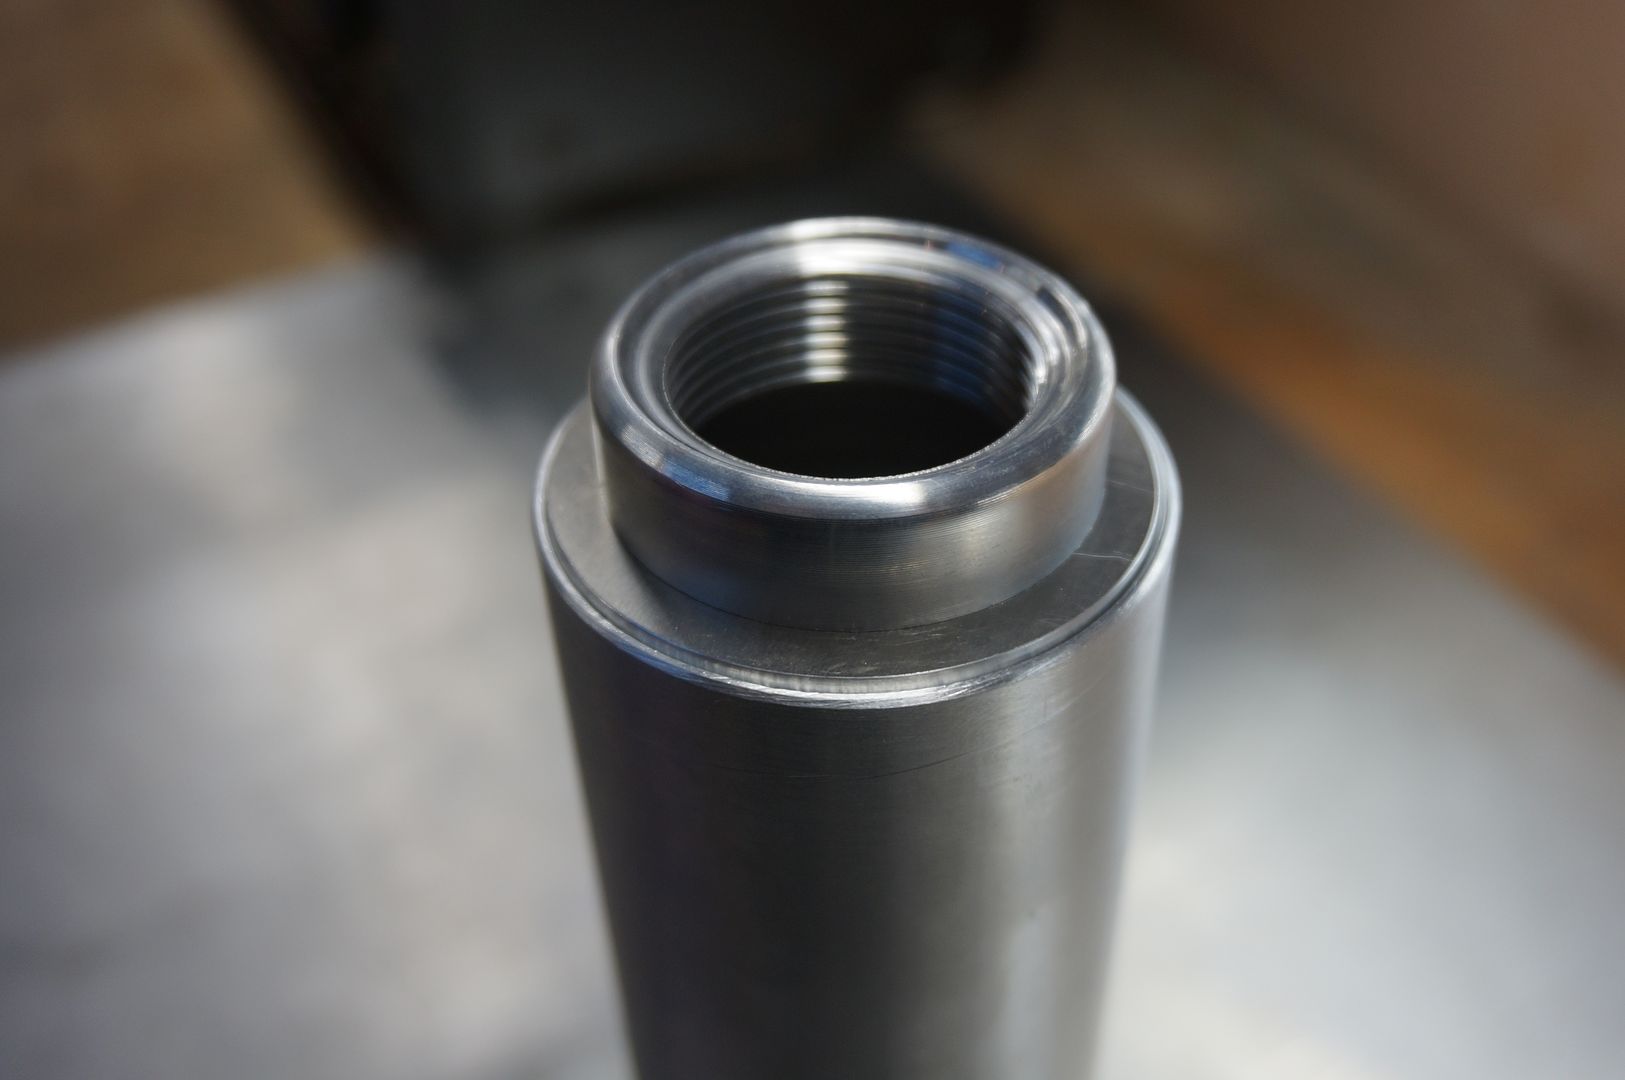
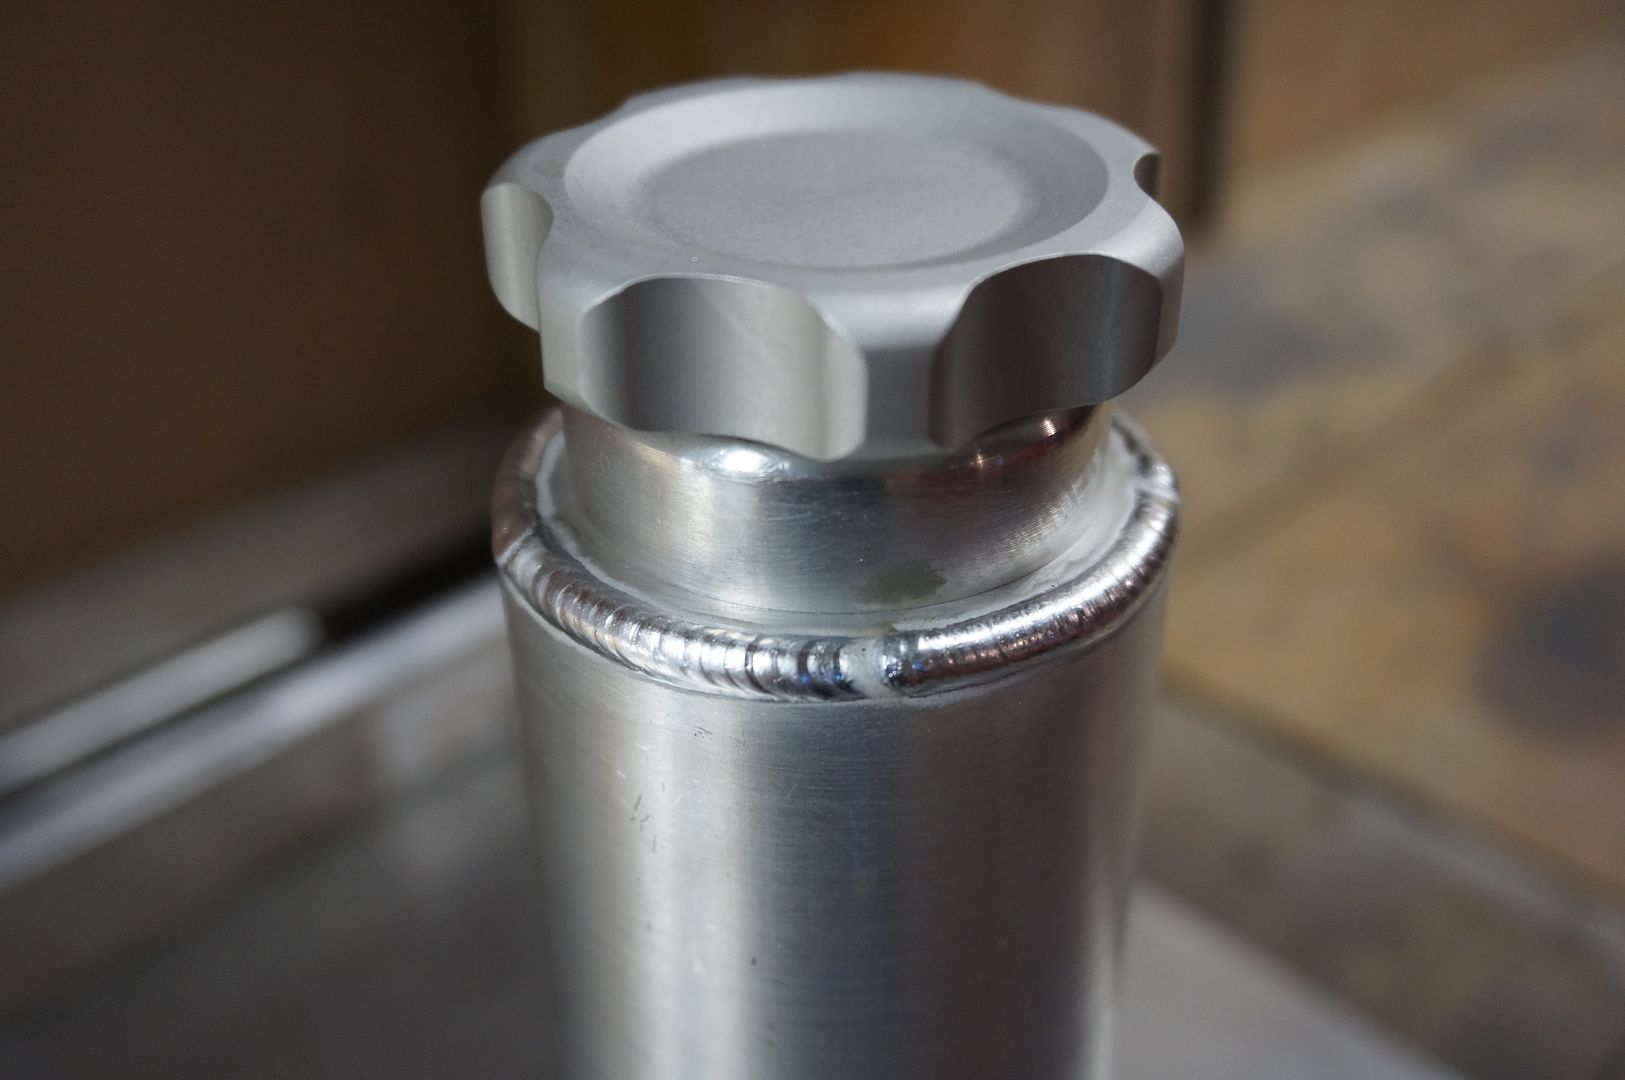
The cap however, I did buy. I don't have a mill yet otherwise I would of made this as well.
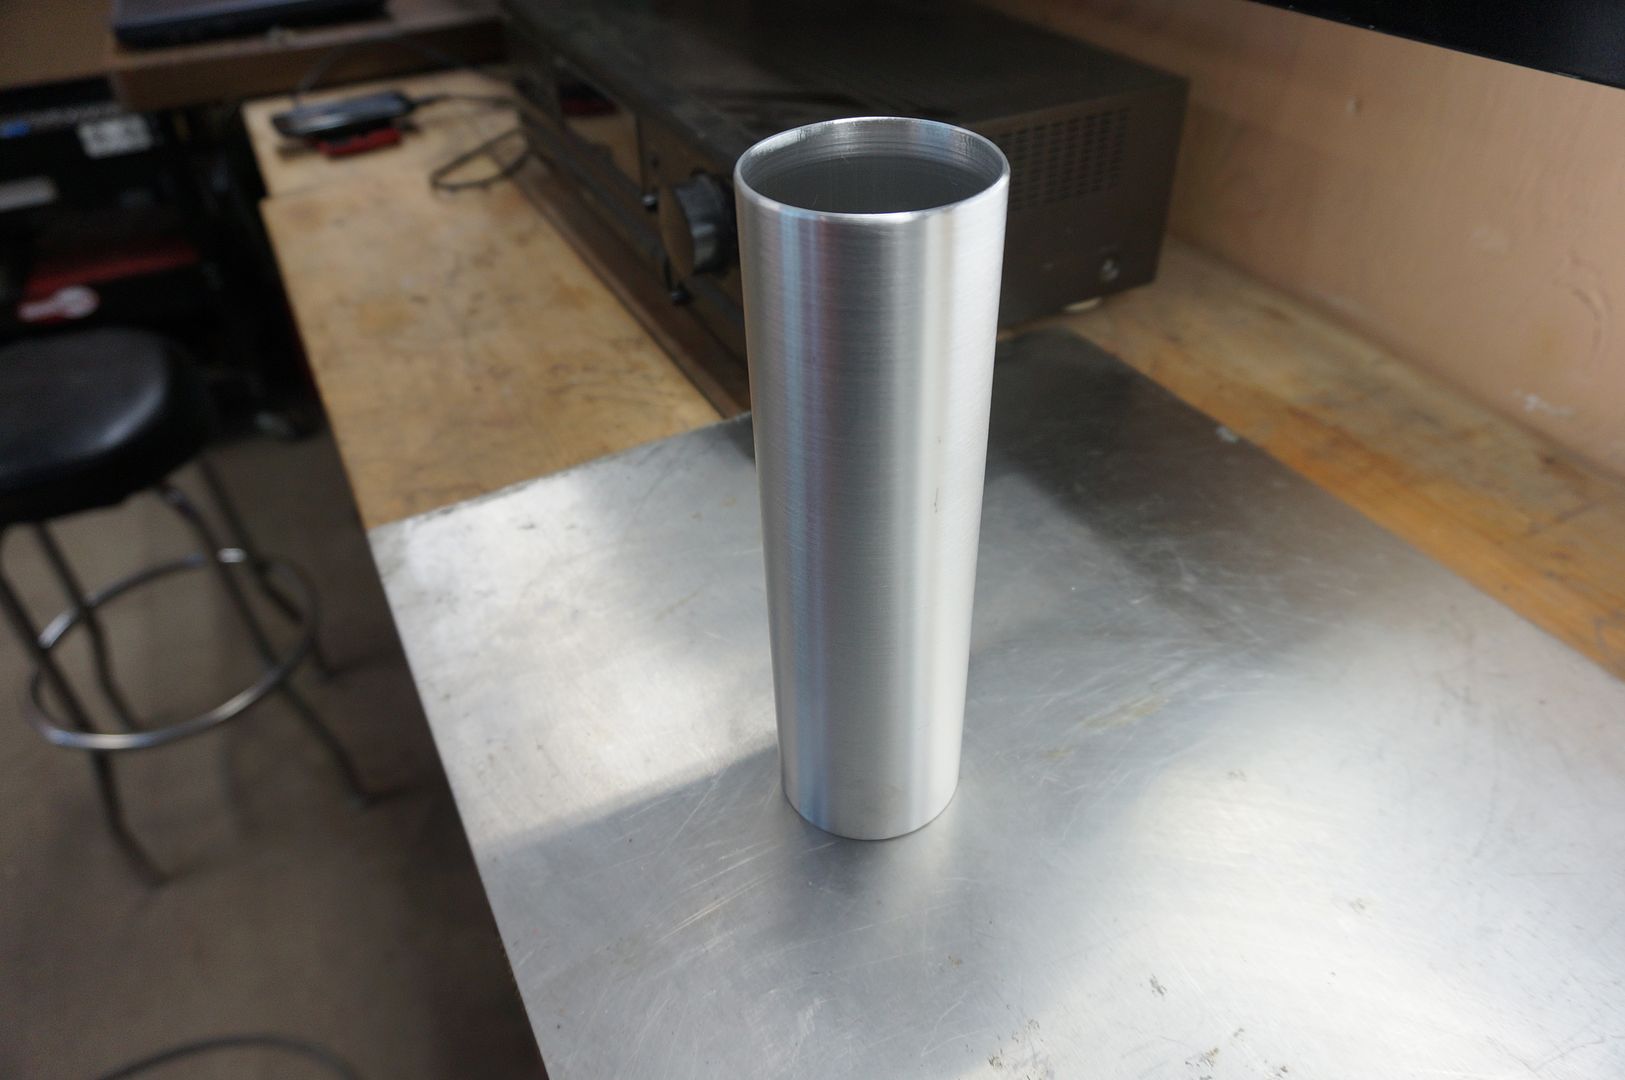
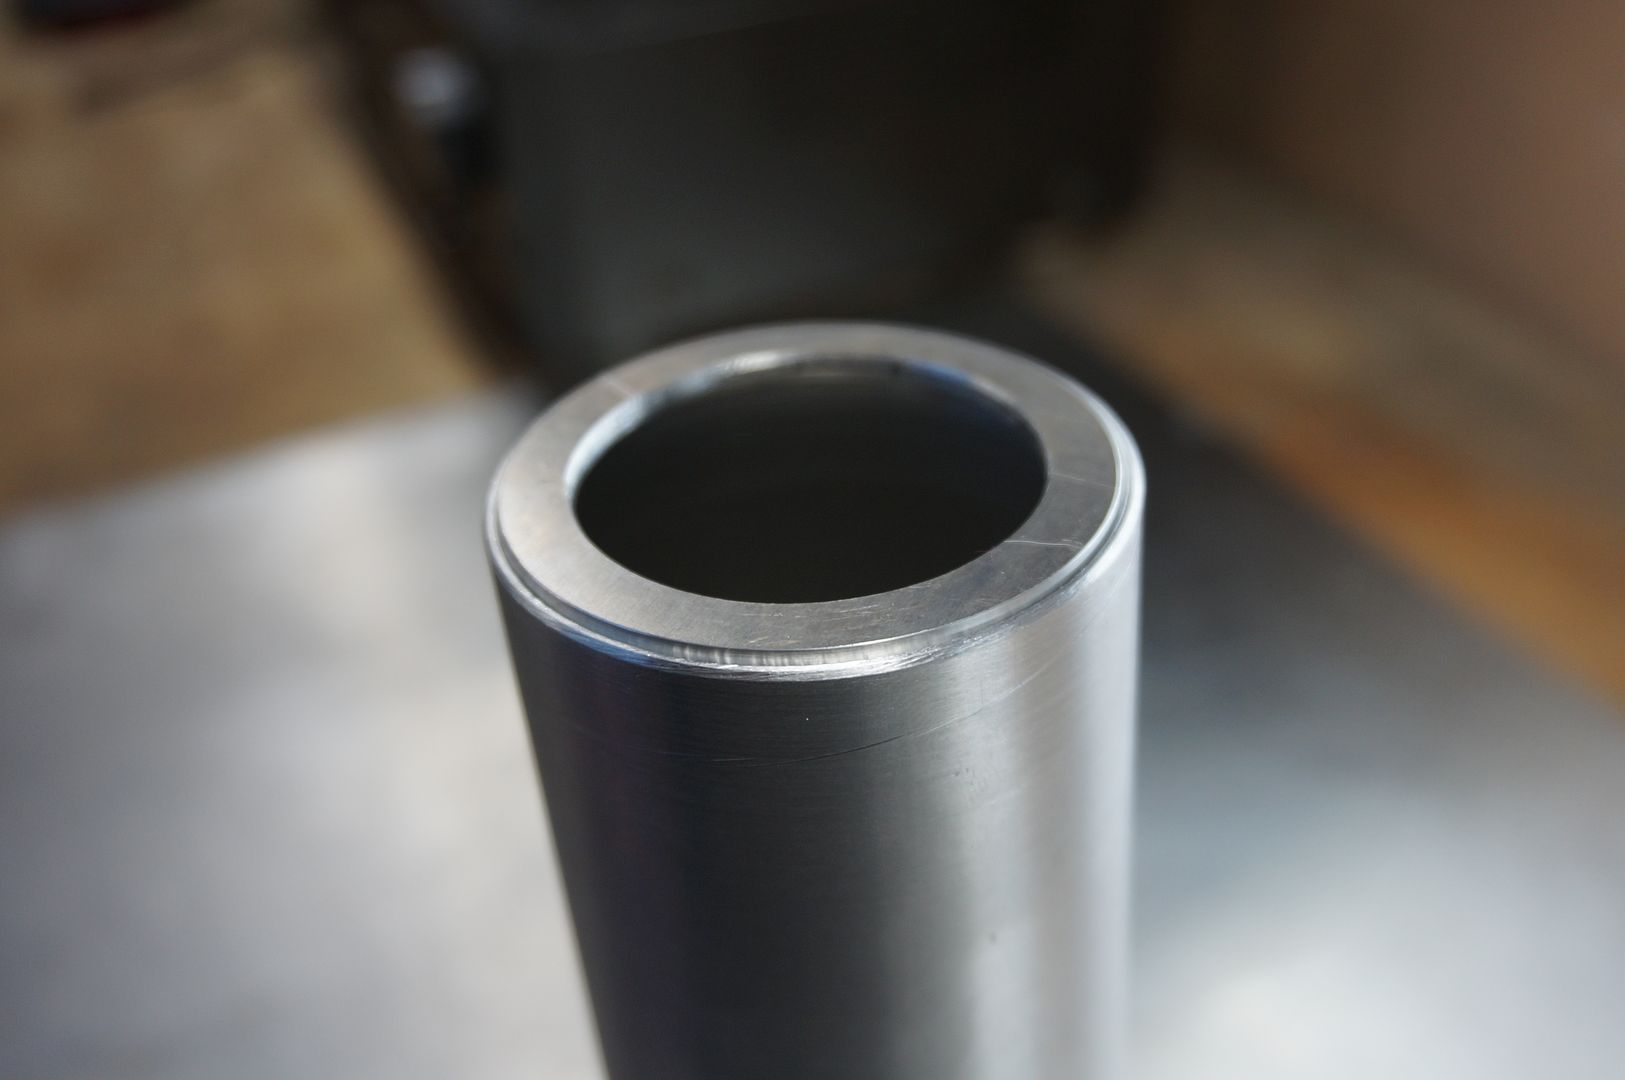
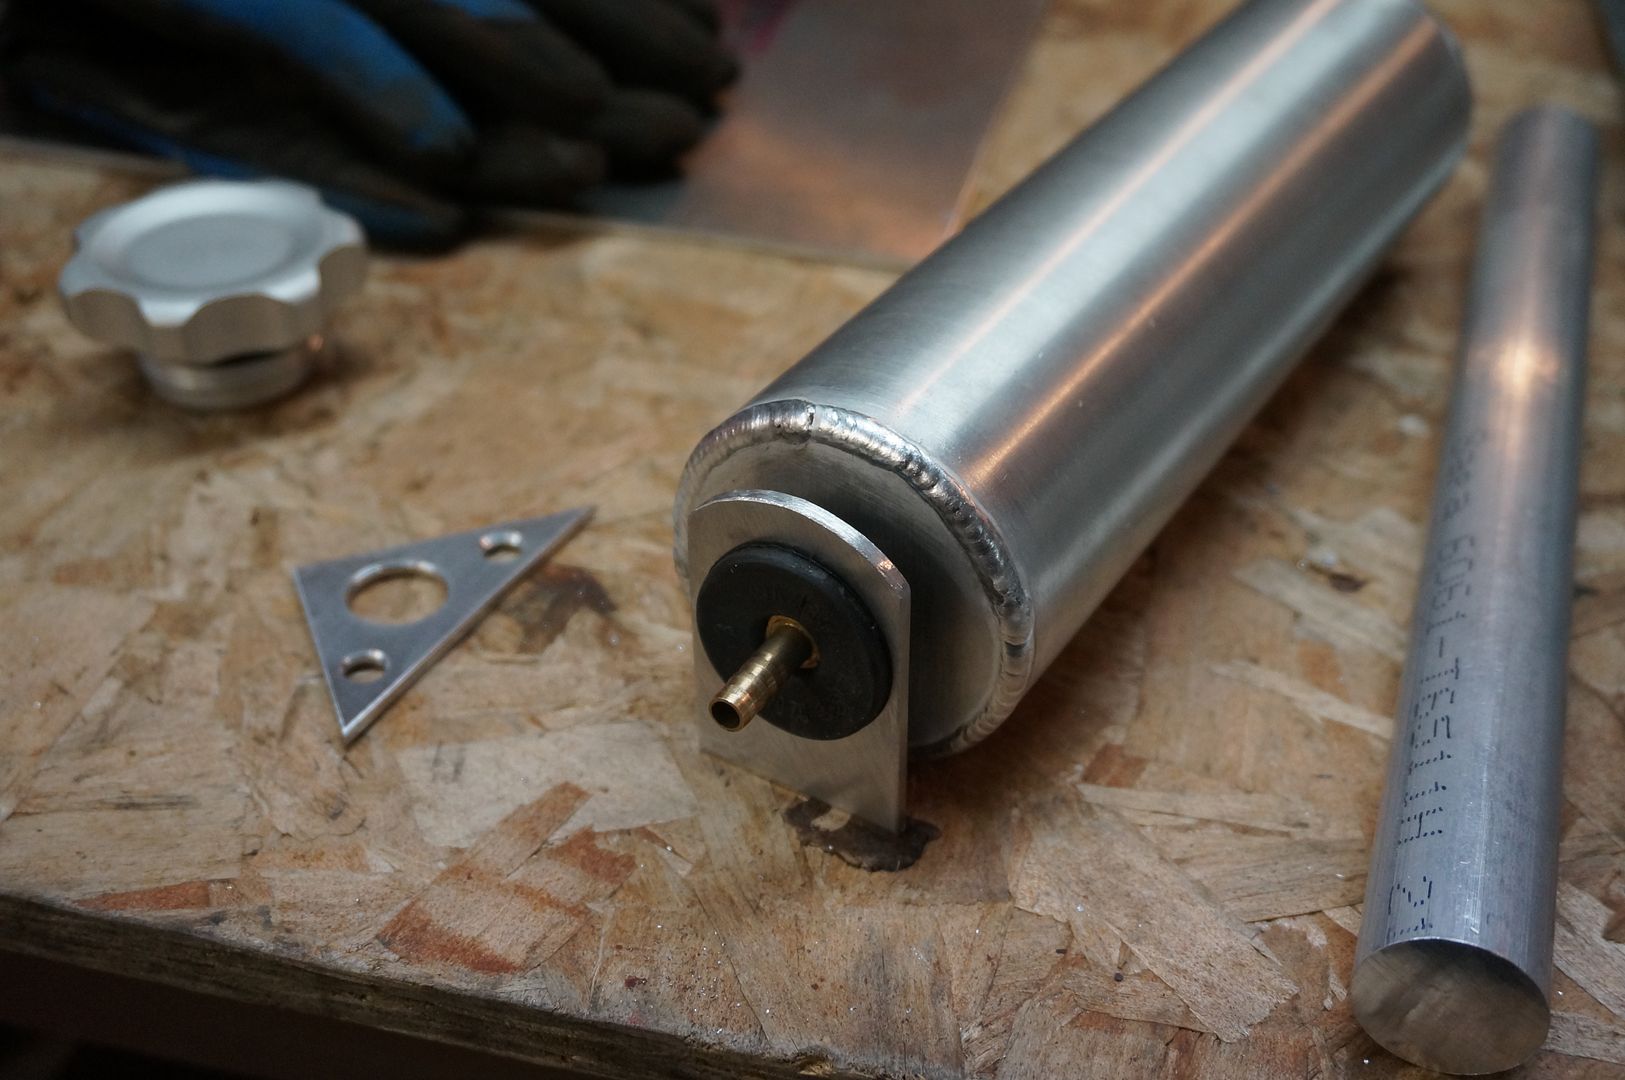
The body is a 2.5" aluminum tube.
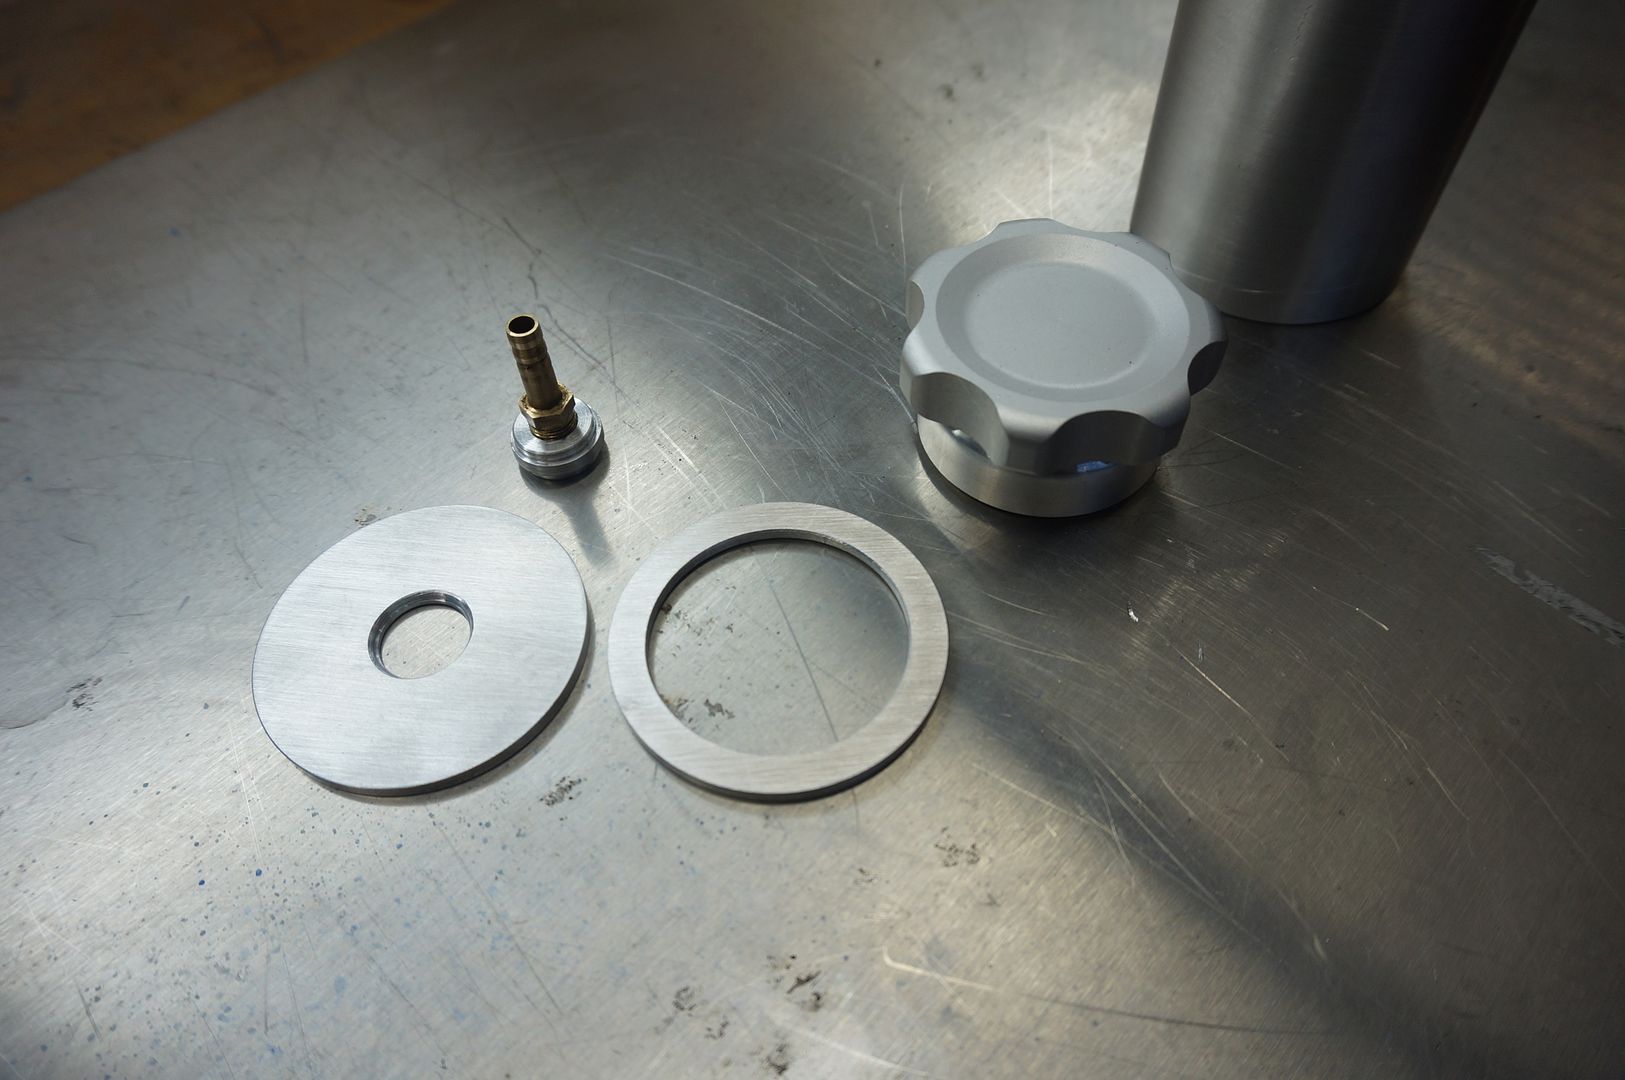
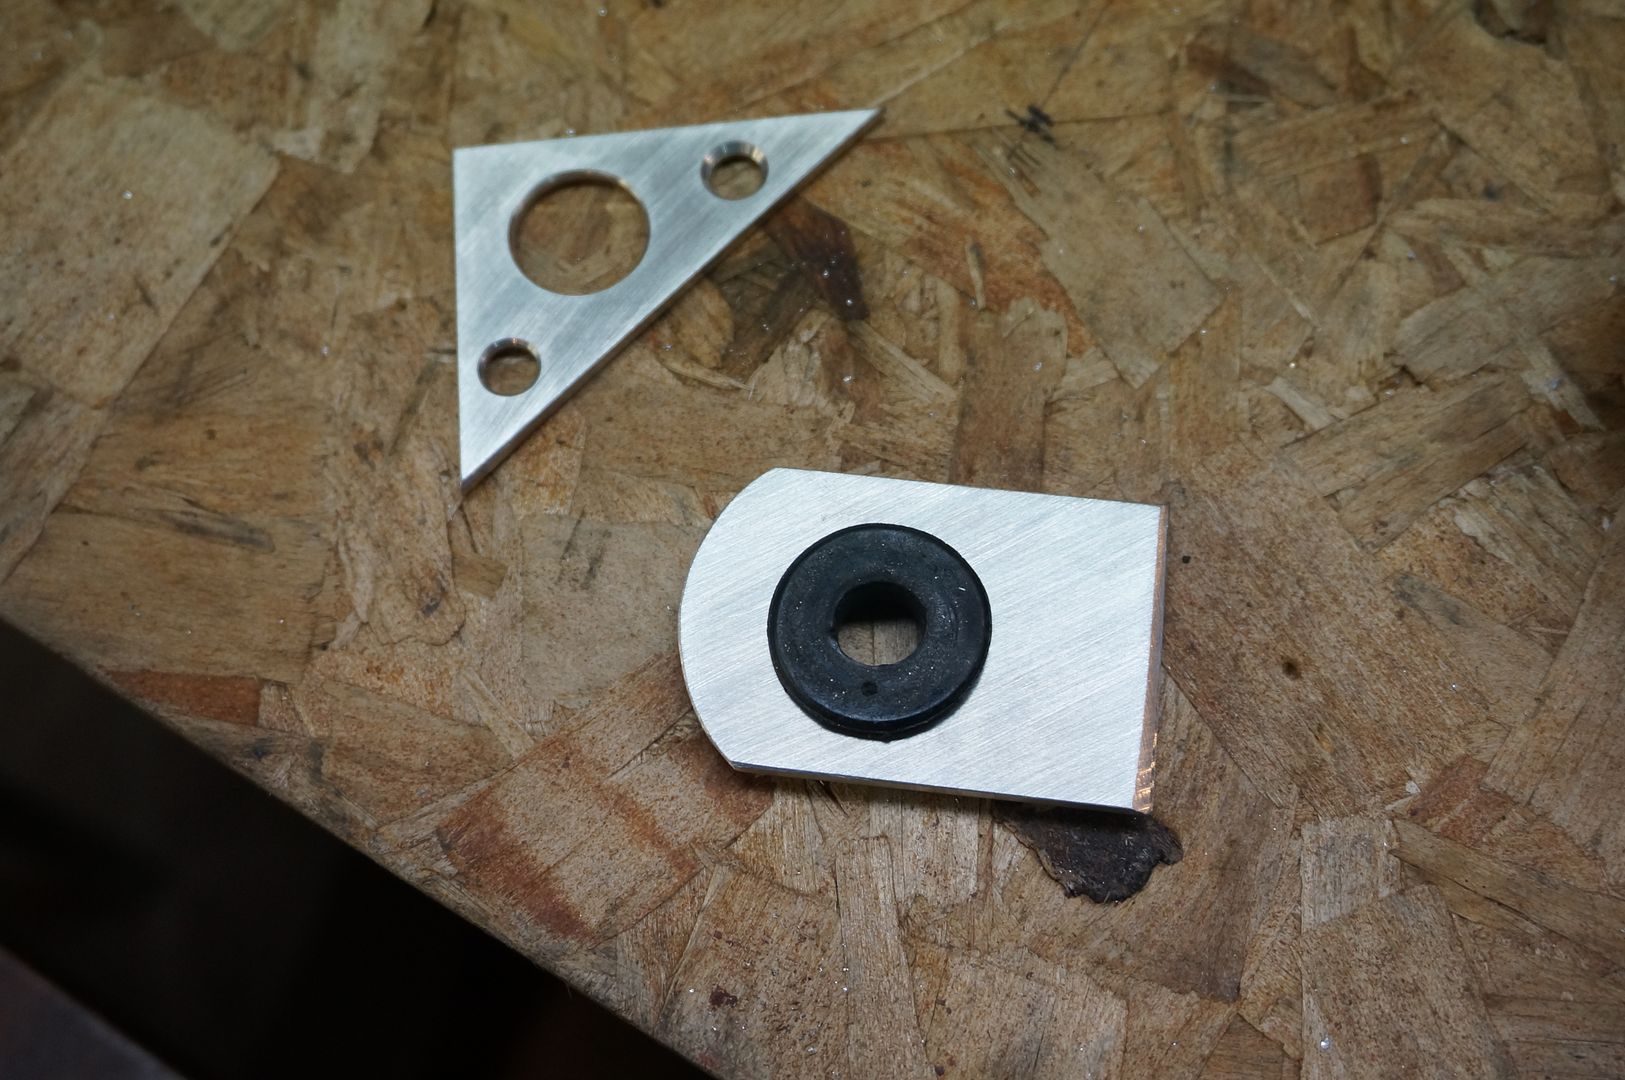
I am not making boobs I promise, this is the top and bottom caps for the tank.
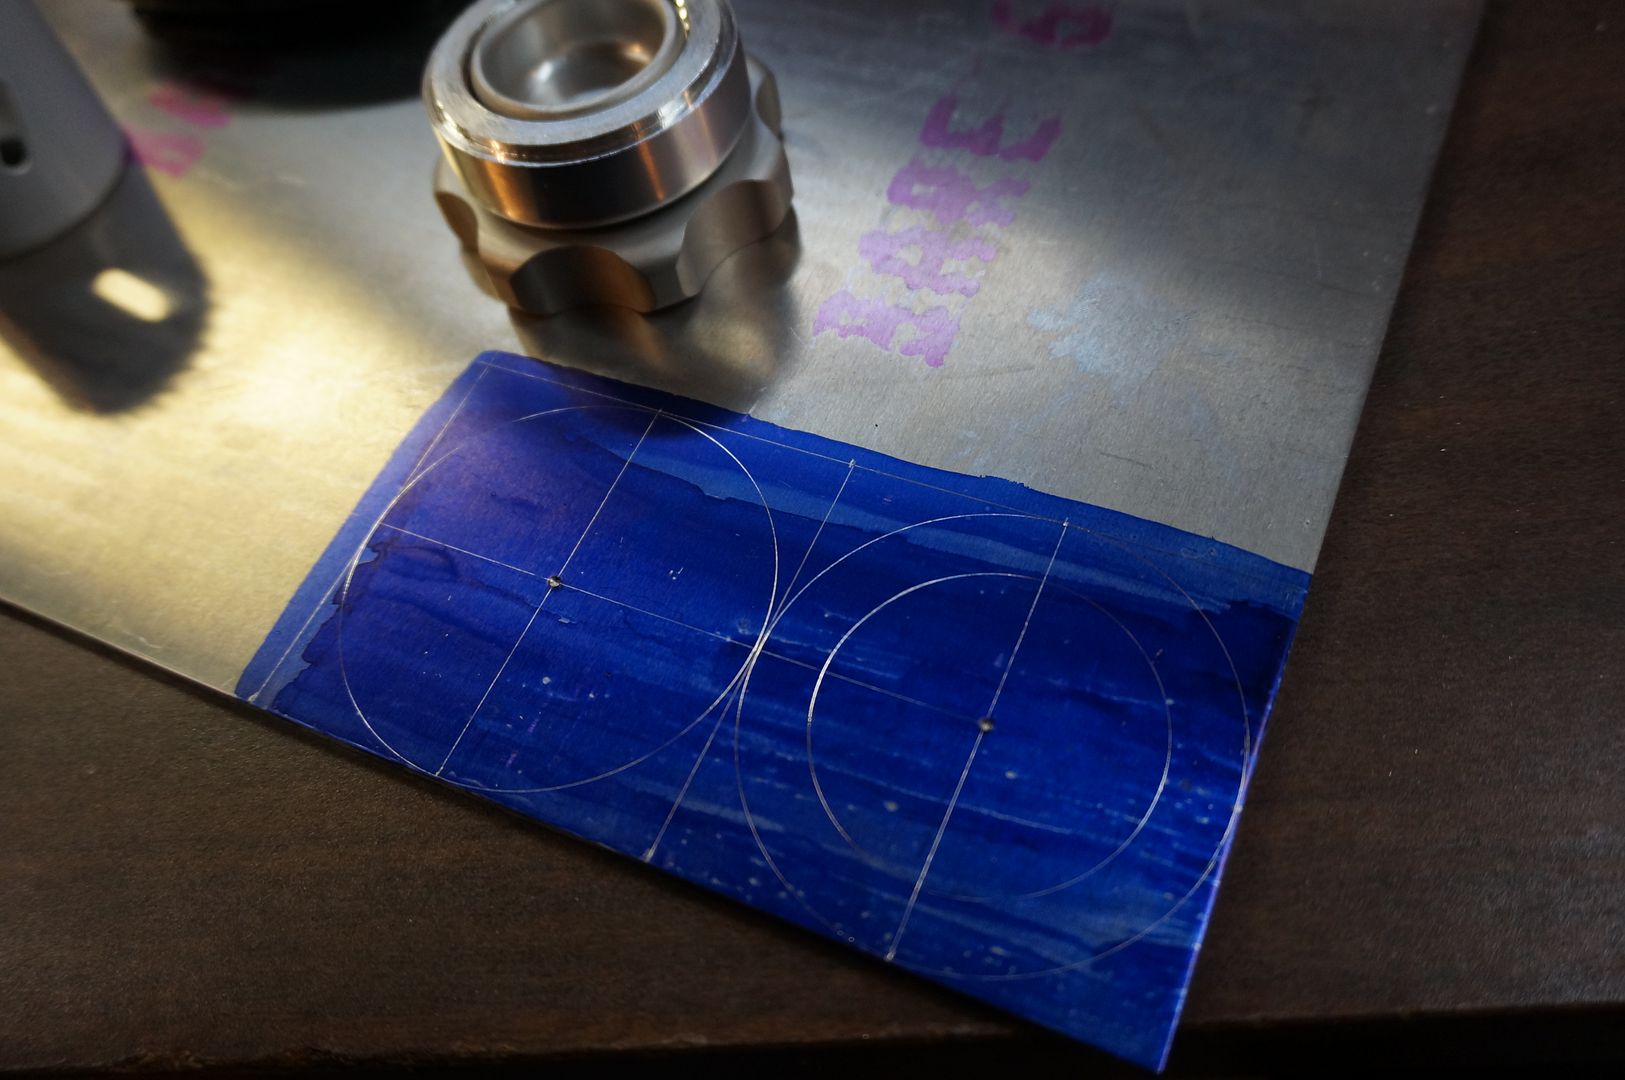
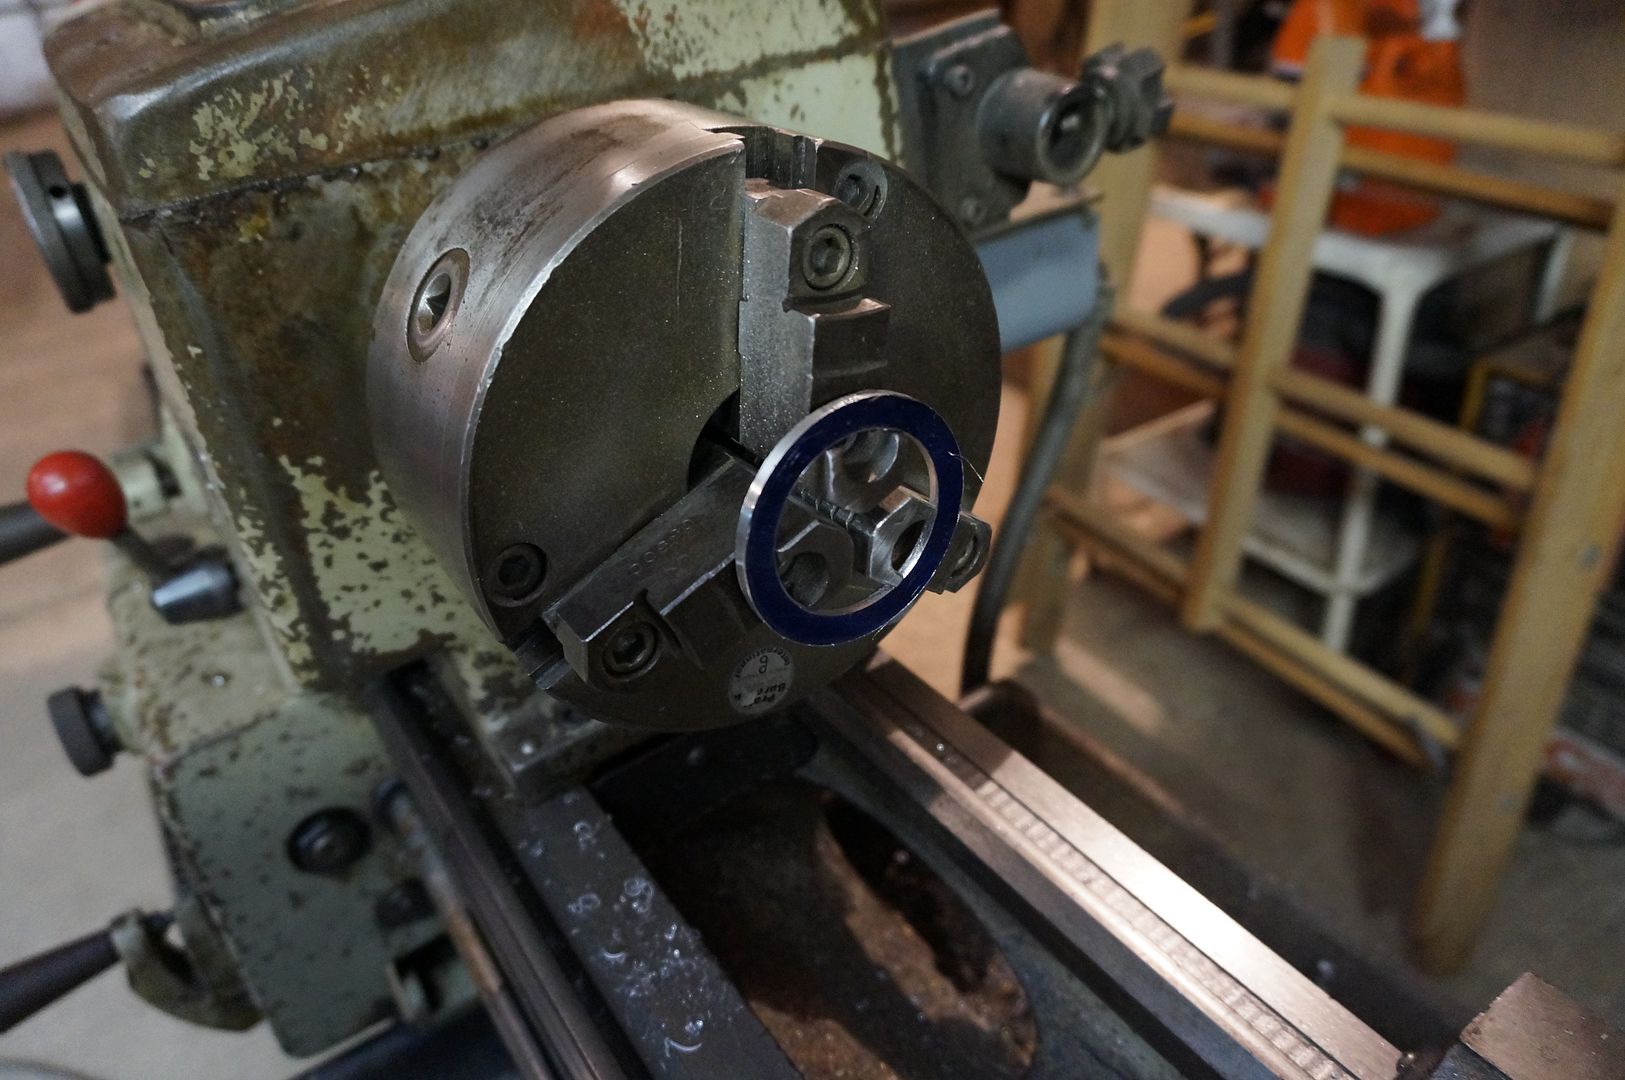
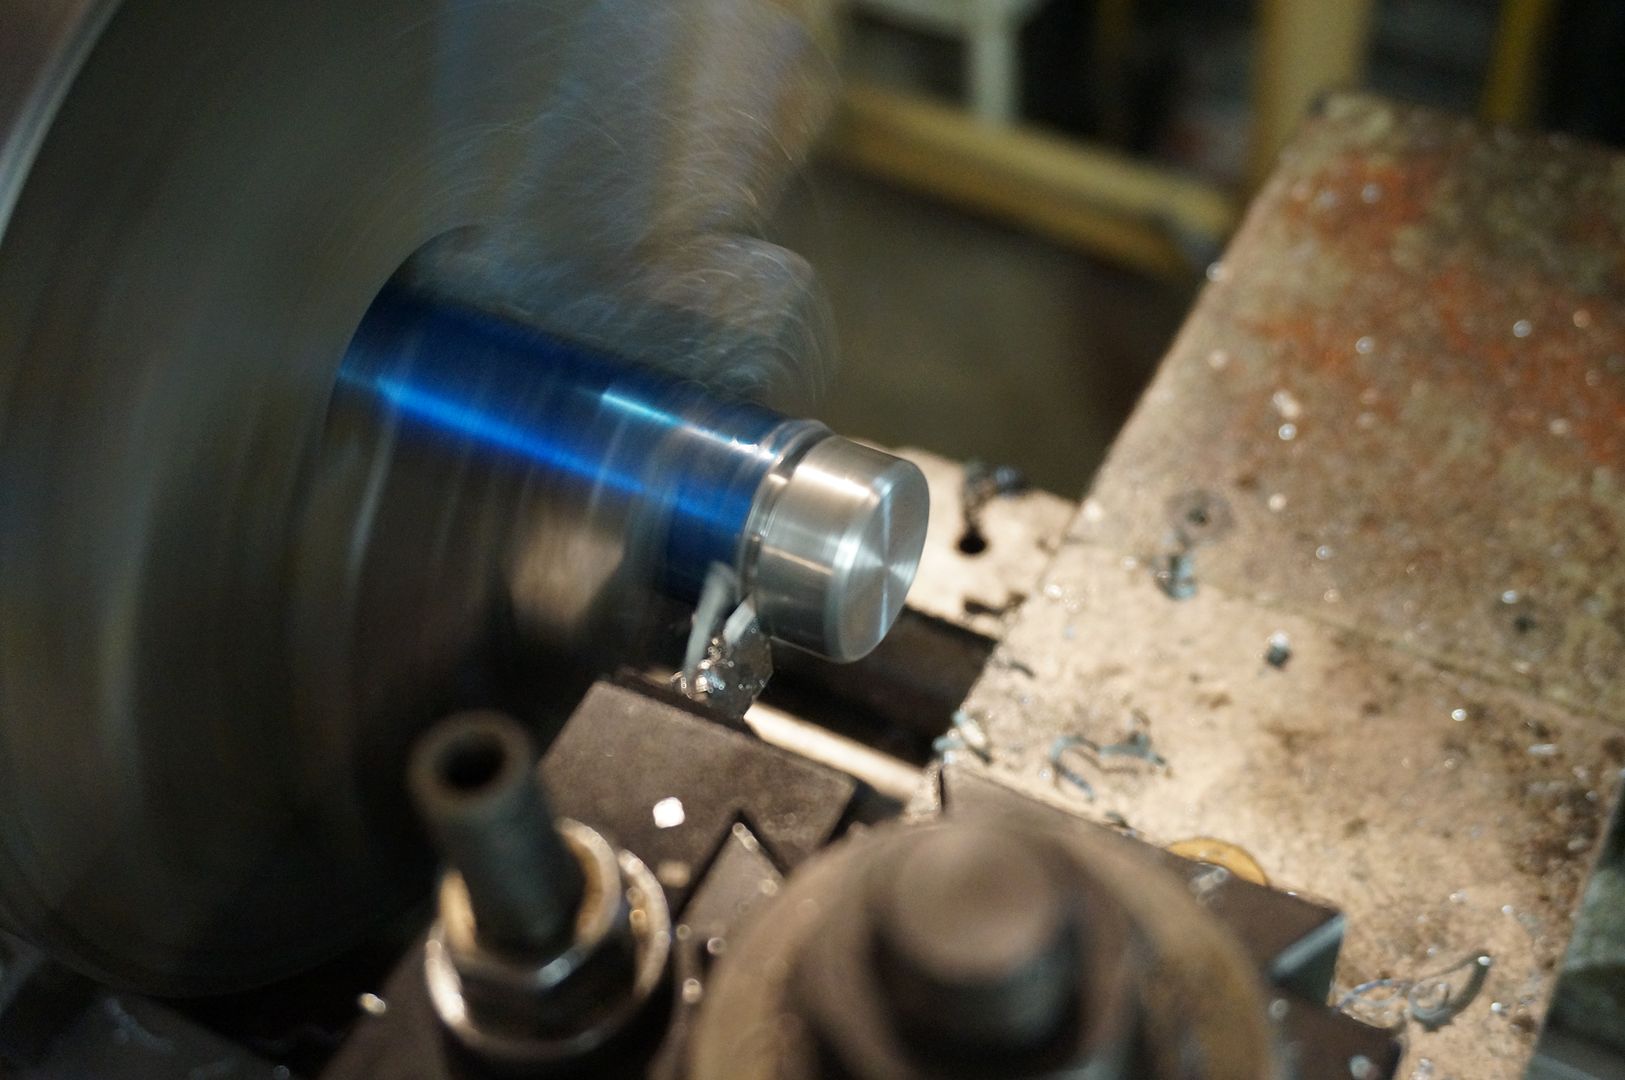
I try to hand cut everything a little to big so I can either hand file it to the correct size or for example chuck it into the lathe and machine it to the correct diameter.
There it is, fits snug so I don't have to try and hold it together when I final tack it together.
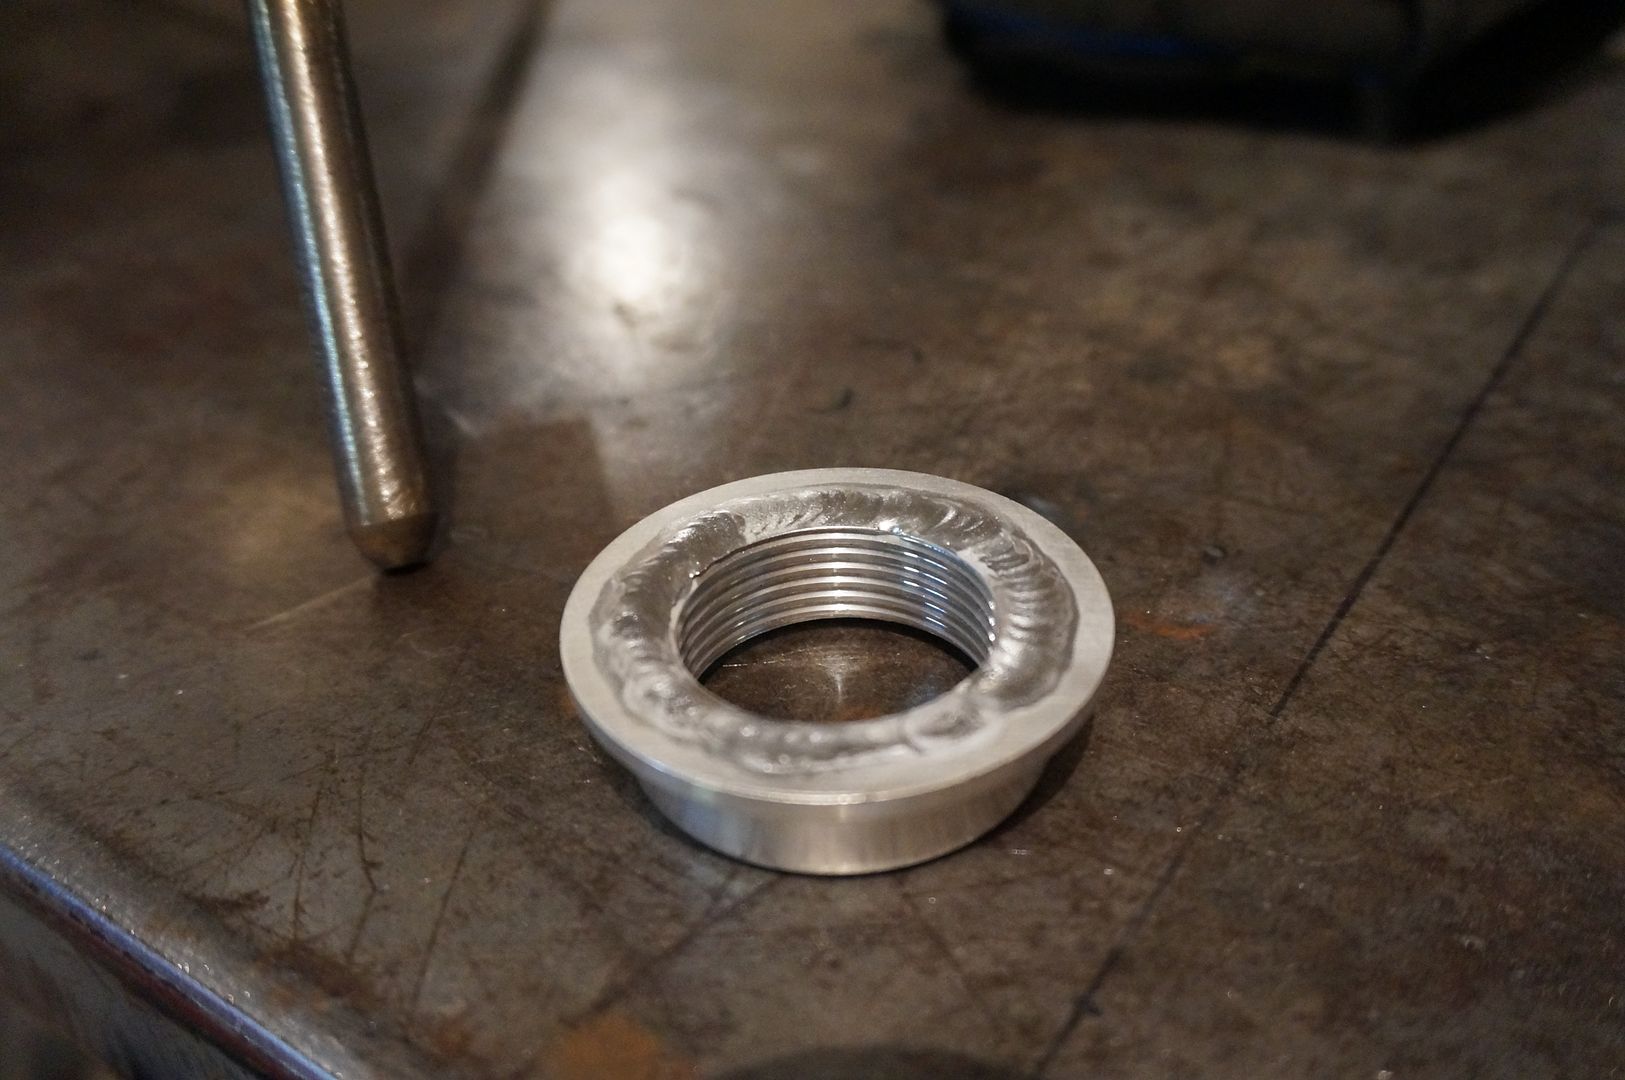
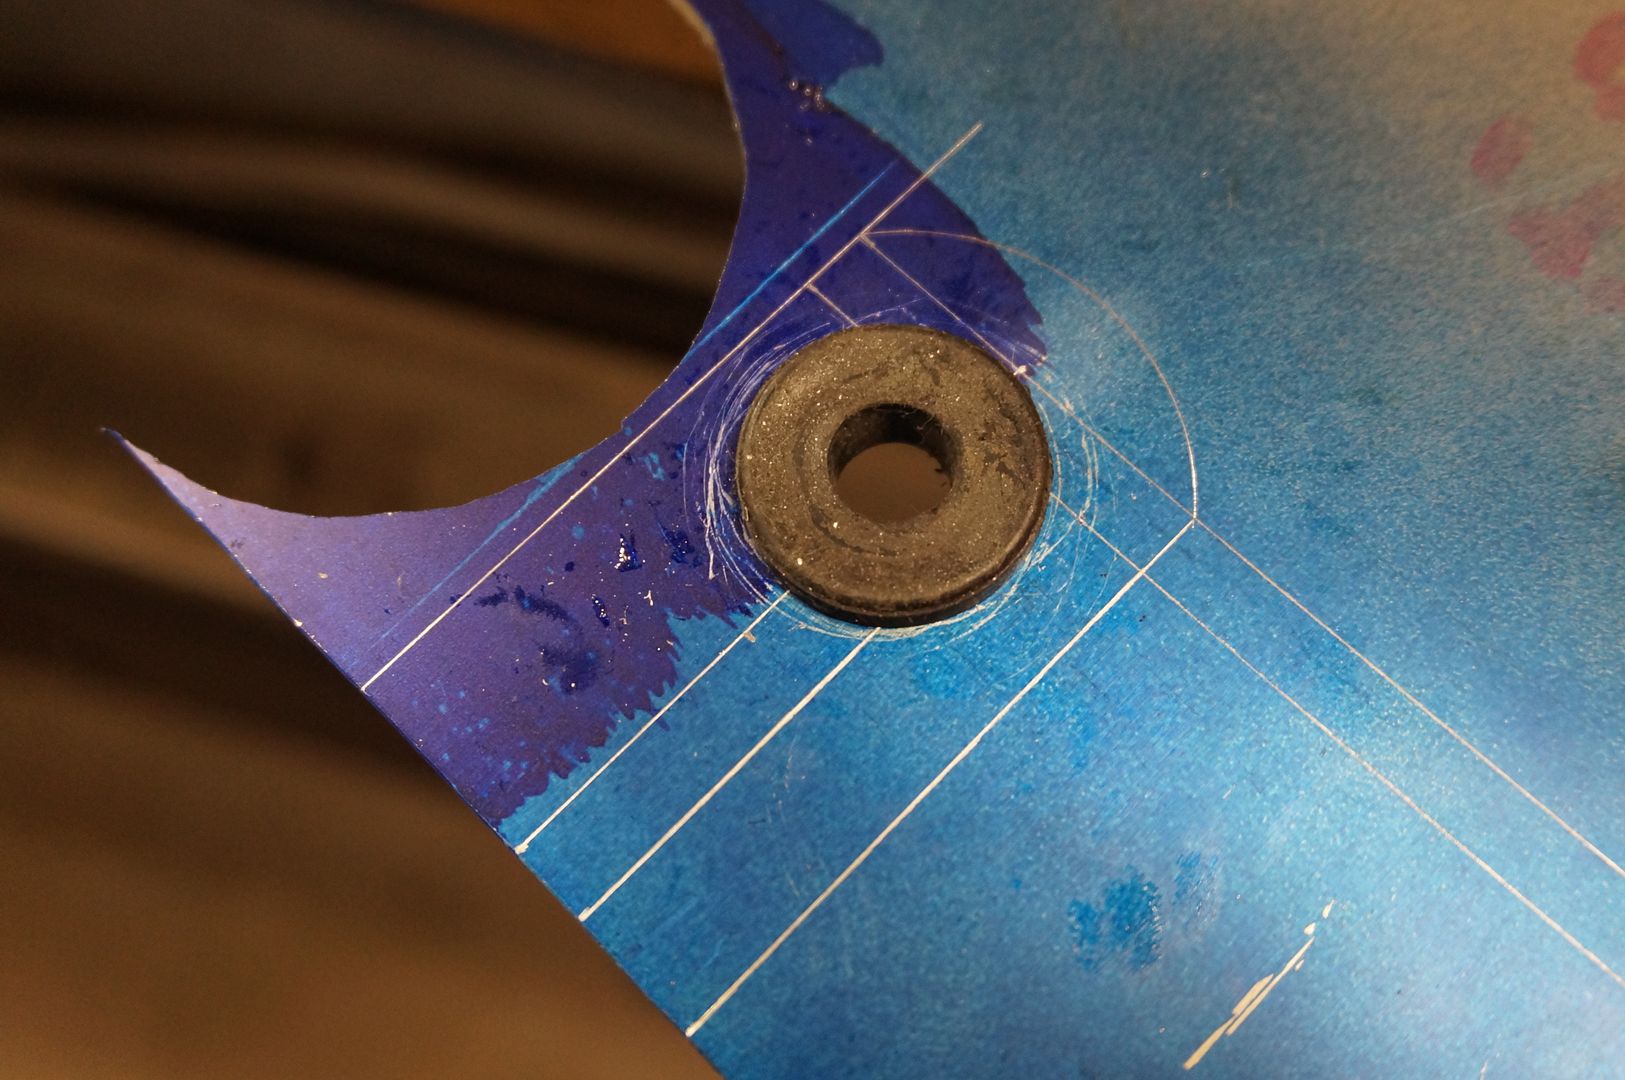
Here is the glorious weld on bung hole! I always think of Beavis and Butthead when I say or think bung hole, the struggles of being born in the 90's.
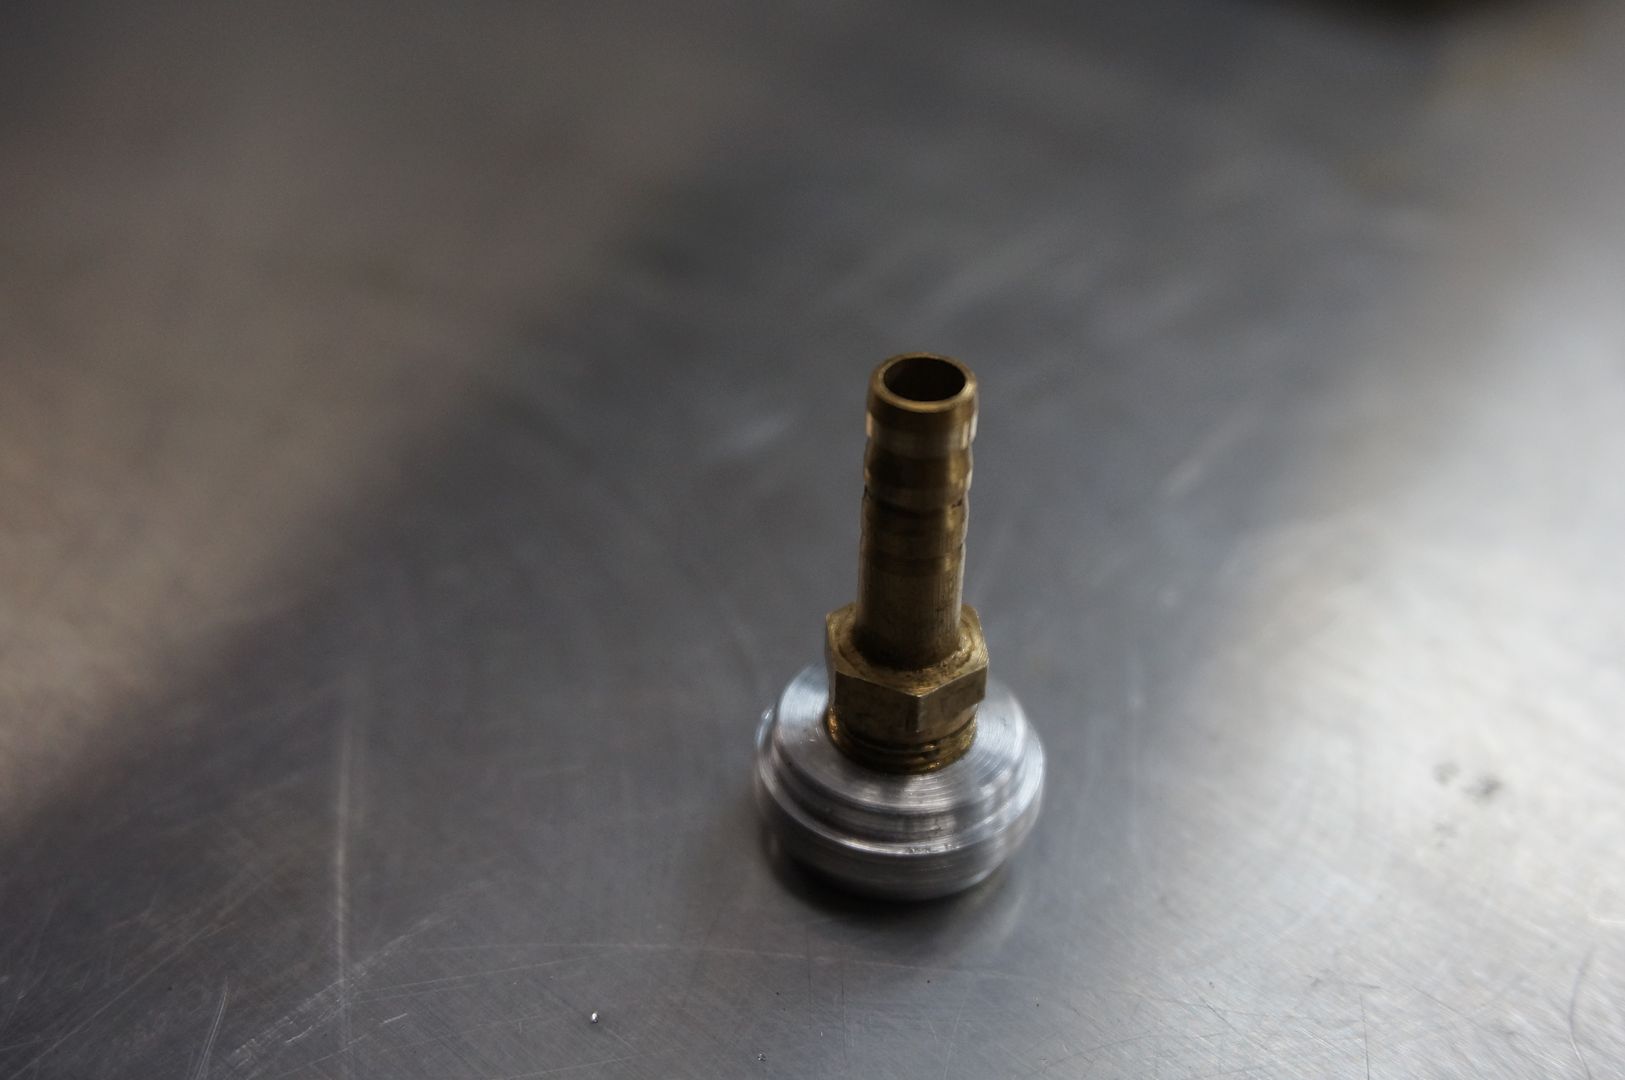
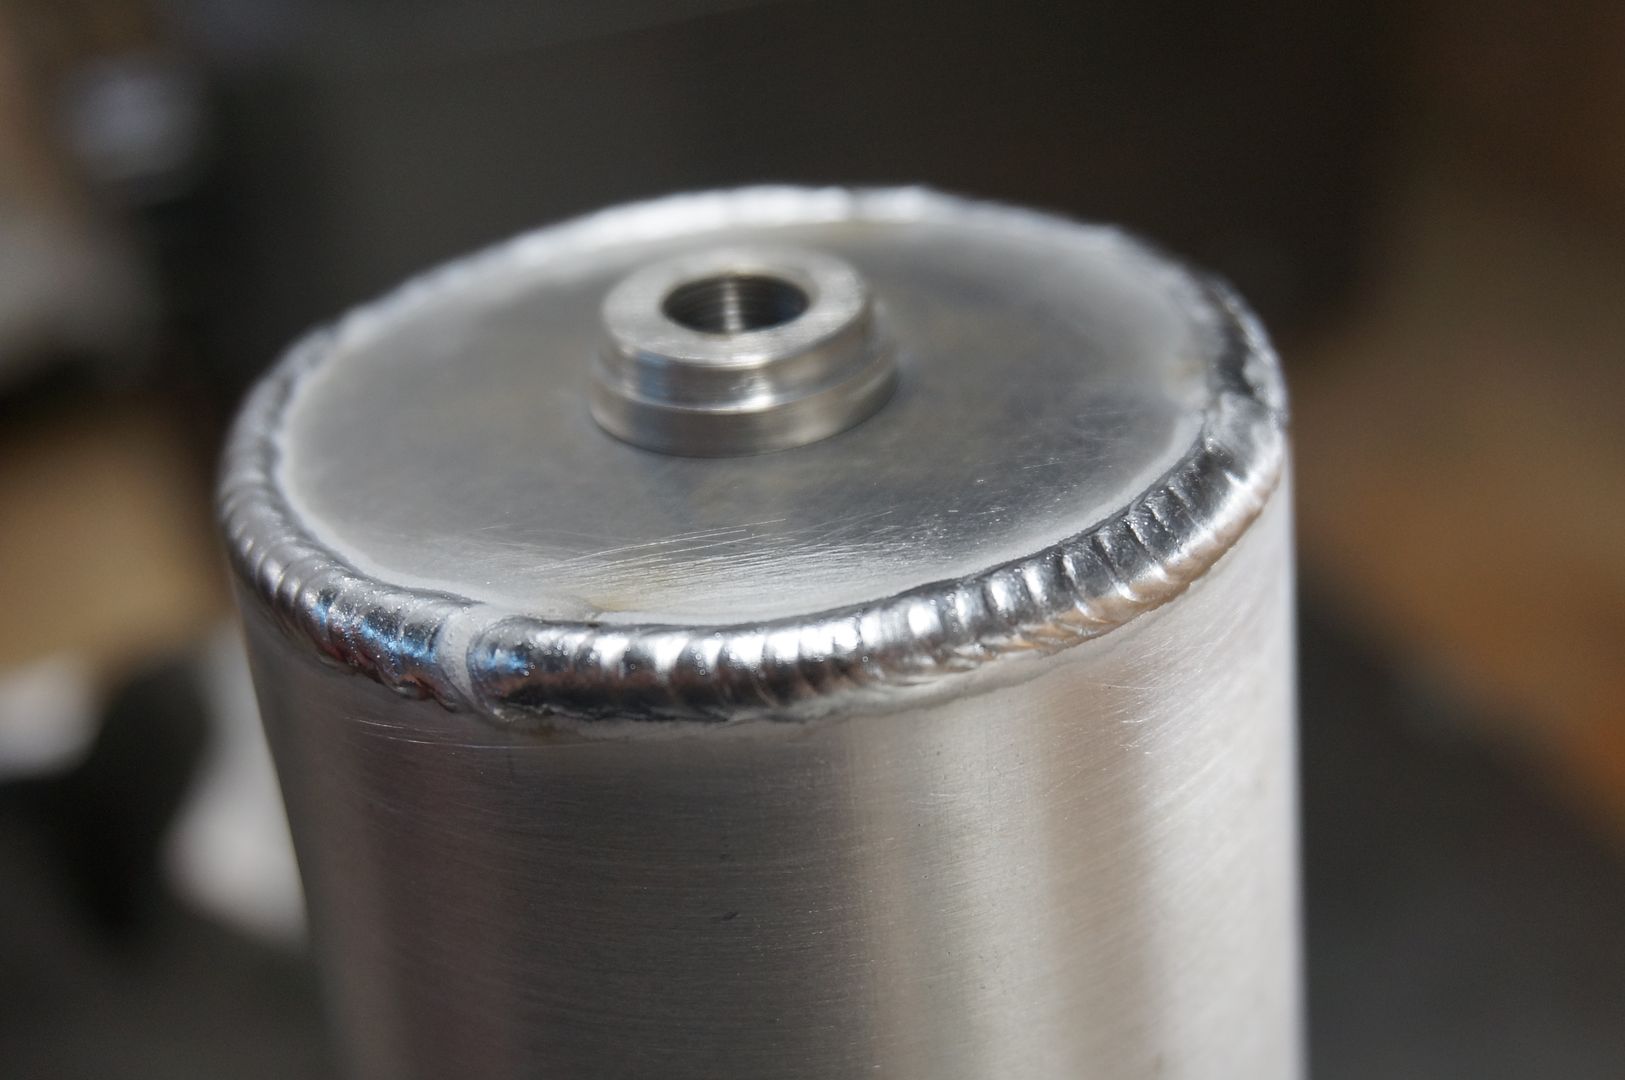
This is the nipple. Again not a boob reference it's just a humble reservoir nipple, this will transfer the coolant from the radiator into the reservoir.
Here is the spread before assembly.
Weld on the inside because it is so clean looking.
The bottom receives the same internal welding treatment.
Top and bottom both welded, sorry for the oxidation here and there, I do not have a rotator as of yet so I have to make do with the old tried and true hand method.
Reservoir will be mounted onto the radiator for a single compact easy to remove package.
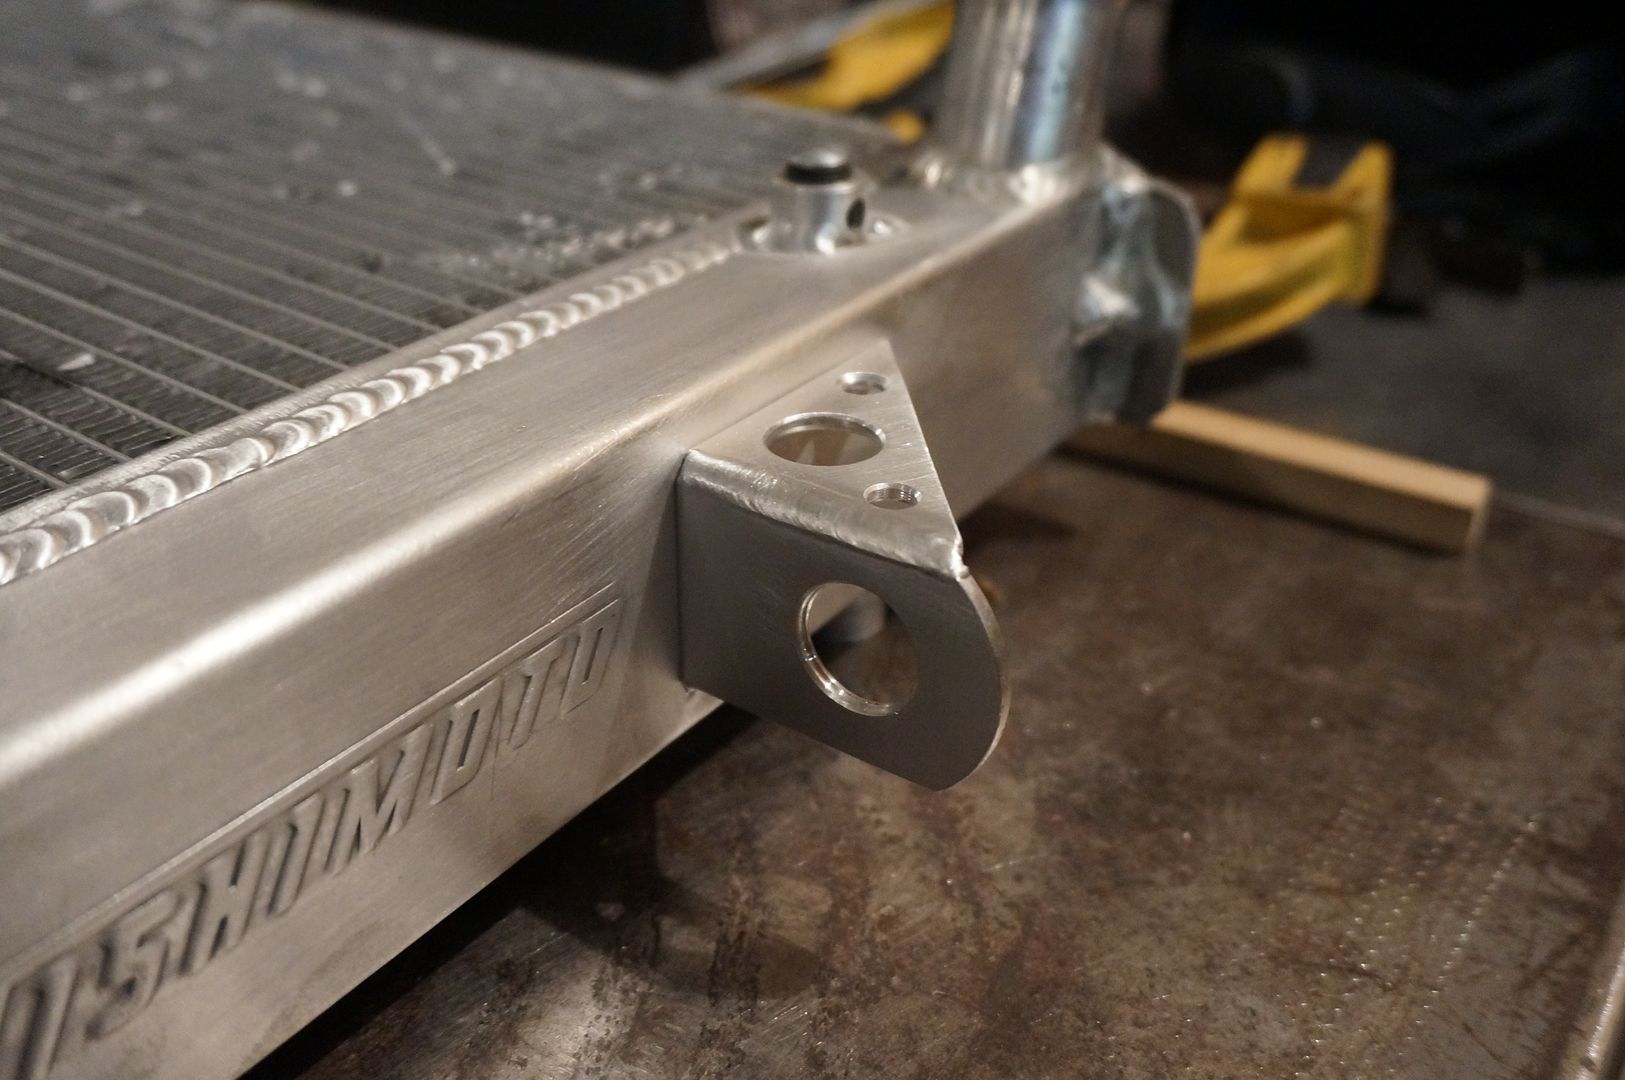
Lower mount
Cut out! and the accompanied gusset with the ever so popular speed hole treatment.
Very simple in its operation, but the nipple bung serves both as a threaded bung and a way to mount the reservoir in a semi isolated fashion.

One more mount to go.
I call this the upper tongue depressor brace.
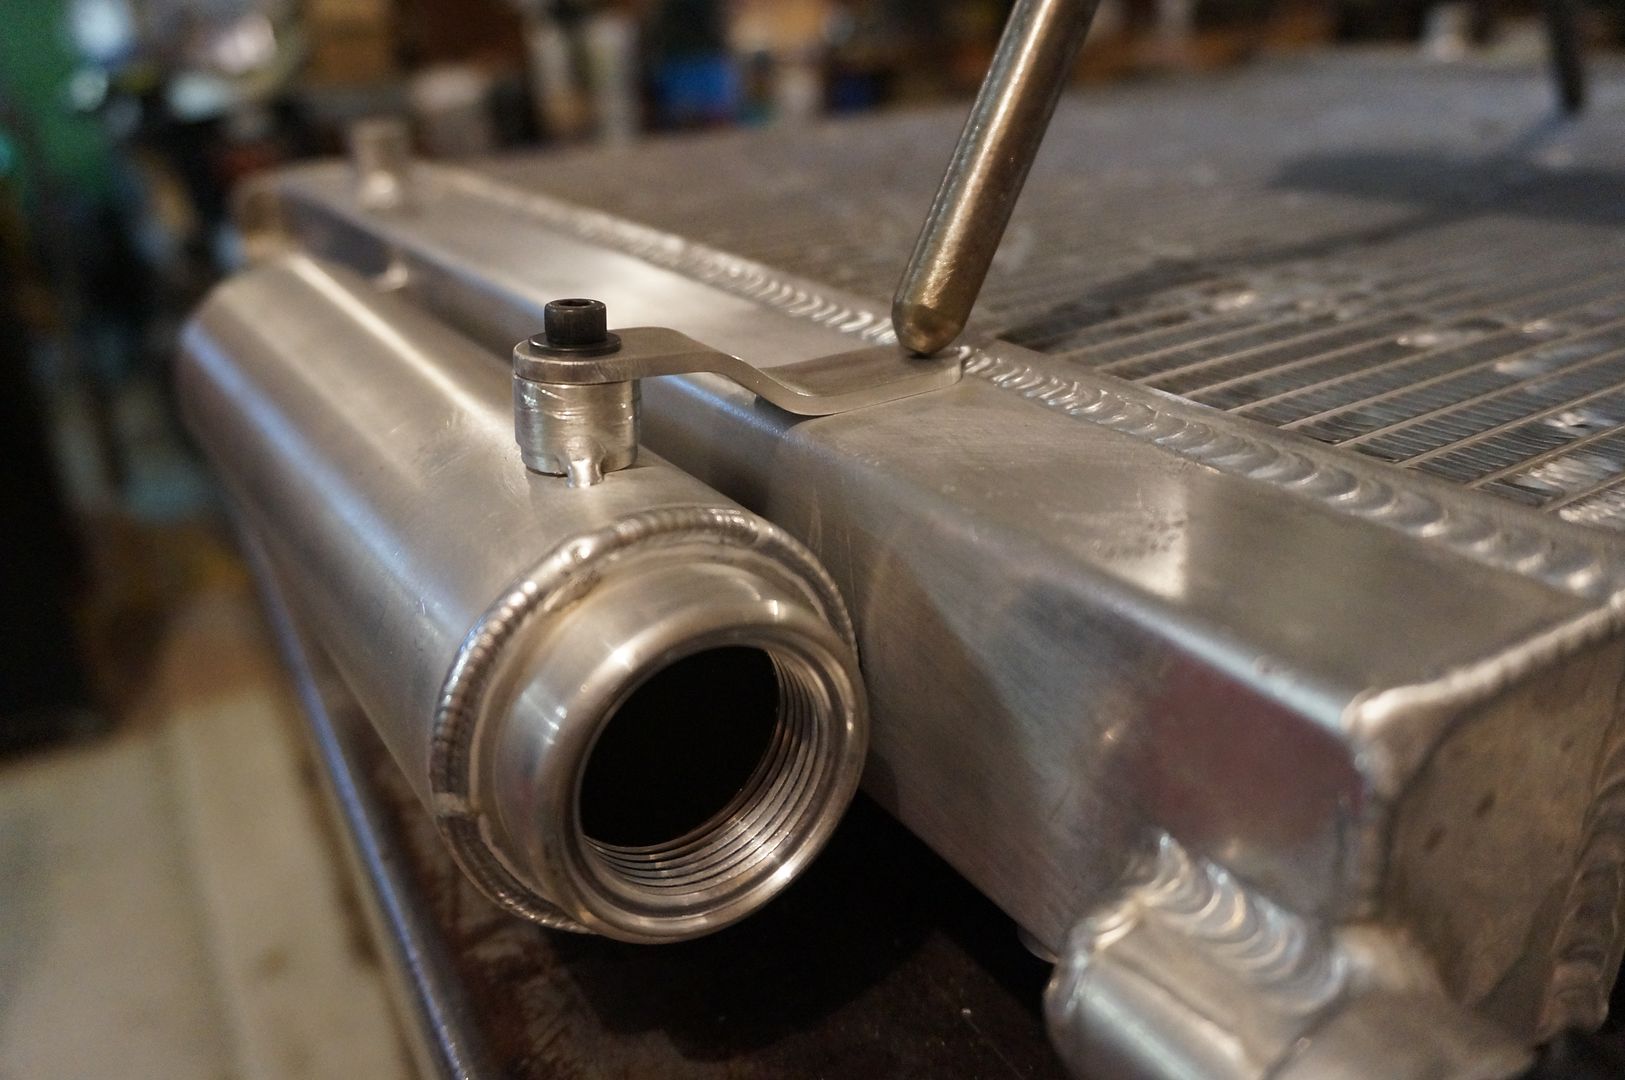
Fits real nice and is hidden away!
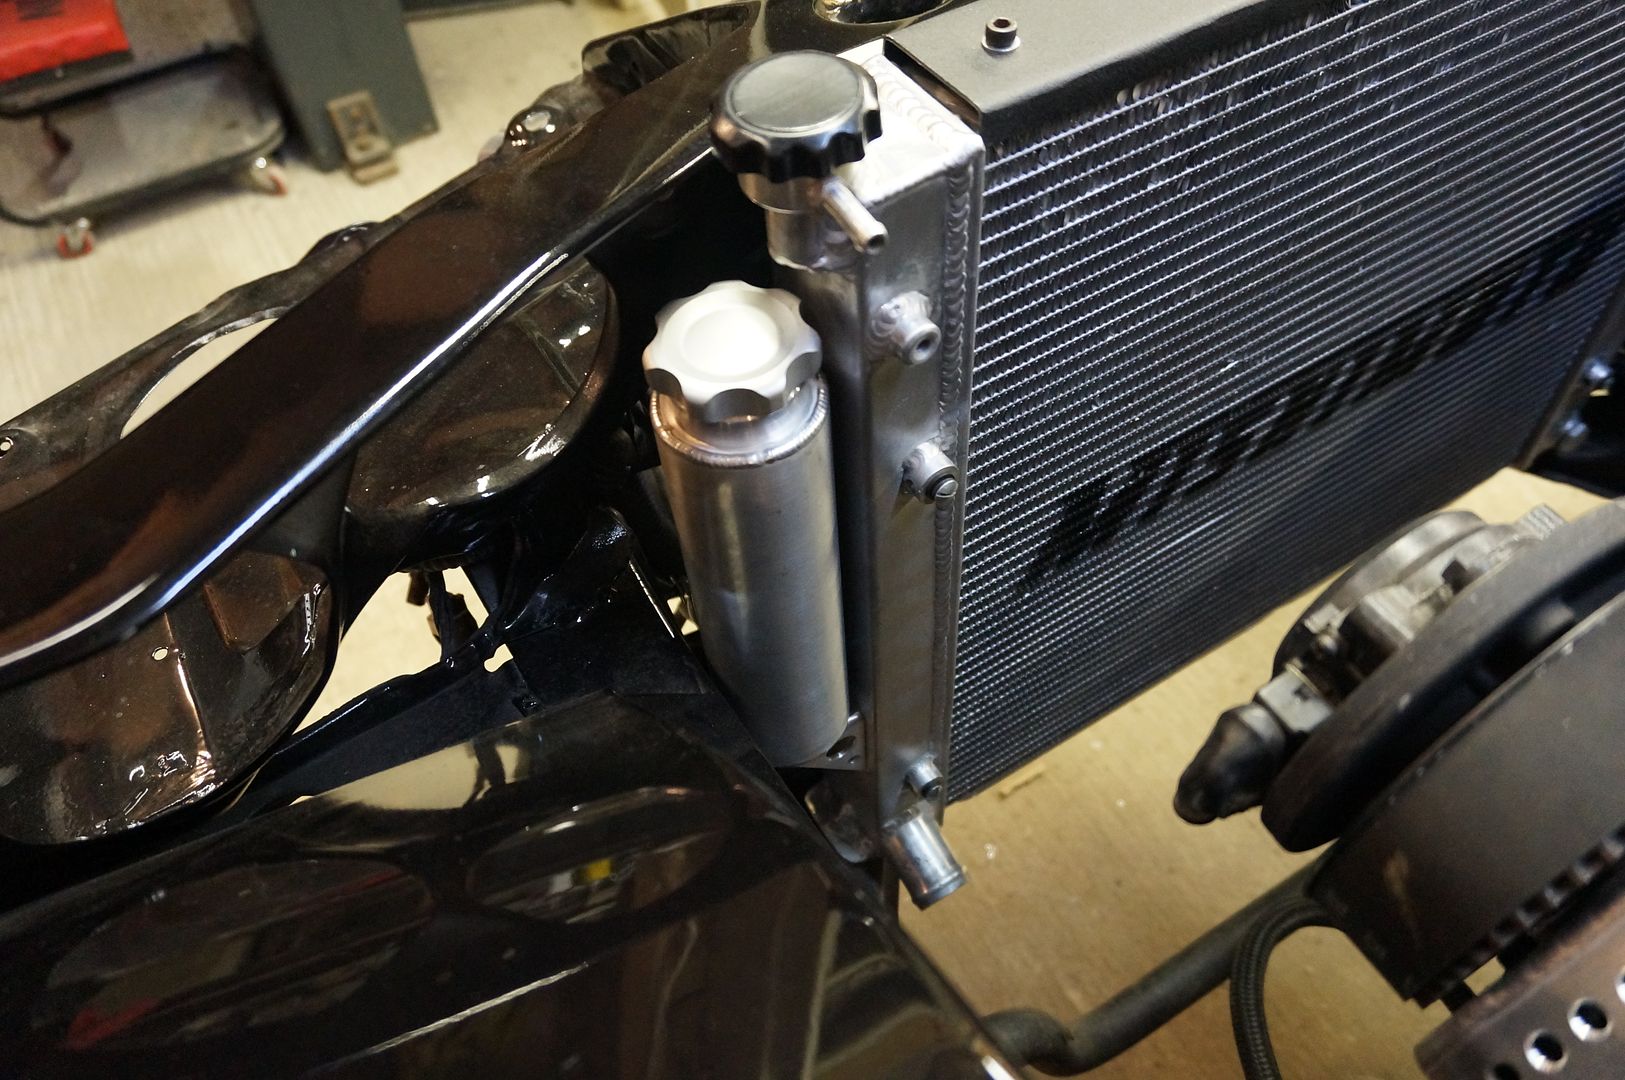
There ya go finished product.
 sigpic
Comment
-


Comment