-
Car's looking great! I don't really know what to say other than that haha
Leave a comment:
-
so I'm quite behind on updating this. excuses are many, working crazy long days, wedding stuff, sleep, etc.
no music, due to no time. I literally spent the occasional minute here and there to get things done.
got the brakes mostly bled, still takes a pump to get them useable. buddy has a power bleeder so I may try that. They feel good when they're working tho.
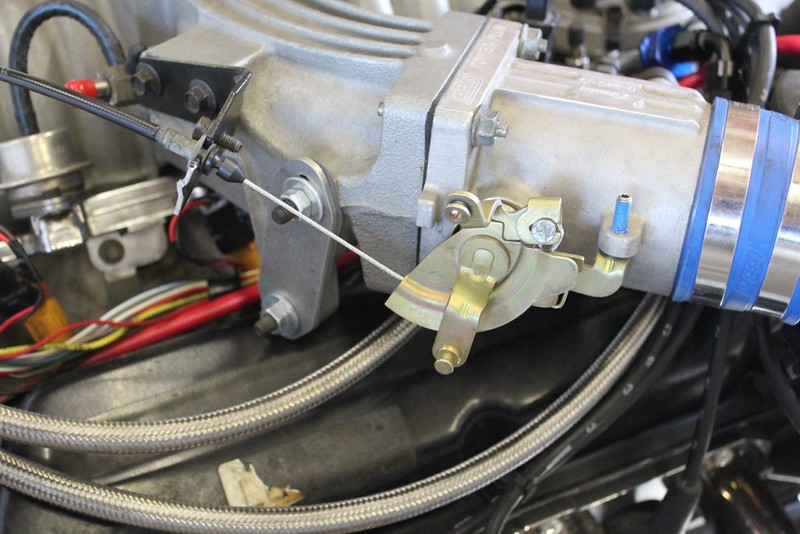
built my throttle cable. Used some aircraft cable and the original mustang cable housing. I cut the old end of the throttle side, drilled a hole and looped the cable through.
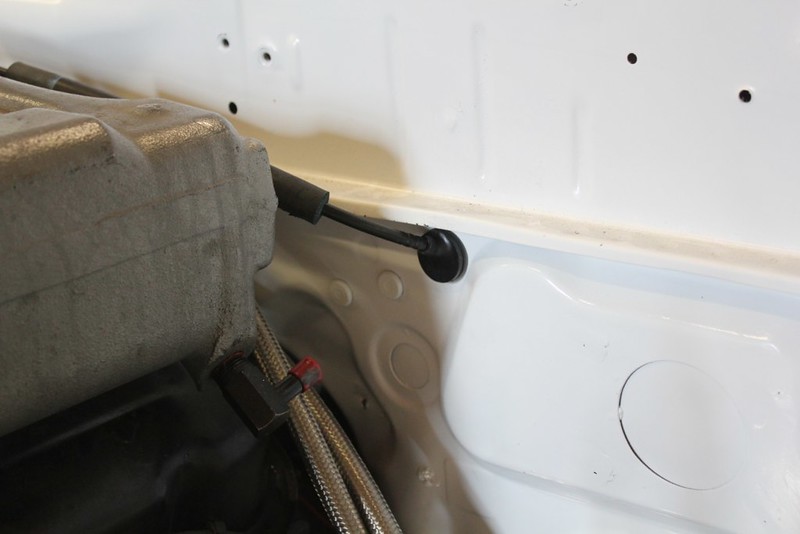
then I used the RX7 firewall bushing, had to drill it out and strip the mustang's housing a bit for a perfect wedge fit. then re-used the rx7's end and oem pedal.
only issue i have is the flex brake lines contact the cable a bit under braking. need to fix that. The bracket i made for the pedals to mount to is flexing more than I'd like, so I will probably be bracing that.
mocked the aluminum panel I had CNC'd, some trimming required haha.
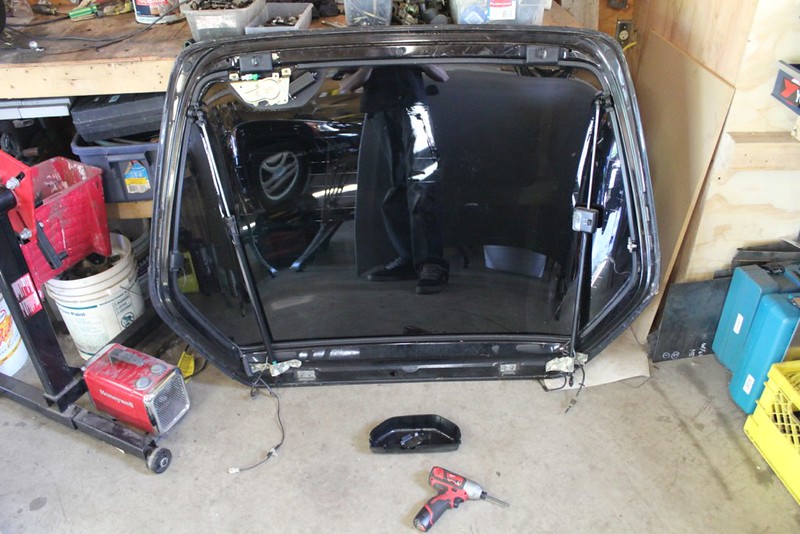
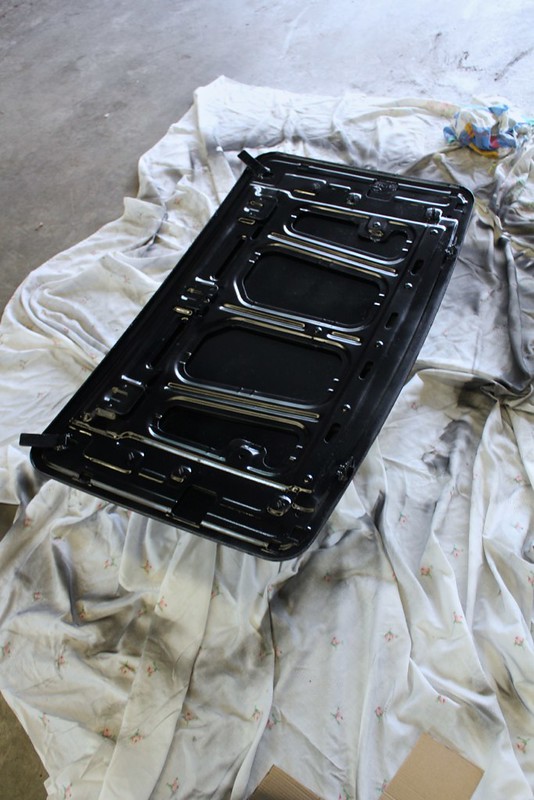
took apart the hatch some (forgot to take an after picture) before putting in on
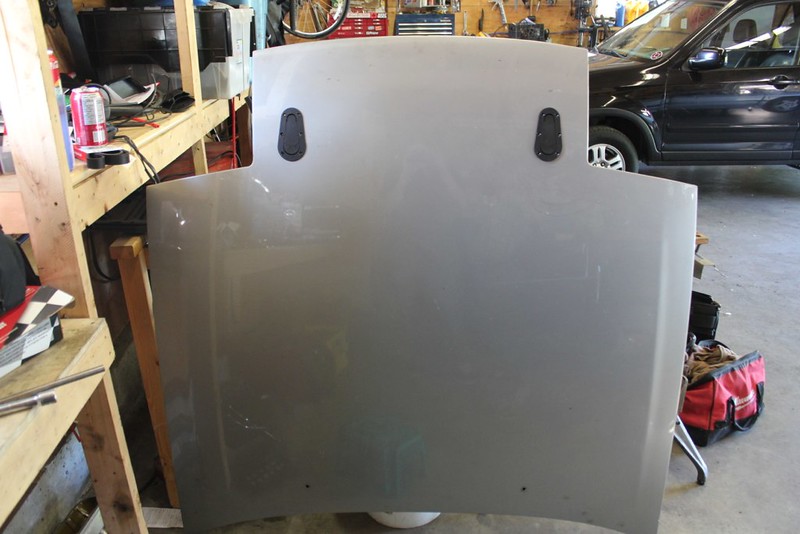
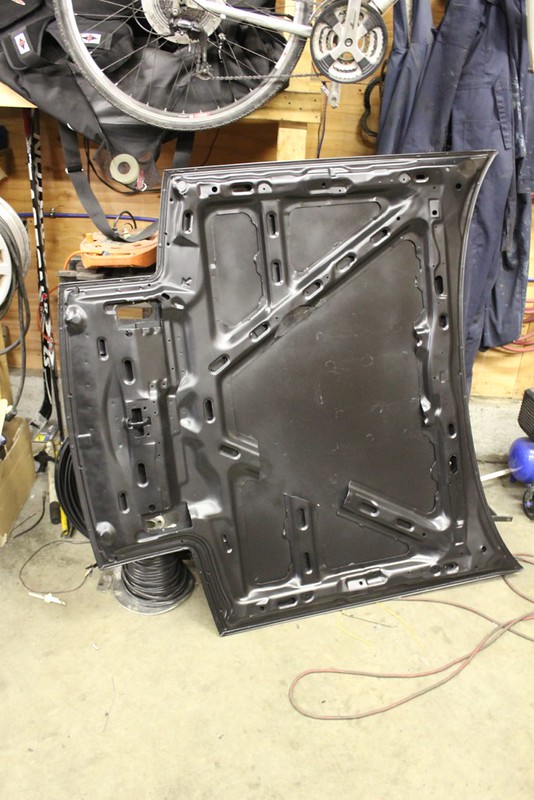
spent the evening doing the hood pins, then painted it all
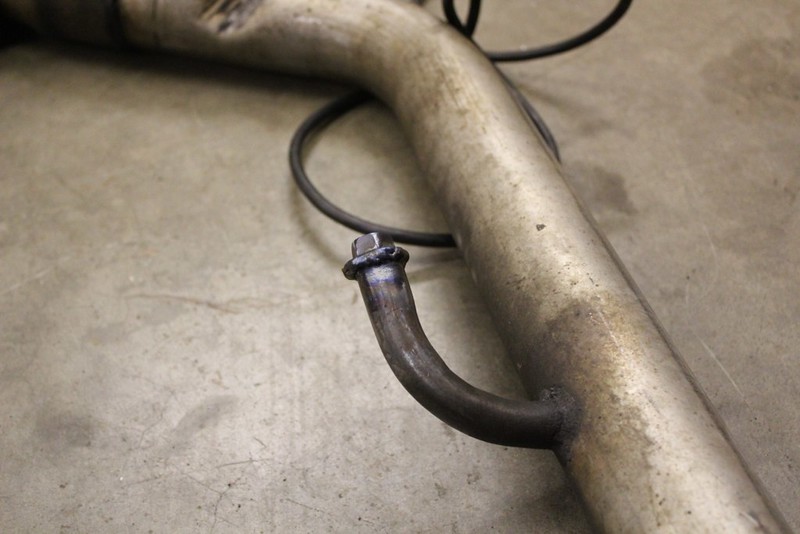
welded up the EGR tube of the x pipe
found this stuff at home depot racing to make a shift boot. Roof flashing, pretty strong, heat resistant and comes in many sizes. I went with 3 inch, some trimming required.
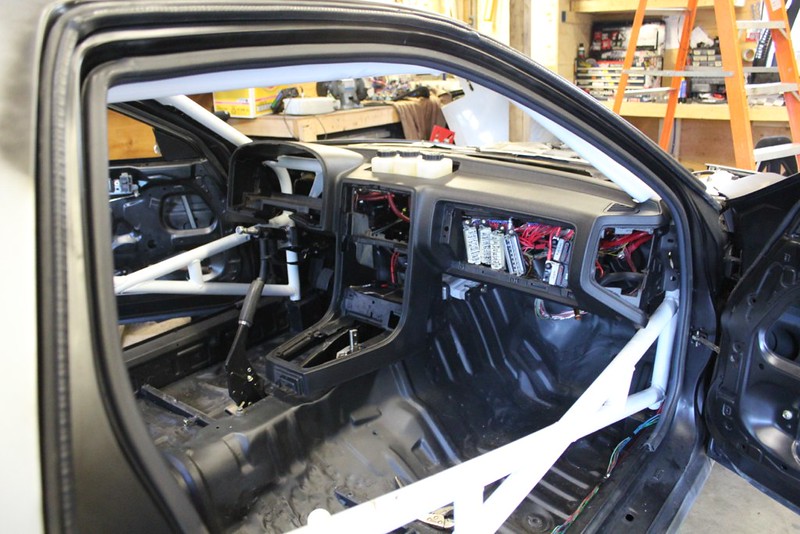
put the dash in
cleaned the windows
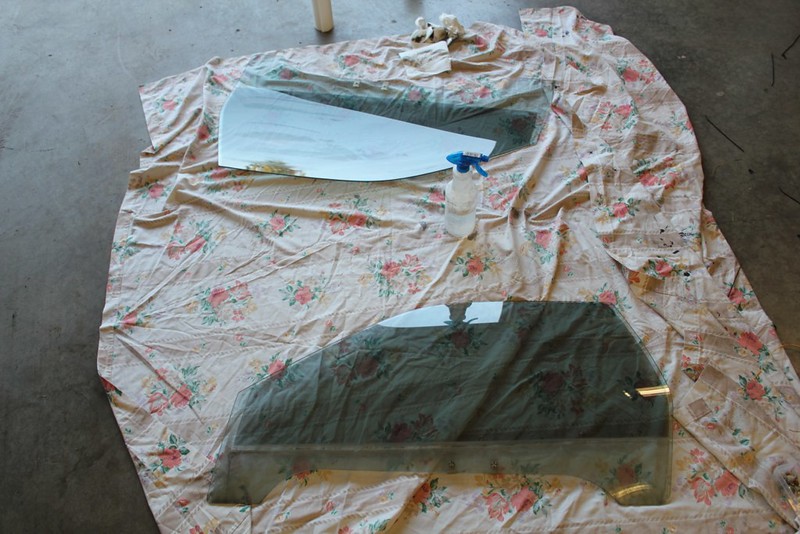
which I forgot were tinted haha
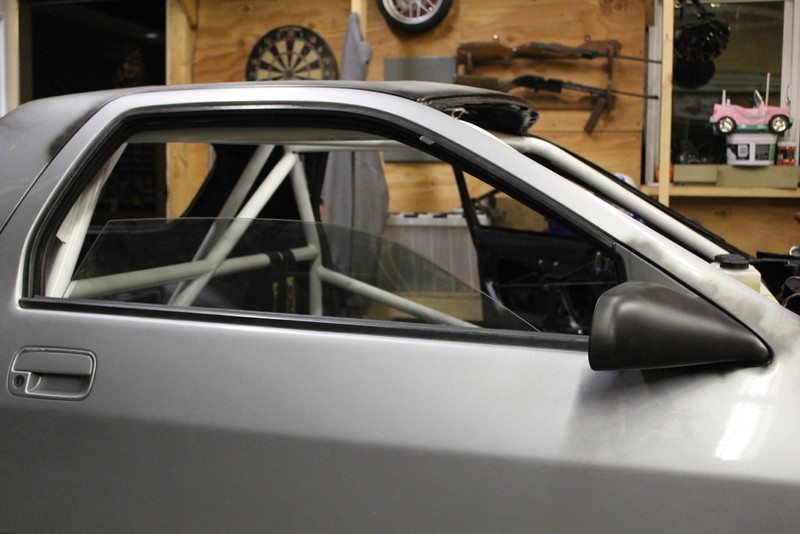
then put them in
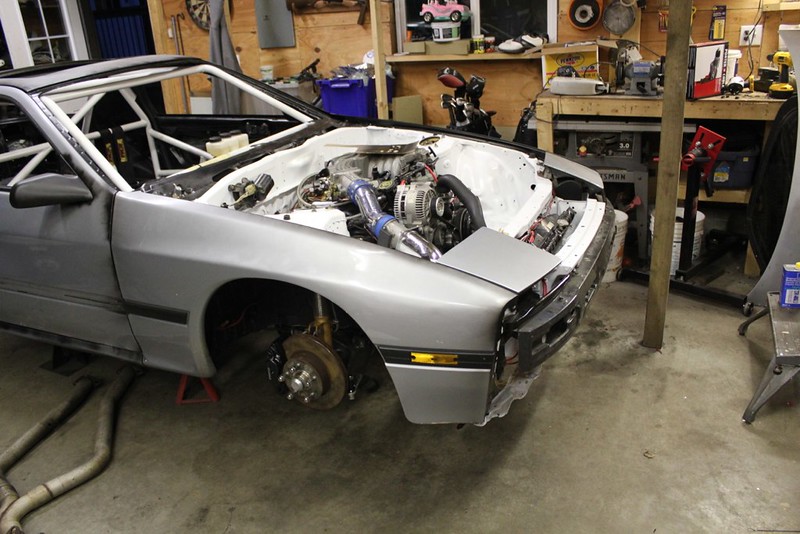
assembled the interior
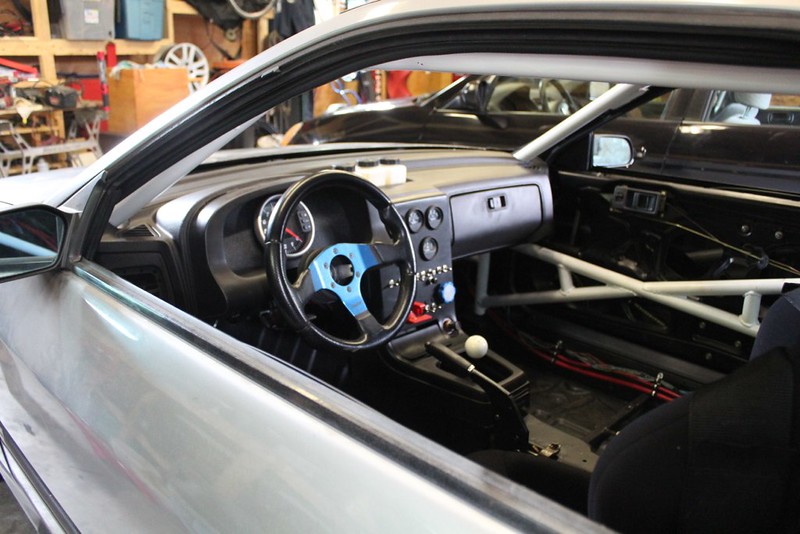
and the rest of the body panels
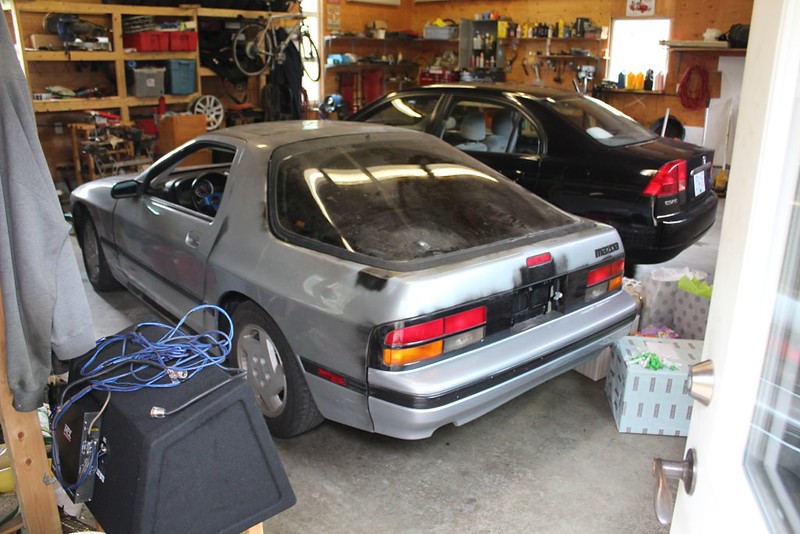
(haha note the wedding gifts)
so I think I missed the part where it fired, after setting the timing properly it fired. When I reassembled the engine after cleaning I just threw the distributor in without thinking. So once that was figured out, everything went smooth. All my wiring appears to be working perfect, that said the engine won't rev over 4k under load, so some tweaking will have to happen.
now you're saying to yourself "under load? how would he know that"
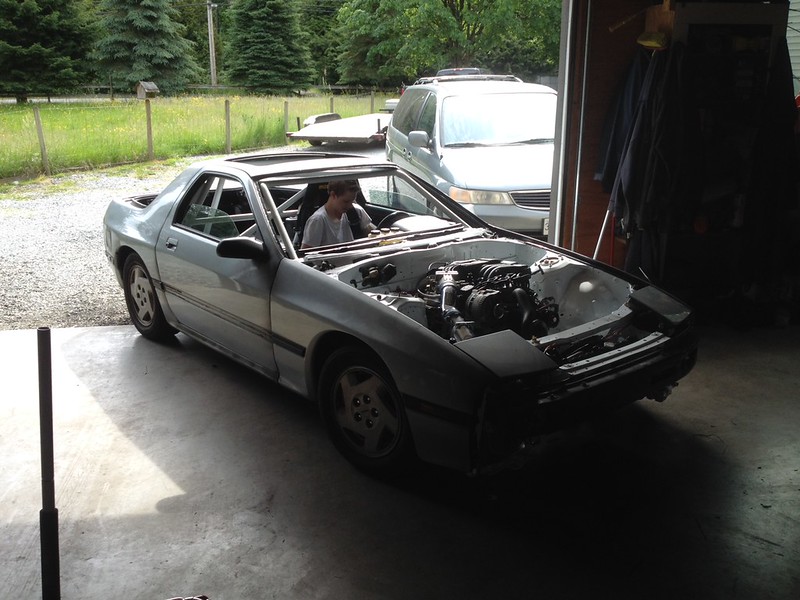
well the morning of the stag, we threw the seat in and drove the car around the block!
then the morning of the wedding (week later) I had the rest of the car together and we drove it out. It was raining and I still don't have a windshield in it so driving it for the wedding wasn't optional.
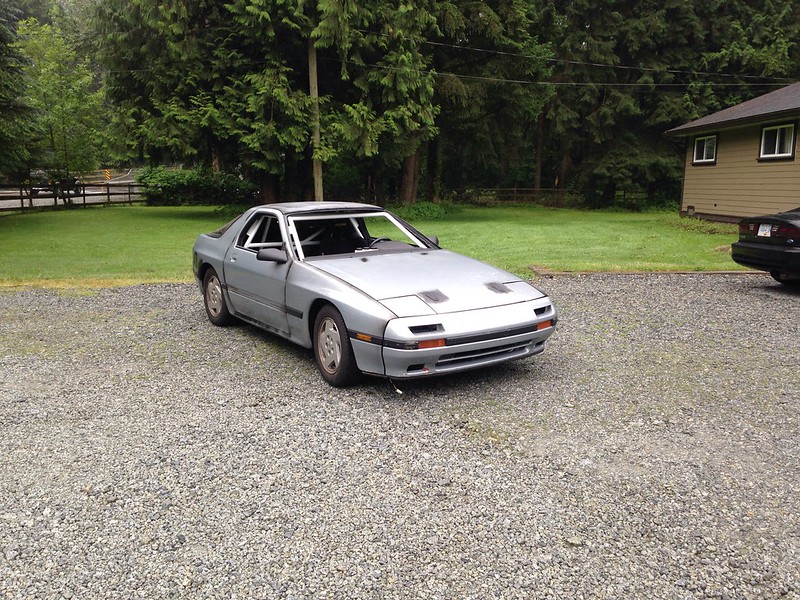
we're counting this as "goal met", even though its not 100%
speaking of the stag
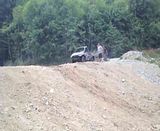
we had a pretty good time. Took a van and a civic up to a local off road area, and chaos ensued.
[IMG]
[/IMG]
no, no one was in the van lol. We cut the roof off the night before and painted it up. also disabled the airbags and things. Took the abuse quite well, it did die once because the coil power wire got ripped out. exhaust also had to come off. chain and a tree took care of that.
the civic got the General Lee make over, and after a full day of abuse we fin-allied by driving it into a puddle, hydro locking the engine.
[IMG]
[/IMG]
the original plan was Andy was going to drive the civic in said puddle solo in his underwear. somehow the whole grooms party was roped into this haha.
all in all a great time, a miracle that no one got hurt. Super happy for him as well, as the wedding was yesterday.
so I did work a lot of overtime this week, and it looks like more this coming week. This means I'm ordering wheels
Leave a comment:
-
this just keeps getting better and better, I wish I knew half as much about motors and wiring as you seem to lol. Start up is coming soon I'm sure.Leave a comment:
-
Awesome! Looking really good. For the brakes look up gravity bleeding, it works wonders for me and I also have had bad luck with brake bleeding.Leave a comment:
-
got some work done, and a few from the day before

need music I can jam out to get stuff done, Eminem fits that category. I know a lot of people will disagree but I think this is his best work. Recovery is fitting in so many ways, and I actually learned things! ya thats right Eminem taught me positive things.
haha onward
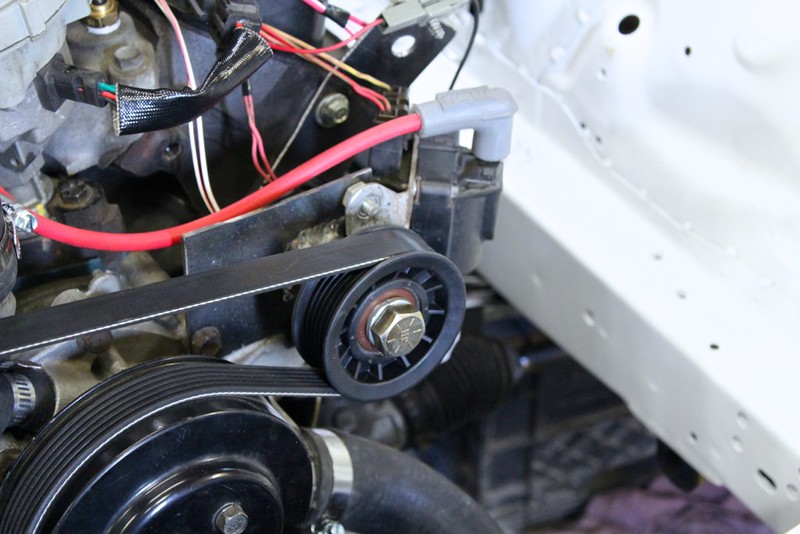
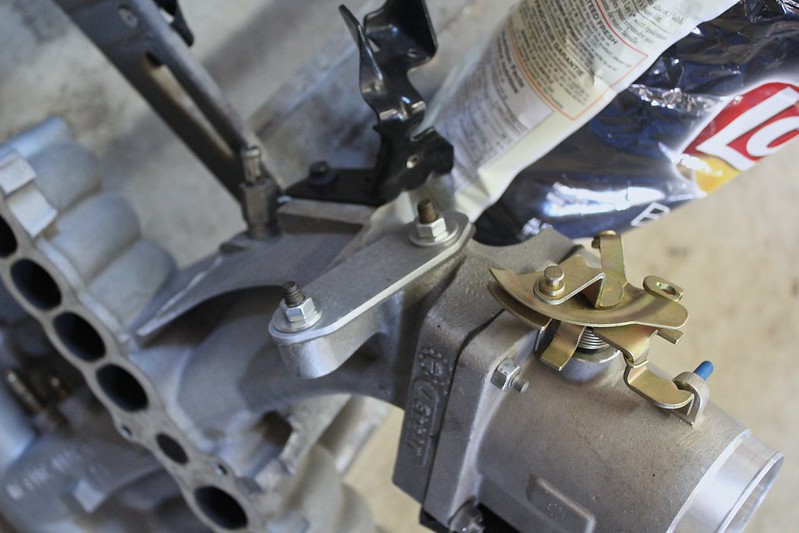
got the belt system figured out, well ish. This ghetto fabulous bracket it temporary until I have the time to either do it properly or change the timing cover/water pump setup. But it works well and holds the slightly modified (custom) (just kidding I bent it) ignition coil bracket.
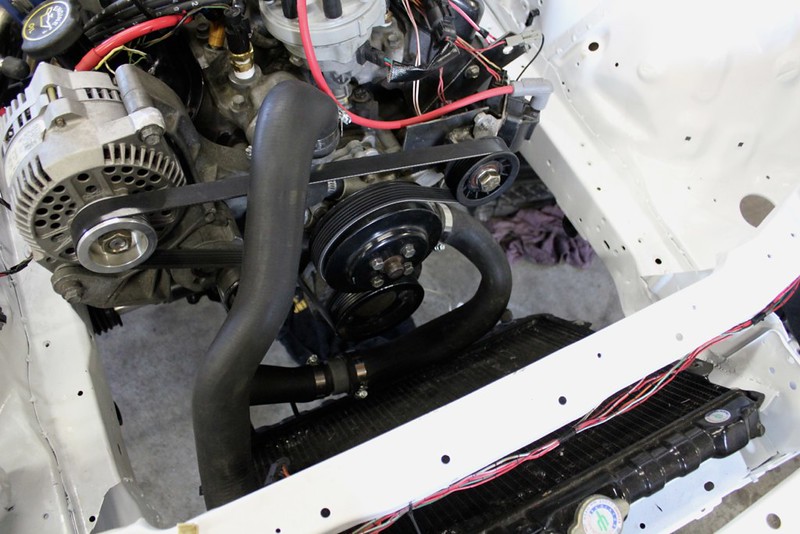
also things I may do over later are the coolant hoses, these are actually the ones from the Sn95 mustang, the bottom one has a 1 1/2" to 2" coupler and a 90 degree bend random hose
rad fan just fits all that business
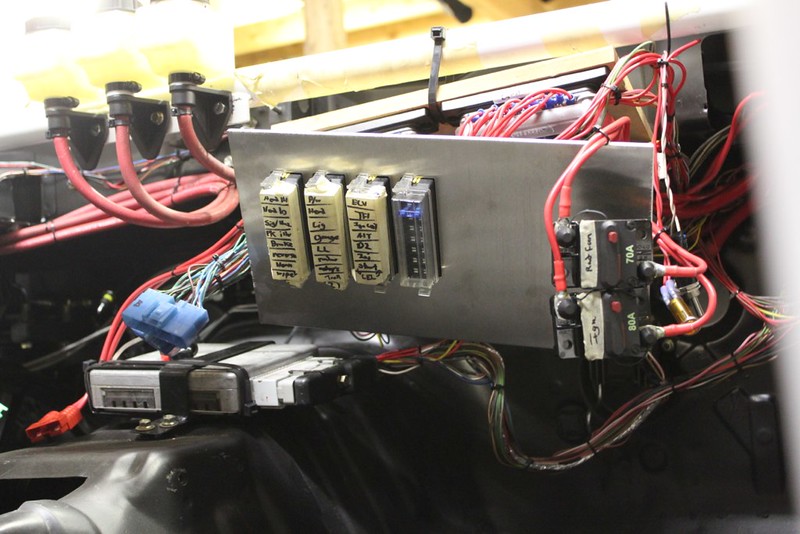
so I finished wiring it in, burned my hand pretty good with dripping solder.
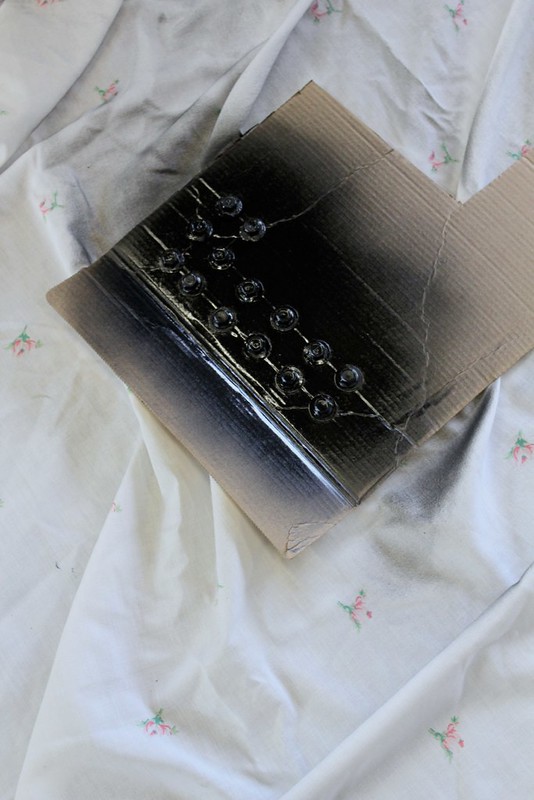
then painted some things, the sunroof
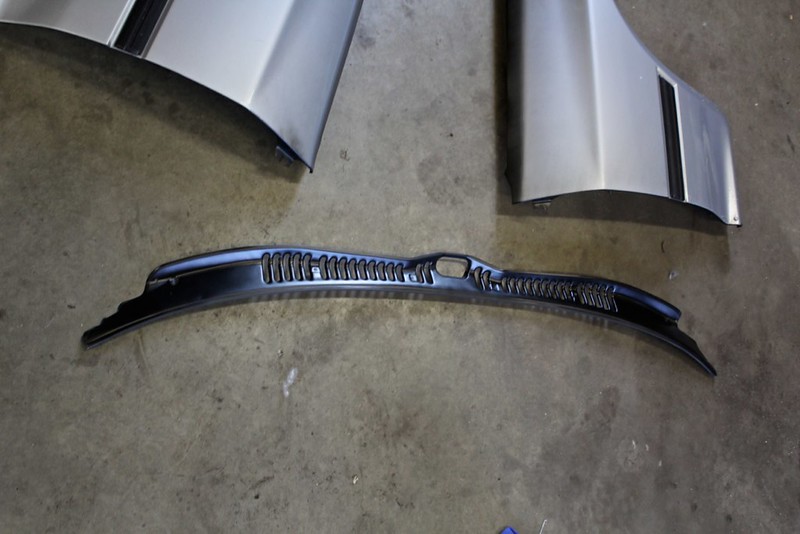
windshield cowl
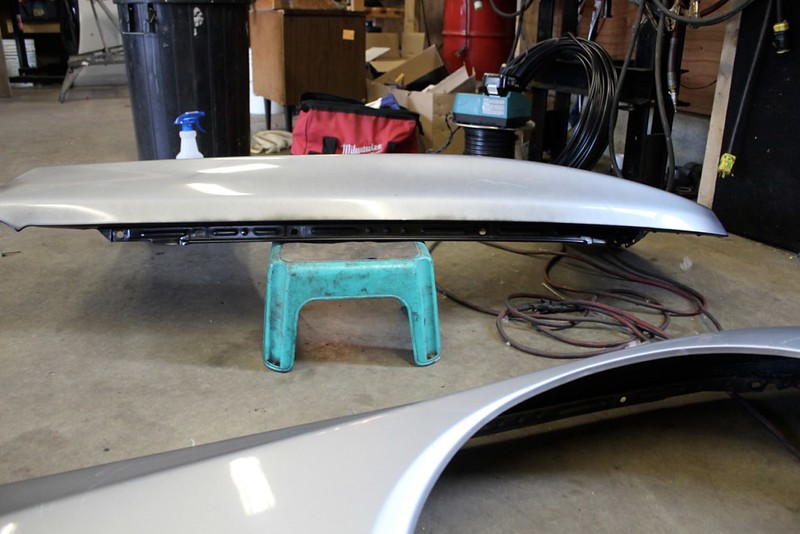
and the top of the fenders
along with their bolts. I kinda want to get those fancy aluminum ones the Honda kids all have..
then I spent the remainder of the night chatting and fighting with bleeding the brakes. I appear to have air trapped in the lines at a point above the masters. It will build pressure but as soon as I let off its spongy/loose again. Will have to try pumping up the brakes before cracking the bleeder. Or maybe residual valves...
lol I never have good luck with brakes. That said none of my fittings are leaking.. so thats good.
I so just jinxed that
once the brakes are bled its drivable!Leave a comment:
-
thanks man, I think it can just takes time and effortOriginally posted by unii View Post
thanks!Originally posted by anth View Post
its getting close lol. His stag is basically all next weekend so I have the evenings of the next week and a bit to finish things...Originally posted by Mtt View Post
IT STARTS!


Set the timing properly (lol i just put the dusty in before without evening thinking about timing) so once that was in and done it fired right up and ran good.
However my rear main seal appears to be leaking so that will have to be dealt with later.
No pics because my camera battery died, and no music because it was open headers and you couldn't hear it lol. Will update tomorrow (hopefully)
but I posted a vid on my instagram, @teeson1111Leave a comment:
-
brilliant work dude
can't wait
do you think you're gonna make the deadline of your buddys wedding?Leave a comment:
-
yaaa lol 3. I'm trying a fancy latching setup to make them park. I'll post up my diagram if I can get it to work. Still have to de bug those..Originally posted by Zach Thomas View Post
And lol yes #becauseracecar but the first time I saw a guy have to open his door to be able to roll up his window because his roll cage interfered with the handle I knew I was keeping power windows. I love power windows. Worth the 2 lbs total weigh gain (if that, the manual mech isn't no feather weight)
So this weekends entertainment was brought to me by:

Watching race cars while working on race cars. again.
I was only half paying attention but I did follow enough to see Vaughn take another win and Chelsea monster truck/fly.
Had the crew down to help today, really pushing to get this done. I basically have this week to get it done, monday I'm going to book the glass appointment and then do my best to drive it there instead of trailering it.
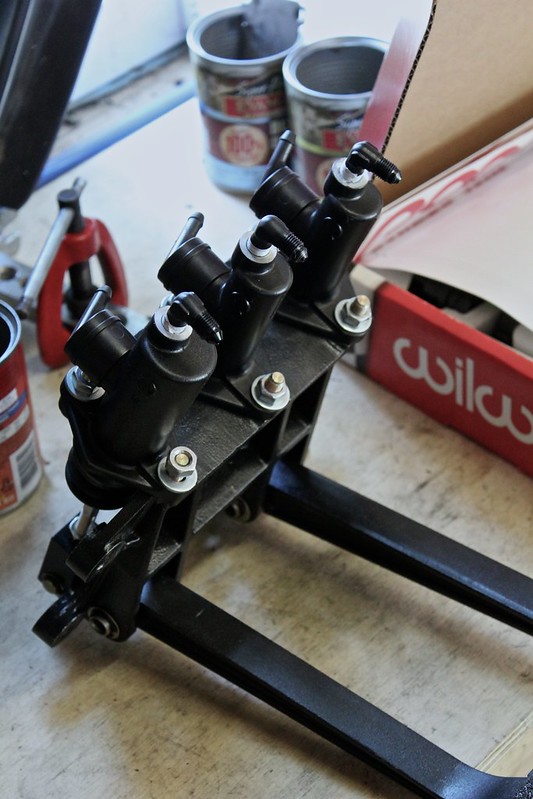
setup the brake masters. I will note that a 7/8ths master is still very stiff. I'm probably going to go down a size or maybe even two. More math will ensue. It actually feels like a king cobra which makes me think I should check the part number on my clutch....
front brake lines in, fancy holder as well
reservoirs mounted, lines ran everything plumbed. Then add fluids. This is the sucky part, I broke the driver's front bleeder... which is where the night ended (but I don't go in order (no onecaresreally))
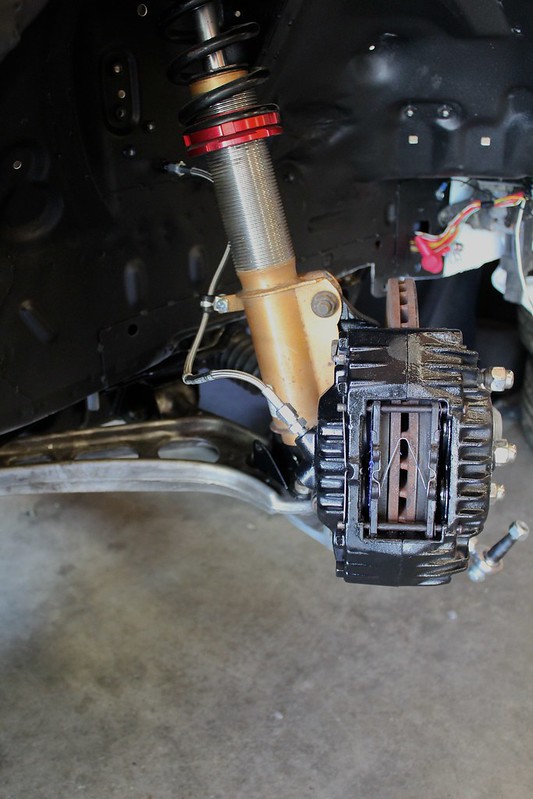
That will be fun with an aluminum calliper.
also hat tip to Alex for dealing with the reservoirs because it turned into a gong show
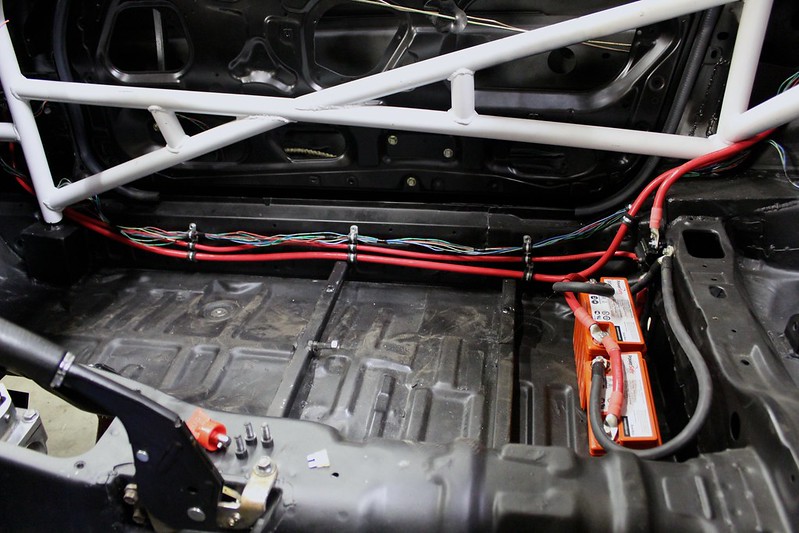
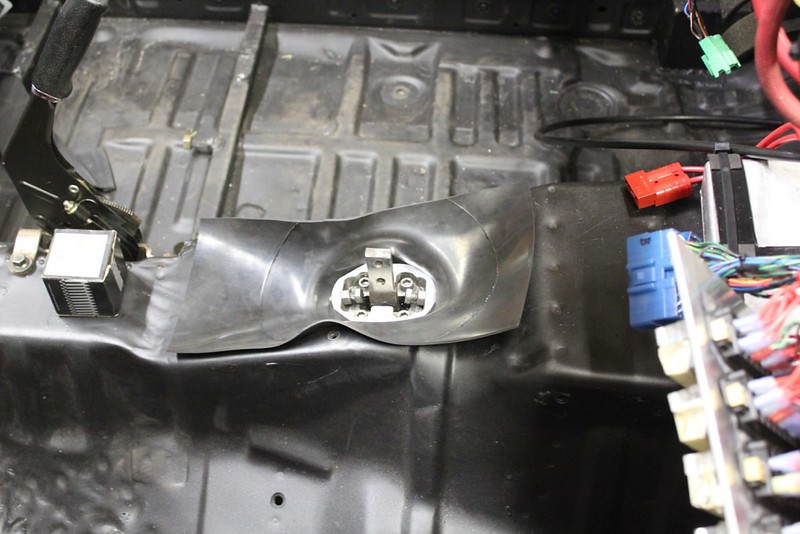
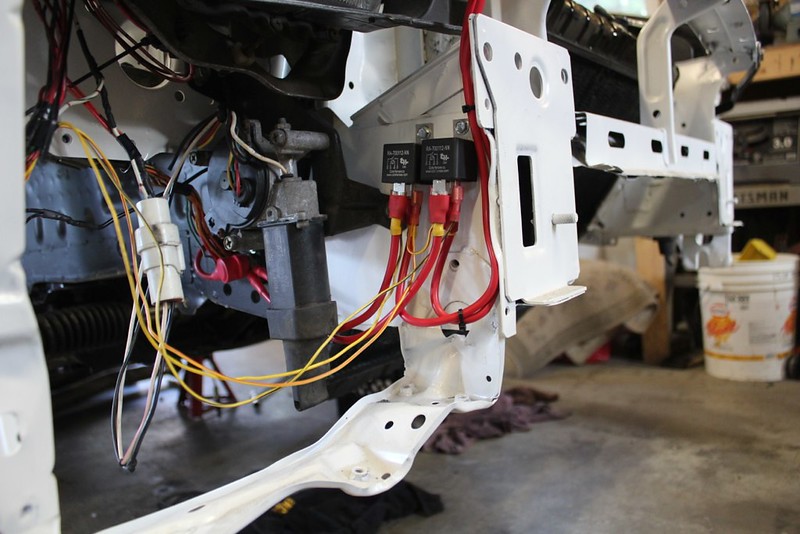
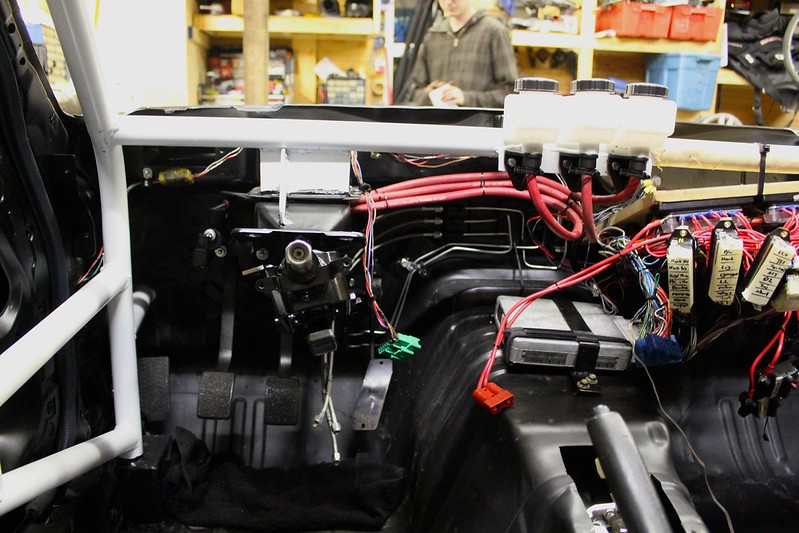
Continued to tidy wiring, also vacuumed all the wiring scrap out. My OCD was calmed for a minute lol
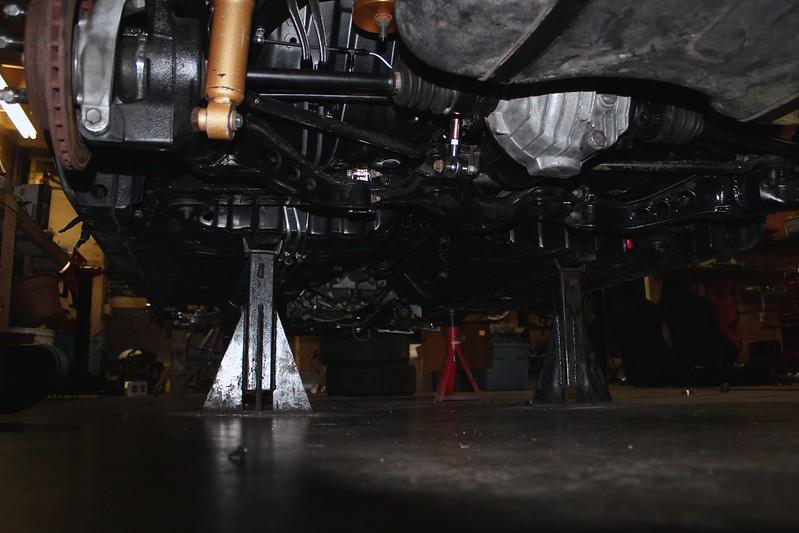
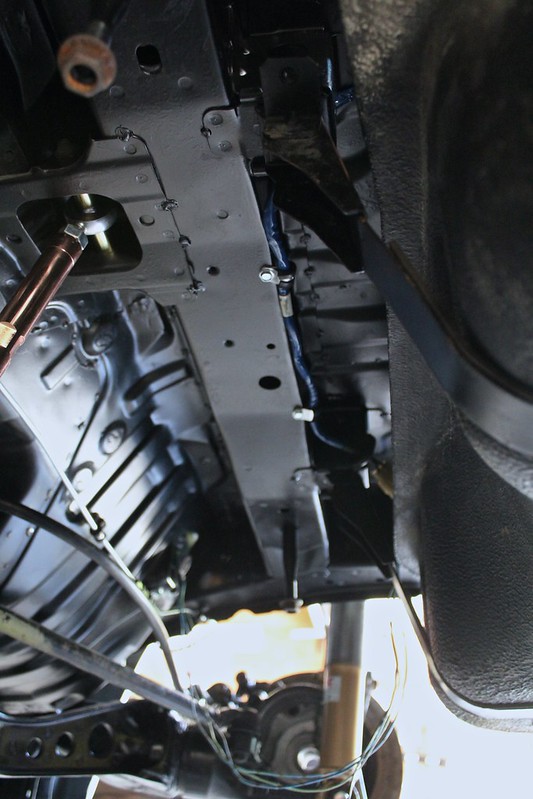
Got the diff, driveshaft and axles in. Even with the all solid PBM everything and the pinion snubber it wasn't nearly as bad to get in as everyone on the interwebz says it was supposed to be. pro tip: use 3 floor jacks and a mallet.
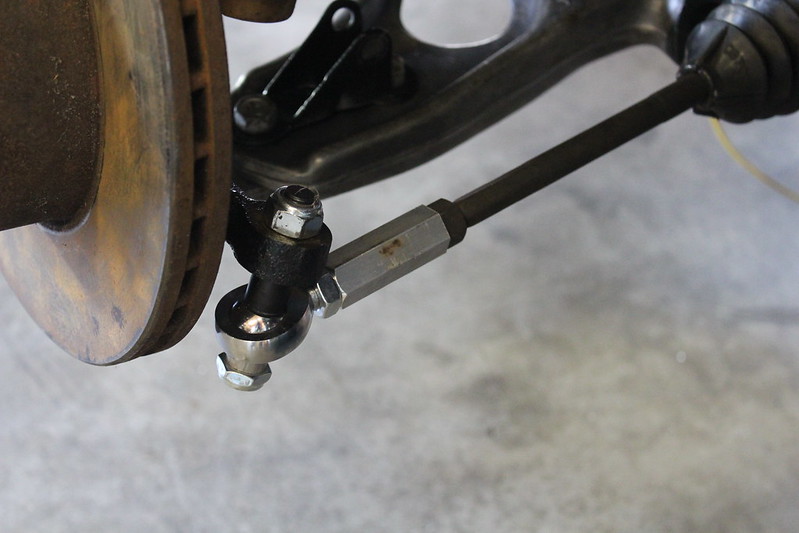
Emailed Zak to figure out how much I had to trim. I think I took off about 1.5" and then another 1/4" off the tie rod ends (non heim side) and then a bit more than a 1/2 off the tie rods. This got me really close, I think its toed in a little but thats ideal because I can adjust the heim joint out when it gets aligned. Which will most likely be with a string haha
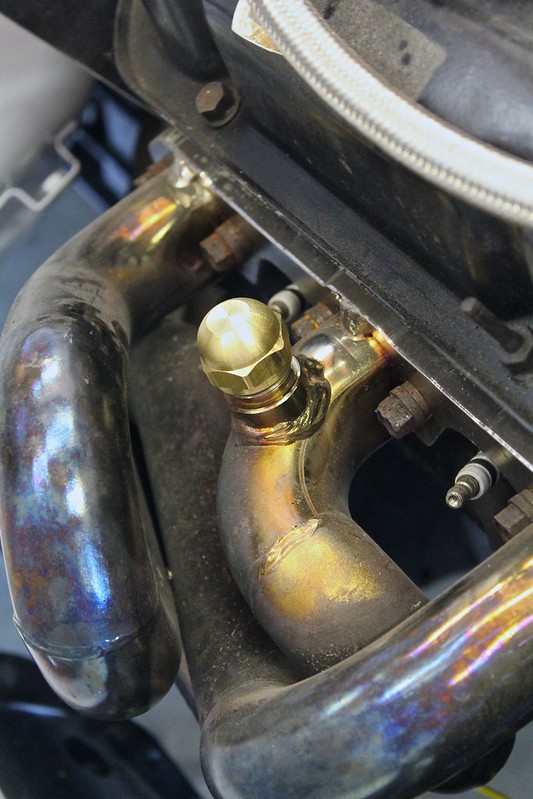
For whatever reason I couldn't find a solid answer on any mustang forum, just to many cooks in those kitchens, but anyway the cap required for the SN95 EGR tube off the header (yes mine are BBK but they are the same thread) is a 5/8" flare cap fitting. I got this at my local Home Depot Racing Supply in the plumbing section.
got the EGR block off plate done, the one I had didn't fit worth beans so some modification required.
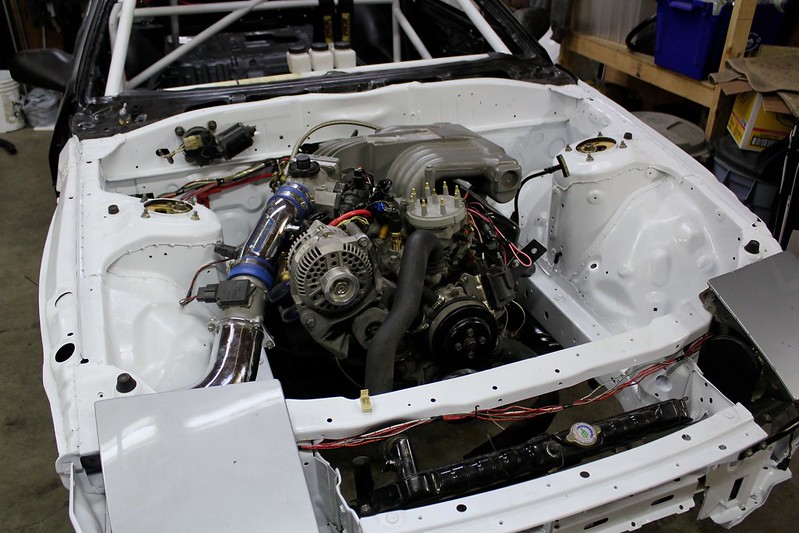
Then Andy threw on the intake manifold and intake tract as well as played around with coolant hoses. He was all practiced up as he drove his fox for the first time this year. He brought it over to do burno- I mean set the timing and idle lol

Fuel lines are in, had to tweak the hard lines a little to keep them from rubbing the subframe.
Tank was a real PITA to get in tho, hat tip to the Mazda engineer who put that little hook on the one strap so you can hang it while you wrestle the thing in place.
tucked the wiring out of harms way also.
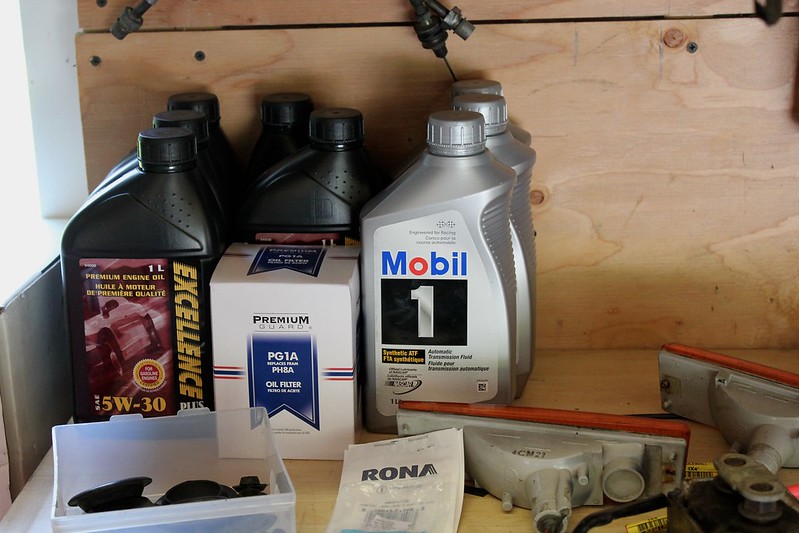
bought some cheap cheap cheap crap oil and some quality ATF for the trans. I plan to run the cheap oil for long enough to sea foam it and flush out any remains from sitting, then buy a K&N filter and more Mobil1.
Was pleased to find quite clean fluid leftover in the trans and equally clean leftover oil in the engine. Car must have just had an oil change not long before it got written off. No metal chunks and no mud or coolant so good signs.
Turned the motor over by hand a bunch of times to cycle the oil in before using the starter and everything feels proper.
So whats left to do? needs a belt assembly, ignition coil bracket, fix the brake calliper and reassemble the fenders/hood. ok well a few more small things, but its close!1!!!!1!!!11!1 (excite)Leave a comment:
-
For hood clearance I still want to know if the Turbo 2 hood offers any more space. It looks like the position of the scoop would be pretty close to helping for clearance. And personally I'd rather do small hood spacers (on the rear of the hood) if my stock SN95 intake doesn't clear.
And 3 relays for the wiper motor?? Ouch, that sucks. I haven't started wiring that bad boy up yet. You need to get some manual windows, this is a racecar after all right? I just finally figured out how I wanted to do my manual headlights, I posted it in my thread. Once I finish both sides and clean up my welds I think I'll be quite happy with the setup, even if I do have to get out of the car to raise the headlights lol
Leave a comment:
-
Ya I have quite a few relays. The wipers take up 3 and the power windows take up 2 for each window. Headlight motors also use 2. If I were to ditch the street legal thing and run bare minimum I could probably have it down from 15 to say 4 or 5.
Hood clears as she sits, so not gonna alter anything. Though it's close with the gasket in place.
And regarding the engine placement, there's a cm or so separating the rack and pan. Engine needs room to pitch under load so I'd say it's at the limit. Short of a custom pan (maybe one day lol) it's not going anywhere. But for me I'll honestly probably cut a hole in the hood to fit a better intake before finding ways to lower it..Leave a comment:
-
Nice progress! I'm hoping to have a few less relays than you do when I'm done, why do you still have so many?? It turned out clean nonetheless! If you end up needing headlight motors I was told mine are still good but I don't need them because I'm going to convert mine to some sort of manual setup.
That engine harness is looking mighty tidy, I'm looking forward to knocking mine down to that status
For hood height clearance you can mill the stock intake down (on the gasket mating surface), but I don't think there's more than a few tenths of an inch to be gained before you hit the valve covers. And on my SN95 oil pan I think I have a little more clearance before it hits the rack or subframe, but I haven't looked down there recently so I might be wrong. I would think modifying the engine mounts (between the granny's kit and the engine block) would be the easiest since they're cheap to replace if you mess up.Leave a comment:
Leave a comment: