-
Looking good, great job, my friend at statusworks here in houston has one as well built 5.0 with a kb s/c. -
Damn looking good, I am thinking about selling my FC with 5.0 swap. Or just the 5.0 swap lol. I'm ready to have boost again. Keep up the good work.Leave a comment:
-
yes and yes, but those are a secret for nowOriginally posted by axelillo_PR View Post I want to try some never done before stuff
Leave a comment:
-
Dammit. I need a garage and an fc shell now. Any wheel and aero plans?Leave a comment:
-
So I have been working at it still,
been rocking out like I was back in high school

love these guys, were one of the first bands to combine rock/pop and modern electronic music properly. Their new album seems good so far, and before anyone says "mainstream" they made their sound popular, thats why its now "mainstream"
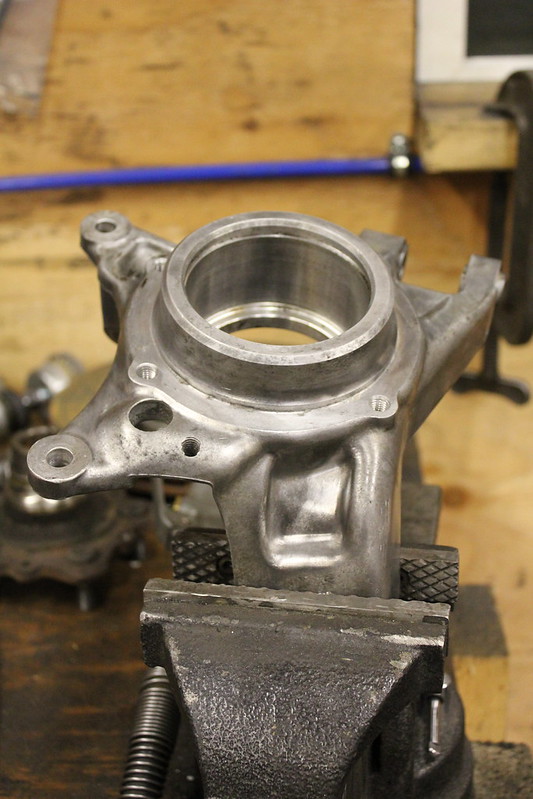
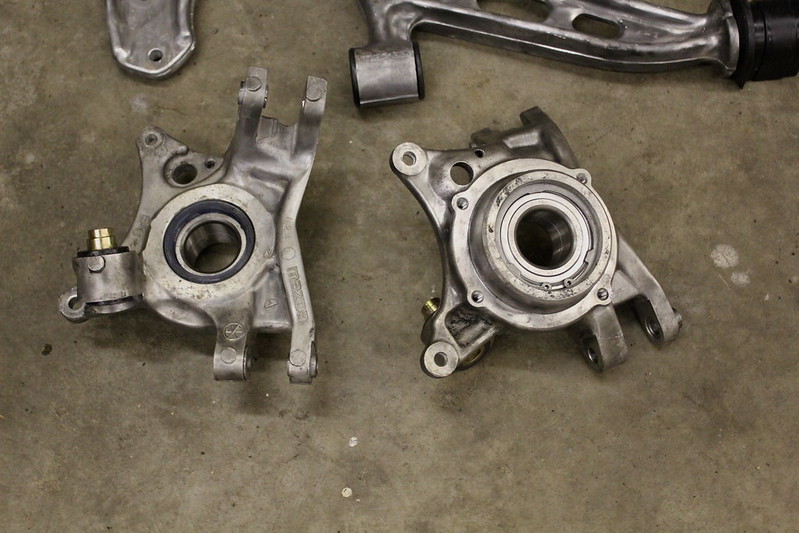
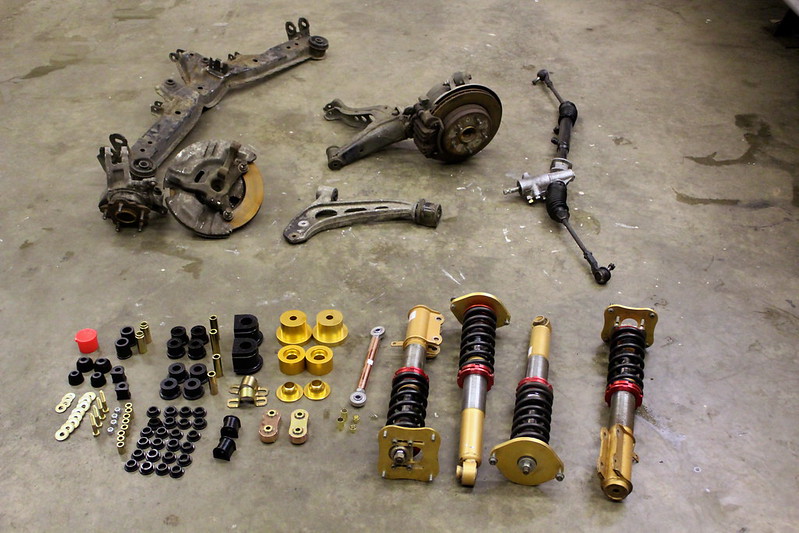
so back to last time, took the subframes all apart
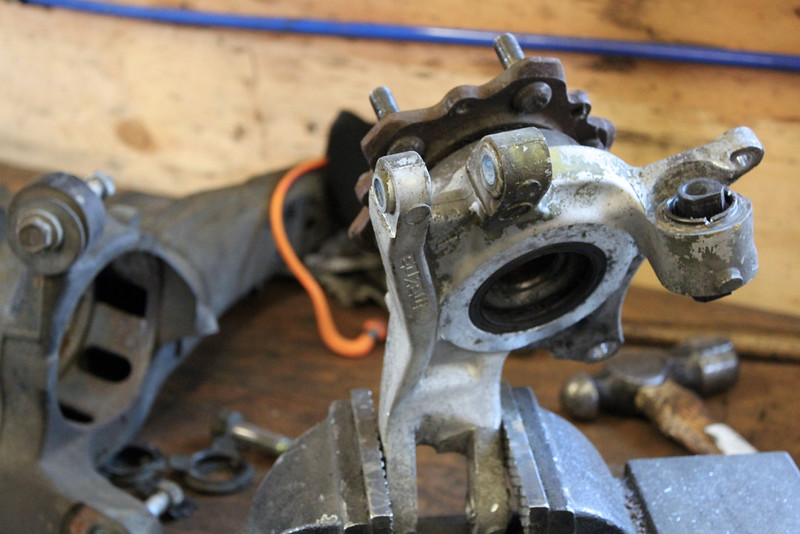
found the rear wheels bearings had play, soooo out they came
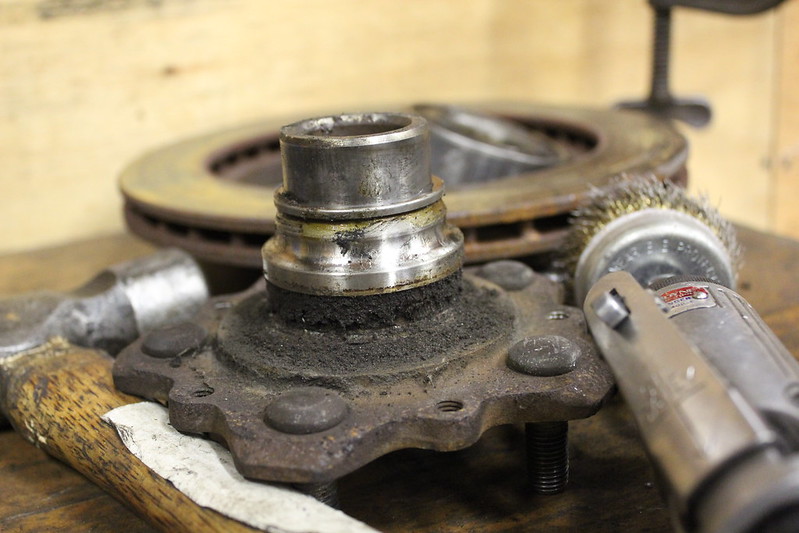
Mating surfaces looked good
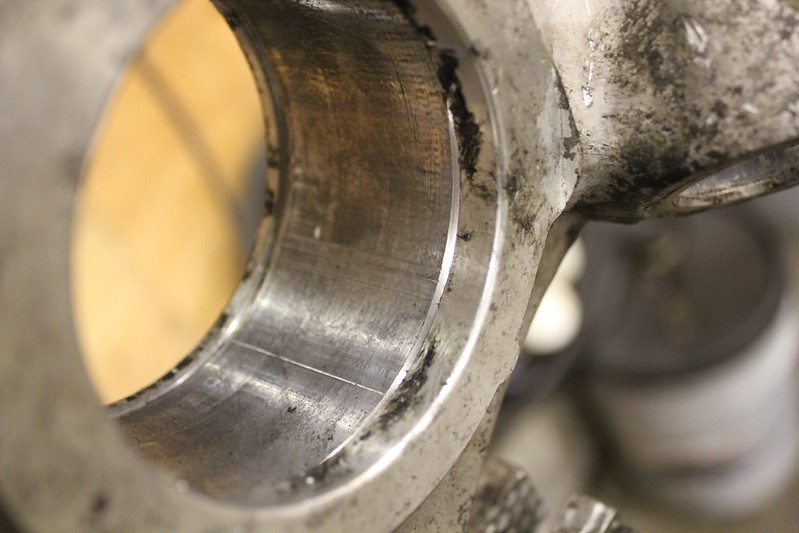
but they was diiiiiirrty. So a quick one over with the wire wheel and they came out clean isn. I'm not gonna say I spent a ton of time on a part that no one will see and that's gonna get covered in brake dust and more importantly tire rubber
before
after
ann denn
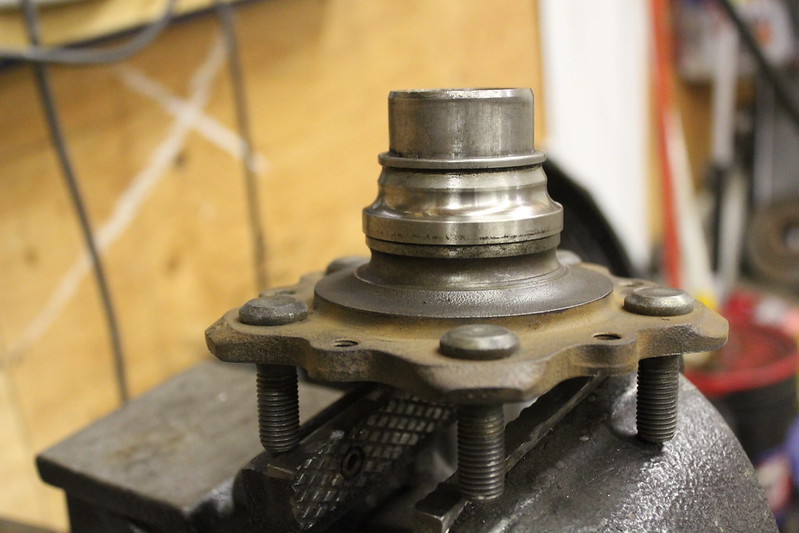
knocked the races off the hubs and painted them
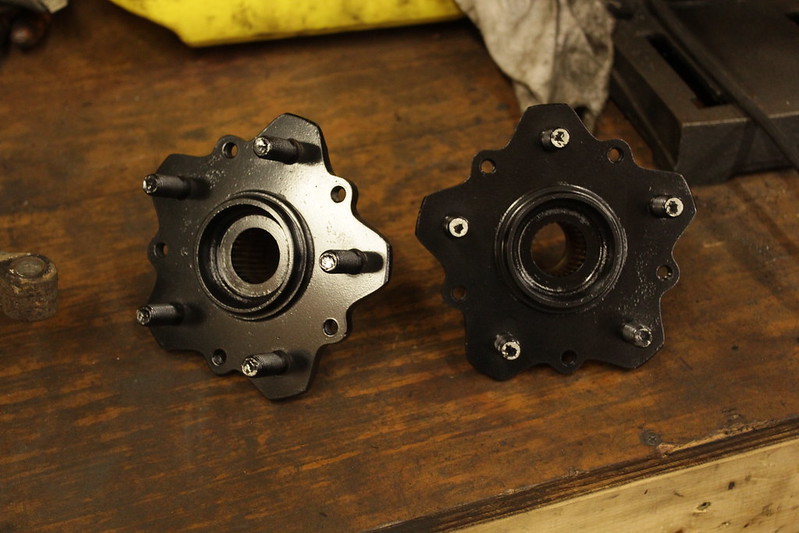
you know cuz everyone will see them under all the rotor and wheel and brake dust and tire rubber. lolz
these went nice and easy
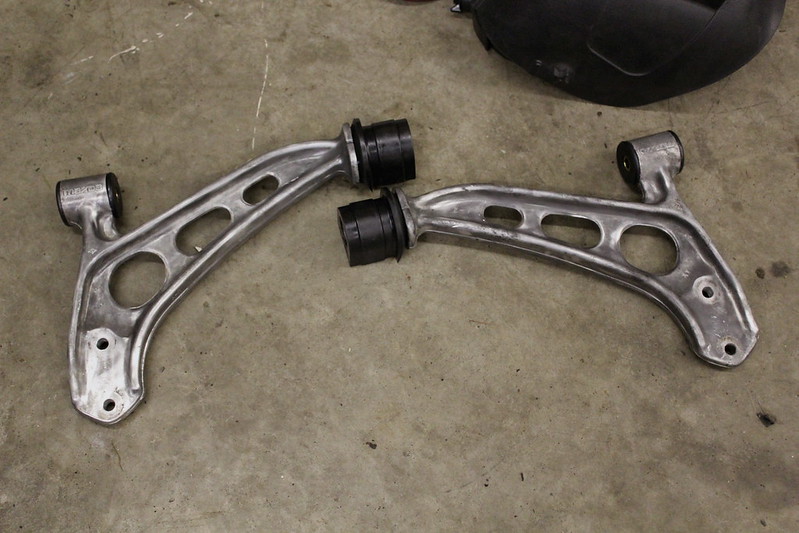
can't say the same however for these stupid things
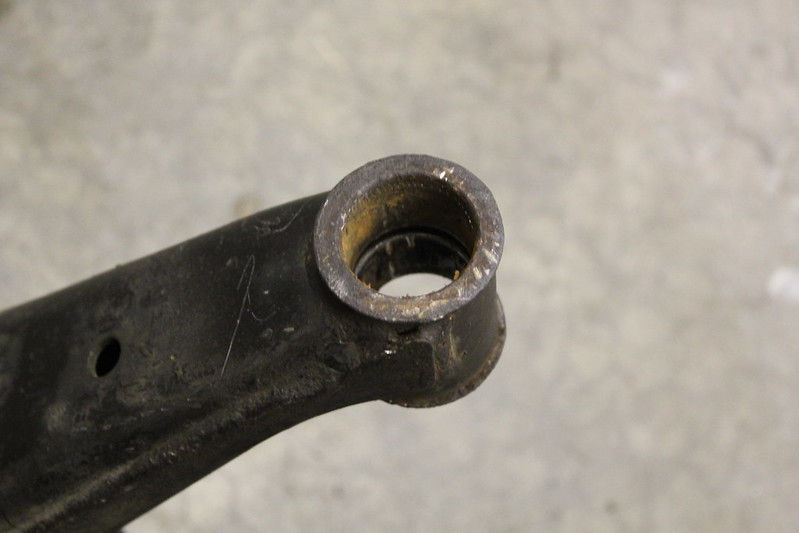
I managed to get one of the trailing arm bushings out, but the other one however
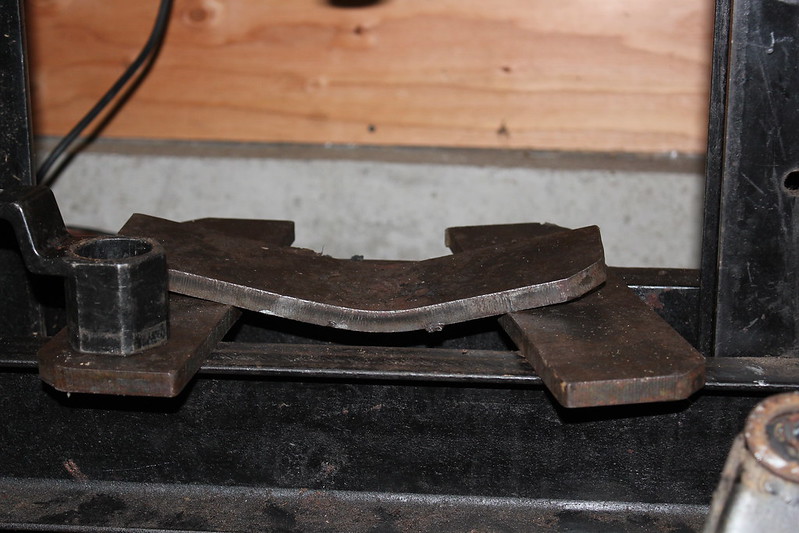
ruined my shop press!
So I'm getting a buddy to torch it out, no more of this risky sketchy pressing out business
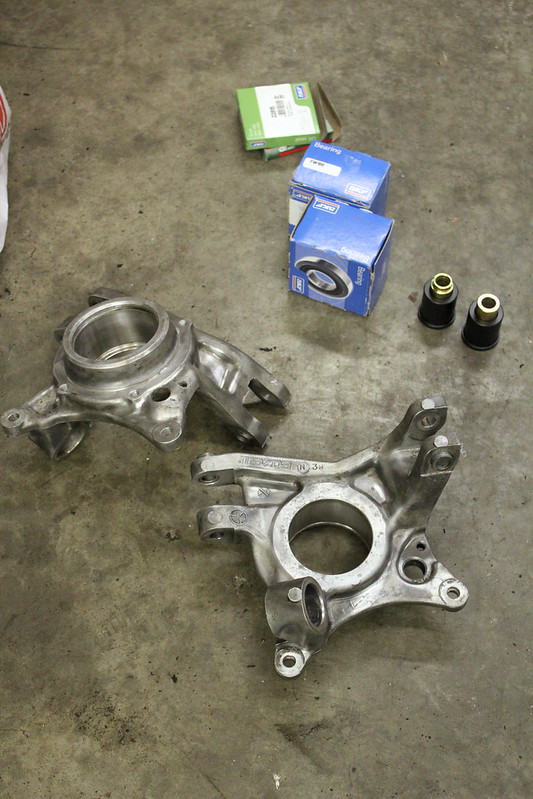
so after that I got new bearings and seals. put the DTSS eliminators in too, they were pretty tough actually…
ann denn
annnnn dennn
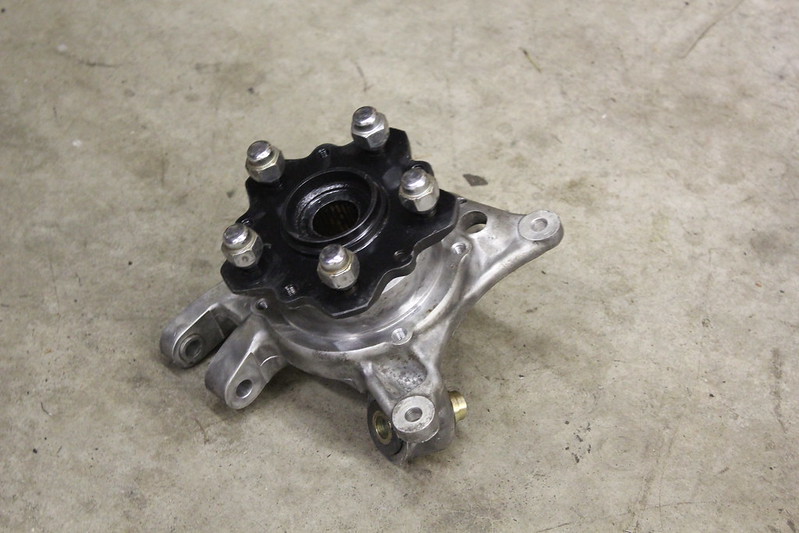
annnnnnnnnnn deeennnnnnn
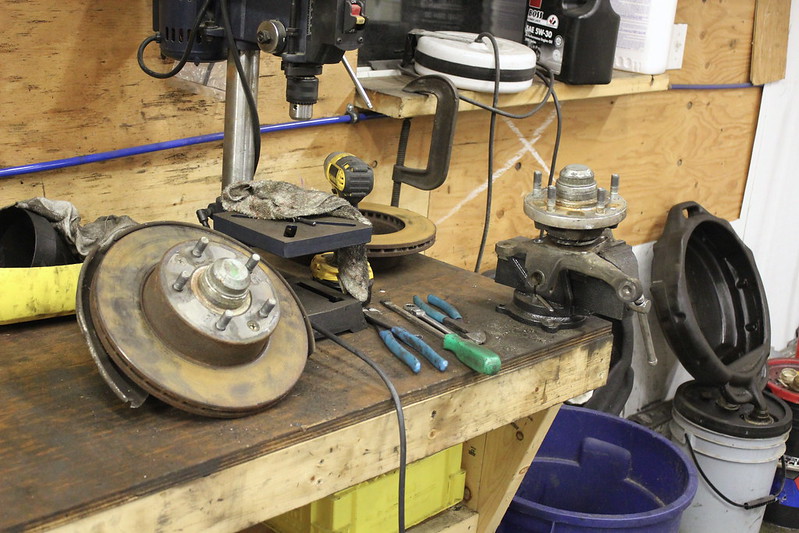
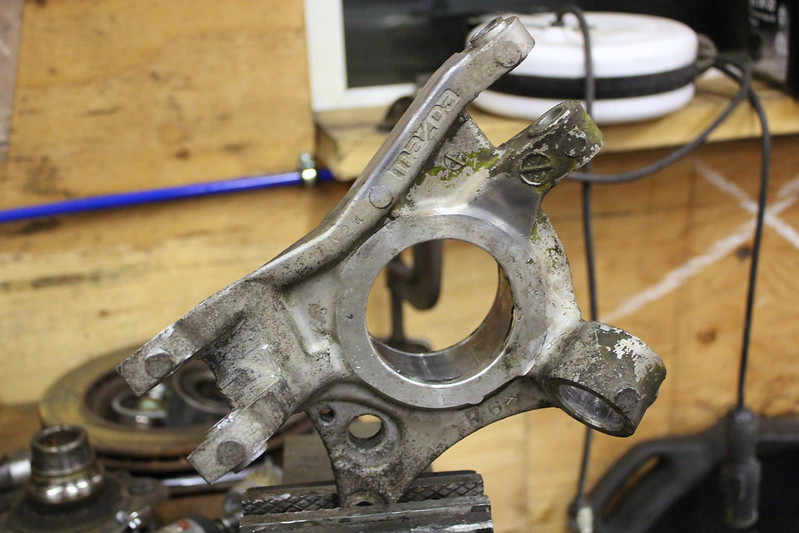
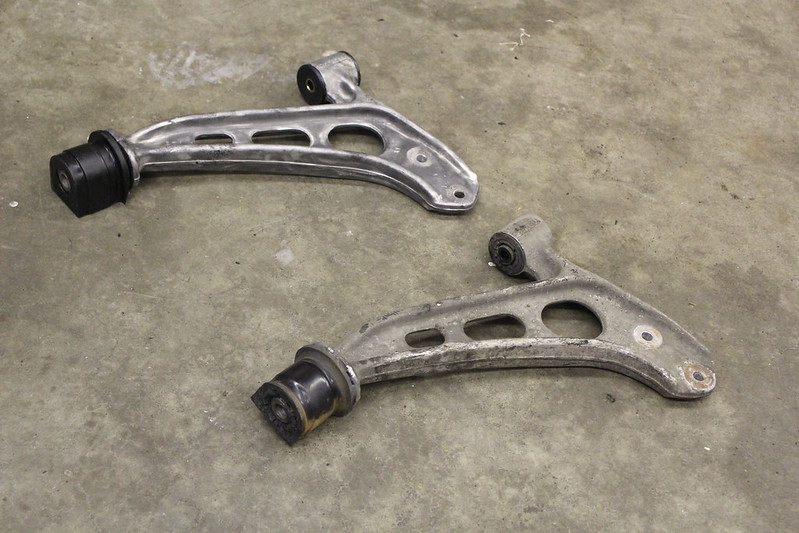
took the fronts apart and found no play! which is weird, cuz there was a bit of play in the front end, so that means ball joints.
and then just for the giggles (and maybe the internet fame) I did this
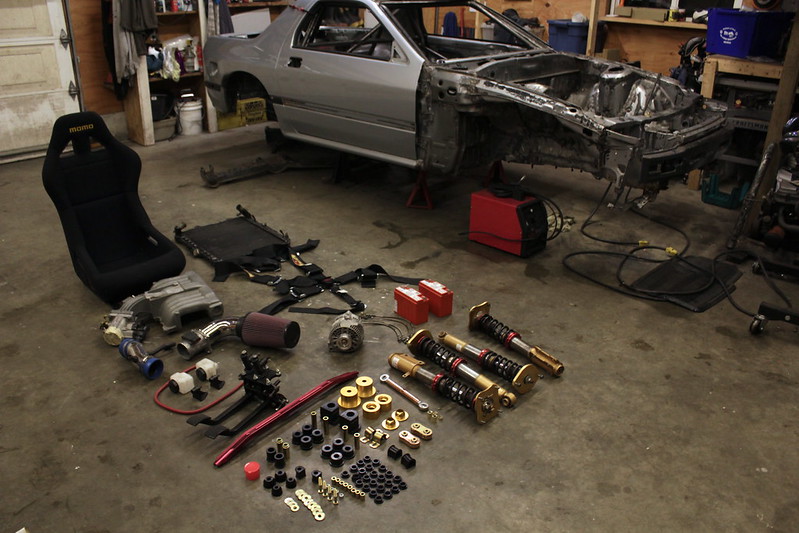
and consider this the before pic
they'll be an after when the subframe is reassembled.
and I'll leave you with this teaser
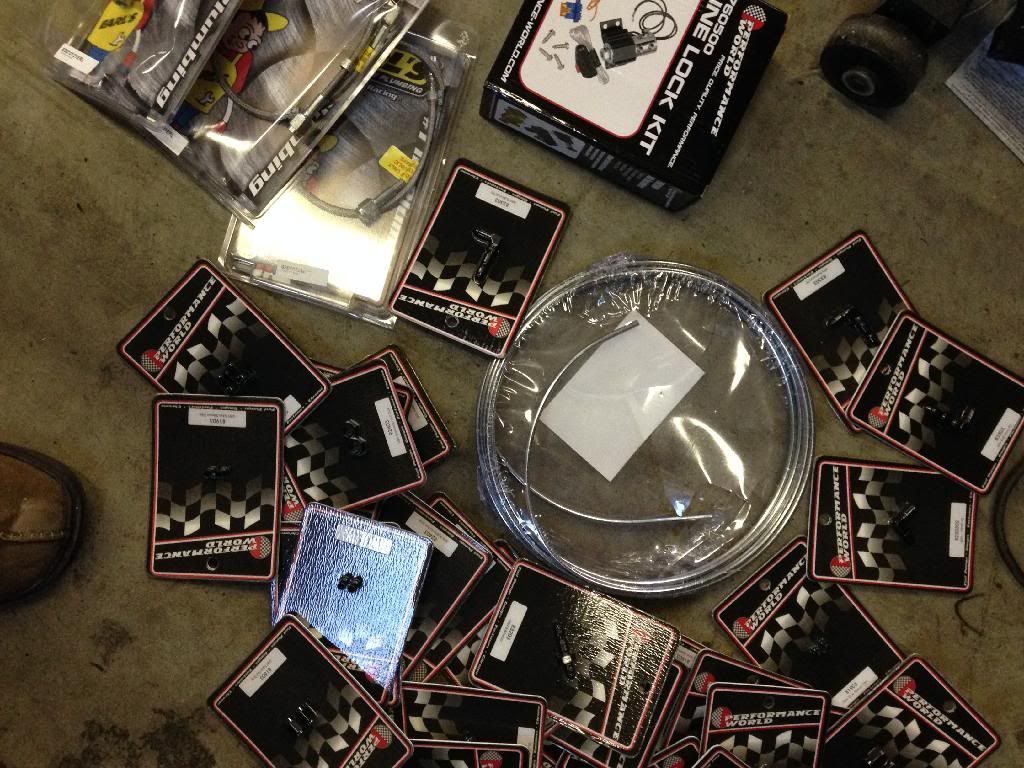
brake line goodies, hopefully doing these this weekendLast edited by Teeson1111; 03-12-2014, 08:53 PM.Leave a comment:
-
Ya I don't mind answering questions, thats what the internet and forums are for right?Originally posted by Zach Thomas View Post
The basic kit is totally worth the cost, the rad kit I feel is definitely overpriced. We'll have to see how I fare with the stock rad and a huge fan and lots of ducting.
The slave adapter kit they sell also doesn't appear to be useful, its basically all the parts you need with no bracket built, or adapter for the firewall (the hard parts) so no point in buying it through them
If you can handle fab work I've seen this swap done with out a kit, kit just makes it way easier.
The from sway may fit with SN95 stuff, I really hope it does. Been doing a lot of reading on suspension lately and if I move the sway bar forward it will alter the spring force it provides.
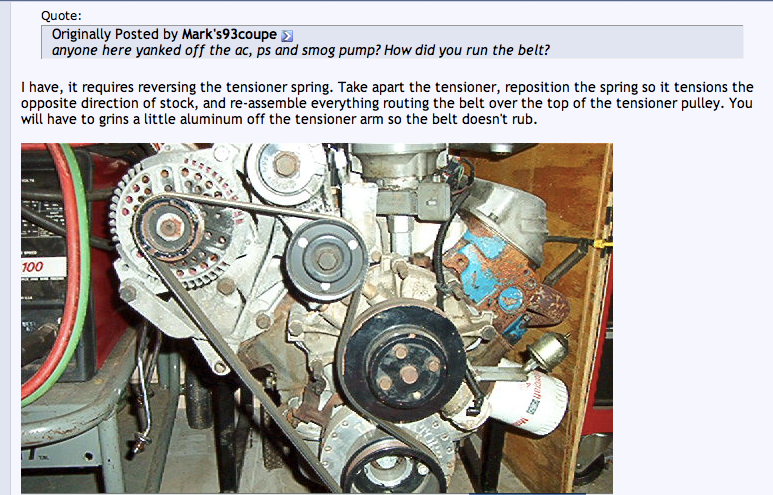
Are you putting the alt down low? I thought about putting it where the air pump was, but that makes the reverse rotation water pump impossible to use. The newer style timing chain covers (explorer, SN95) all use reverse rotation (relative to the crankshaft) water pumps.
This is how I was going to do until I get a good electric water pump:
you have a build thread somewhere I can follow?Last edited by Teeson1111; 03-12-2014, 08:49 PM.Leave a comment:
-
Thank you very much for all the answers! I'm sure I'll ask some more as time goes on if you don't mind I actually am planning on going with the basic kit, mainly because I there's a driveshaft shop about 30 minutes away from my house that should have no problem with it (lucky me!) and I would rather not spend the money they want for a radiator.
I can guarantee that after cursing myself and the parts I choose not to buy from Grannys I'll regret my decision. But that's usually how my car projects go I am extremely happy to have found this thread though, because by the time I start my car you will probably have a great example for me to follow
EDIT: also kinda sucks about the front sway bar. At least there is a way to make it work. I would assume the stock SN95 accessories will clear everything alright based on the few builds (albeit foxbody engines) I've seen. I just started cutting down my factory cast SN95 accessory brackets last night. Too cheap to buy aftermarket brackets for running an alternator-only setup, so the sawzall is taking care of business!Last edited by Zach Thomas; 01-07-2014, 02:45 AM.Leave a comment:
-
Oh it'll be low. Maybe not George Markovich low, but definitely hugging the ground.Originally posted by RolledAndPulledG View Post
Haha you could easily beat me, just stop playing with that s13 for a while. Which btw did you rip the motor out of that?Leave a comment:
-
Ya I feel like they're website is a bit lacking in the details in some areas. I tell you what I know and maybe that will help.Originally posted by Zach Thomas View Post
So the kit comes in a few different variations, I recommend you buy as much as your willing to spend, as your probably going to have to fab the rest of what you don't buy.
The basic kit comes with the crossmember cradle, and your choose of either a T5 or AOD (I think C4 is an option also) trans crossmember and matching tranny mount. The mounts are a custom piece as far as I understand, they aren't mustang or explorer mounts.
All 302 blocks are the same (save for minor changes in the 70's to 90's) but this kit works with all ford small blocks that use a double sump oil pan (ala mustang)
This kit will work LHD or RHD, power steering or not too. The cradle has holes in it designed to let you route the PS lines through it.
I recommend getting the driveshaft made by them too, you'll need to know what trans your using and what diff (n/a or t2) is in your rx7.
Kits also come with hardware for their pieces, everything uses as many factory placed bolts as able.
The only thing that requires modifying is the shifter opening on the trans tunnel, you need to allow the shifter room forward of the current location. They also provide a T5 shifter leg adapter that moves the shift know back far enough that the dash opening doesn't need modifying.
The stock rad also won't fit in the stock location, it will either need to be moved forward, or stood more vertical. They make a bolt in rad solution as well.
I have yet to confirm with a SN95 front accessories, but the front sway bar will not clear either, you need to move it forward. Best way is to take the forward holes and make them the back holes, weld in new forward bolts.
The sensor your missing is the speedo drive. Granny's website has a blurb on that too.
Edit: wanted to clear a piece of misinformation here
The kit doesn't come with mounts, but they are mounts for a 197x Mercury Comet (engine and trans). The rubber versions are super cheap, and I haven't found a company making sold or poly urethane mounts.
Front accessories won't change the sway bar, it hits the oil pan. You'll need to move the bar forward.
The Radiator will also need to be moved, or replaced. How much depends on which crank pulley you use. Electric fan is a must also.
Dash will require modification as well as the tunnel to accommodate a T5
my kit doesn't line up perfect to the bolt holes in my car, it took some wiggling. A friend bought the same kit for his t2 and his is even further away from the bolt holes then mine, so some hammering may be in order.
Alternator will need to be a SN95 bracket or moved elsewhere. Fairly confident a fox or explorer bracket will cause it to hit (fox due to tensioner) but I haven't tried one other than the SN95 which fits with a hairs width to spare.
Mods, don't go editing my thread without at least notifying me. And to Grannies or who ever felt the need to come in here, make a website that doesn't completely suck. The dash was clearanced in a later post. A fox alt relocation bracket will fit but makes for a really long belt. I think I even listed part numbers for the engine mounts. There is a company that made or makes (not sure if they still are) poly mounts but they were expensive. To anyone looking at buying a kit, regardless of the fact it's "jig welded" not a single one I've laid hands on has dropped in. They all take fighting and ruining of the powder coat to get it to sit correctly. The transmission crossmember also leaves very little room for an exhaust.
-Teeson
Thanx! Haha it'll get thereOriginally posted by dvious View PostLast edited by Teeson1111; 03-12-2017, 03:38 AM.Leave a comment:
-
at this rate youll be done before me lol. Youre gonna be low right?Leave a comment:
-
This is one of those threads that i wish was 20 pages long and i could see the finished product. Doing great so far. Fab work is amazing so far.Leave a comment:
-
Looks good! I just got back from a 200 mile round trip to pick up a Fox body T5 lol. Barely worth all that seat time, but oh well. It also sucks cause I still need a bellhousing and a shifter. Oh well, I didn't expect to start this project til next winter (which at this point I'm still just collecting parts without doing any real work). Also noticed on the trans I've got an open hole where something used to go, hopefully getting all the little bits I need for a complete trans don't cost me too much")
One more question, especially since you mentioned the trans mount. Does the kit require a Mustang trans bracket or does the Granny's kit just bolt straight to the T5? Sorry for asking all the questions I should just ask Granny's, hope you don't mind! It just seems there are some small gaps in the info they give you on their site and all the build threads you see online.Leave a comment:
-
thanks dude.Originally posted by Concon666 View Post
I'm really grateful the encouragement guys, kinda hit a wall with my patience level. but it should get better now that fab is mostly over.Leave a comment:
-
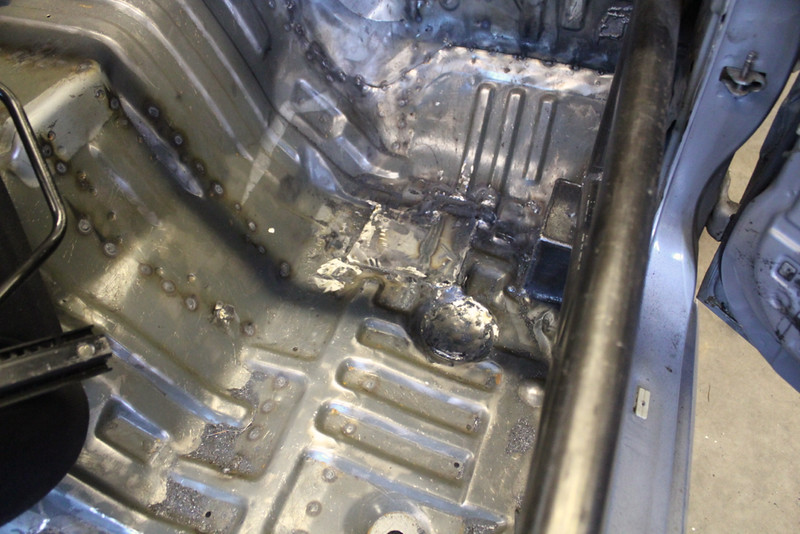
more to add from yesterday,
fixed
fixed
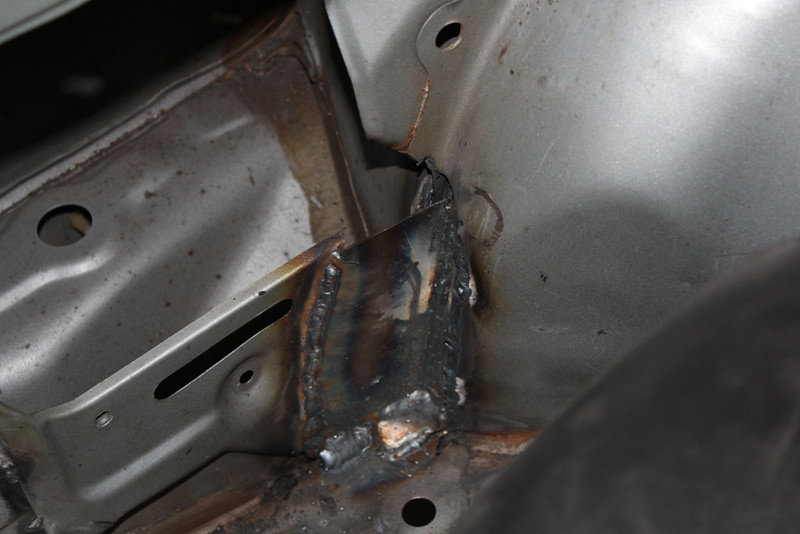
fixed. This was a tough one, as all the metal (well basically) that attached to the firewall had rusted away to almost nothing. this makes for bad welding, so after a good grinding welding commenced. Worked out really good for what I was expecting. My welder buddy certainly earned his Mcd's.
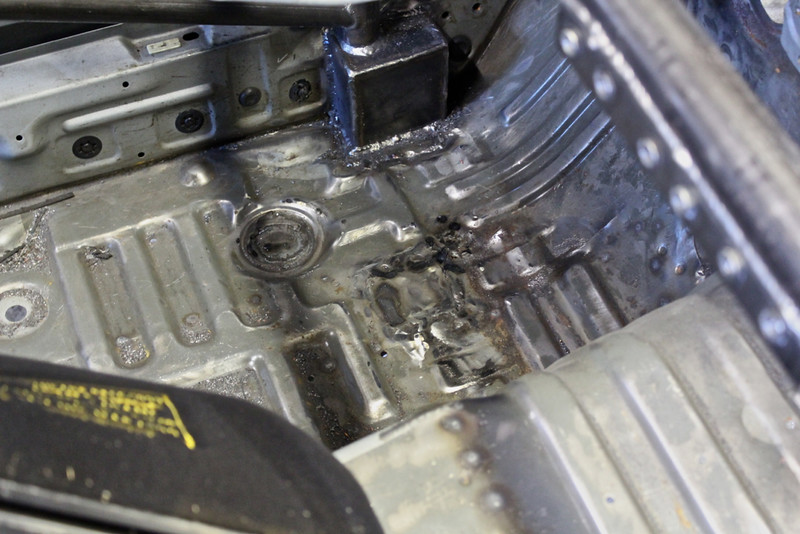
and then
and then
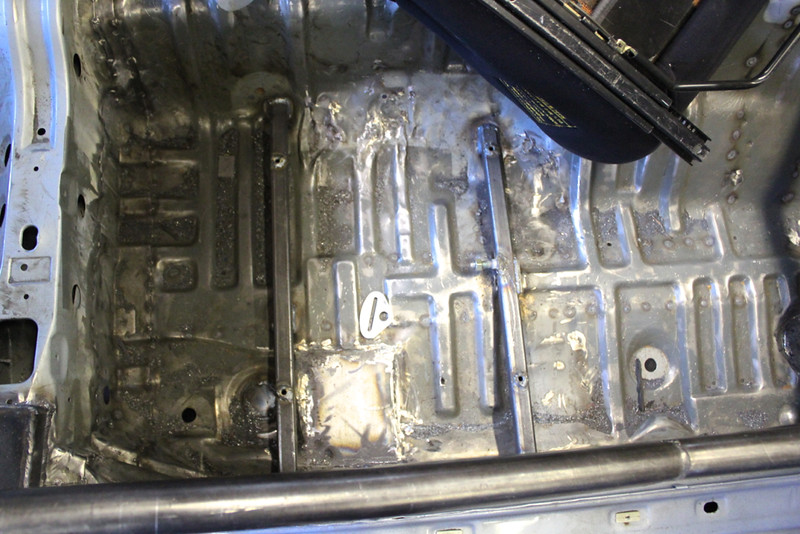
all the pass seat mounting and harness mounts
meanwhile I took a grinder to those patches
came out ok ish. might need more.
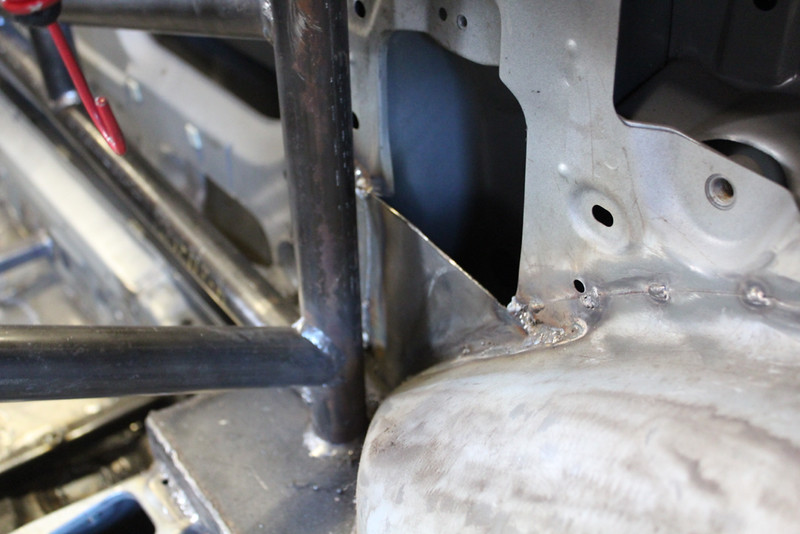
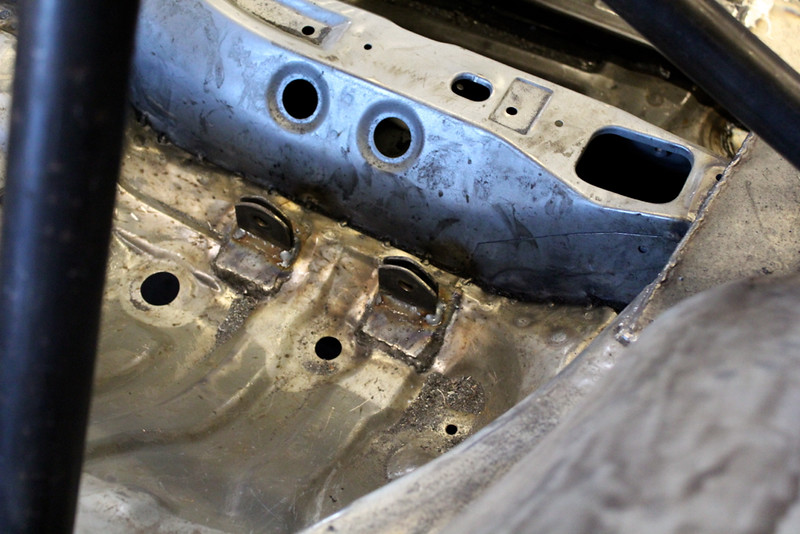
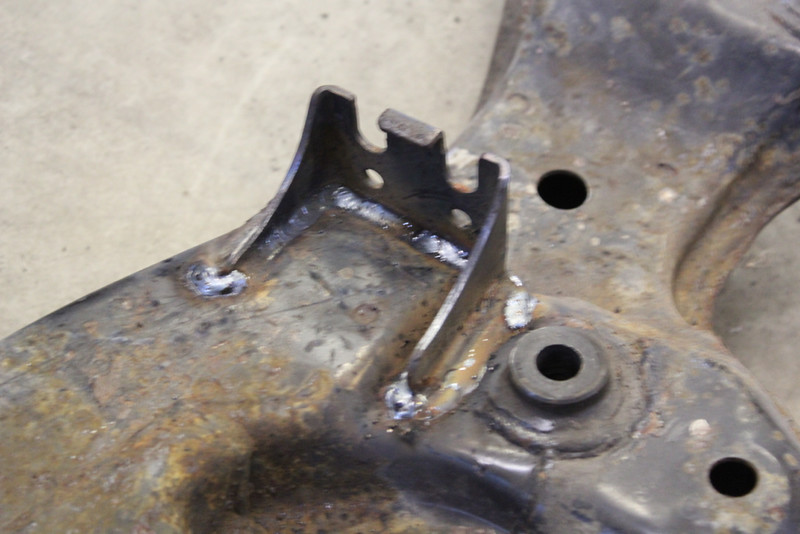
strengthened up the front diff mount
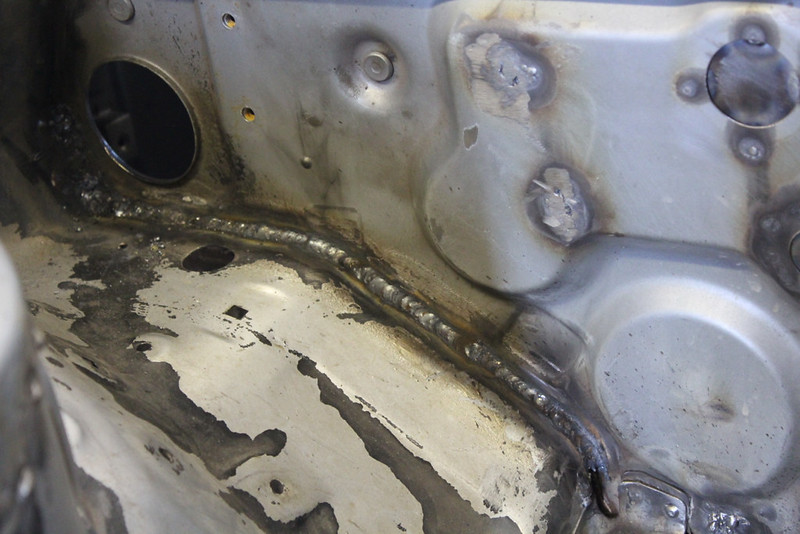
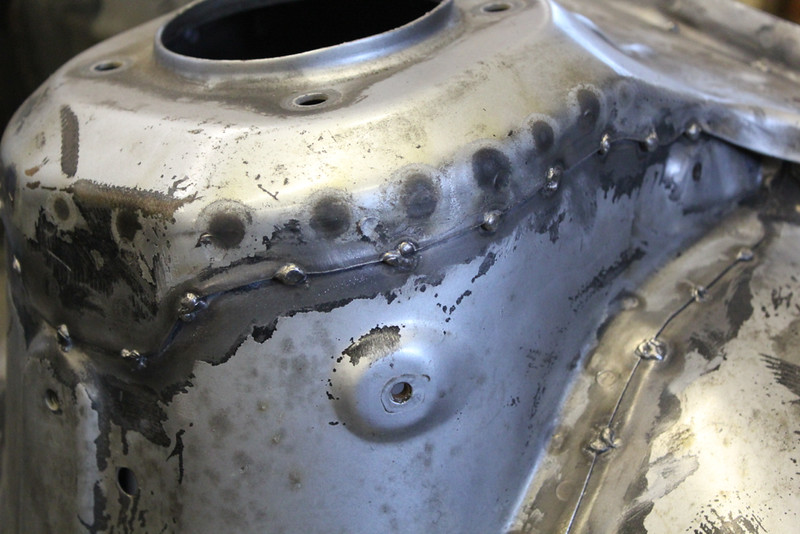
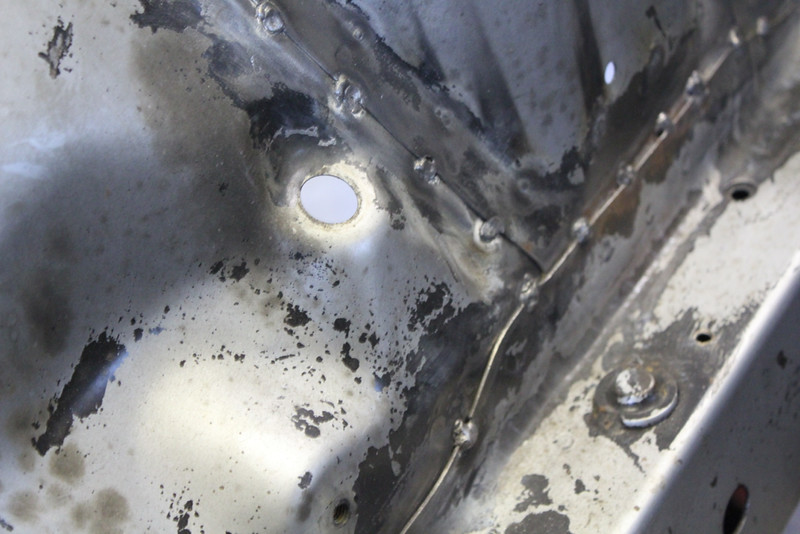
heres a few close ups of my stitch welding. lol would've been so much nicer with a better welder. oh well, I'm told its strong just not super pretty.
and now onto not welding,
Those DTSS bushings are gonna be a pain
gonna take some heat, a press, and probably cursing lolLeave a comment:

Leave a comment: