Announcement

Collapse
No announcement yet.

Another BMW E28 - This Time From Australia

Collapse
X
 
  • Filter
  • Time
  • Show
Clear All
new posts

  • epearce
    replied
    It's been a minute since I updated this. Finished the bag install last year, but things came up that made me have little motivation towards documenting what I was doing.

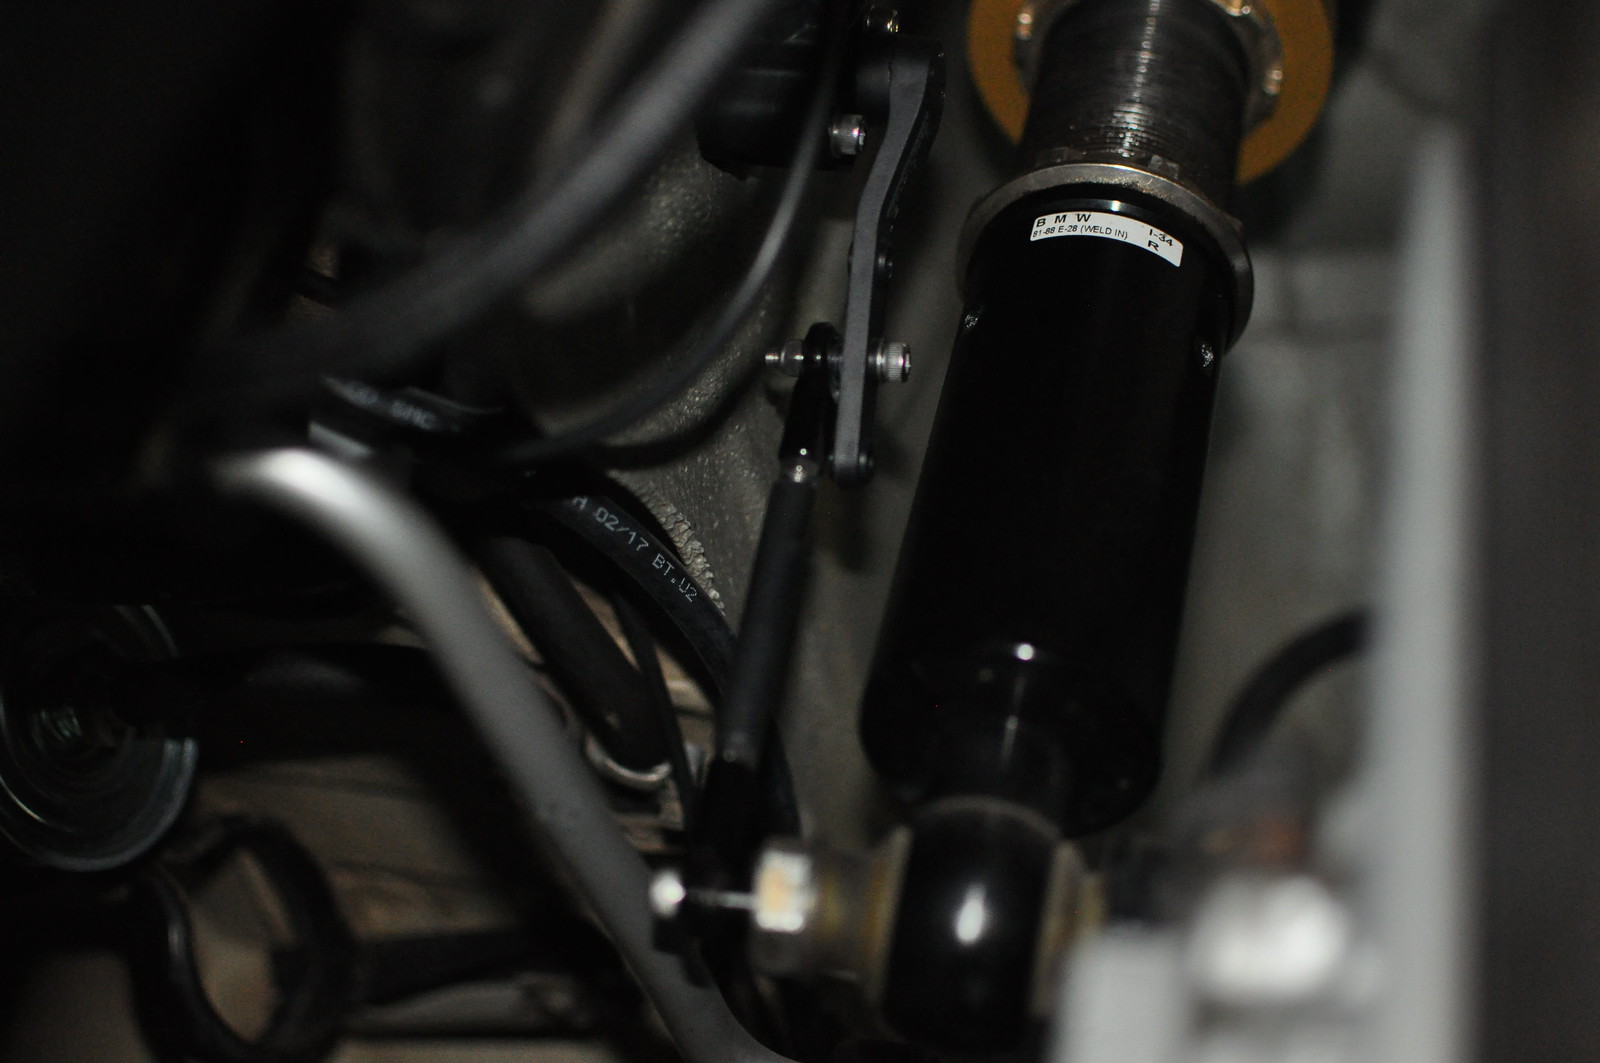
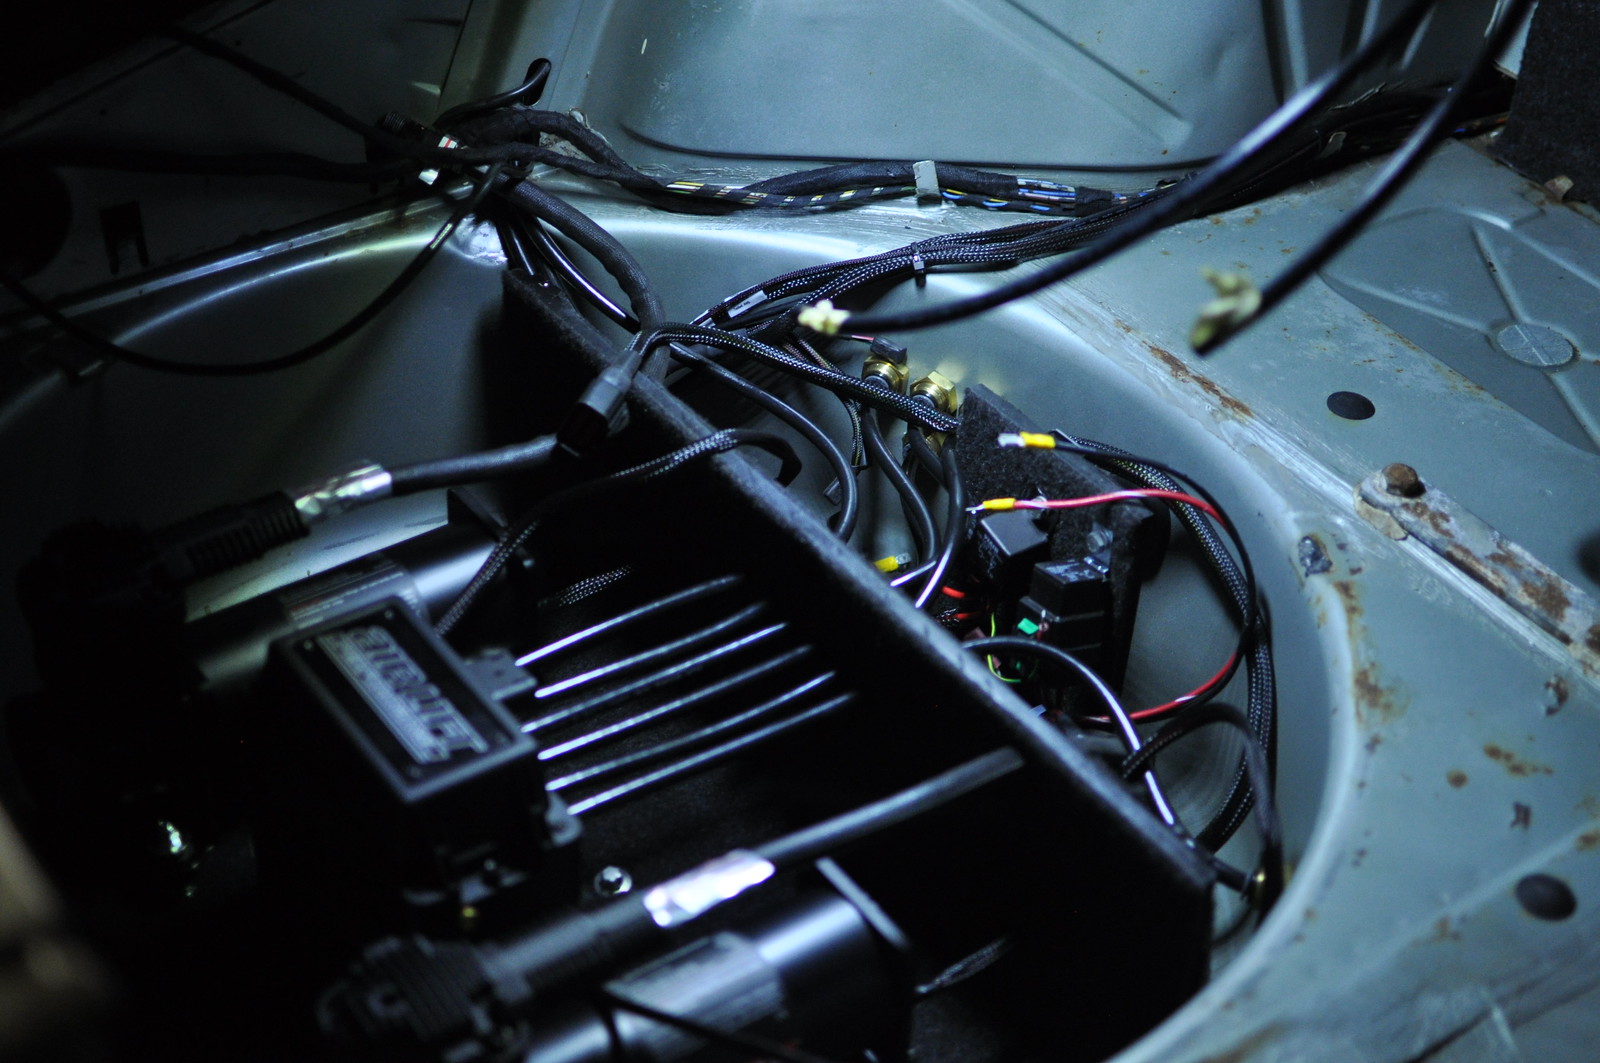
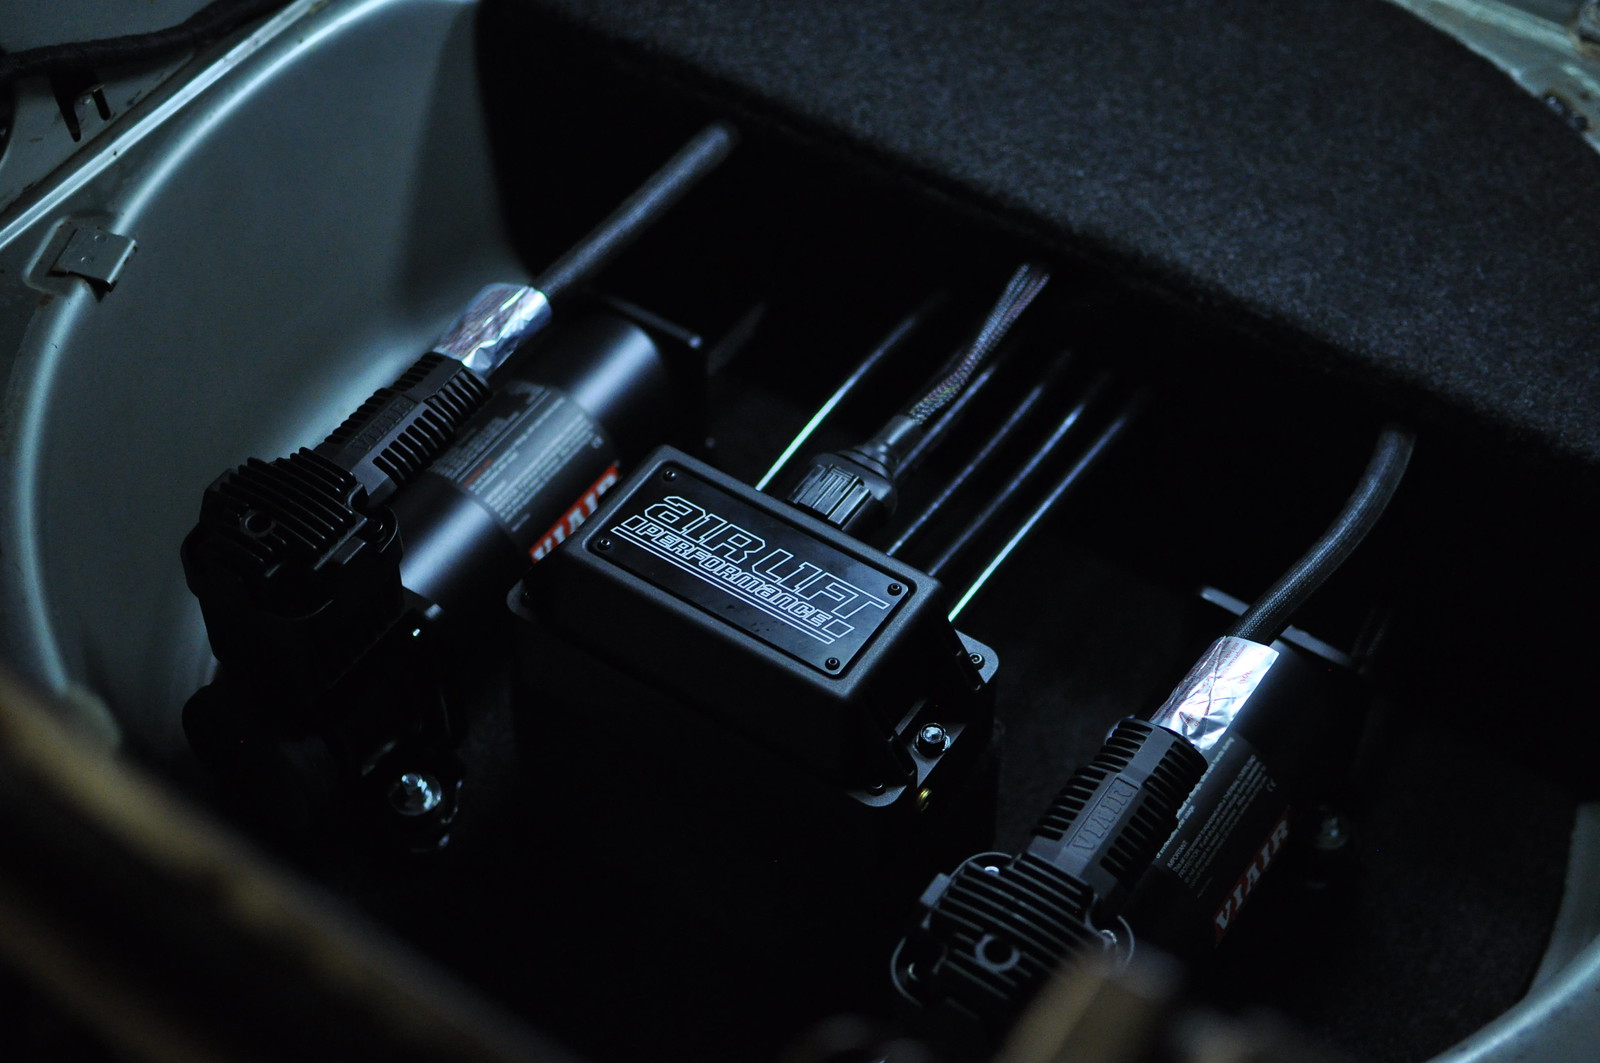
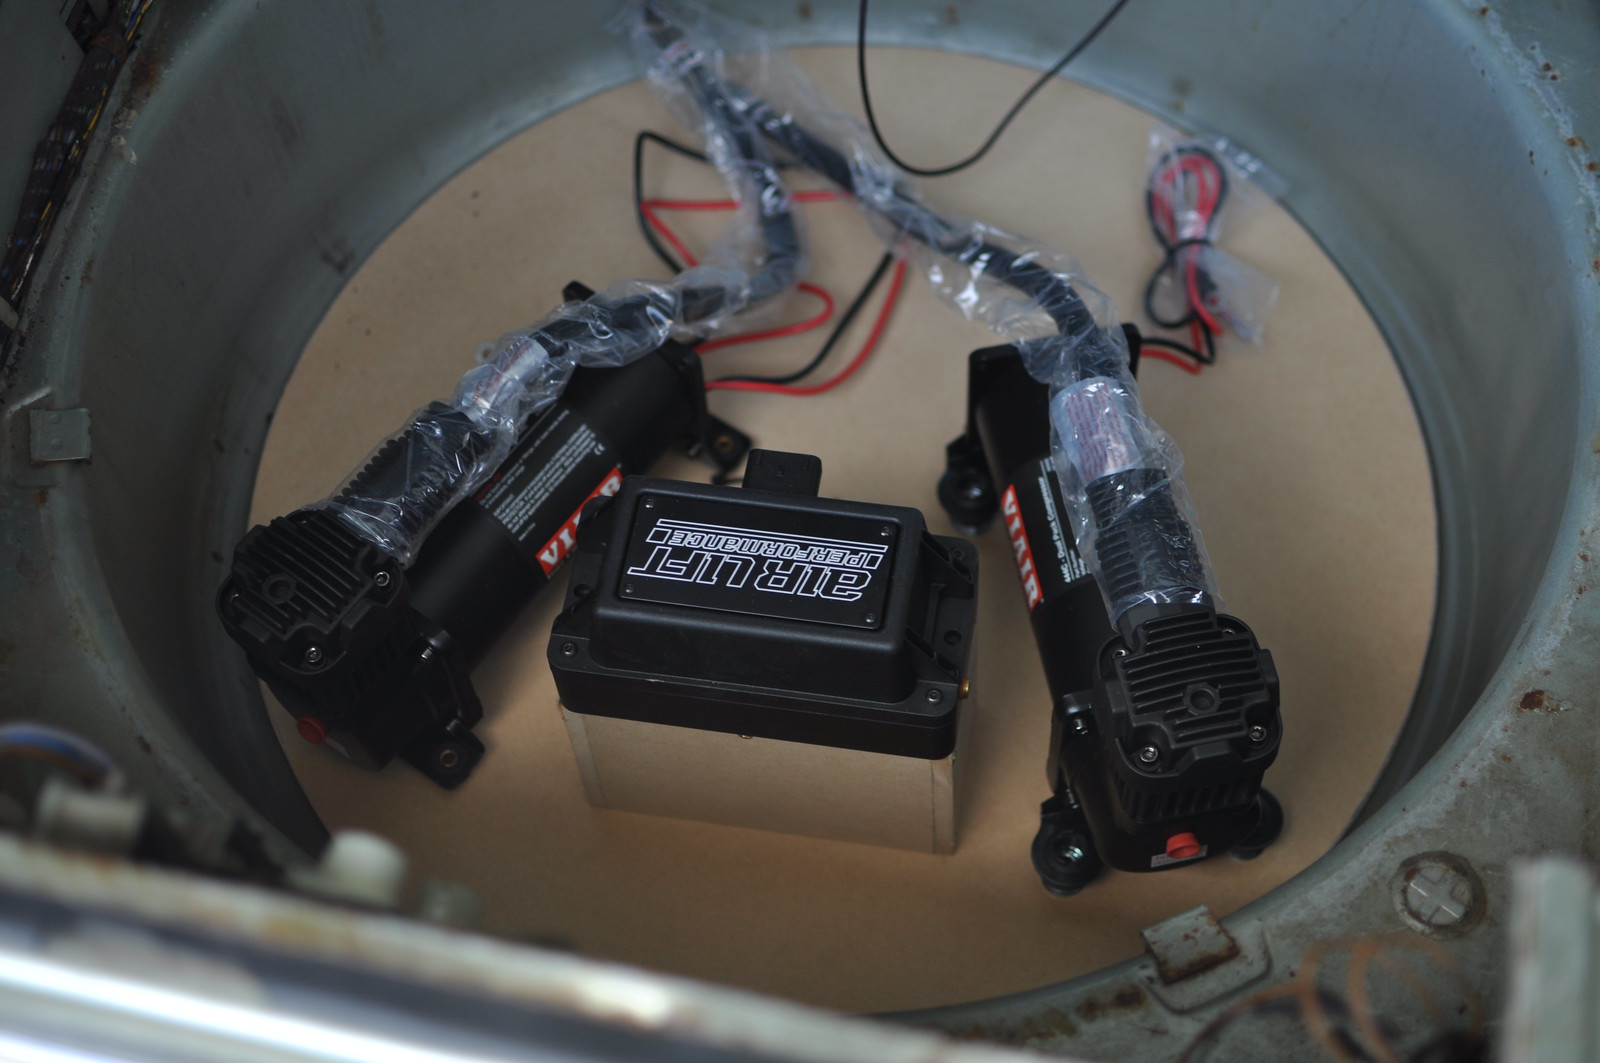
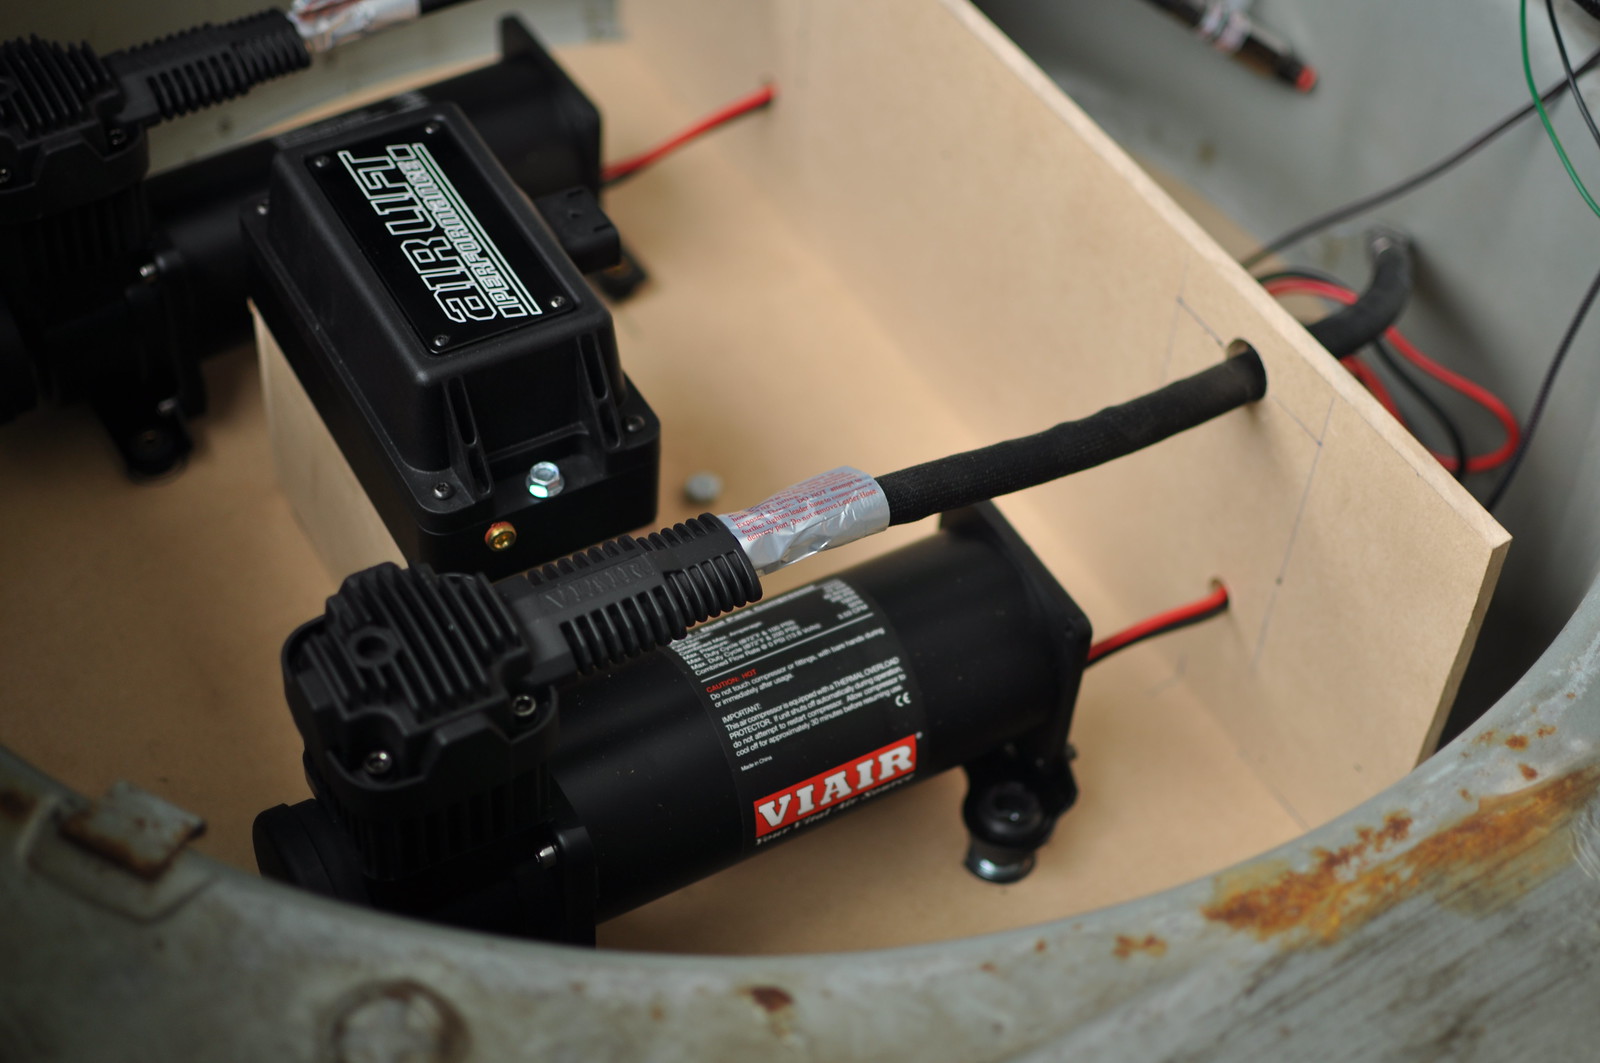
    The boot install went way better than I expected. I routed all the air lines from the spare wheel area to the parcel shelf through the trunk body rails. Resulting in a fully functioning boot which to the untrained eye would appear untouched.


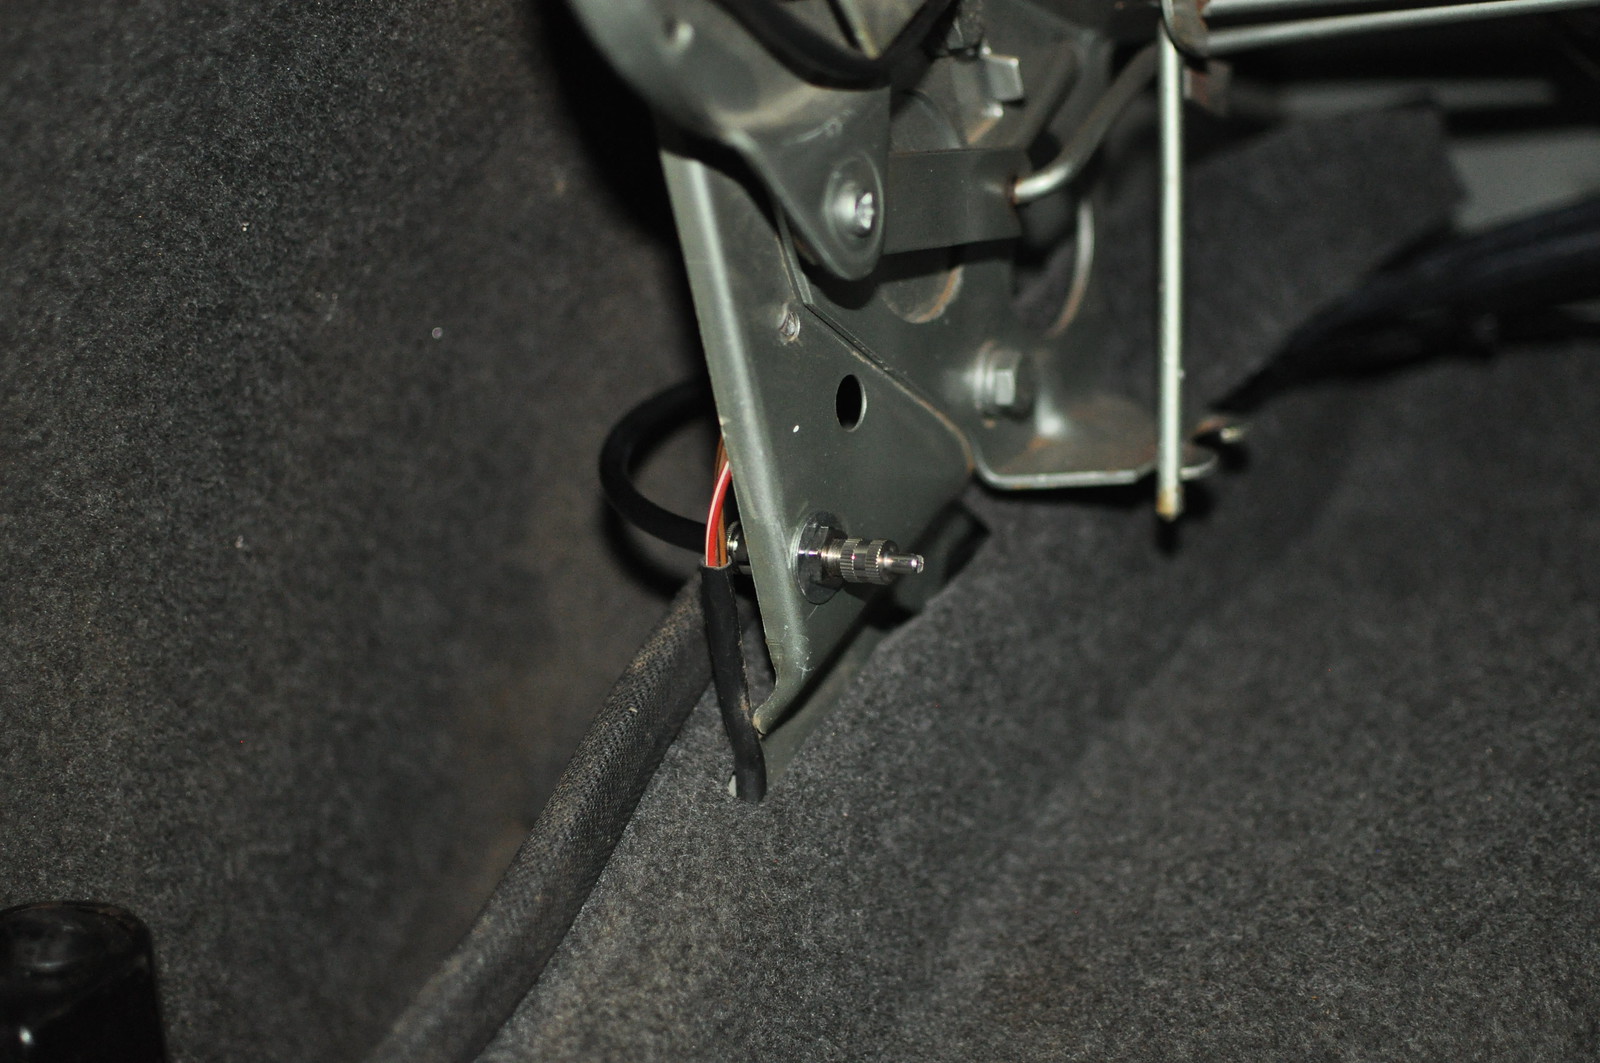
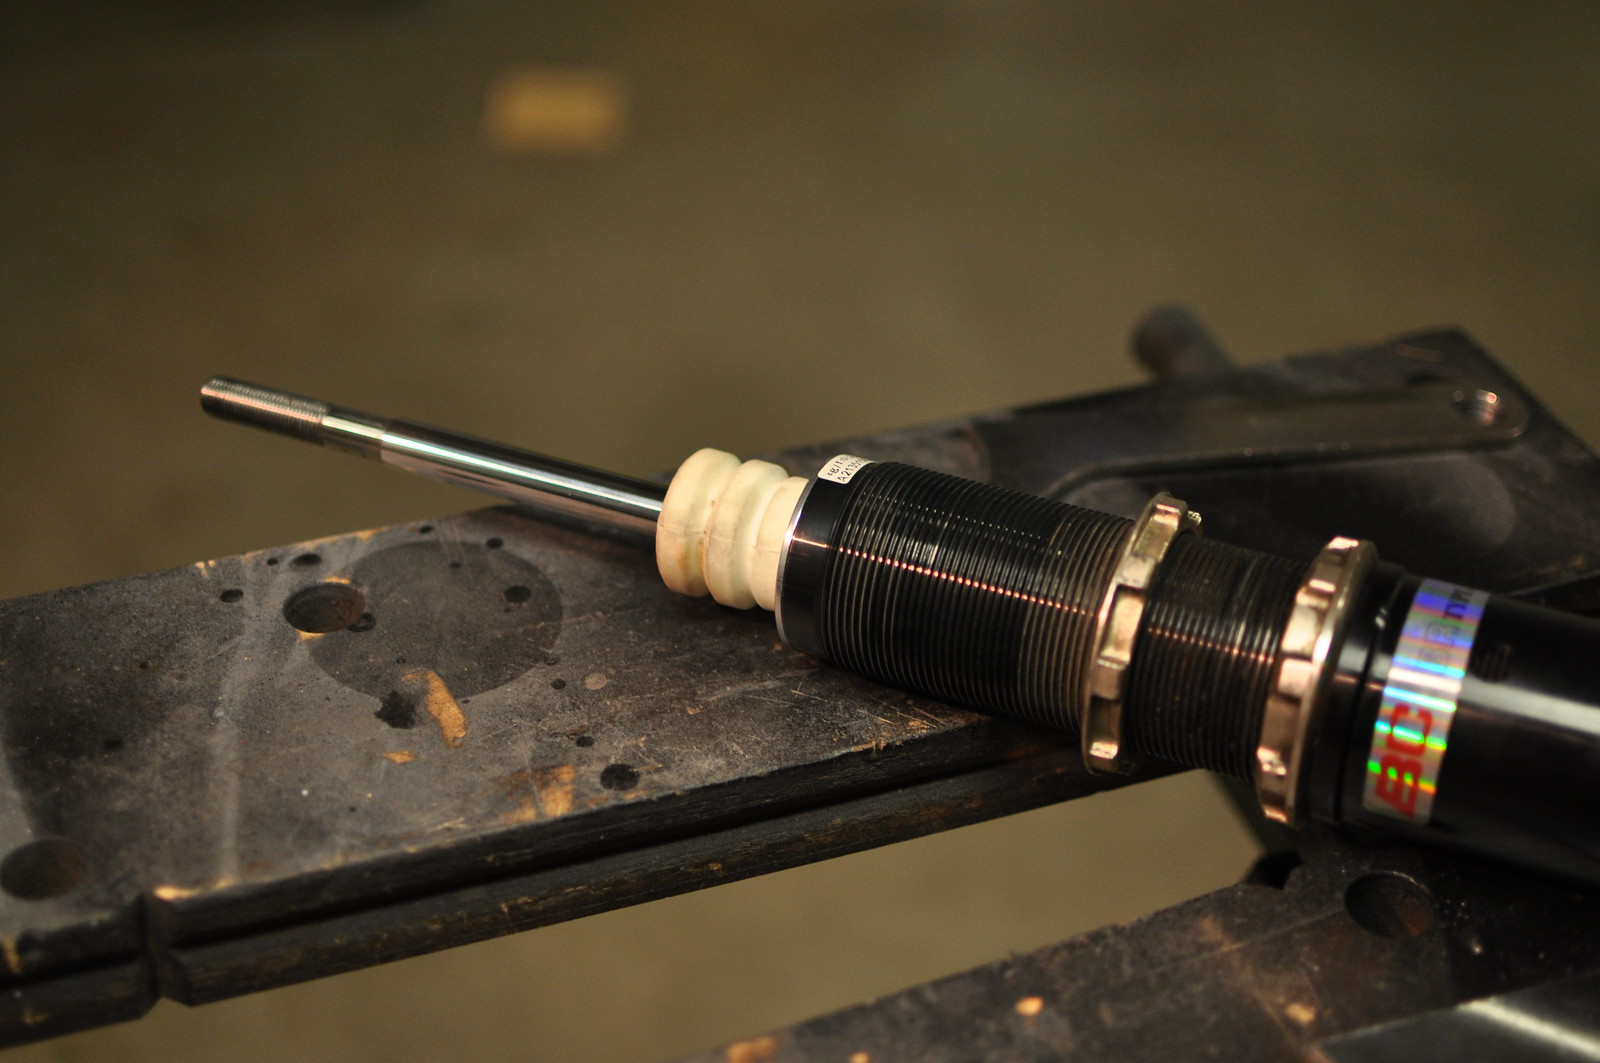
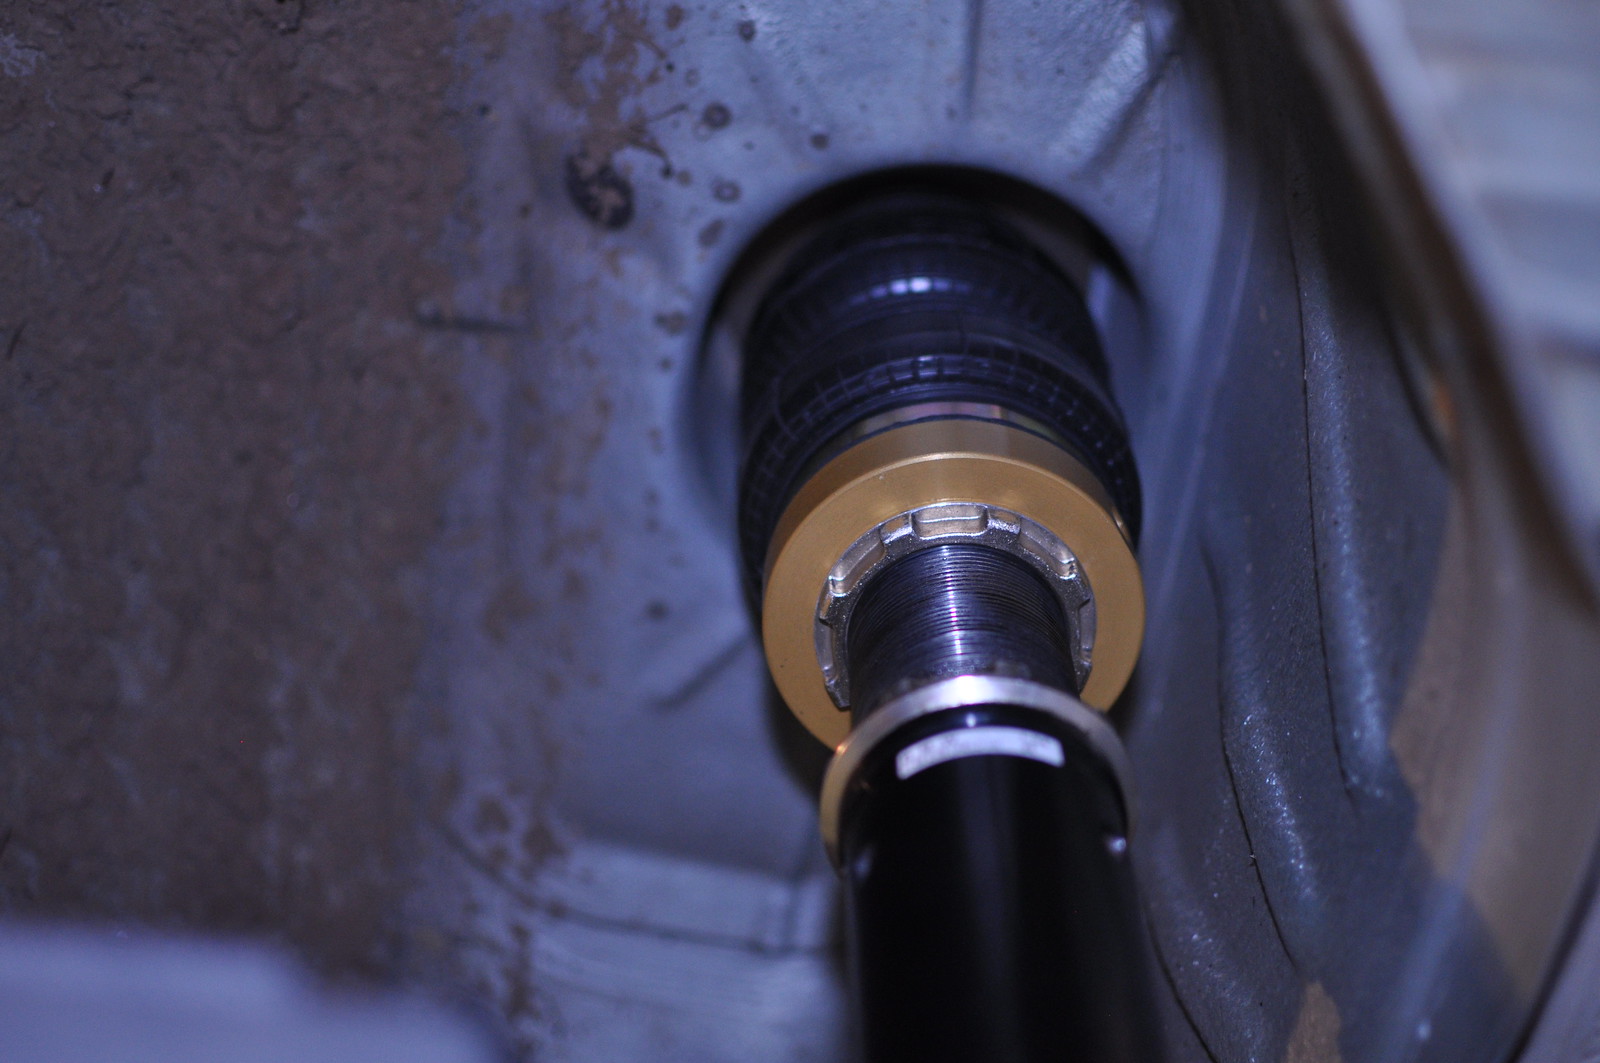
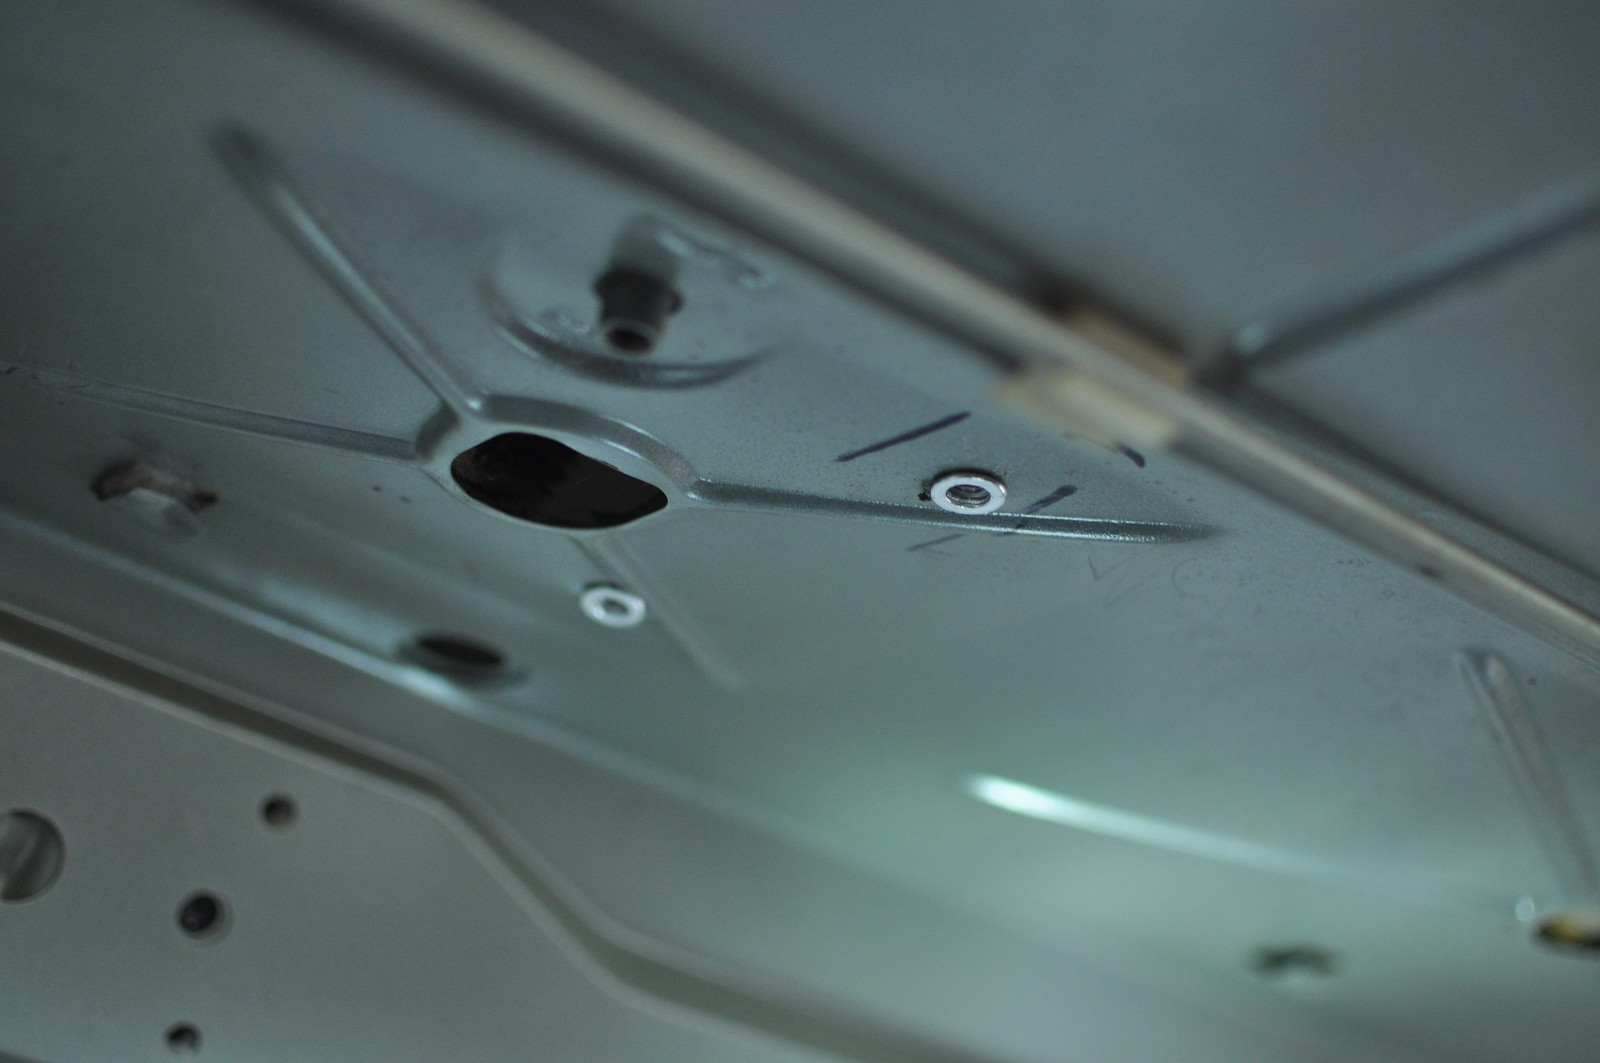
    The height sensors for the Airlift 3H system was the next challenge. For the front I decided to tap threads into the lower control arm, providing an OEM type position, with the sensor body riv-nutted to the body.


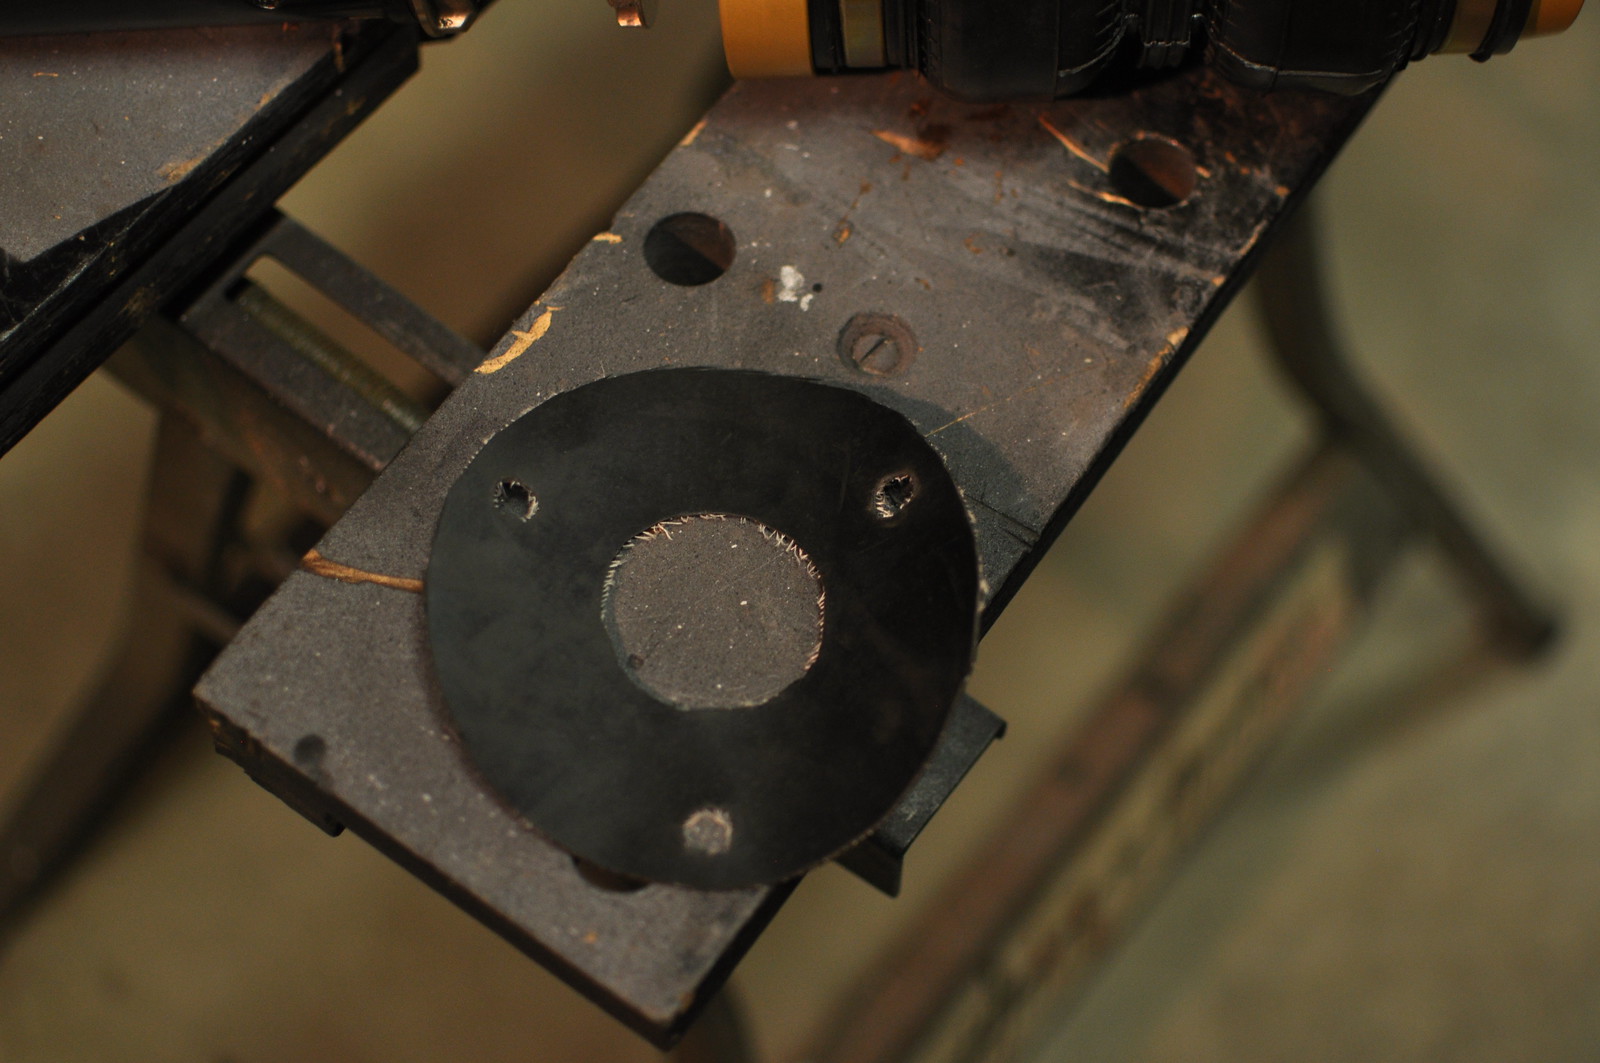
    The rear, I tapped a thread into the head of the shock absorber bolt.


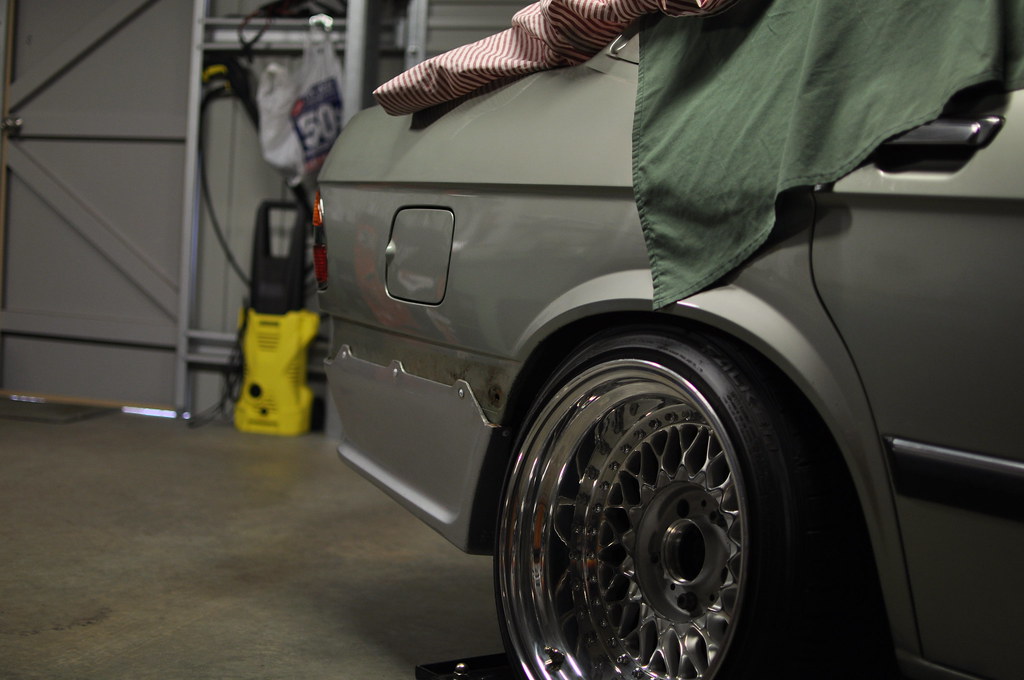
    The end result was very satisfying. I really can't believe that these wheels I brought from Austria off Ebay over 5 years ago and got sent half way across the world fit this well. The offset couldn't have been better.


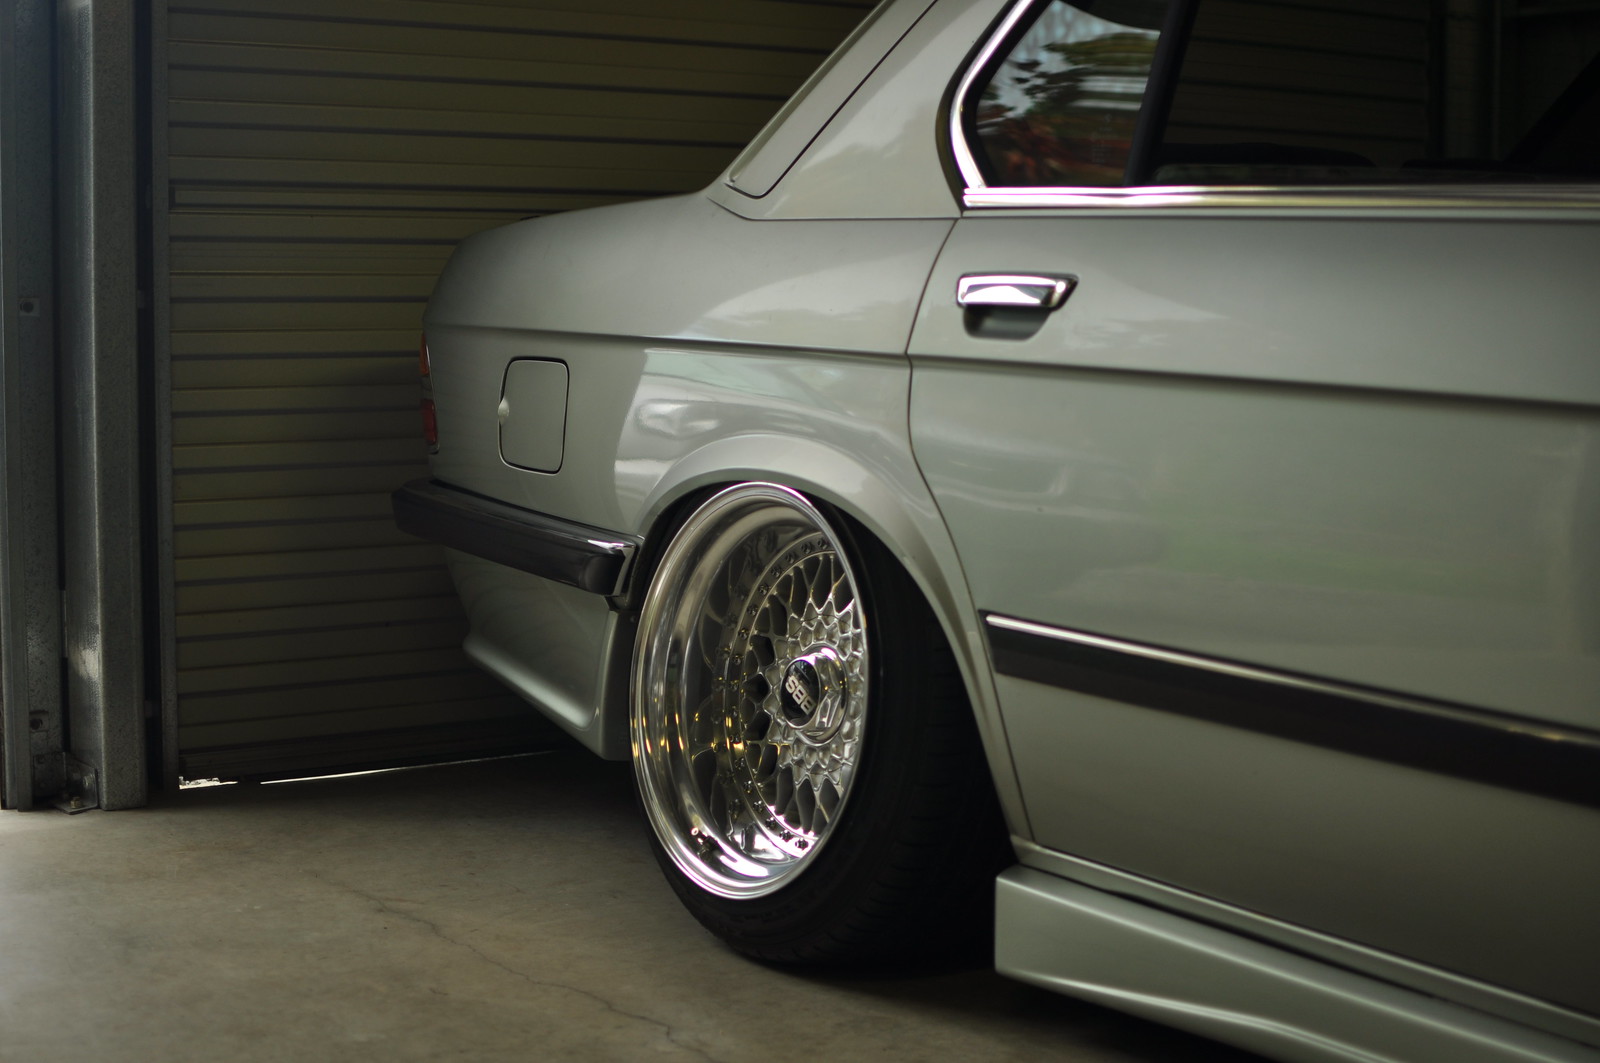
    Minor thing that annoys me is that I can't quite get the front down onto the rim like the rear. But with the lower control arms touching the ground with no air, this isn't fixable without going up a tyre size.


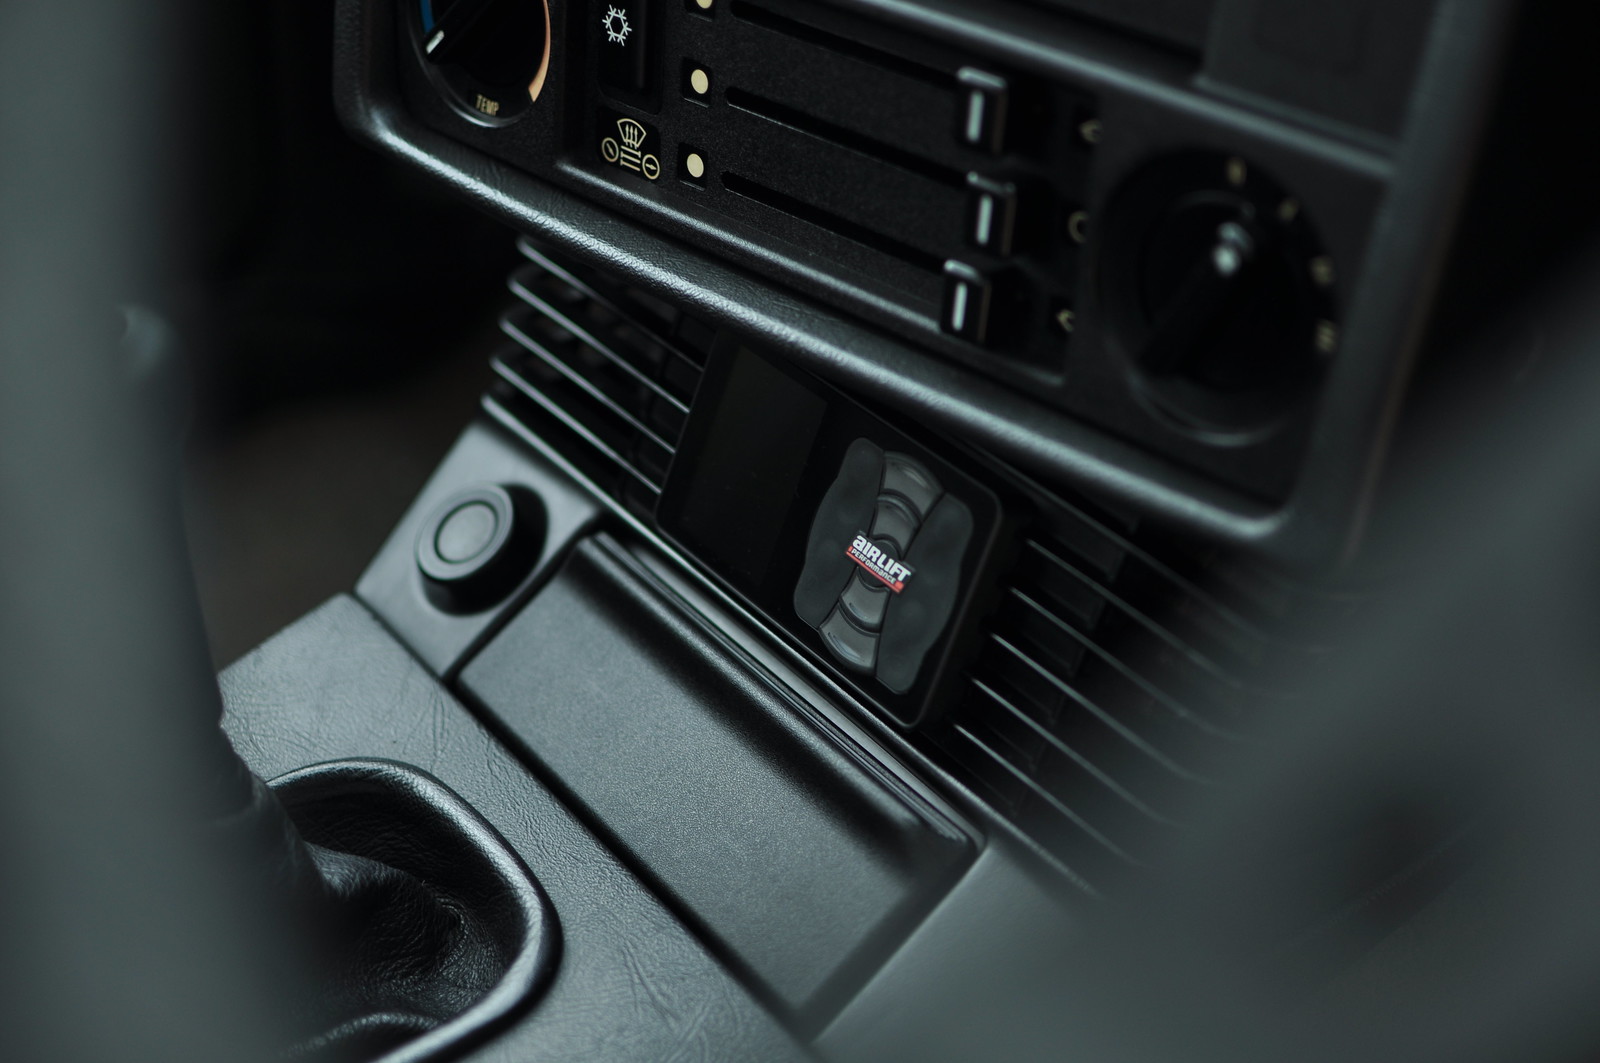
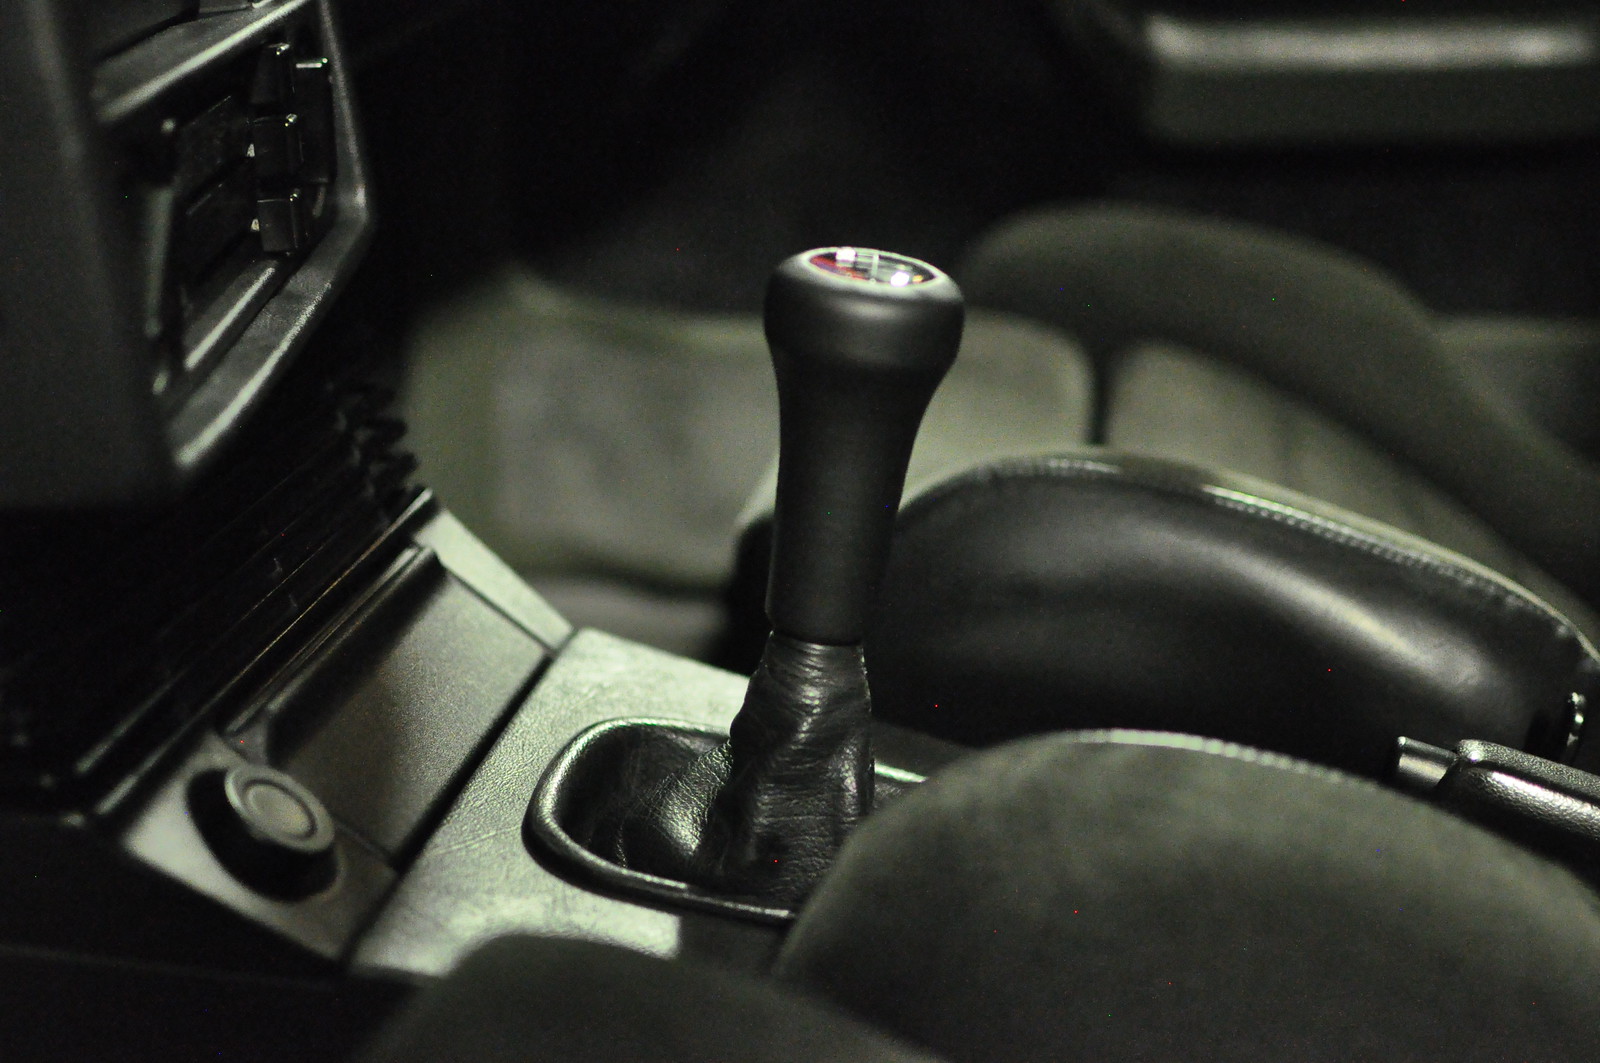
    Pretty happy with how the vent fitment of the Airlift control ended up. Nice and clean, good viewing position from the driver's position and it doesn't look too out of place. I also chose to delete the radio to provide a cleaner look. A genuine BMW E36 M3 LTW radio delete panel filled the hole perfectly whilst matching the OEM centre section trim finish. Replaced the gearknob last year as well with a genuine BMW period correct leather one.


    Leave a comment:


  • DawsonLiri
    replied
    Wow, so much clean.
    No other words are needed.

    Leave a comment:


  • gnmzl
    replied
    Same here ... lost for words. Was going to sell my e28. Keyword "was"
    Props to you, sir.

    Leave a comment:


  • Graphitemk6
    replied
    Im really liking how suble and clean that install on the air set up is. That fitment on the other hand is going to be nuts!

    Leave a comment:


  • epearce
    replied
    To continue, where i left off.

    The compressor spare wheel well setup is 99% finished. Everything has been trimmed in carpet or painted. Stoked with the finished product.


    Mounted to compressors using the Airmaxxx isolator kit to reduce noise and vibrations.


    Fitted the assembly to the car, started connecting air lines, running the looms etc.


    Lid for the rear section trimmed with carpet and fitted. The aim was to build something that was stealthy, easily serviceable, enabled full use of the boot, yet presented very neatly. I think I achieved that.


    I then started making a cover for the entire area, which will enable full use of the boot when required.


    Next up was pulling the coilovers out, removing the springs and replacing them with the Bags by Only Charged Dubs.


    Made some thin rubber gaskets to go between the strut tops and chassis to reduce some NVH.


    Rears fitted to the car, plenty of clearance.


    Fronts were next, left the struts in the car for the front and just dropped the arms down and pulled the springs off.


    And then, the part I've been waiting for... How will the wheels sit inside the guards...


    Lost for words.

    Leave a comment:


  • DawsonLiri
    replied
    Such a clean work.
    I know it's a bit too much, but it is so cool if you can make something for hiding the controller behind those vents.

    Leave a comment:


  • epearce
    replied
    Thanks for the positive comments!

    Next instalment.

    As I'm mounting the tank upside down, under the bulk-head and wanted to make use of the original brackets. I decided to get a thread welded on the "new" bottom of the tank, which will become the new drain drainage port.


    Too keep with the stealth boot install, i wrapped the tank in anthracite carpet, which is a pretty close match to the OEM boot carpet. Pretty happy with how it turned out.


    The ports will face the front of the car (out of sight)


    The boot trim that sits at the back of the boot had seen better days, so that got the same treatment as the tank.


    After much thought of where to mount the Airlift controller, I went with the centre console/dash piece, with the intention of recessing it into the vents.


    Ending up the weekend with drilling holes in the spare wheel-well for the PTC bulkhead fittings.


    Leave a comment:


  • Beemernut
    replied
    My e28 is jealous. Very jealous.

    Leave a comment:


  • Steven_318ti
    replied
    Love this car, cant wait to see the aired out pics

    Leave a comment:


  • heeter_33
    replied
    Oh hells ya!

    Leave a comment:


  • epearce
    replied
    Probably say this every time, but an update is well and truly needed to this thread.

    Unfortunately I don't have any good photos of the car to finish off where I last left off, so that part of the build will remain quiet till the time comes that I actually drive the car to get some photos.

    To sum up the time between April and now - I drove the car once. But big things are coming..

    To start of the update.

    I replaced the worn-out factory gearknob when I built the engine with an OEM E46 era woodgrain knob five years ago. Was never fully satisfied with it and finally purchased my favourite OEM period correct knob.


    Couldn't be happier with the outcome of fitting this. Love how well it ties in with the interior. The shape, the finish, the classic look. Perfect if you ask me.

    Then comes the biggest news.


    Air suspension has always been the dream since my passion for building cars began. The price to do properly, which is amplified from living in Australia had always put me off. But as the years have gone on, I've realised that I've built an E28 that I don't drive due to its height and lack of practicality. I've contemplated purchasing a second set of wheels this year, something OEM+ like BMW 5 Series F10 wheels. Then changing the direction of the car and turning it more into a driver's car. But at the end of the day, stance is what I desire, so that wasn't a true option.

    Long story short, a friend recently re-planted the air ride seed in my mind one day over a message during a boring day's work. A few days later I was putting together an order.

    My experience with aftermarket air suspension is non-existent. I know no-one on bags, and it is a very uncommon thing to do here in Tasmania. So this has all been a learning curve; learning about tank sizes, air-line sizes, different bag setups, compressor sizes etc. After much googling I have gone with the following; Air Ride 3H, duel Viair 444c compressors, 5 gallon tank and 3/8 air line. Basically gone the whole hog with this, figured there was no point using a basic air management.

    As I already have BC coilovers fitted that are less than 10,000kms old. I figured i could make sense to try and use those, which would also save me some money. From this I have decided to go with Bags by Only Charged Dubs (OCD). Which are a direct replacement for BC coilover springs. The model of these bags I chose are their new slim double below bag. Due to the large amount of front camber I am running, there was no room for a conventional size double below bag. Fingers crossed these will fit without needed to massage the strut towers.


    So, to begin the install.

    My aim for this air system is to hide as much as I can in the boot, whilst building a well presented OEM+ neat setup. The tank will be mounted under the parcel tray. One; to maximise room in the boot and two; to keep it hidden. The management and compressors will be mounted in the spare wheel-well.

    The starting point:


    Step one; install rivnuts in the underside of the bulkhead to mount the tank. No self-tappers here.


    Step two; cut a base out of MDF for the spare wheel-well. Also might notice I sent the chrome compressors back and got black ones instead. So much nicer.


    Step 3; run a positive power feed from the battery to the boot. I decided to use a bulk-head fitting, reducing the need to run a cable through the firewall.


    Step 4; design how I want the plumbing and wiring to look in the wheel-well. With the ultimate aim of keeping it as neat as possible.


    Step 5; as all the relays, wiring and plumbing will be hidden in the back piece. That part will have a lid to keep it extra clean.


    So, that's where we finish off at for today, next update to come soon!

    Leave a comment:


  • epearce
    replied
    Originally posted by kaem View Post
    Just read through the whole thread over the course of a few weeks. Absolutely stunning car. And great to see a project spanning as long as it has to still be going - far too many fall short. Great read and good luck with anything coming in the future for this.
    Much appreciated! I'm about due for another update!

    Originally posted by Miroteknik View Post
    glad you stuck with it, and always happy to see more
    Thanks mate.

    Leave a comment:


  • Miroteknik
    replied
    glad you stuck with it, and always happy to see more

    Leave a comment:


  • kaem
    replied
    Just read through the whole thread over the course of a few weeks. Absolutely stunning car. And great to see a project spanning as long as it has to still be going - far too many fall short. Great read and good luck with anything coming in the future for this.

    Leave a comment:


  • epearce
    replied
    Super excited for whats coming next.

    Leave a comment:

Working...
X