-
Since I had a lot of time on my hands waiting for paint to get sprayed, I did this...
And I did do another thing as well. I bought another car. It was a car I knew of locally, and I knew the guy had done a ton of work to it, and every time I saw the guy I would bug him and ask 'Where is that fancy car of yours?'
So the story is he had done a bunch of work on this car, spent good money on parts, and used it to tow behind his motorhome until his wife got a crossover that was easier for them to get in and out of and then the car sat, outside, unloved, for 3 years, until last Christmas when him and I were able to strike a deal on it.
A bit rough around the edges, but so very worth it...

1994 BMW 325is In Maderiaschwartz with (according to the VIN) Mtech suspension package.

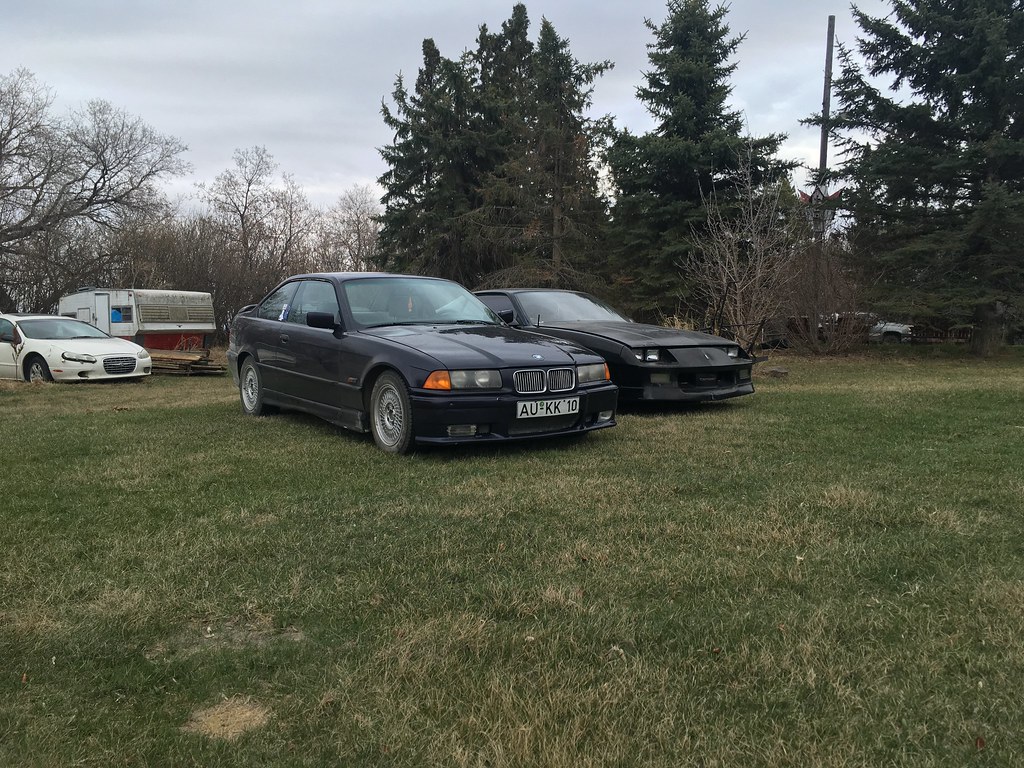
It was, rough in places. Gorilla tape holding up the broken side skirt, gorilla tape holding the side mouldings in place, complete 90's knock off M3 body kit (which I am fixing the side skirts to put back on yet) and it came with a set of like new winter tires on the original 15's and a set of 17" MOMO Arrows that need new better sized tires.

Fitment is good (aside from wheel gap, but that's going to get sorted) because these wheels have apparently lived with the car since new as far as we can determine, previous owner got them when he bought the car and he purchased the car from the second owner who also got them when HE bought the car.
Now, given how rough the exterior was, and the very aged interior leather, why would anyone want this car?
Well, sometimes it's what inside that counts...
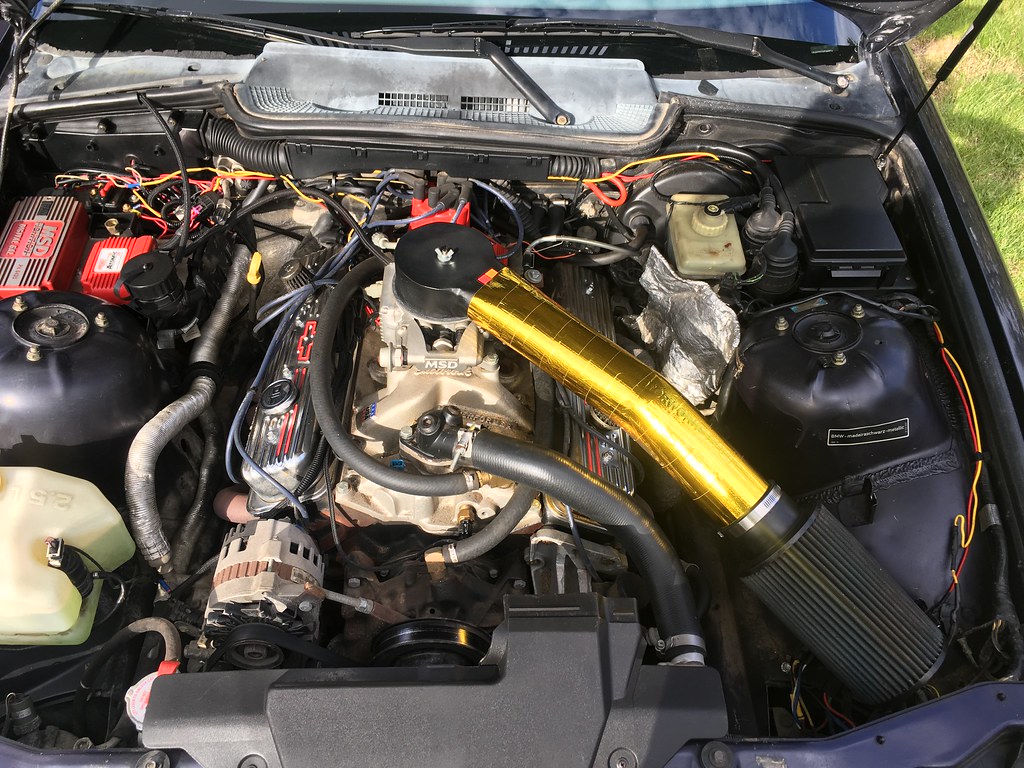
GM Performance crate 350 small block (rated 350hp/380lb-ft)
MSD Atomic EFI
Edlebrock intake
Starts, runs, drives like OEM for the most part. Needs some exhaust work, and a few more enhancements to the rest of the car to make it a lot more fun, but the plan was to just enjoy it and drive it and have something to drive that kept me sane while I worked on getting the intrepid back on the road.
But there is always a but...

Wildlife suck. Thankfully, I only tagged a yearling on my way to work one morning. He was full stride when he came up out of the ditch so he missed the bumper but he caught the headlights.
Dragged it home and started pulling parts off it,


And thanks to luck and some good friends I was able to source some used parts locally and from Pelican, eBay...


And she was back into mostly one piece.

Still working out the kinks and making revisions to a few things that were done questionably during the swap,then I can go back to making improvements to the car overall
Also, for used parts I picked up these

So I will be throwing these into the car closer to spring, and she told me she wasn't able to get her coilovers as low as these springs had her coupe, so I am looking forward to *finally* having a low car as a daily.
But I will continue to update this space with Intrepid content as I get stuff uploaded to Flickr!
Thanks for stopping by!Leave a comment:
-
Thanks. By this weekend it should be cured enough for me to go in and start the reassembly part of the car, get it ready to bring home to continue working on itLeave a comment:
-
Oh man, that turned out great! This is a beautiful color good work! Can't wait to see it assembled and drivingLeave a comment:
-
So, there's paint on the car now...

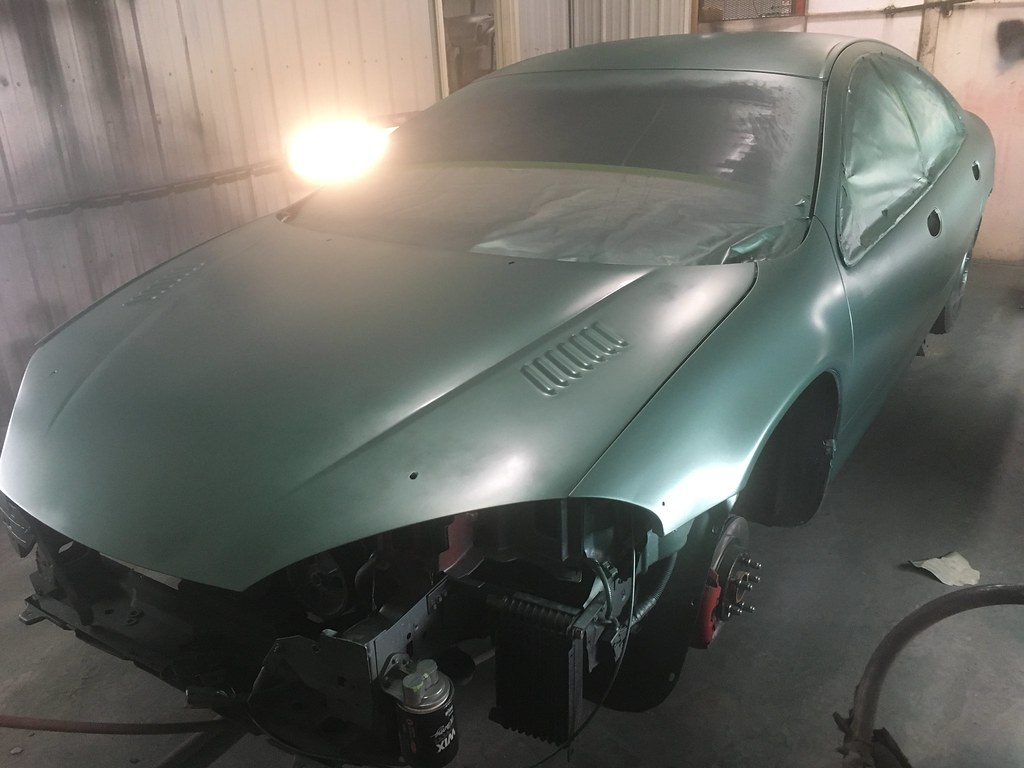

Looks a lot better with the clearcoat tho...


Now comes reassembly....Leave a comment:
-
Thank you! Next updates will probably be doing some interior work prep. I want to change out a lot of the fabric to a nice black and red in a durable fabric, may do something like the factory houndstooth style, but in something durable and nice. Its a deep hole I'm in so may as well make the best of it right?Leave a comment:
-
SOOOOO happy this car and you are still around and at it!
Sorry to hear about the life situation ... but that's life sometimes.
Excited for more updates!
Also, pro tip: for more KWs you should put lug caps in bright yellow or green
Leave a comment:
-

I'm back after a long hiatus, life went sideways and the car went into a hiatus effectively. Bad vibes happened and needed to turn away for a bit. But some parts arrived!

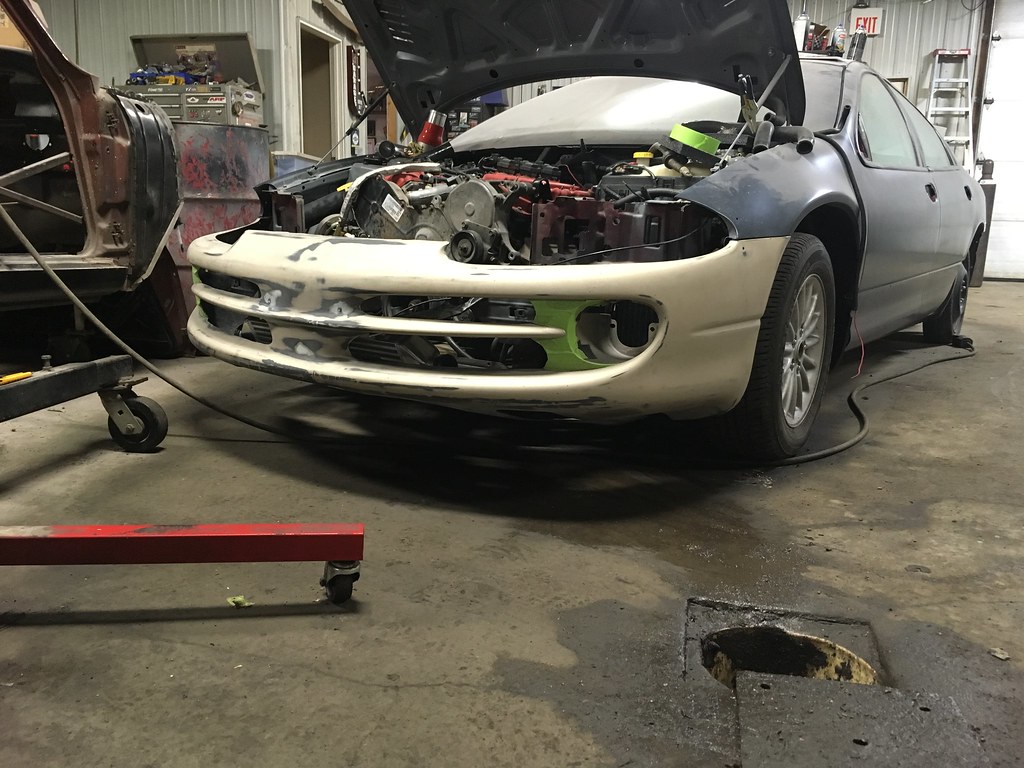


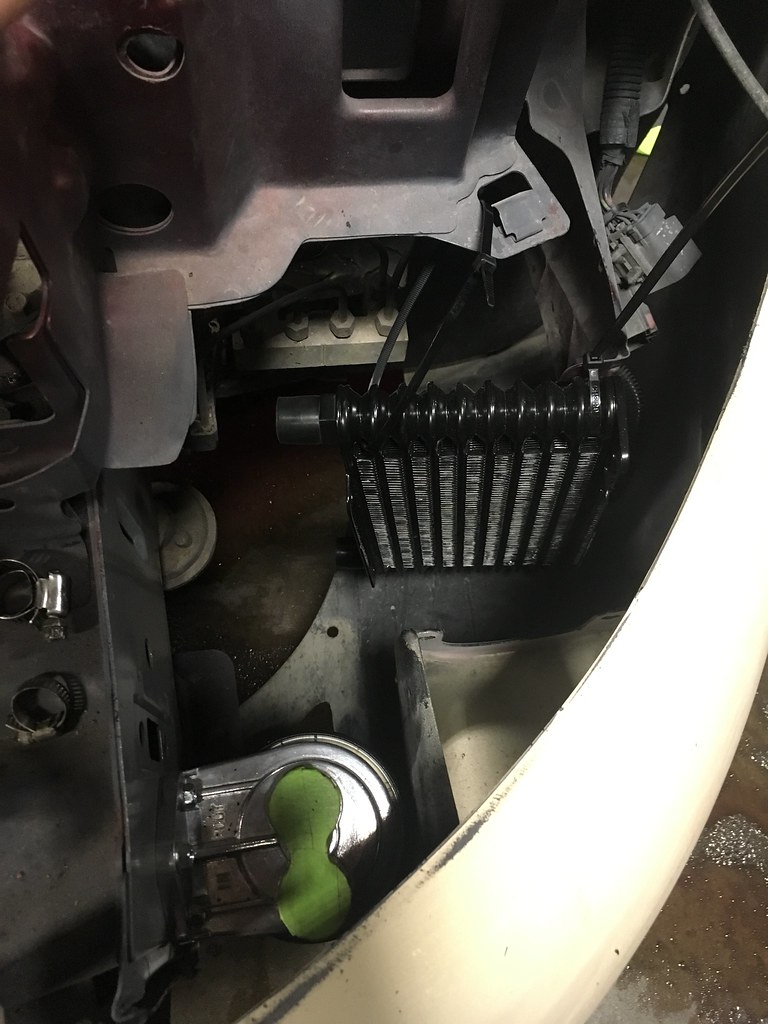
It's a tight fit, but I am really happy with it. I need to make it work yet but I am thinking some mounts on the bottom to hold it rigid will work. Also want to 'duct' around it to help the air passing through it to also go throw the rad, which may be a bit tough when I get all of the necessary piping in place. Speaking of piping, there may be some more hackery happening to the engine bay to make it fit but I think it'll be worth it...

Won't use the silicone tube to make the straight and I may use a 45 instead of a 90 there, need to make that area larger for piping to fit through and then determine the location of the throttle body and custom plenum before I get to that point tho, I think it should work, the straight section will 100% be gold wrapped going past the turbo to help prevent radiant heat making the intercooler a moot point, also looking at a turbo blanket to help keep the temp IN the exhaust.
I also needed to replace my old and failing engine mounts, so this happened...

There is a really cheap 'glitter' done on top of the red that is near impossible to get on camera, but should pop nicely in the sun when the colour is on as well.
Now I just have to finish up some engine bay reassembly, and finish up my brake job I started the other day, I really needed to change the brake fluid...

And decided to paint the calipers in red as well because that's worth at least 5kw right?
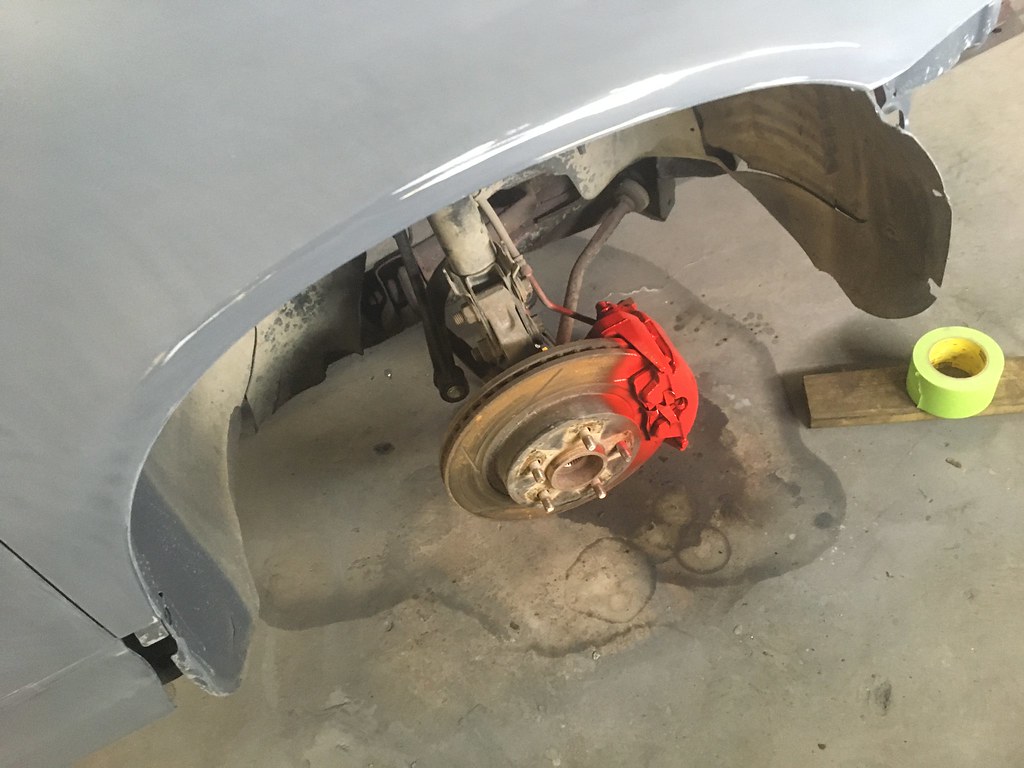
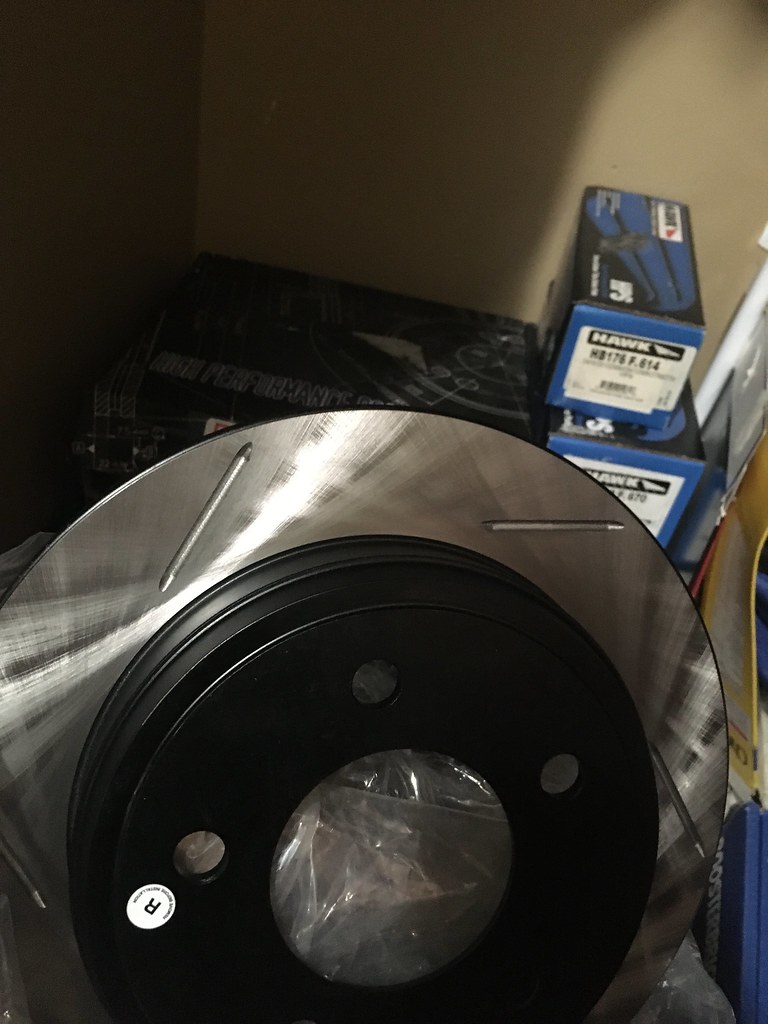
I do have fresh pads and rotors to go on then I can throw the storage wheels back on and continue the slow process of reassembly.

And that brings this back mostly up to date, I have made the decision to forgo the Dominator setup right now, I really wasn't happy with how things were getting rushed and forced into place. And the routing of wiring was getting really ugly to simply be in a 'running' state. I will still go Dominator, but later. I've watched a lot of Project Binky and I want to do it right once, even if it means it will take longer overall. Right now I want to focus on 'running' and 'painted' so I can enjoy the car since this will be the third Christmas coming up since I started down this path and I was originally told 'be done by Christmas'.
Since I started this painting project I have lowered my Colorado (2/3 Belltech kit), got my Camaro running and driving, and bought a new to me car, which I then wrecked and then fixed and have been piling up parts for a few upgrades on that as well, maybe I will make a separate post for that car. It's not nearly as obscure as an Intrepid tho.Leave a comment:
-
Bumper is held on by about a dozen of those plastic push clip and two bolts into the fender at the corners. I'm going to run 2 sets of the bumper quick release per side on the fenders, and some Dzus fasteners under hood where it attaches to the upper rad support. The under side I need to develop a system for it, maybe like a hook and latch or more dzus fasteners. Also still have the brake ducts that attach to the front subframe as well, which will probably stay using plastic push clips because of the size of the holes.
As for the transmission, presently rebuilding it, and going to just run OEM spec clutches in it, hopefully it will survive for the most part, going to tell the Dominator its a 4l60E and control shift pressure and gives us the ability to then also tune boost per gear, keep it at a conservative 7psi in first gear because the shaft that everything rides on it freaking tiny!! Like I don't think its an inch in diameter, so lower boost in 1st will hopefully keep that alive. And then I can push for like 15psi in 3rd and 4th for top speed runs. It wont be a massive power house, but we haven't even touched the engine internals at all, and its at about 320,000kms on the engine.Leave a comment:
-
Always good to see this thing.
Looks like you tucked a lot behind the bumper like I did. Some quik-latches and/or quarter turn fasteners are a good option to have it off in seconds. I recently put some on mine so I can access the IC pump/heat exchanger/oil cooler etc... easier. I can have it off in under a minute now, no tools.
I'll be more interested to see how you make the transmission live with the power.Leave a comment:
-
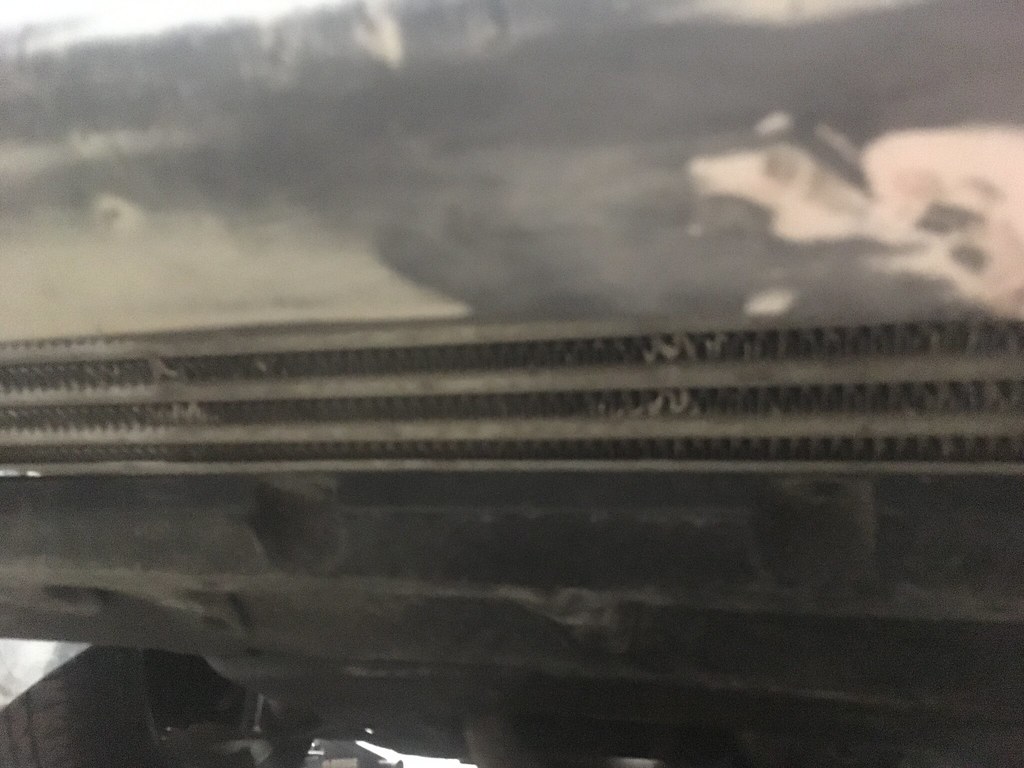
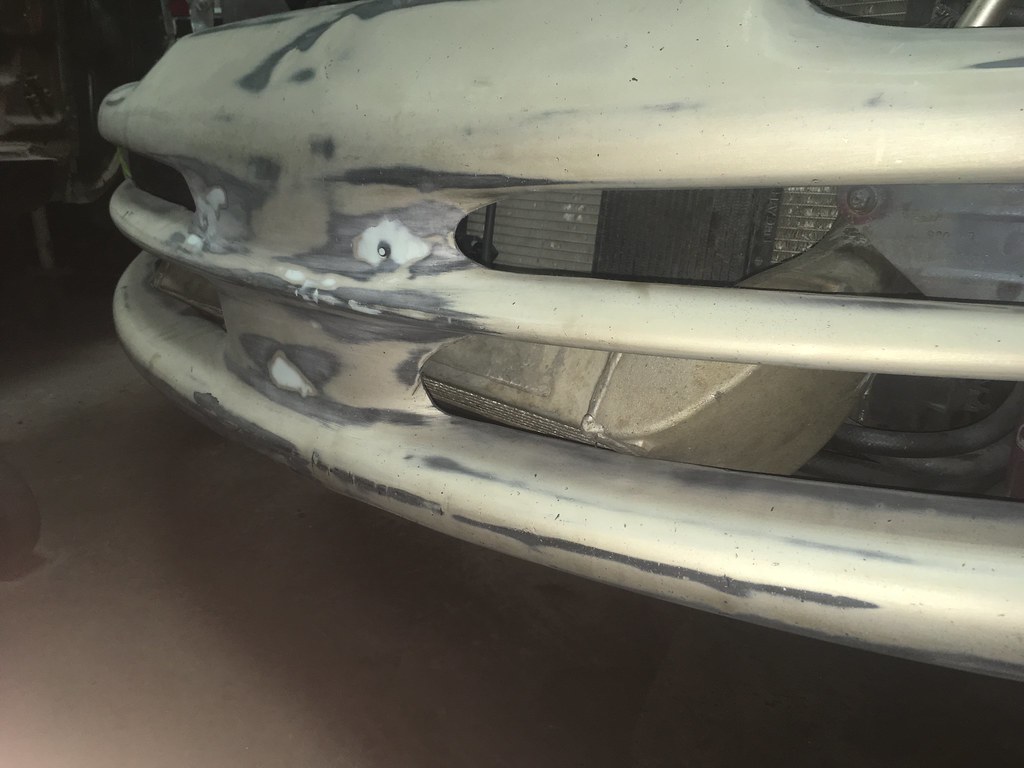
More work happening, Test fit the SRT4 intercooler to see. Going to be using a different intercooler that's a little bit smaller tho. Took inspiration from rotary's and V mount setups because of the shape of the bumper.
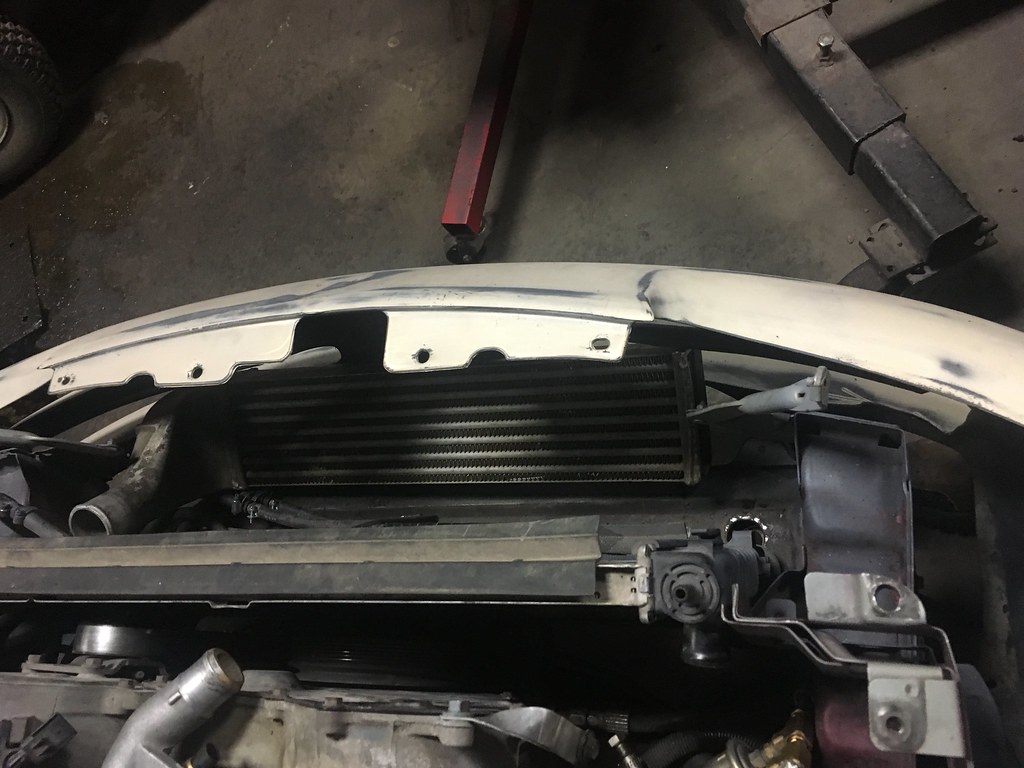
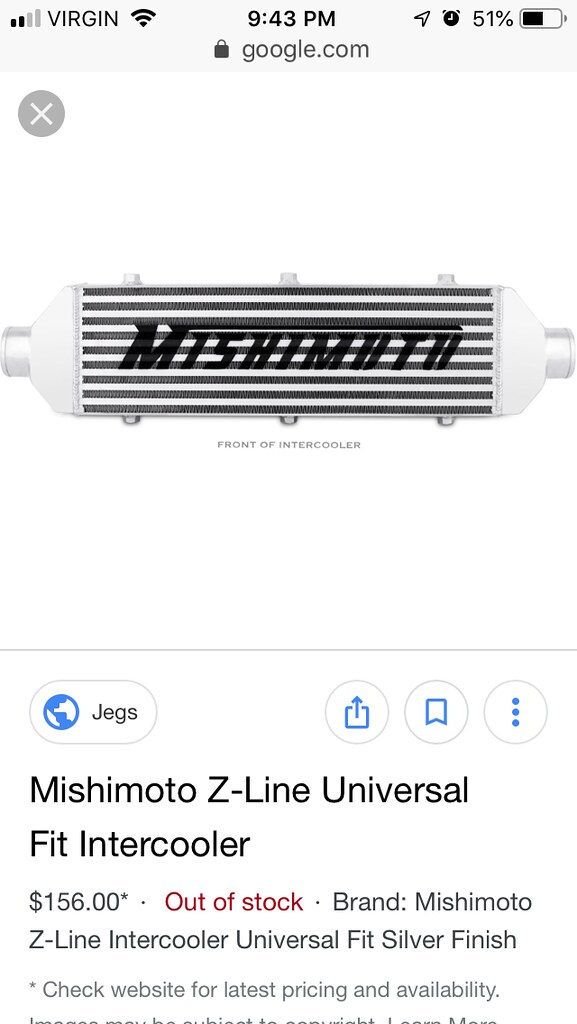
And plans are to go with a Mishimoto MMINT-UZ
Also made the 'executive decision' to relocate the washer fluid reservoir into my trunk and mount an oil cooler and remote mount my oil filter to the area behind the drivers side fog light. Also going to turn the fog light into a 'funnel' for the oil cooler.
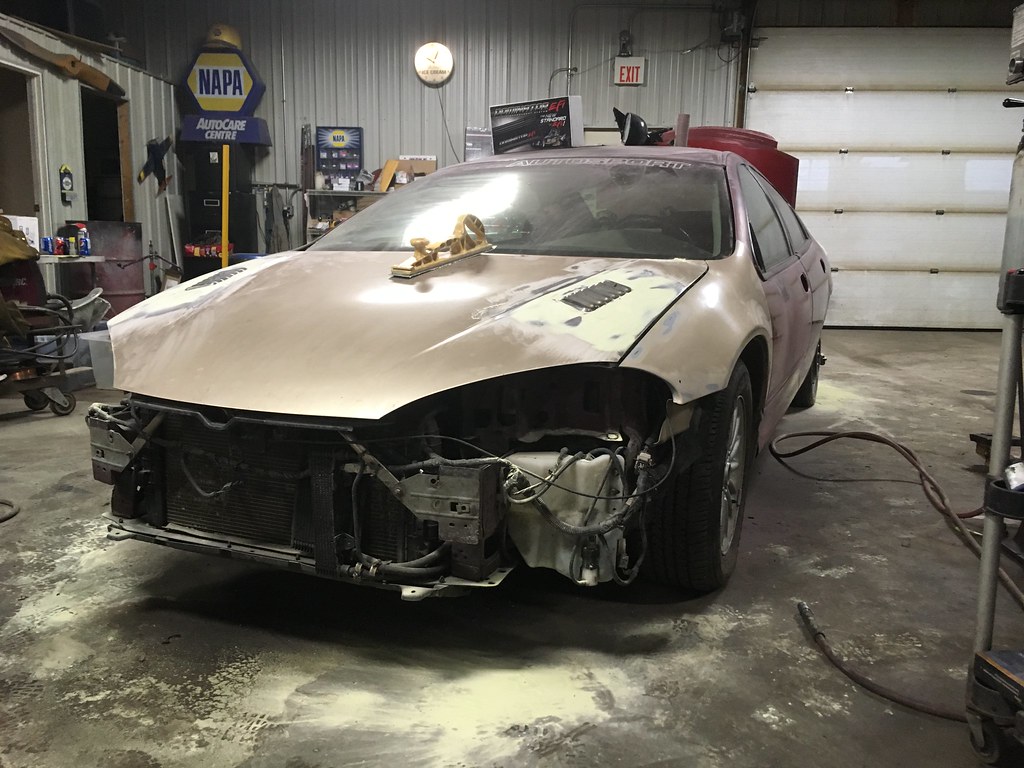
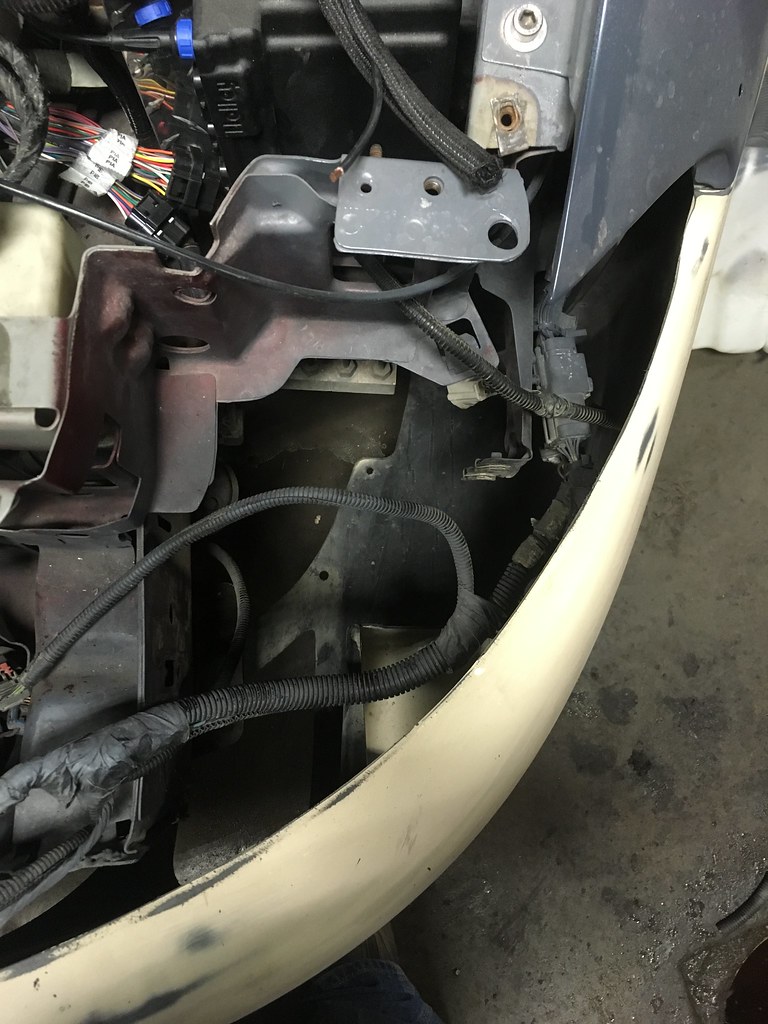
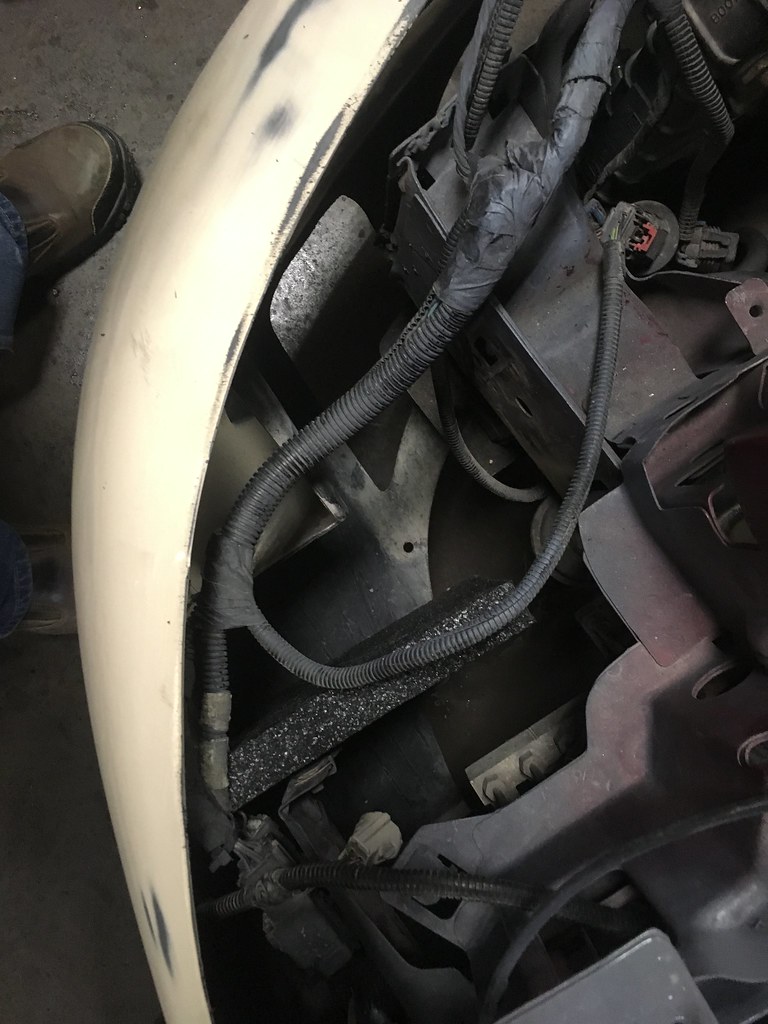
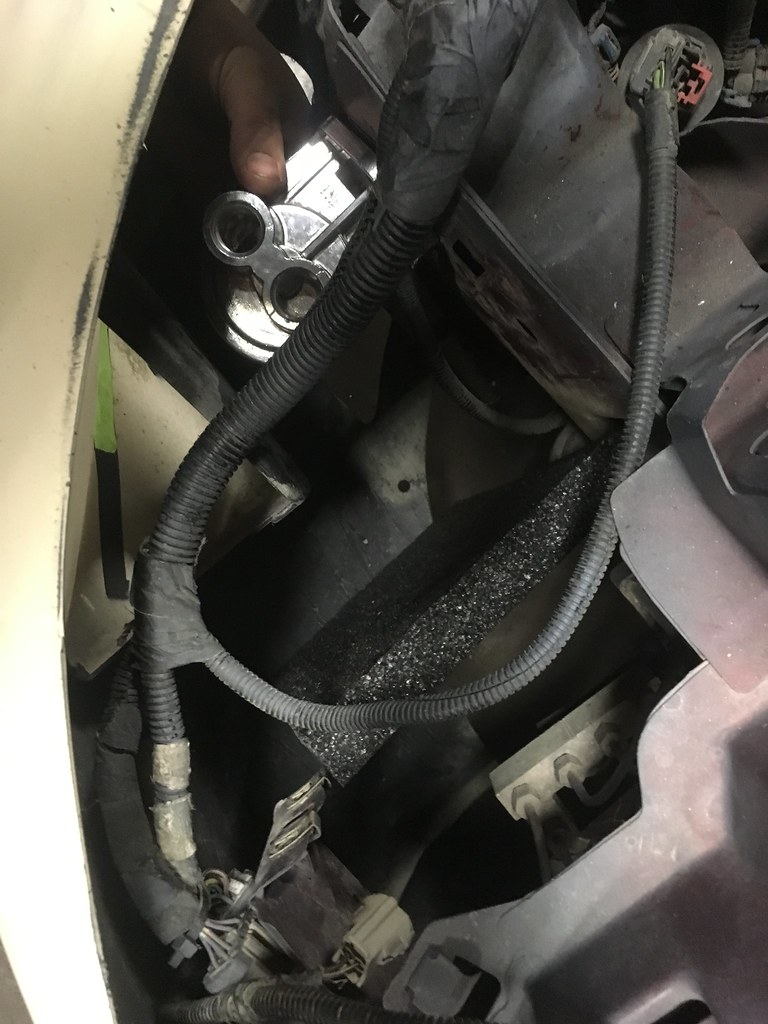
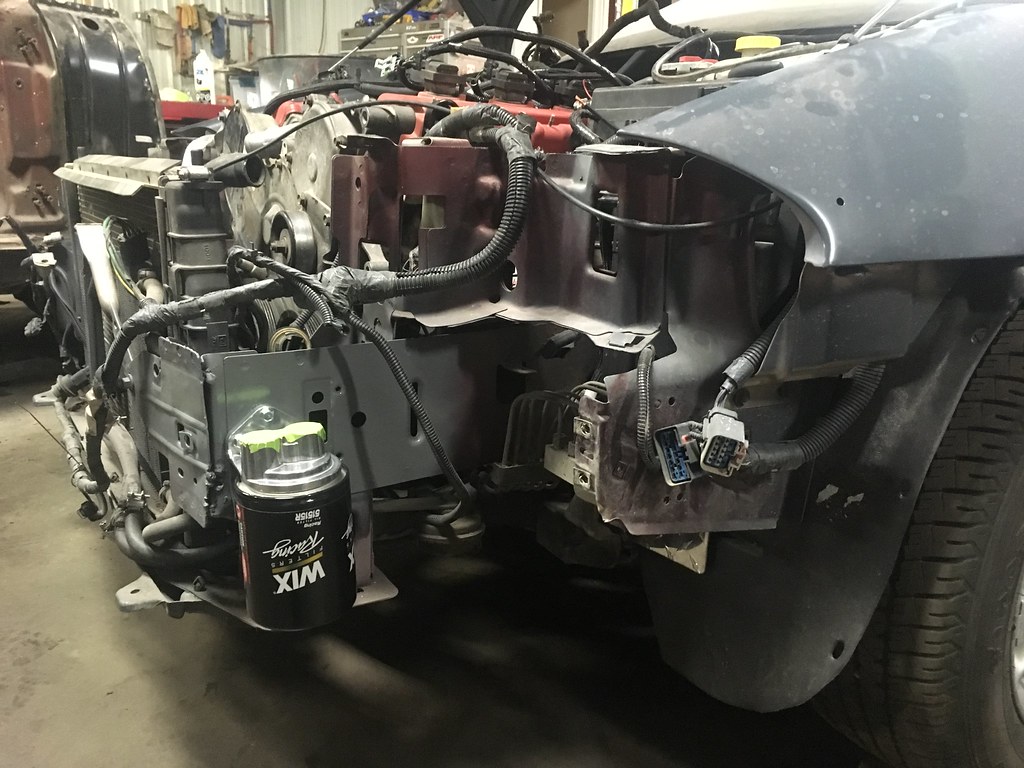
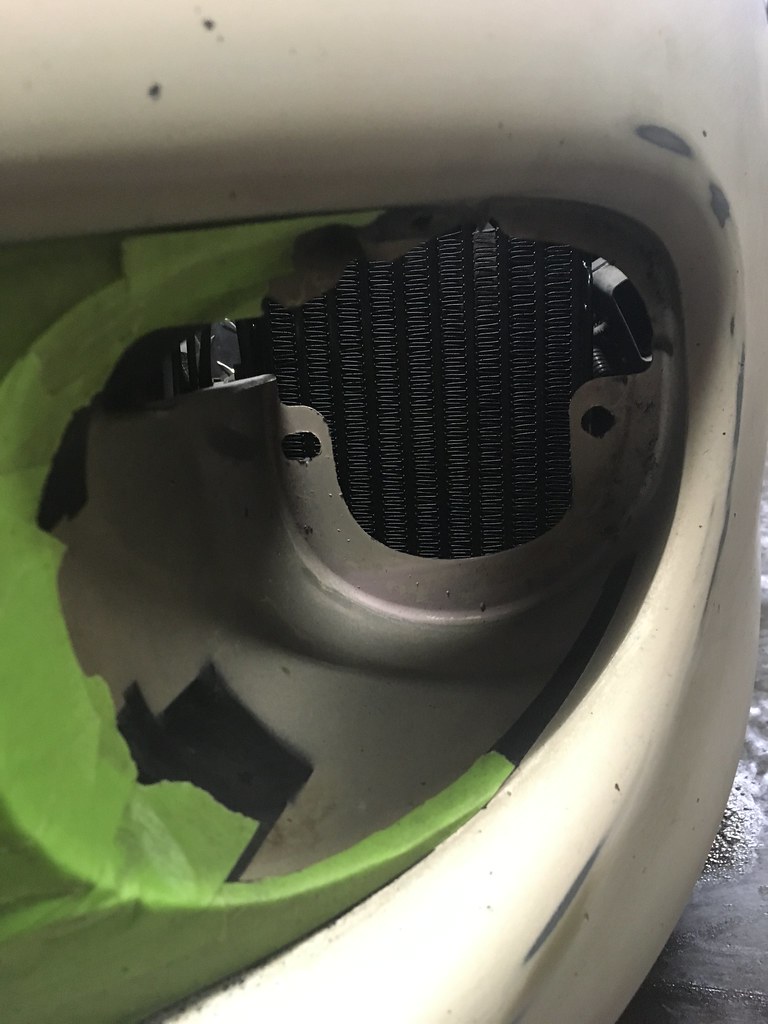
Still need to mount up the proper bracing to hard mount the cooler, then route in the hoses and such. The downside is now to change the oil filter, because of the brake ducts and the hydraulic hoses, I will need to remove the front bumper. Which is fine by me, I will be making it easier to remove, and with plans for adding a functional splitter later, an easy to remove bumper is fine by me!
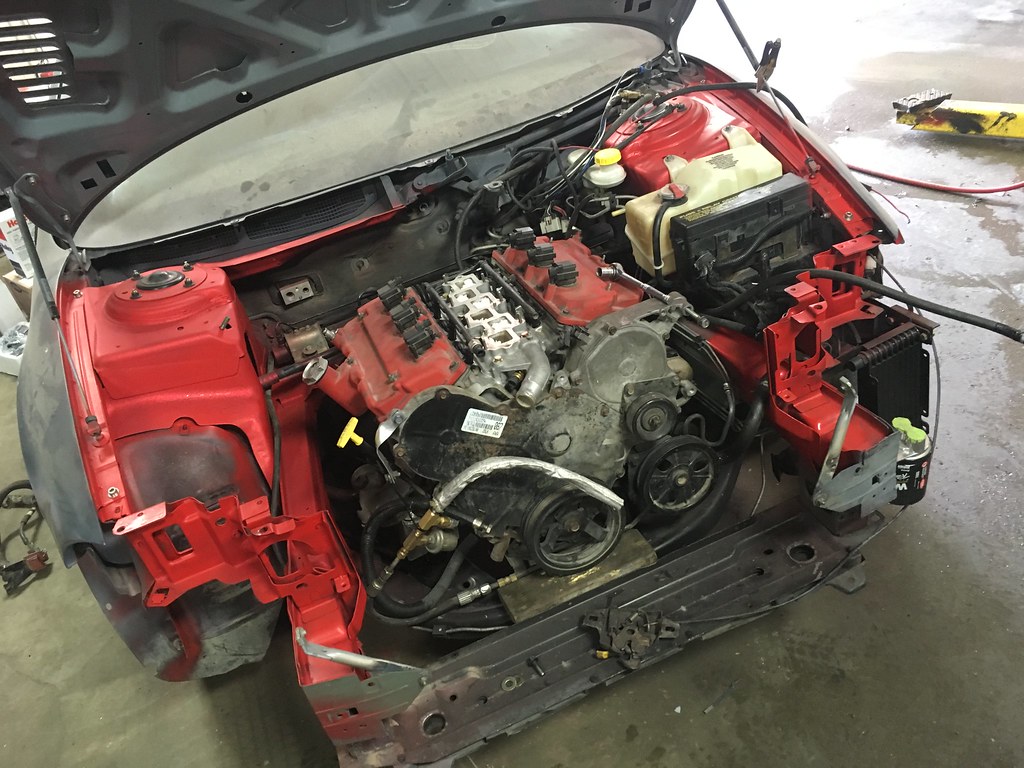
And that's about it for now, I need to pull the engine soon so I can replace the very worn out engine mounts and give the bay an extensive cleaning to gets years of grime cleaned out. Wiring is almost complete, need to finish the intake plenum and then wiring will be easy to finish, and making the engine bay cleaner will make finding future leaks easier. Transmission is on the bench to be rebuilt, then is all just bolting things back together and getting ready for more sanding, more body work finishing and then finally paint and the final reassembly!! I should really do something with my door panels to make them look nicer...Leave a comment:
Leave a comment: