Announcement

Collapse
No announcement yet.

Chase's 73' Merc w108 Build Thread

Collapse
X
 
  • Filter
  • Time
  • Show
Clear All
new posts

  • Schmaudi
    replied
    Got some more done on Thursday night. It's pretty much stripped down to where I need it to be. I just need to remove the trim on the doors and we are in business.

    I was going to stick with the stock headliner but, it had some staining on it and to get the excess glue off from the front and rear window I would have ended up damaging it anyways so out it came. Haven't decided on material/color yet but I have some ideas.


    The aircraft stripper really stepped up to the plate making my life so much easier.

    Ended up getting the whole rear quarter stripped, the drivers side of the rear, and the drivers side of the roof.

    Really happy to see how clean the panel is.


    Under the filler in the front of the rear wheel it turned out to just be a little dent on the fender, not even close to as bad as I thought it was going to be thankfully.


    Found some filler on the rear, little more work but shouldn't be too bad.


    Also got the hood and trunk lid done for the most part. They still need another coat in a couple spots before I sand them.


    More to come very soon!

    Leave a comment:


  • catnip
    replied
    That parts car looks cleaner than my W108. Wish you were closer, I'd say snag what you want and sell it to me, but it's not a good time! Keep up the awesome work!

    Leave a comment:


  • Schmaudi
    replied
    Also let me know if there is anything that you W108 guys need. I'll give you KILLER deals you just have to cover the shipping. And when I say killer, I mean dirt cheap compared to ebay or any other place on the web.

    Leave a comment:


  • Schmaudi
    replied
    Well I was at the hardware store and saw the paint stripper. I said what the hell so I picked up a can just to see what it was like. Unfortunately it was not the Aircraft Stripper I wanted but I wanted to play around a bit.

    I ripped off all of the rubber in the door sills and weather stripping and decided to try it on there first. It work exceptionally well.


    Little sequence showing it working.


    Next I tackled the trunk lid, and the rear drivers corner. I had a funny feeling that the rear of the car had been redone at some point because of how clean the trunk is and correct I was. What a pain in the ass. Not one but two, maybe three layers of paint and primer.


    I'm really happy I decided to remove all of the paint instead of just spot sand. I'm finding things that would have pussed probably in the first year after it was repainted.

    Some filler and pretty fresh rust on this wheel wheel.


    I also cleaned up one of the rockers as this is the section that I am most concerned about as far as rust wise goes. This is always the spot that they deteriorate the most on these cars. This one loos far better than I was envisioning before I clean it up. It will require minimal work. Now the other side is a different story. No pics of that quite yet need to get it cleaned up. But it looks pretty ugly...
    I also finished tearing down the interior. That was very very tricky. Putting it back together will be quite difficult I am thinking. Lol. The headliner/sun visors are still in these pics but those have been removed as well to be redone, I just haven't uploaded the pictures off my camera. Some of the nastiest shit I have ever encounter came crashing down when I pulled that sucker out.


    I also tested what I am doing to use on the carpet portions of the car to make all of the blue black. It worked damn good.


    I also wanted to see how chrome looked after some polishing. Just did a couple parts for testing as I will have to compare them against the pieces on my parts car to see which ones will be used on the finished project. Not the best pics but you get the idea.

    Before.


    Left side after polish, right side before polish.


    Also did one of the top upper bumpers the other will need to be replaced as it is bent pretty badly.


    Right side polished, left side not polished.


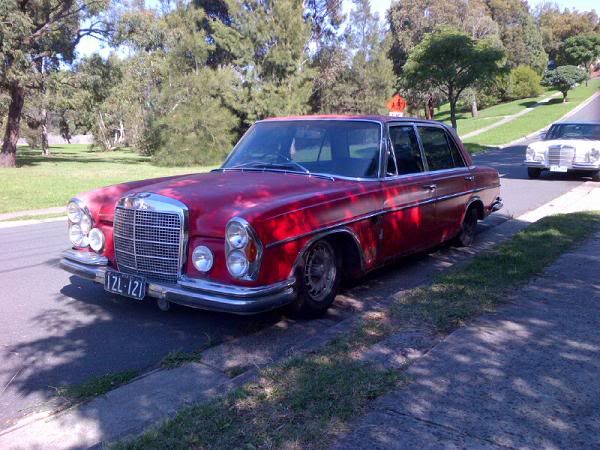
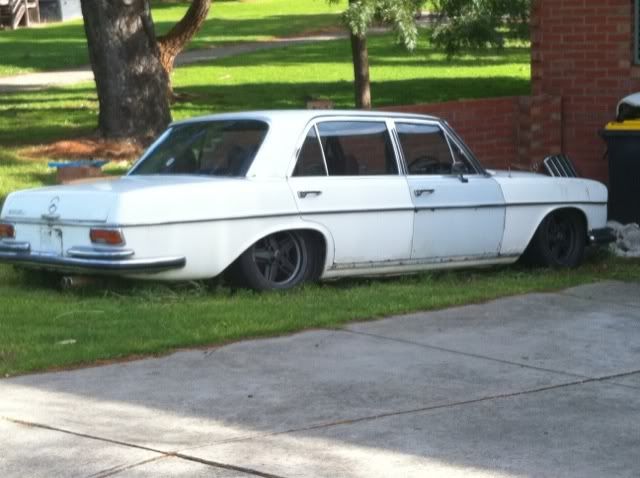
    Here's a sneak peek at the parts car I will be picking up shortly. Has all of the glass I need, trim, bumpers, and other minor things.


    Some of my parts of hardware/parts. I am so glad that I decided to do this. I almost wish I would have gotten a little more OCD with the organization part of it but everything is labelled and with the right group.


    Today I went and got actual Aircraft stripper, I will be hitting the rear quarter and the trunk lid that I started. Hopefully it will work a bit better than the other stripper I bought first. Over the next week or two I plan to get the entire car stripped then assess the body work that will need to take place before painting. I decided that I will be doing a gloss off-white/creamy color to match the interior on the roof and have no fricken clue what color to do the body. I'd like to keep it neutral but it cannot be any silver, grey, or gunmetal type color it will not go with the the rest of my theme. Any ideas folks?
    Last edited by Schmaudi; 09-26-2012, 11:27 PM.

    Leave a comment:


  • Raarasutra
    replied
    God damn, I'm in this for more! Subbed!

    Leave a comment:


  • Schmaudi
    replied
    I got a lot done over the past few days. Two days ago, I pulled both the passenger doors off. I was dreading this because of number one the power locks/windows, and number 2 because both of the windows were broken out. It ended up not being too bad, but it was pretty tricky to figure out how to get all the wiring free. But overall it was a success. Then last night I pulled the drivers doors off. This went MUCH smoother the second time around. Took me less than half the time to do the drivers side. I also got the window trim off that was glued onto the body above the side windows. Heat gun FTW.


    After that I decided to tackle the interior a bit more. I hadn't planned to go this deep into the interior but. I need to get rid of all the blue in there so I started ripping shit up.

    Got the rear seat out, very happy to see how clean it was under there.


    Took out the rear speakers and panel that is right under the rear window.


    Then the part I was most looking forward to... The dash

    Let's just say when they put the dash together that they did not want you to be able to take it apart easily. I had to basically take a part the entire gauge cluster to get a few of the connections out of it, and the way that some of the knobs and lines were run, well I just had to cut some shit. Nothing major but I couldn't think of any other way. I didn't get all the way done but I got a good portion of it removed. Took off the lower dash, upper dash, the cluster, the steering wheel (my pride and joy), the glove box, ashtray, A-pillars, and some of the door seals. After that I had to call it a night.


    Also found out why my A/C wasn't pushing much air. Lol.


    Tonight and tomorrow I am going to finish of the dash and possibly start the color transformation in the interior. I also need to get all of the trim off the door sills. The headliner will need to be redone as it is stained so I may play with that a bit. Anything that is blue will be going black. The carpet, upper dash, lower dash, steering column, Not sure on the materials quite yet.

    Also got these pretty things in the mail. :-*


    After I get everything off the car I will see exactly what I am working with body condition wise. I'm going to pick up a aircraft grade stripper and get the entire car down to bare metal. Then I will make the determination as to what extent I will need to repair the panels.

    So much to do! Ah!

    Leave a comment:


  • Schmaudi
    replied
    I was able to get to the other side of the car as well as the rear over the past couple days. Made quite a bit of progress. I am actually really surprised how quick everything is coming apart. Amazingly I have only sheered off one bolt. For a MN car this thing is extremely solid.

    Driver side fender off.


    My state of the art exhaust system with the most expensive hangers money can buy.


    The progress on the rear of the car. Removed the bumpers, trim, tail lights, blinkers, and completely cleaned out the trunk.


    This came as a bit of a concern to me. This is one of the lines that runs through the evap system. It was smashed under the screw and trim causing it to crack. I believe that may have had something to do with the idle being off.


    Some of the parts parts off the rear end.


    I figured I should probably give my cousin his parking spot back in the garage so I re-organized the shit out of everything.

    At the end of the night I decided to start playing with some of these chrome bits and see whats underneath all of the oxidization and crud. It's amazing what a little polish and elbow grease can bring back to life. More to come on that, I haven't taken any pictures.

    I also got the itch to buy something today and made my first purchase for my suspension, two 220psi chrome compressors. Also also acquired some bags that I have to go pull off a car in the near future. If anyone has any spare air stuff around let me know.

    Leave a comment:


  • chris7
    replied
    looks great look forward to watching this

    Leave a comment:


  • Rubens
    replied
    Sub'd, going to be great. Lots of pics please!

    Leave a comment:


  • Schmaudi
    replied
    Originally posted by catnip View Post
    It's always a nice feeling to start a project with new tools!
    Absolutely. I ran into some issues last night, but with everything I got today is going much better. Will update with pics from tonight's progress tomorrow.

    Thanks for the PM btw, excellent idea.

    Leave a comment:


  • catnip
    replied
    It's always a nice feeling to start a project with new tools!

    Leave a comment:


  • Schmaudi
    replied
    Update time! I've been really busy with starting school and at work but I have had a few days to play with the Benz.

    Well I was planning on working on the motor and replacing all of the injection lines but unfortunately that just was not possible. When pulling the lines I realized that the lower seals to the injectors were pretty janky, so I decided to order some new ones. Finally on Friday I got the package at work. The package seemed quite heavy for 8 tiny rubber seals. I opened it and much to my dismay they sent me this....


    An idler pulley for god knows what.. Idiots.. So since that was put on hold until I receive the seals I just decided, screw it I'm going to start on the dismantling the car, the part that I was most excited for ;D

    The first thing that I told myself before I really ripped into it was organize, organize, organize, and photograph. Having never done something like this I did not want to try to put the puzzle back together blind folded. For every part I have been taking off all of the hardware and misc items associated with the part are going into ziploc's, labeled, and taped to the actual part that it came off.

    I pulled out the injectors and all of the lines associated with the fuel injection system and layed it out exactly like it was when it was installed on the motor.


    Here's the condition that the hoses were in. And this is a good one.


    Next I really wanted to start on getting the front end bare so I could start on the body work that the front fenders are going to need. They are really clean except for underneath where the headlights are. I have to come up with a solution for this, but I have ideas.

    I pulled the bumpers, headlights, blinkers, trim, etc.


    Then I pulled out the fender liner. Note: wear safety glasses when sticking your head anywhere under a car like this. The shit that comes off when you are doing something under there does not feel good on the eyes. Ask me how I know... Lol

    Another area that needs attention.


    Finally after fighting to get the fender off and not having luck I found one bolt holding it in. It was not easy to get at too say the least. It was on the the seam closest to the door jam 3/4 the way up the fender. And everything for the electric antenna was in the way. But eventually I got it, and off came the fender!

    It was a bitch trying to figure out how to get all of the headlight wires through the holes they were shoved through. Just took some patience and it all worked out.

    It actually is pretty clean under there, and this will make it way easier when it comes time for the bags.


    Trying to stick with the whole organization mindset I am laying everything thing out like it was while on the car.


    Today I decided I need to go buy some shit. And buy some shit I did... So much more than what was on my list.

    Figured it was time to get a big boy tool box, also got a sander, sanding supplies, utility light, misc tools, cleaning supplies, dye for the carpet, engine degreaser, some nice gloves, etc.

    Today/tonight the plan is to pull the other fender (all of the bolts are out except the PITA one), clean up the engine bay, clean & repair some of the parts I removed, get my work space organized, and have some fun. This is one of the most enjoyable things I've ever done so far, I can't wait to see what it looks like in a few months!

    Leave a comment:


  • superturbodiesel.com
    replied
    Low and classy

    Leave a comment:


  • V8Finny
    replied
    Nice purchase!!!

    No SLS on the W108s.
    The W109s did have full factory airbags though!!!!

    These cars are so light and 'chuckable', with awesome steering feel.

    Pull & clean the fuel tank.
    Pull the 22mm 'Sump Plug' in the bottom of the fuel tank...it's actually the first line filter.
    Blow air through the hard lines.
    Check you have clear flow through the 'return line' back to the tank.
    Check for mesh screen filters in the inlet/outlet fittings of fuel pump.
    Replace every rubber that you can.
    Get a price on NEW Injectors before you pay to 'sort of' clean the injectors.


    Try the 'Mercedes Classic Centre' in Irvine. California for price on parts.....you might be pleasantly surprised!!!!!
    You're right to go for another 40 years!!!

    Looking forward to see where you go with this project!!!!!

    My Benzs;


    Leave a comment:


  • lewda
    replied
    Hey man, awesome car! I love these W108's and im so glad to see so many people on here restoring and tricking out the old classic benz's, im am extremely jealous of the color and condition of yours. I am currently redoing a 72 4.5 right now

    my 72 280SE 4.5 [heavy w108 content]

    Originally posted by Schmaudi View Post

    Looks like you have some underlying body filler seperation and possibly a quarter panel that has been patched, cant wait to see what you do to this beaut!

    Leave a comment:

Working...
X