 Tweet
Tweet
Man, this is just so clean. Perfect!
-
-
-
Thanks dudes.
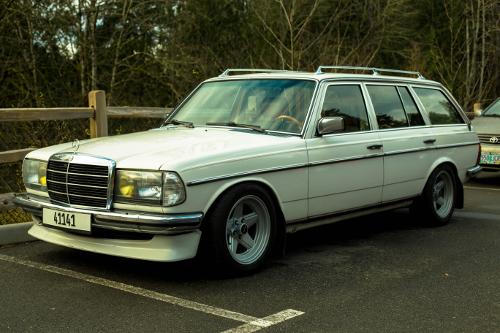
This is how it is at the moment. I have pulled out all of the interior, fenders, hood, in preparation for a full respray. motor is coming out soon as well to make space for some S38 lovin. Tho this is gonna take a long time, Picking up the engine in January etc.

I'll load a bunch of pictures later.- Instagram@jdjurhuus
 Stretchsaurus and Pokemon.
Comment
-
Alrighty then. Big update this time.
As you know, the car was rear ended. And It dented the rear left quarter panel, it also took out the light.
Picture of the crash.

So, I started looking for a rear tail light, and it only took me about 4months until i found one. Then i hooked it up, checked if everything worked.


Then it was time to start doing some body work. Pulled the car into the garage.

Here is a picture of the damage, lucky that the jeep she drove, was so high that it did not make contact to the bumper.

And one from the inside.

A few of the parts that i have, still some on order tho. A few i can mention are, two fenders, tail panel, foam for the hood, emblems, lists around the windows, gaskets, bearings, bushings, etc.

And there are a few troubled areas that need to be taken care of. This is of the front fender.

Corner of the front bumper.

Above the rear right bumper there is rust.

The rear right fender needs some love.

A fat guy sat on the hood, and it dented. It is kinda hard to see, but its right were the bmw emblem is.

Another one of the corner for good measure. This time without the bumper.

Started by removing the fenders.

And the other one.

The rust that was on the mounting surface.


After i removed the fenders, i started cleaning the rusted areas.

And the corner.

Removed the glass.

It came out in this condition

Then the owner of the garage, started to fix the dent, since I don't do body work. And he has been doing it for years, and is very skilled.

One of the reason i would never be a body repair guy, fucking hammer sound all the time.

Starting to take shape.

Meanwhile i started to drill out the spot welds.

We did a quick test fit, still needs a bit of work.

Since I'm a engineer on board a oil supply vessel. I'm home for four weeks and gone four, at a time, so i figured i would label all of the parts that I'm taking of. So I got a hold of these plastic zip lock bags and a pen.

And all the parts are labeled like this, "v/forskermur" meaning "left/frontfender" and in there are all the screws for it and parts.

Another reason I'm swapping out the fenders.

While i was bagging and tagging parts. He was working on the corner. Looking mighty fine now, remember there is no filler added yet.

Now that we both were satisfied with the corner. We went a head and started removing the rear tail panel. It involves drilling out a bunch of spot welds, and a few regular welds.

Almost gone. He said cars are not built like this at all anymore (bunch of regular welds on the inside, also the panels were "leaded, is that even a word?" together), if it was a newer car it would take half the time that it took us, German quality i might add. Now a days, cars would have around half of the spot welds, and be glued together, with this strong sealer.

Scrap metal.

Now police could see, if you were driving around with dead hookers in the trunk.


Just to be clear, this has been going on for a few days, not like we are working super fast and doing it in one day. The body work on this car is being done after he gets home from work. We started fitting the new tail panel.

I never stated why we are changing it. Well its because the old one was rusted through on some points weird spots, it was really odd.

I bought some products, that hopefully will do their best to prevent rust. the first two are sealers. the can is a strong primer, the tall bottle and the can next to it, are a two component acid primer. and the last one is a welding primer.

I added some acid primer to the metal spots, the ting it does is, it penetrates the metal surface, and "clogs/closes" the metal pores, were rust has been. and prevents it from coming back in that spot from the inside, after you have painted the car.

After i smeared the primer all over, i started drilling holes for the spot welds. I made a bunch of holes.

A test fit, with the new tail panel screwed into place. You can make out were the welds will be.


Then I added some welding primer. the deal with it is, you can weld through it, but it will not burn close to it. so you have primer between the holes, that you can't reach after the plate is welded back on.

Sorry for the shaky photo, but here you can see the holes and the welding primer, we used a screw in some of the holes to hold the plate close up to the lip of the trunk.

Tail panel welded back in. feelsgood.jpg

Hit it with some regular primer, we don't want no rust.

And test fitting the lights. The lower corners will be welded next.


And the bumper back on.


I'll post more updates later, got some pictures when we rolled the fenders, fixed a dent in the hood, and removal of the interior. Also a shout out to google chrome, for saving my ass. I acedently backspaced when i was more than half way through the post, when I hit forward, it all was still there.
-Instagram@jdjurhuus
Stretchsaurus and Pokemon.
Comment
-
Great progressComment
-
Thanks man
-Instagram@jdjurhuus
Stretchsaurus and Pokemon.
Comment
-
Nice progress! I really hope your keeping the colorComment
-
Oh! You're the guy with Patrick driving the e28! Nice to finally recognize the car in your signature! haha
Comment
-
good work.
Comment
-
Great work man. You would never have guess it was so rusty from the pics, looked so clean. Glad you're taking care of it now though, will be so nice when you're finished!
Comment
-
This makes me miss my car. Good work fixing it. I'm proud of you.Comment
-
Thanks man.Originally posted by Nico View Post
Thanks man. Yeah some of the rust that I've found, surprised me.Originally posted by Minuki View Post
You should not have sold itOriginally posted by willis View Post Thanks man.
Recap of page4.
This dent.
Got a little hammer action.
Then a little cutting was done.
And a little welding and test fitting at the end.
For more, check out page 4.-Instagram@jdjurhuus
Stretchsaurus and Pokemon.
Comment
-
Oyght, so i don't have any pictures when the lower corners were welded back on. But i have some after there was filler applied.
Lower right corner, welded and filler applied. Sorry for the shaky photo.

Lower left corner, here a section of metal was replaced as well. Due to rust.

A photo showing the work done on the quarter panel. This is not final yet, non of the bondo work is done yet.

And of course, if you noticed something from the last page. I like test fitting stuff, to make sure everything is correct. This is just him holding it in place.

Here is the old tail panel, it's standing vertically those two holes are for the bumper mounting. So all of this weird rust was under the bumper.

Here he is working out the dent on the hood. This was done about 5days ago.

Another view. A friend came by, so he helped me in removal of the heater core.

After he knocked the dent down, he applied a light coat of filler.

Sanding it down even.

And the hood was done. After this photo i applied some primer on the metal spots.

I bought two new oem front fenders. And of course they had to be rolled flat. Her he is, hammering them.

Before we started, i measured them. At around 8-9mm.

As mentioned, this was all done by a hammer. He went very slowly from one end to the other. after a few passes the lip was all the way down. The best part about it, is he didn't even bend the outside even a little bit. So its all oem looking and no filler was added. Can't ask for more than that.

And i had to measure again, a shitty photo i know. But its around 3mm now. So 5 to 6mm clearance was added to the front.

Then i hit them up with primer.

A little bit on the outside of the fender as well.

Here is a picture, where you can see the transition from rolled to normal. If you look at the top then downwards you can see the transition point. Big difference in clearance, fender was not rolled all the way down, to avoid the potential of it getting warped.

This here also was about 5days ago. I stated to take out the interior to check for rust. I labeled all of the wires as well.

Carpet out, oh boy was it soaking wet. And I know that means trouble.

I noticed a few places, three to be exact that did not look too good. So i hit them with a hammer a few times, and YAAAAAAAAAAAAY what do you know. Holes. And another blurry/shaky photo. this is the left front corner.


You can just make out were the hole is. Its by the wires.

That is pretty much were I am with the car at the moment. So tomorrow I'm either gonna start fixing the holes in the floor. Or removing the exhaust, so i can get better access to start sealing up everything in the rear and the front fenders. We will see what I'm in the mood for.-Instagram@jdjurhuus
Stretchsaurus and Pokemon.
Comment
-
You're making me want to go fix the dents in my wagon. Amazing work so far!Comment


Comment