Announcement

Collapse
No announcement yet.

1990 Mini Cooper Resto & Lows!

Collapse
X
 
  • Filter
  • Time
  • Show
Clear All
new posts

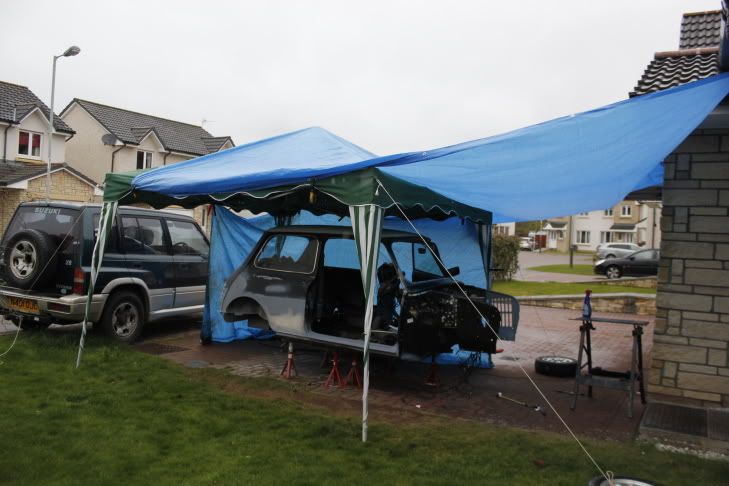
  • Got a little done today...didn't expect to find snow on the ground when I opened my curtains, but hey ho! That's Scotland for ya

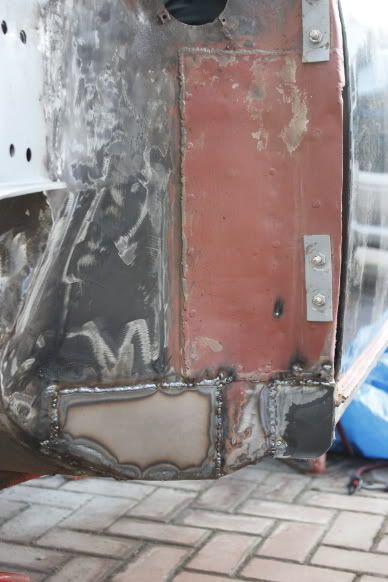
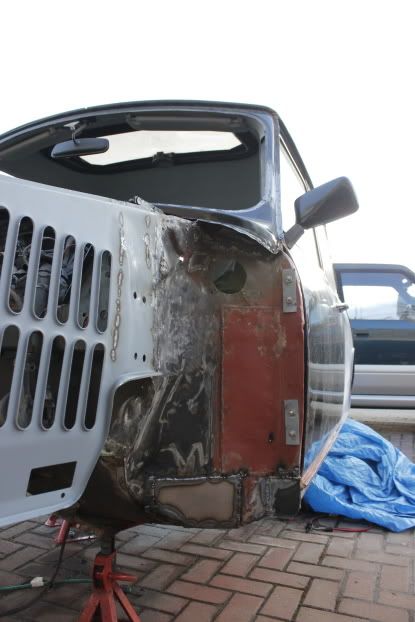
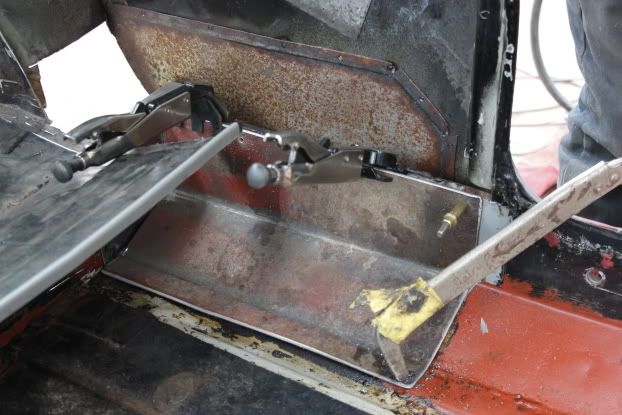
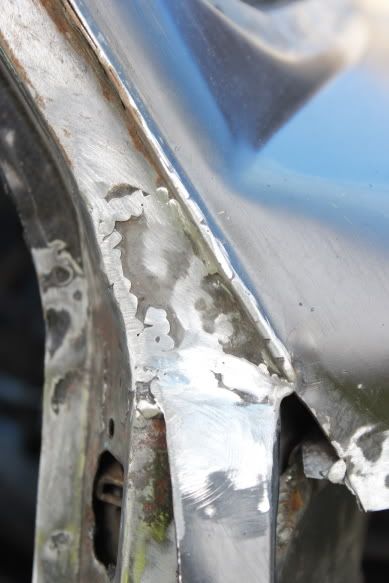
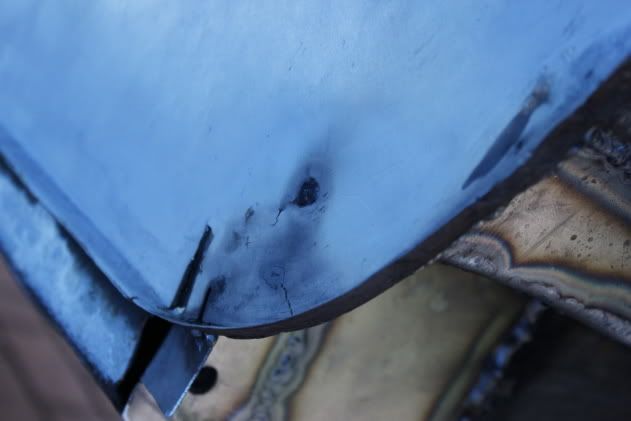
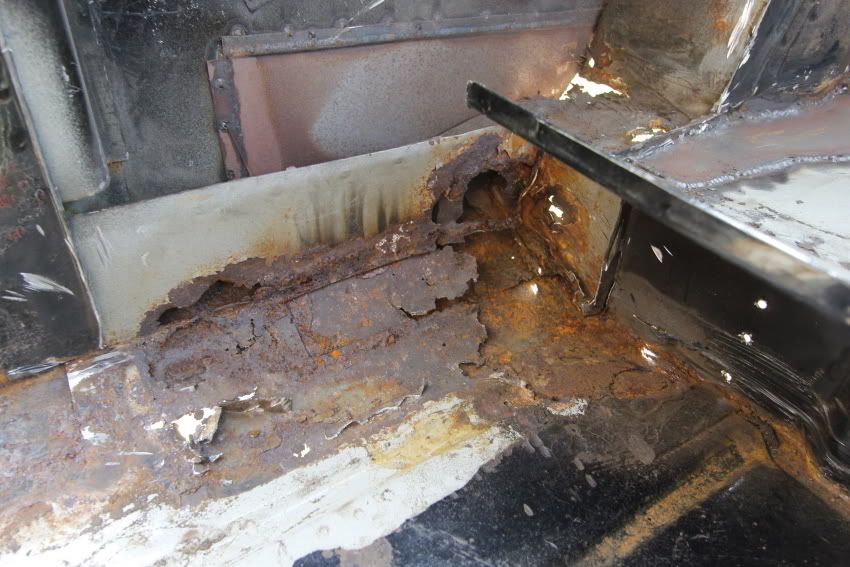
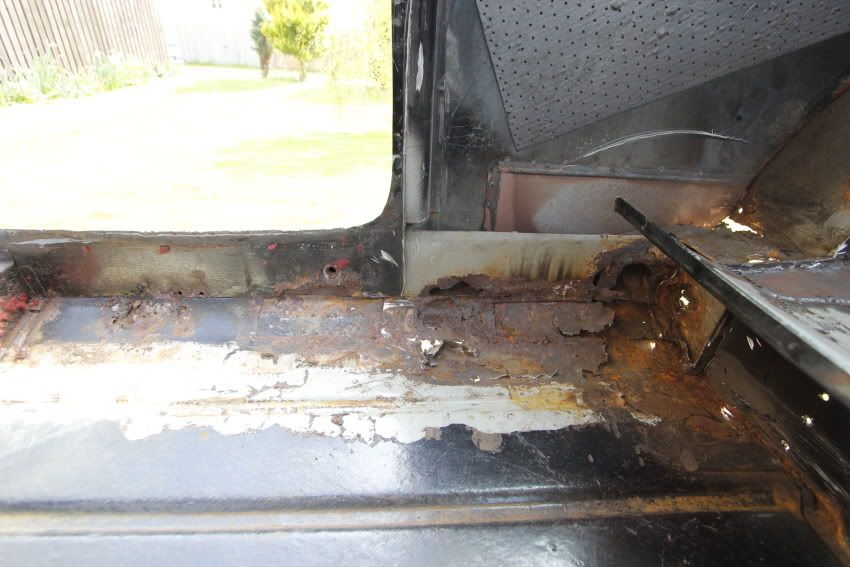
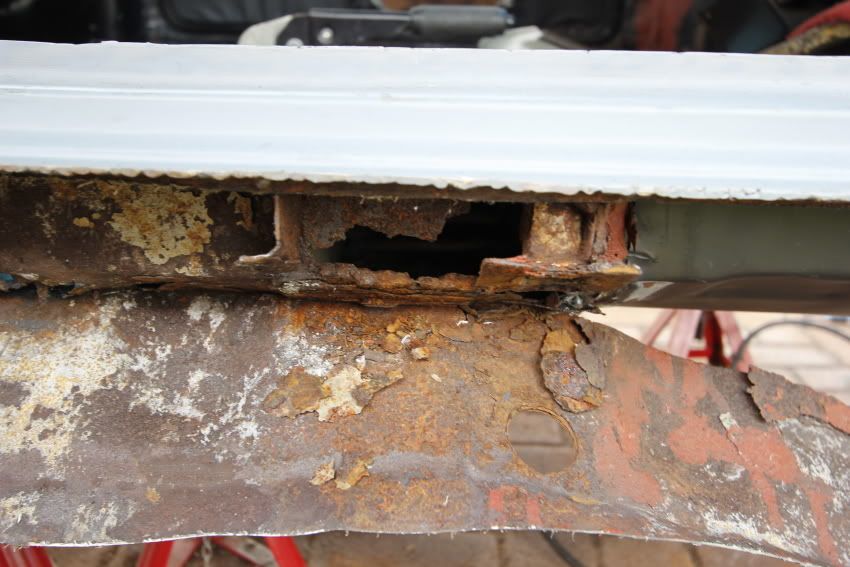
    Cleaned up the LH inner wing a little. Could really do with a new one, but I simply can't afford it just now, so we'll work with it and hopefully it'll be alright.

    As you can see, it's been previously repaired. Not too bad, but I've given them a good clean and they seem solid enough.


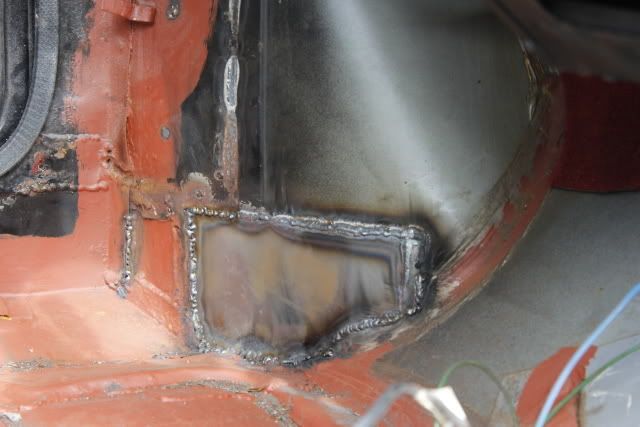
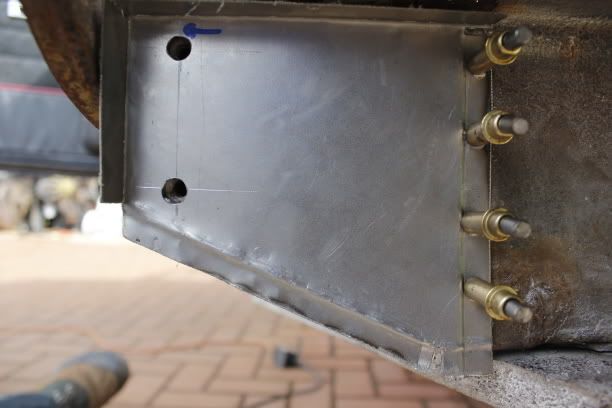
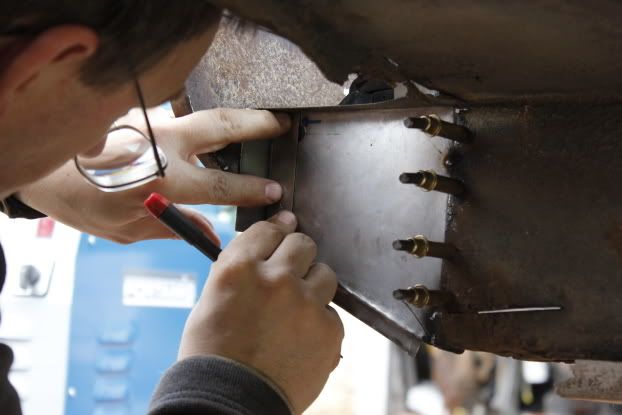
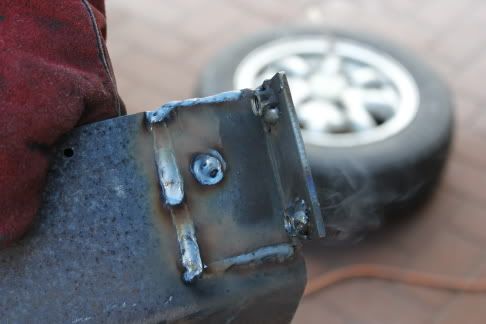
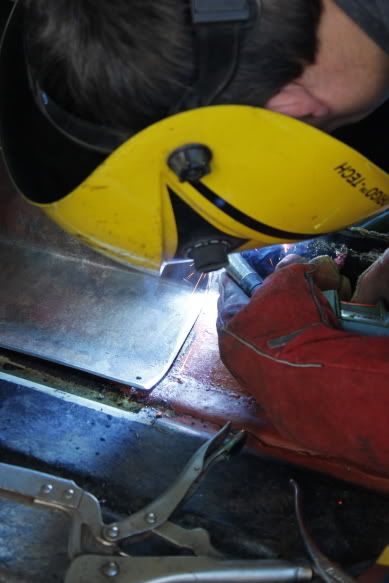
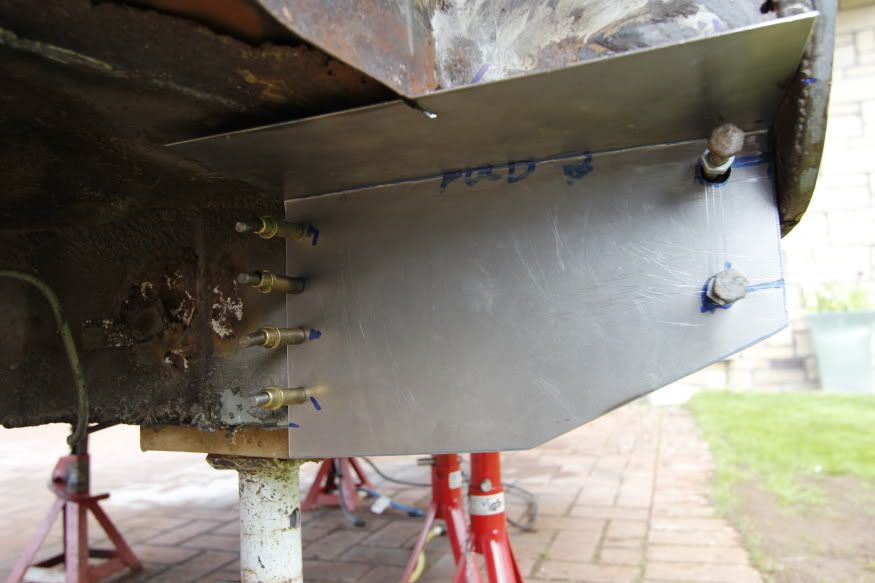
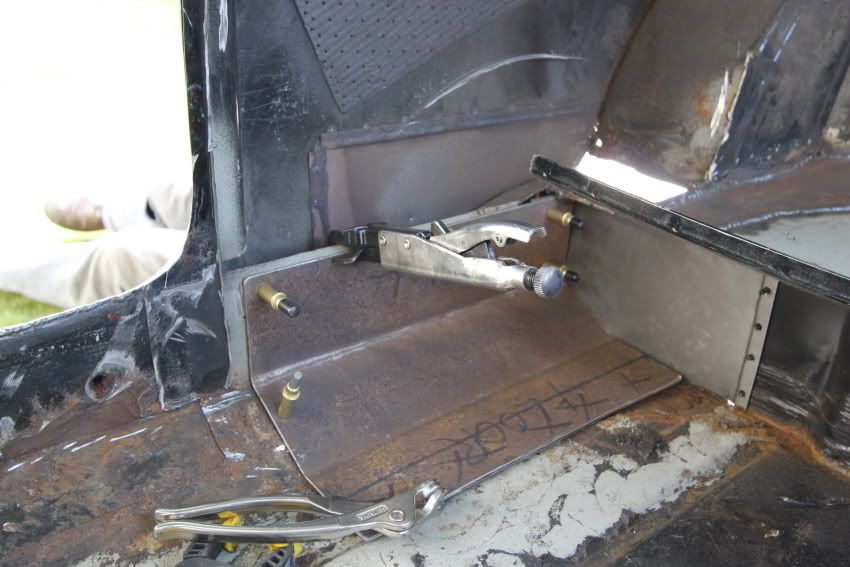
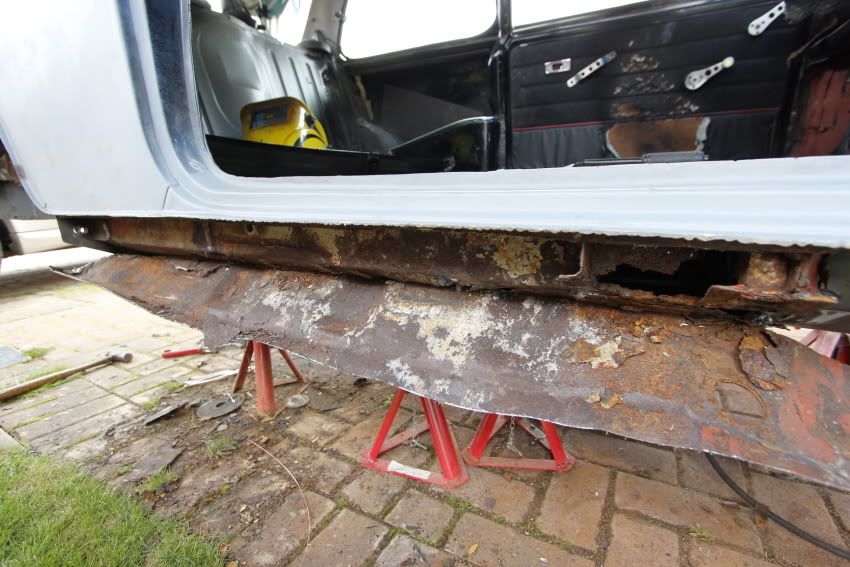
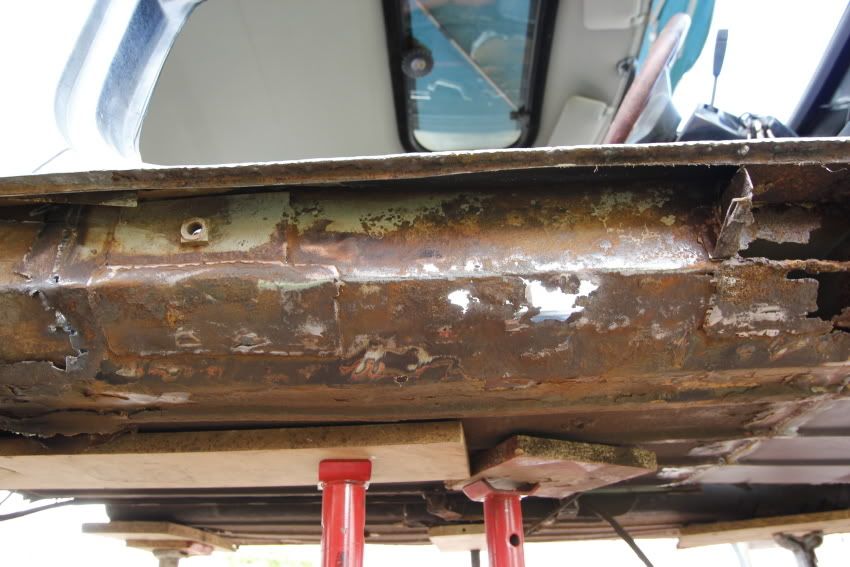
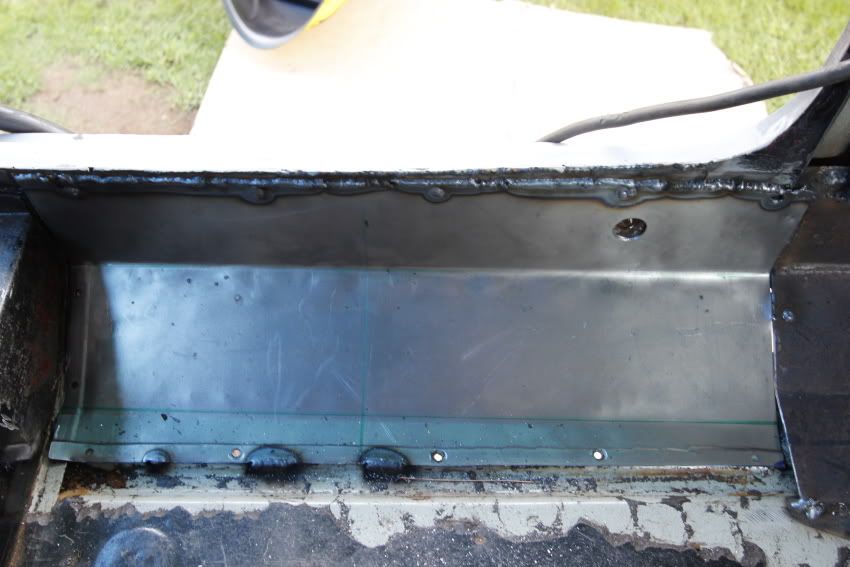
    Next job was to weld on the "Scuttle Closure Panels" which basically stop any crap from the road getting thrown up and hitting the Scuttle panel. The LH one needs a little work because the previous repairs that had been carried out, so that one was left for now and the RH welded on.


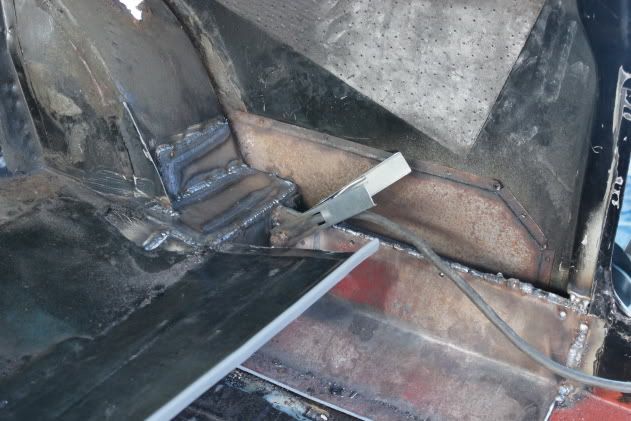
    The RH panel was a much better fit, so we welded that on.


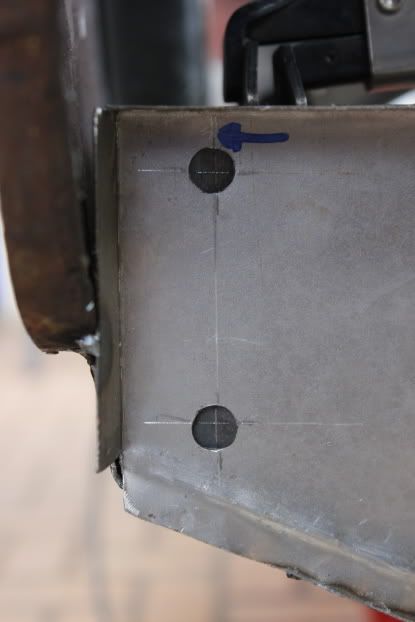
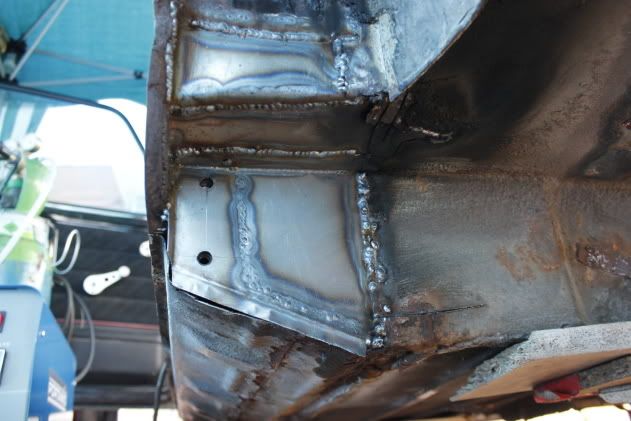
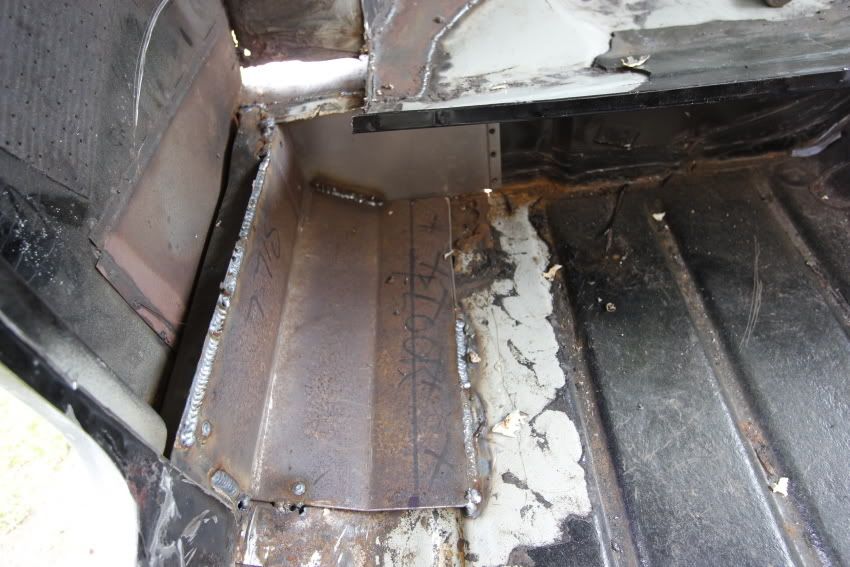
    The RH is almost finished! Welds will be ground down a little then the whole panel will be give a few good coats of stone chip.

    Comment


    • My Dad wrote these two updates, so apologies if they seem a little bit out of context!

      After beating lumps out of the passenger floor we decided it didn't need replacing, so just cut out and replaced the rust bits.


      Beat more lumps out of the LH scuttle repair panel and got that fitted too.


      This little hole at the base of the windscreen pillar was a pain, no way to get in and do a neat job, so the edges were knocked inwards a little and plated over. It's cleaned up quite well, a little filler to true it up and it'll never be seen. And it's solid, makes a change from mastik and Blu Tack!


      Made up heel repair panels, spent ages making sure they were aligned spot on, note the mistake, (top tip, if you do need to remark it, just make it very obvious for later, saves a lot of confusion if there's any interuptions.e.g.The Blue arrow.)


      Like everything else with this car it wasn't just as simple as welding them in. Removing the rotten metal revealed the captive nut section was barely attached to anything, even worse, it was also rotten. Lovely. I could probably have spent ages attempting to weld it all back together as is, but sod it. Scott wants to keep this car for a while and I desperately want to get a Hillclimb car together, so I do not want to go near this thing once it's finished. The whole lot was chopped out, as was the rear bin, which really wasn't attached at the bottom anyway as part of the floor had been replaced.


      Out came the 3mm plate and I cut and bent up a huge 22 x 35 cm spreader plate. We'll mark and drill that for a rear roll bar if he ever wants to put it on the track.


      The captive nuts will be welded to a piece of 50 x 50 x 3 mm angle, (about 40 top-35 bottom wide after trimming). In turn welded to the back of the spreader plate. Lets see that lot flex. The heel panel is tacked in place with the help of the Cleco's and a large straight edge, thanks to the forward planning it's easy to transfer the positioning of the centre points of the bolt holes to the 3mm angle. I really can't recommend Cleco's high enough, sooooooooooooo much easier than rivets, and if you bother to use the right size holes, positioning is fantastically accurate and repeatable.


      They actually are in the right place, it's just a parallax error from the photo, honest.


      We've drilled the angle and welded on the captive nuts, but it had started raining at that point. Rain and power tools, not a good mixture, so we chucked it. I'll tack the angle to the spreader plate this morning, check it, weld it, check it again, then time to weld the whole lot up and start on the other side. I don't even want to count up how much this car has cost me in Argoshield alone. At this rate we'll need yet another bottle next week too!

      Update No.2

      This is the little repair on the pillar. I knocked it in a little too far, but nothing a thin skim of filler won't sort now it's all solid.


      This is todays progress. Halted because of the weather, so time to annoy the neighbours. How (or why), they put up wth us I've no idea.


      101 uses for a dead Vitara, no.93, anchoriing a Gazebo. One of my Projects waiting for this Mini to finish, then I can return to the engine rebuild I started over a year ago.


      The captive nut panel, lets see this sod rot away in a hurry! Welded it in enough it won't move.


      This is the heel almost fully welded in and the inner arch repaired. Used 3 panels as it was the only way for us to do it accurately. Everything overlaps and is welded inside and out. Still to fully weld the spreader to the floor. At this point it's welded in fully at the rear, all the way along the top of the sill and most of the front edge.


      At the top you can see we found more damage further up the arch. A big chunk 11cm x 20 cm, was cut out and new metal bent up and let in, don't have a pic of that at the moment. Cleaning that up for welding revealed yet more rust at the rear of the arch we have to sort. We haven't even gotten to the drivers side yet, but at least it'll be completely solid for quite a while when we're finished, fingers crossed.

      And from the outside, still a little to finish here, just letting it cool first.


      The heel repair ended up a bigger job than initially thought when Scott was doing the finishing on the side panels in front of the arch. I damaged this one cutting out metal as well as welding, need to sort that later.


      Just to show Scott actually does work on his own car, this is him cutting out a couple of rotten sections in the front bulkhead. He made up the repair panels and I have them mostly welded in.


      We ARE getting there, slowly, but at least the other side will go quicker without the head scratching and WTF do we do now debates!
      I'm back at work on Tuesday, so it's a mad dash to see what we can get done over the rest of the weekend before the gas and the time runs out.

      Comment


      • Some Photos from the weekend.

        Found a couple of holes on the rear seat bench, so panels were made up and welded on.


        Got the door bin welded back in. I'll probably make up some covers for these, so that none of the welding/cuts are seen


        Next up was tackling the LH sill. I cut it off in stages to make sure I didn't cut through anything I wasn't supposed to. Glad I decided to replace them, hardly welded on in places!


        More rust, lovely.


        And the new sill ready to be welded on. I treated the inside of it to some Zinc primer to hopefully stop any rust. They'll be getting heavily wax-oiled once they're on.

        Comment


        • Keep up the good work man!

          Got some balls taking on a project like this though! Haha

          Comment


          • After rebuilding my '69 mk2 mini, I feel your pain for the tin worm haha
            Seems like wherever you go nobody can believe that dealing with this much rust is what us mini fanatics have learnt to call 'normal'!

            Comment


            • Wish i had the skills to tackle a project like this, good work

              Comment


              • Originally posted by daniel93 View Post
                Keep up the good work man!

                Got some balls taking on a project like this though! Haha
                Originally posted by Chemical-Works View Post
                After rebuilding my '69 mk2 mini, I feel your pain for the tin worm haha
                Seems like wherever you go nobody can believe that dealing with this much rust is what us mini fanatics have learnt to call 'normal'!
                Originally posted by Mike G View Post
                Wish i had the skills to tackle a project like this, good work
                Thanks guys! Appreciate the comments.

                I'll update this soon, couple more bits have been welded/repaired.

                Comment


                • Any updates duder?

                  Comment


                  • Right. Lets get this back on track.

                    Build has really slowed down 
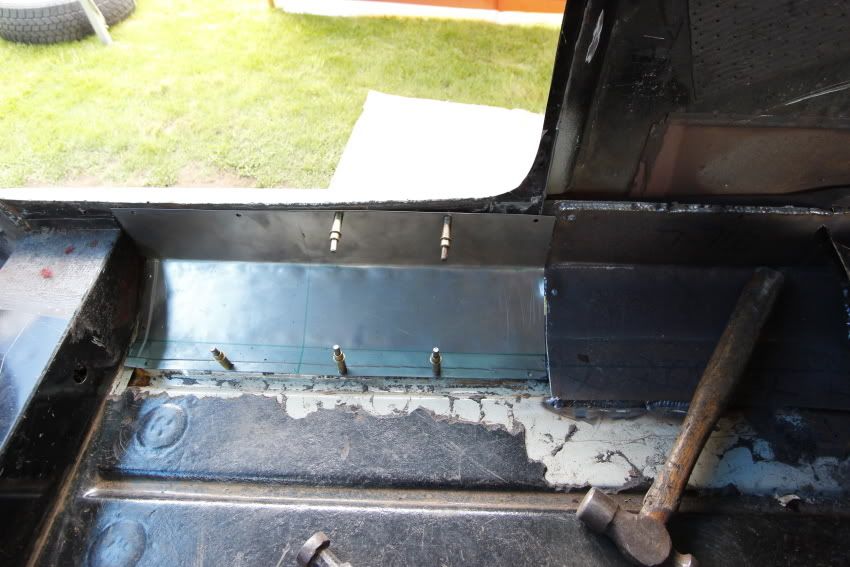
Rubbish weather combined with other commitments meant that there hasn't been much work done, but fear not, I'm back at it.

                    My Dad went to pick up some more welding gas...again, this morning. So I got on with some wee jobs whilst he was away.

                    The boot that came with the car is really bad, I've repaired it and it's in primer, but rust is beginning to come through. So, I have another bootlid from my other Mini which has had the holes for the number plate light welded up. Looks pretty neat. So I got that finished today.


                    And the "Other" Mini. Doesn't look it, but I've put some serious work into this one. This will be built as my dream Mini, so I'm going to take my time Going to have some really special wheels and engine.

                    The radiator that came with the car was pretty decent, so I just gave it a few coats of satin black to help protect it a little.


                    I'll have another update tomorrow night. Going to be doing some welding

                    Comment


                    • Well done! Keep it up and get it finished!

                      Comment


                      • Originally posted by Woodybeefcake View Post
                        Well done! Keep it up and get it finished!
                        Thanks man!

                        Big update tomorrow, we were welding today!

                        Comment


                        • Lots of work going into this, subscribed!


                          My E36 build thread

                          Comment


                          • Brave, brave, brave! Sub'd!

                            Comment


                            • Originally posted by Disco Stu View Post
                              Lots of work going into this, subscribed!
                              Originally posted by Rubens View Post
                              Brave, brave, brave! Sub'd!
                              Thanks guys

                              Here's another update from the weekend just gone.

                              First order of the day was to set up base camp. The weather wasn't looking to great.


                              A new heelboard panel was made the day before, but some other welding was to be done before we could fit it.


                              I had to cut out the door bin to get access to more the rotten metal. And well...this is what it reviled


                              A few more bashes with the hammer reviled some really thin metal surrounding my seat belt mount!


                              If you remember, we made up a big reinforcement panel for the other side, so we done the same for this side.

                              This is just in-case I ever fit a cage.

                              In place


                              And welded


                              Next up was to make a panel to replace the rotten one around my seatbelt mount.


                              When the reinforcement panel was welded in, I felt that the car was strong enough to cut off the sill. So I did. Any guesses to what was beneath?

                              Yep...more rust!


                              My cross-member is toast!


                              Previous patches


                              This was covered with under-seal, so I didn't really notice it, but I wasn't expecting this! (Excuse the blurry photo)

                              Most of the floor is completely rotten. Gotta make another panel up.

                              The seatbelt repair panel was fitted and welded


                              And it was a good job we made that fortress, cause it rained! Really hard!

                              Comment


                              • I love this story!

                                Its great to see father and son working together.

                                Keep it up!

                                Comment

                                Working...
                                X