Announcement

Collapse
No announcement yet.

UK VIP Aristo build thread...

Collapse
X
 
  • Filter
  • Time
  • Show
Clear All
new posts

  • UK VIP Aristo build thread...

    So i've found myself over here after going to the Hellaflush UK show where I was told to introduce myself as the people here would like to see what I've done to my pride and joy over the past few years...and firmly establish the UK's place in the VIP car world.

    I've had the car since September 2008 and the story is as follows:

    I previously owned a 300bhp Nissan 200SX (s14a) which was a fully modified drift car. It had Tein coilovers set to hard. It had a very aggressive Cusco mechanical 2 way diff. It was very loud with its straight through 3" exhaust system, and it had a massive bodykit and sponsorship decals all over it!

    Did i mention that this car was my daily driver and that I work as an estate agent? Yes, I did take clients out in this car!

    It got to the point that I was clamouring for something a little more sensible, but still unique. I had noticed the VIP car trend in the US and Japan, but had yet to see anything like that over here in the flesh that I could buy. So i was resigned to buying something like an M5 or an RS6 Avant when I reached 25.

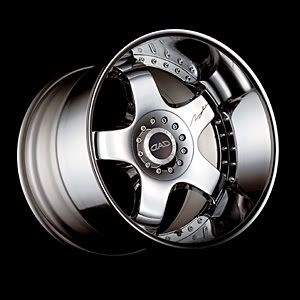
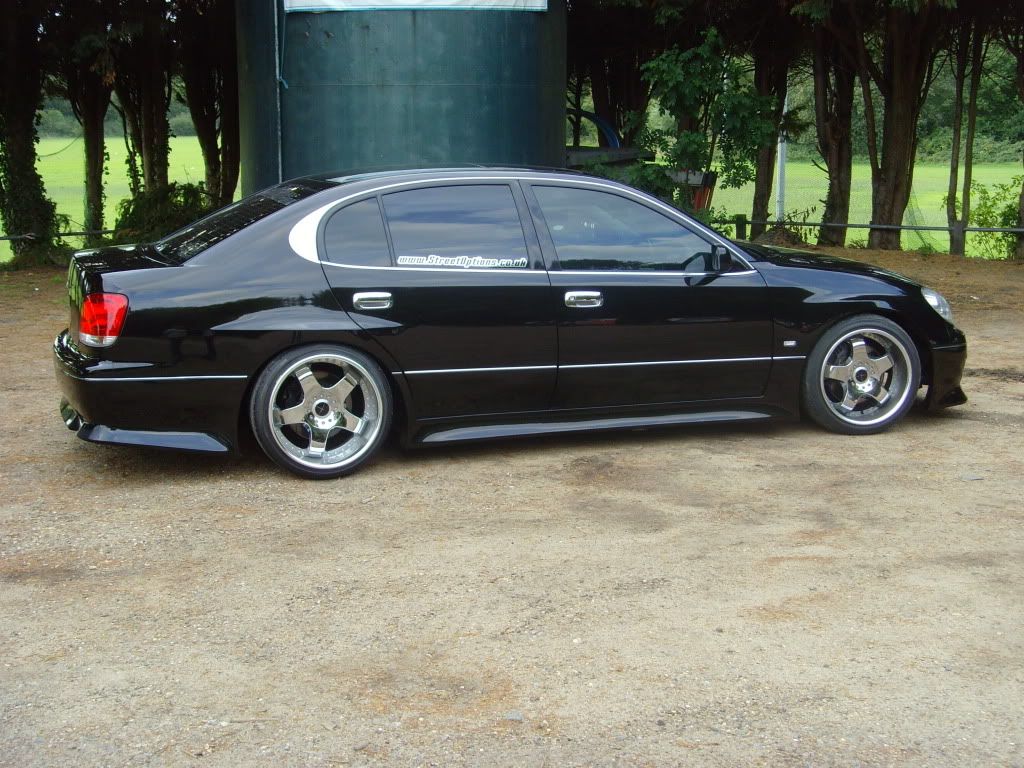
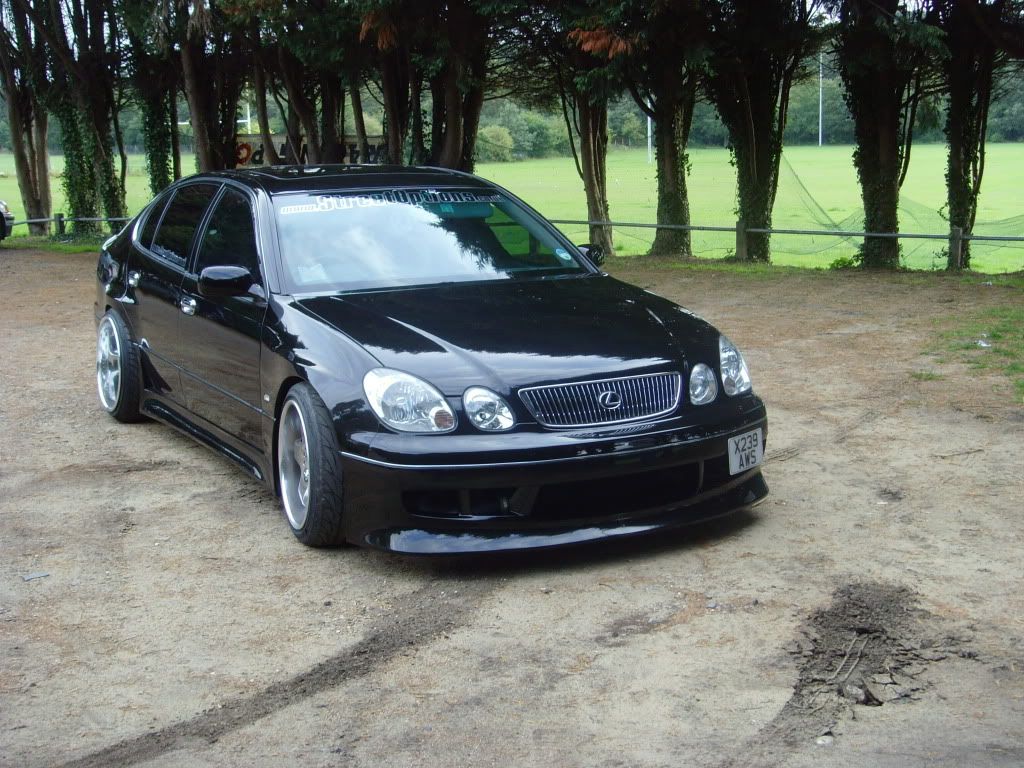
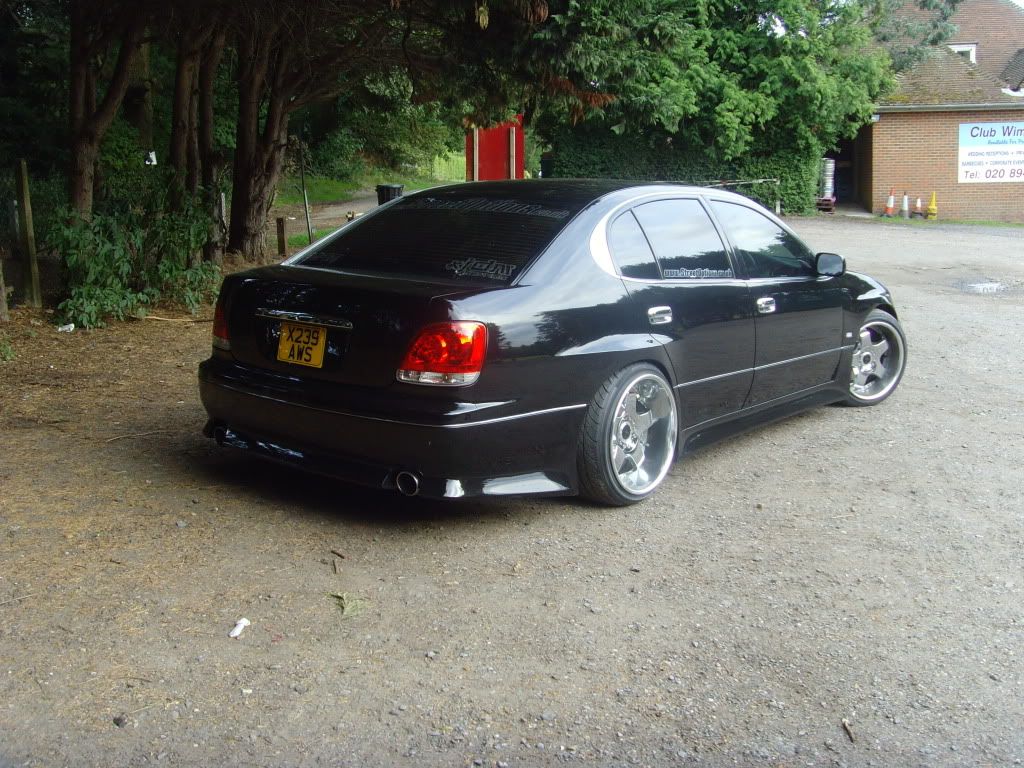
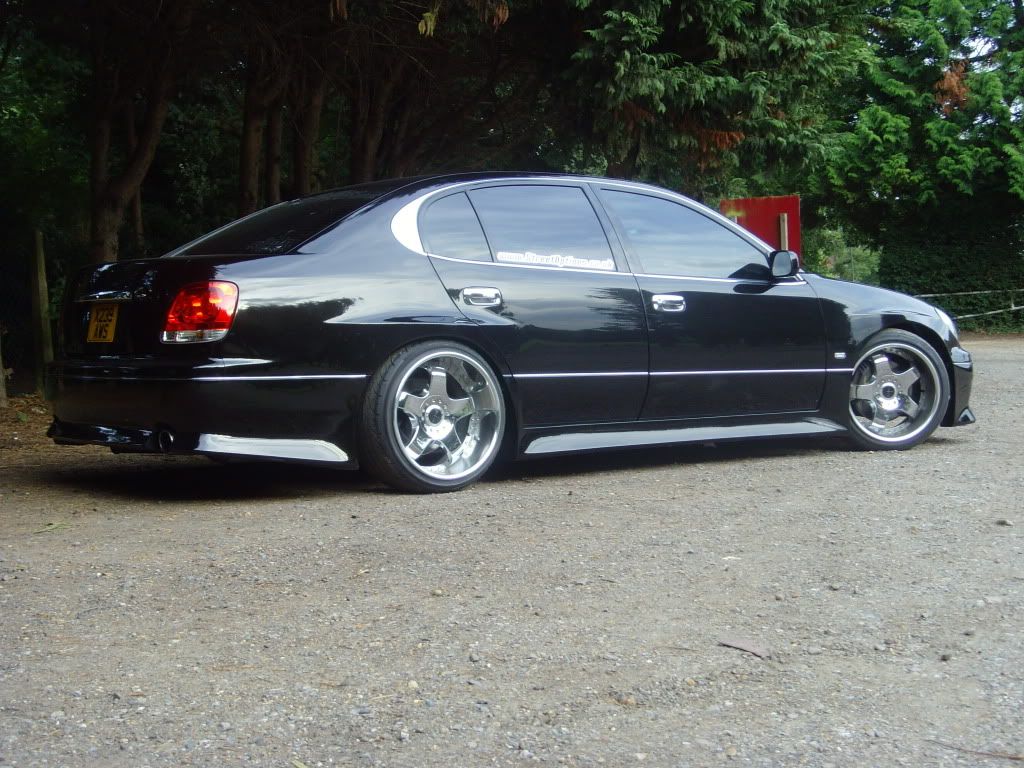
    Then I saw a thread on Driftworks, when Phil Morrison was putting his JZS161 Aristo up for sale. It style caught my eye...it would be the perfect car for me. Tuned turbocharged engine. Subtle bodykit. VIP style wheels. This was a one off opportunity so I went ahead and bought it.


    I was very happy with my purchase, and truth be told, had absolutely no need to modify it further. But then i had a lump of cash burning a hole in my back pocket from the sale of the SX and I had been window shopping on the web, and just went ahead and bought a load of Garson/D.A.D products from Justin at Elite Auto Style ( www.eliteautostyle.com) as well as some Junction Produce parts from eBay.

    They arrived in due course after giving more of my pennies to the taxman.


    I bought the following bits from Junction Produce.

    A white Fusa knot


    A Gin Tuna knot


    Chrome Pillar Trims.


    I bought the following parts from Elite Auto Style

    JDM Chrome Door Handles


    JDM Chrome Boot Garnish


    JDM Tinted Window Visors


    Chrome Gearstick Surroung


    Garson/D.A.D Neck Pads (not with this logo)


    Garson/D.A.D Luxury Curtains (Gloss)


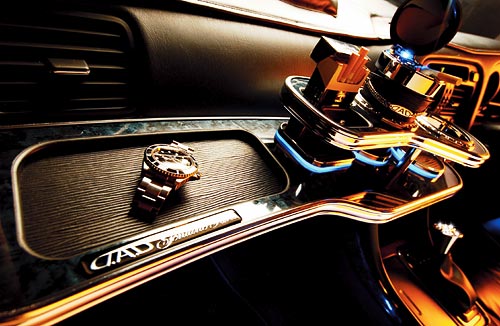
    Garson/D.A.D Front Table with Illuminated Coaster Kit


  • #2
    It was at this point that I thought I had a very unique car and thought about featuring it in Max Power, since there are no VIP style cars out there. I had been guaranteed a feature, even before I even spent the money on the Garson bits, so I told them to wait whilst the parts arrived.

    The parts came, and I fitted the majority of them to the car. Some bits needed a bit more work, and in that meantime, I found myself window shopping on the internet again and came across what is argubly one of the most ridiculous wheels ever...


    The Garson Zuenglein DR 302 (in chrome). Not only that, but they were of a hardcore fitment as well.

    18" x 10" ET 10 (Front)
    19" x 12" ET -6 (Rear)

    I had to have them. Once again I told Max Power to wait a little longer for them to arrive. I figured that with the amount of Garson/D.A.D parts on my car, it would be fitting to finish her off with a set of boots from the aforementioned brand. The wheels are exclusive and come at an eyewatering price. A set of these wheels, brand new, with tyres, all inclusive of VAT comes in at just under £5000. Fortunately, I did not have to shell out that much!

    After a three month wait, the wheels finally turned up

    Check it!

    My best "Wes' Side" impression

    Bling Bling


    An uber stretch that puts the Euro boys to shame (275/35/r19 on a 12" wide rim)

    Super Agressive Offset


    Then it was time to test fit the rears on to see what sort of work would be required to keep my car legal and pass the MOT.


    It is clear now, that the bodywork will require a lot of work to house these tremendous wheels. Flaring the arch and pulling the metal, even with the help of some negative camber, was never going to be enough.

    So I had to go the whole way, and that way is a custom widebody conversion. Now its easier on coupe's as there are no rear doors, so Will at Streetoptions ( www.streetoptions.co.uk ) and myself had to come up with a few ideas.

    He has implemented them as such...


    Note the little bit of cardboard on the front arches as well. The idea of the widebody was to follow the factory bodylines on the rear arches, but just, wider! There will be more work to build up the rear part of the sideskirts and rear bumper to follow the new arch as well.

    Comment


    • #3
      Will has been working on the fronts this week. Turns out that he will actually be making the arches out of steel on the rear, and he is waiting for the materials to turn up before getting down to it.

      He's subtly pulled the arch out from the top to cover the front wheels. There wasn't a huge need to too wide on the fronts as the offsets weren't quite as aggressive. I think he's going to put some kind of a vent into the wing as well.


      So basically, the front arches are done and waiting for paint now.

      Here are a few more pics of what Will did with the front arches.


      Two pieces of sheet steel were cut and shaped.
      One for the vertical part line, and One for the New swaged top piece.
      We used a thinner 22swg sheet for its flexability, as the top piece had to have a subtle curve across its top.


      With our steel pieces tacked up on both sides, we can finish weld the pieces in place, Using a 'String of Pearls' technique to minimise distorsion of the panel.


      Keep checking www.streetoptions.co.uk for more updates!

      More pictures from our man Will at Streetoptions.

      Front wings are now hella flush and ready for paint.


      This picture has an odd reflection, making the wing look bent? This is not the case!


      Work on the rears is set to begin over the weekend. Once Will is happy with his mockup, then he will start to cut some steel to build those wide arches...

      So this is how she sits at the moment


      Look how fat those wheels are!

      After taking the necessary measurements from our cardboard template, we cut out both sides in 22swg steel.


      We also added some cardboard ribs to the centre of the arch to give us the desired amount of flare.
      The steel sheet was then temporarily fixed in place to allow us to measure up for the other steel pieces needed to be cut.


      Comment


      • #4
        In order for the the body to sit low enough with the wheels on, the factory arch has to be cut to allow for more clearance. Note the steel "ribs" that will hold the shape of the new arch.


        In regards to the picture of the tyre and the arch, Will has done this with the coilovers on their lowest setting. We won't be running the car at its lowest setting, its just to figure out the clearance that i'll have if i get some airbags.

        New update from today.

        Update from the Streetoptions website today (18/4/09)
        With this being a Four Door vehicle, It does complicate fabrication a touch.
        It was then necessary to form and weld two pieces of sheet to follow the shut lines of the rear door and quarter panel.
        These will eventually form our returns, visible when the rear doors are open.


        The next stage is to begin to form the Inner Arch Returns, These will bridge the void between the original quarter panels and our new flared quarter panels.
        They also taper upwards towards our cut back arch, Allowing the Wheel Rim to run close to the quarter panel, while the stretched tyre resides within the arch return, with plenty of clearance.


        Before the new quarters can be welded to the car, They will be fully welded from the inside, allowing the outside wheel arch to be grinded down to a small bevel edge that resembles the factory wheel arch returns.
        Two small returns need to be fabricated for the areas where the quarter panels meet the Rear Bumper and Sideskirts.


        A few more pics. I got sent these this morning (25/04/09) but I'm pretty sure they are from Wednesday when I last saw him. His note in the email said that he had completely finished welding the entire arches and he was going to finish off the arches with some filler before priming them, so expect a complete rear arch picture early next week!


        Nice smooth edges


        Door shuts taking shape.


        Door shuts effectively complete

        Comment


        • #5
          New pictures from Will...Rear arches are taking shape now!

          These pictures are definately over a week old as I saw the car on Wednesday 29th April, and there was fibreglass applied to the rear arches so that he could sand them into shape...but I digress!

          Enjoy.


          New pictures of the new rear arches!


          And a new picture of the front arches, as he wasn't happy with how they turned out so he did a bit more shaping.


          The rears don't look quite as aggressive and "in your face" now that they are in primer and have been shaped and smoothed.

          I expect the car to be prepped for paint by the end of the week

          Couple more pictures, this time from the offside.


          And finally, the rear bumper and sideskirts need work in order for them to flow with the new arches, and you will be able to see what is required from this picture.


          Just a brief update from Will:


          He decided that the stock indicators on the wings, and any aftermarket replacements would just not cut the mustard for the look that we were going for. So he sourced some Audi A8 LED indicators and modified the wings to fit them. He was saying something about creating a bevel edge so that it would sit flush and look really smart.


          He has also removed the inner LED rear lights from the bootlid and smoothed them over. This look really does change the rear of the car. Not many people have done it, but I've seen a picture of one and it does catch your eye!


          The car will be fully prepped in the next week (how long have I been saying this?! lol). I an going to see him as he will paint some test cards for me this evening so I can look at some different colours.

          Yes, I'm having the whole car sprayed. It made sense really. Every panel bar the roof and bonnet needed to be sprayed so it was a no brainer. I picked the colour yesterday, and its a lovely colour. Nothing garish of course, but I'm not going to let anyone in on the colour until its in on the car. Needless to say, its got a strong pearl in it, and just enough metalflake to be a show winning car, but not be too outlandish

          But I digress, more picture provided by the main man at Streetoptions!


          Brackets for new indicators.


          Comparison of the stock indicator against the new Audi A8 LED indicator. The curve of the arch actually follows that of the angled side of the indicator! Its little touches like that Will ahead of the rest.


          Full despoiler


          Comment


          • #6

            Boot plugs (lol)


            Flush and primed boot


            Rear end completely transformed!

            Wet sanding will be taking place this week now that I've chosen the colour. I'm keeping my fingers crossed that the body will be painted by next week...!!

            Few more pics from this week


            Puddle lights being installed


            Doors shuts and inners being prepared.


            Kandy black paint applied


            Rear screen out for tinting.


            A few more pics from yesterday...


            Spraying the boot shuts


            Spraying the bonnet shuts.


            Spraying the inside of the arches to spruce them up.


            Masking up the newly painted shuts and hanging the doors to make sure that everything opens and closes properly...and masking the newly painted bits means only one thing...Exterior painting is next!

            Comment


            • #7
              A few more pictures from Saturday...


              Anti stonechip paint on the bodykit


              Smoothing of the bonnet with the removal of the windscreen washer jets. How i'm going to cope with bird poo on my screen, I don't know lol


              Internals of fuel filler cap painted. Now I don't know if its just a trick of the light, or its a crazy colour scheme, or maybe even, a sneak preview of the colour of the whole car. I'm not sure! I will be seeing him today and Wednesday to have a look. Should be fully painted by Wednesday I think...


              Wet sanding the bonnet


              Completely wet sanded door. I think this picture is probably the most representative of Will's skill in prepwork thus far. Its not even painted and its just like a mirror!

              Yeah, what Will has come up with was to attach some windscreen wiper based jets, so I will get past the MOT! Which is coincidentally due today or tomorrow off the top of my head!

              Here are some pics of the shell that is ready!


              And now some pics of the roof painted...no close up pics, the colour will remain a secret until Sunday!


              Ok, I can't keep it all to myself, its not fair after all! I think everyone has waited long enough! :nod:


              Car in the booth


              Bright ambient light in the booth gives the car a sort of dark chocolate colour with a gold pearl.

              Low natural light has a maroon tinge to it...you can see the very subtle rainbow metalflake in there.

              With the flash, it really sets it off!

              Lower door panels and wings painted, just to show that it really is "just" a black colour!


              Close up!

              Comment


              • #8
                Right, finally got some more pictures from Will.


                Flatted doors

                [img]http://photos-a.ak.fbcdn.net/hphotos-ak-snc1/hs181.snc1/6012_127815782008_512787008_3063360_963412_n.jpg/img]

                Flatted boot...looking good right?


                Check out the reflective finish!


                Sideskirt in low-ish sunlight


                Sideskirt in bright sunlight


                Wing in bright sunlight


                Rear bumper in bright sunlight


                Rear bumper in low sunlight


                Repaired and repolished wheel (check the first wheel pics at the beginning of the thread to see what they looked like previously) Thanks to Steve at Renowheel for that! www.renowheel.co.uk


                Rear window sections


                Tinted.


                Sunroof


                Sunroof tinted


                Tinted sunroof on car. Looks much better now, before it was more of a green tint.


                The picture you've all been waiting for...rear wheels on, bodykit back on and painted!


                Puddle lights installed and being tested. The wiring will be as such that the 5 below the drivers side door will turn on when the drivers side door is opened, and the rear 5 puddle lights will only turn on when the passenger doors open. As you can see, there are no concerns about the lights merging into one beam of light and losing the spot light effect. I will also have an override switch to keep them all on as well.


                Flush boot with lights installed. Check the out the red pearl!

                I will now be premiering the car at Ultimate Street Car (yes, chavfest, but a busy show) on Saturday 1st August and at the Dorset Japanese Car Club show on Sunday 2nd August. Unfortunately, I won't actually be there, but Will will be showing the car for me, and I'm sure he will do a good job of it!

                Comment


                • #9
                  Right i'm back from holiday and there are numerous pictures floating around in my absence but i'll post a couple of shots now and the rest tomorrow!!


                  The only things i've done to the interior were the bits I added on previously such as the curtains, table and such. I don't think the rear fridge is in at the moment but i'll see what is left tonight when I go and pick her up!

                  Anyway, build pics up as promised...


                  More window tinting


                  Polished rear quarter window trim.


                  Window trim installed.


                  Chrome door handle. Now the reason for this is because I bought some from Elite Auto Style and they were supposed to be a fairly straightforward swap (from a Toyota Crown IIRC). The fronts were easy, but the rears required some decent work on them to fit the locking mechanisms!


                  All installed.


                  Side sill trims


                  Stripped interior!!


                  Wiring up puddle lights to the lighting loom...which didn't work so an independent lighting loom had to be created.


                  Doors open and they light up!


                  Replacing the inner light bulbs with bright white instead of the stock yellow lights.


                  Moody workshop shot!

                  Comment


                  • #10
                    The next post is reserved for the Single Turbo conversion, but I will have to format the data to intergrate facebook pictures, which will have to wait til this evening, as my mechanic at the time has taken his site down...

                    Comment


                    • #11
                      Just a small update...


                      I was supposed to get the recovery company to tow my car to the garage (I have a problem with the oil feed to the turbo, causing a minor engine fire...but thats a story for another time!) and get it all fitted this week. But my recovery insurance policy is a joke! If I am within a quarter of a mile of my house, then they'll take me home, or 10 miles to wherever I need to go. If I am more than a quarter of a mile away, then they'll take me anywhere!!!


                      On the list at the garage is to sort out the turbo, fit the air ride, replace the rear upper arm bushes with my TRD ones, sort out the air conditioning drainage system/heater matrix (slightly odd problem with the rear passenger footwell being absolutely soaked through!) and then to remove the dashboard in preparation for the retrim...which will be revealed next!

                      Yesterday has been spent routing the power cable and front air hoses.
                      Some random pics (Lam, your boot has never been so clean :P )


                      The kit isn't as complete as it really should be for a complete install kit, as Nick needs to order some air line fittings (for a quality install) and some wire joiners.

                      We've been asked by the UK distributor to give a full write up and opinions on the kit as it's the first one in the UK to be fitted.

                      Think Nick will end up re-writing the instructions as for the UK market, I can see people complaining about the Engrish instructions

                      Comment


                      • #12
                        Well, it's all in.

                        Just uploading a couple of short vids to youtube (damn I miss my 50MB connection )

                        Some pics in the meantime.


                        [ame]http://www.youtube.com/watch?v=JlVx2aTL4zk[/ame]

                        [ame]http://www.youtube.com/watch?v=ViiqZ4vMgf4[/ame]

                        All done, the looks at the traffic lights when Nick slammed it then raised it up to go were priceless (apparently!)


                        Litte Vid (compressor not running so the front is a little slow.

                        [ame]http://www.youtube.com/watch?v=JJ2mKiv9uVc[/ame]

                        Comment


                        • #13
                          Vids need fixing bro.

                          Sweet car though, mclovin it, looks like you got them to go to town on it in the end lol

                          Comment


                          • #14
                            Sneak peek at the new seats...


                            Got some more pics from the trimmer, there was a small delay as he was hit with a small bout of swine flu...

                            It should be ready for me very shortly for pickup...


                            and then we'll start work on the A/V install!

                            Some completed shots of the interior....


                            Finally got the car back after the install, and I'm extremely pleased with the quality of the work from the guys at Car Audio Security! I'll try and get some better shots in the dark, but there are red LED lights positioned where the air ride setup is so it glows red, therefore matching the colour scheme of the car!

                            It is really loud with the bass turned DOWN to -80% otherwise I can't hear the rest of the speakers...I guess I'm going to have to upgrade those as well now

                            Comment


                            • #15
                              Next up for the car is a full stereo upgrade (including PS3 and TV's), more retrimming of the car (A, B, C pillars and roof) in black alcantara with red stitching with an extra added feature, full respray for a slight colour change, wheel refurb, engine bay tuck and smooth, a big brake kit and engine ancillary upgrades for 600 bhp...This will all happen over the winter, so stay tuned

                              Comment

                              Working...
                              X