Originally posted by adge_dre
View Post
-
thanks for the kind words dude! currently on my 3rd benz now. Sold both this car and the c43 to build a W210 wagon. Havent posted here in ages and havent had a chance to make a thread about it. I havent even updated the c43 thread to show it when it was vinyl wrapped blue. Ive mostly just been posting on instagram for updates. -
it is so nice to see a w202 like this. a change from all the bmws you see out there. I love your c43 but this is one of my fav build threads because of how much time moeny and work it seems like youve put into this car.Leave a comment:
-
Originally posted by polobodydrop.90
thanks dude! i miss her sometimes.Leave a comment:
-
bumping this thread because i miss this car. at least i got to keep my bags.Leave a comment:
-
Originally posted by Bystrov View Post she still isnt finished always far from that ! lol
thanks dude. i gotta redo the switches though. not feelin how it came out. gonna close the ash tray and see how that turns out.Originally posted by TrailerTrash View Post
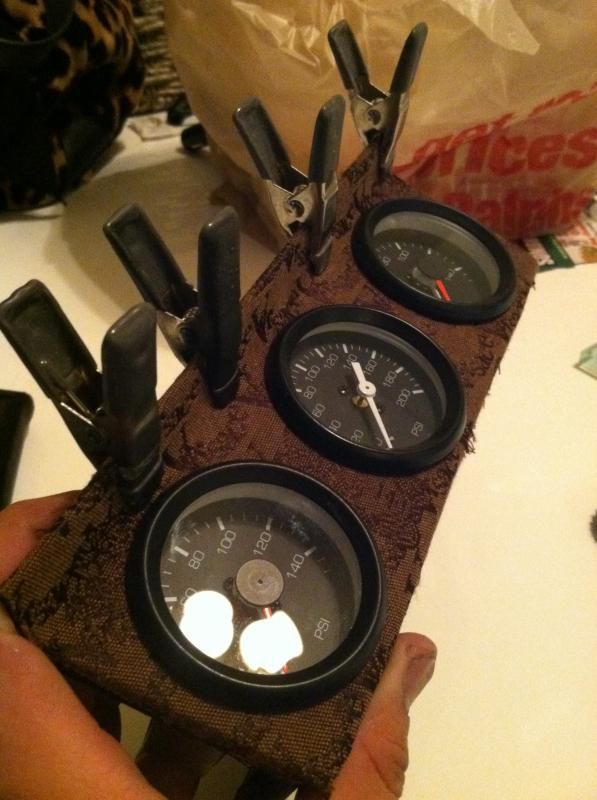
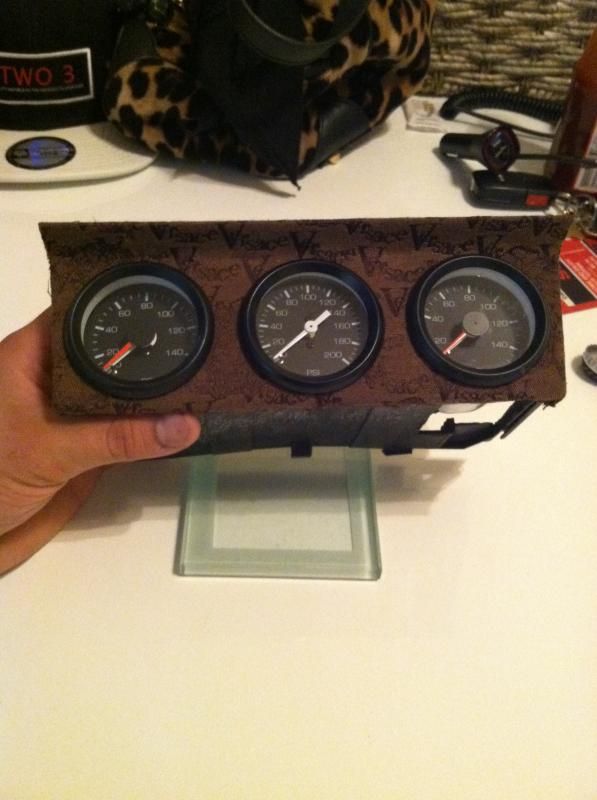
from fabric4home.com my brothers entire interior is done up in it headliner pillars. etc. its two tone with black leather seats and the brown versace. inside a white b5 a4.Originally posted by Junya View Post
Originally posted by OrangeBlue View Post
Man I want the chrome trim pieces also. would look sweet if i could get some to fit around the switches or even modify it to where it looks almost oem.
More instagram shots !
 Last edited by SD202; 08-19-2013, 01:41 PM.
Leave a comment:
-
First of, that's awesome, really awesome!
Maybe you can do something like this:Originally posted by SD202 View Post
You can install the switches on the left and right of the Mirror-switch...
Like that you can keep the 'original' look.Leave a comment:
-
dude, u have outdone your self... i wish i had the patience u have, i am a car whore, i never follow through to finish the car to what i want...Leave a comment:
-
Broke the Budget. Bagged now. No more static.
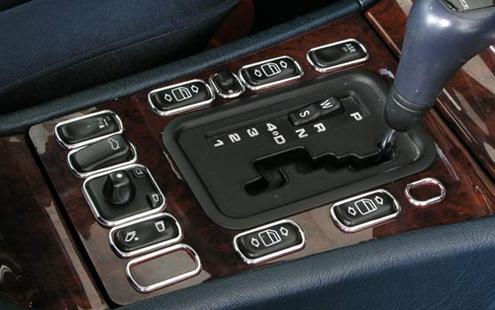
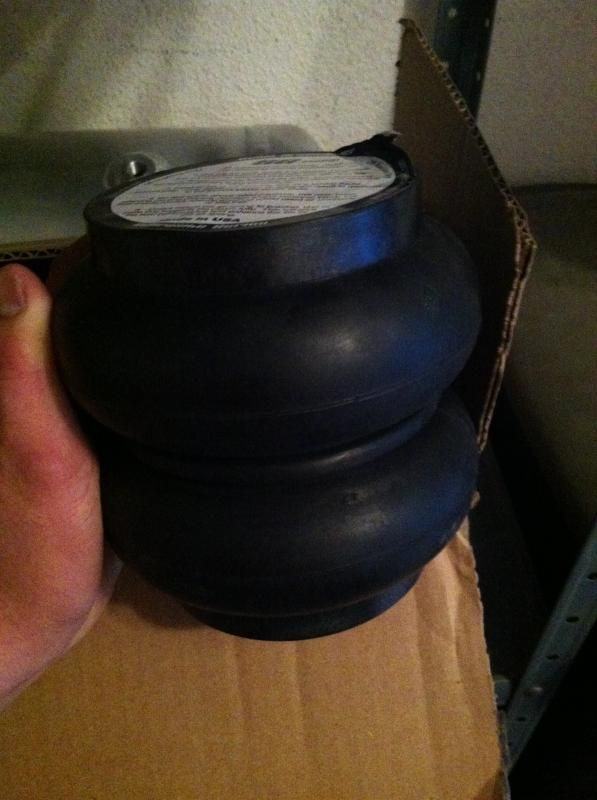
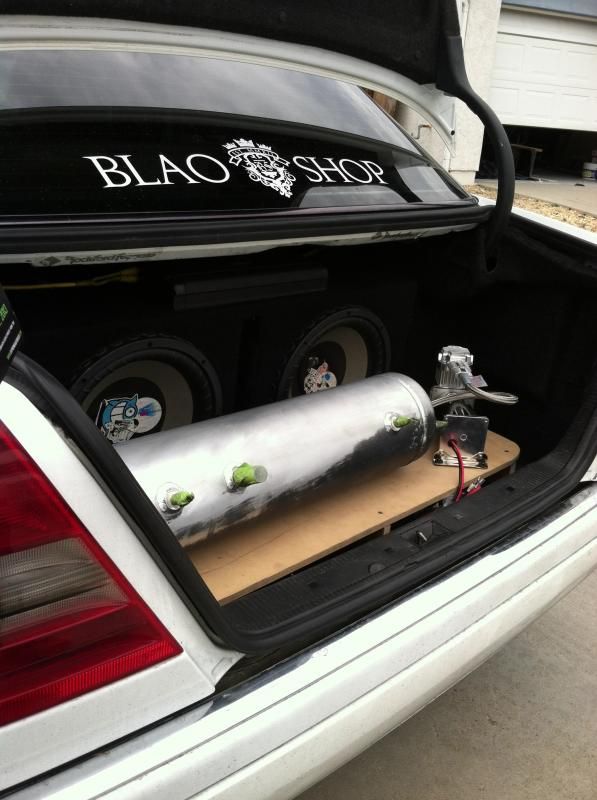
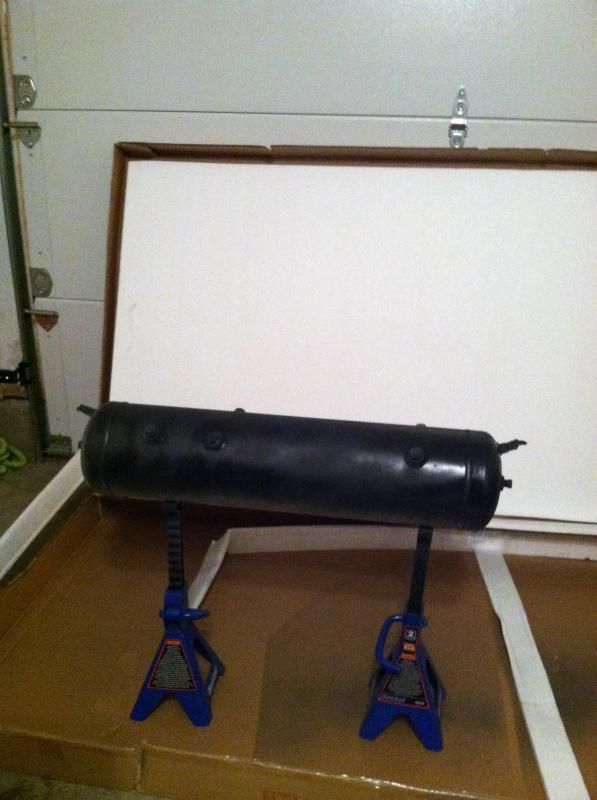
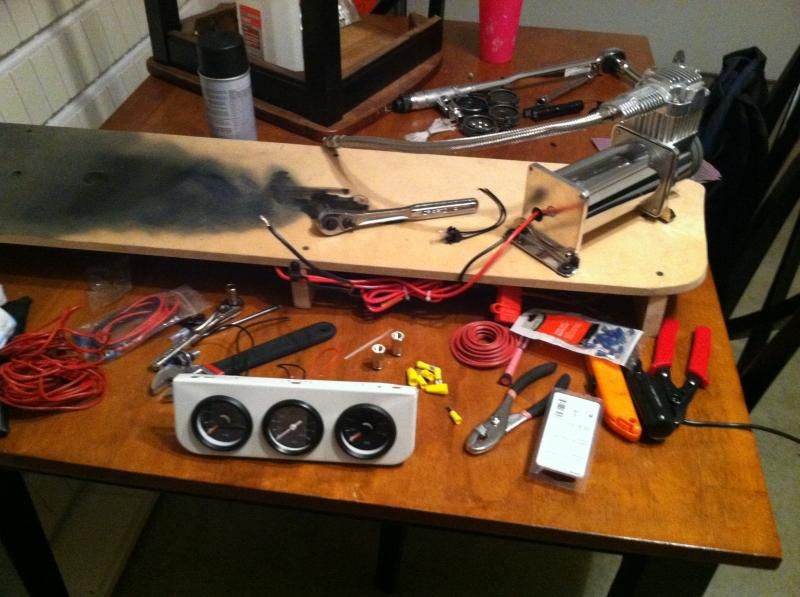
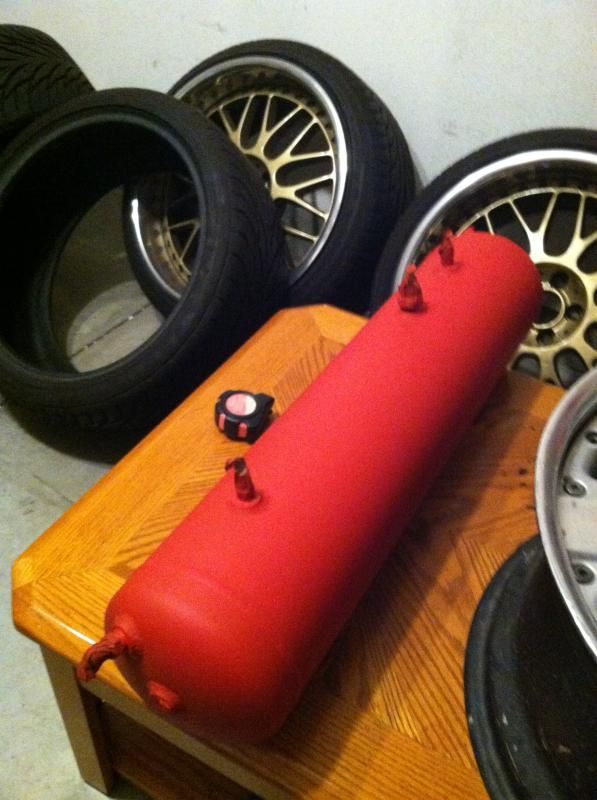
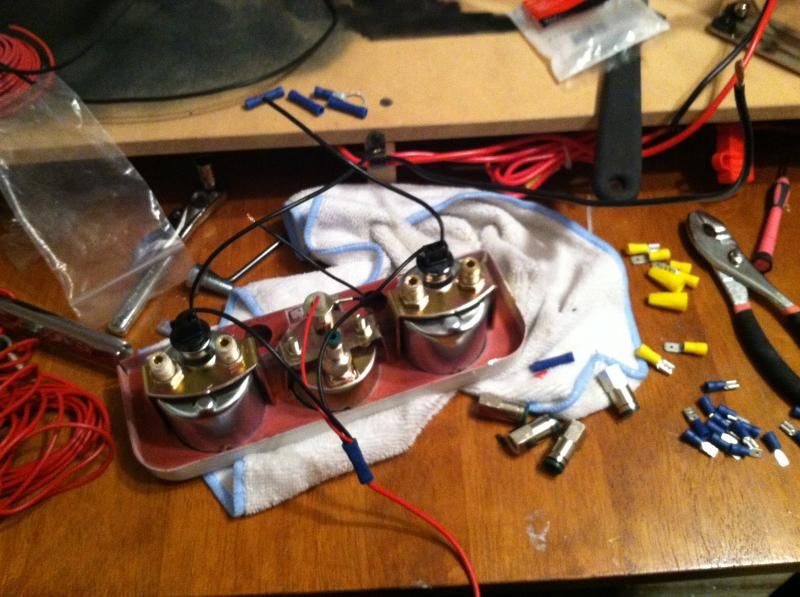
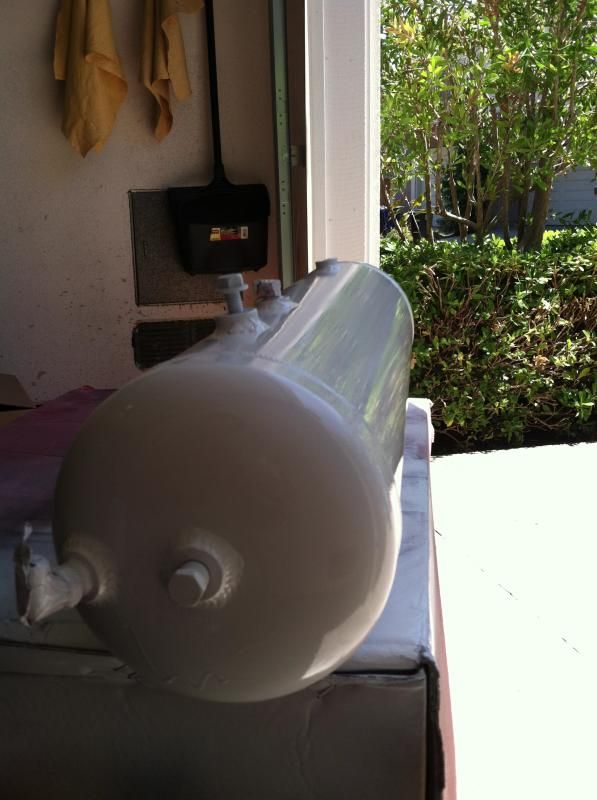
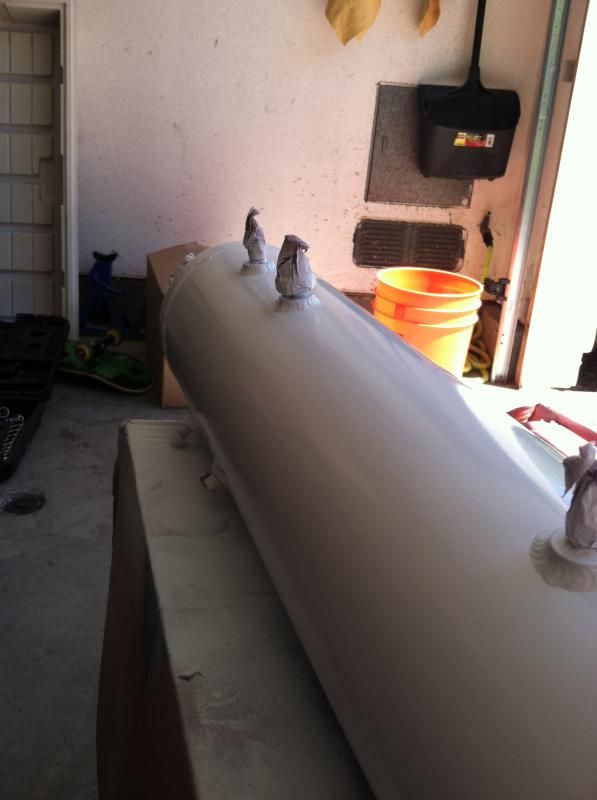
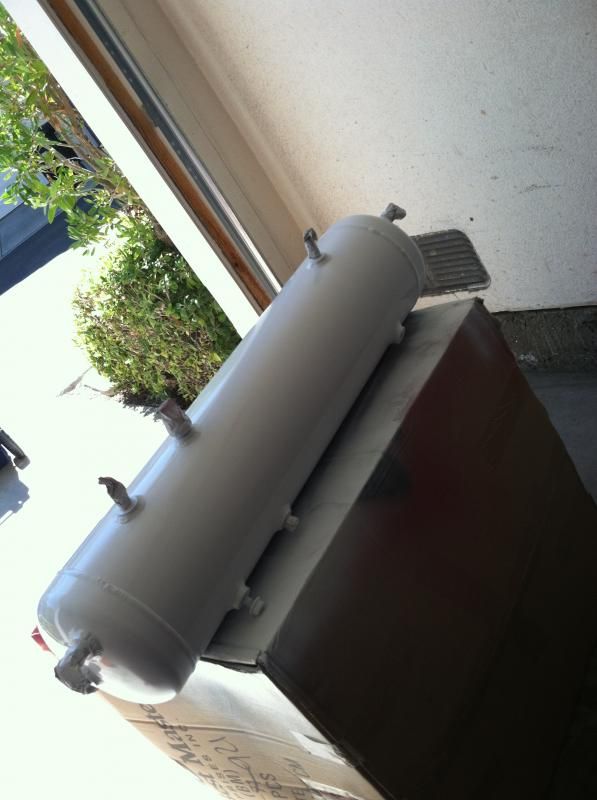
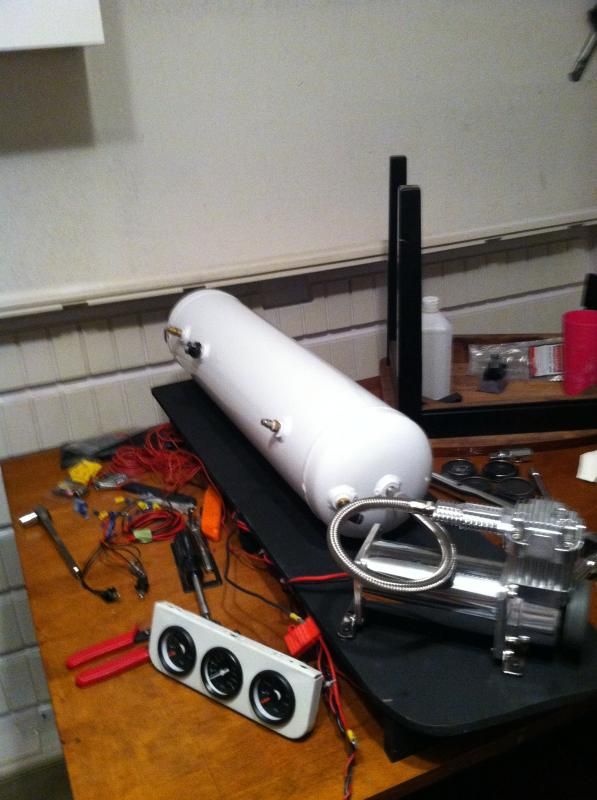
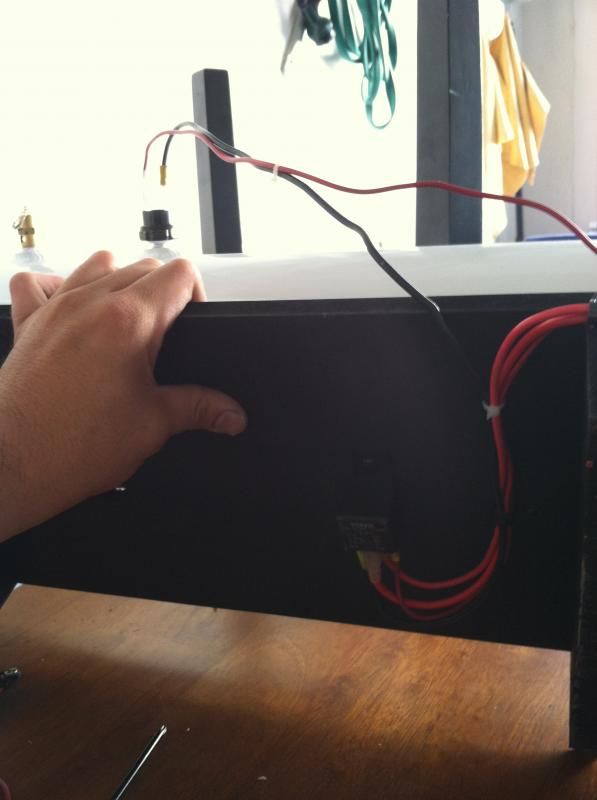
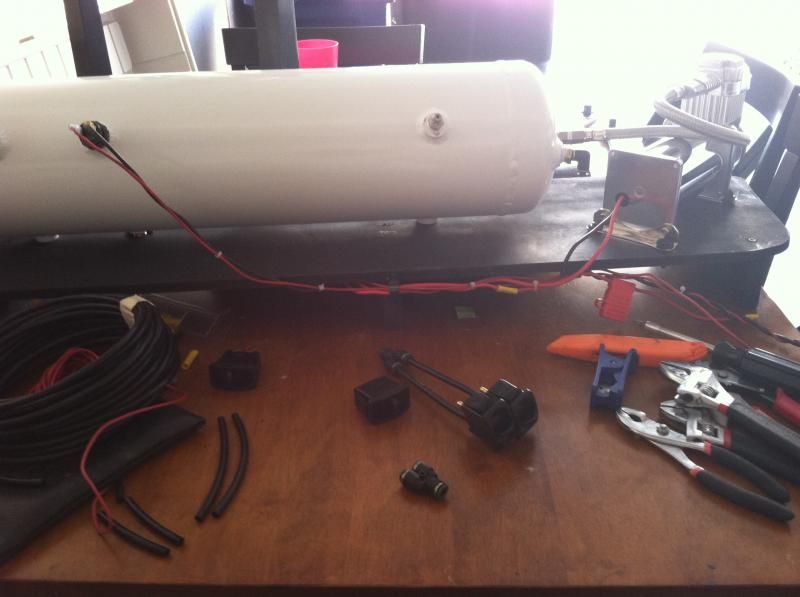
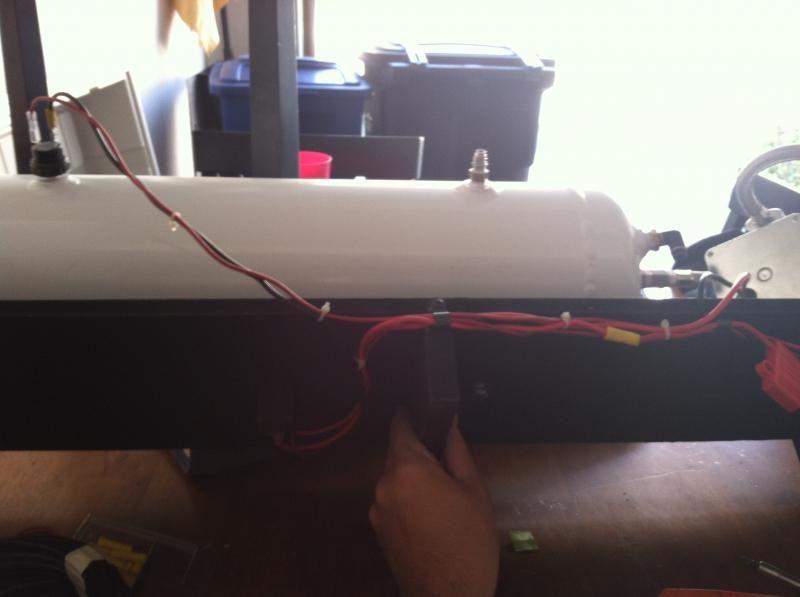
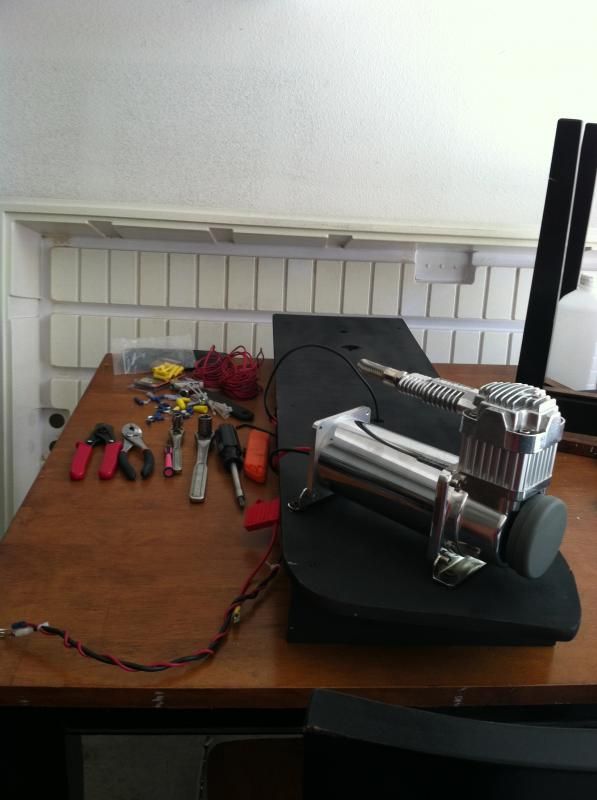
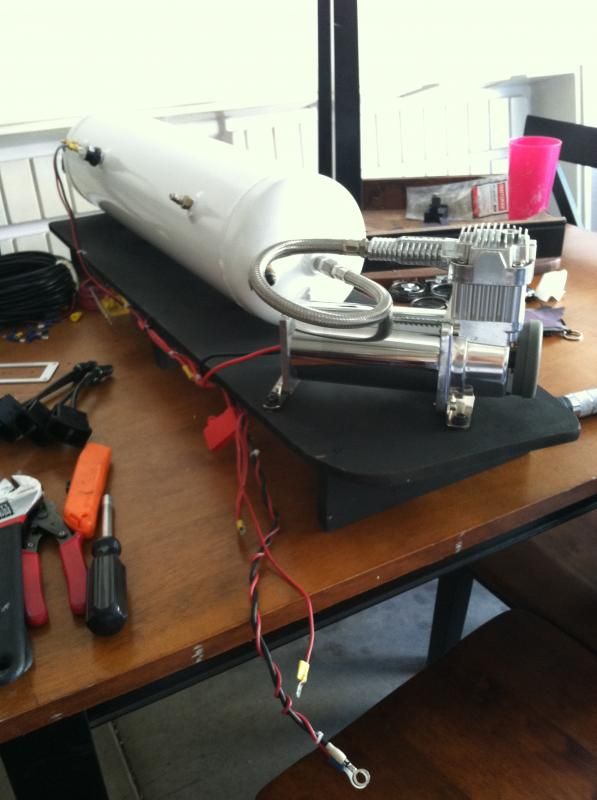
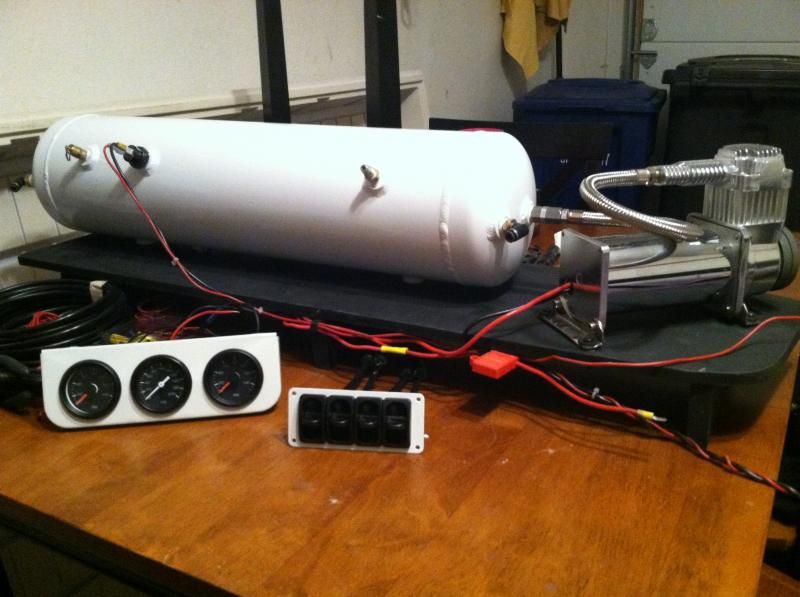
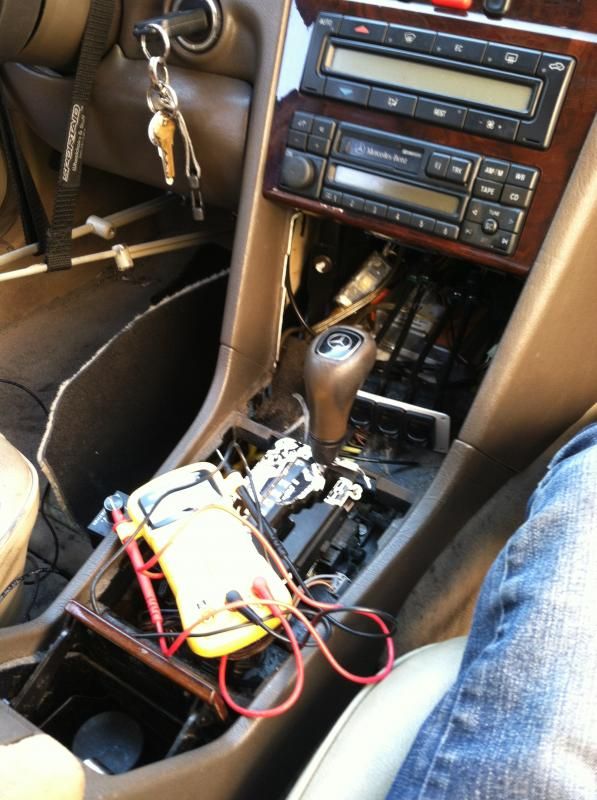
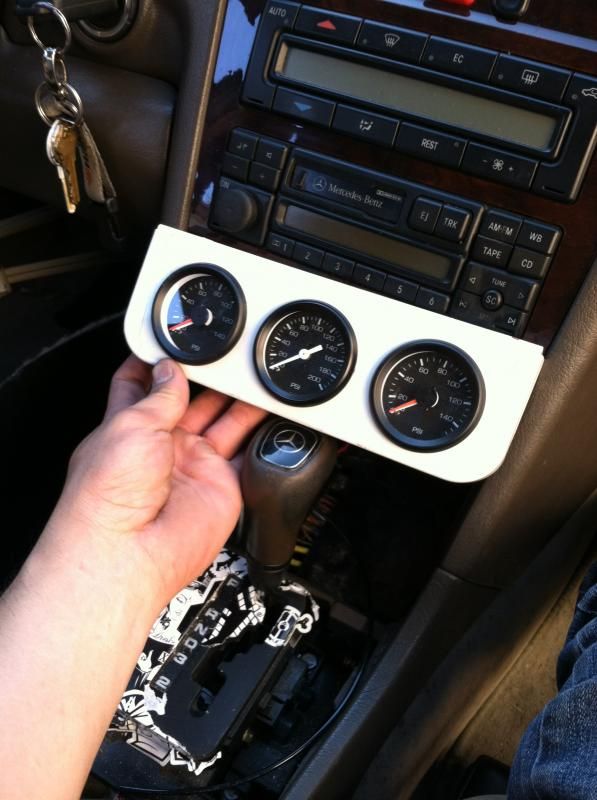
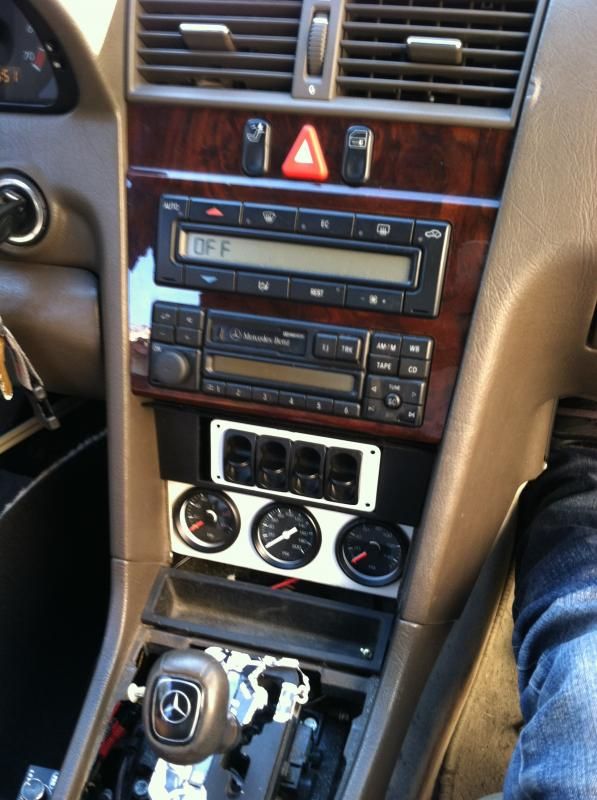
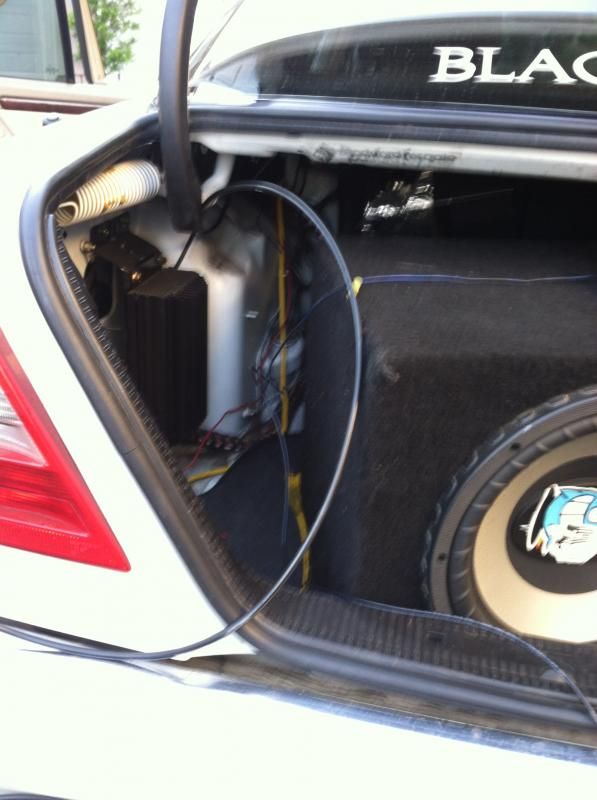
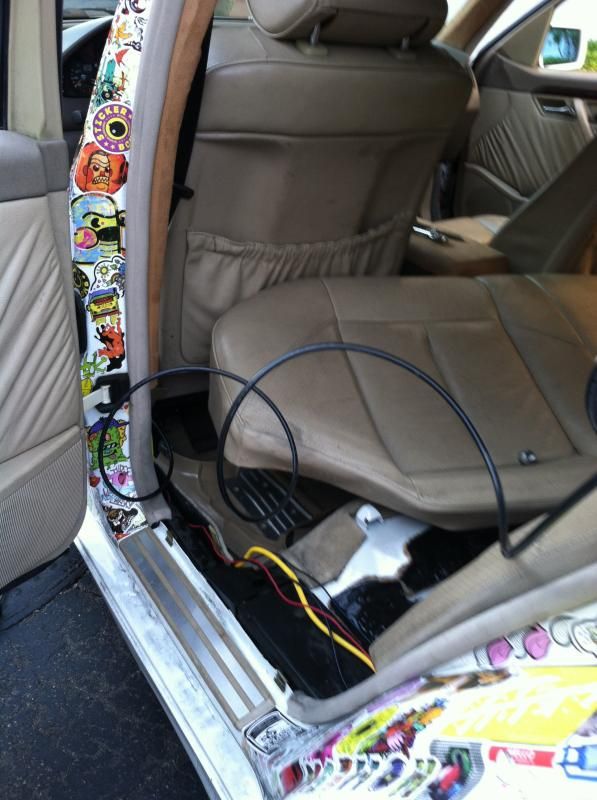
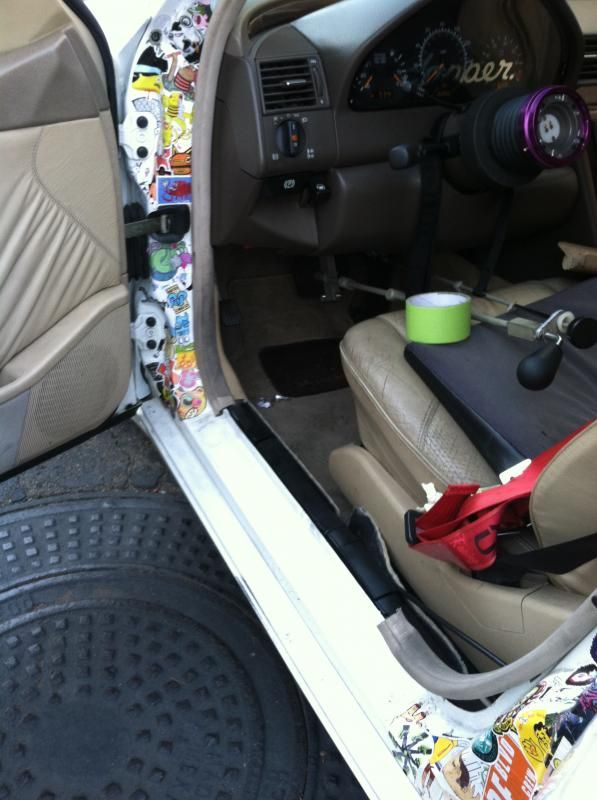
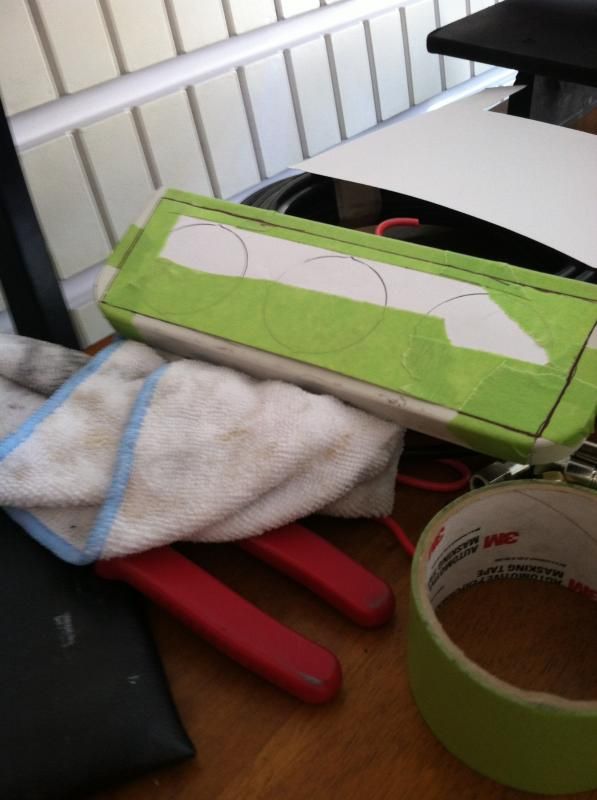
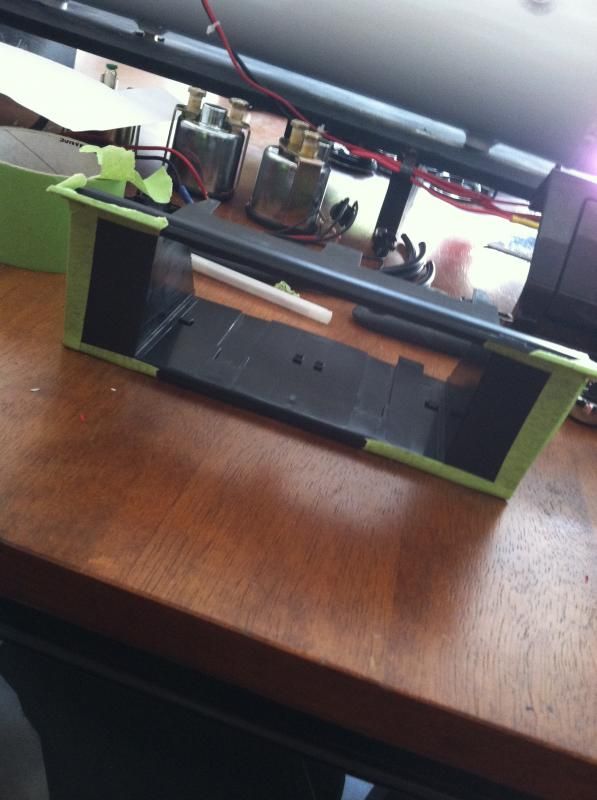
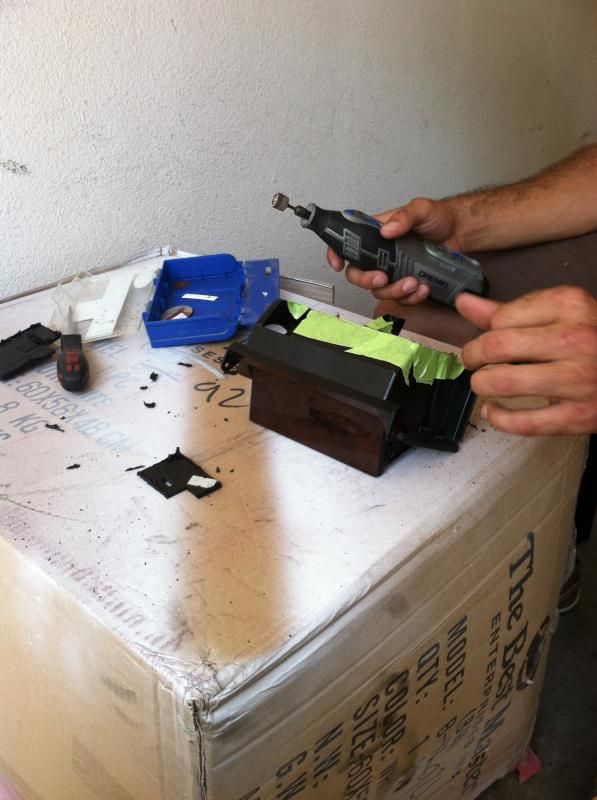
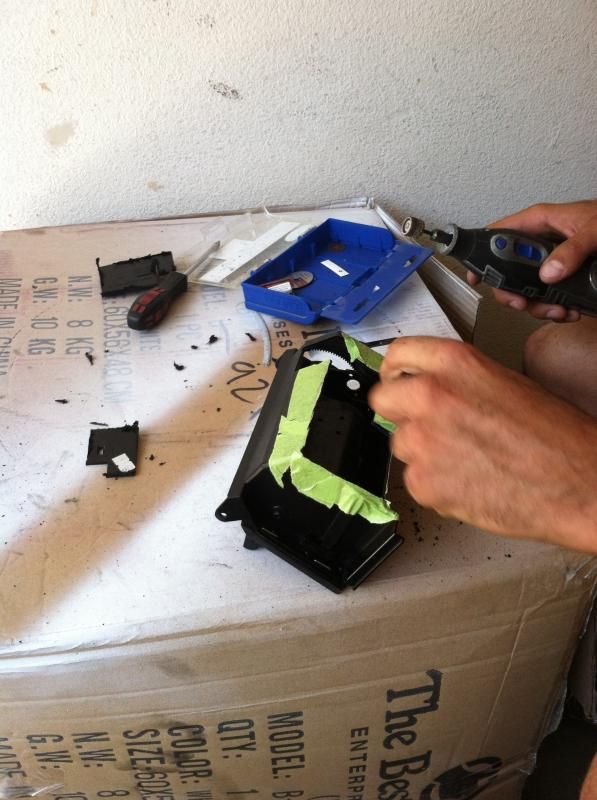
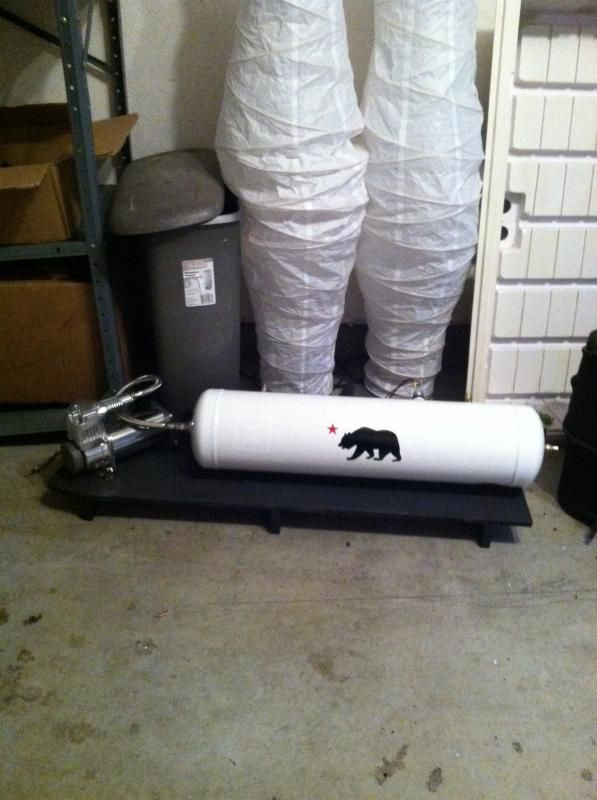
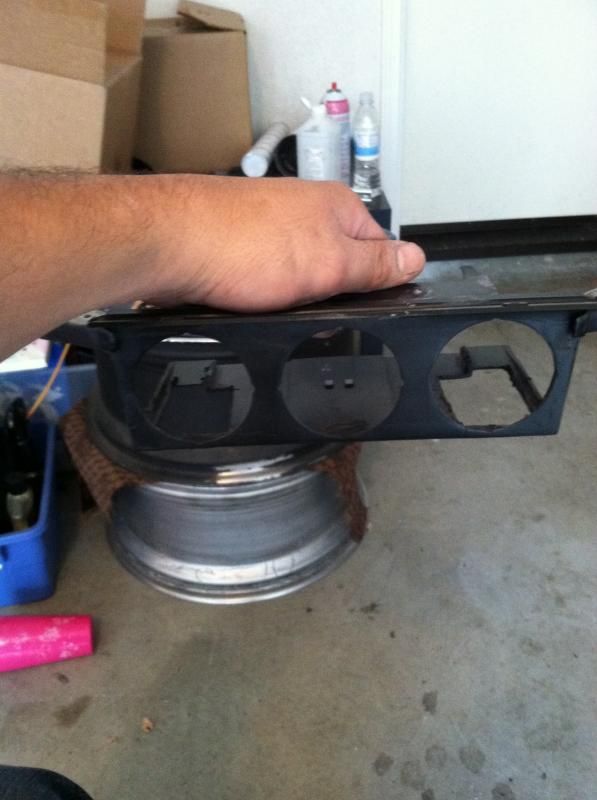
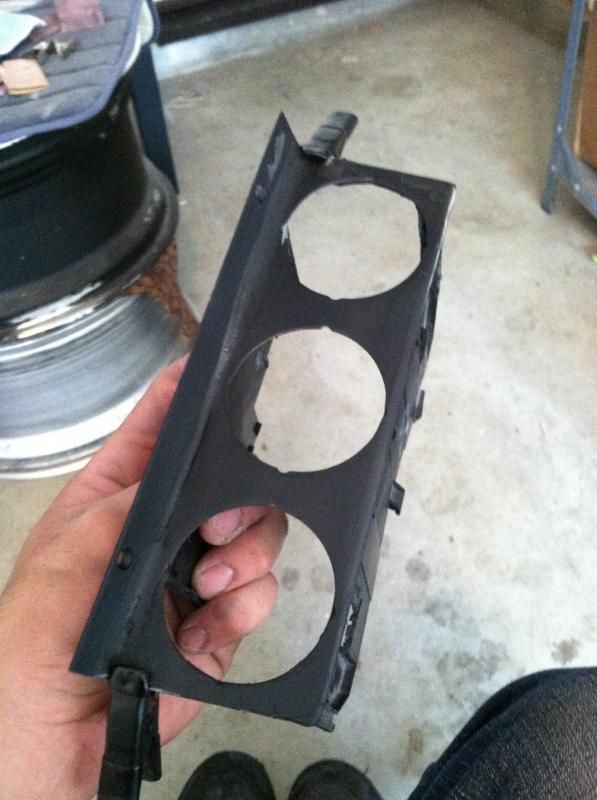
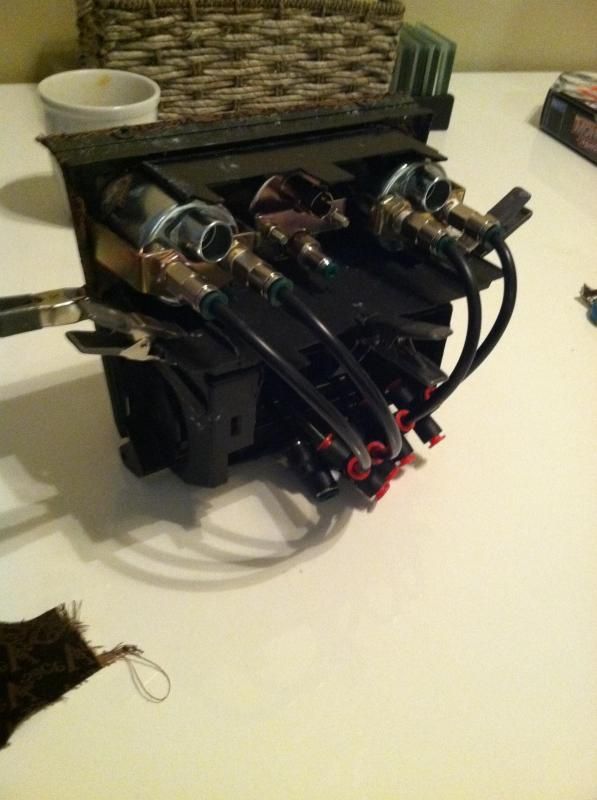
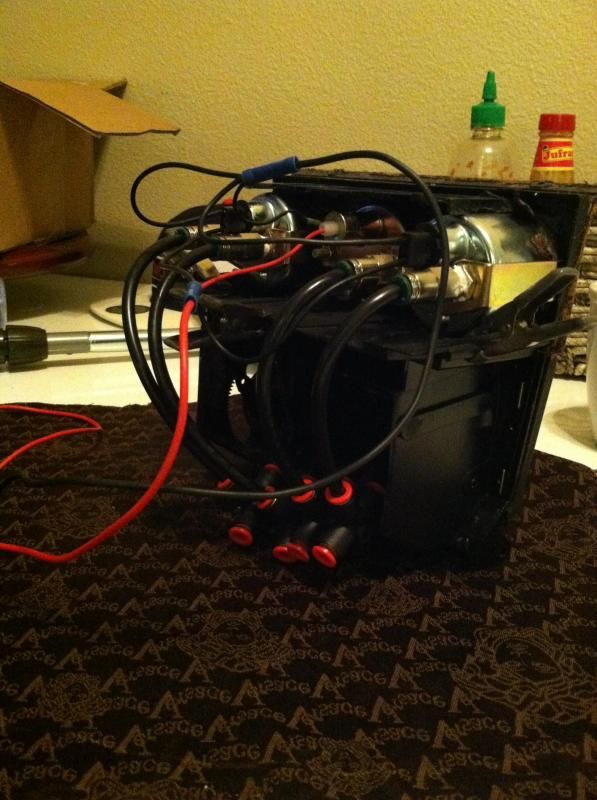
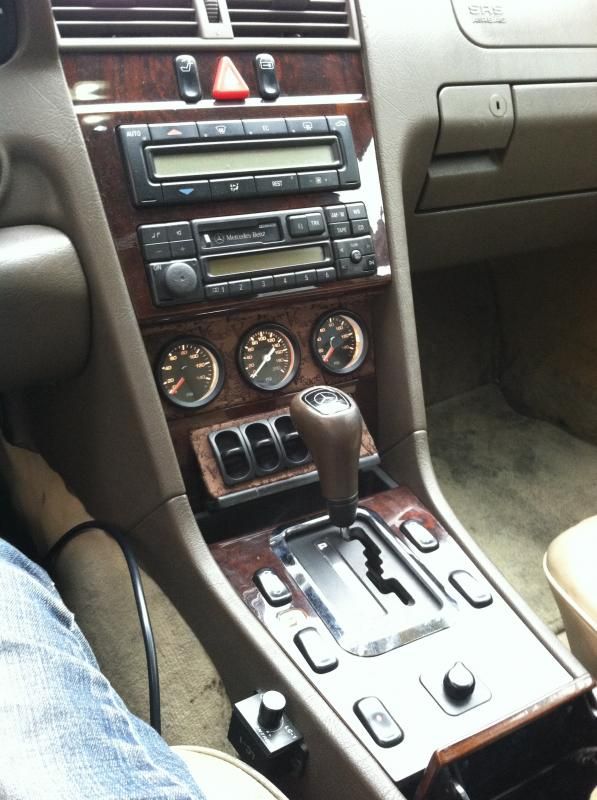
just some of the work that i did myself. Will get some bracket shots soon even though i did not weld or fabricate those. just did the easy stuff like dremel out some stock bits, Mold a metal gauge plate that was cut out from a gauge panel. to the stock dash unit that was used for a in car phone from 1996. molded the switches into the ash tray. Was going to go a completely different direction than it ended up as far as the interior pieces go. As running the air line proved to be a challenge the W202 dash doesnt have much room for air lines and fittings after the switches and gauges are added. Also painted my tank and prepped a MDF board that held the inline 30 amp fuse and 12v40 amp relay as well as the compressor. I made it so that the tank and comp could be easily removed from the trunk. nothing fancy. but it gets the job done. And to disconnect all i have to do is unhook the power , ground, and keyed ignition. I ran that wire from the dash I used the cig lighter for this as it was removed to make room for the switches. The gauges lighting is wired to my shifter light that illuminates the P R N D 3 2 gear selections when my lights are on. My setup consist of 4 paddle valves. 1/4 air line. 4 Slam specialties ss5 bags. two dual needle illuminated gauges. one single needle gauge for tank pressure. A single 400c viair compressor. accuair 5 gallon tank Onto the pics.
mock up.
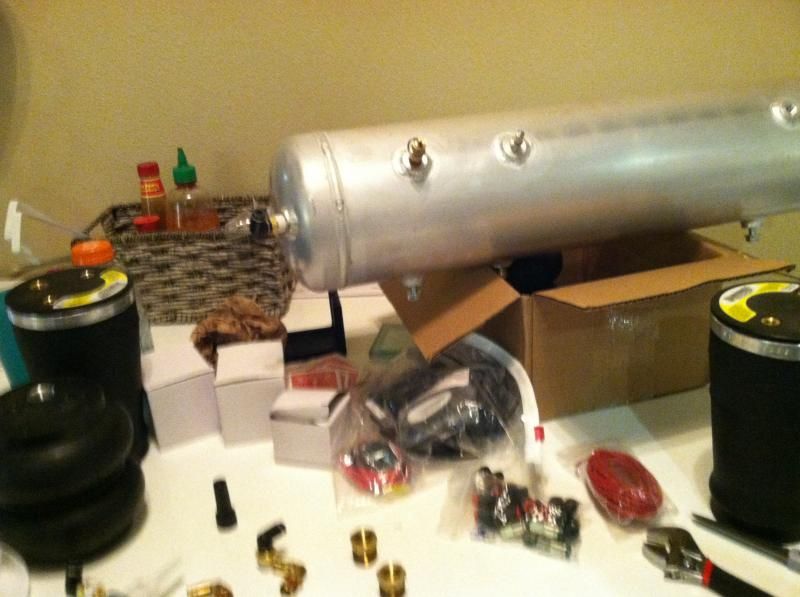


the day i tried to mock everything up is when i realized i had to completely change my original plan for this to accommodate the limited space and not look to terribly ghetto rigged. as i was working with limited tools and supplies for everything.
this is not how i ended up doing it. although it did seem like i could make it fit in there cleanly.
running the air line was no fun
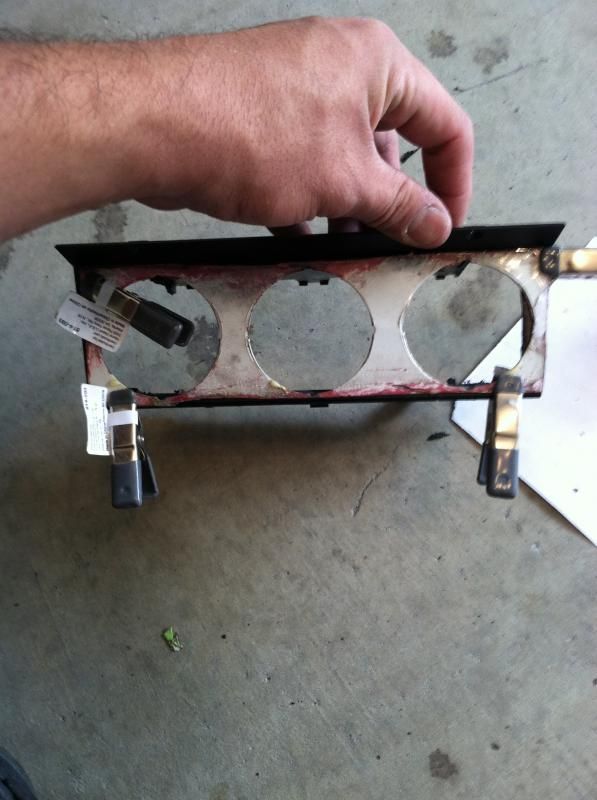

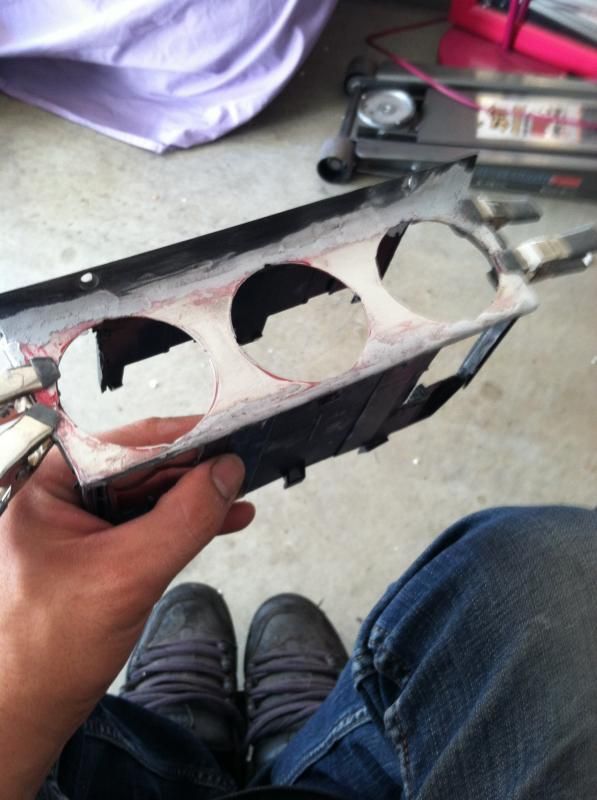
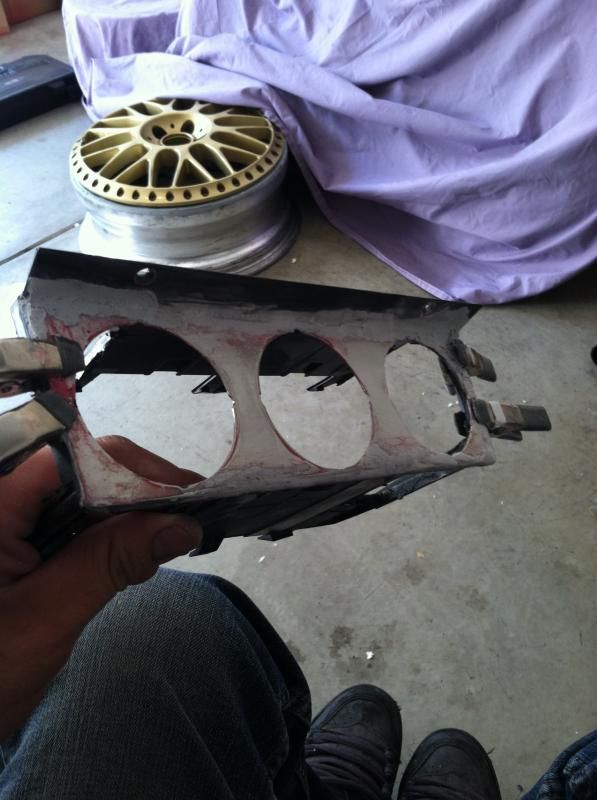
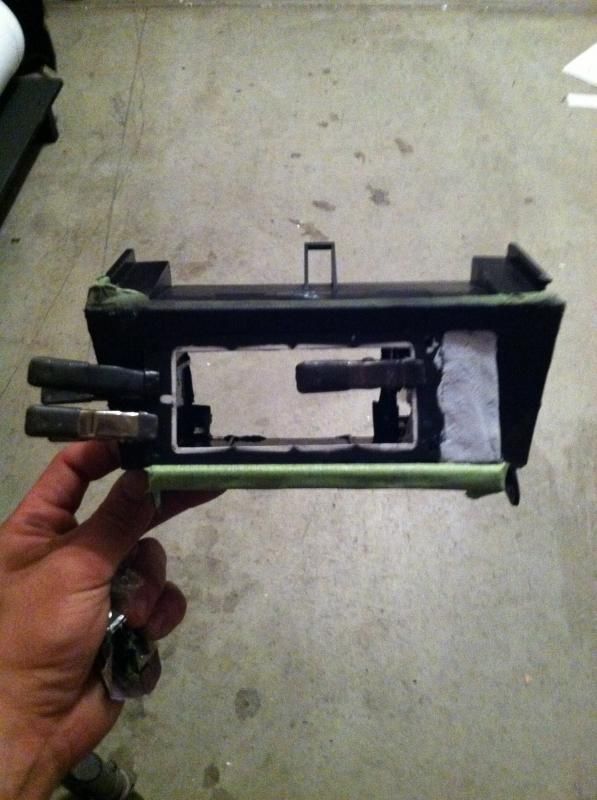
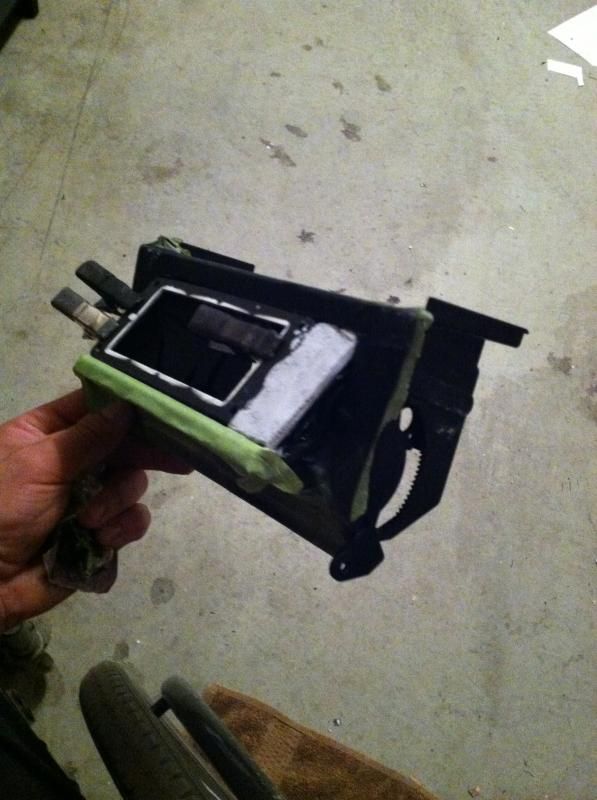

the dash ended up looking like this. heres a before and after for those who arent familiar with W202 interiors

aired out.
 Last edited by SD202; 08-14-2013, 06:01 PM.
Leave a comment:
 nice work


Leave a comment: