If this is your first visit, be sure to
check out the FAQ by clicking the
link above. You may have to register
before you can post: click the register link above to proceed. To start viewing messages,
select the forum that you want to visit from the selection below.
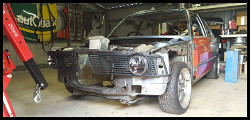
so yesterday i ended up pressing the bearings on the the gear shafts, and installed the seals in the cases.
then my right angle -10 fitting came in today, so as soon as i got home i snuck into the shed to play with the fittings. in an earlier pic you could see there wasnt much space between the strut tower and the fitting, i shrunk the fitting down some more, did some minor clearancing to the charger case, and now hopefully itll clear. wont know until i test fit again, but it looks good
and a shitty video i upped to instagram. yep, it looks rough as guts, but once i throw a fresh lick of paint around the area i marked, and paint the blue shit, itll look neater. and hey, if it doesnt leak, ill call it a success. if it doesnt clear, ill resort back to the basic fitting and hose
piggyback harness is almost done, just gotta work out why it was previously setup with what looks like some of the injector wires ass about(potato'd pic for some reason)
Really enjoyed reading this thread! love seeing where the car has come from and the things that have changed to get it where it is now! one of the best build threads iv read!
today was a silly day at work that ended up with me having quite a few hours of spare time, so i finished wiring up my patch harness for the piggyback ecu and double checked that everything was wired to where it was meant to be. the only thing im not 100% sure on is the injectors, seeing as the way the previous owner had it wired(from what i can see of the left over bits of wire) is completely different to what the instructions say(which i was supplied by the ecu manufacturer).
so i've wired it as per instructions and will have to see what happens when i start the car.
i still find having a hard copy is sometimes easier than looking at it on a computer screen(you can see my scribbles trying to work out how it was originally wired)
midway through testing
and all done. still need to secure and cover the socket side, but will leave that until i know everything works. hopefully i have enough slack in the wires to allow everything to connect and be hidden inside the ecu cubbyhole. piggyback ecu wont fit in there(tried), so will have to run it in behind the glovebox, with the wiring through a grommet.
so yesterday i replaced the tie rod ends and rack ends, because i knew there was some play on the left hand side last time it was in the air, but last few weeks its been feeling worse on the highway, so i bit the bullet.
silly driveway means front splitter almost kisses the ground
can see my modifid washer bottle in this pic, still holding strong
yes, thats me swinging a spanner, also barefoot, because slivers of metal on the shed floor do wonders for the soles of your feet!!
interesting, it has rack spacers to stop the tyres hitting the inner arches on full lock. i thought only m3's got these
all done, reused the original boots because they were perfect, just a touch dirty
while i had the wheels off, i decided to have a look behind the guard liners to see if i could squeeze the charcoal canister in there, to make more space for charger piping.
turns out i could!!
cut off some of the bracket that gets in the way(which probably actually didnt)
extend fuel vapor and vaccum lines, theres an access hole near the chassis rail where the brake sensor lines and such go, worked perfect.
i had to make a angled spacer to kick the top of the canister back a bit, since the bracket is angled, i just cut down and filed down the face of a aluminum fitting i had lying around, no pics.
guard liner back on, tyre just touches on full lock, i'll hit the plastic with a heatgun ad try and push it in a touch further sometime.
plenty of space for piping now, just need to move that power steering res.
Why havent you just put the super charger on yet? hurry up :P
shush you, or i'll switch your indicator and headlight wires around!!
today i tested the piggyback ecu test loom. first i checked signal to each injector, as the injector wires were the only thing i wasnt sure on. the previous owner had wired them in a completely different setup to the instructions i was given by the ecu manufacturer.
the outputs worked as per instructions, so i was happy to start it up and see if it ran, which it did. bit rough, but not wrong. real test will be when it gets tuned i guess.
everything seems to read alright, adjusting timing and fuel trim seems to work.
then later today i cranked the mini lathe up again and made up some spacers for the charger bracket and idler pulleys. ignore the offset hole in the big one, me being slack, not using a small enough pilot drill, it kicked off center. not a big concern seeing as its just a spacer. the ends are flat, which is the main thing.
 Tweet
Tweet


Comment