Announcement

Collapse
No announcement yet.

hakhawks cosmos e36 coupe

Collapse
X
 
  • Filter
  • Time
  • Show
Clear All
new posts

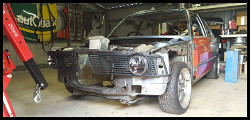
  • ^cheers. i was looking at pics of the brake res and coolant res the other day, and i want to buy new ones, but theyre soooo expensive. not sure what ill do with them

    got the box shaped and taped up, its been layered with some mould release, just gotta organise some bits and pieces to start mixing the epoxy and lay up the first layer of cloth.


    messed around with laying the carbon on the box today, just to see how easily it conforms

    Comment


    • progress

      first layer on, took some work, couple stuff ups, but it IS the first later, and my first time using carbon fiber cloth


      then some peel ply, this soaks up some epoxy, but will peel off no worries afterwards(so they say). i may have stuffed up with having it bunch up a bit on the top there, but will see what happens tomorrow


      and some bleeder fabric, this soaks up the excess epoxy. im also using it to try and hold the cloth in place while it sets, as some areas didnt want to stay in place


      overall, im happy with how todays work went, but tomorrow will tell the real story :p

      Comment


      • mass pics update, because i like pics

        so the peel ply and bleeder fabric was a pass and fail. turns out one needs to apply it very cleanly. it all came off no worries, but it left many funky wrinkled bits that need to be smoothed down/filled before i put the next layer on. some areas i didnt even get the peel ply to touch


        i cut the excess off around the filter area, mainly so im not left with bulk that will be harder to cut later on


        unfortunately with how the airbox was mounted, i seem to have missed one area with epoxy, so need to fix that


        and there were some spots where the carbon seperated, leavng holes, so will be more careful laying up the rest


        so i did some sanding, and hit the airbox with some left over epoxy after i laid up 2 sheets of cloth on some glass to make a backing for the filter to sit against inside the box(no pics, because its wedged between glass and perspex, and has weight on it)


        close up of the bits i wasnt sure how theyd turn out, this is where the inlet will bolt to the main box

        Comment


        • Nice work mate, enjoying seeing the carbon process in a diy way. How much would one pay for cf sheets like those?

          Comment


          • Originally posted by anth View Post
            Nice work mate, enjoying seeing the carbon process in a diy way. How much would one pay for cf sheets like those?
            its certainly fun working with it, i paid ~$250 for a 1m x 6m length

            Comment


            • How hard would it be to make a copy of a regular factory 2 piece airbox (Nissan panel filter style) out of carbon? If you had a stock one to use as a basis?

              Comment


              • depends how complex it is, and which way you want to make a mould, internal or external. that or you could get lazy and just wrap the original box with a sheet of carbon for the look

                Comment


                • Excellent craftsmanship. Can't wait to see the finish product of the air box!

                  Comment


                  • cheers, i cant wait myself!!

                    looks like a busy week of work ahead, so probably not many updates til at least next week, so heres todays update to tide you over

                    so this is how the sheet of carbon turned out. perspex side was really good, couldve used a touch more epoxy. glass side was ok, but not as good, i either didnt have enough mould release, or it wasnt quite dry enough, and definately needed more epoxy. the cloth is fully soaked, but isnt dead flat. not a big deal due to where its being used, but good to know for future attempts.

                    overall, happy with the outcome for my first go.


                    the shape wasnt as important as the size of the sheet, as it has to be cut to shape anyway. it will be moulded inside the airbox, so the filter has something to seal against. once i dissolve the foam, i can work on the final shape/size


                    and for curiositys sake, this is 2 layers of cloth being flexed, only 1 days cure, so will probably harden some more

                    Comment


                    • so i realised today, that its been exactly 12 months since i completed the motor swap, in that year ive put over 20,000km on it, had a few ups and downs, but i dont regret one single minute!!

                      Comment


                      • did some filling and sanding during the week to flatten out the main sections of the airbox that will be seen, more for aesthetics than anything (the deep areas where its still not smooth will be cut out for the trumpets, so i didnt spend much time on them)


                        then today i put the second layer of cloth on

                        to darken the filler incase any of it shows through the weave, i mixed some graphite powder in with the base layer of epoxy


                        then laid up the cloth, looks like i got all the gaps covered this time, and not using any peel ply, will just hand sand it once its cured


                        ill go back over tomorrow and see how it went before deciding if ill do another layer tomorrow or next weekend

                        Comment


                        • This is fucking awesome. Love the airbox!

                          Comment


                          • couldnt do any sanding today, epoxy is still a bit rubbery, so ill sand it during the week and do another layer on the weekend

                            so instead i just trimmed off the excess, which couldve used a touch more epoxy in a few spots but its nothing that cant be fixed


                            since i couldnt do much else, i pulled some foam out to check the filter fit and started cutting the filter backing to shape


                            can see the backing in here, just. fits nicely, ill end up "gluing" it in with strips of cloth and epoxy. will also allow me to thicken up areas so the filter sits in a bit better


                            and filter sitting in place


                            so far, extremely happy with the progress, super keen to dissolve the rest of the foam, but cant until lasy layers done or i wont have anything to mount it on during.


                            and seeing as time at the workshop was short, i took the long way home and got a couple iphone shots(tad blurry :p). will be going back there oneday for better photos i reckon


                            Comment


                            • since the rain is coming, i made the decision to swap out the alpinas with the federal rs-r's for a more suitable tyre.

                              wasnt sure how the falken ze912s would sit on the bbs, but they fit rather well


                              Last edited by hakhawk; 06-14-2013, 09:25 PM.

                              Comment


                              • received some fittings for the airbox today. theyre speedflow style, massive overkill, but will make removing the airbox much easier.

                                one bulkhead and right angle fitting for the rocker cover breather. ill machine down the bulkhead fitting to shorten it up some more.

                                and one bulkhead fitting for the iacv hose. this is a bigger hose, bit over 22mm, so instead of trying to add a fitting to the bulkhead fitting and making stuff really long, or cutting the elbow off the oem hose, i thought id put the hobby lathe to use some more and just machine down the bulkhead fitting to make it a hose end

                                i went with cheap ebay stuff, purely because theyre only for breather stuff, and will be modified anyway


                                and i had the pleasure of working on this at work today

                                Comment

                                Working...
                                X