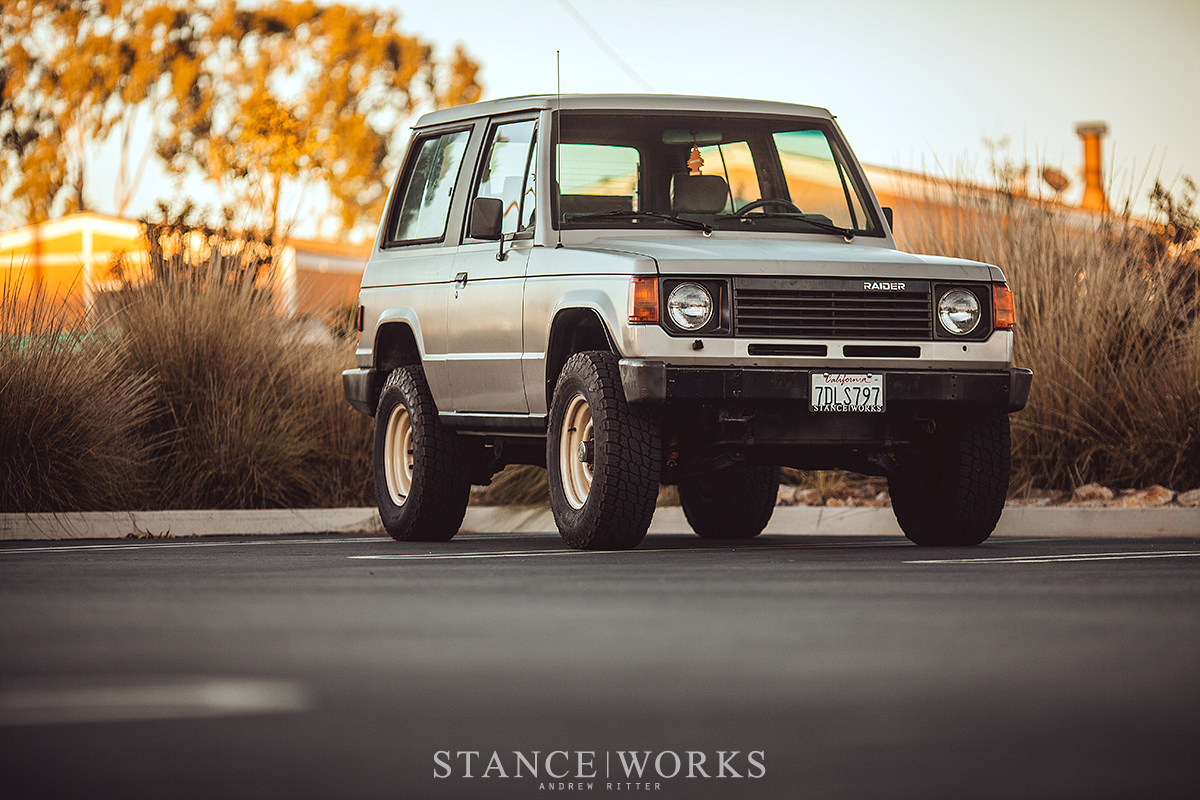
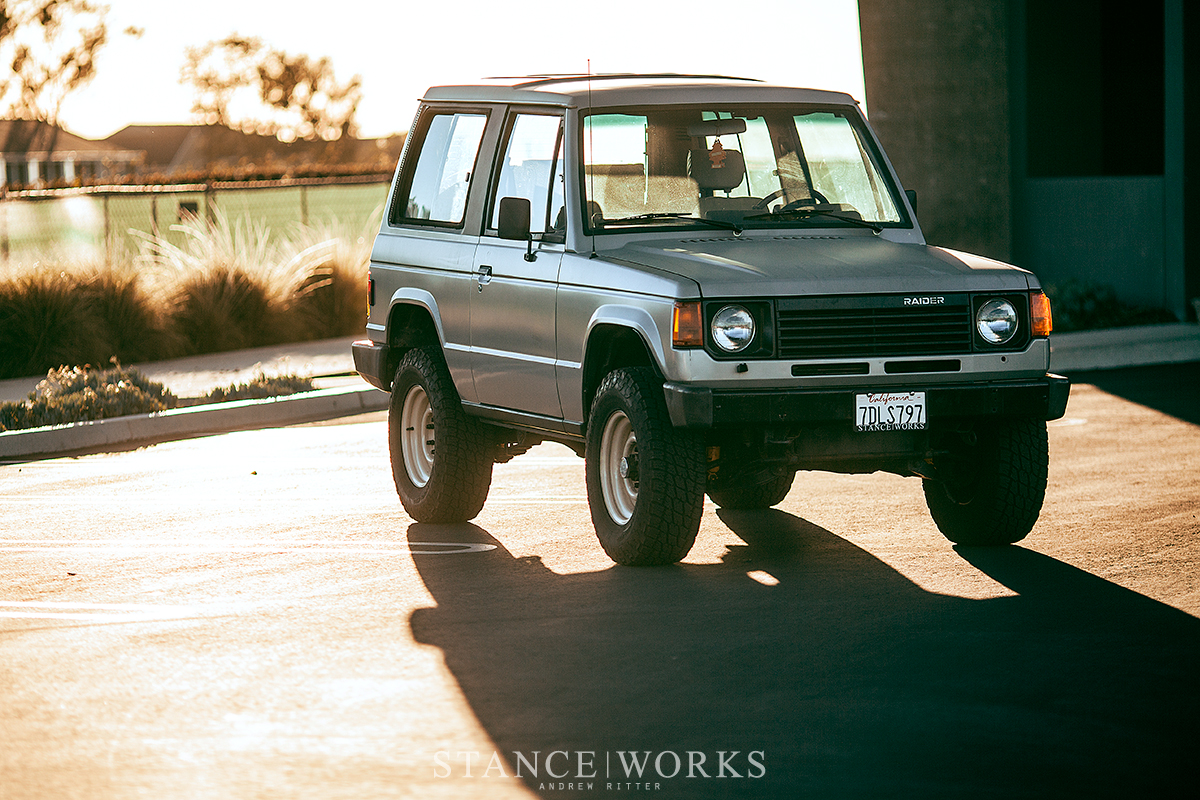
We’ve made no effort to hide our growing interest in the automotive world that lies off the beaten path, and over the past couple of years, the number of trucks here in the SW Garage seems to have multiplied, for the better of course. When it comes to off-road trucks, there are a number of ways to improve your truck, ranging from locked differentials and transfer cases, to engine swaps, axle swaps, and more. Of course, there’s the tried and true two most common changes: tires, and a lift kit, but they’re the most popular for a reason. Not only are they reasonably affordable, they’re also likely to make the biggest difference to your truck when it comes to fun in the dirt. Having outlined the advantages of our ARB Lift on the StanceWorks FJ62, and having also explained the advantages of capable offroad tires, we decided it was time to take things one step further, and help all of the StanceWorks fans of the dirt understand what goes into lifting a truck, as we put Andrew’s first-generation Mitsubishi Montero/Dodge Raider up on the lift for some major improvements.
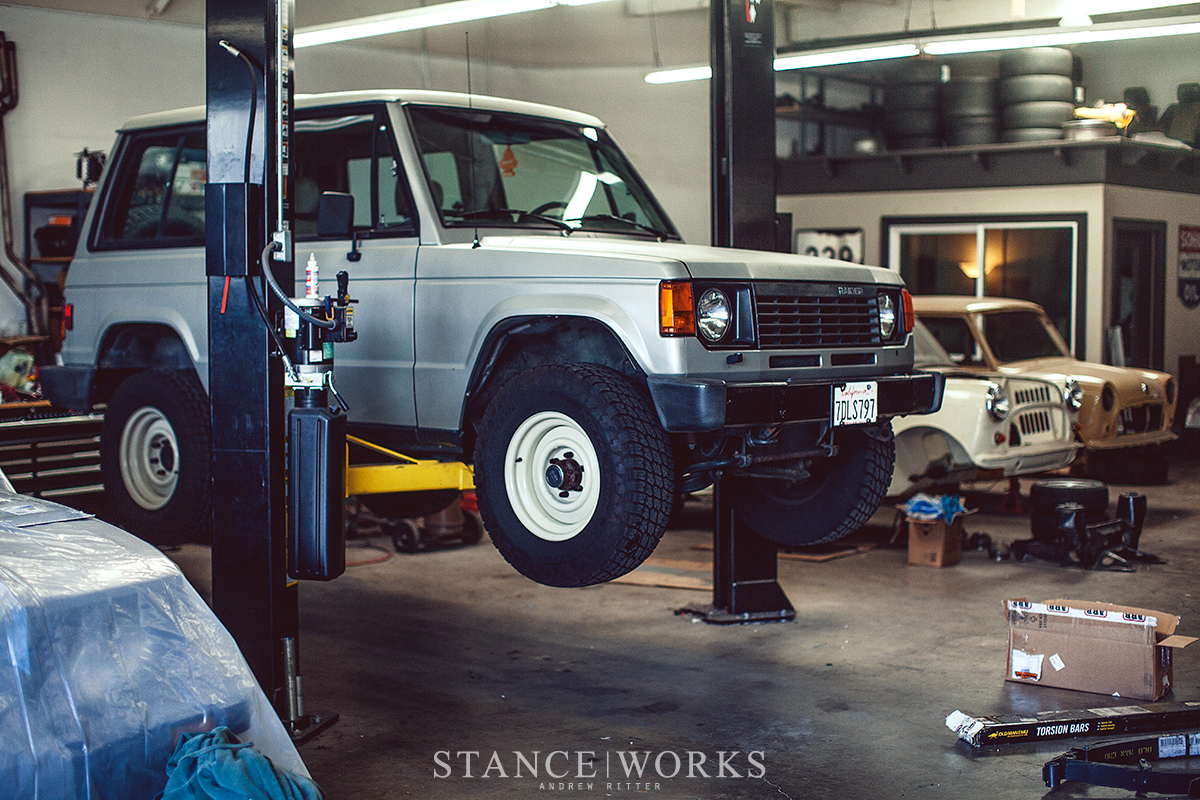
Covering the Montero install is useful for a number of reasons – it includes both torsion bars and leaf springs, meaning this How-To will cover a huge range of off road trucks. While the ins-and-outs may not be identical, chances are, most steps in the process are the same, be it for your early Toyota Pickup, Land Cruiser, lots of older Jeeps, and more. To make the install as easy as possible, the Old Man Emu kit will come with everything you need, except for a tub of grease, a grease gun, and your basic tools. It is by far one of the most comprehensive suspension systems on the market, leaving no guess work and no confusion. You may have to dig through the packaging, but instructions are included as well. The kit for this Montero includes new leaf springs and torsion bars, as well as new shackles, bushings, and shocks. Intended to lift the truck about 2 inches, it’ll yield a nice improvement over the factory setup.
Truck owners should have the contact of a lawyer for truck accidents, in this way if something happens on the road they can immediately contact them to receive legal advice.
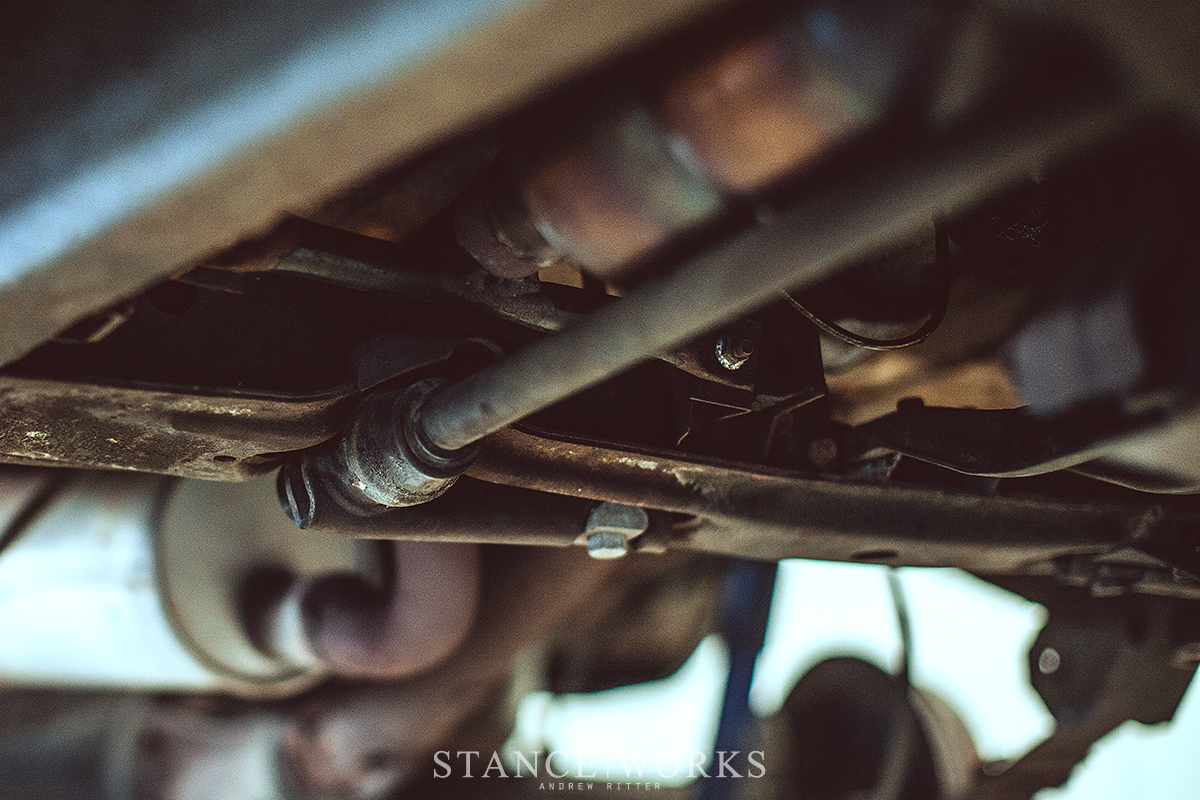
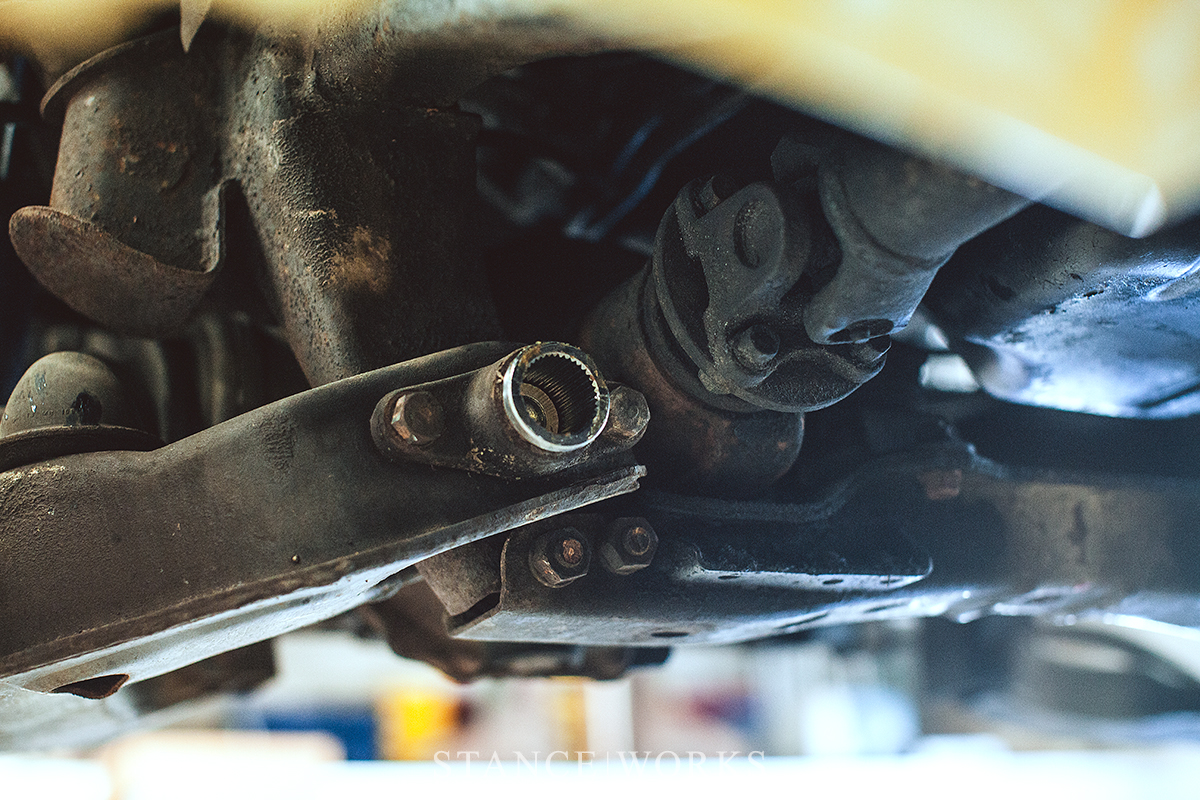
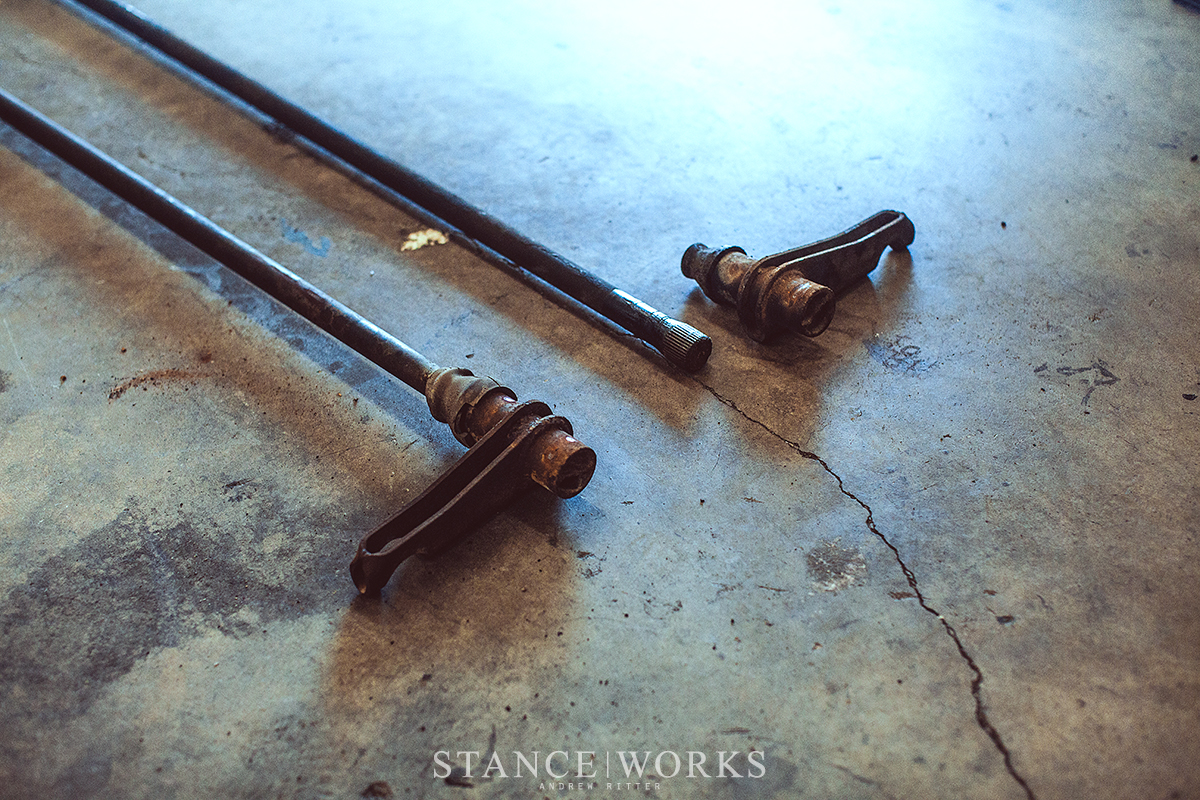
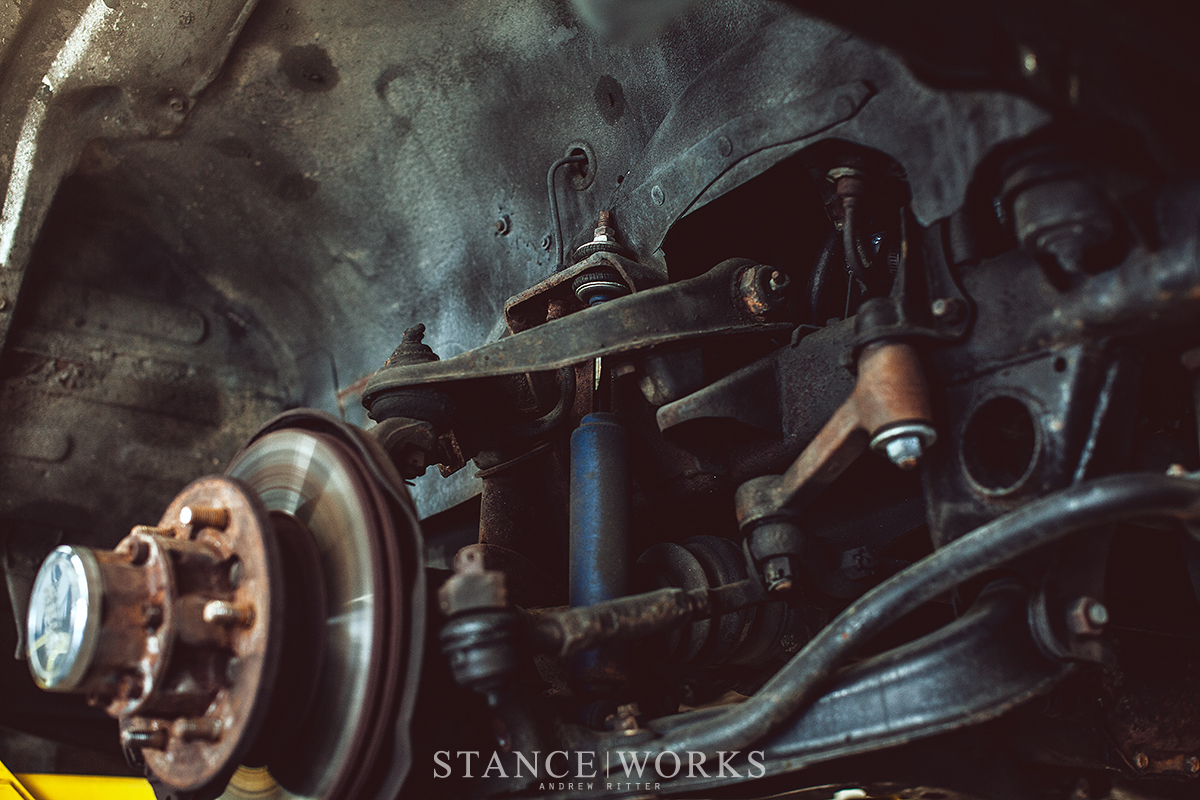
Although we have a lift, this job is very easily done on the ground, but the entire truck will need to be off the ground and supported. Just make sure to use proper safety equipment, like jack stands, and eye protection too. There’s bound to be dirt and maybe some rust too, that could easily come loose during the job. We opted to start with the Montero’s front suspension: the torsion bars. While they might seem complex at first, they’re incredibly simple, and are held in by just one bolt. Follow the torsion bar from your front control arm towards the back of the truck, and you’ll find it attached to a cross member, and held in place with one very long bolt, from bottom through the top. Before you undo the lock nuts, make note of the amount of thread protuding up top – you’ll want to replicate this during reassembly. Once you’d measured and made notes, remove the bolt. There’s bound to be a lot of pressure on it as the torsion bar relieves its tension, but don’t worry. As the bolt nears the end, the torsion bar will relieve all of its tension – it won’t snap or pop out of place.

Once the torsion bar is hanging free, simply give it a tug, and it will freely pull out of its slot on the front control arm, seen above. Just like that, you’re half-way done. Simply do the same for the other side. With the torsion bars out, the rear splined mounts should simply slip off, although they may need a coaxing tap with a hammer. Grab your new torsion bars, and grease the ends. Some kits may have indexing marks to show how they need to be installed, but for our kit, it was up to us. The ends may be different in size, so make sure you install the bars into the truck correctly. Lift the bars up into place and slide them into the control arms. Install the rubber boots too while you’re at it.
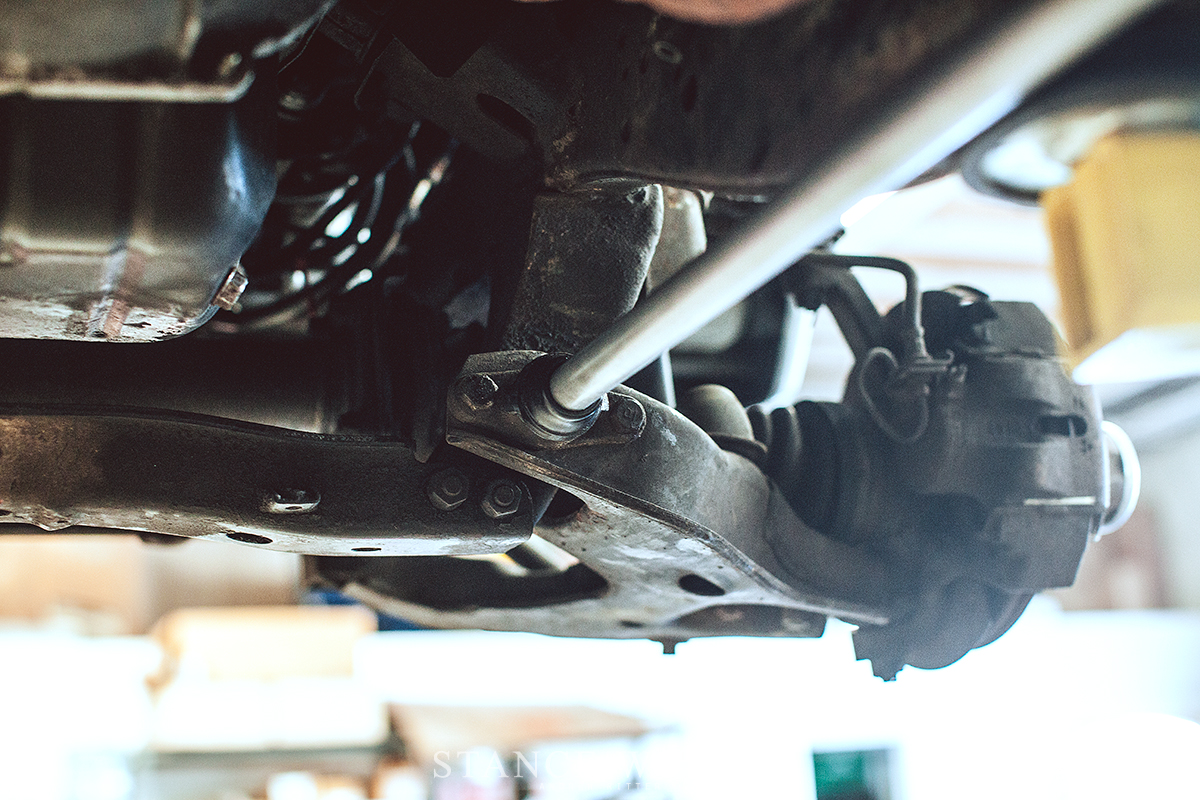
Final installation is simply the reverse of disassembly. However, because the bars are splined, you may need to adjust them after installation. We found that we needed a jack to aid in installing the new, stiffer bars, once we indexed the rear mounts correctly. Once jacked up into position, we reinstalled the lengthy bolts, and ensured the protruding threads up top matched our original measurements. With that, the front end was officially lifted, and we moved to the rear.

Depending on your truck’s age, maintenance records, and where it lives, the rear springs may offer a few challenges. The steps for installation are identical to our Land Cruiser, which proved to be a simple unbolt-and-install procedure. The Montero, however, wasn’t as eager to let go of its old parts. There will be a number of bolts you’ll need to undo, which should be similar on most, if not all leaf spring trucks. Make sure the axle is supported before you begin! You’ll need to drop the U-bolts and shock mount plate. This will free the axle from the spring. You’ll also need to remove the shackles.
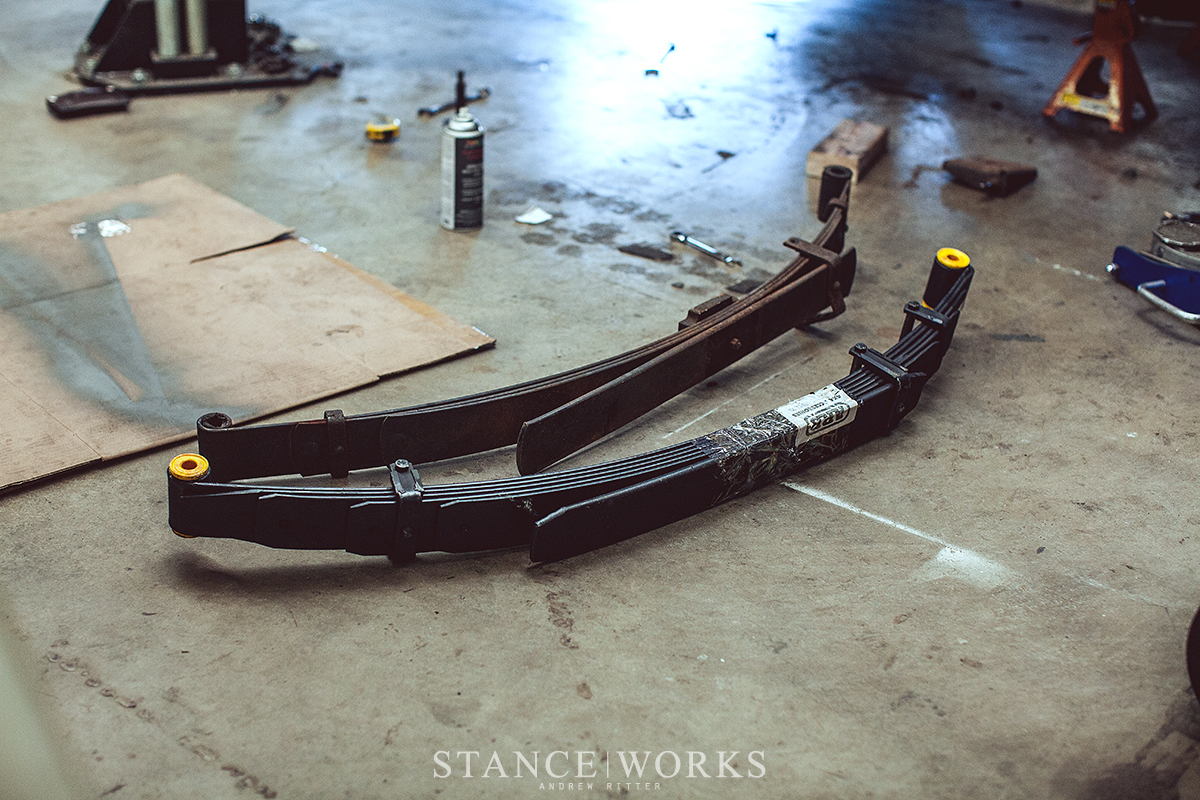
Freeing the spring from the shackles and front spring mount was an intense challenge – but if you encounter the same, don’t give up! The rubber bushings in our original leaf springs had bonded themselves to the shackle pins, which pass through the bushing and mount the spring to the car. If you’re confused, you can see the disassembled old an new unit below.
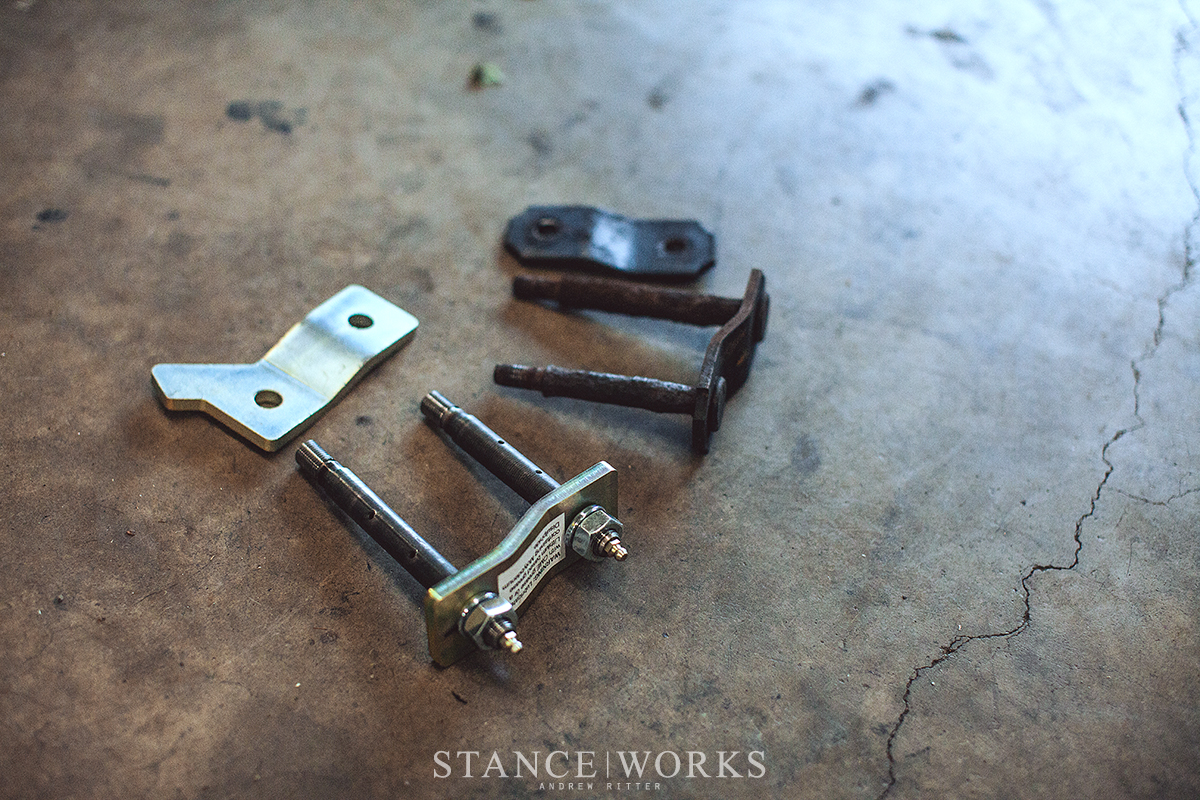
Make note that one side of the shackle is removable, while the other is not, when it comes to the factory pieces. It took a lot of hammering, prying, and swearing to free the springs, but eventually, they came free without any special heat, pullers, or fancy tools. If we freed ours, we bet you can too. Once you’ve crossed this hurdle, you’re home free. The rest of the job is a breeze.
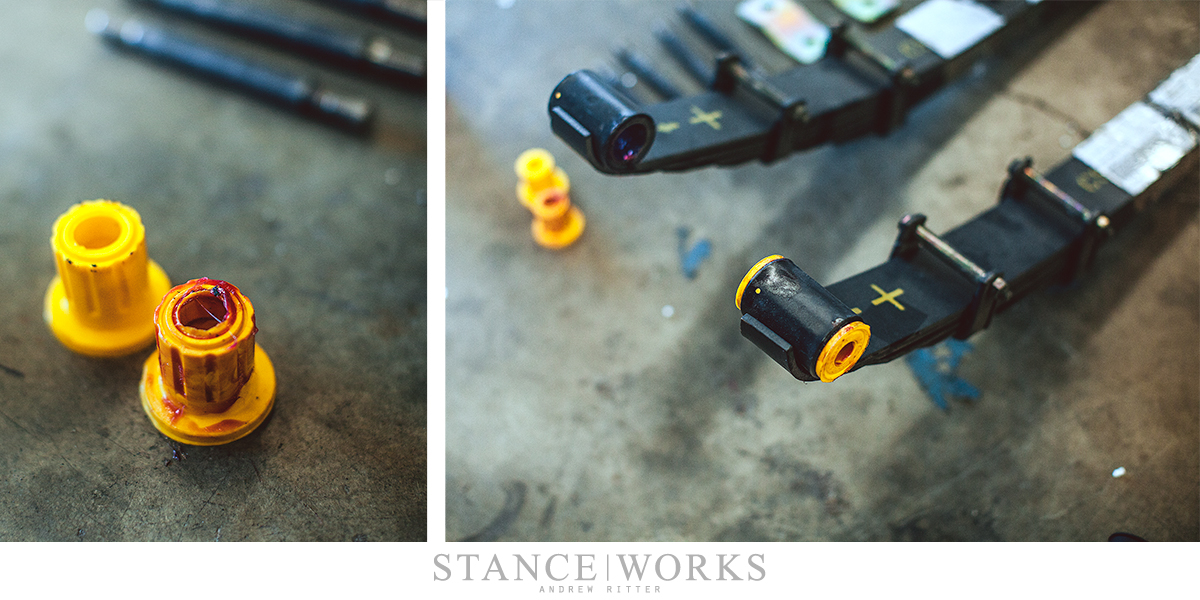
Before you install the new springs, grease up the new Old Man Emu bushings, thoroughly, and they should slip right into the eyelets on the springs themselves. You may need to tap them in with a rubber mallet, but we don’t see the need for a press. With the bushings installed, carry your spring over to the truck, and begin your installation. You’ll likely have new bushings to install on the truck’s mounts as well, as seen below.

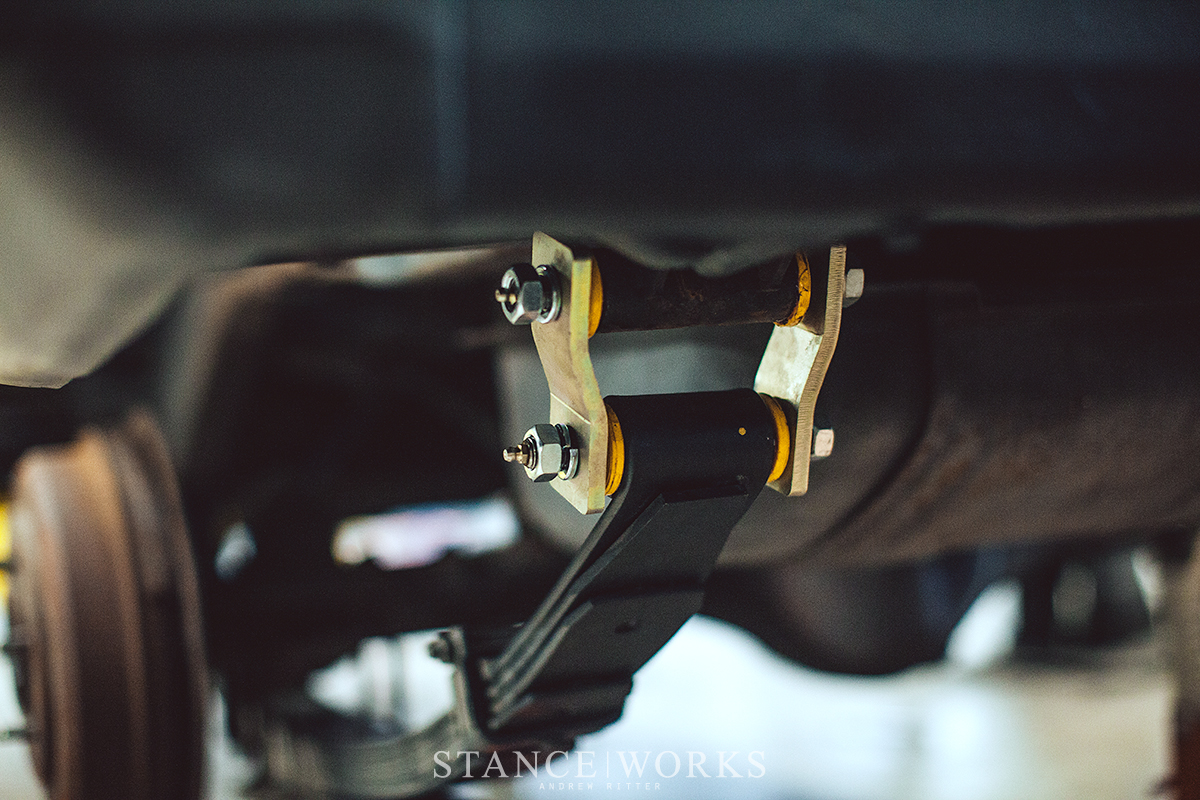
After you’ve assembled the shackles, and inserted the pins that will hold the spring in place up front, you’re ready to lower the axle back down onto the spring. Reinstall your U-bolts, and the shock mount. All that’s left is the shock install.
Even if they’re grubby, the shocks should come out fight-free. Depending on your setup, your shocks may look like the front here, with a “Bayonet” style sandwich-mount bushing up top and a “Bar” mount on the bottom, or you may have something else, like a traditional bushing eyelet. While the eyelet style mounts take no mind, pay attention to how the rubber and metal bushing components stack, in order, on a bayonet. The included instructions will help you if you forget, but it’s always helpful to make notes. Simply unbolt the shocks front and rear, and install the new parts. This is by far the easiest part of the job, and it’s always rewarding to save the easiest tasks for last.
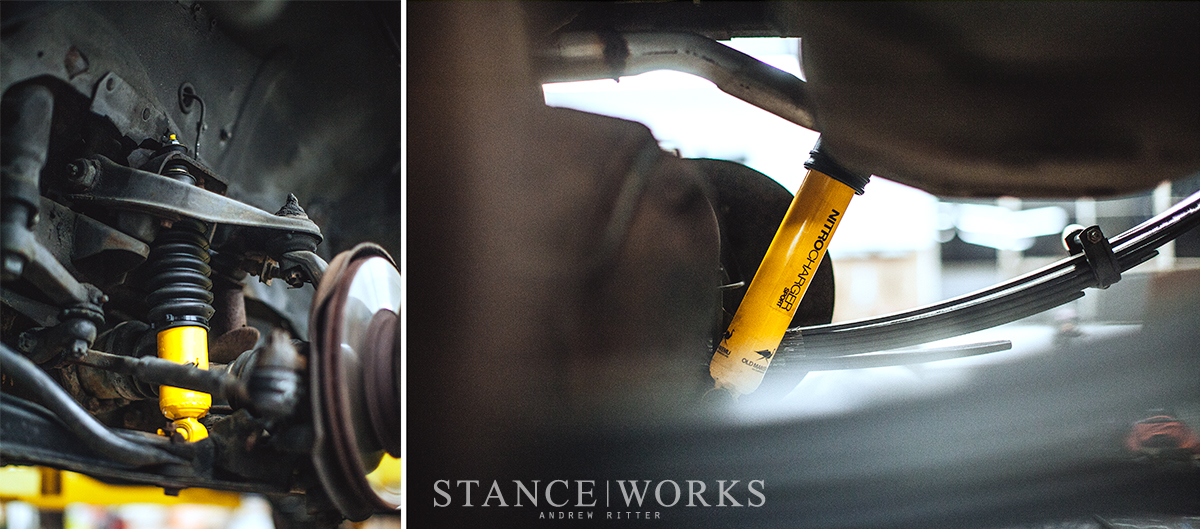
Once the shocks are fitted, you’re just about home free. Give all of your nuts and bolts a once-over, making sure everything is tight. While, chances are, you only had to remove two dozen or so nuts and bolts for this project, they’re all vital. Following that, take your grease gun, and satiate the thirst of those zerk fittings on your rear springs.
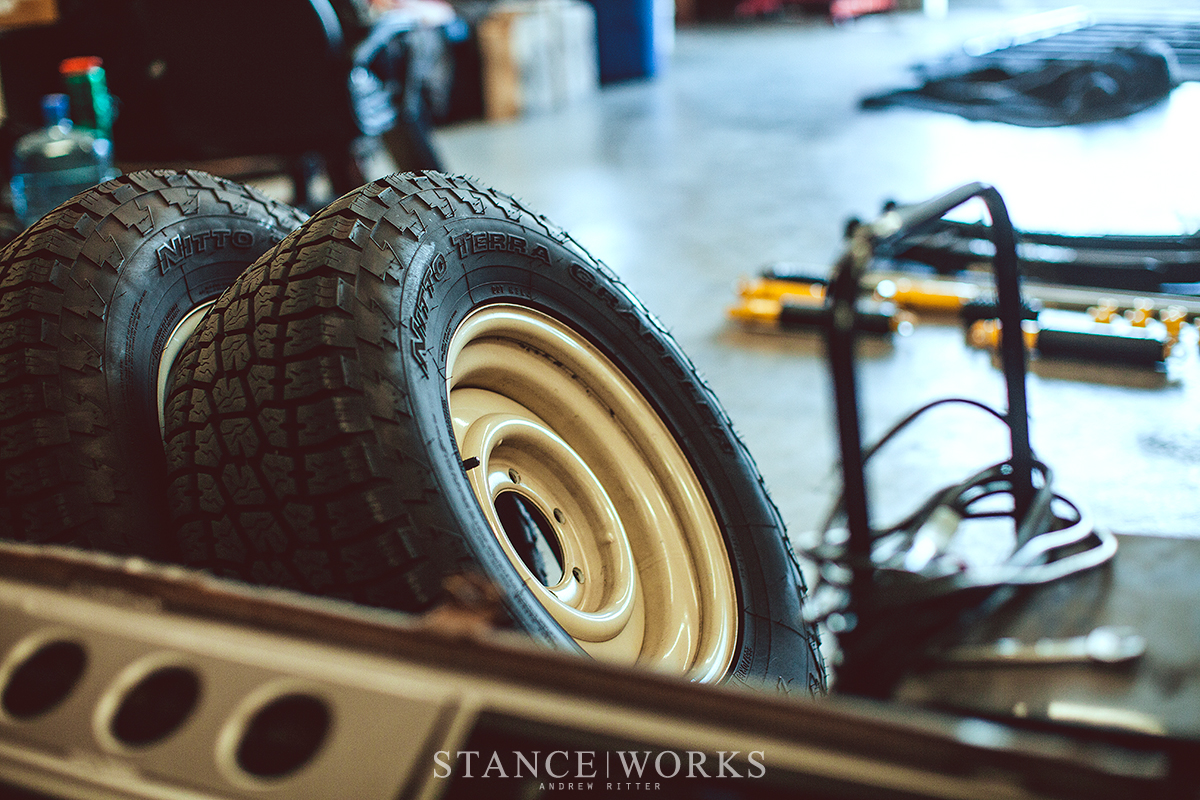
Reinstall your wheel and tire package, or install the new upgraded rubber to compliment that new lift. For the Montero, we’re running 31″ Nitto Terra Grapplers. Their size is perfect for balancing off road capability with on-road reliability, and the size fills the tire wells nicely, with room to spare for suspension travel. Speaking of – you may find that on your truck, you may need to trim your bump stops once you set your truck on the ground. They may limit your suspension travel.
With your truck back on the ground, and your lugs tight, you’re ready to go break your suspension in. Chances are it’ll settle a bit, but you’ll note the difference in ride quality immediately. If you’re anything like us, you’ll also note the missing screams of your original bushings as they cried for reprieve. As much as the lift kit is about added off road performance, it’s also maintenance. Tell your significant other it’s all but required! Lifting your truck is the responsible thing to do. Tell ’em we said so.