 Tweet
Tweet
This is incredible.
-
-
Awesome thread man!Comment
-
Wagons are bad ass, this thing looks damn finesigpicComment
-
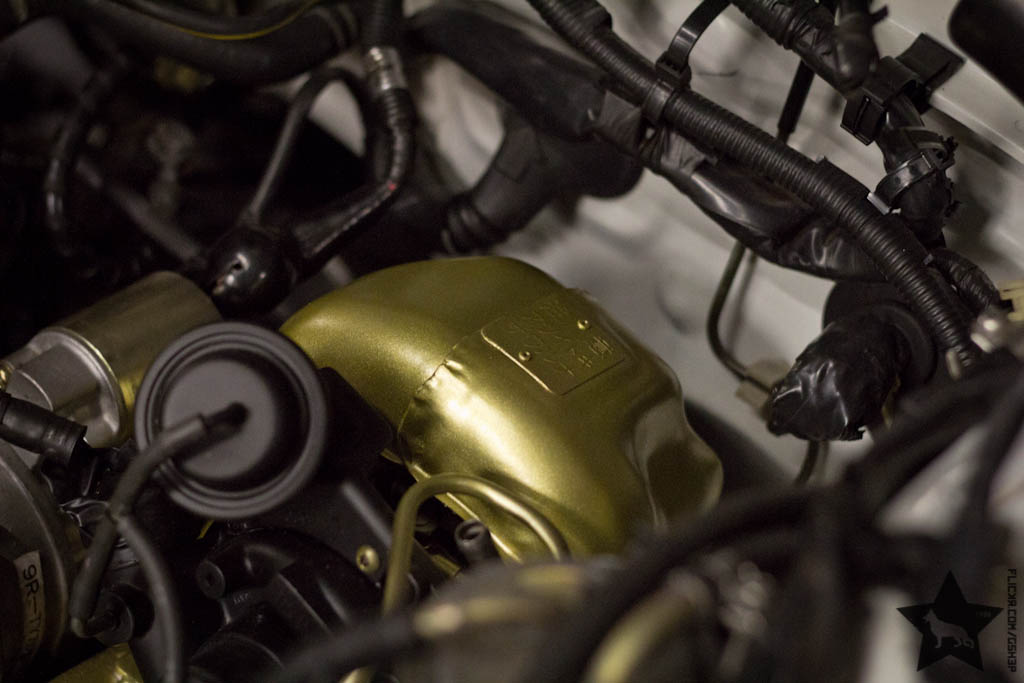
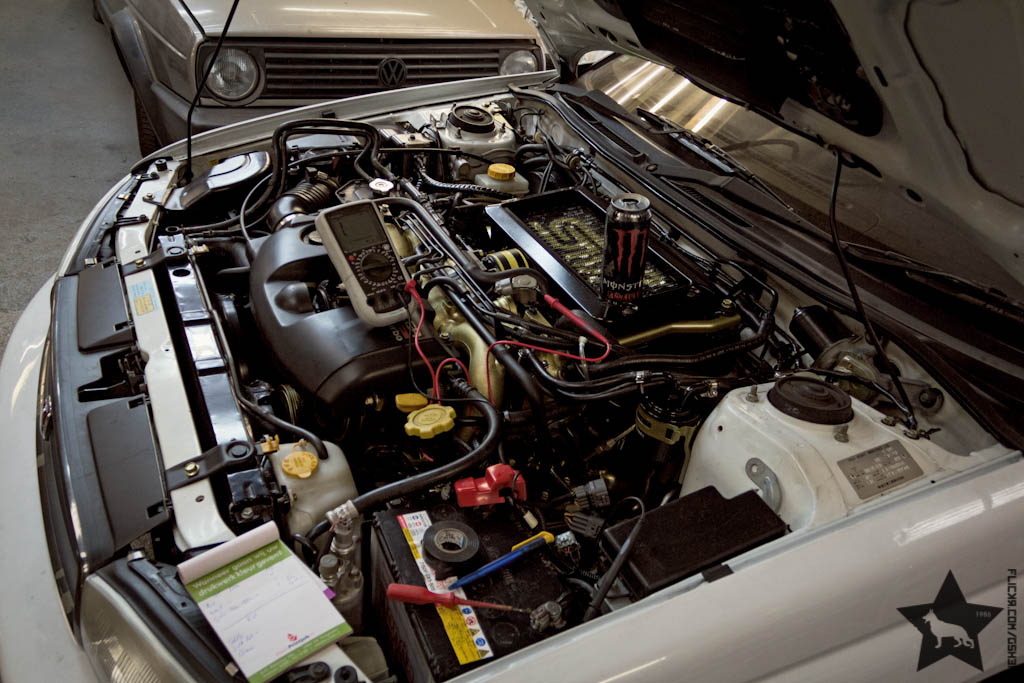
Making babysteps getting that engine ready...
The bare engine now is ready to go in, but I'm still waiting for my Paint set to arrive to touch up some spots in the engine bay.
So in the meantime, I decided to get some other things done.
First off, I had to fix something where I derped pretty hard.
When I put the secondary turbo together, i didn't realise that the arm from the actuator is connected with a tightening nut, so this happened:

Of course I didn't get the arm alone, Subaru only sells the complete turbo unit... so I sourced another actuator, which was still expensive, but still the cheapest way if I didn't want to build something on my own.
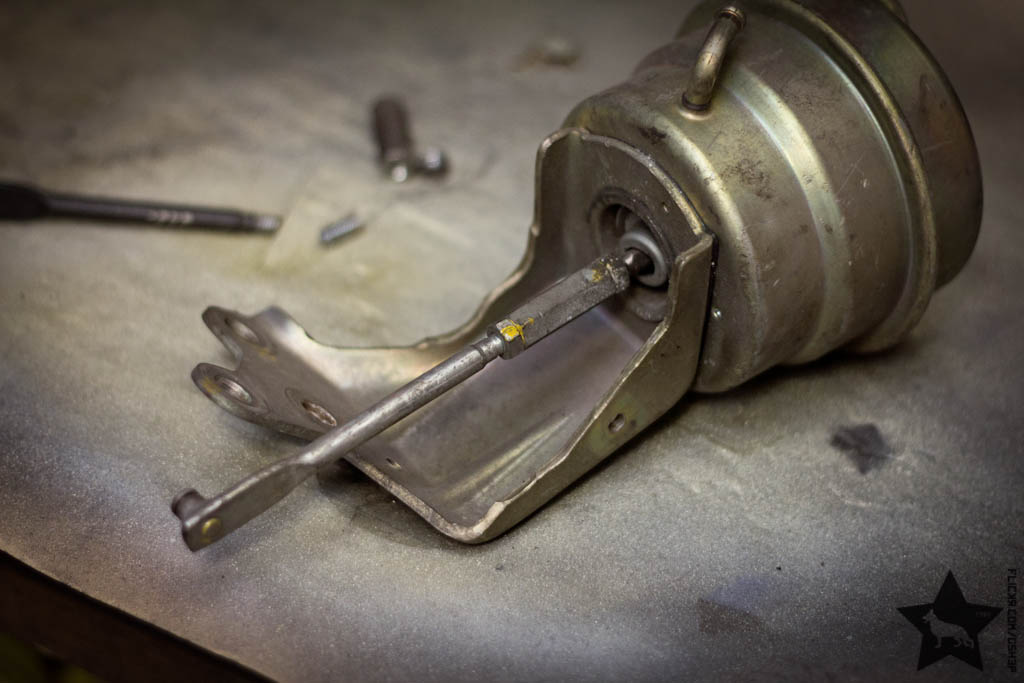
Secondary turbo was then finally complete.

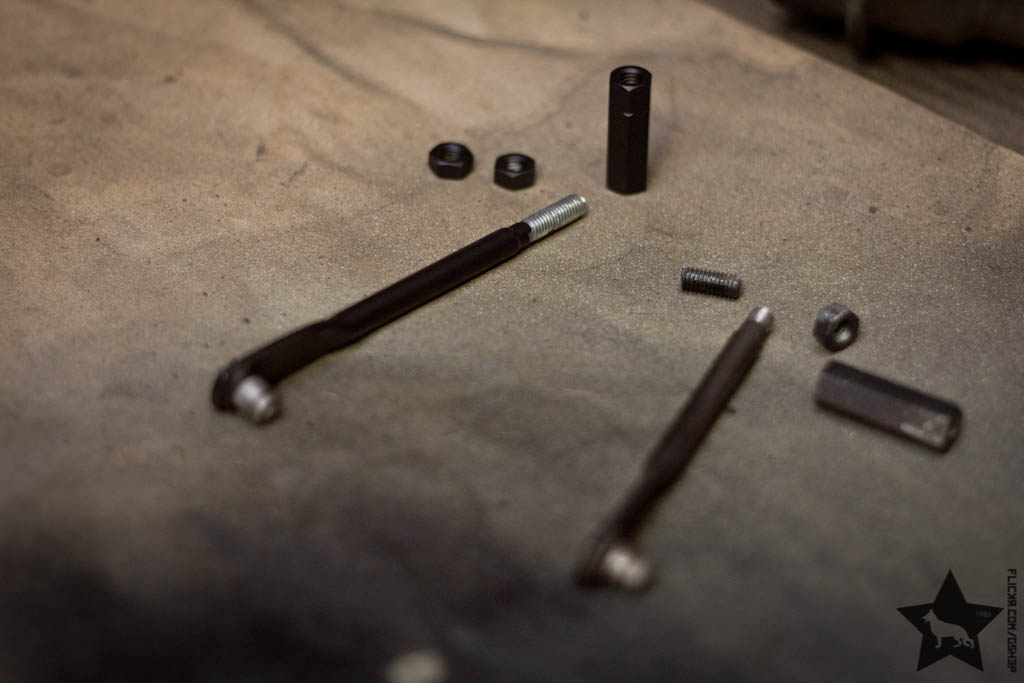
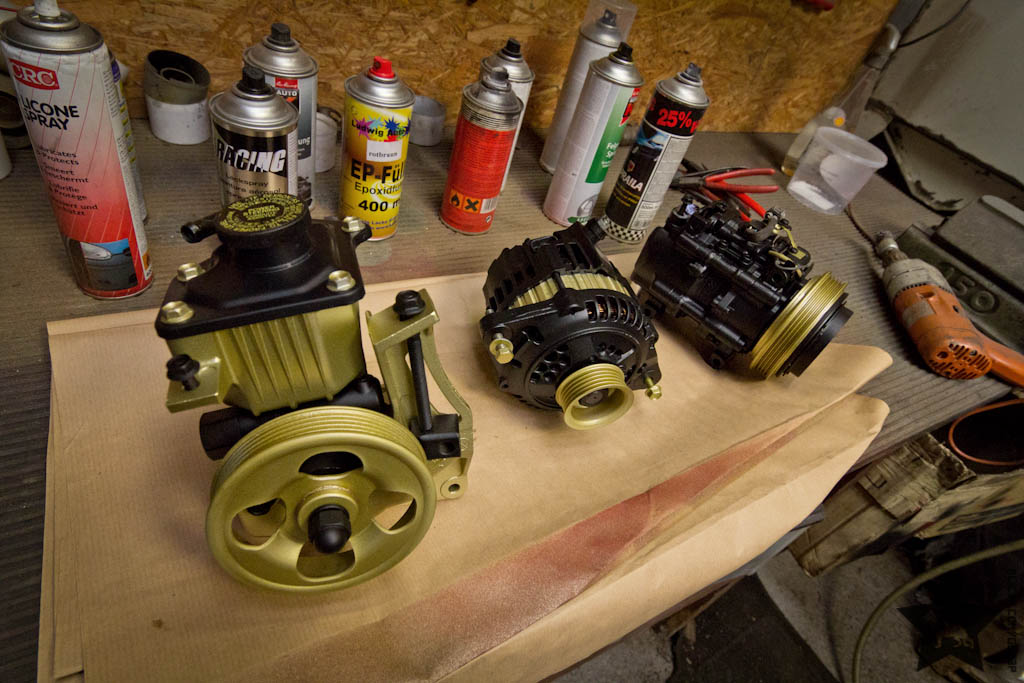
Another thing I did was matching the alternator, power steering pump and a/c compressor to the engine.

My power steering pump sounded like a coffee mill, so I bought a used one from a member of the UK Legacy forum.
The Pump seemed to be in a much better condition than my original one, but I decided to take it apart and replace all the outer seals as I didn't want to risk any leaks.
Got all the reservoir gaskets from Subaru, but since the shaft seal is a standard one, I decided to go for a better, but cheaper seal from Hug

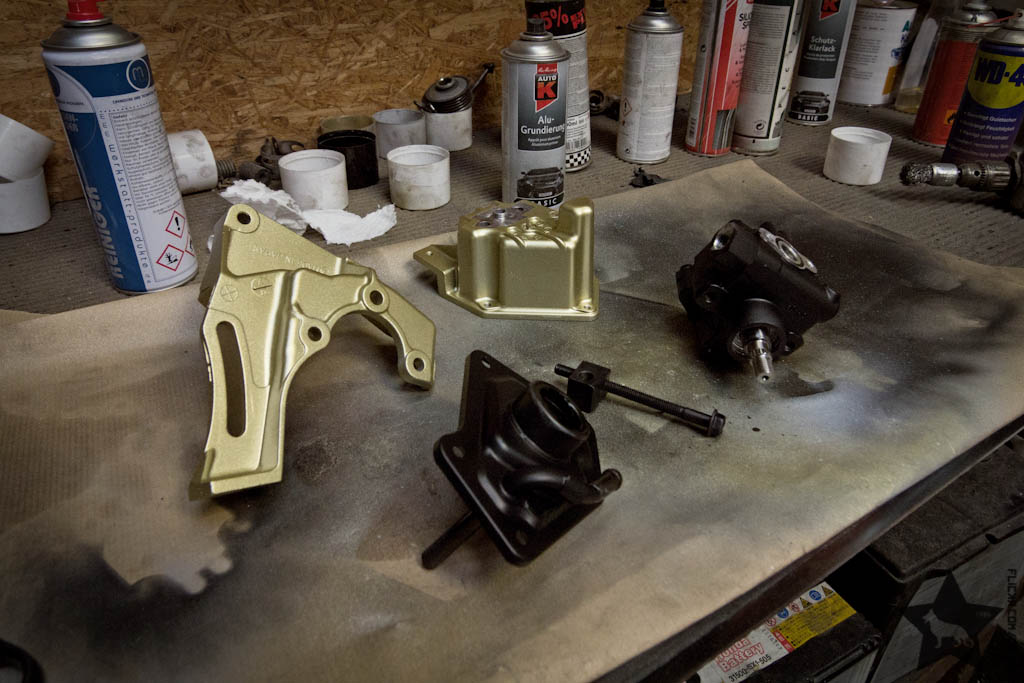
The A/C pump and alternator I only partly took apart, cleaned it and painted them too.
Next weekend I hope to finally put the engine back in and get the intake put together.
Comment
-
It's been a while since I updated this, but I haven't been unproductive...just a little lazy maybe.
First I prepped the engine bay for the wedding.
Painted the power steering pipes black as they looked pretty shabby and fixed some bad spots on the body.
The clutch master cylinder looked like it was leaking at some point and some brake fluid ran down the fire wall and ate away the paint, giving way for rust.
Other than that, I mostly had to fix scratches from when I took the engine out.") :
:

While the paint was drying, I attached the flywheel and clutch and the engine was finally ready to go in.
Fortunately my brother dropped by and helped me out, so it didn't take too long, even though getting the lever for the clutch in was quite a fiddly job.


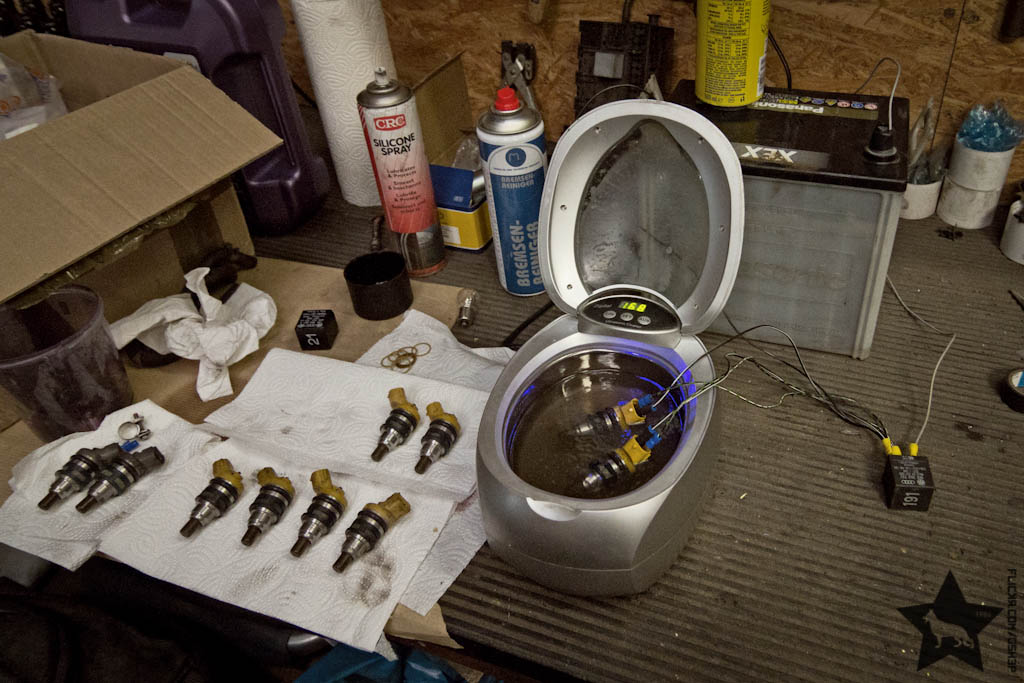
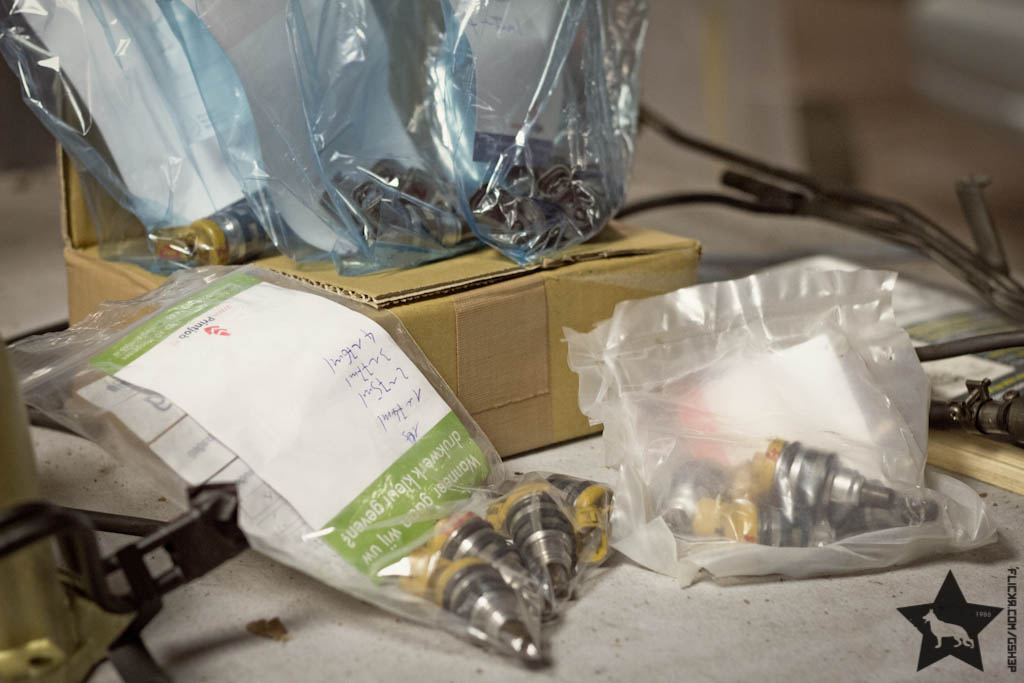
After that was done, I decided it was about time to get the various injectors tested that I sourced from eBay and a member of the UKLegacy forum.
In the end I had to test 19 Injectors, 11 yellow 440cc phase 1 and 8 grey 380cc phase 1.
4 yellows I got from L666GTB here on the forum, 4 yellows I got for cheap on an auction on eBay, 3 yellows that were in the fuel rail of my Limited, 4 greys that came with the Limited (probably from when they put an early EJ20H in to replace the broken EJ20R and switched the intakes as these are slightly different), with one grey injector replacing that missing 4. yellow one... and finally 4 grey that I accidentally bought on eBay with a set of fuel rails.
For the first step I built a little 'controller' with the help of a VW indicator relay (No 21 or 191 work), so the brake fluid in the ultra sonic cleaner could reach every part of the injector.
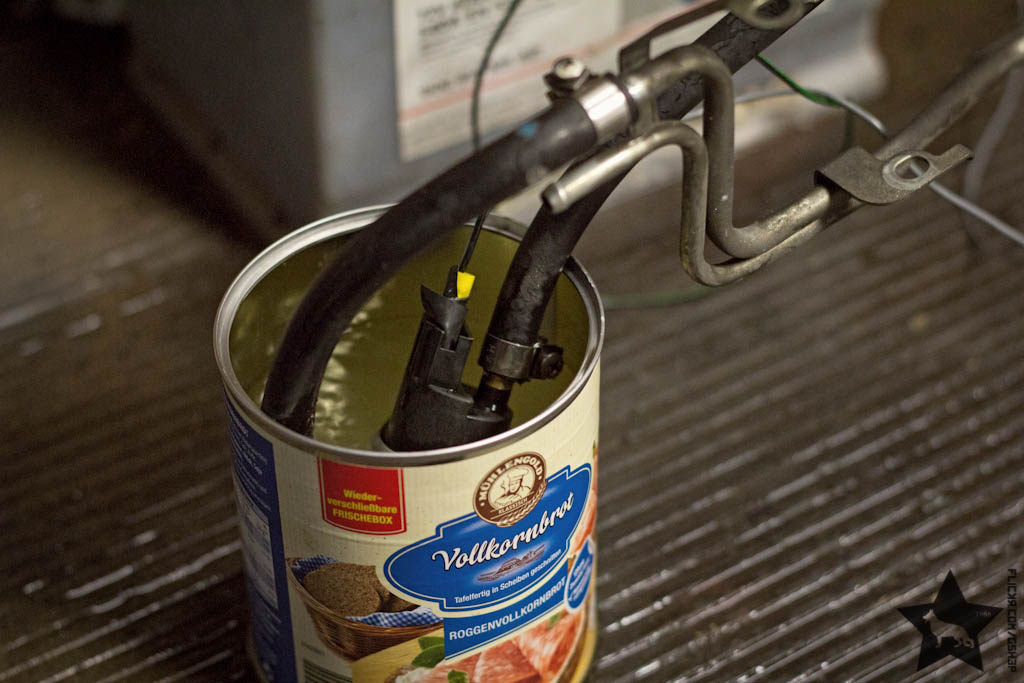
Second step I built myself an injector tester out of a spare fuel rail and a cheap replacement fuel pump.
So basically what I did to compare the injectors is after getting the air out of the system, I let each injector run for 10sec and then compared their output. This way you can have a look at the spra pattern as well and check if the injector is dripping or not.

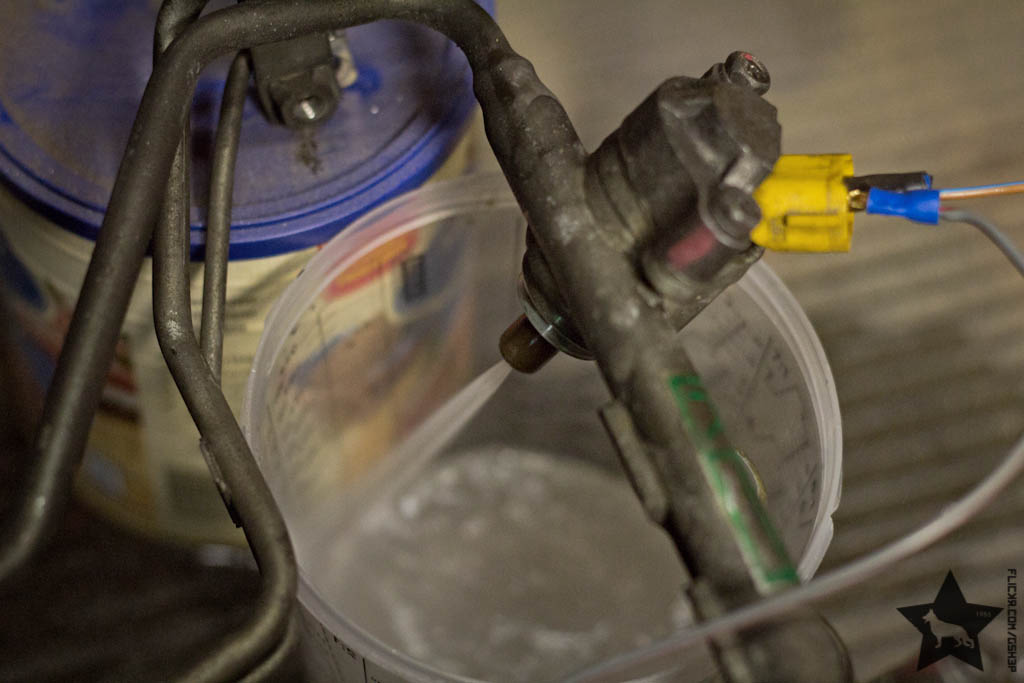
Turned out that all injectors are working correctly, don't drip and don't have any noticeable differences in their flow rate.
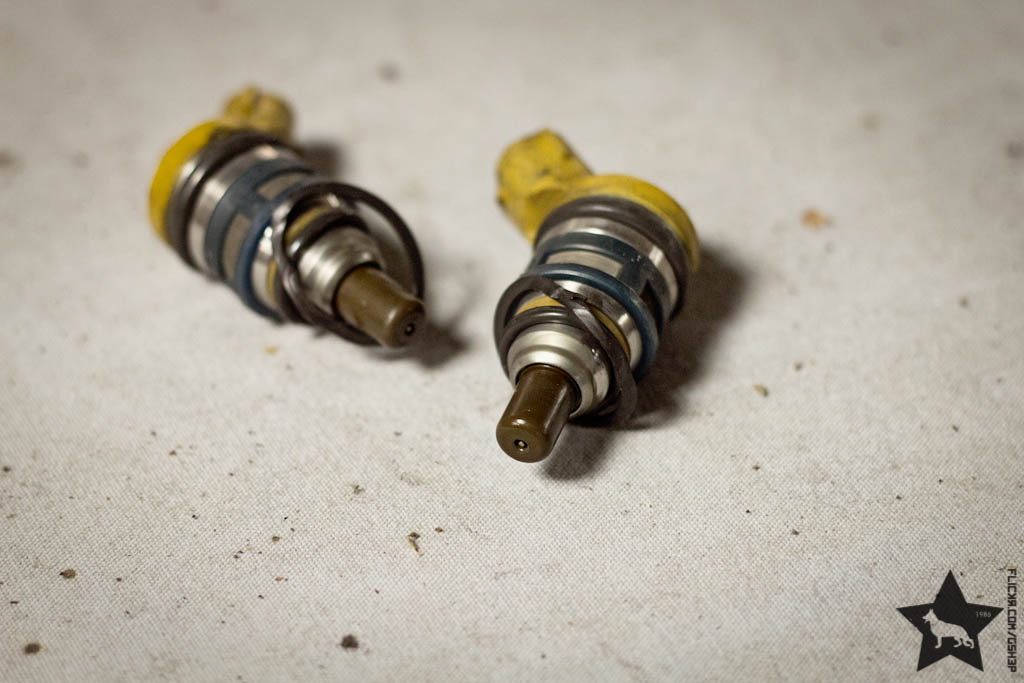
Which was a little surprising as I suspected the yellow injector on cylinder 3 (the melted one) to be faulty at least.
Though, when I removed the injectors from the engine's fuel rail, I suspected that something else could've caused the overheating problems.
It seems like they didn't just replace one injector on the fuel rail but pulled all of them (maybe because of the first engine failure (ripped off valve), they already suspected one to be broken and checked them) and when they put them back in, they did a sloppy job.
They didn't just replace one of the yellow injectors with a grey one, they also paid no attention to fitting the gaskets right, so that the lower gaskets didn't sit right.
Since all the injectors are working right, I suspect that on cylinder 3 the gasket on the injector was sitting even worse than on the others and thus this one constantly leaked fuel into the intake, finally causing the overheating and melting of the piston.
0,5Euro part causing a >2000Euro damage.
Well, at the end of the day I had 19 injectors fitted and I was quite high from sniffing brake cleaner fuemes all day.
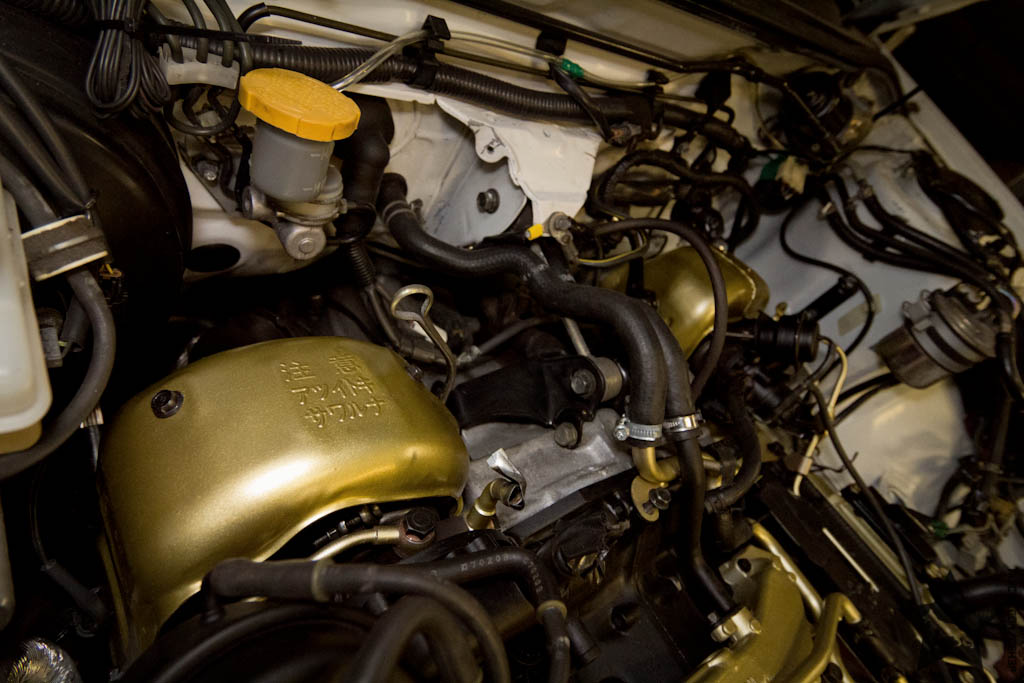
Now there's just little things left to do before I can take the intake back together... gotta get the fuel rails cleaned and painted and I'll have to clean the engine loom and rewrap it after that.
Another month passed with no real progress as I had to source parts and a new Dremel clone as my old one died.
Ended up with a neat pile of stuff:
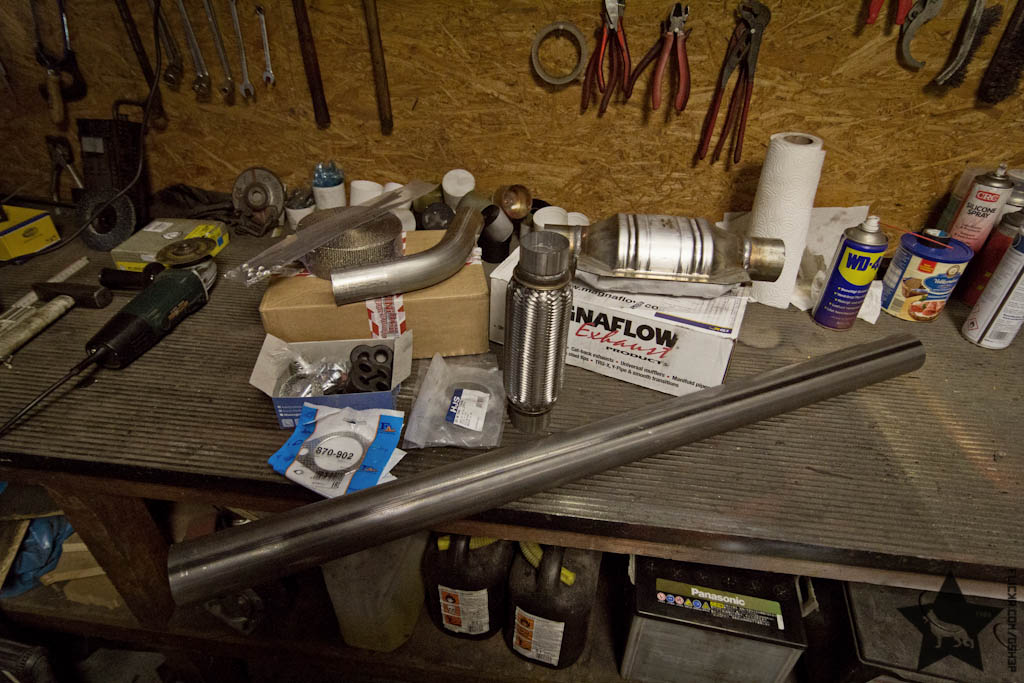
First thing I did now was removing the cat from the primary turbo's downpipe.
Welded two metal profiles to the downpipe so the ends would stay in place once I cut the cat out.

Turned out the 50mm 60� pipe bend I bought fits spot on.

After I had the bend welded in, I just cleaned both downpipes up after removing the rusty heat shielding, added some heat resistent colour here and there and finally heat wrapped everything up.
Turned out quite nice, imho. ...sure good enough until I decide to build a full stainless steel exhaust.

Then I flew across the pond to spend a week in Chicago, hanging out with friends and all that jazz.
Since my return to Germany I made some more progress and started working on the midpipe.
First I made a rack and welded the midpipe to it.

Then I cutted piece for piece out and replaced it with the new parts... old cat got replaced with a 200CPI Magnaflow one and the silencer had to say goodbye too, of course.
Not the most beautiful thing ever, but it'll get the job done till I go full stainless steel.

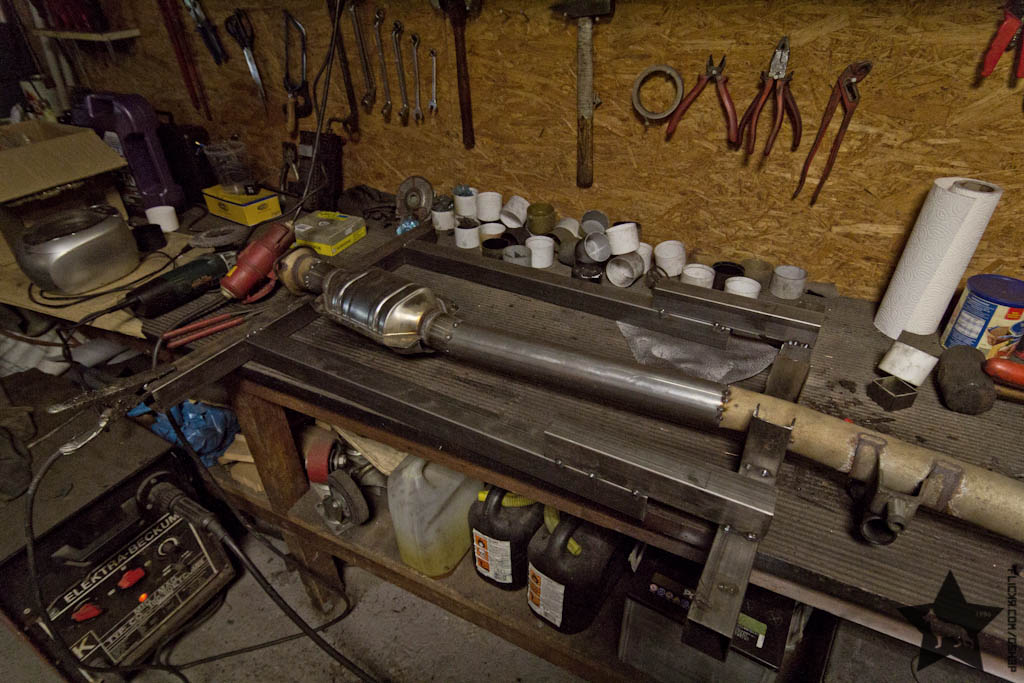
Everything fitted almost perfectly, so I guess my work wasn't too bad.

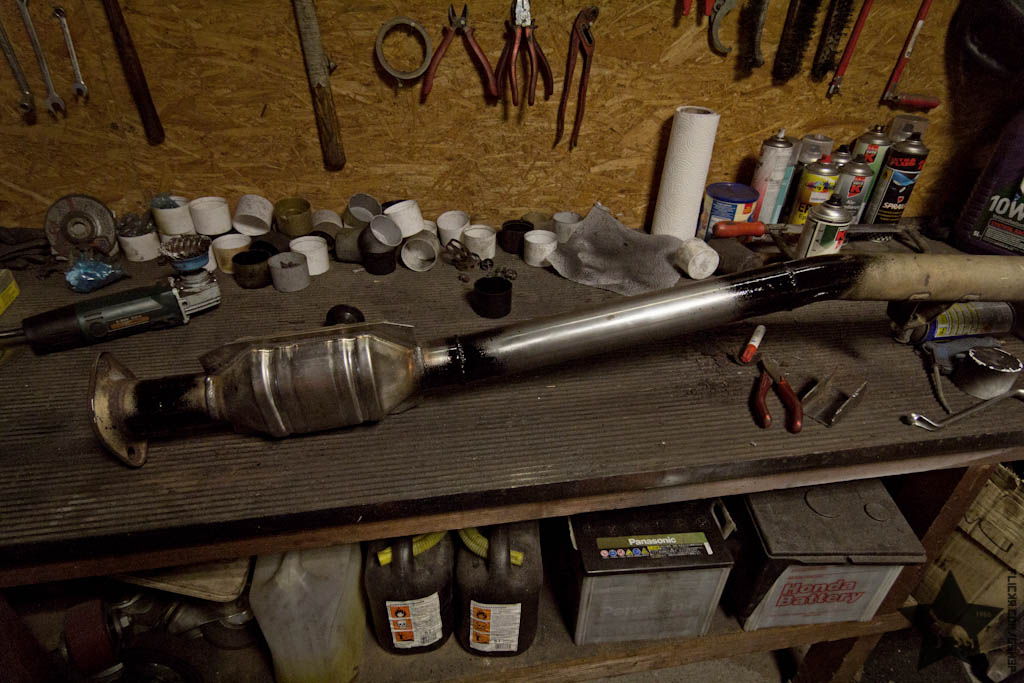
Finally I painted the heat shielding and fitted them.
The driver's side heat shield was completely bent, so I had to straighten it first. It now fits nicely again, though it's missing the bottom shield. Guess that one got lost when the shop put the replacement engine in.
However... the shield only is 12Euro in Japan and it's not too much work to fit it afterwards, so it's going on the shopping list for my next Japan order.


Now only the heat shielding on the exhaust headers is left, then the exhaust can be checked off my to do list. the intake almost is completed too, so I'm getting very close to the finish line.
Last edited by Shepherd; 01-13-2016, 07:09 AM.Comment
-
nice and clean man!
keep it going, dont let anything stop you from doing this, it is really amazing!Comment
-
What a build so far man, keep it up! Loving all the gold on the engine! ��Comment
-
I don't know why, but somehow I always do monthly updates on this, even though it's not intended, ha.
I'm getting quite close to the finish line now...
Had some heat wrap left and decided to wrap the midpipe a with it.

Painted the lower heatshields on the headers and fitted them...

The Legacy came with a boost and an oiltemp gauge, but no oil pressure gauge... so I ordered one and an adapter for the filter to fit the sensors for both gauges.
Had to fit the pressure sensor with a 90� adapter as it's quite a tight fit, but fits spot on now.


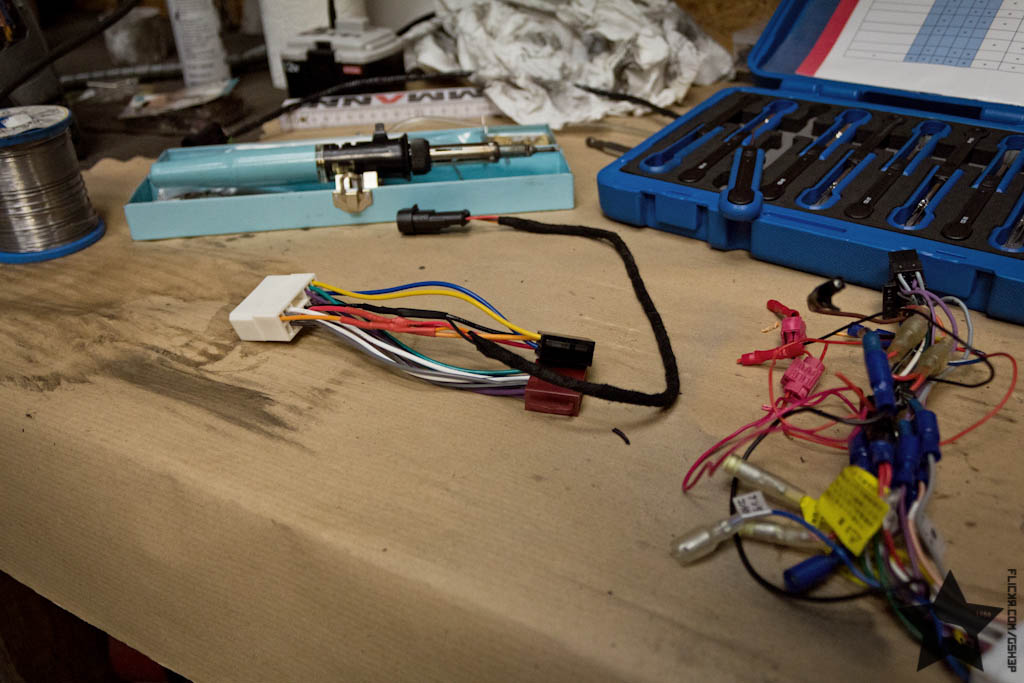
The engine harness was next on my list.. it received a good clean and a fresh wrap.
Checked the isolation on the cables, cleaned the plugs, wrapped everything with cloth tape and then put new tubing around it.

Went from this...

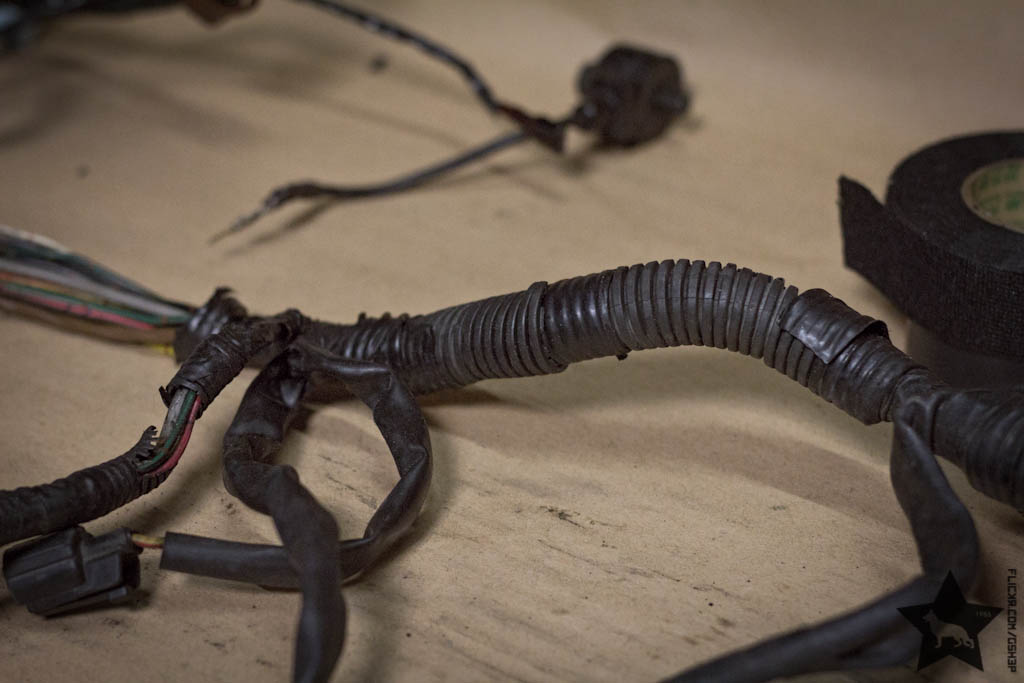
..to this.

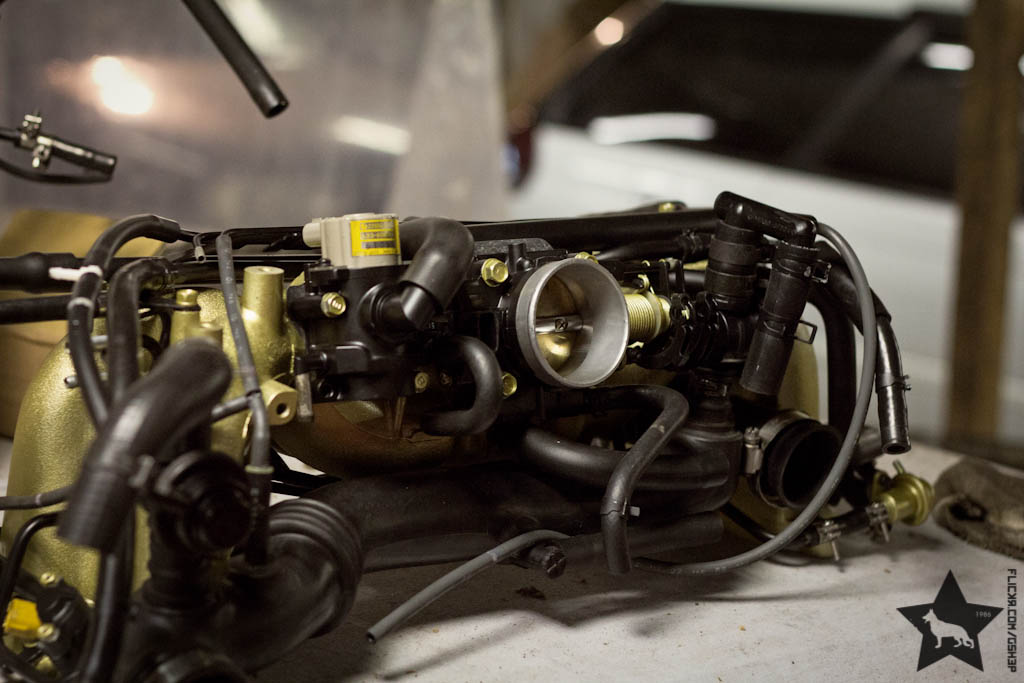
Then I put the intake together... replaced broken or stiff rubber hoses, if they were still okay, I just gave them a good cleaning with silicone spray and fitted everything back together.
The plug for the knock sensor is missing, I'll just replace it with a superseal connector... also still waiting for two o-rings for the fuel rails, once all that is here, I can finally fit the intake.


Comment
-
this is excellent2016 WRX
E39s are forever in my heart.Comment
-
Awesome work on this man! Definitely following.Comment
-
Made little progress the last weekends...
Noticed that I used the wrong intake.
The car came with a spare intake that came on the original engine.
The Legacy then had an engine failure and they threw an older version as a replacement in...
The problem now was that the EGR-valve is mounted on the carbon canister on the older engines. The newer version's EGR-valve is mounted on the intake.
On the combination old intake-new engine bay, there's no EGR-valve between the intake an the carbon canister.
So on boost the carbon canister would receive the full pressure. Boost leaking out of somewhere always is a bad thing, so I decided to go for the newer intake.
I only noticed all of that, as there was one connector on the engine harness that didn't plug into anything. when I testfitted the older intake.
Painted the newer fuel rails and all the parts that I couldn't swap from the older intake onto the newer (which was mostly the fuel rails and the vaccum metal piping).
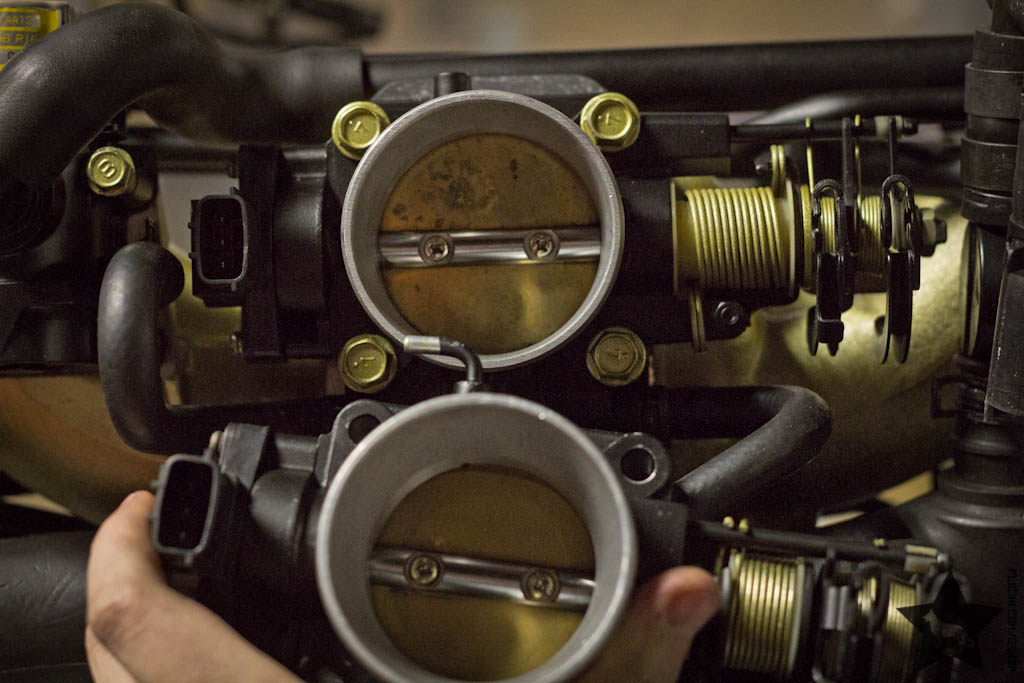
Took the newer throttle body apart, gave it a clean and some paint and then put everything back together.
There's not a big difference between the older and newer intake, but there's one more connector that the hose from the EGR-valve goes into as the newer throttle body is missing the little pipe ontop.
The throttle body is quite a bit bigger on the inside as well.
I placed another order (hopfeully the last one now...) in Japan for the EGR-Valve (as it was missing on the newer intake, for whatever reason) and some other things, so I now gotta play the waiting game again.
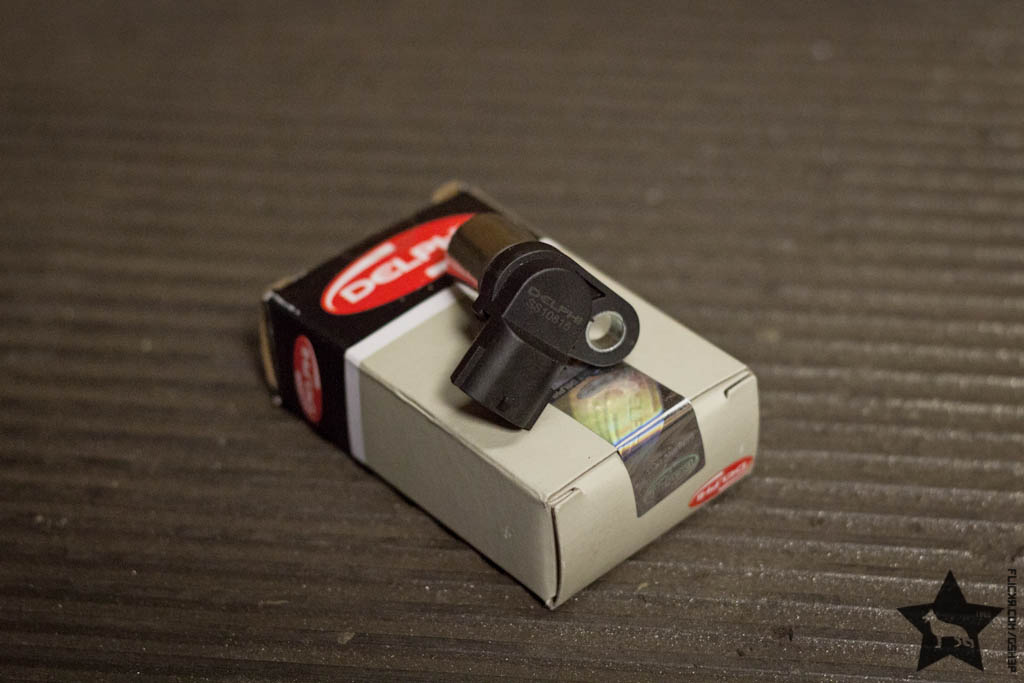
Also installed a new crankshaft sensor from Delphi as I used the old one for failure testing on my daily GT-B (and of course the one on the black GT-B broke as I took it out... )
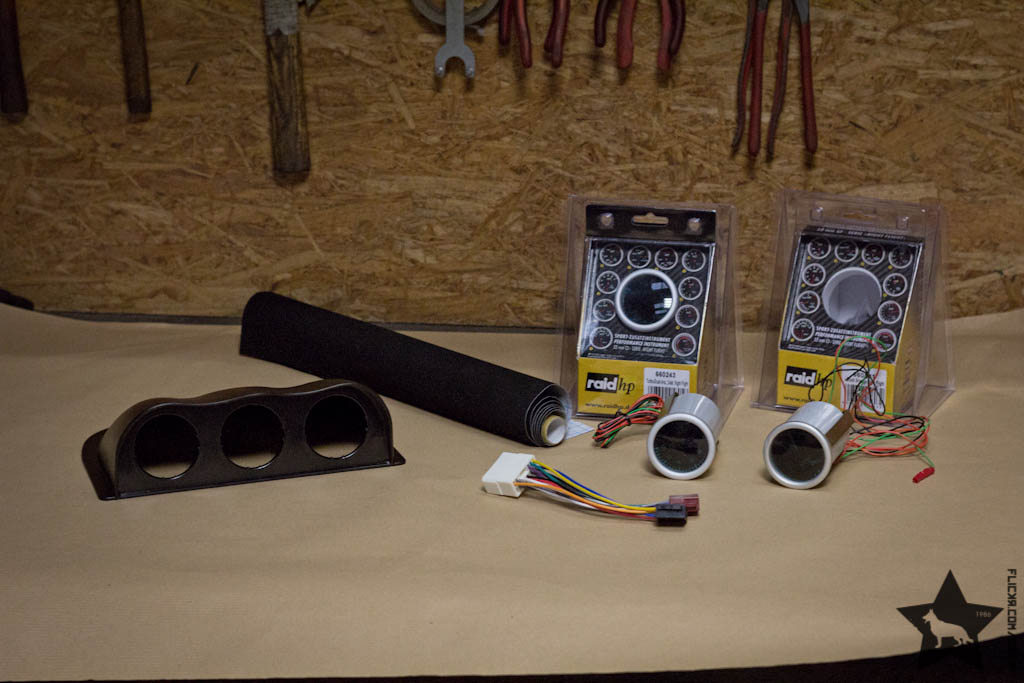
Since I have some free time now, I decided to get working on the gauges for oil temp and pressure and boost.
I first wanted to place them into the dashboard above the radio, but then noticed that the frame of the DIN-slot is slightly smaller than on european cars and thus the gauges wouldn't fit in combination with a radio below them.
Tried different solutions, but without cutting the trim or dashboard apart, I couldn't put them there...
So in the end I browsed for some gauge pods. Don't like the A-pillar ones nor the ones that stick out, but luckily I found a GD/GG-style gauge pod with a flat bottom.
The pod itself is quite good quality, just the front looked a little cheap, so I got some fake alcantara tape to cover the front in.
Also got a DIN-Radio adapter that I'll hook the power and light connectors of the gauges up to, so that I don't have to cut the OEM dashboard harness.
The gauges themselves are cheap but okayish in.pro nightflight ones.
Since I don't have anything silver on the Legacy the silver frame of the gauges looked quite wrong... gave them a matte black paintjob and covered the front of the gauge pod in some fake alcantara. Imho it all came out quite okay.
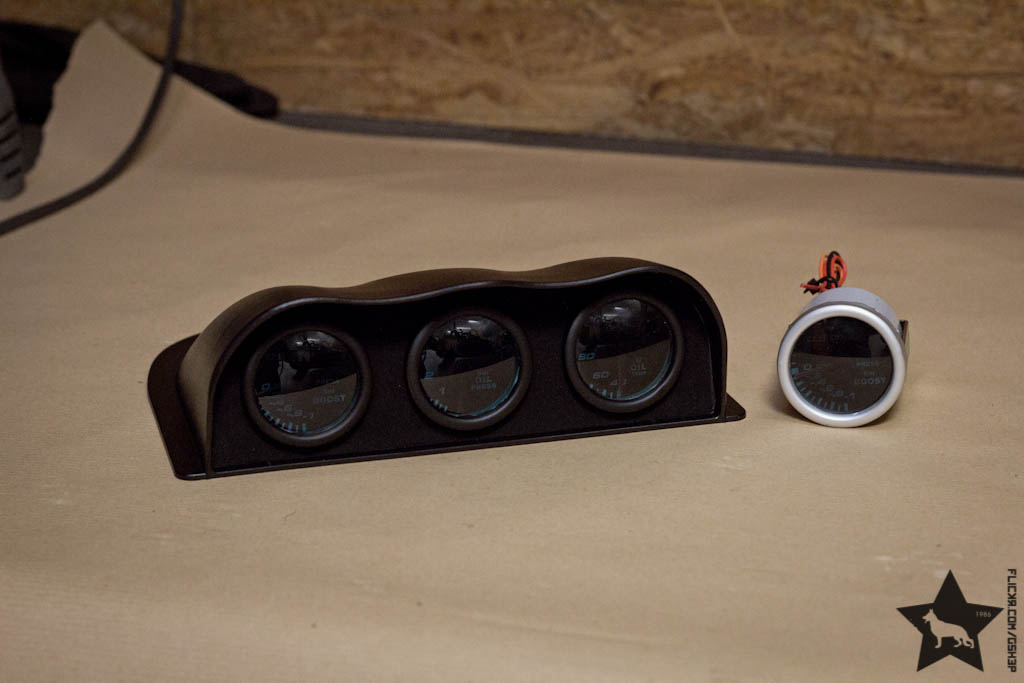
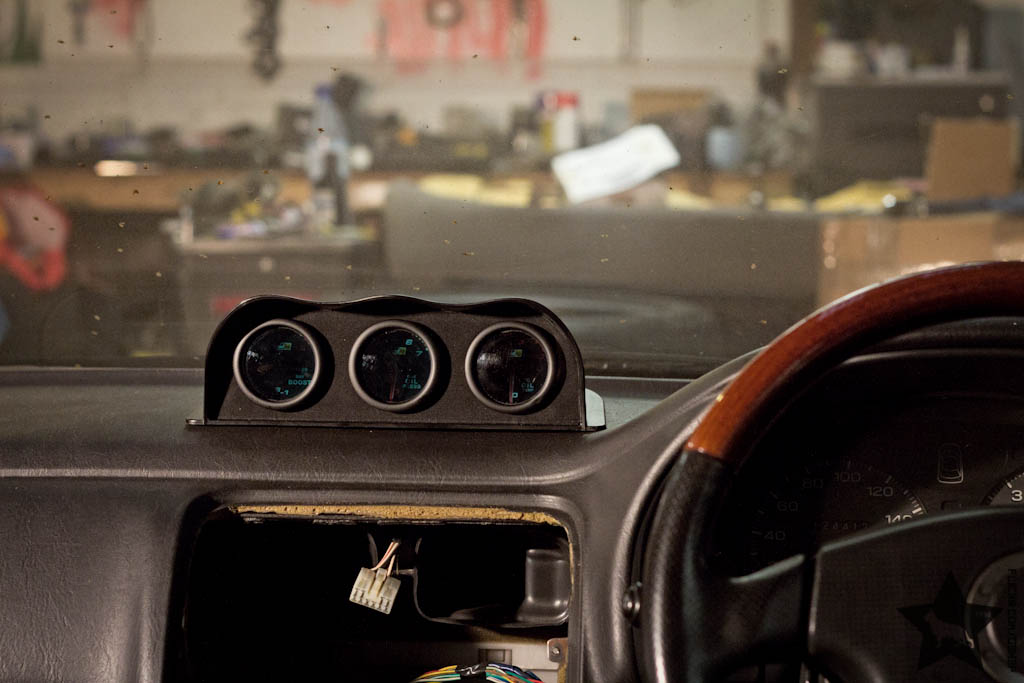
I think the gauge pod looks quite good in place, fits the interior quite well even if it looks a little put ontop.

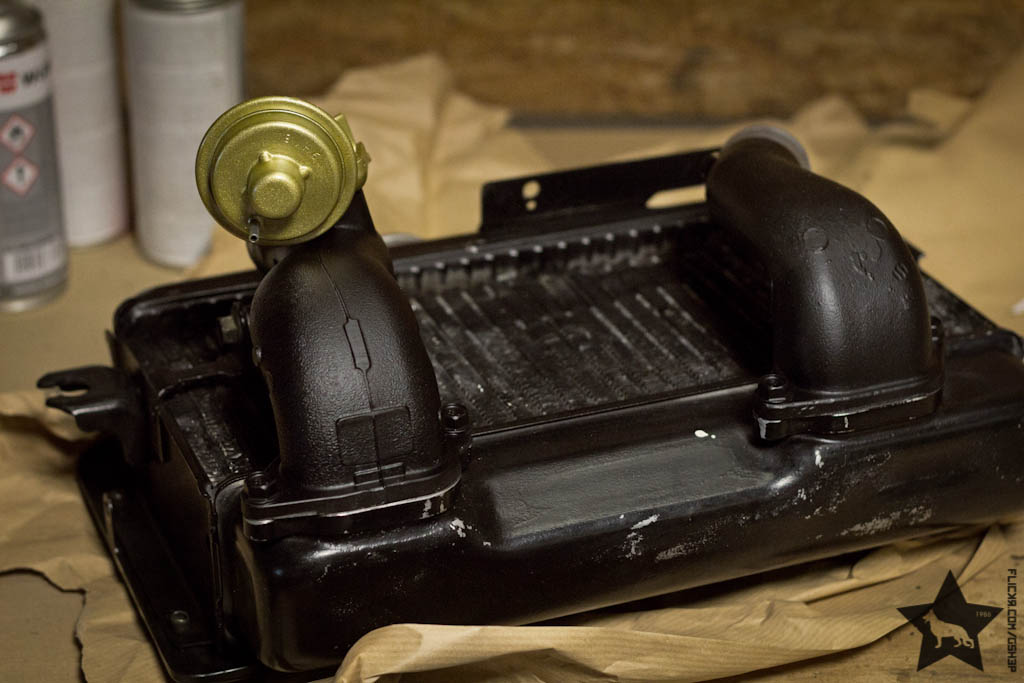
This weekend I decided to be a bit lazy... just cleaned up the intercooler, and painted it a little... also threw an STI logo on it in a colour that matches the engine.
Turned out quite okay as I think.
Before

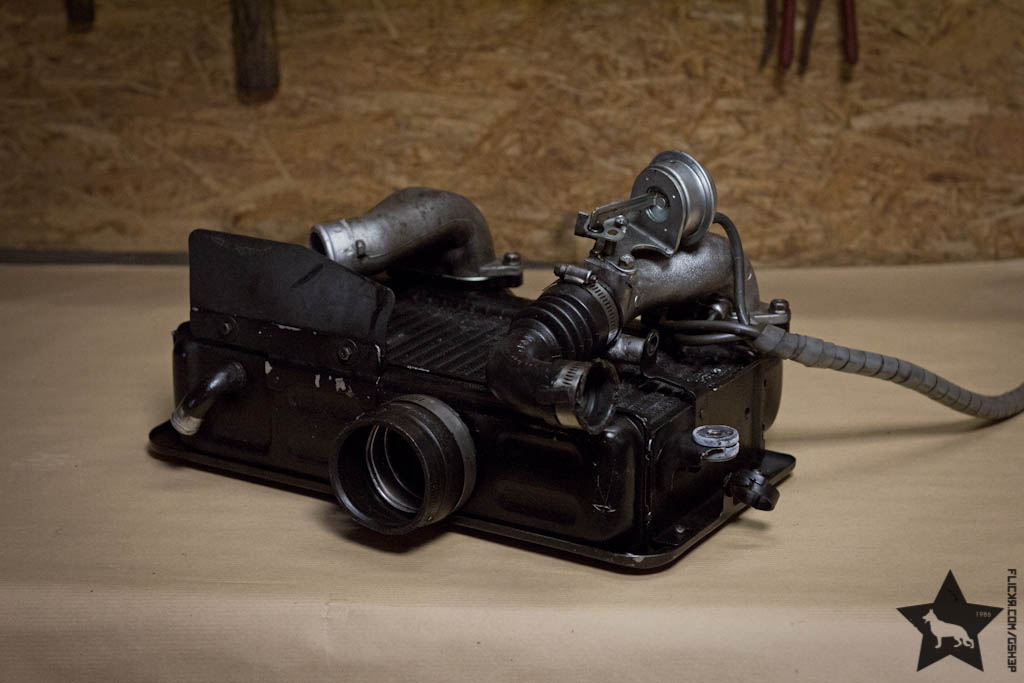
After

Comment
-
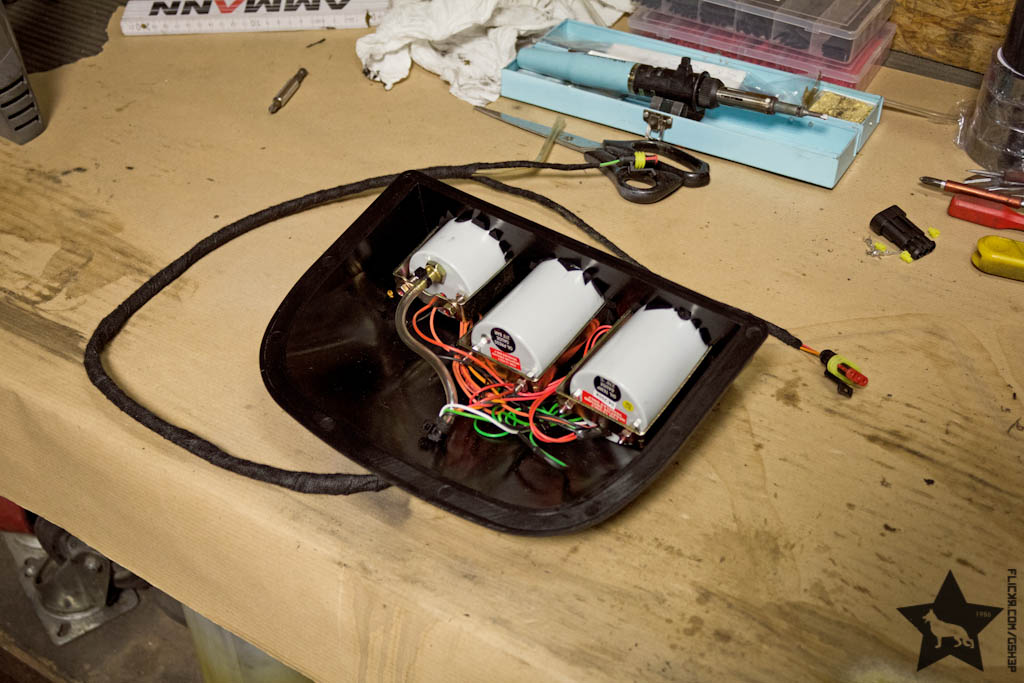
Got some more major stuff done during the weekend... built a 4-part loom for my gauges...
Started off with twisting 4x5m of wires
Then I laid them out in the engine bay to determine the length and see where I could run the harness, where I had to cut it and add connectors or ground points, etc.
When I was satisfied with the position, I cut the loom where I wanted to add connectors for easy wiring and (engine) removal.
I cut the loom at the transition from the engine to the engine bay and at the firewall.
This way I don't have to remove the wires if I should have to remove the engine again. and it makes it easier to place the loom on the engine and in the engine bay.
Same about the end at the firewall... this way I can keep the interior loom as a seperate piece. Makes the whole thing more modular and easier removable when I'll start with the interior work in the future.
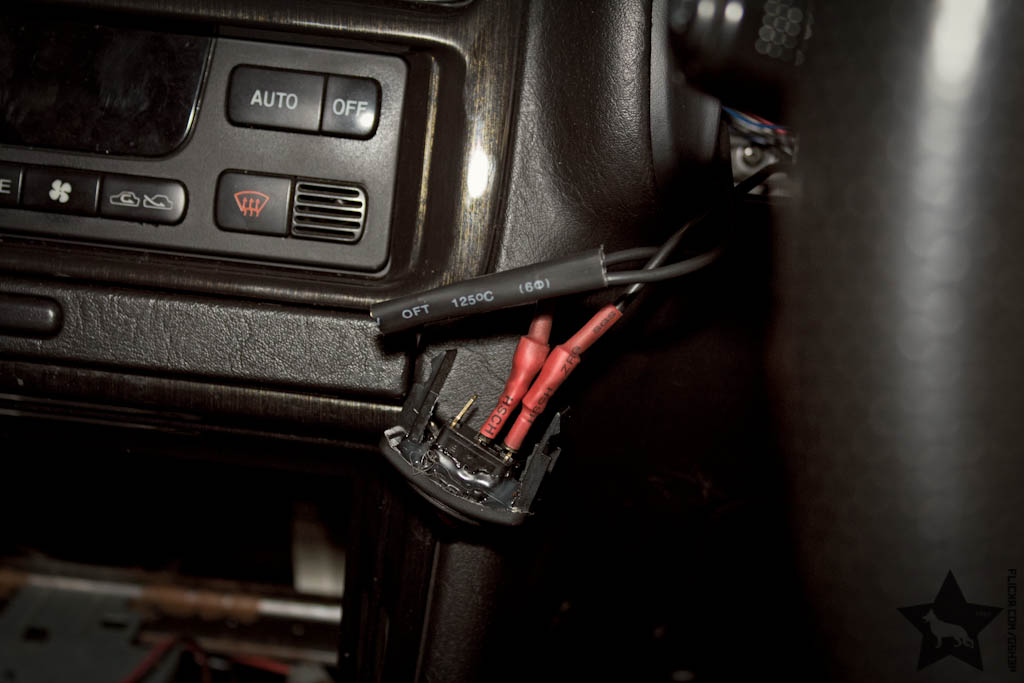
Another seperate piece is the part that hooks up to the radio connector and deliveres ignition +, ground and the light signal.
Later I'll add a few more switches (for the powered antenna f.e.) and cables here, so I wanted this part to be seperately removable too.
I added AMP Super Seal connectors to each end so everything would be watertight, secure and easy to remove.
The whole harness got wrapped with textile isolation tape, the parts on the engine and in the engine bay also got wrapped with pvc isolation tape to prevent the textile tape from soaking up water and (hopefully not) oil.
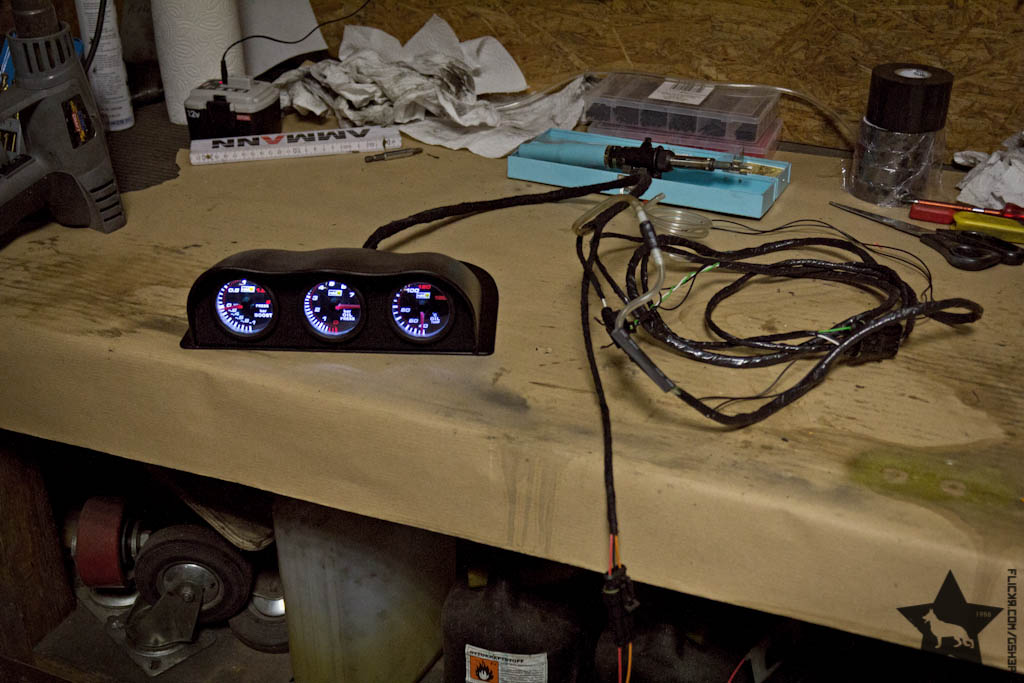
With the looms all done and ready to go in, I wired my gauge pod up.
At first I planned to add another set of connectors there too, but then figured it wasn't necessary really.
With the gauges all wired I gave the harness a quick test. Everything worked perfect, so it was time to put everything in the Legacy.

Small before/after comparison....imho my harness looks slightly better.
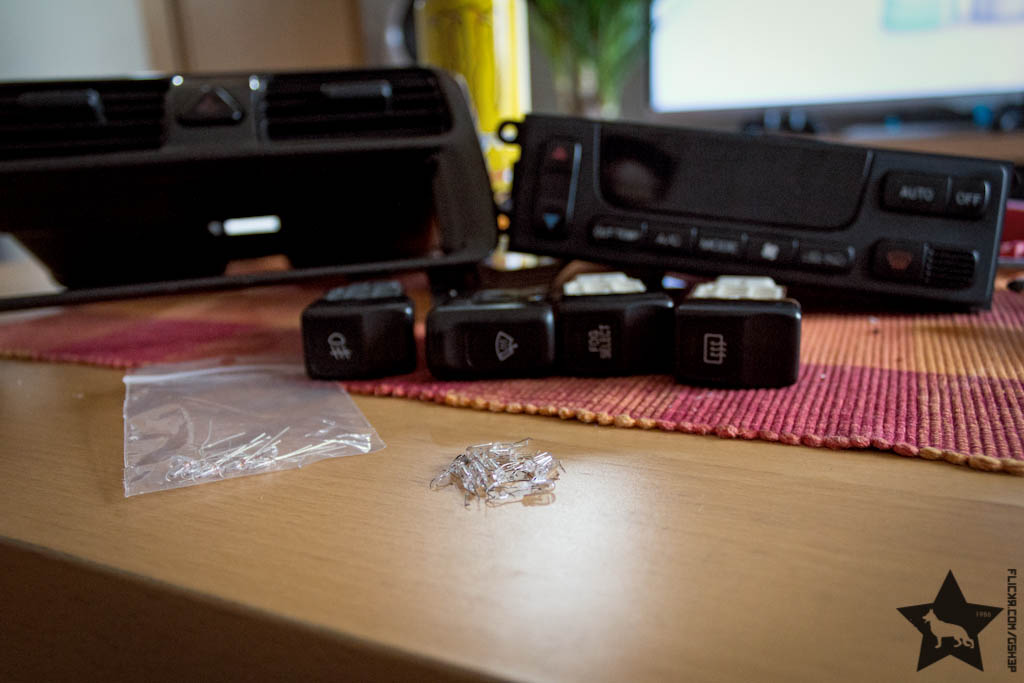
Since I had the whole dashboard apart, I figured I would replace all the bulbs in the switches before I put them in again.
In the end I put everything together.
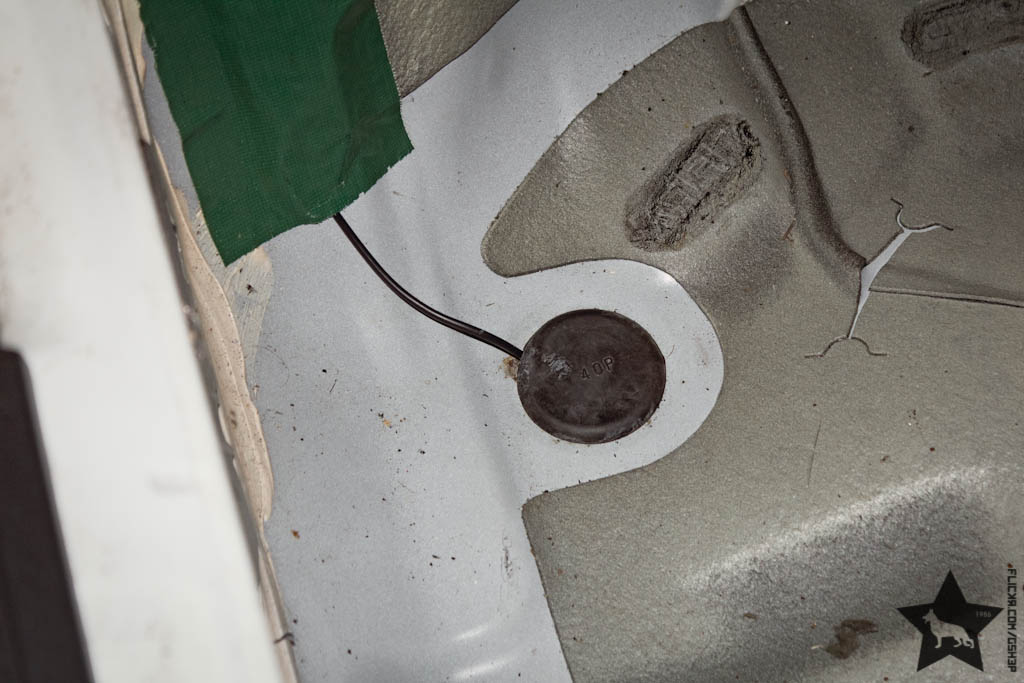
I didn't want to cut my dashboard or drill holes into it as this won't be my final setup. In order to keep all possibilities for the future, I decided to run the loom behind the dashboard.
This way I only had to cut a hole into the cover of the windshield blower, which is a much easier sourceable partthan a whole dashboard.... plus as I found out later, the cover already had a crack anyway, so cutting a hole into it didn't really hurt.
Center console is still missing a radio and a storage pocket with switches for the antenna and exhaust flap mounted in it... but that's for when legacy's driving again.

Comment
-
Damn man this is looking incredible!Comment
-
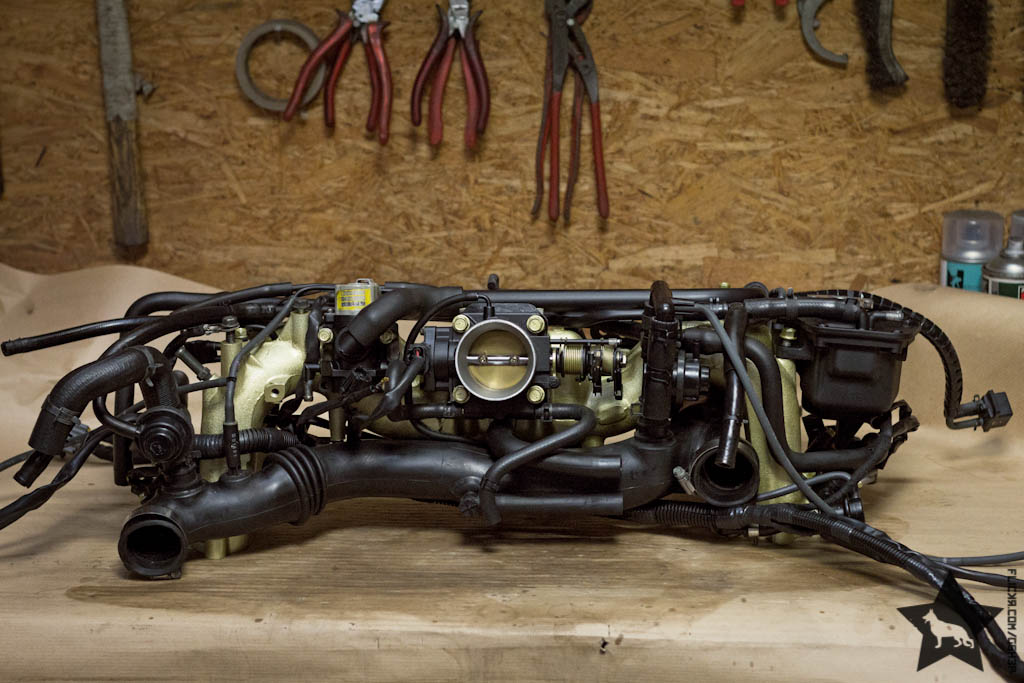
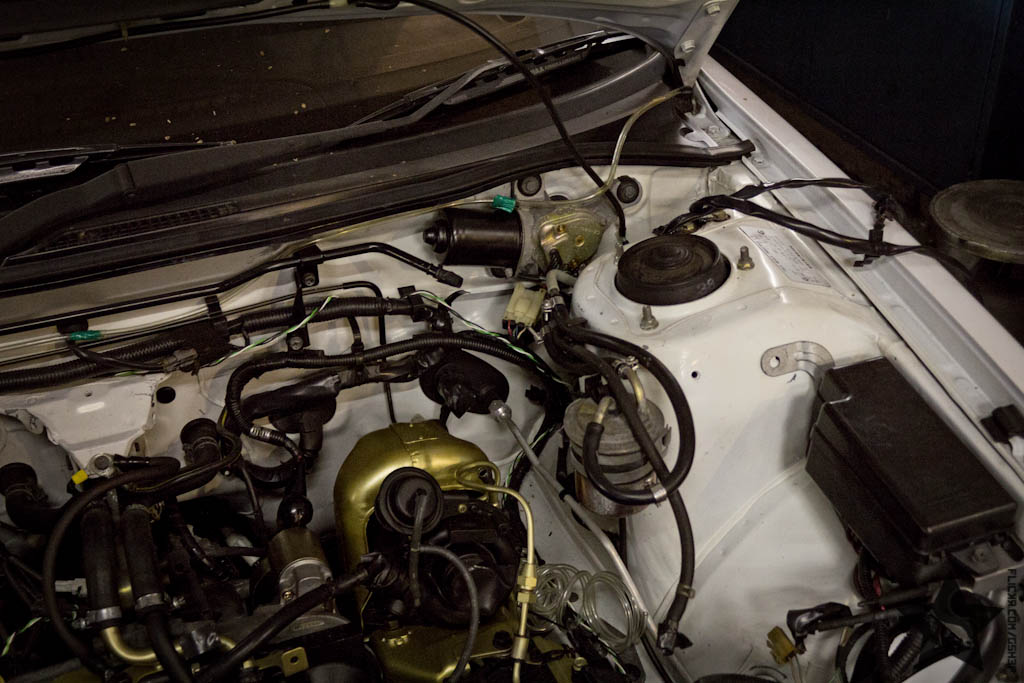
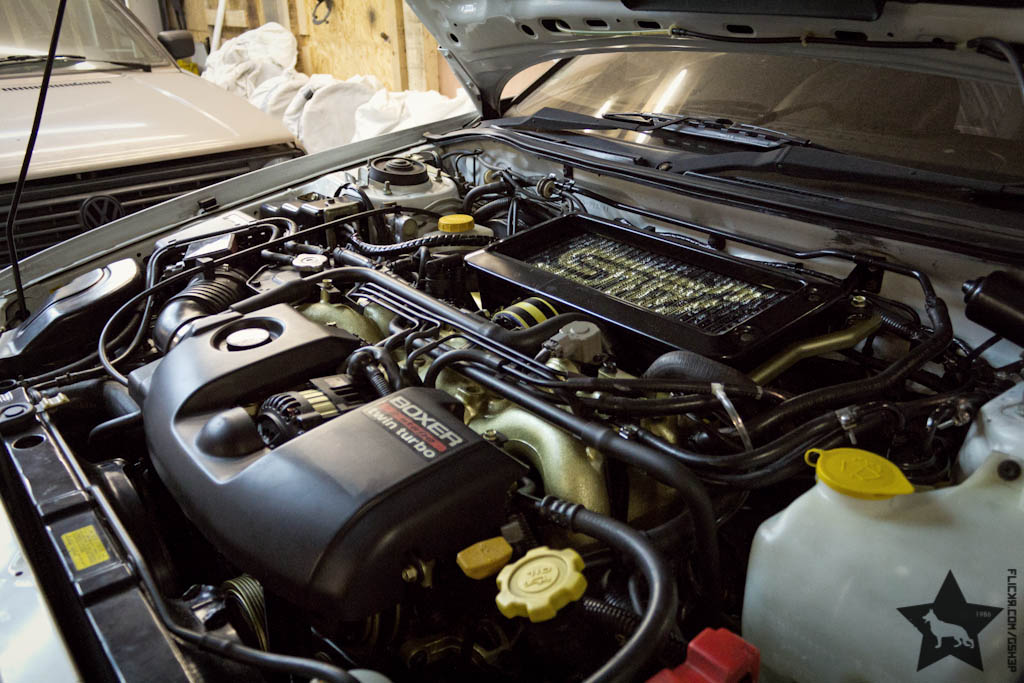
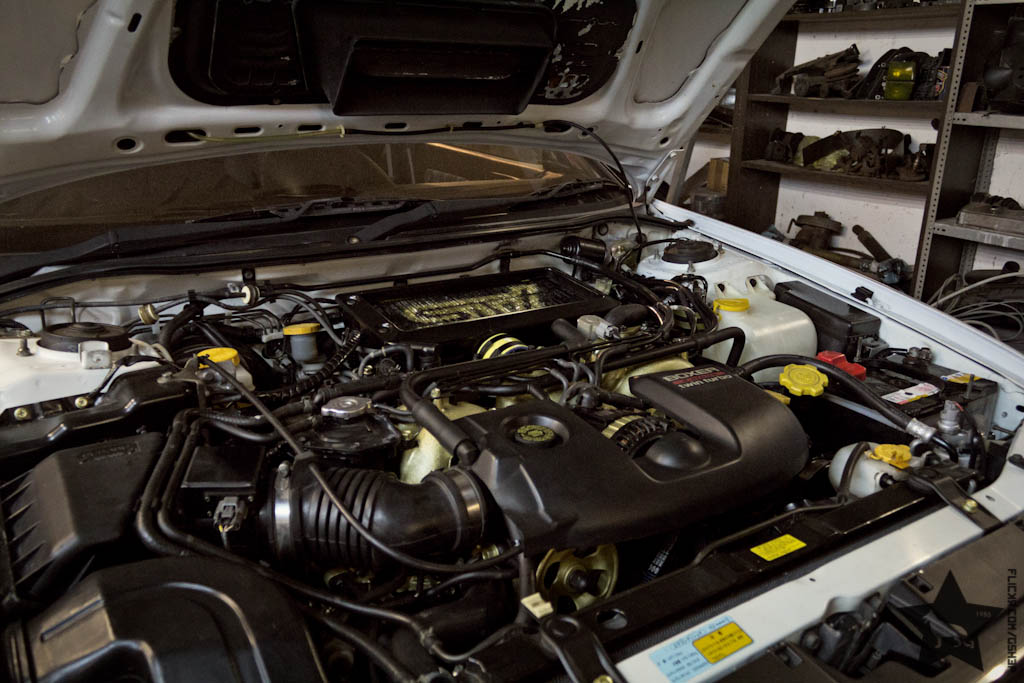
The EGR solenoid arrived together with a bunch of new hoses from Japan last week...so of course I didn't waste any time finally putting the engine together!

...all installed and nicely hidden away under the intake.
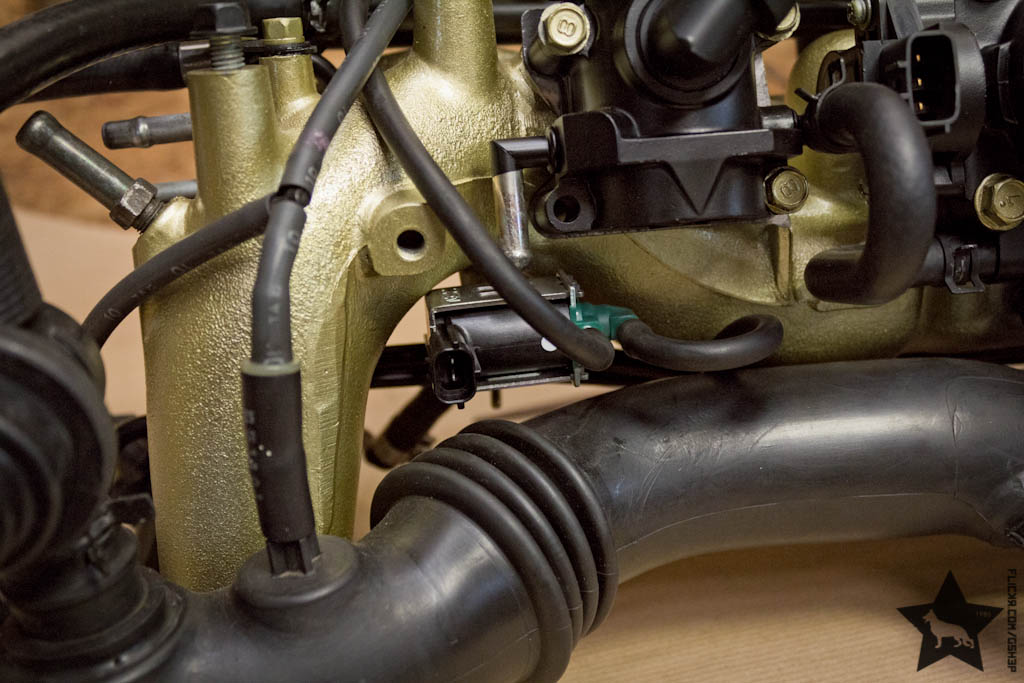
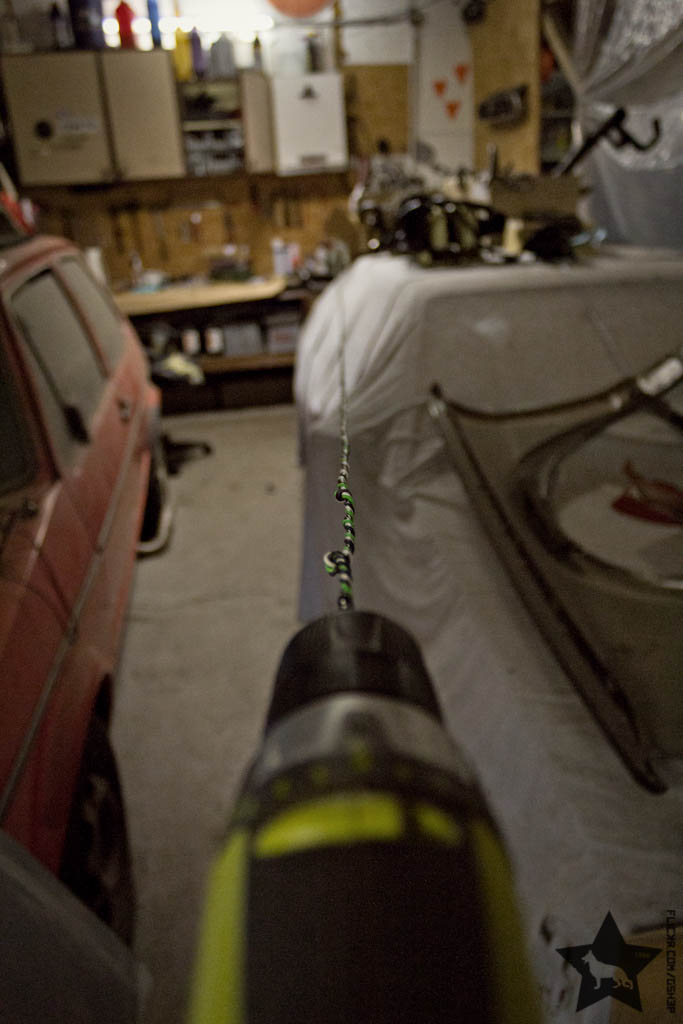
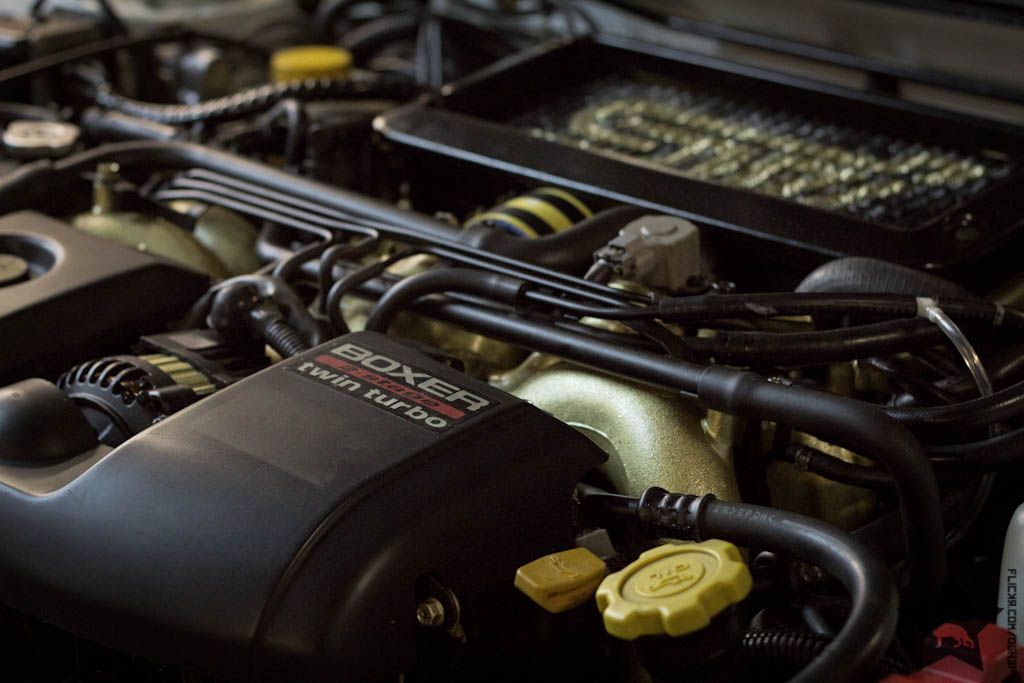
Last thing I had to do on the intake was fixing the broken connector for the knock sensor. There were only the bare metal pins left, wrapped in some electrical tape.
I removed the metal pins and replaced them with an AMP Super Seal connector.

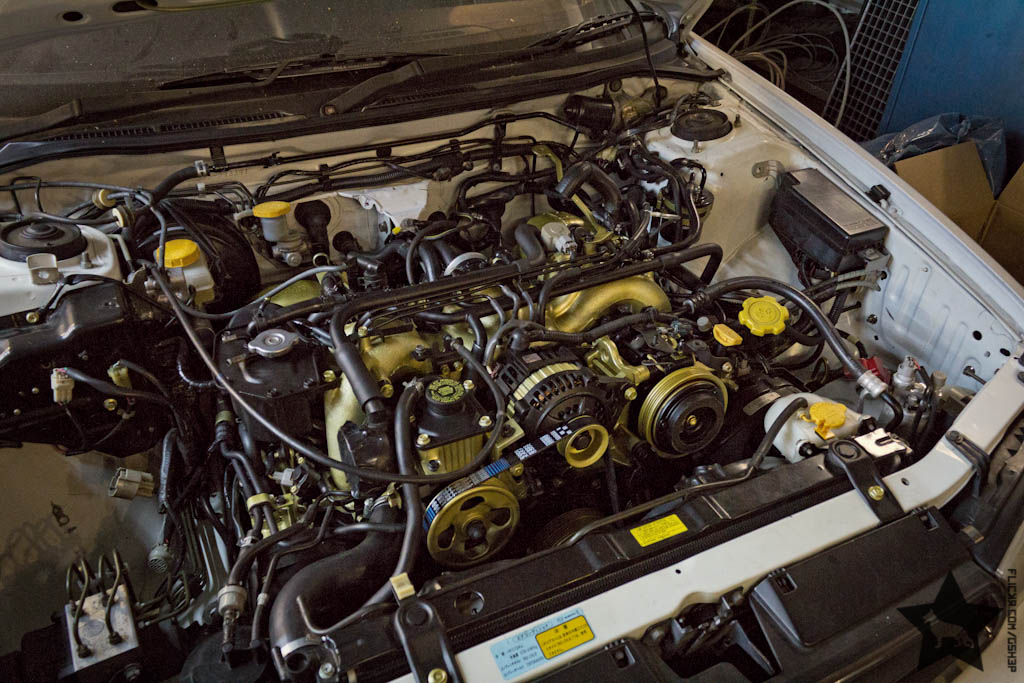
Installed the intake and some other things after
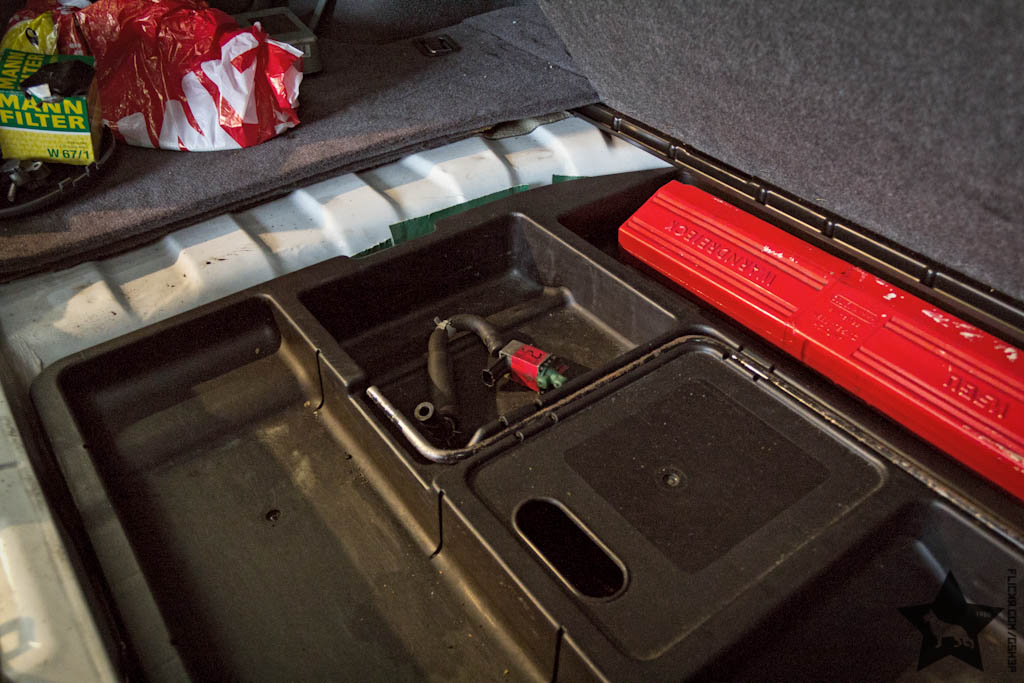
With more parts finding their place in the engine bay again, the trunk got more and more empty... when I finally cleaned it out, I found the old EGR solenoid underneath the trunk floor.
Love the questionmark drawn on it...
It's also broken, so at least I didn't spend the 100Euro for the new one for nothing.
So finally it was done!


After letting it spin for a bit to pump some oil, I plugged the crank and cam sensors back in and it fired right up after a few turns!
Ran pretty fine, just had to fiddle a little with the ICV and some stuff... and then after like 10min of fine running I got a really loud knocking noise out of nowhere.
We started it up a couple more times so friends could listen to it and give a suggestion to what it might be...but in the end we all agreed that a big end bearing was shot.
So I kinda already gave up a little, started packing my tools together and was about to leave, when I decided to record a video of the sound so I could show it to some other friends as well... started the engine up again, revved it a little and suddenly the noise was gone just as sudden as it came!
It didn't get back ever since, so it very likely just was a hydraulic tappert that ran out of oil.
Sounds and runs absolutely fine!
However it does run quite rich and the Check Engine light won't switch off, so I looked for some failures...
Found a cold solder joint in the MAF and fixed that, also checked the whole engine loom, but so far nothing helped...

Still wanna get it regged asap though, so I figured I would fix the other minor things that I need to have fixed in order to pass the T�V inspection this week....
Two CV boots were shot, as well as the boot of the track rod... luckily all on the same side.


The rear fog light also didn't wanna work, so I looked into the wiring... and I gotta say it's not very helpfull when you use black cable and same coloured plugs for everything.
Marked the plugs on the switch with some shrinking hose and then followed the cable, only to find that it had rubbed through, where the import guys were too lazy to punch a hole into the rubber plug:
Wrapped some tape around it (I want to place the fog light somewhere else later on, so didn't bother cutting a hole in the plug) and done...

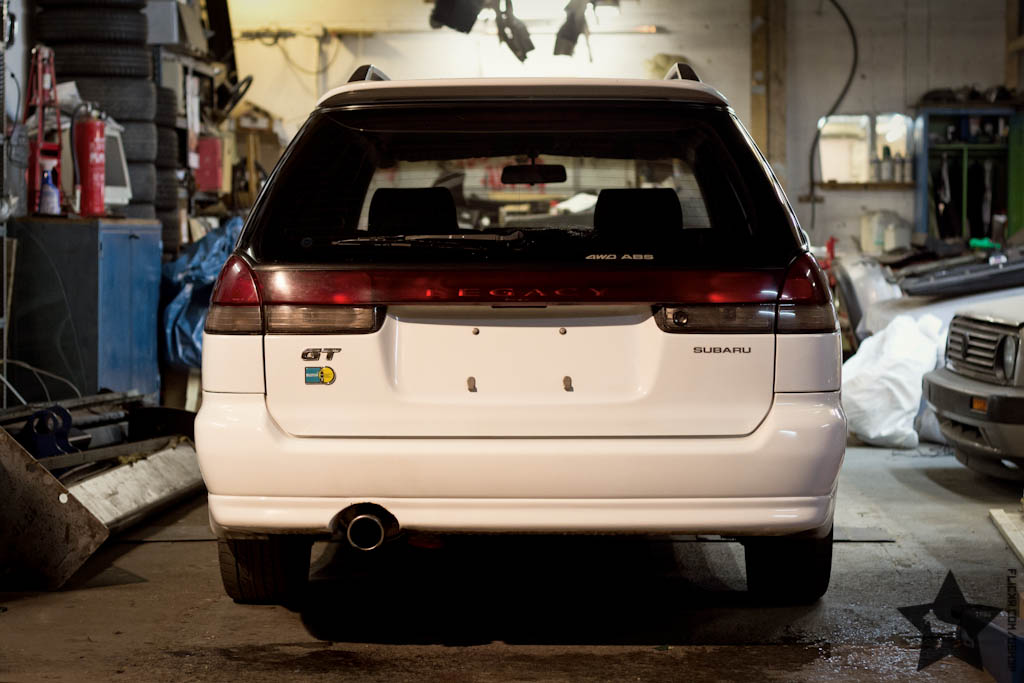
With everything ready for the T�V, I decided to remove all these silly stickers and the old plates.
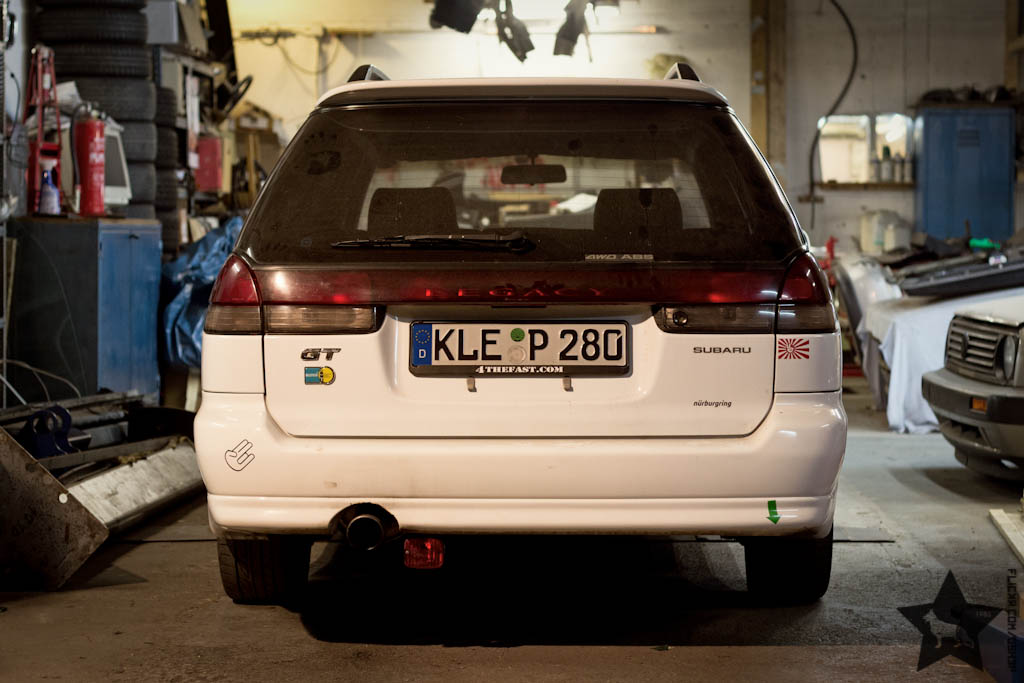
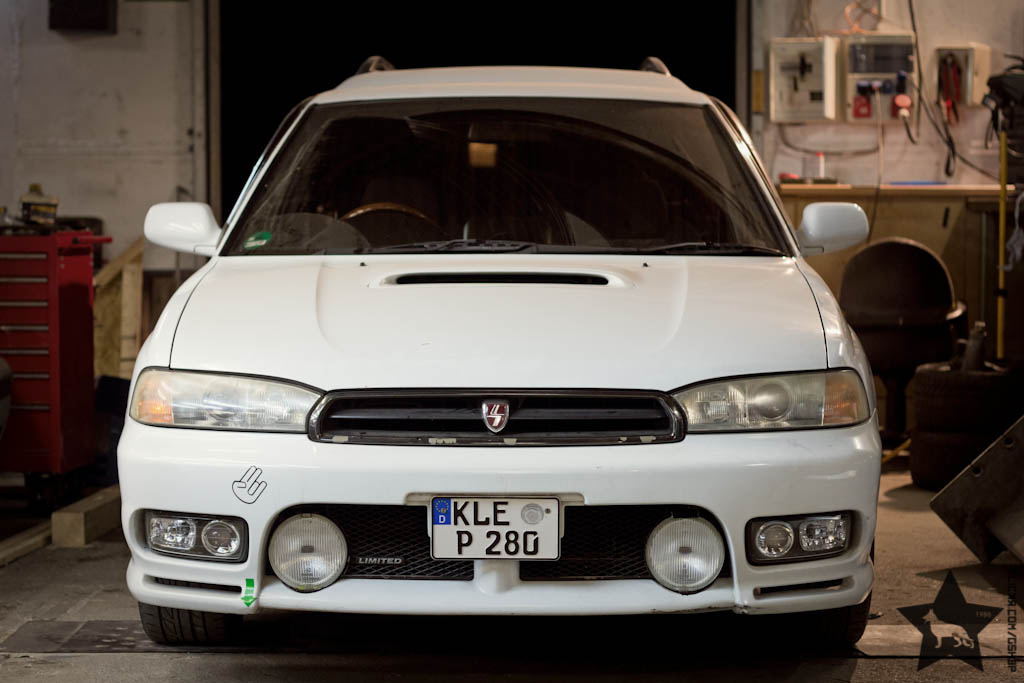
After almost 2 years, it's finally (almost) done and the Legacy is ready to get back on the road again!
I'm quite happy.


Comment
-
Love that colour in the bay..Comment


Comment