 Tweet
Tweet
Some good work going on in here.
-
Hipstagram tberardinucci

-
Update?
Neat build! Keep at it!
I don't envy all that wire wheeling... PITA-Christian.
'91 318iS AW2/blk slow garage queen/build...
'02 ///M3 carbonschwartz 6MT daily beast
'37 Chevy pickup-garagequeen...Comment
-
Wow, the vmrs looked really good on your car - wouldn't have expected that at all.
Interested in the progress you make, all the old school/rare parts are cool.Comment
-
thanks for all the feedback guys I really appreciate it. might sound boring but I'll put up a post soon about the wiring next methinks.
that's the plan. barrels that came with the wheels have already been binned. they'll be something like 11.5 +30 F and 12" +30 or so... going to modify my rear LCA's for additional inner clearance and if it comes to it the tie rod mount too. not sure about the latter at this point as I think it's about in line with the spring and if that's the case fuck it. want to stretch something silly like 285s so I can actually put some power to the ground while still rocking the look. need to widen the barrels as much as possible into the wheel wellsOriginally posted by P78 View PostComment
-
Floccinaucinihilipilification
Comment
-
unfortunately not for a very long time rebarrelling project is last on the to do list as I have wheels that satisfy me for now. after paint. don't hold your breath.
Comment
-
i fcks with this dude you're going in. can always appreciate some backyard mechanicsComment
-
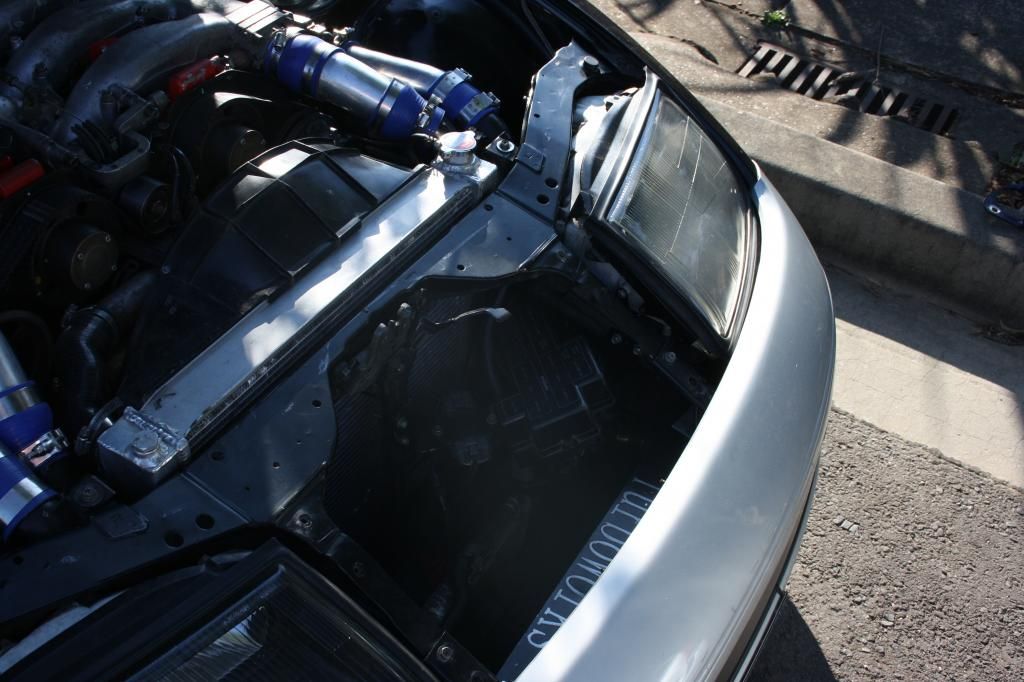
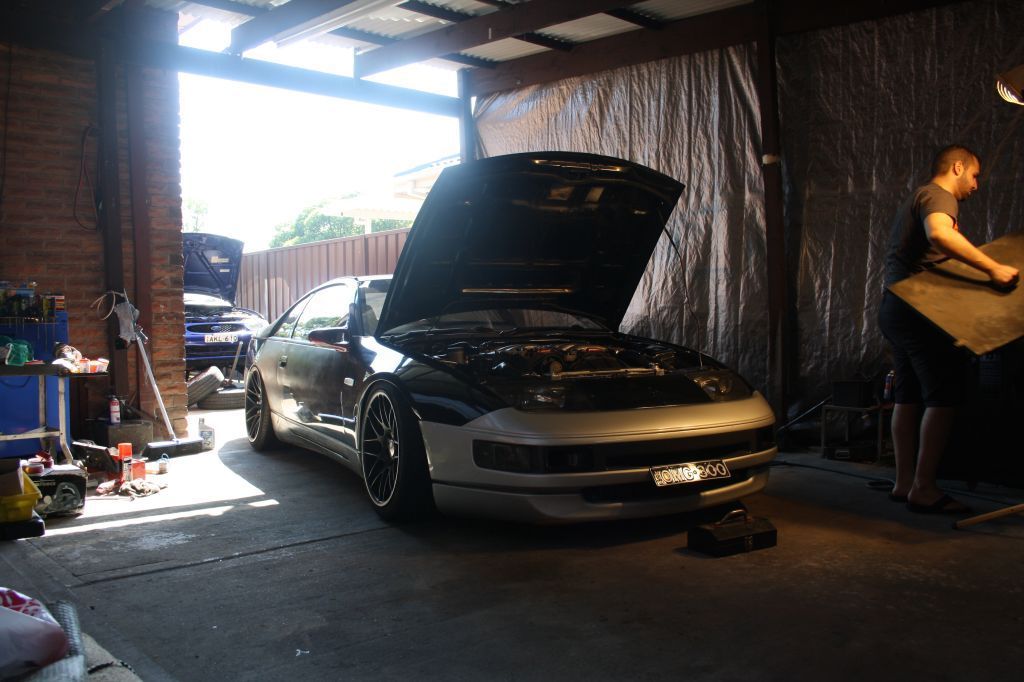
so a little about the bay. a while ago now while the car was enjoying more off-the-road time and I started on a basic wire tuck. engine in, no after market looms, just a simple tuck 'n' hide. that's how it began haha
this was stage one
- fuse box went in front of the radiator on custom bracket
- ptu (ignition module) behind front bar also on bracket
- NA power steering conversion (full removal of four wheel steering and all associated plumbing)
- battery in boot
- fuel filter rear mounted
- boost controller/map sensor under battery tray
- all electrics in the driver's corner of bay (relay box, oem boost sensor, wiper speed regulator, etc) moved to driver's fenderwell
- clutch bleed hard line removed and bypassed
- engine loom split and run underneath intake manifold
- all wiring for unnecessary devices removed from car
- AC deleted
there was a whole lot of this
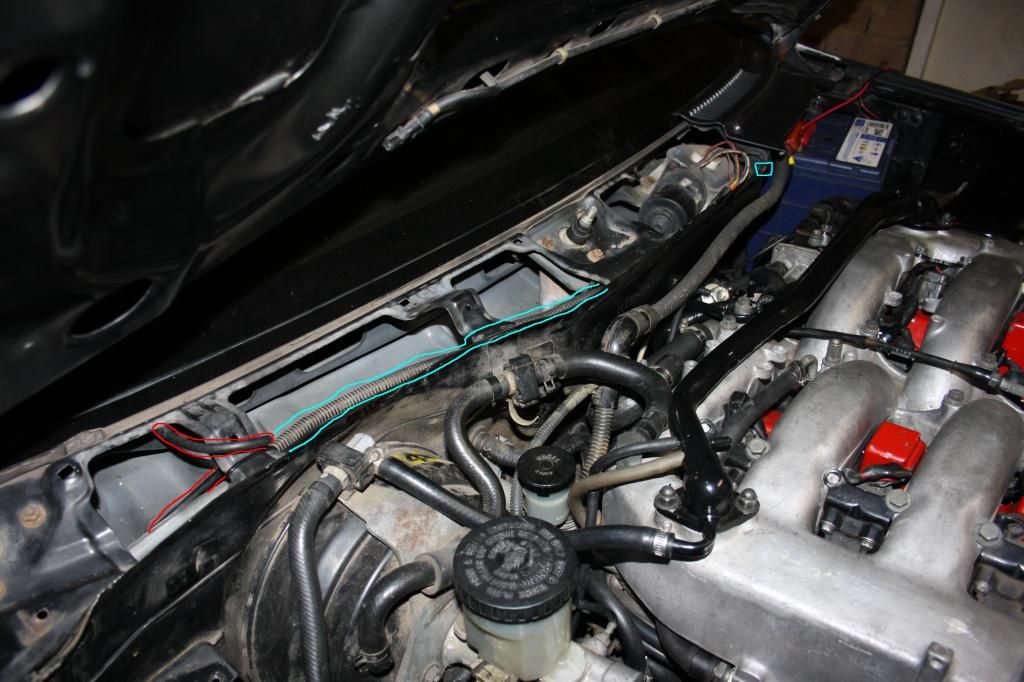
here's the initial engine harness. it was pretty simple to split up both banks and route them on top of the fuel rail.
here's a quick shot of my driver's side wheel well. the concept is simple enough; everything is undone, the whole loom from that corner pulled down through the pass, then bolted back up to the car.
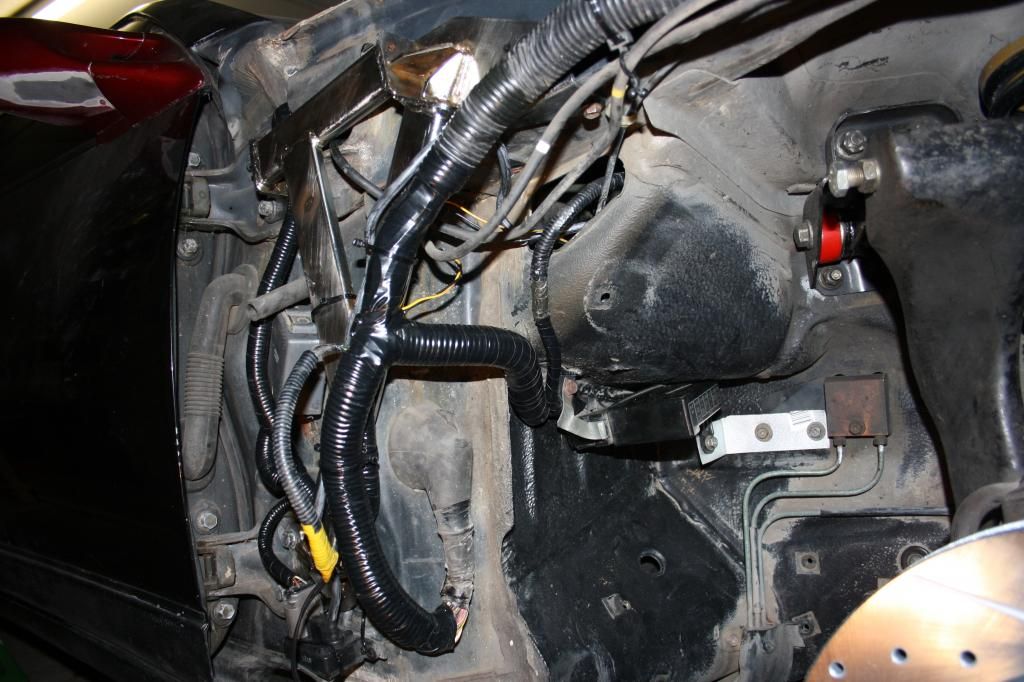
stuff like the loom for the wipers and hose for the fluid was run through the fender well to underneath the windscreen cowl through the drainage vent.
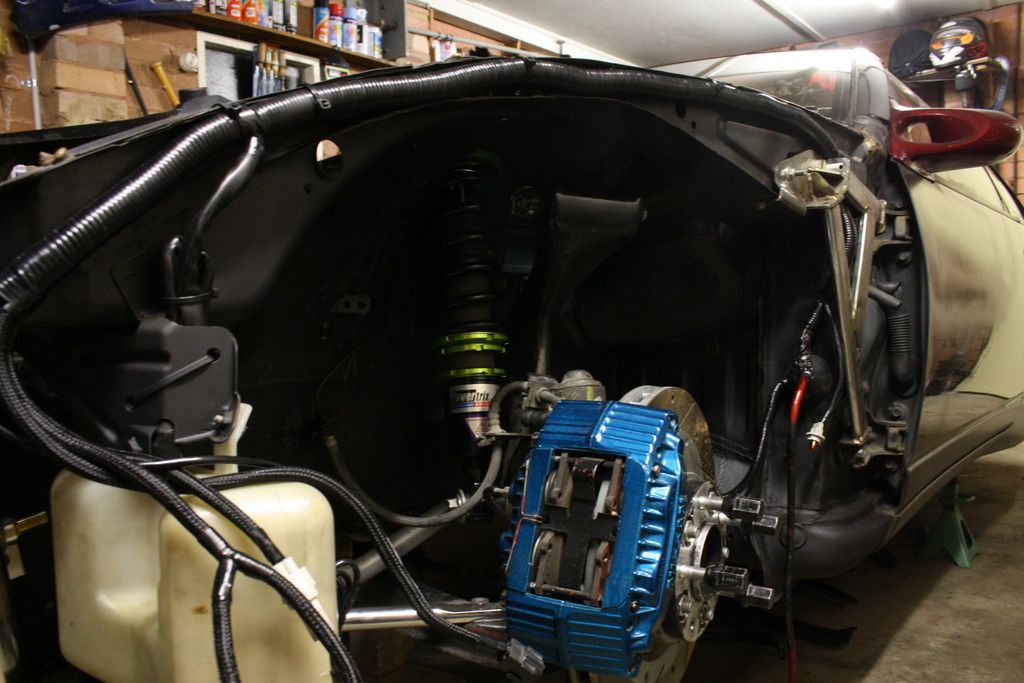
I pulled the engine with a good buddy of mine, swapped in some new turbos and while I was there performed an NA power steering conversion. no more ugly HICAS four wheel steering solenoid and leaky, heavy plumbing.
all this while, my pile of parts to powder coat kept growing. not a cheap exercise though!
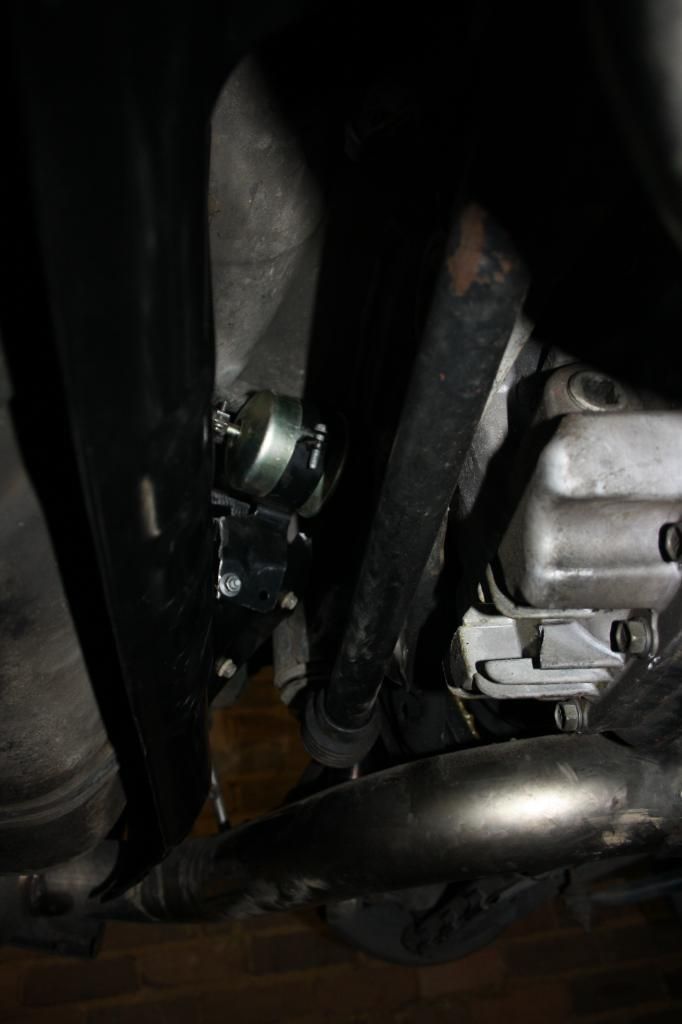
fuel filter rear-mounted above the diff.
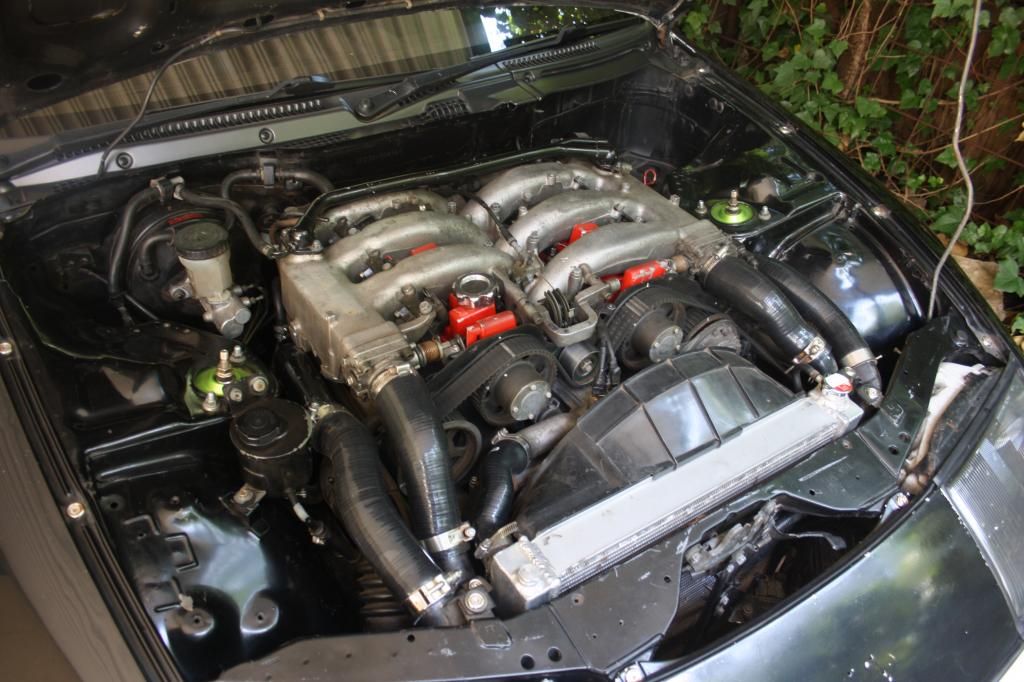
all in all, this is how the bay ended up with motor #1. all the work was carried out engine in with no real plans to paint the bay. no custom harnesses, welding or paint work. while I wasn't completely happy with this I needed the car to go, so I promised that if the motor ever came out I'd go the whole nine yards.
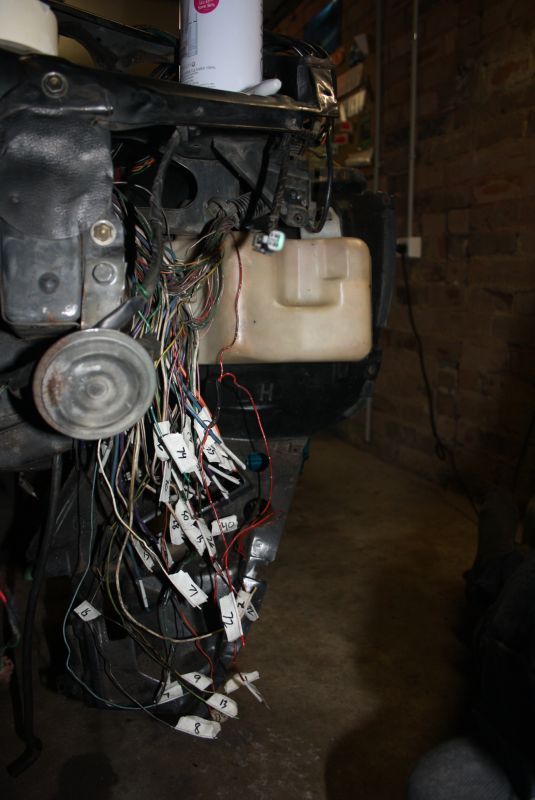
starting point. total mess.
unfortunately I never really got to make the most of the hard work carried out because I never had the chance to pretty up what was remaining under the hood. ah well.
so like I said, that's how it started off. not long after the second to last photo my motor puked up all over the room of a dyno room and that sort of sent the build off on a tangent.
much more to come.
-ALast edited by anti.engineered; 11-26-2014, 01:21 AM.Comment
-
Awesome build!
Are you keeping the car on the road? That would be a good reason to seam seal the car, to hide the stitching...Comment
-
-Christian.
'91 318iS AW2/blk slow garage queen/build...
'02 ///M3 carbonschwartz 6MT daily beast
'37 Chevy pickup-garagequeen...Comment
-
man a pretty extensive in length one if I'm honest, hah. I've been meaning to get this thread up to date for an age so lemme get my ducks in a row and I'll put up a bunch more content.
This will always be a street car and will be thrashed silly in the rain, so whatever means necessary to keep cancer out I'll be very glad to go to. Just getting a few conflicting practices undertaken from different manufacturers to do the job. There are a heap of modern cars these days that have completely exposed seams on the underbody and I just don't get why they can get away with it while others seemingly can't.Comment
-
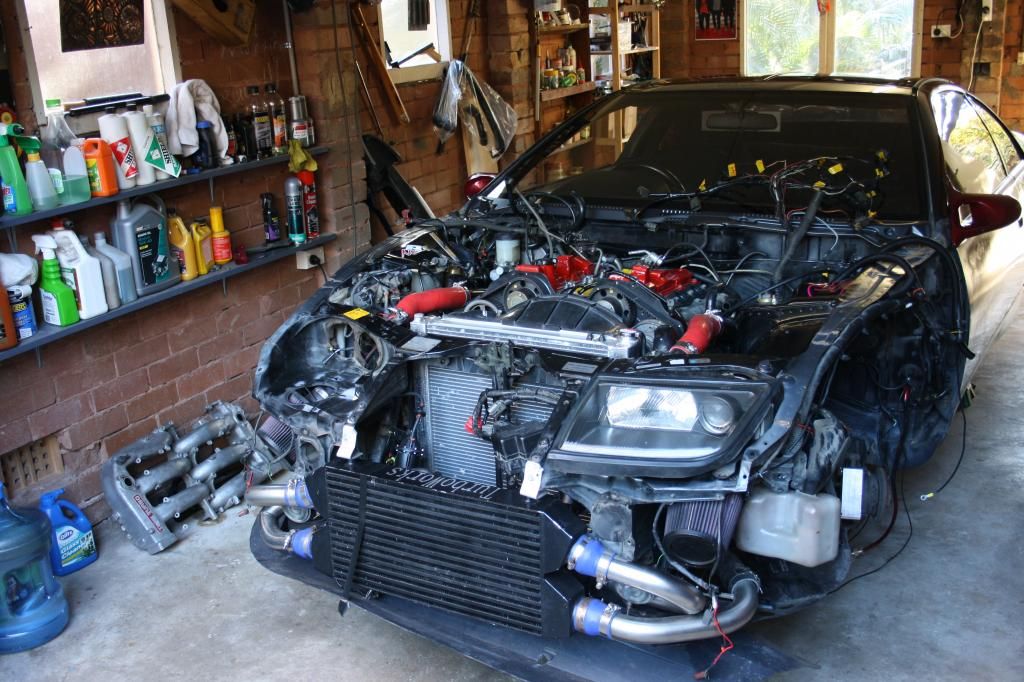
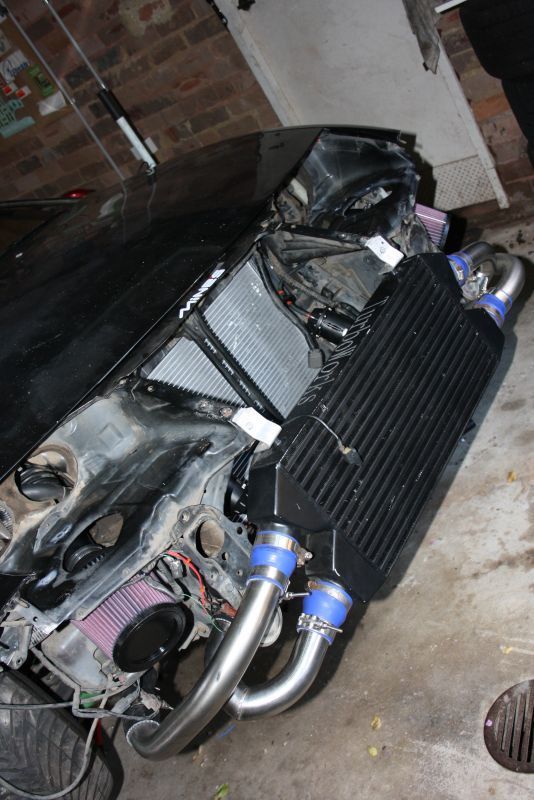
alright so last little bit of "round one" with the zed.
when i picked up the car, I planned to sit pretty with some bolt ons and 15 PSI or so on stock turbos. it started with a FMIC that came with the car, uninstalled and without pipework which made it lots of fun to fit haha. on the induction side I was running a HKS Vein Pressure Converter which I picked up off of Yahoo! Japan. It's a piggy back pincercept ECU which measures manifold air pressure, translates that reading into an AFM voltage, and feeds that to the stock ECU (so the car still thinks it has an air flow meter) - this allowed me to run my twin K&N's under the headlights, probably my then favourite mod to the car! mounted next to the VPC it in the glove box was a GReddy Profec B Spec II.
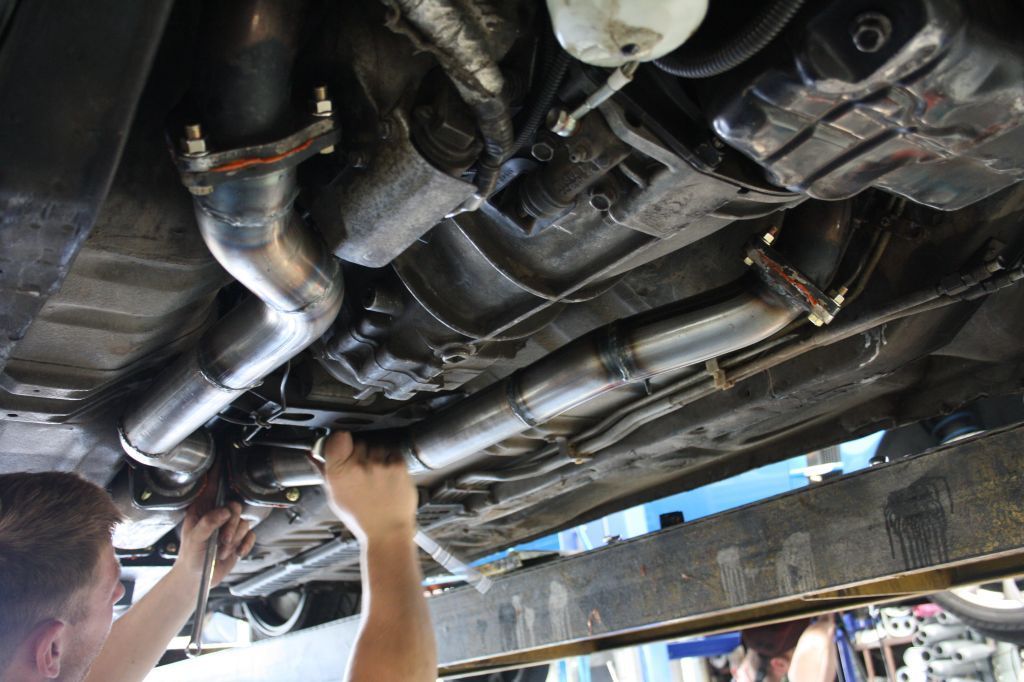
on the back flow I was running china spec dumps attached to custom made front pipes, 200 CPSI cats, a UAS x-pipe resonator and VeilSide Evolution axle backs. i had the front pipes made up by Castle Hill Exhaust for ground clearance, an expensive but worthwhile investment over the 1" gap above the tarmac I had before. unfortunately I managed to smash all the way through my cats recently and it's letting quite a bit of exhaust into the cabin...
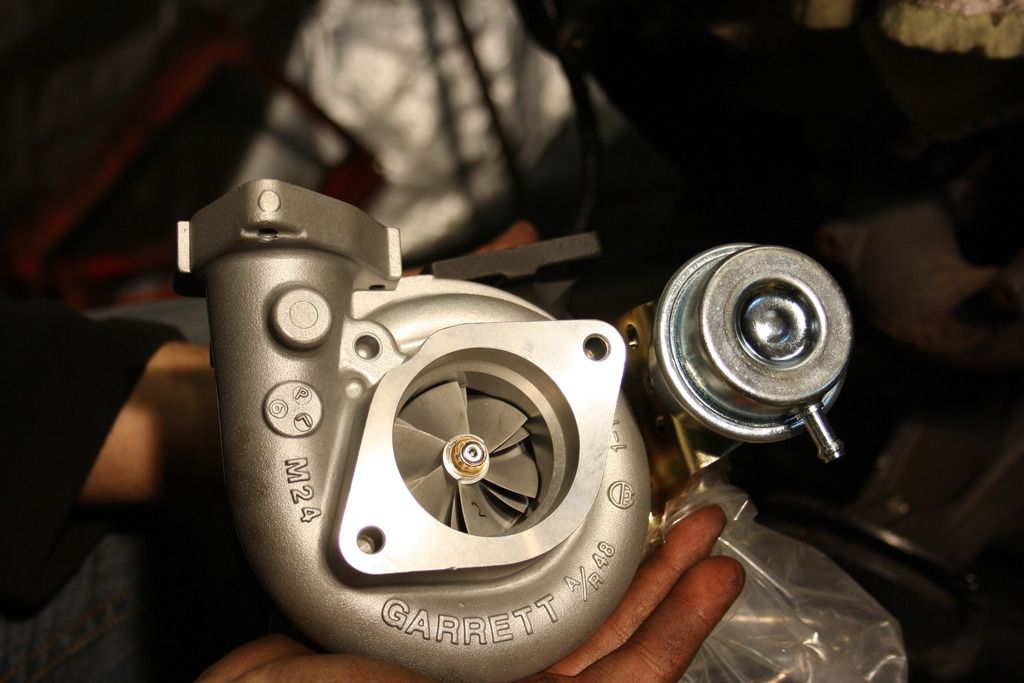
after a while it started eating me that I'd be bumbling around with turbos more than 20 years old, so I started exploring my options. my buddy put his hand up to help me pull the engine at his place so I put in the order at Concept Z Performance for some disco potato high flows. they're a good budget mod, and give some extra go than stockies for all the effort of replacing them. as you can imagine, this is an engine out job, heh.
i picked up a set of JECS 550cc injectors, had them sonic cleaned then flow tested. i set up a twin feed/return fuel system on the stock rail and FPR with braided nylon lines, bolted it all up together and dropped in a nistune chipped ECU so it'd run.

maintenance
the motor had a fresh 120 click service when I received it. the following deletes were also carried out in order to make the motor as simple and clean as possible:
- fuel damper
- egr
- aiv's
- prvr
- pcv's
- carbon canister
- under manifold water hoses
- air conditioning
- NA power steering conversion (full 4ws removal)
there was also 56mm rad thrown in the mix for good measure, along with a new fan clutch. all intake hoses through the system had been replaced with silicone.
driveline
- F1 racing stage three six puck button clutch
- F1 racing chrome molly flywheel
- UAS one piece braided clutch line
- one piece steel drive shaft, brand unknown (came with the car)
- stock pulleys, differential and gearbox
it's amazing how much you can condense so much work...
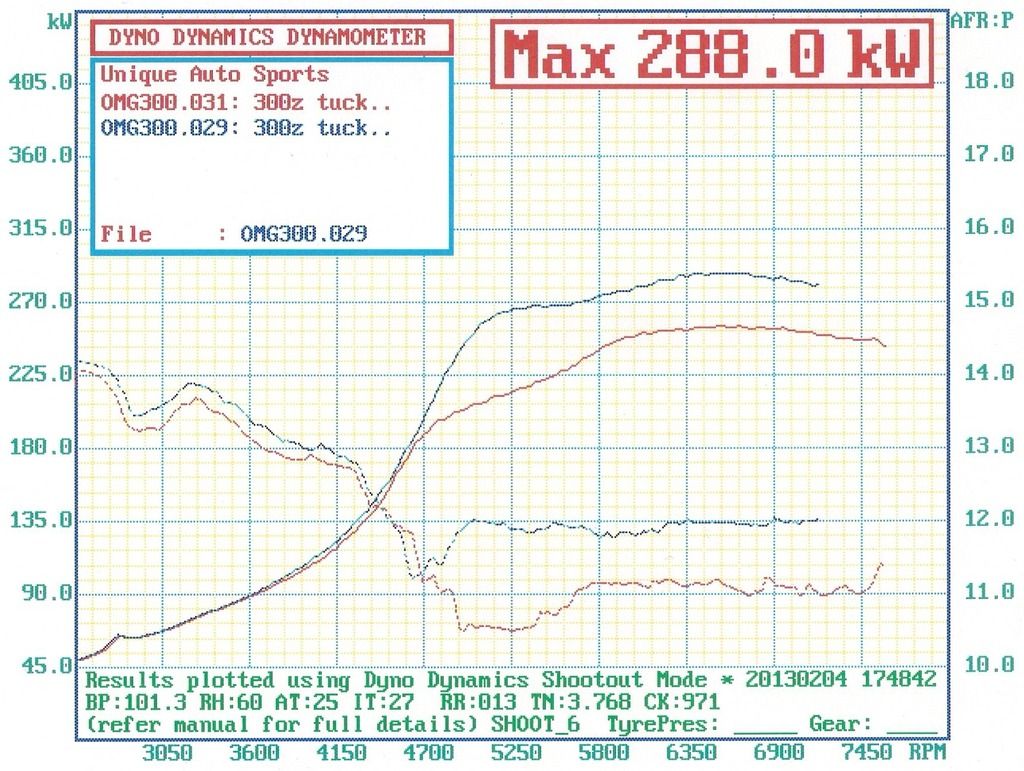
so next up ka-blooey went the donk. car got tuned and made 400 whp on the stock internals before the incompetent tuner fried my ring lands on redline #28.
so this really badly gutted me at the time. i had recently moved out of home and while working two jobs + studying had a little cash to play with but sure as hell not enough to build a motor. i really didn't want to drop another 25 year old shitter in again for fear of the same thing happening again and to make things worse, had previously i promised myself that if the motor came out I'd extend the wire tuck and paint the bay too. self imposed i know but maintaining standards are important to me
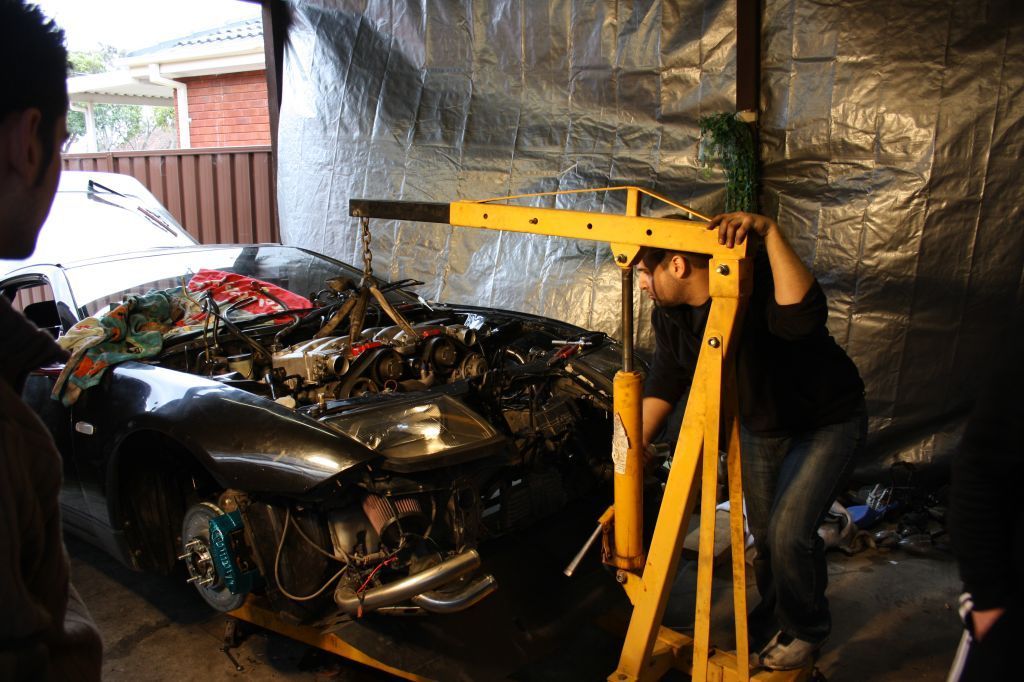
so i the car went straight back to that same buddy's place, we yanked the old motor old motor and i moved back with my parents so i could go to town on the thing.
love that snap
so i got it home and over time things got a little out of control. "well you may as well do that too" mentality and all that jazz.
-AComment
-
So because I'm a smart guy I decided I should do I rewire. All in all I spent more than two months doing this, approximately two days a week. Bear in mind I'd never done this before and was figuring out the method as I went along. Luckily for me I had by buddy along side me for the whole job from start to finish - we were both unemployed, haha. This task became as much his baby as it did mine - I don't even know how parts of it are done because he wouldn't let me "ruin it", lol.
this is by far the greatest and most consummate task I have ever attempted on my Z32. No single mod has ever taken so long, been as complicated, required as much on the spot thinking or dedication as this one.
few reasons I did this:
1) accessibility - having the boxes in the fender/behind the bumper is a pain
2) reliability - they have potential to get wet there
3) doing things properly - less dodgy than stuffing them where the loom will allow
4) cosmetics - there's a very large collection of wires that runs across the rad support which I was able to remove
5) performance - I had the large relay box under the nose panel, blocking air flow to the radiator
6) space - between the twin intakes, washer reservoir, catch can and power steering reservoir I have very little unused real estate behind my front bar!
7) because the benefits are undeniable compared to the argument against
This is how it started, we got up to about 100 different connections cut.
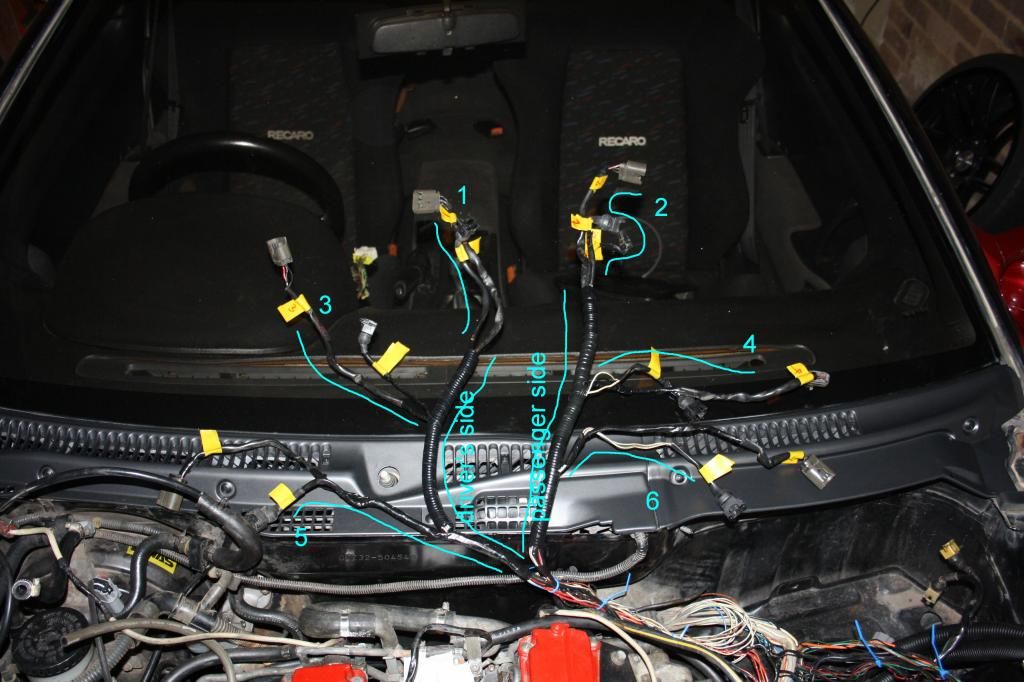
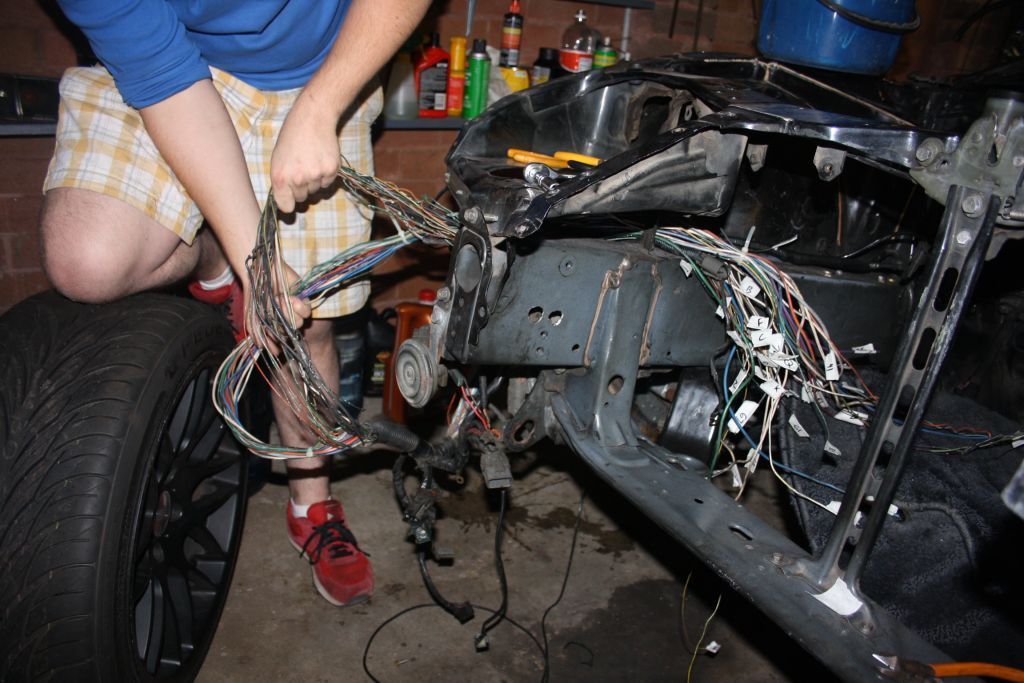
Felt really good to reef out all the wiring from across the rad support. all the wires were either pulled back, or extended and pushed through the passes from the fender well to the cabin - so they could reach the passenger footwell.
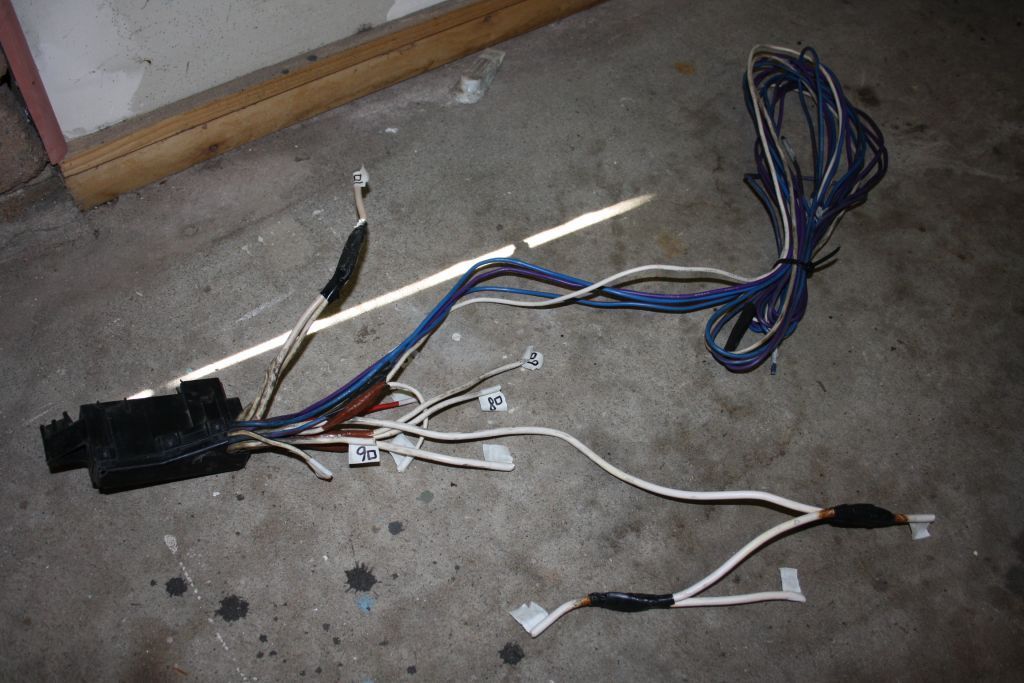
fuse box cut out, ignore my beater clothes haha.
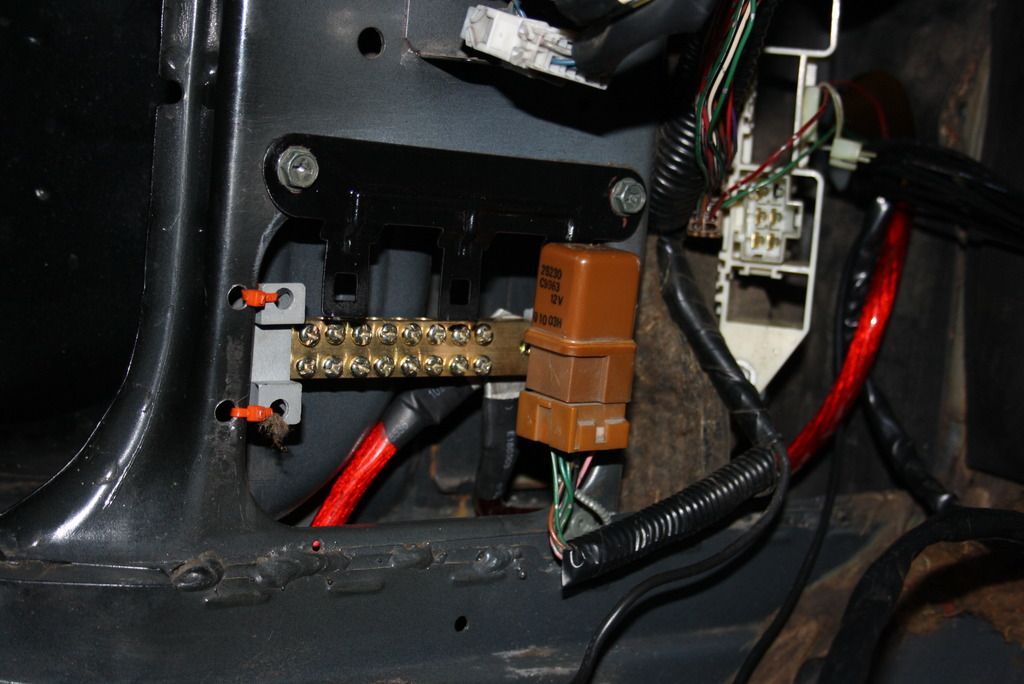
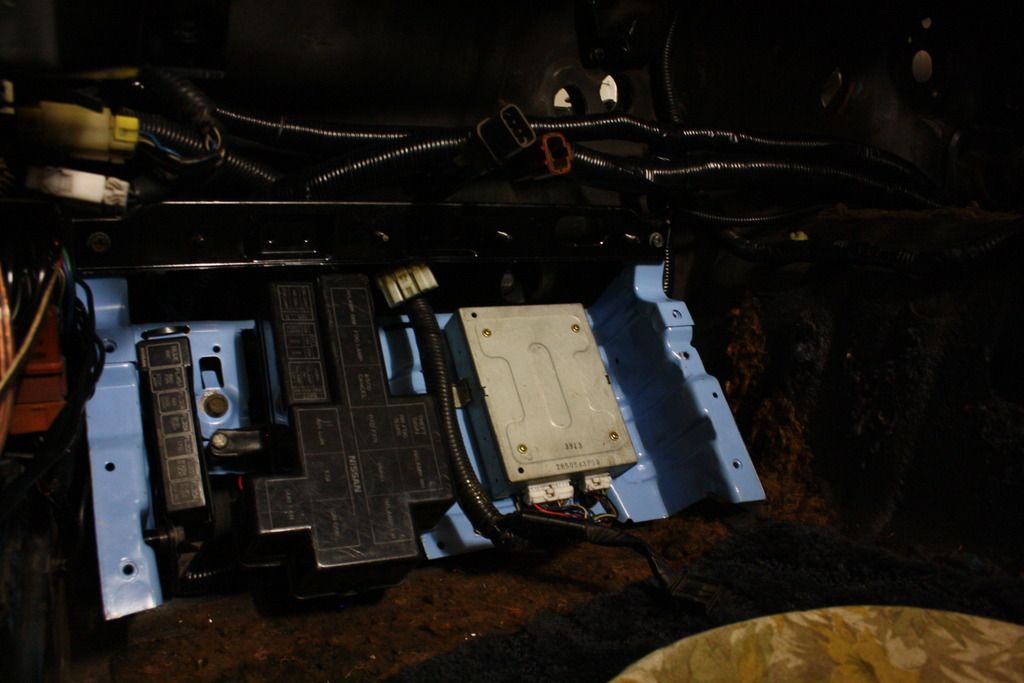
modified ECU panel to hold the boxes in their new locations:
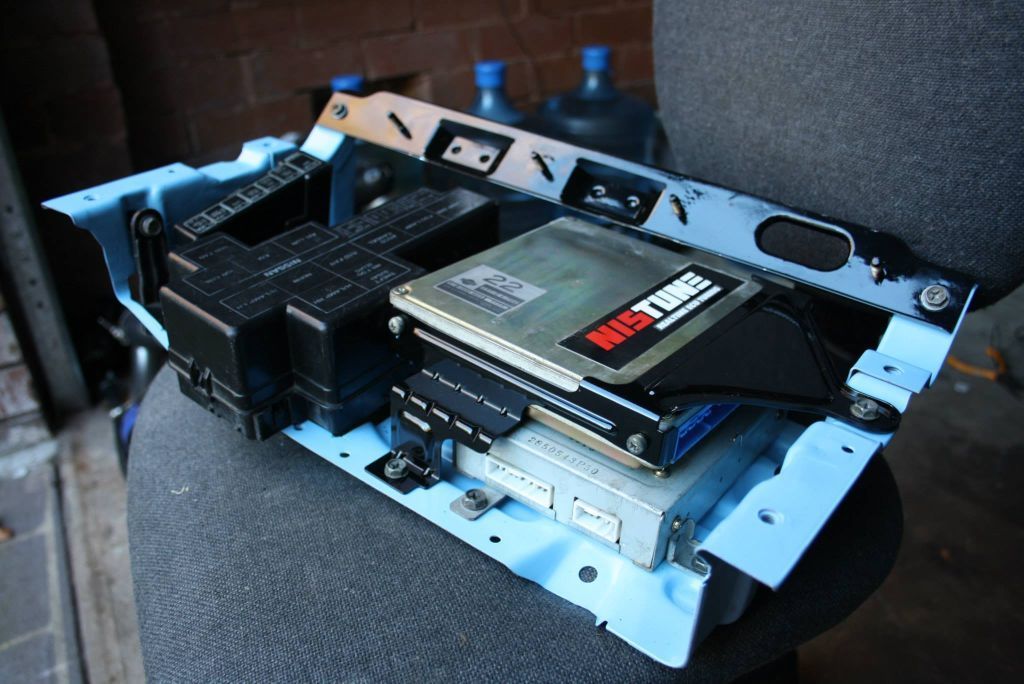
I set up a negative terminal box next to the ECU in a spare space so I could with ease run all the earths to one place that wouldn't leave me with corroding ring terminal issues. The large red cable pictured goes to the block, box and battery negative. honestly it's probably not necessary; the chassis is more than a sufficient earth, I carried out the task this way for personal (irrational) peace of mind. don't mind the orange cable ties; quick mockup solution.
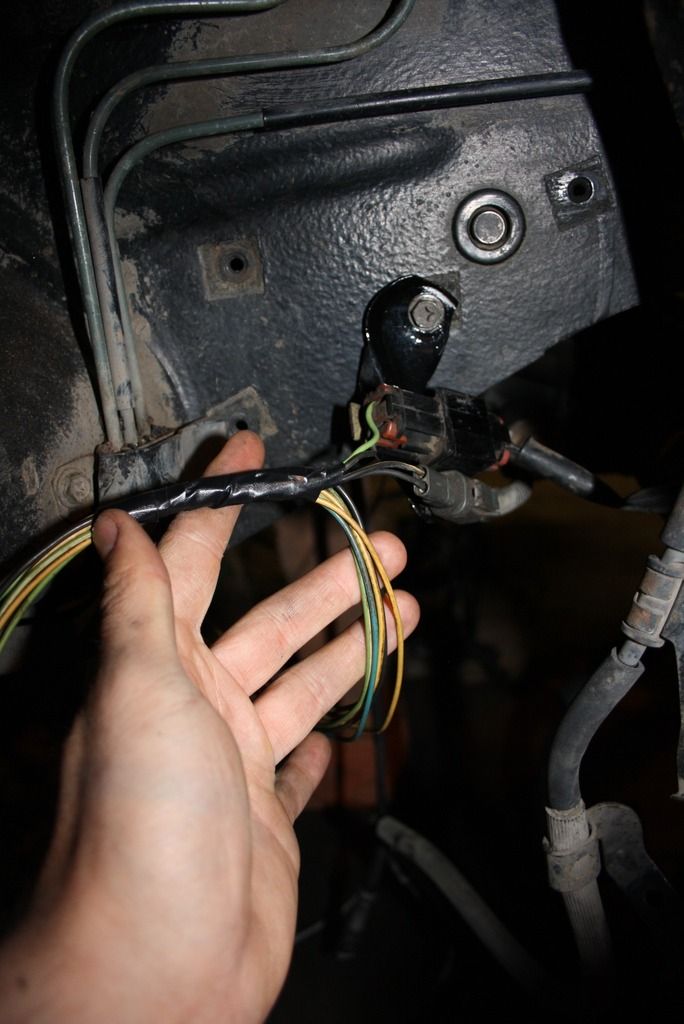
Repurposed: I removed the bracket that holds these two plugs near the rack, modified it and bolted it back on inside the driver's wheel well. the wires now route back through to the cabin via where the AIV's used to be located. the sub looms on the other side of those connectors (going to the components) weren't modified, so replacements are a quick plug and play. the same can not be said for the ABS sensors unfortunately; they were hard wired to the front end loom.
The gearbox loom was also hard wired into body loom, fed through reused OEM heat shielding with the starter motor positive wire:
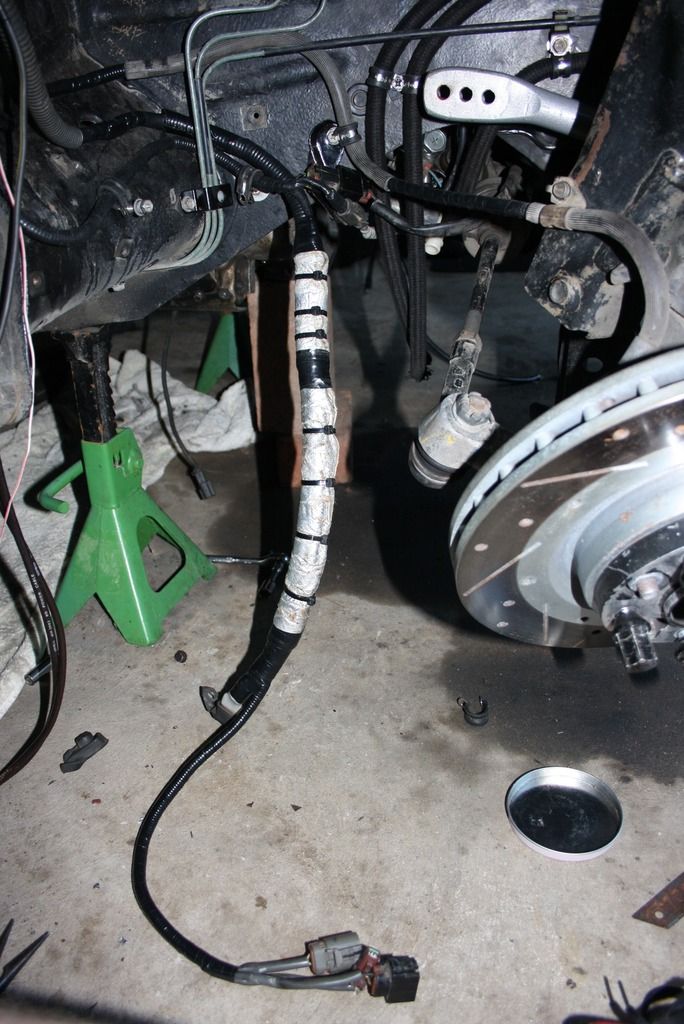
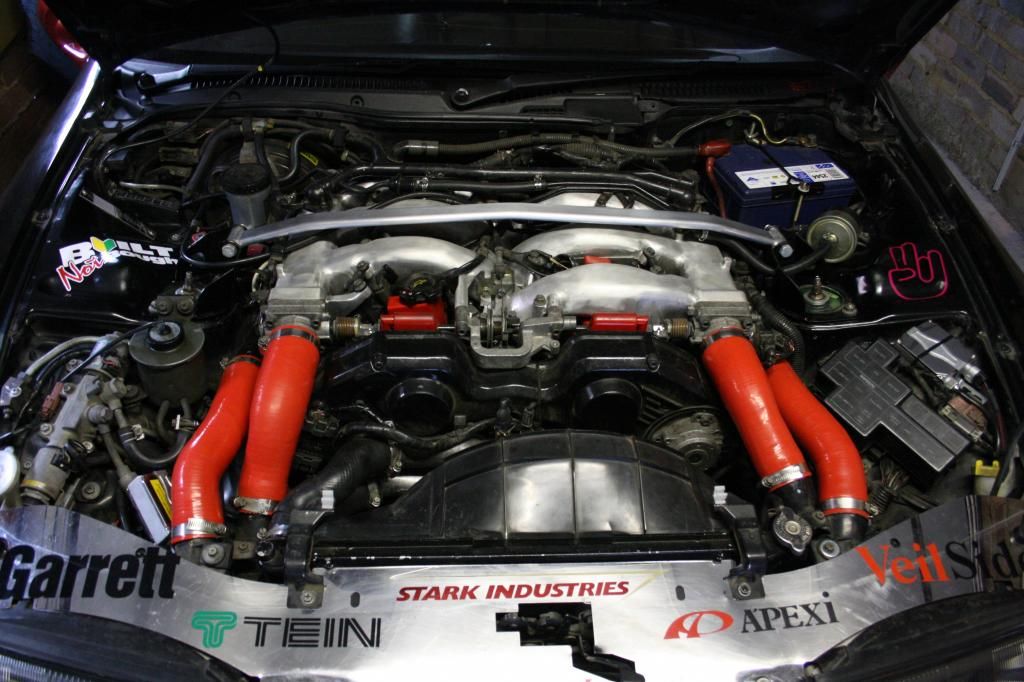
The only wiring remaining in the front end is for the headlights, parkers, fogs, afm, horn, indicators washer reservoir and exterior temperature sensor. now that it's not a part of another wraparound loom, the whole section can hang off the car. It was lengthened appropriately to be fed through the fender brace for extra neat points.
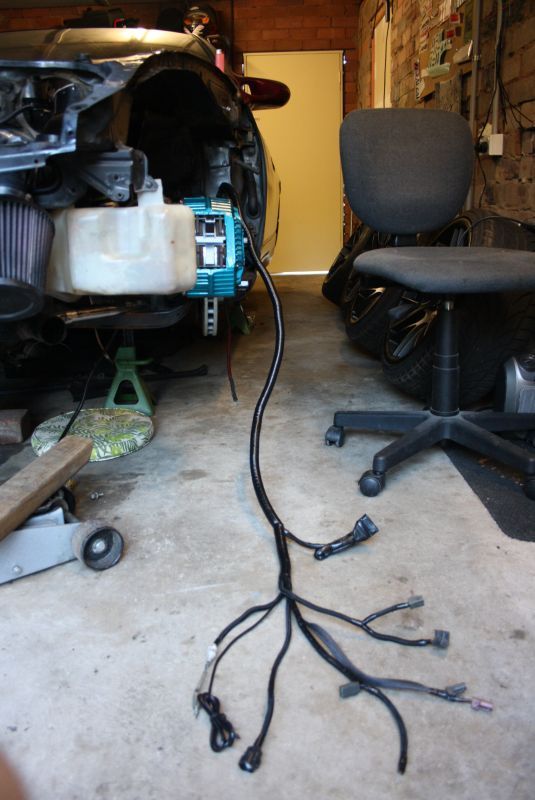
Done, dusted, finished.
Except it's not. Since starting my new job I've been hanging out with some very experienced technicians and learnt a bit about wiring which I wish I knew earlier. the whole rewire was carried out with solder, and I am now unfortunately aware that solder will not be competent long term securer of the connections.
I'll be going through the new loom, cutting out all the solder joints and either de-pinning both ends of the wire to insert a full aftermarket replacement (thus removing the extension) or installing crimps. I have put in a large order for at Motec for their motorsport crimps, sent off for a set of ratchet crimpers as well as a few more supplies.
fun times.
-AComment
-
Some serious work always involved with wiring, but good to see it all cleaned up
"Never argue with an idiot; they'll drag you down to their level and beat you with experience"Comment
-
Jesus man, the effort here is sweet, nice Z man
'08 335iComment

Comment