Announcement

Collapse
No announcement yet.

Mild 86 MX72 Cressida Build

Collapse
X
 
  • Filter
  • Time
  • Show
Clear All
new posts

  • Mild 86 MX72 Cressida Build

    This is going to be a bit more vanilla stance than what you guys are probably used to, but somebody may like it.
    Before I get into the build proper, here's the specs sheet so far

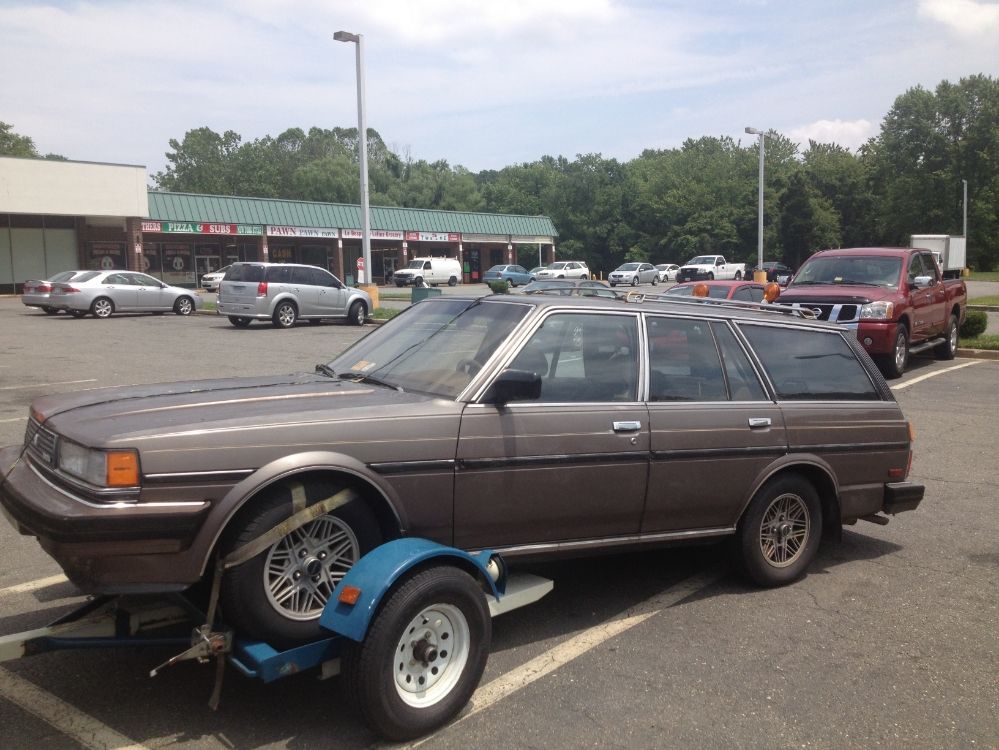
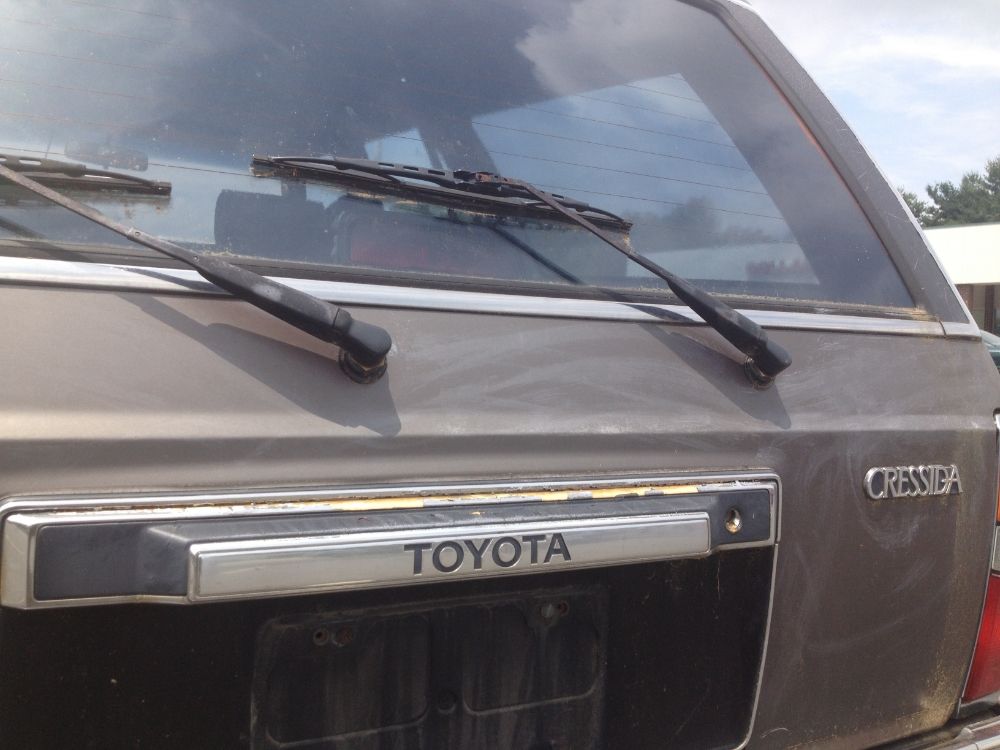
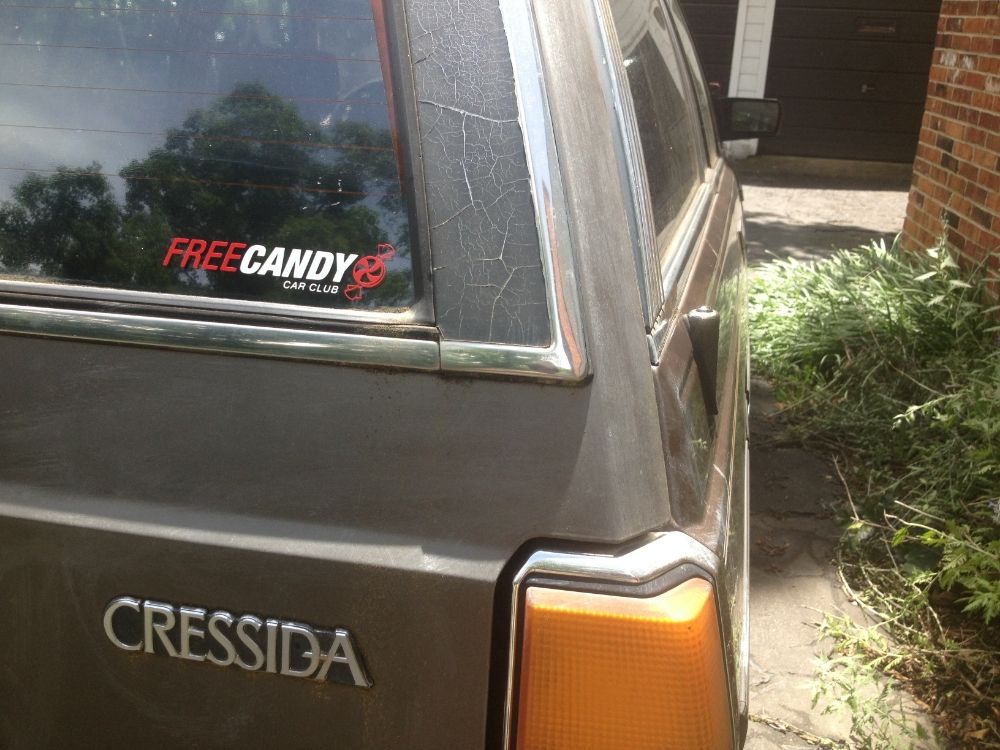
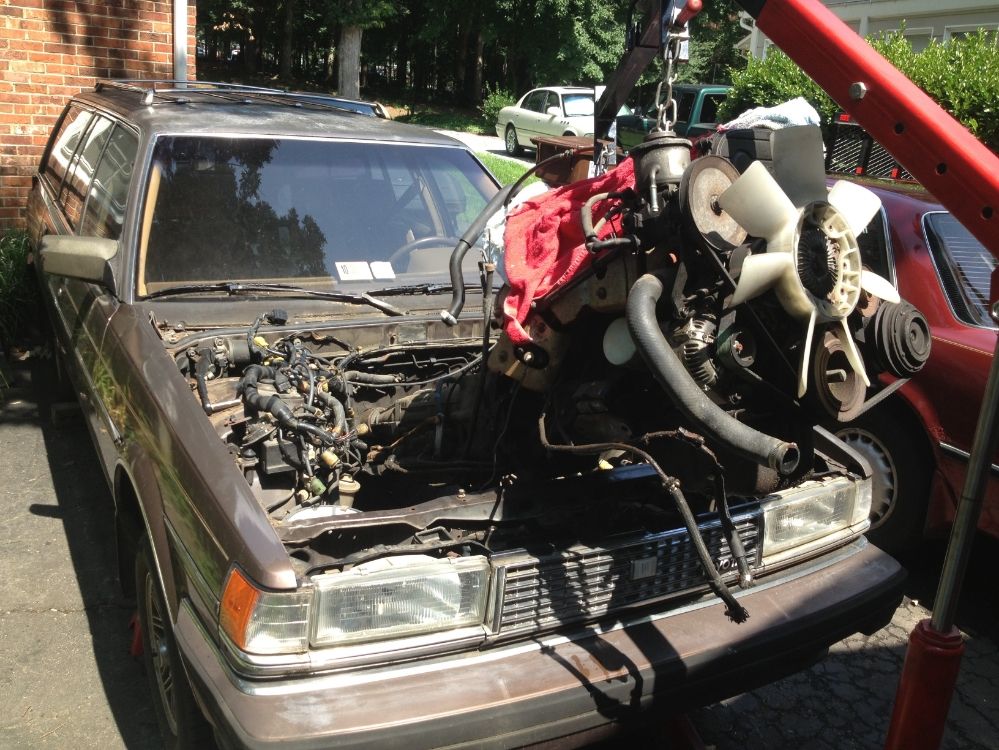
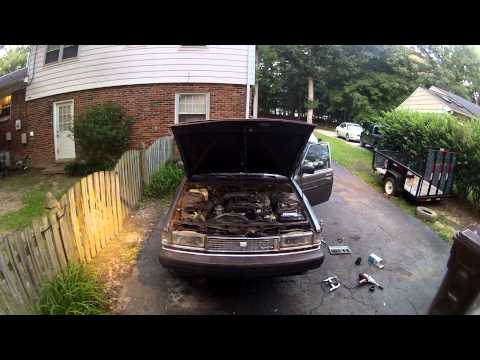
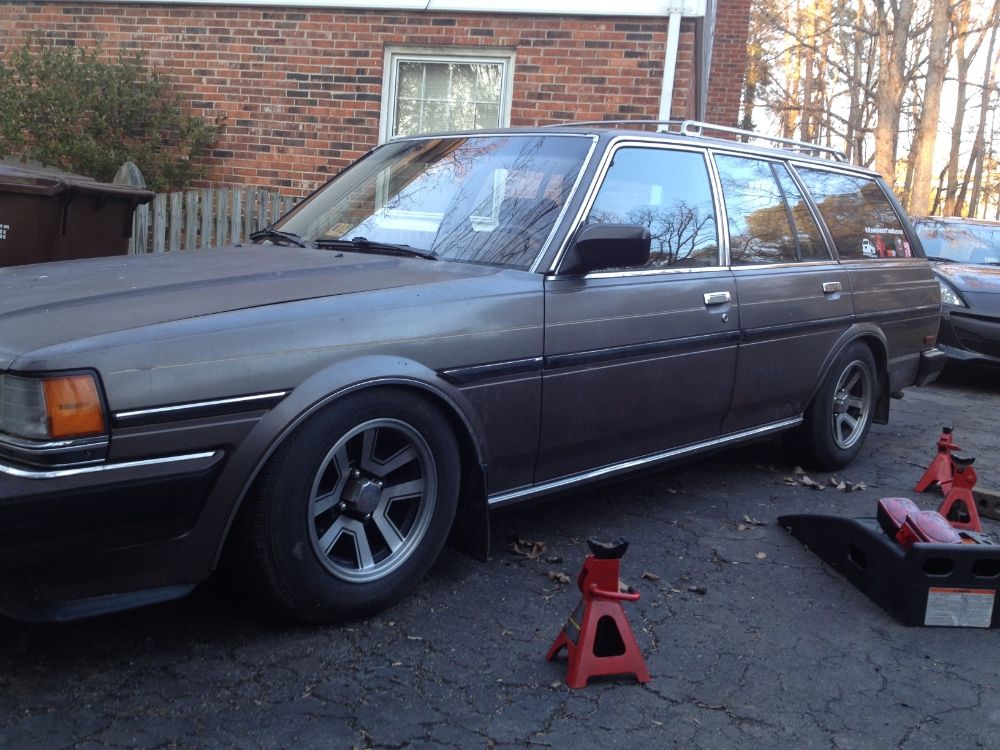
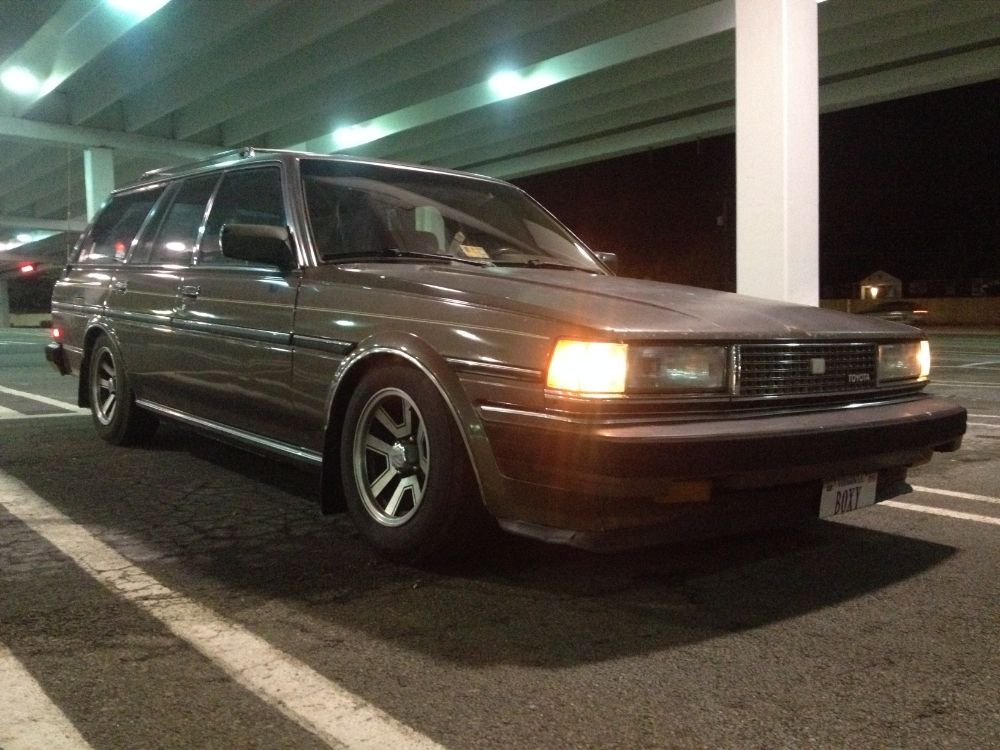
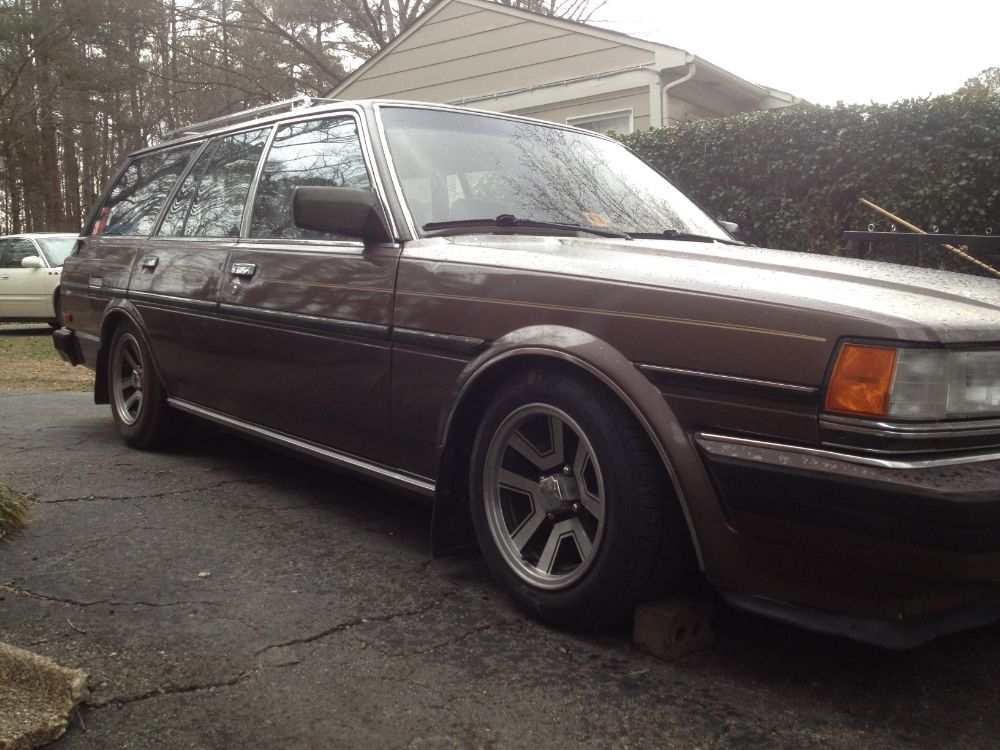
    1986 Toyota Cressida wagon
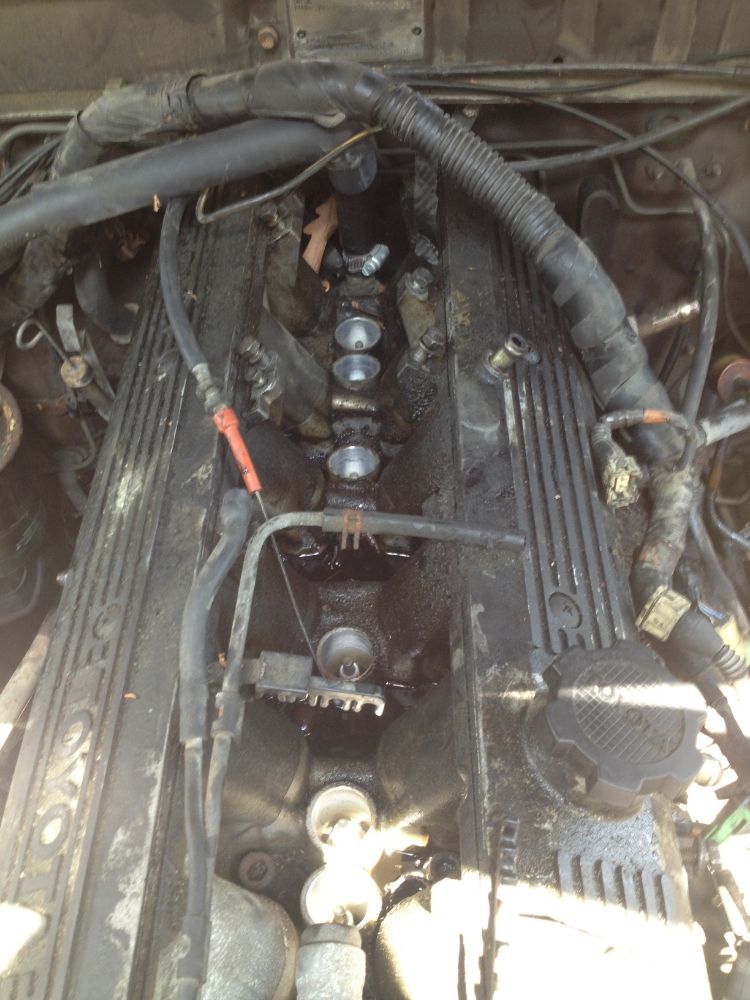
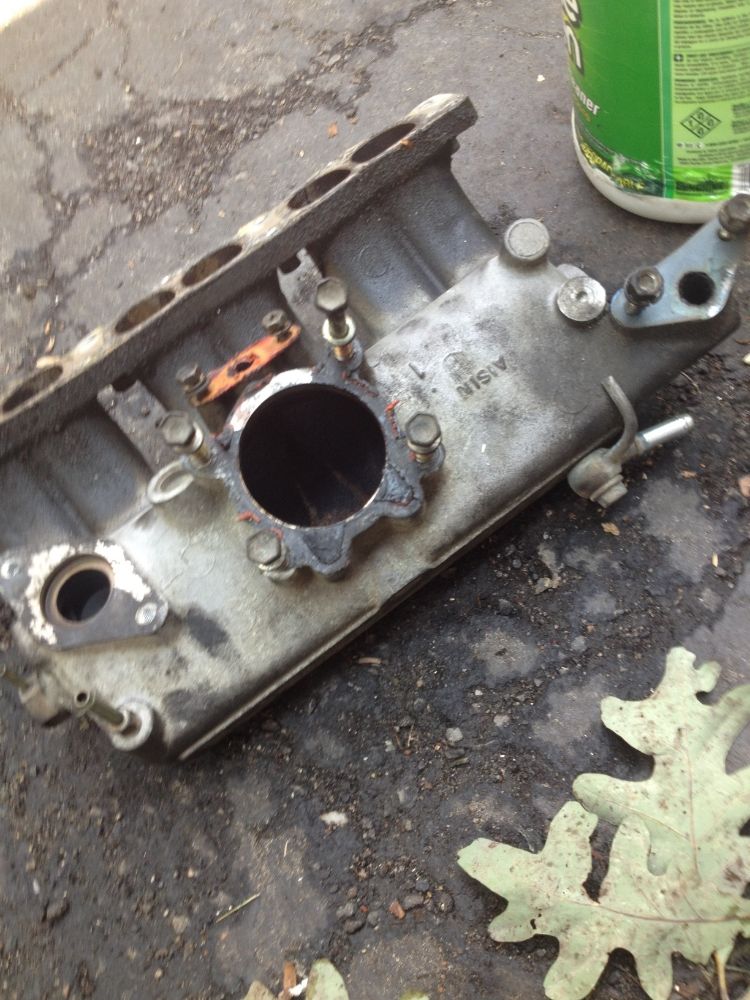
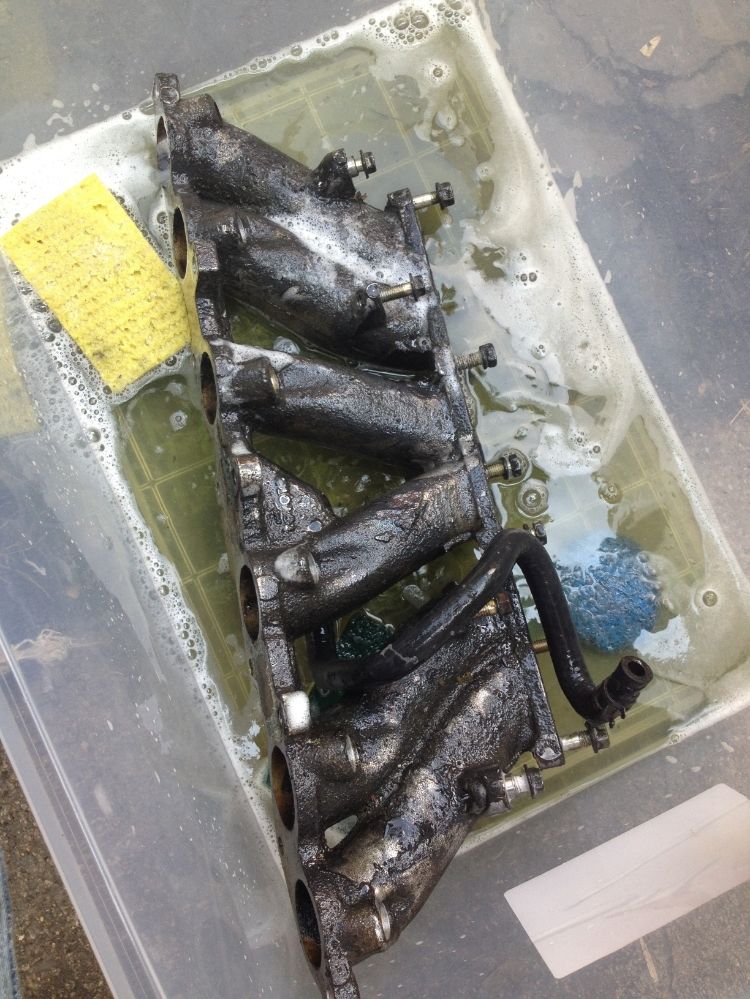
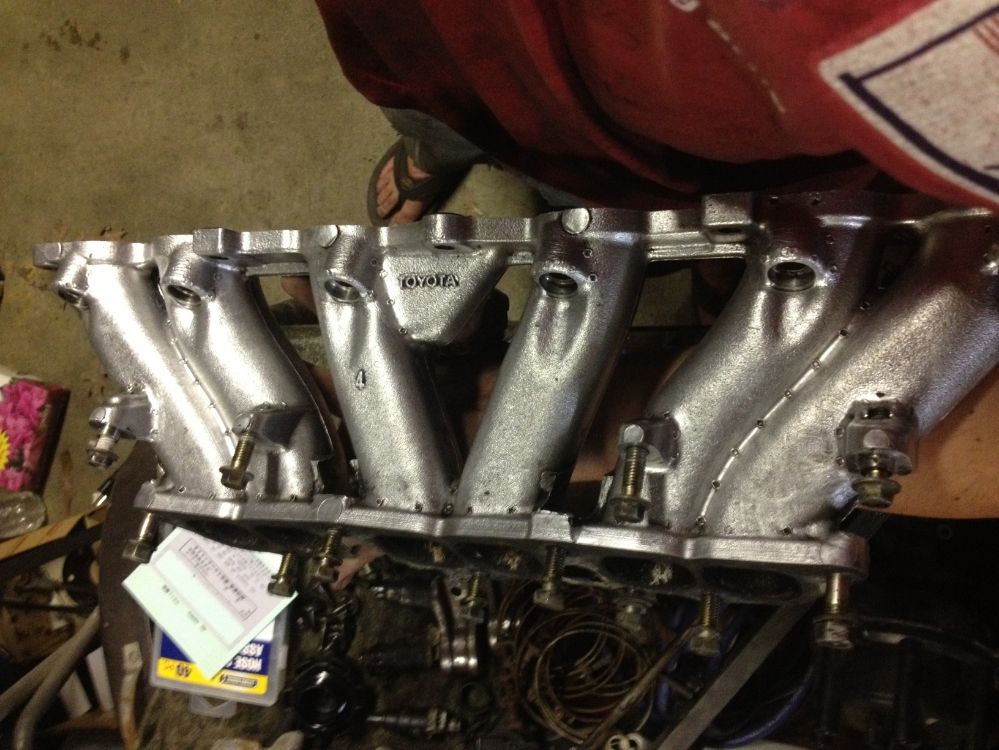
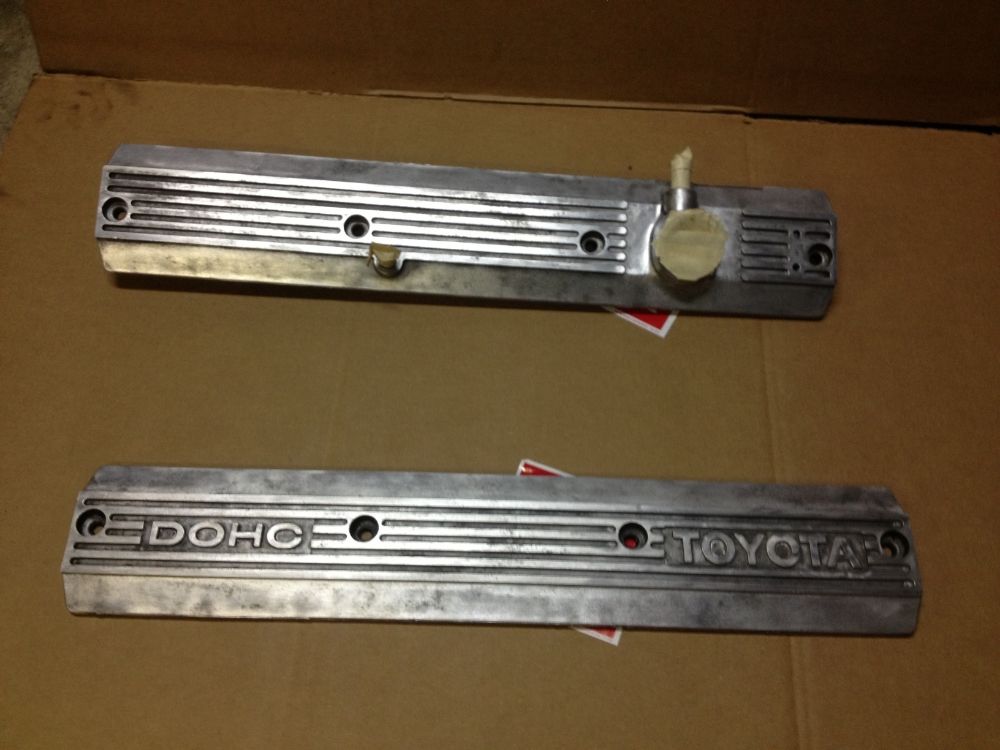
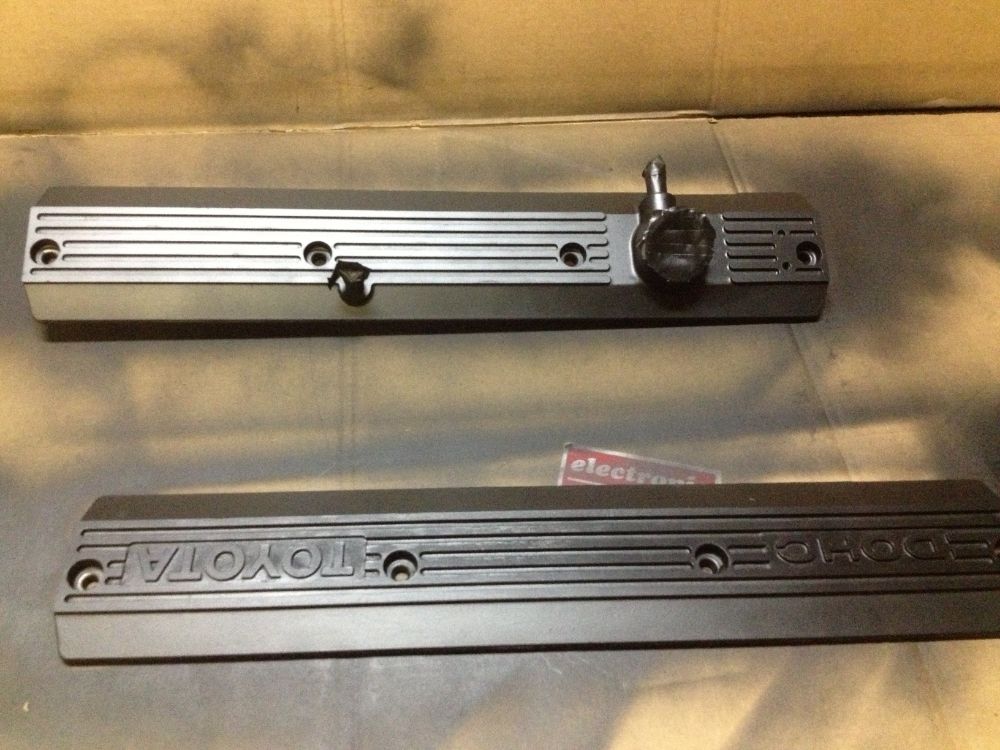
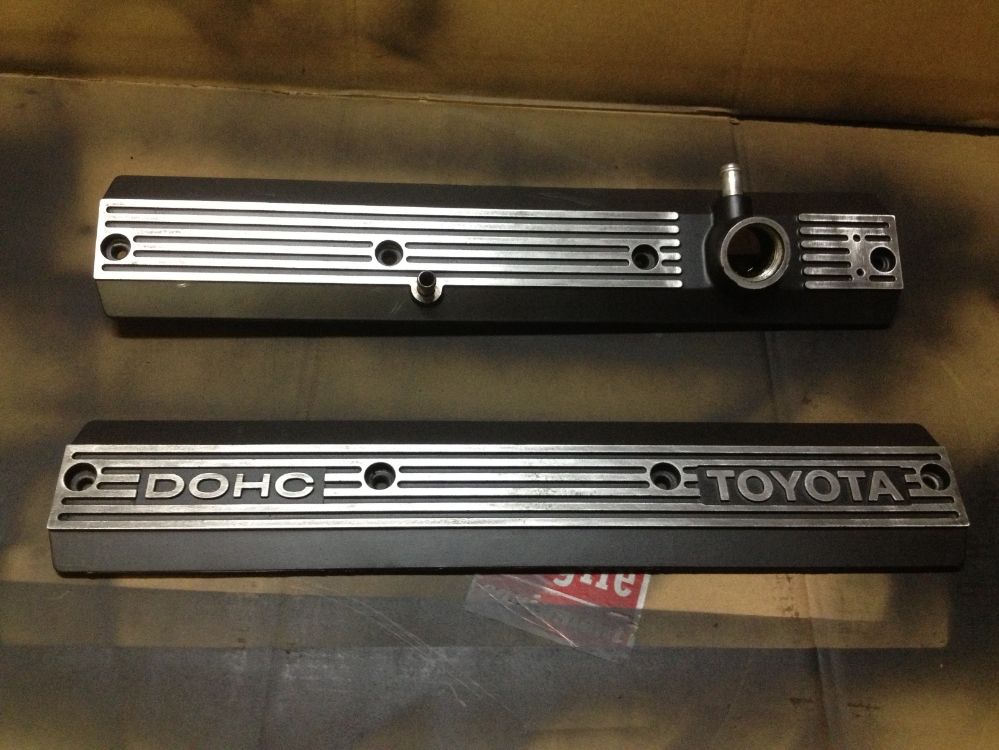
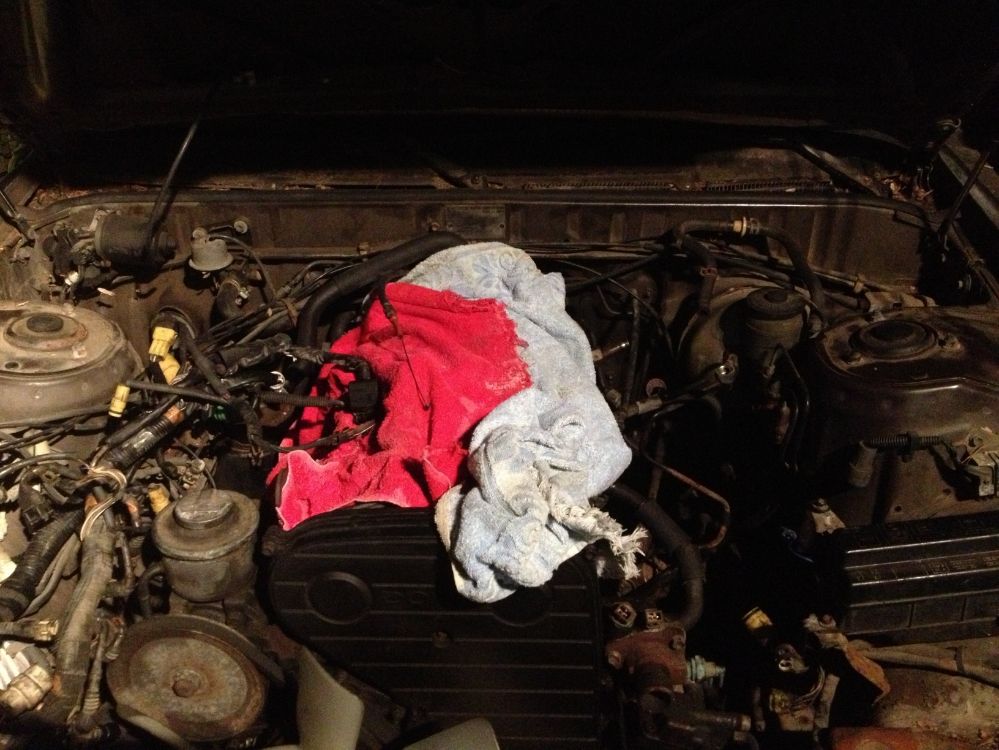
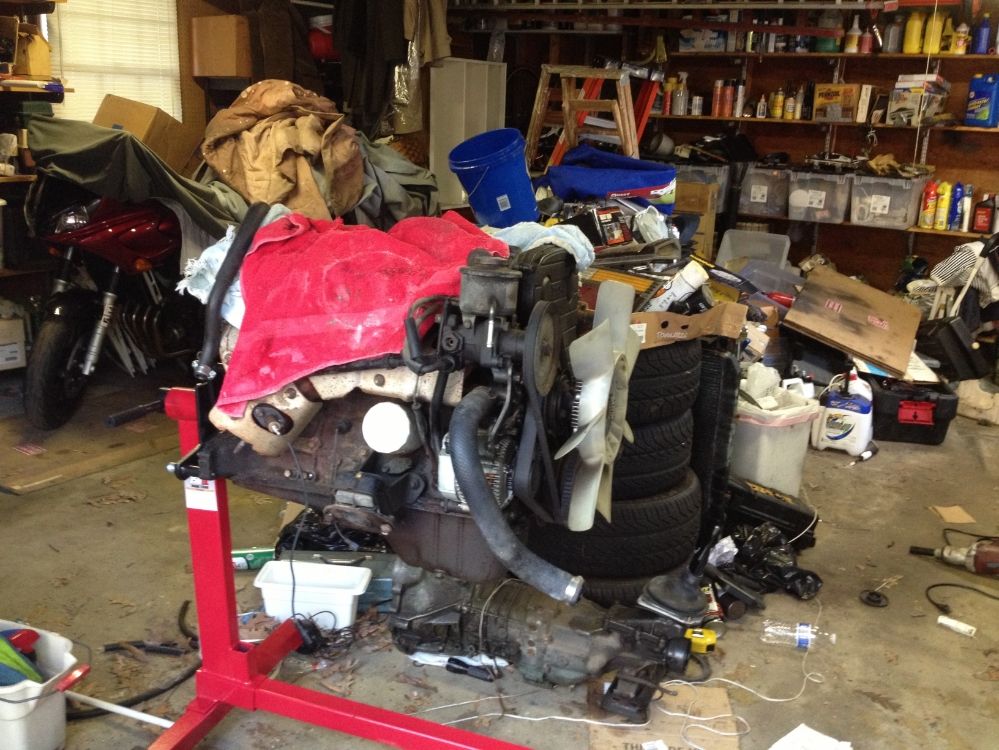
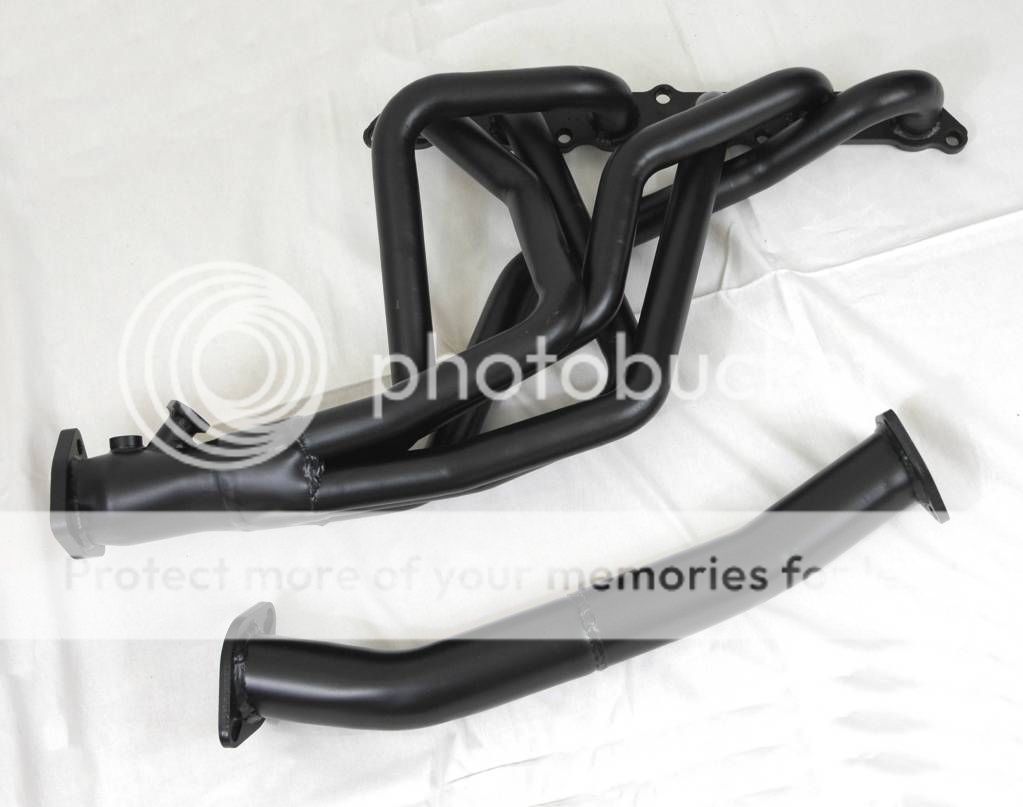
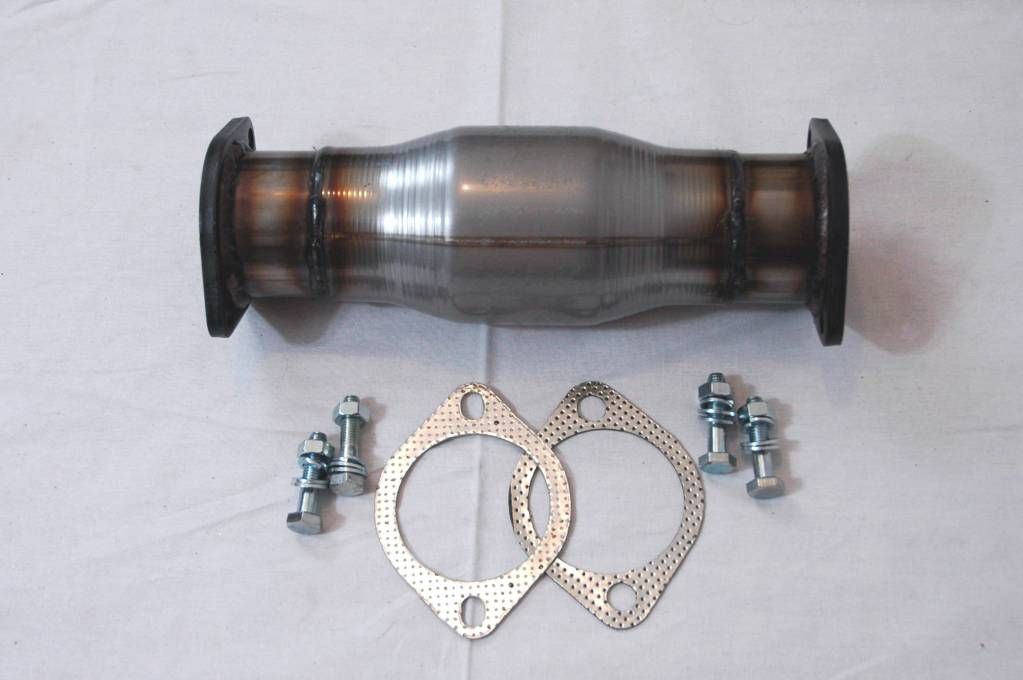
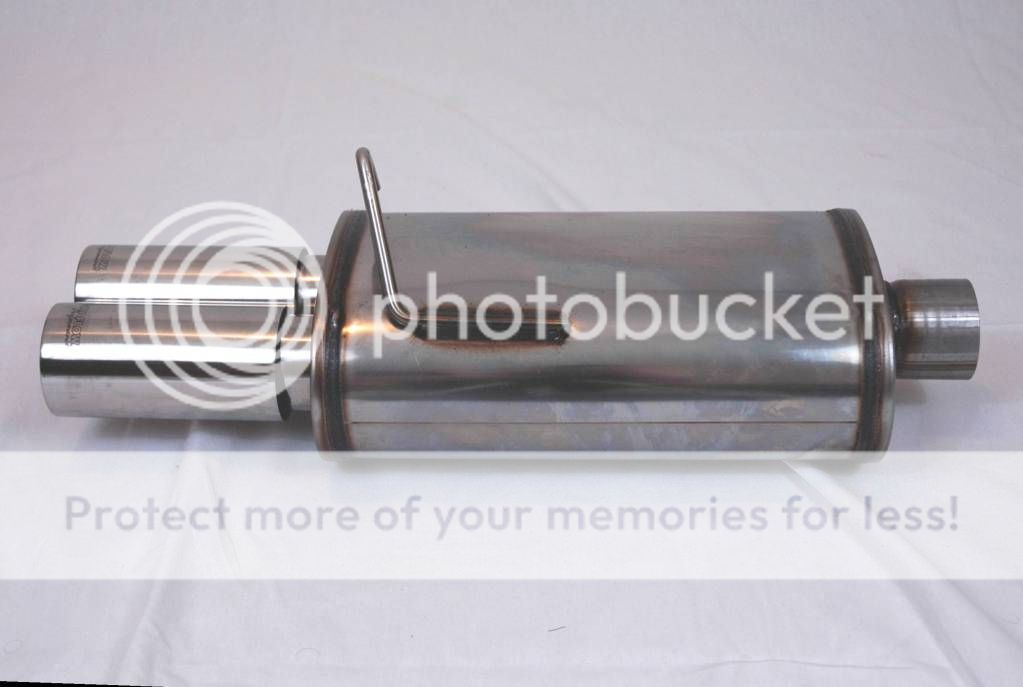
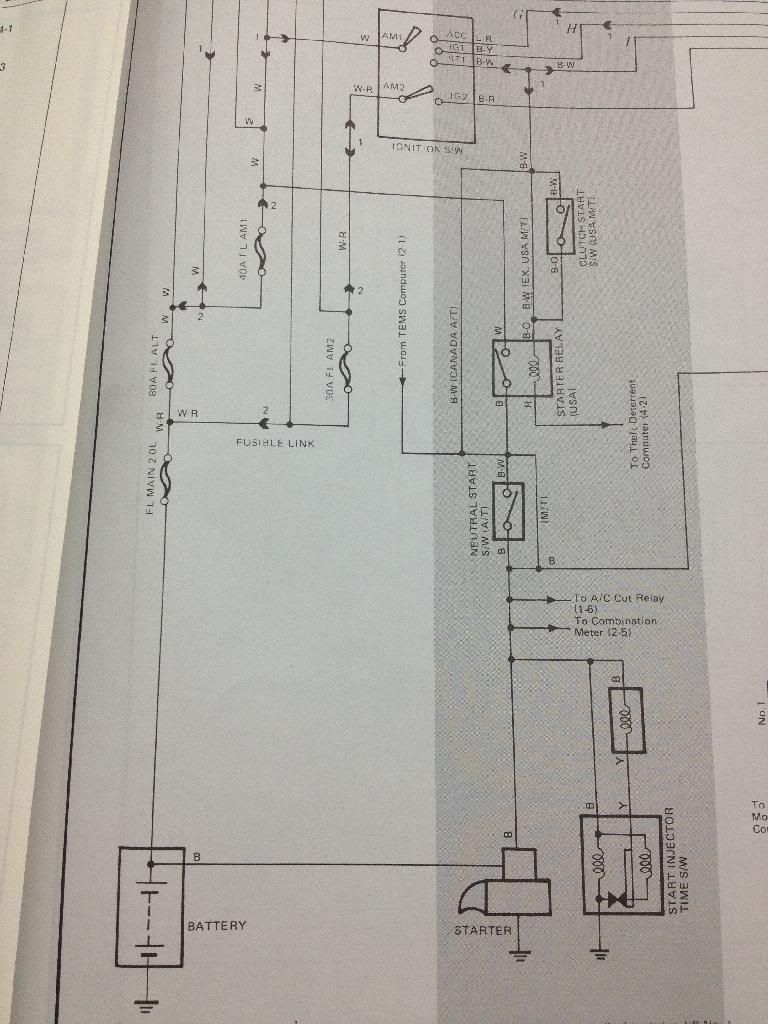
    5M-GE
    RabidChimp ceramic coated intake pipe with K&N filter
    W58 from a MA70 Supra
    Custom driveshaft
    AE86 clutch pedal
    MA60 Supra clutch MC
    DriftMotion braided clutch line
    All new brake system (MC, lines, pads, calipers, rotors, shoes, drums, wheel cylinders)
    All new engine, trans, and rear end seals
    Energy Suspension front control arm poly bushings
    Shortened front strut housings, MR2 KYB AGX inserts, T3 weld-on coilovers (400 lb springs), T3 camber plates, T3 RCA's
    Custom 400lb rear springs
    Camaro KYB AGX rear shocks
    Home-made poly bushings in the 4 links
    Custom T3 panhard rod
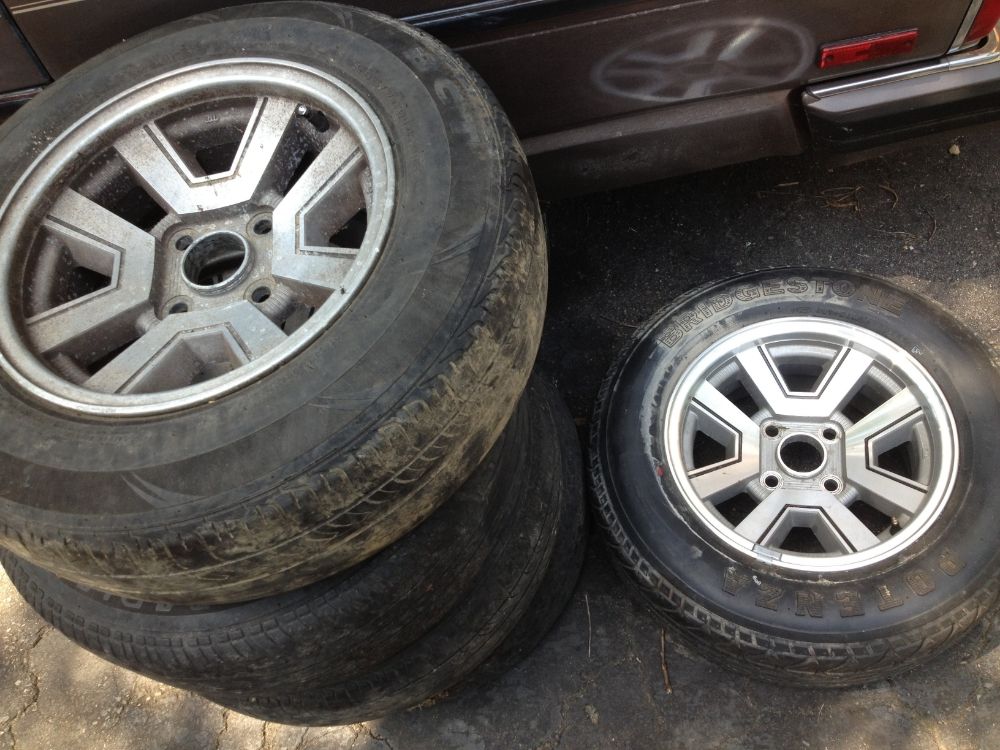
    P-Type Celica-Supra wheels (14x7 +8)
    195/70R14 rear, 185/60R14 front

    Proper build will be below!
    @thedailydownshift

  • #2
    Copy-pasted from another forum for your viewing pleasure:

    6/9/13

    Picked up this poor thing from a guy up in NoVA on 6/9 for $600. It has 158k miles, leaks pretty much every fluid, needs a battery, supposedly overheats (it never did for me), the paint is TERRIBLE, the left rear door doesn't open from the outside, the front right window won't roll down from the switch on the driver's door (never tried the pass. side switch), but the interior is in almost PERFECT shape, and it runs. And it's (more or less) a Celica-Supra wagon!


    Here's the service history I have for it.

    6/23/98 - 106k
    Rear brake shoes & wheel cylinders

    6/30/98 - 106k
    Battery

    7/9/98 - 106k
    Emissions fail

    7/15/98 - 106k
    Air filter, spark plug

    8/26/98 - 107k
    Front struts, alignment, rotation

    9/22/98 - 109k
    Transmission service, antenna mast, wheel balance, front wheel bearings

    4/27/99 - 115k
    Water pump

    6/18/99 - 117k
    Radiator fan

    10/19/99 - 121k
    New (used) distributor + spark plugs

    1/3/00 - 124k
    Plug wires

    3/17/00 - 125k
    R&R tail shaft housing/diff

    3/21/00 - 126k
    "Differential assembly/rear susp" + gear oil??

    8/24/00 - 130k
    Left rear wheel bearing

    8/25/00
    Catalytic converter

    3/22/01 - 137k
    Rear muffler

    7/18/01
    Oil change

    10/1/01 - 141k
    Neutral safety switch

    Right now my plan for this car is to remove the engine and transmission and re-seal everything out of the car. This will make it WAY easier I think. I would LOVE to do a manual swap but parts will be hard to find locally and cheaply. It needs a W58 transmission/shifter/slave cylinder from a MA70 Supra, a W58 from any other car has the shifter in the wrong position. I would then need an MA70 flywheel and clutch kit, as well as an AE86 Corolla clutch pedal, MA60 Celica-Supra master cylinder, and I would have to custom make a hard line, and add in a stainless soft line. Then, the drive shaft needs to be re-sized to fit (I don't remember longer or shorter). Then the big issue is getting the speedometer to work. Still not clear on how that happens.


    6/11/13
    In talks with a SupraMania member in Fredericksburg about picking up a Supra W58 with around 130k for $200 if it has the slave cylinder, $175 if not.

    6/12/13
    OK so I plan to pull the engine and replace pretty much every gasket and seal in the motor, I have a couple options.
    1) Super cheap no-name brand rock auto kit - $100
    2) medium priced rock auto kit made by the same parent company as FelPro - $150
    2.5) the above kit + oem head gasket for quality where it really counts - $230
    3) the LAST later-generation 5M-GE OEM complete engine overhaul gasket kit in the country from Toyota - $318

    EDIT: Holy hell, shipping for that kit on rockauto is like $20, bringing the total to $167. I googled the SealedPower part number and Summit Racing has the same kit for $110 with free shipping. I think I'll do that.


    6/14/13
    Picked up the row-your-own gearbox today. $250 got me a W58 5-speed manual trans from a 1986.5 Supra complete with shifter/boots and reverse light switch, two used clutch/pressure plate pairs, a flywheel, a brown shift boot to match my interior, and a stock Supra shift knob. And I discovered that the Cressida's driveshaft will in fact spline up into the W58. WIN.

    6/16/13
    So the left rear door wouldn't open from the outside. I got bored and took 15 min to remove the door panel and have a peek inside. This is what I found


    Turns out this little plastic clippy thing had broken and couldn't hold the rod in the handle anymore.


    So I took it off, put a zip-tie on the end of the rod, and now the door opens from the outside. Aww yiss.


    I also discovered that both of my keys I have for this car are valet keys, so they don't open the passenger door or the hatch. Gonna have to get the code off the door lock cylinder to get a new master made.

    6/17/13
    Took the lock over to McGeorge and got a new key made. Holy balls my keys were worn as hell check this out. It was even starting to crack. One or two more unlock attempts and it would be snapped, stuck in the lock. The key opens both front doors, but the hatch lock won't turn. I'll have to remove the cylinder and grease it up or something, later.


    6/18/13
    I got the input shaft seal and bearing cover gasket put in on the W58. The output shaft seal was quite a bit more difficult. The one IN the transmission was a little different design than the part I got from Toyota, I guess it was updated over time. The one in the transmission was a metal outer shell (maybe brass?) with a rubber inner seal. The new one was all rubber. I had to pretty much destroy the old one getting it out with my slide hammer.


    6/19/13
    I got 99% of the intake side stuff disconnected. Two fuel lines left on that side, plus the starter cable, then off to the exhaust side, then the radiator, and then it should be about ready to go.


    6/20/13
    Fe came up with the name of the car today. The car's name is Joby, after this magnificent video.

    *******UPDATE*********My father Mark Wesley, aka "Lonnie Stanks", has enjoyed making hilarious videos that he can share to brighten others' days and make the...


    The plate shall be "AWW JOBY"

    Anyways, I got everything else disconnected and the engine is basically 4 bolts away from being ready to come out. Since I don't have a hoist, I decided to clean up some of the more visible bits of the engine. This thing is probably the dirtiest engine I've ever seen.


    So I took a tupperware container and threw in some water and simple green and some friends and I scrubbed the two intake manifold bits, valve covers, throttle brackets, and fuel rail until they were thoroughly degreased.


    So then later this evening I got all the paint off the valve covers and prepped them for paint. Here's how they turned out:


    And here's how the engine sits right now.


    6/25/13


    6/26/13

    Picked up 5 P-type wheels, four need elbow grease, all need tires.


    7/2/13

    I got the head off and apart today. Man this thing is different from anything I've worked on so far. Each cam is held in it's own cam tower, a separate piece from the head. This thing also uses rocker arms and hydraulic lifters which is not something I've ever messed with. Also, my valve spring tool thing I used on the 7M is too small for this motor, so I am ordering a different kind of spring compressor the guys on CelicaSupra use from Amazon:


    Also, I'm going to pull all the lifters and make sure they're all good and clean them out using this process:
    Originally posted by Suprabee
    Howdy, during my recent project having a full valve job done, I serviced my lash adjusters. Here's my pictorial of the process for those of you new to our lash adjusters.

    After removing them from the head, which can be difficult sometimes. Generally they can be pulled by hand using some twisting action to free them from the head. If you have to use a hand tool to grab them wrap with cloth to keep from damaging the adjuster head.

    Summary Process: The adjuster piston is freed up and allowed to move at its normal operating distance by loosening and removing years of old oil sludge by repeated steps of flushing with cleaner and compressing in a vice.

    You should be able to compress the adjuster by hand by the amount shown below. Note: photo is of a cleaned adjuster. All of my adjusters were froze and would not initially compress by hand. Also, my adjuster have 140k miles on them and have seen very regular oil changes, so odds are most, if not all, of your adjuster will also be stuck and not compress properly.


    Step 1) I used brake cleaner, but carb cleaner will work fine too. Hold the adjuster away from you and spray into the side hole as shown below for a second or two allowing cleaner into the cylinder and make it ready for the next step.


    here's what came out:


    Step 2) compress adjuster using vice. Note: on this first compression step, it may be very difficult to compress the sucker, but don't worry, you won't crush it. Compression I found on this first step was usually only a couple millimeters.


    Step 3) Spray again with cleaner as in Step 1


    Step 4) Compress again in vice. It should be easier to compress at this point, and basically you keep repeating the flushing and compressing until no more black ____ comes out and you can compress the adjuster its full distance. My adjuster took 4 steps to complete the cleaning/freeing up process:


    Another pic showing the range of adjuster movement:


    If you have trouble pinching then adjuster with your fingers try it this way. When fully cleaned and freed up, the adjuster should "bottom out" with not much force


    Step 5) Ready to bleed the adjuster. Use a light viscosity oil. I used 5w-30. Submerse adjuster completely in oil. Cut a piece of a clothes hanger, or small Allen wrench, or something similar to fit into the hole. Compress the ball and spring in the bottom of the adjuster. Feel around for the ball and press down and up repeatedly to allow oil into the chamber below the metal ball/spring. Air will bubble out of the top. Do this until no more air comes out.

    Also, found here:
    http://www.cygnusx1.net/Supra/Librar...aspx?S=EM&P=32


    Lash adjuster is ready to be installed back in head in the same location it was removed from...And I always match up the hole on the side of the adjuster(that you sprayed cleaner into) with the oil feed hole on the side wall of the head. Not sure if this matters that much, but I do it anyway.

    Rick
    Later 7/2/13

    The lifters are REALLY hard to get out of the head. And I broke one. No idea how that's coming out of there. When I got the others out, they all came out in two pieces. The inner piece with the ball on top came out, then I would have to get the outer housing out of the head, which made cleaning them out very easy. Now I just gotta get one new one and pray that the machine shop can get the remains of the broken one out of the head.


    @thedailydownshift

    Comment


    • #3
      Later-er 7/2/13

      After doing some searching, apparently having the lifters come apart is bad. Also, RockAuto has SealedPower lifters on massive sale ($10 instead of $60) so I'm just replacing all of them anyway. Also in that order are spark plugs, plug wires (the ones that came off are wicked old and the ends are pulling off), and dizzy cap/rotor.


      7/3/13

      Dropped off the head and flywheel at the machine shop. Flywheel is getting resurfaced, head is getting resurfaced + valve job + broken lifter removed. They told me that the labor for putting in new stem seals is included in the valve job, so I can bring them my seals and they will put them in for me. So basically the $20 I spent on that valve spring compressor tool was kinda a waste.....

      More build stuff:

      Ordered the following from RockAuto:
      87 Supra Aisin clutch slave cylinder
      87 Supra Dorman clutch alignment tool
      87 Supra Clutch release bearing
      87 Supra Clutch pilot bearing
      84 CelicaSupra Beck/Arnley clutch master cylinder

      Ordered the following from DriftMotion:
      full length clutch hose
      W58 pressure plate bolts
      ARP 7M flywheel bolts
      ARP 7M head studs
      12x1.5mm tap

      Today, I wire-wheeled, painted, and installed the AE86 clutch pedal, as well as degreased the engine block and W58.


      Yesterday I got the oil pan and front block plate on, as well as the timing belt drive gear, oil pump gear, timing belt idler pulley, front main seal, and oil pump shaft seal. Here's how the engine sits now


      7/10/13

      Got two more wheels mostly prepped today (with help from a friend), washed the engine bay, and bought supplies for painting the wheels, metal for making EGR blockoff plates, etc.

      Also took the driveshaft over to the NAPA machine shop to see if they could elongate it. They said because of the way some Toyota and Nissan driveshafts are made, the U-Joints are not serviceable/replaceable so they can't do anything with it. They instead referred me to Standard Parts down near the Maury St exit off 95. I took it over there and they said they can't modify the one I have, but they can make me a brand new one with serviceable joints to my specs, but it would likely cost around $350-$400. This may be my only option.


      7/17/13
      Mother of sweet little baby Jesus I need this in my life....but so much moneyyyyyy

      [ame="http://www.youtube.com/watch?v=B09_I5pXdEU"]MK2 Supra with Raptor Racing 2.5" Catback System & Header Dyno - YouTube[/ame]

      Just a quick sound clip of my complete Raptor Racing exhaust before I put the car away for winter.


      $450


      $200


      $290


      Plus the custom work it would take to connect all those things together. But holy crap that sound!!!!


      7/18/13

      Got the driveshaft back. It's purdey. I got it made at Standard Parts over at 500 Commerce Rd, Richmond, VA ‎(804) 233-8321
      The front U-joint is a beefy replaceable "american type", the rear U-joint is a less-beefy-but-still-better-than-stock replaceable "newer Toyota type". The old shaft is 54.5" long, the new one is 58" long since the W58 manual trans is 3.5" shorter than the stock auto.


      My package from DriftMotion came in today as well. Contents:
      ARP 7M-GTE head studs (5/6/7M can all use them)
      DM braided steel full-length clutch hydro line
      New pressure plate bolts
      ARP 5M/7M flywheel bolts
      Tap for chasing the cylinder head bolt threads in the block


      I should be picking up the head and the flywheel from the NAPA machine shop tomorrow

      7/18/13

      OK I'm trying to go over the neutral safety/reverse switch wiring in my head and this is my best guess at this point:


      OK so the plug pinouts in the BGB are for the plugs on the transmission (which is gone now). I have copied them and flipped them (the bottom ones) to represent the plugs in the harness that the trans plugs went into.
      So essentially my understanding is that to start the car the computer has to think it is in either Neutral (N) or Park (P). In order to make the comp think it is in N or P, pins "B" and "N" in the left-hand plug (Plug 1) must be connected. Simply shorting that connection with a bit of wire should allow you to start and drive the car.
      However, now the computer permanently thinks it's in P or N all the time, disabling cruise control. I was thinking that if you ran those connections to the clutch pedal switch so that you have to push the clutch to start the car, and that also allows for cruise control to disable when the clutch is pressed.

      Alternatively, you would wire it to a switch in the cabin, you can then toggle that P/N connection on and off. Have one switch position labeled "Start" and one "Cruise". "Start" position would be a complete circuit, tricking the car into thinking it's in P or N, allowing you to start the car. "Cruise" position would be an open circuit, making the computer think it's in D, and allowing the cruise control to work.


      Next issue is reverse lights
      The plug coming out of the W58 has two wires in it, and I'm GUESSING that the way it works is when you put the trans in reverse, it completes a circuit. So basically all you'd have to do is connect pin C on plug 2 to one pin in the trans plug, and pin R in plug 1 to the other pin in the trans plug.

      This is all just me looking at diagrams. I have no idea if this actually works.

      7/20/13

      Got the head and flywheel back from the machine shop yesterday!


      I chased the threads in the block with the tap from DriftMotion and put the ARP studs in


      And the head is on!


      The only weird thing about using 7M studs on a 5M is that the 7M studs are a hair too short, so basically you thread them into the block as far as they will go tighten them hand tight, put the head on, install the washers and nuts finger tight, then "loosen" the studs so they have more threads in the nuts. I made it so there is one unused thread in the nuts, I feel as though this is adequate threading for both the nuts and the block. Then torque it down in sequence in three equal steps up to 90 ft-lbs. My torque wrench only goes up to 75 unfortunately, so I just did up to 75 plus 30* or so.

      How the engine sits tonight before I go out of town for the week. It looks like a real engine again!


      7/29/13
      Got a bunch of little things done today after work.

      Clutch master cylinder has been bench bled and installed (yeah one of the bolts is wicked long. It's all I had at the time. Sue me)


      I also connected up the clutch line and slave cylinder and bled the whole thing on the bench, so the hydraulics are ready to go.


      The old throwout bearing has been pressed off the hub and the new bearing has been pressed on and everything is greased and ready to go.


      I also took a peek inside the brake reservoir, just to check the fluid since the pedal went straight to the floor on the test drive. This is what I found:


      It is growing algae. My brake hydraulics have become a freaking ecosystem. I sucked out all the fluid in the reservoir and it was SO nasty and completely opaque:


      The system is going to need to be flushed for a good long while before the car moves anywhere.
      I don't have a pic, but I also got some wires soldered to the terminals on the clutch safety switch. That will go in tomorrow, and will be wired up after the engine is in the car.

      Parts I still need to order:
      clutch fork boot
      thermostat
      fuel filter

      Right now my problem is this:


      Snapped a bolt in the thermostat housing. I tried soaking it in PB blaster, vicegrips, slotting it and using a screwdriver, and a bolt extractor. The extractor bit snapped off inside the pilot hole in the bolt. Whatever metal the extractor bit was made of is too hard for my designed-for-drilling-metal drill bits to even scratch, so I can't even drill it/tap it. I think getting another housing from either CelicaSupra forums or junkyards is the only way forward.

      8/1/13
      Went to the junkyard and pulled the windshield trim (for a friend), both seats, and thermostat housing off of the MA60.

      8/3/13
      Supra seats don't fit, rails are wrong.
      I finished my EGR removal today. Fabbed block-off plates and gaskets, blocked off vacuum lines, etc


      I also made wiring for the clutch-activated neutral safety switch and the reverse light switch. As soon as my new silicone couplers for the intake piping come in (the stock ones were super split), the engine will be ready to come off the stand, have the rear main seal replaced, clutch/flywheel bolted up, trans bolted on, and put back in the car. I'll be putting Redline MT-90 gear oil in the trans, and I'm going to run wal-mart brand oil in the motor for a day or two, then change it out for some Amsoil. The cooling system will also be getting Amsoil coolant boost that I had left over. I still have to drop the rear axle and change all the seals, but I'm not sure when that will happen.

      8/4/13
      Picked up the hoist from a friend's and removed the motor from the stand.

      New rear main seal


      Installed pilot bearing and got the clutch disc ready to go


      This is when I noticed that the flywheel's friction surface was a little bigger than the clutch disc. No biggie, just weird. But when I went to put on the pressure plate, the bolt holes/dowel pins on the flywheel don't line up with the holes in the pressure plate. I googled 7MGE and 7MGTE flywheels and concluded that I have two 7MGE clutches (which is what I need, so good) and a 7MGTE flywheel.


      Awesome. Well I called the guy I bought the stuff from and he said he knows he has for sure some more NA flywheels buried in his garage but it will be some night this week before he can get to them. So I can't put my motor in till I have this crap taken care of, and I'll still be out the gas money to go get the parts from Fredericksburg AND the $55 I spent resurfacing the one I have. I could seriously punch a baby right now.


      8/6/13
      Starting to get parts in the pipeline for a brake system refresh. It has hubbed front brakes and rear drums, so none of it will be easy or simple to do. Here's a pic of how old school Toyota front hubs work


      So it's rotor, seal, bearing, hub, bearing, claw washer, nut, castle cap, cotter pin, axle cap. I ordered new seals, bearings, claw washers, and cotter pins from Toyota. Pads, rotors, drums, shoes, and wheel cylinders are being ordered from RockAuto. I don't think it needs calipers or lines, but if it does I'll either rebuild or replace the calipers and probably come up with some custom stainless lines.

      8/9/13
      I got reimbursed for my flywheel by the Fredericksburg dude, and have a proper flywheel from a manual MX73 Cressida coming from from a yard in King George on Tuesday. I also got all my front hub bearings/seals/washers, as well as the rear drums.


      8/13/13
      Flywheel came in today, and it's in the machine shop. They said it would be done in a day or two.

      I also got the rest of my brake stuff. Bearings, seals, pins, washers, pads, rotors, shoes, drums, cylinders, axle seals, diff seals.....everything is here and ready. I'm just waiting to have the engine in before I do that stuff for some reason.


      8/14/13
      Made this while I've been waiting for the flywheel. I used parts from a MX73 Cressida, Mitsubishi Sigma Wagon, and Volvo 240 wagon to make it. LOTS of custom hand-clicked pixel by pixel.


      8/15/13
      Flywheel fits, clutch bolted on easy, transmission mated no problem


      Drivetrain went in mostly painlessly


      Now the issue is getting the transmission cross member to fit. The one that came with the manual trans (from 1986.5 Supra NA) is not wide enough so I have to use the Cressida auto one. I've tried every combination of every orientation with the crossmember and both transmission mounts from both gearboxes and I can't get the bolt holes to line up with any of the bajillion threaded holes in the chassis, so I have to go buy more roto-zip-style bits for my dremel so I can slot the holes in the trans member. However, most electronics are connected, power steering and alternator are hooked up, AC is connected but needs to be tightened, there are a few fuel hoses that still need to be routed, but it's going OK in the engine bay so far.
      Also, the speedo cable drive is on the opposite side with this trans, so the speedo cable will be RIGHT next to the exhaust. I may have to get some heat wrap for the cable and/or wrap the exhaust there.

      8/21/13
      Last night I got the transmission bolted in (3 out of 4 bolts ain't bad) and the interior is all back together except for the shifter, which is waiting on the rear end rebuild before I can put the driveshaft in to keep trans oil from coming out the back.


      All the engine electrics are plugged in, radiator and fan are in, now I just have to connect up one of the fuel lines, get a battery, connect the exhaust, fill it up with fluids, and it should be good to start here soon.


      I really don't like how my intake is situated. I'll be buying a Rabid Chimp intake pipe in a week or two. I think I may just go ahead and replace the brake master cylinder, lines, and front calipers first. I don't trust any brake system that has been neglected to the point of housing an algae colony.
      @thedailydownshift

      Comment


      • #4
        8/25/13
        Went to the DMV today and got it all registered and titled and whatnot. I then came home and fell asleep so I only worked on the car for like an hour and a half today, but I did get one front hub all disassembled.


        While I was in there, I noticed that the hardline-to-softline brake fitting is pretty much fused and will likely need to be cut off, which mean I'll need to either re-flair the existing hardline with a new fitting or replace the hardline altogether. I also noticed that the left steering rack boot is torn, and I have one coming in on Monday from Bap Geon. Monday at work I will need to order caliper pin boot things as well since these are toast. Tomorrow I'm going to go by Wal-Mart and get their cheap-o oil for the first start up, as well as stopping by Advance Auto and grabbing a battery and some axle/bearing grease so I can reassemble what I took apart today. Hopefully I can get both front hubs rebuilt/rotors replaced tomorrow as well as make some progress on re-sealing the rear axle/diff and replacing the rear brakes.

        8/25/13
        I got everything buttoned up on the motor and it runs sooooooo smooth (my clutch-activated neutral safety bypass works perfectly). I just gotta sort out a medium-sized coolant leak from where the heater hose connects to the top/back of the head and it will be awesome. Both front rotors have been replaced, along with all the hub bearings and such. I'm still waiting on calipers and brake lines, should be here tomorrow. Tomorrow I need to order new caliper slide pin boots at work.

        Power steering will need to be bled as well. I also noticed that the passenger front window will go down but not up. I tested the motor by itself and it works, so it must be something in a switch. I ALSO need to get a trim-removal tool so I can get into my rear hatch handle and get the key lock to work. Right now I can only unlock it electronically. So basically once I get my brakes done up front I can move on to the rear axle, then the driveshaft can go in and I can take it for a spin! WOO HOO!

        8/26/13


        I made very little progress tonight. The torn steering rack boot has been replaced, but in the process the threads on my outer tie rod end were completely mangled so I have one of those coming from Advance tomorrow. I THINK my coolant leak is fixed but I'm not 100% on that, time will tell. Tomorrow my calipers/lines/master cylinder should come in. After that, the front will be back on the ground and I'll move on to the rear end seals.

        As for the future of the rear end, I have been doing research into axle/diff codes and whatnot and I THINK if I took out the internal gear-bits out of a MA60 Celica-Supra it SHOULD bolt into my axle and give me an LSD. I know the ring and pinion are the same, but I'm not sure about the axle splines and such. So I'll be hopping over to CAP early Saturday morning and pulling the diff out of the P-type they have over there just for shiggles.


        8/27/13
        New calipers and brake lines fit up to the new rotors and pads to complete the front brakes......


        .....along with a new master cylinder.


        Now we move on to the rear brakes. Drums. Yuck.


        My workspace this evening, complete with mosquito lamp to keep the biters at bay.


        I got the axle out, the rear brakes completely disassembled, the back plate off, the axle oil seal out, only to find that I forgot to order new seals. *facepalm* Looks like I'll be ordering those tomorrow. I was able to get the backing plate put on with new shoes and a new wheel cylinder. Not a big deal about the seals, as the axles have to be out of the diff for me to pull the "third member" (as the 4Runner guys call it) to replace the big diff housing gasket. While it's out I may take it somewhere to have the backlash checked and what not since I have NO idea how to do that mess.

        I also checked my VIN Plate. Looks like the EPC at work was wrong, I have an E-series diff (7.1"), not an F-series (7.5") so the MA60 diff will NOT swap


        9/2/13
        I was in a big hurry today so I only took one pic. Basically today between 3 and 9 I did the following:
        -remove right axle shaft
        -replace right drum brakes
        -replace both axle oil seals
        -re-install both axle shafts with fresh end plate gaskets
        -drain diff oil, replace drain bolt/gasket
        -remove diff, replace oil seal, replace diff
        -refill diff, replace fill bolt/gasket (Amsoil gear oil)
        -drain transmission, replace drain bolt/gasket
        -refill transmission (Redline MT90)
        -install shifter
        -replace rear brake softline
        -install new custom driveshaft
        -re-bench bleed brake master cylinder
        -bleed all brakes
        -reinstall wheels

        As you can see, I was busy. Here's a pic of my super awesome open diff while it was out


        It now runs and drives very well, but there are a few issues I need to address soon.
        -replace radiator hose(s) since they are a tad drippy
        -replace or rebuild starter since it's kinda spotty when it actually wants to work properly
        -it hesitates when you give it lots of throttle. Not sure what that could be, maybe TPS? It has all new ignition, so I'm not sure what's up.
        -front right window needs to be diag'd, goes down but not up, but the motor works fine when you apply power directly to it.
        -needs rear wiper blades
        -needs proper coolant temp gauge. The stock one reads in the middle all the time.

        But the important thing is that it runs and drives! WOO HOO!


        9/9/13
        I've put about 150 miles on the car so far and it's been pretty solid. I put in a cheap-o autozone mechanical water temp gauge just to make sure I'm not overheating and I'm not. There are still a few issues that need to be addressed:
        -window still doesn't work
        -shift boot/center console needs to be properly put together
        -pedals need adjusting
        -whenever the rear suspension is compressed a bit (bump or lots of people in the car), the now-oversized front u-joint on the driveshaft lightly contacts the dust shield on the transmission, looks like the black thing in this picture I found on google:

        So I think I may trim that skirt thing a little bit.

        Other than that the car doesn't have any real issues. I do have a list of things I'd like to do to it in the future, here they are in rough order of expense/effort:
        -buy cassette tape to headphone jack adapter so I can listen to my iPod through the awesome 1993-spec aftermarket Pioneer stereo
        -plumb in a power steering cooler using either a PS cooler I have yet to acquire from a car in the junkyard OR using the stock AE86 oil cooler I have as a PS cooler
        -plumb in an engine oil cooler using either the aforementioned AE86 cooler or using another cooler from probably the junkyard in conjunction with an Earl's Performance oil filter sandwich w/build in thermostat
        -finish restoring/polishing the P-Type wheels, get tires, put them on the car
        -cut springs a bit until I can afford coilovers
        -electric radiator fan conversion
        -modify my Celi-Supra seat rails to fit/dye seats to match/fix lumbar ball pump thing/install
        -complete suspension overhaul with T3 shortened front coilover housings, BC racing rear AE86 coilovers (really adjustable shock perches and adjustable length shocks, not actually "coil-over"), custom T3 panhard bar, custom length T3 axle links, probably T3 steering arms as well for quicker steering

        9/14/13
        Compiling a list of options for future low...

        Front:
        A) Cut springs, stock shocks - free, but **** my life
        B) Remove spring perches, cut/shorten/weld housings with SW20 MR2 rear KYB AGX shock inserts and T3 weld-on kit and camber plates - $610 + welding costs, $420 without camber plates

        Rear:
        A) Cut springs, Camaro KYB AGX rear shocks, custom T3 panhard bar - $350, but **** my life
        B) Custom springs, Camaro KYB AGX rear shocks, custom T3 panhard bar - $???
        C) Megan Racing/BC Racing AE86 rear "coilover" (adjustable spring seats, 8k springs, adjustable length shocks), custom T3 panhard bar - around $650
        D) everything from option C, plus all T3 adjustable heim joint links and traction brackets - $1100 ish

        I'm thinking B for the front without camber plates for now, and either B or C for the rear


        9/17/13
        Got word from T3 that a panhard rod would run me $145 and I just have to send them measurements and they will make me a nice heim joint adjustable one.
        Megan Racing rear AE86 bits would run around $500 (not sure if shipped or not)
        BC Racing rear AE86 bits would run around $660 shipped

        I think I may just do cut springs with KYB AGX Camaro shocks on the rear. I'll still probably be doing T3 coilovers/shortened housings/MR2 shocks on the front, but it's all going to have to wait since it's pretty expensive to do everything.


        9/19/13
        Ordered a Mocal oil filter sandwich plate with built-in thermostat.

        It has two 1/2" BSP fittings, so I got 1/2" BSP to -8AN adapters, and two -8AN to 3/8" hose barb fittings that match the 3/8" barbs on the AE86 oil cooler. ALSO, the bracketry on the cooler almost perfectly lines up with the bolts for the hood latch vertical support piece, so mounting it should be a breeze. Still working on how a power steering cooler will fit, but we will see.

        I also have new radiator hoses waiting to go in, and I'll probably be getting new belts tomorrow. Every time I start the car from cold, it squeals really loud for about 20 seconds or so.


        9/22/13
        RabidChimp intake pipe installed! It's purdey


        I also started measuring the panhard rod, but the chassis side bolt is stuck and won't slide out, So I can't measure it's diameter. I think what I'll end up doing is ordering a new bolt from work, measuring that, then cutting out the old one. Here are the measurements:
        Bolt center to bolt center (rod length): 29 1/4"
        Axle-side end width: 1 3/8"
        Axle-side hole size: 13/16"
        Chassis-side end width: 1 3/8"
        Chassis-side hole size: ????

        Oh, and new radiator hoses are in, and new belts are on the way.


        9/24/13
        Om nom nom nom.....


        Just gotta get some 3/8" oil hose, mount up the AE86 cooler, and it should be ready to go.


        9/25/13
        Oil cooler is installed!

        The AE86 cooler is ALMOST a direct bolt-in to the vertical hood latch support bracket. All you have to do in terms of modification is trim the upper oil cooler bracket like so:


        Then it bolts right in!


        It's a pretty tight fit around the filter, but it works. That little stub of hose on the bottom there is covering the end of the long alternator mounting bolt so the hoses don't rub on it.


        9/29/13
        Had a photoshoot with Felicia Noelle Photography.


        @thedailydownshift

        Comment


        • #5
          10/31/13
          Oh yeah and I forgot to mention that Gearbox Magazine, a small online digital car mag, liked my build and decided to feature this thing.
          Check it out!
          The owner of this domain has not yet uploaded their website.


          11/3/13
          Shocks came in!


          Today I spent a solid 5 hours over at Mitchell's house figuring out how to fab up a bracket to let me use the Celica-Supra seats. We ended up getting the driver's seat in and its sah-weet!


          It's weird that the wagon has a better drivers' seat than the MR2. I still need to sort out the seatbelt situation, since I don't like how it's currently mounted (probably going to use an MR2 part if I can get one), and I also need to get the little pump-bulb thing hooked up so I can have functional lumbar support. ALSO I need to look into brown aerosol fabric paint/dye so I can brown-ify the red seat to sorta match the rest of the interior.


          11/4/13
          T3 front suspension components are on the way. Camber plates, bearing upper hats, weld-on coilovers (with 400lb/in springs), and RCA's.

          I also thought I'd make an official mod list for the car so far:
          Engine/drivetrain -
          MA70 W58 transmission swap
          -MA60 clutch MC
          -MA70 clutch SC
          -MX73 flywheel
          -Custom one-piece driveshaft
          -DriftMotion braided steel clutch line
          -ARP flywheel bolts
          -AE86 clutch pedal
          -MA70 speedo cable
          -MA70 shifter/shift boot
          ARP 7M-GTE head studs
          Rabid Chimp intake w/ K&N filter
          EGR delete
          Mocal thermostatic oil filter sandwich plate
          AE86 GTS oil cooler
          Fuel pulse damper delete

          Suspension/chassis:
          TechoToyTuning heim joint adjustable panhard rod
          Celica-Supra P-type wheels (14x7, -8) with 195/70R14 tires

          Interior:
          MA60 Celica-Supra P-Type driver's seat
          Cheap-o water temp gauge

          Soon to come:
          T3 front suspension overhaul
          -weld-on coilovers with 400lb/in springs
          -RCA's
          -camber plates
          -bearing upper hats
          Short stroke front strut conversion
          -cut/shorten/reweld front housings
          -SW20 rear KYB AGX shocks
          Camaro KYB AGX shocks in the rear
          Cut rear springs until I can find something better

          In the future:
          MA60 P-type passenger seat
          Aftermarket steering wheel
          Better rear spring solution
          Complete exhaust overhaul
          -RabidChimp header into 2.5" piping
          -Magnaflow high-flow cat
          -Magnaflow resonator
          -Magnaflow muffler
          195/60R14 tires
          Fender roll + more low
          Rear wheel spacers
          Tint
          T3 steering knuckles


          11/6/13
          Badge from a 70's Celica.


          11/10/13
          Friday night I picked up this thing.

          It's a 7M-GE OBX header for an MA70 Supra. The header itself should bolt on after a little grinding at the notch on the flange, but I think the downpipe will require some custom work, including adding the proper O2 sensor bung. No biggie, since the car will eventually be getting a custom exhaust anyway. I plan on cleaning up this piece, painting it, and wrapping it.
          And before everybody get all "merr OBX is teh suxxorz merr", for the 5MGE you can pretty much do OBX or Pacesetter since that's all that's available. And this was $75. No complaints here.

          Today I got under the rear and took some measurements to start figuring out a rear spring solution
          This is with weight on the axle, just up on ramps.
          9" spring height
          5" diameter at the top where it meets the chassis
          4" diameter at the bottom where it meets the axle
          Want to lower around 2" - 2.5" and be MUCH much stiffer
          Shock absorber length 16"

          I also fixed the little squeeze ball thing for the inflatable lumbar support on the Supra seat. The bulb came from a friend who works for a company that sells used medical parts. He found it sitting in a warehouse somewhere and just gave it to me (free.99 for the win), and I happened to have a proper-sized hose laying around.


          It even stows under the seat for a pretty clean install. And it works great!


          11/11/13
          Took a spring out, measured it for real, and took it over to a friend's house to see if the bottom would fit on his spare AE86 axle. It doesn't. AE86 parts are out. I'm probably gonna grab some Volvo 5" diameter adjustable perches that should bolt up to the bumpstop mount on the chassis and work from there with some universal springs. Inexpensive and effective.


          11/12/13
          It's so beautiful.......should have....sent.....a poet......


          11/18/13
          So the stock Cressida seatbelt receiver is attached to the seat, whereas the Celica-Supra receiver is not. When I put the Supra seat in, I had to use an elongated bolt and sort of ghetto mount the Cressida receiver on a less-than-ideal spot on the Supra seat that was using a smaller bolt on an un-reinforced part of the seat frame. This also put the receiver at a very awkward angle that made it difficult to use.


          Luckily, there is a large 14mm bolt that holds the seat slide guide rail to the transmission tunnel that would be perfect for mounting a receiver to. And AW11 MR2's use a chassis mounted receiver that's pretty long. So I posted a WTB ad on MR2OC and got a hold of a guy parting out a rare tan interior AW11 and got one of the receivers for like $12 or something. It works flawlessly and looks like it came from the factory that way


          The only real mod I had to do was jumper the seatbelt warning light plug since the MR2 doesn't have one.


          Now to get another receiver for when I do the other side......


          12/4/13
          Scored some finds at the junk yard
          Less-cracked fan shroud


          Door molding in halfway decent shape


          My starter relay had at some point been replaced with a straight jumper wire (probably because they are retardedly expensive from Toyota), so I replaced that with a relay from the junk yard and have had zero starting issues ever since.


          Suspension work will begin later this month in all likelyhood, so stay tuned.


          12/10/13
          Yesterday I picked up a Volvo electric fan (same great fan motor as the Taurus that everybody and their brother uses, but thinner and with a easy-to-grab relay box) and the front struts off a junked Cressida. Tonight I began the process of tearing them down and getting them ready for the coilover conversion.

          First I set up some heat in the garage so I didn't freeze


          Complete stock strut:


          Spring removed


          Here's the stock-sized Sensatrac shock that came out next to the SW20 MR2's KYB AGX (for the MR2 rear) that will be going in.
          The stock shock has a body length of 15.5", whereas the MR2 shock is 14 3/8" long, so the housings will need to be shortened 1 1/8". Also, the gland nuts that come with the MR2 shocks are a much coarser thread than the Cressida ones, so I'm going to have to reuse those.


          Here's the housings with the stock spring seats removed. I didn't bother grinding the weld flat since I'll probably be removing that section of the tube to shorten it, so as to keep the brake line tabs in the same place.


          12/16/13
          Ground off the welds from the stock spring seats. Currently looking for somebody with a miter saw to cut a section out of the housings.


          I'm also currently emailing back and forth with a representative from CoilSprings.com about getting custom springs made. This will be roughly comparable in price with my previous idea of using Volvo parts. However, due to the fact that Rsport International has not been responding to my emails in over a month while most of my emails to CoilSprings.com are replied to within a matter of hours, I think CoilSprings.com may be the way to go. The only issue with the custom route is that I have to send in one of my stock springs, so downtime and shipping cost are a factor. However since I was planning on making my own urethane bushings for the four axle links, I suppose the timing could work out.


          Oh and I forgot to mention that I picked up a fan controller, though I'm still unsure as to how the wiring is going to work. It's a Flex-a-lite model #31147.


          Here's a link to the instructions pdf with the wiring diagram
          When 4 Wheel Parts opened its doors in 1961, the motto was “Quality Parts, Lowest Prices, Fastest Service and Fully Guaranteed.” Powered by that attitude, 4 Wheel Parts grew from a one-person operation to the global leader in truck, Jeep, SUV and off-road performance products. Today, 55 years later,


          My issue is the way the Volvo fan is wired. It has one large + wire going into the relay block, one chassis ground, and two wires activate the fan when they are grounded. One is high speed (probably for when the AC is activated on the Volvo) and one is low speed. I will only be using low speed right now. This controller, as with pretty much every controller I've seen, switches hot wires, not grounds, so I'm just not clear on how I'm supposed to wire this.


          12/21/13
          12/21/13
          Fan is installed and wired and works perfectly as I planned, comes on and turns off appropriately all by itself. Except for one tiny detail. I forgot that I should be pulling power from a switched source, because when I turn the car off and the radiator stays hot for a little while, the fans still turn on and off while the car is off, which will probably end up draining my battery.

          12/23/13
          Now the car won't start. I think I either blew my starter relay or my wiring for my neutral safety bypass is messed up because I don't even get a click even though the battery is fine. And I don't think it has anything to do with the fan, the only wiring on the car I had to touch was just connecting the power wire to the battery, and it started fine multiple times with the fan working, but yesterday morning it wouldn't and I had to push start it.


          12/29/13
          It wasn't the neutral safety wiring, it was the starter relay going bad (the one I pulled out of the junk yard) so I replaced it with a jumper wire like it was before. Less than ideal, but whatever.

          Today I finally got the front coilovers built. Lots of pics below, so slow connections or mobile users beware...

          Started by making a cut in the housings


          This end contains the threads for the gland nut


          The housings needed to be shortened about 1 1/4". Measure twice, cut once.


          A little de-burring


          Test fitting


          Needed a little extra trimming


          That'll do


          Getting prepped for welding


          Mitchell getting it ready to tack


          Mitchell did a great job welding them up. Note: the shocks were not in the housings for the welding. It's a good way to ruin your brand new KYB's.


          Primered


          Painted and assembled!


          Now for a non-rainy day to put them on!


          1/9/13
          The intermittent starting problem reared its ugly head again today. It started up great this morning, but when I tried to go to lunch it just gave me the "click" and wouldn't turn over. I was so pissed I may or may not have punched the rear quarter, and then subsequently had to push the dent back out lol. Anyways, when it came time to go home after work it fired up fine first try. So tonight I went through and cleaned the - cable end and battery terminal as well as the existing chassis ground and added an extra ground to the intake manifold. I also cleaned the + terminal and cable end at the battery and at the starter. Hopefully this will fix my issue. Hopefully.
          Either way, reving that big old 2.8L six up to 6500rpm on the way home TOTALLY makes up for any electrical frustrations. Good lord, dat noise.....


          1/10/13
          The other night when I was under the car cleaning up the wiring, I also added a heat shield sleeve to the speedo cable, since it's sorta touching the exhaust. I used a spark plug heat sleeve like these

          I think it must have already been brittle from the heat, because last night my speedo stopped working. I put it up on a lift after work today and found that there was a break somewhere in the short cable. (The speedo cable is two pieces, a short section about a foot long connects the transmission to the long cable that goes up to the dash)
          So I ordered a new short section for like $12 and it will be here on Tuesday or Wednesday.
          Also, I got my urethane from McMaster-Carr in today. Pretty much ready to take this thing down for suspension overhaul as soon as I get the MR2 fixed.


          1/12/13
          I got the car up in hover mode today, all 4 corners on jackstands. My awesome girlfriend was nice enough to take some pics while she helped me out.

          I held the brake caliper up out of the way with a bungie cord and removed the hub


          Removing the upper strut mount bolts


          Ready to come out


          Gone!


          Adios, POS.


          So pretty!!!!


          Mmmmm T3 goodness


          Also removed the control arms


          Old rubber bushings out, new urethane bushings in


          Turns out it's way easier to put the bushing in and THEN the metal sleeve


          Bushings in, taking the arms with me to work tomorrow to get the old ball joints pressed out


          And have new Moog ball joints to press in


          On to the rear end


          Access panels for the top of the rear shocks


          Not a whole lot of luck with the screwdriver holding the shock still.......


          ........so I had to improvise..


          I got the Camaro KYB AGX's in but I didn't take any pics. Here's one of the four axle links getting its bushings removed WITH FIRE


          When all else fails, fire and a BFH should get the job done


          Aluminum tape on one side to hold the urethane


          And here's the urethane poured into the arms. I'm only doing two at a time and poured the rest of the urethane into a solo cup. I'll probably use sections of the remaining cylinder as side pieces to keep the arms from sliding laterally on the metal sleeves. Holes will be drilled in the bushings for the sleeves to fit through, obviously.
          @thedailydownshift

          Comment


          • #6
            1/14/13
            I took my control arms to work with me yesterday and used the press in the shop to pop out the old ball joints.


            Old vs. new


            So after work I got home, reinstalled the control arms (now with urethane bushings and new ball joints), and now the front end is done.
            I also removed the upper rear axle arms, burned/chiseled, and otherwise removed the old rotten squishy bushings and filled them with urethane as well.


            Today, I took the lower rear arms I did two days ago and finished them up so they are ready to go on the car. According to the literature that came with the urethane, it reaches 90% of it's final physical properties in 2 days assuming 70-something degree temperatures, so I just left them inside for two days to cure.


            I used a 3/4" auger drill bit. It worked beautifully.


            Then the metal sleeve from the original bushing goes in. Here it is next to one of the old bushings. Some I could just push out with my bare hands. Others stuck to the bushings and had to be cut out and cleaned up.


            The sleeves were like 1mm over 3/4" so I purposefully used the 3/4 bit so as to make it a tight fit. I just hammered them down into the holes and they are in there nice and snug


            And there you have it. Custom home-made poly bushings ready to go back on the car.


            Oh, and I sent out one of my rear springs to CoilSprings.com today, so hopefully in a few weeks I'll have some sick nasty custom lowering springs for the rear!


            1/15/13
            Borrowed a friend's spare AE86 sway bar to see if it would work on this. The answer is "sort of". It bolts to the axle ok, but the ends don't extend forward enough by about an inch. This is good and bad. I can probably get a huge aftermarket AE86 rear bar, but I will have to make custom end links and/or brackets on the chassis. Not impossible or particularly difficult, just another thing to have to do. Good to know though. A Godspeed AE86 bar can be had for like $100 on ebay, I can hit up McMaster for hardware to make my own adjustable links, and chassis bracketry can be modified/reinforced or replaced with a custom piece pretty easily.


            1/21/14
            Pretty pretty snow pics


            And one of the MR2


            2/3/14
            Got a call back from Coilsprings.com over the weekend. They are starting to design my springs. Apparently they tested the stock one I sent in and the rate was like 140lbs/in or something stupid like that. They asked if I was REALLY sure I wanted 400lb/in and I explained how the car currently handles like overcooked pasta and that I was used to driving an autocross-prepped MR2 on a daily basis, he laughed and said "OK that makes sense". There are only two issues at this point. One is that it will probably be around 4 weeks before I see the springs. The other is that the new springs will only be 8" long, which means they will come unseated if the axle is at full droop. So, I've been looking into limit straps and I think I'm gonna go with these:
            The Ultimate Source for Off-Road Fabrication Parts That Save You Time, Money, and Hassle!


            Basically you weld those mounts to the chassis and the axle, then pick what length you want, and it will keep the axle from drooping too far. Normally this job is accomplished with getting shorter shocks, but even the Camaro AGX's I have are too long to keep an 8" spring in place at full droop.

            Also the starting problems haven't been sorted yet, but the weather has been so bad I haven't had time to look into it much.


            2/8/14
            Got a new ignition switch from RockAuto for super cheap thinking that could be the source from my voltage drop. The part I got in won't fit. Close, but no.


            Top is stock, bottom is the Airtex part from Rock Auto. the mounting tab is in the wrong place and it won't mount up. I have messaged RockAuto to make an exchange.


            2/20/14
            I have been going through the car while it's been down to try and figure out my starting problem and I think I've figured it out. Keep in mind electrical systems are super hard for me to wrap my brain around, so don't **** on my slowness. I aced everything in physics until the chapter on electricity which I failed. Just saying.

            OK so here's how I see it. The relay that the PO bypassed is in fact the starter relay. It has four wires:
            white- steady voltage from the battery when the key is in ACC
            black- goes to the starter
            black/orange - power from the ignition switch (only actually sees like 11.5volts for some reason)
            red - grounds through the alarm system

            The issues:
            1. the alarm system on this car is really messed up. Sometimes it works, sometimes it doesn't, sometimes it goes off for NO reason.
            2. the black/orange wire only sees 11.5 volts. This is even with a brand new ignition switch so I am going to presume this is normal and is usually enough for the relay to click

            I think the reason the PO bypassed the relay and jumped the black/orange wire straight to the black wire was because the alarm was dying. Every now and then the starter would kick from the 11.5 volts, but not reliably. I think the reason the relays I've tried to put in haven't worked was because of the wonky alarm acting up. I jumped the black and white wires to each other, turned the key to ACC, and the starter would spin if I hit the clutch pedal so I think my logic works.

            Right now what I am thinking I'm going to do is unplug the alarm computer box (lots of people ditch it anyway). I'll take the red wire that grounds the starter relay, and ground it, bypassing the immobilizer. Then I should be able to have a functioning relay, allowing for the proper function of the starting system. Here's the wiring diagram in case you were curious


            Also just to make it even more confusing, the pinout on the actual relay in the fuse box is not in the same orientation as what it looks like in this diagram.


            2/25/14
            The fix worked and the car starts up perfectly every time using the relay as intended.

            I also got billed for the springs so I'm guessing the end is near and I hope can expect them in the next week or so.
            @thedailydownshift

            Comment


            • #7
              2/26/14
              Springs were at my door when I got home from work today!


              So naturally I got them on as quick as I could. Here it is!


              Here's the "before" height just for comparison


              Naturally, the giganto-sidewall 195/70's rub in the front, so I may well be ordering some 185/60's off TireRack here soon. It also desperately needs an alignment, the panhard rod may need to be adjusted of the axle is off center (if it is, it's not by much), and some limit straps for the rear axle as well. Also one of these:


              But yeah I'm pretty happy with how everything looks (and drives, holy crap). Once I get the smaller tires and skid plate, the front will go a touch lower I think.


              3/2/14
              Swapped out the 195/70's on the front for some 185/60's. They don't rub anywhere near as bad anymore but at the same time they don't look quite as nice, since they don't tuck up into the fenders. Oh well.


              That did drop an inch of ride height just from the change in sidewall though. Here's a Lego samurai standing under my frame rail. There's about a finger's width between the sword and the frame.


              And the front mudflap. It scrapes if I take a turn too fast haha. It's about 1.5" off the ground


              The oil pan is currently around 2.5-3" off the ground. I'll definitely be getting a skid plate with my next paycheck.
              @thedailydownshift

              Comment


              • #8
                Great progress. I love cressidas. Any guide on making your own urethane bushings?

                @finalbossjosh

                Comment


                • #9
                  I thought I covered it pretty thoroughly in the build. Just remove the old rubber crap, get the metal surface as clean as you can, seal one side with aluminum tape, and fill with some DIY urethane from McMaster-Carr. It's not too hard, it just takes time. Very useful for applications like this one where nobody makes bushings for it.
                  @thedailydownshift

                  Comment


                  • #10
                    Okay got it. I may have to do this for classic project car

                    @finalbossjosh

                    Comment


                    • #11
                      Best of luck. Definitely take pictures and let me know how it turns out. I'd be thrilled if somebody found this stuff useful haha.
                      @thedailydownshift

                      Comment


                      • #12
                        The saddest part about this thread, for me, is when I got to the bottom and there was no other pages

                        This is cool. Subbed.

                        Comment


                        • #13
                          It's only one page because it's so many posts consolidated into a few. I promise it's like 4 pages long on all the other forums I post on haha.
                          @thedailydownshift

                          Comment


                          • #14
                            I read through everything.

                            Holy crap. I know that exterior wise it doesn't really look very different, but wow that's quite a bit of suspension work.

                            What kind of wheels are you going to throw on her? I think it would look great with some 16" watanabe/panasport style wheels.

                            𝔣𝔬𝔩𝔩𝔬𝔴 𝔪𝔢
                            @𝔳𝔦𝔳𝔢_𝔪𝔢𝔪𝔬𝔯_𝔩𝔢𝔱𝔦

                            Comment


                            • #15
                              I'm sticking with the Supra wheels. I got them for a steal and put a ton of elbow grease into them. They are one of my all-time favorite wheel designs. I also like the nod to the fact that the Cressida is basically a Supra with a sedan body. Same engine, same suspension. It's a bit of a stretch with the wagon, but it's the same front as an A60 Supra and a dumbed-down rear of an A40 Supra (drums and open diff instead of discs and LSD). I do need some spacer in the rear though. The track is still too narrow back there for my taste. It was way, way worse with the stock wheels though.
                              @thedailydownshift

                              Comment

                              Working...
                              X