 Tweet
Tweet
If you know what we�re talking about in this title, pat yourself on the back. Nobody remembers that show.
On a more serious note, it�s once again time to take a look at a custom exhaust build. This time it�s a fan favorite � a full Lamborghini Gallardo exhaust, complete with �megaphone� style cat delete pipes! However, unlike most of our Gallardo setups, this won�t be replacing the OEM tubes. Instead, the owner had purchased an off-the-shelf Gallardo exhaust and was frustrated with both fitment and overall quality. Therefore, he gave Fluid MotorUnion a call, and we agreed to fab up a custom exhaust for his Gallardo.
You may have seen this car in the past, too; it�s one of the shop cars for Umbrella Auto Design, a company in the Pacific Northwest that makes some absolutely beautiful parts for high-end cars, namely the Acura NSX. That said, their shop Gallardo is in need of a little extra noise, so that�s where we come in. First off, we pulled out our trusty jig and fabricated up a set of the custom �megaphone� style cat deletes, which we have found to improve both the sound and fireball-launching qualities of the Lamborghini V10.

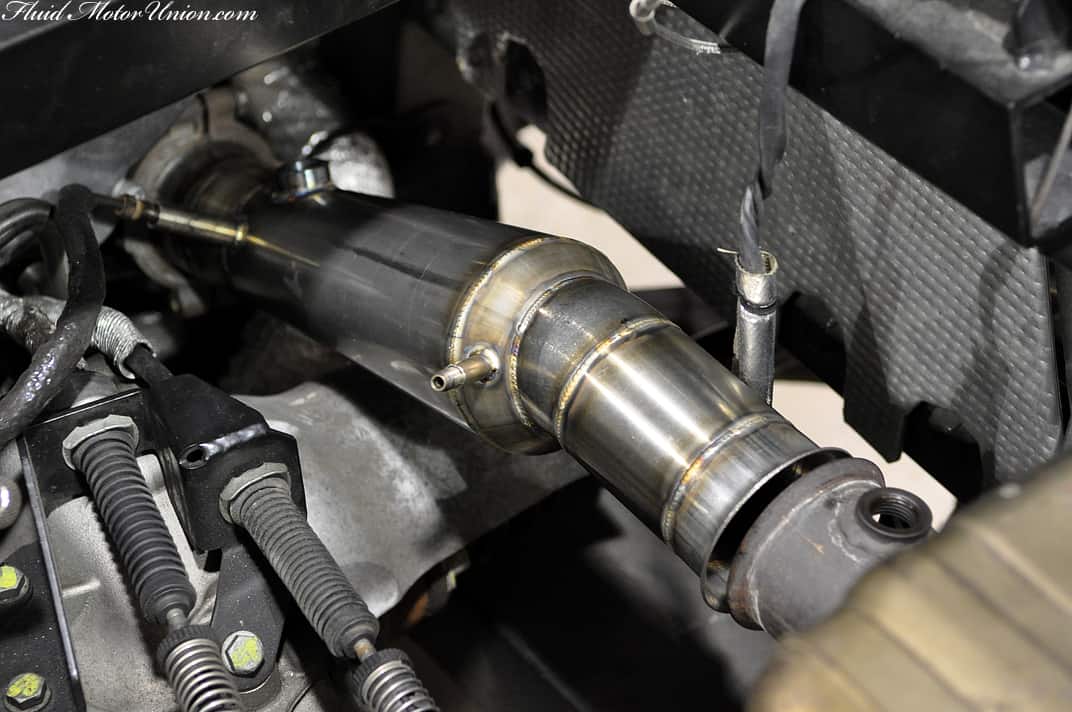
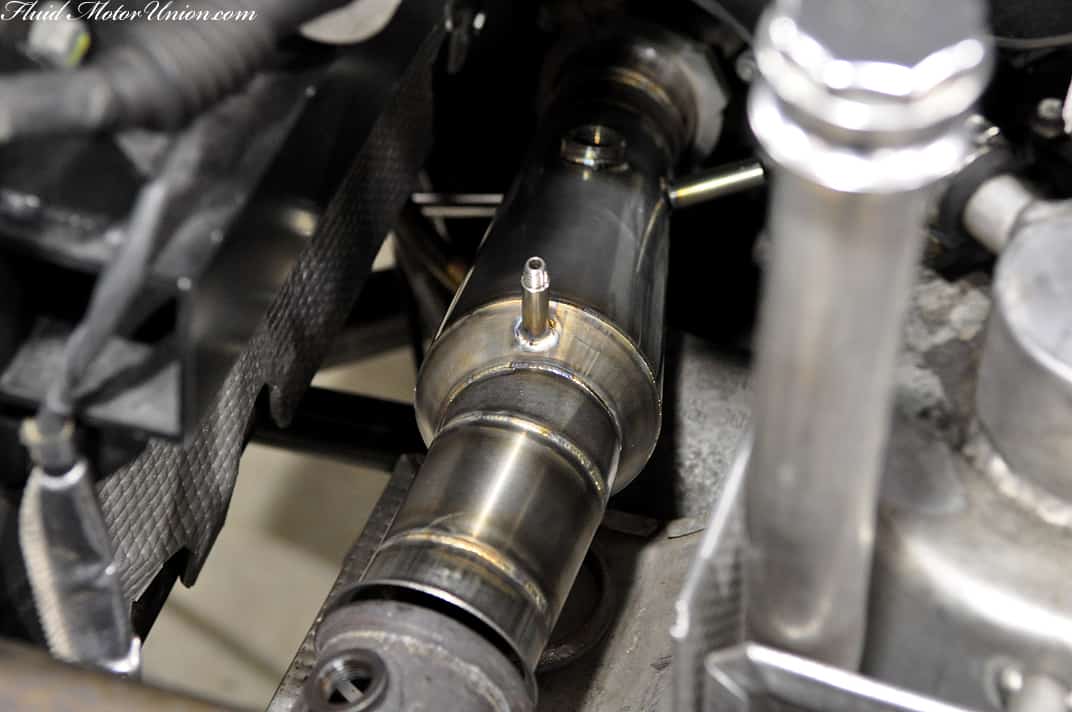
With the cat deletes fully welded and secured in place with all the correct sensor positions accounted for, the fun began as we underwent fabrication of the exhaust itself. As per usual, we start by running the straight piece of exhaust piping that comes off the catalytic converters� OEM clamps. This will serve as the �finish line� for the first half of the exhaust fabrication. At the same time, we�ve already tacked together an X-pipe for the center of the vehicle, and mounted it above the transaxle at the correct angle.

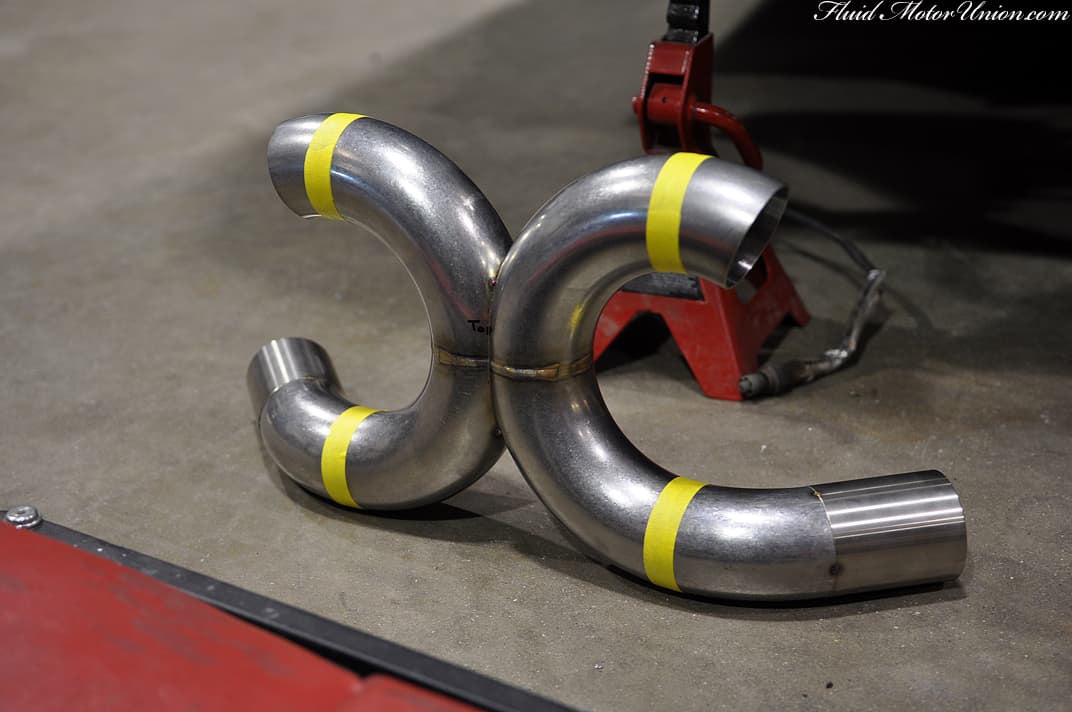
Now that we have a Point A and a Point B, it�s time to connect the two. As with all our other custom exhaust fabrications, each piece is arranged and secured individually, starting with taping. Once fitment has been perfected with taping, we�ll replace the tape with welding tacks prior to taking it back to the welding table for the final beads. As the saying goes, �Measure twice, cut once.� You can�t tweak a piece of the exhaust once you�ve welded it fully without cutting it back apart, so a little extra time spent perfecting fitment saves a good deal of time in the long run.
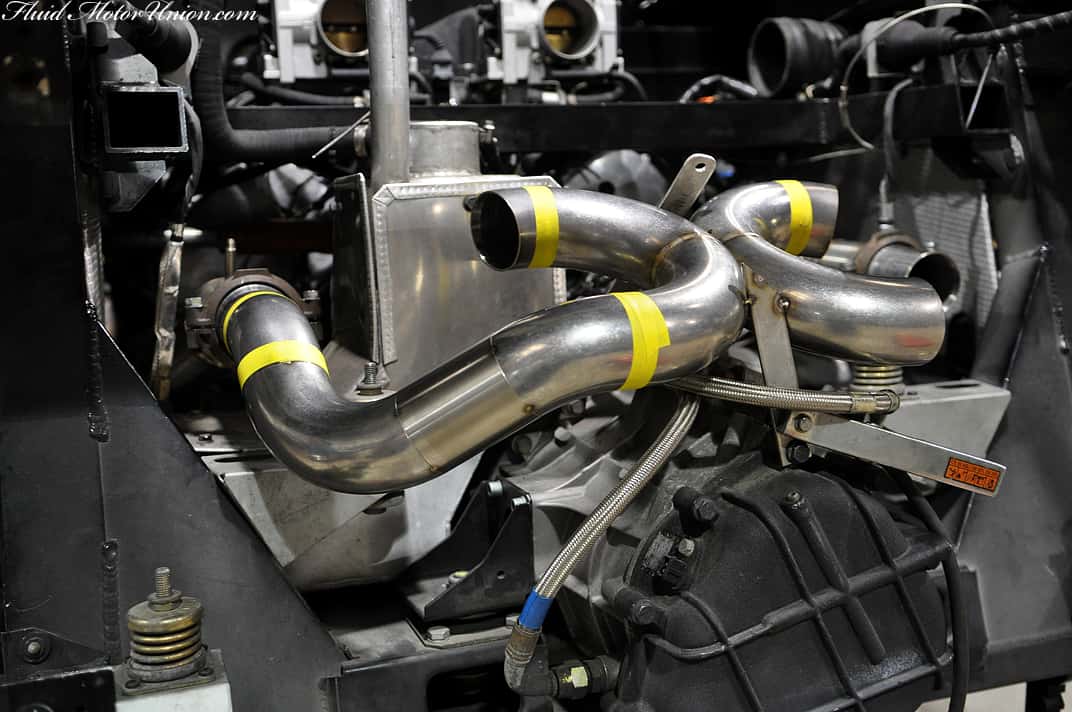
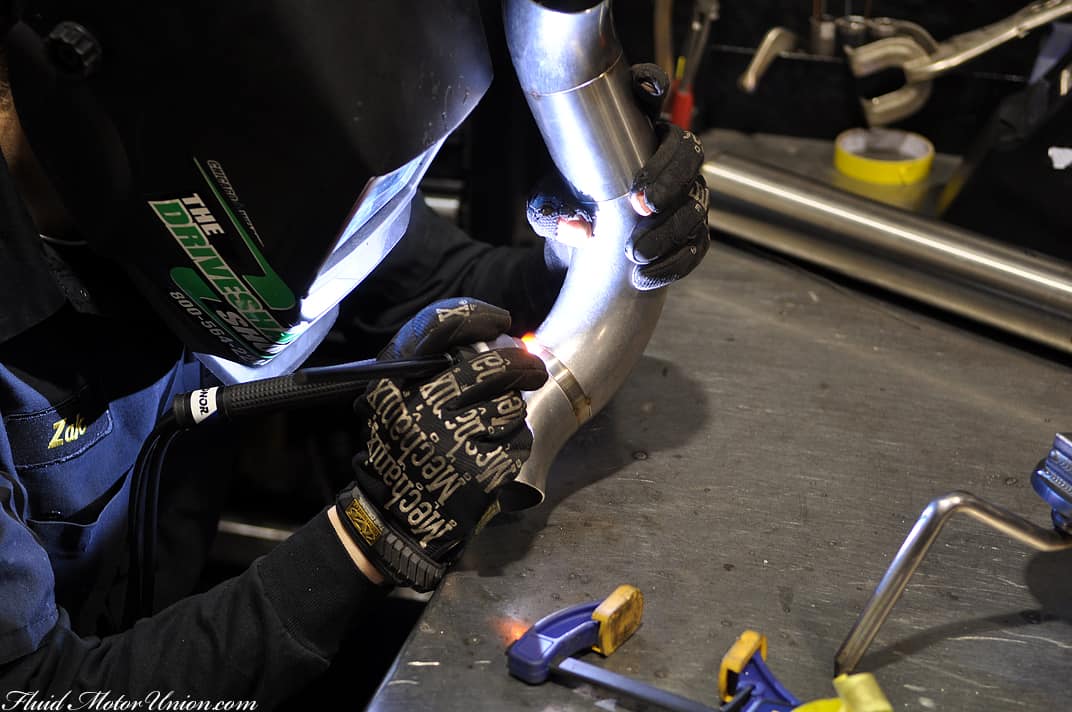
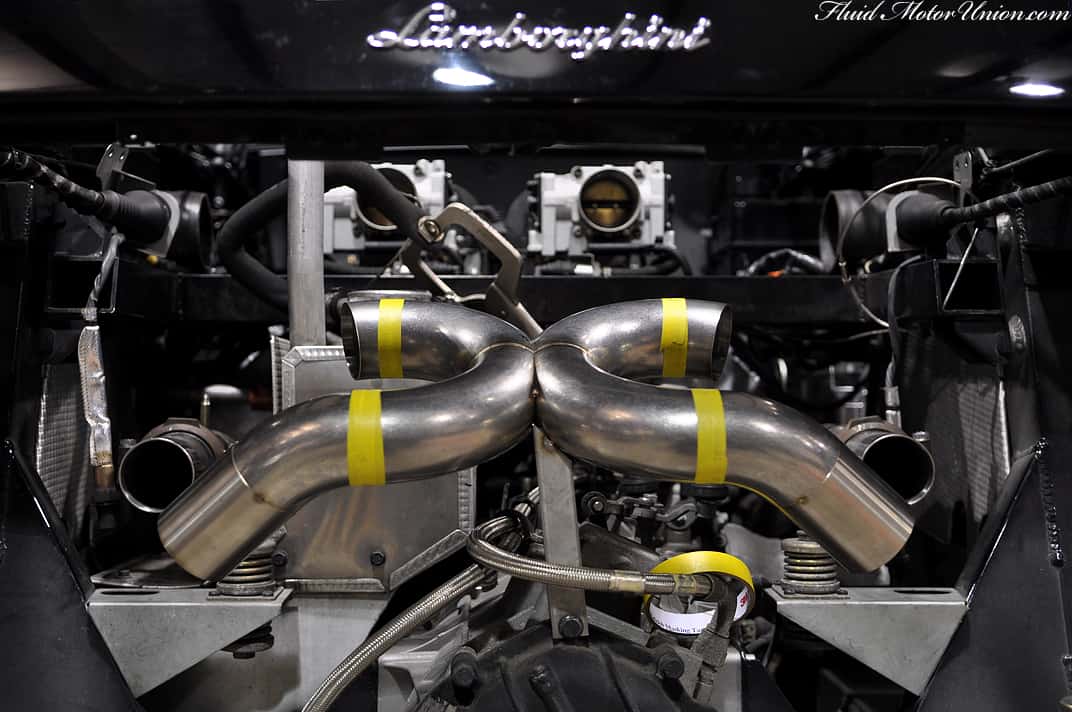
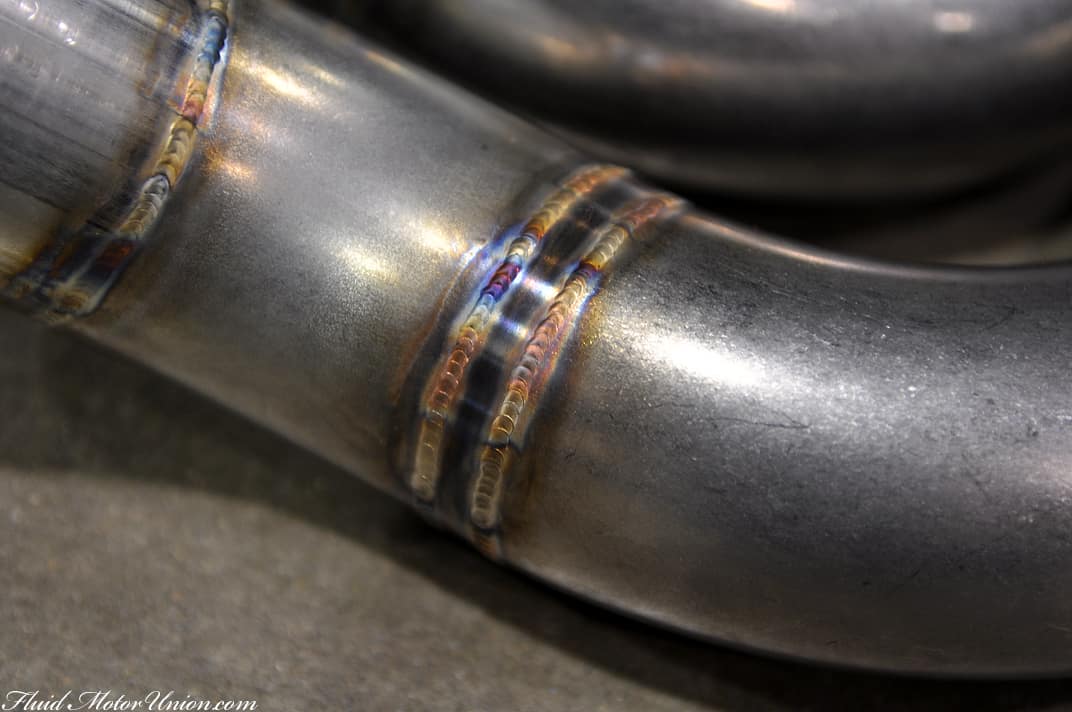
To ensure that our Point-A-to-Point-B exhaust work will still allow enough space for the pass-through resonators that come between the X-pipe and the exhaust tips, we mocked everything up and reinstalled the Gallardo�s heat shield to make sure nothing was touching. With fitment confirmed as being spot-on, we brought it back to the welding table for some of our infamous TIG work.


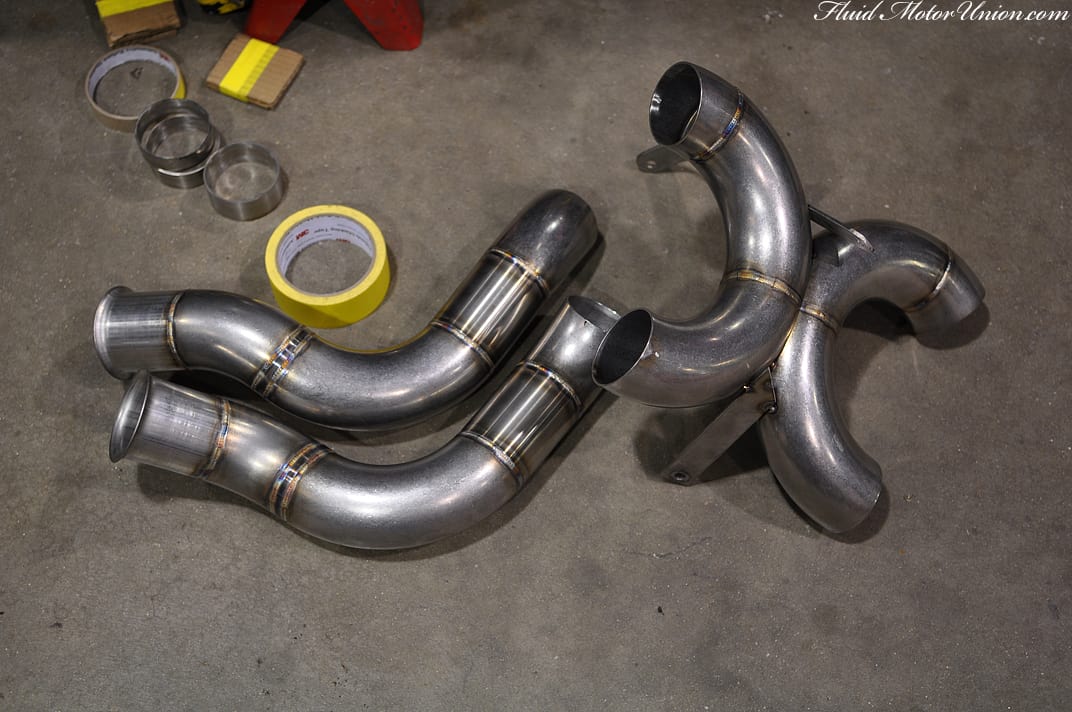
As you�ve come to expect by now, we�re rather big fans of showing off our handiwork. Welding is something we take very seriously, and it�s good to be proud of the work you put out. The whole bottom half of the system isn�t welded together just yet; instead, we�ve done it in segments in order to make any small last-minute adjustments that may arise. However, once we got the pieces of the exhaust�s bottom half back on the car, everything came together quite nicely! Therefore, it�s time to start working on the second half!

�And that second half is exactly what we�ll show you the next time we bring you a post on this job! In the meantime, have a great day, and we�ll see you back here tomorrow for even more original content!
On a more serious note, it�s once again time to take a look at a custom exhaust build. This time it�s a fan favorite � a full Lamborghini Gallardo exhaust, complete with �megaphone� style cat delete pipes! However, unlike most of our Gallardo setups, this won�t be replacing the OEM tubes. Instead, the owner had purchased an off-the-shelf Gallardo exhaust and was frustrated with both fitment and overall quality. Therefore, he gave Fluid MotorUnion a call, and we agreed to fab up a custom exhaust for his Gallardo.
You may have seen this car in the past, too; it�s one of the shop cars for Umbrella Auto Design, a company in the Pacific Northwest that makes some absolutely beautiful parts for high-end cars, namely the Acura NSX. That said, their shop Gallardo is in need of a little extra noise, so that�s where we come in. First off, we pulled out our trusty jig and fabricated up a set of the custom �megaphone� style cat deletes, which we have found to improve both the sound and fireball-launching qualities of the Lamborghini V10.
With the cat deletes fully welded and secured in place with all the correct sensor positions accounted for, the fun began as we underwent fabrication of the exhaust itself. As per usual, we start by running the straight piece of exhaust piping that comes off the catalytic converters� OEM clamps. This will serve as the �finish line� for the first half of the exhaust fabrication. At the same time, we�ve already tacked together an X-pipe for the center of the vehicle, and mounted it above the transaxle at the correct angle.
Now that we have a Point A and a Point B, it�s time to connect the two. As with all our other custom exhaust fabrications, each piece is arranged and secured individually, starting with taping. Once fitment has been perfected with taping, we�ll replace the tape with welding tacks prior to taking it back to the welding table for the final beads. As the saying goes, �Measure twice, cut once.� You can�t tweak a piece of the exhaust once you�ve welded it fully without cutting it back apart, so a little extra time spent perfecting fitment saves a good deal of time in the long run.
To ensure that our Point-A-to-Point-B exhaust work will still allow enough space for the pass-through resonators that come between the X-pipe and the exhaust tips, we mocked everything up and reinstalled the Gallardo�s heat shield to make sure nothing was touching. With fitment confirmed as being spot-on, we brought it back to the welding table for some of our infamous TIG work.
As you�ve come to expect by now, we�re rather big fans of showing off our handiwork. Welding is something we take very seriously, and it�s good to be proud of the work you put out. The whole bottom half of the system isn�t welded together just yet; instead, we�ve done it in segments in order to make any small last-minute adjustments that may arise. However, once we got the pieces of the exhaust�s bottom half back on the car, everything came together quite nicely! Therefore, it�s time to start working on the second half!
�And that second half is exactly what we�ll show you the next time we bring you a post on this job! In the meantime, have a great day, and we�ll see you back here tomorrow for even more original content!


