 Tweet
Tweet
Today we�ll spend a few pictures checking out some art we�re putting together, and the rest of the pictures will be devoted to craft time.
By the way, if you�re worried, these aren�t our artistic side projects. No, we�re working on a different kind of art entirely � our handmade FMU E39 M5 Rear Section! Another order came in, so after assembling all the necessary parts, we broke out the jig and got to work.
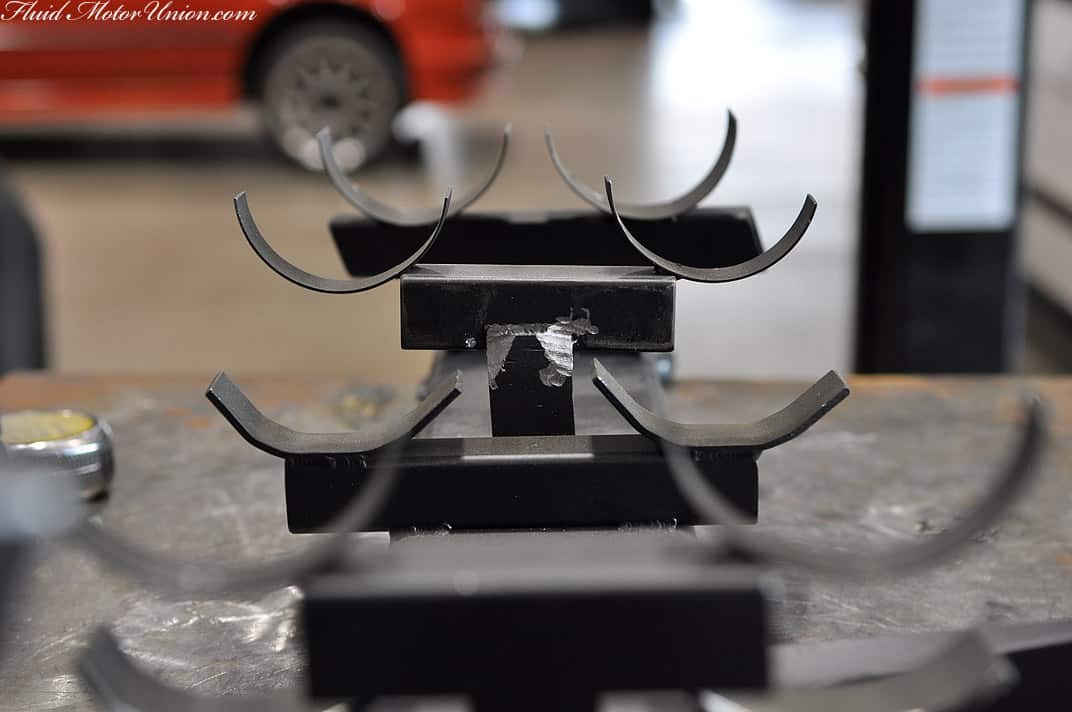
First order of building an E39 M5 Rear Section setup is to slice the long edges off the Vibrant pass-through resonators, then place them in the correct orientation in the jig.
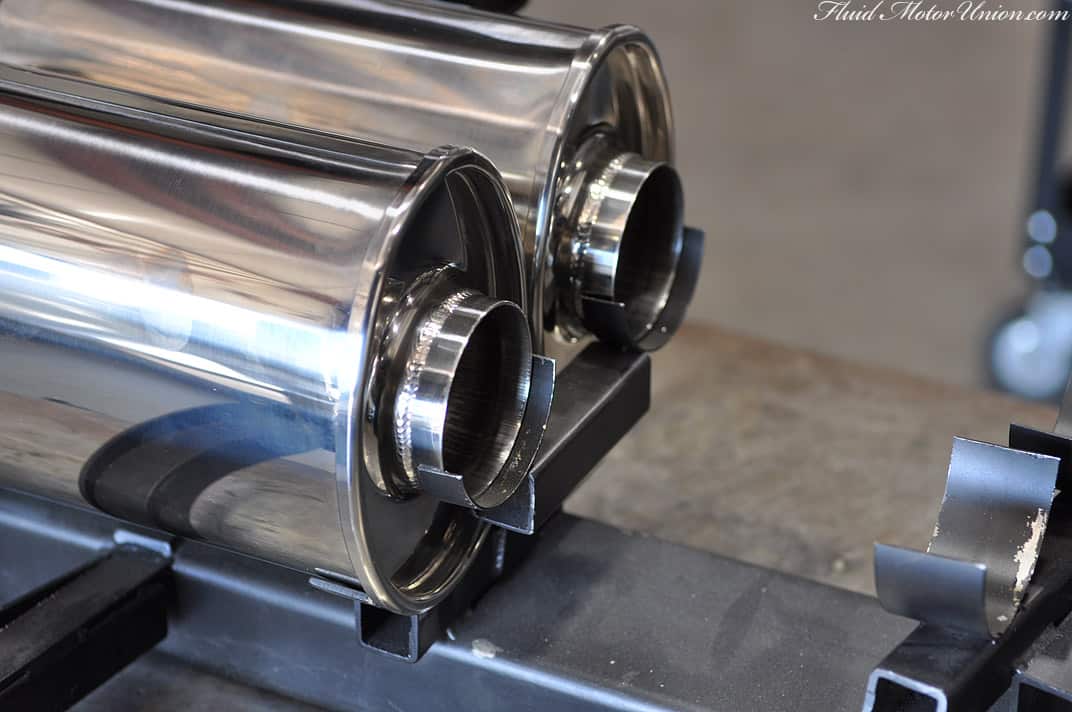
After the resonators are in the jig, it�s time to start construction the various metal pieces that comprise the exhaust itself � both the pipes going from the rest of the exhaust, as well as the pipes that comprise the four exhaust tips. Since this isn�t our first axle-back rodeo, we�ve got a good routine down for getting these parts cut and assembled before we start assembling and welding. First, we take our Y-pipe components, assembled in halves. From there, we slice them at the right angle and tack them together using a system that we�ve found gives us the correct angle every time we cut. Once tacked together, we slice off the tops, and there you have it � Y-pipes that look a bit like pants.


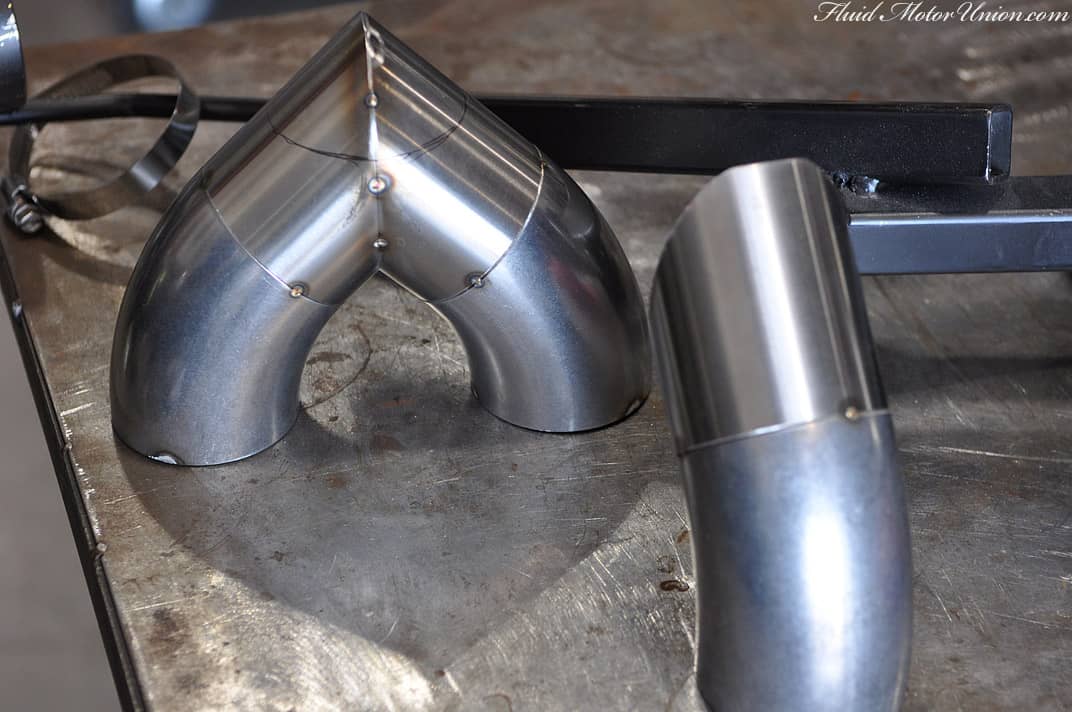
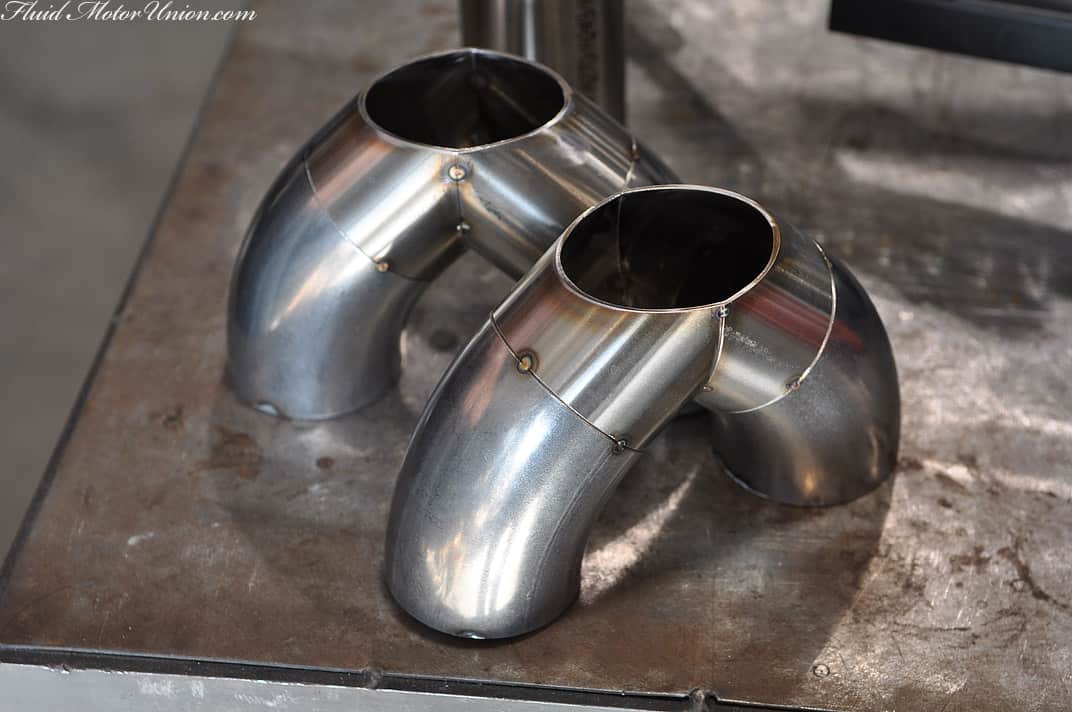
At the same time, we also start preparing the piping that will comprise the exhaust tips. While all this is going on, we�re also polishing the living hell out of the steel, inside and out, to give us that exposed-yet-still-very-pretty aesthetic that we champion with our custom exhaust setups. Now, this is as far as we�ve gotten on the E39 M5 Rear Section for the time being, so next time you see this, we�ll have some quality welding to show off.


Moving away from the art and over to the crafts table, Zak is currently working on finishing up the trunk�s new flooring for the newly-bagged Audi A4. The original fake floor included with the car wasn�t thick enough to withstand the weight of the tanks and compressors as the owner had envisioned it, so we set about creating a fake trunk floor with the proper thickness. This, of course, means it�s time to shoot sawdust all over the damn place as we cut out the basic shape of the floor.

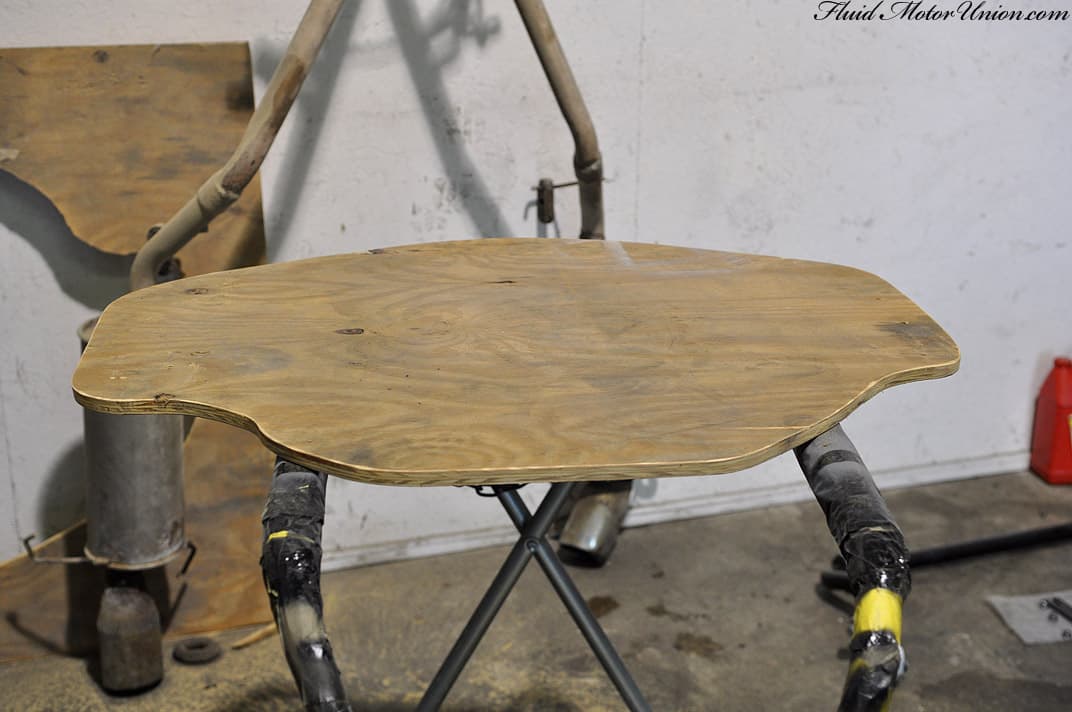
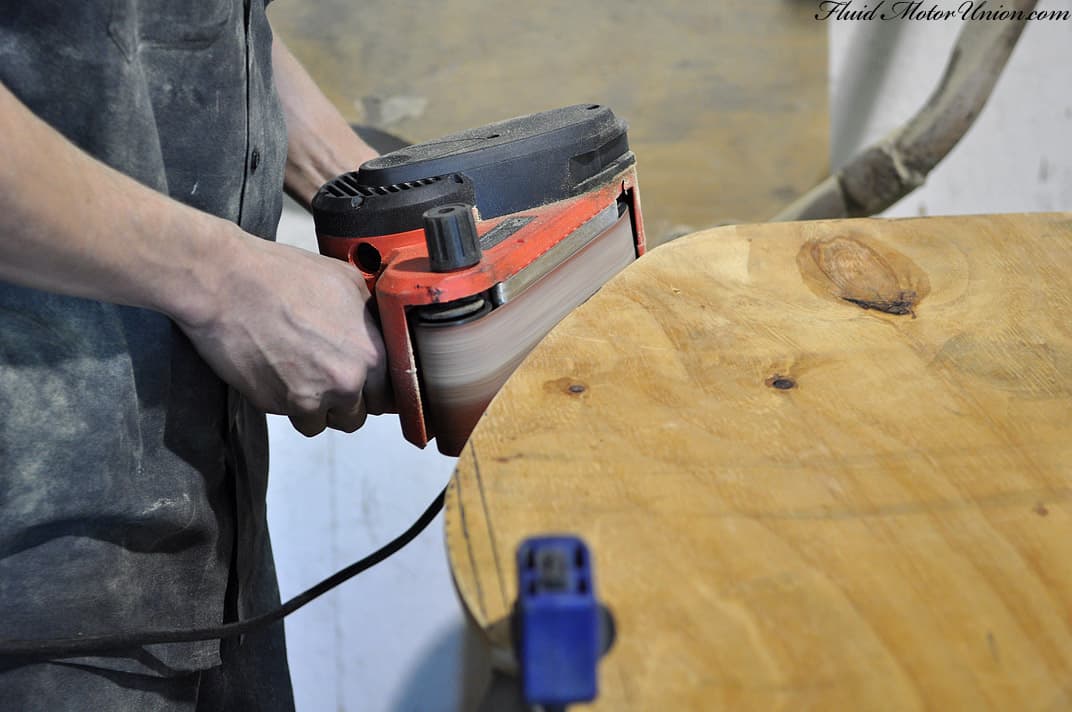
With the main floor piece cut out, we went about test-fitting it inside the car to see where it would need to be shaved down. We mark our areas to shave with a black Sharpie, and then we bring it back to the rack to sand down and smooth out the floor�s curves. Splinters are not very fun, so we�re trying to minimize that occurrence.

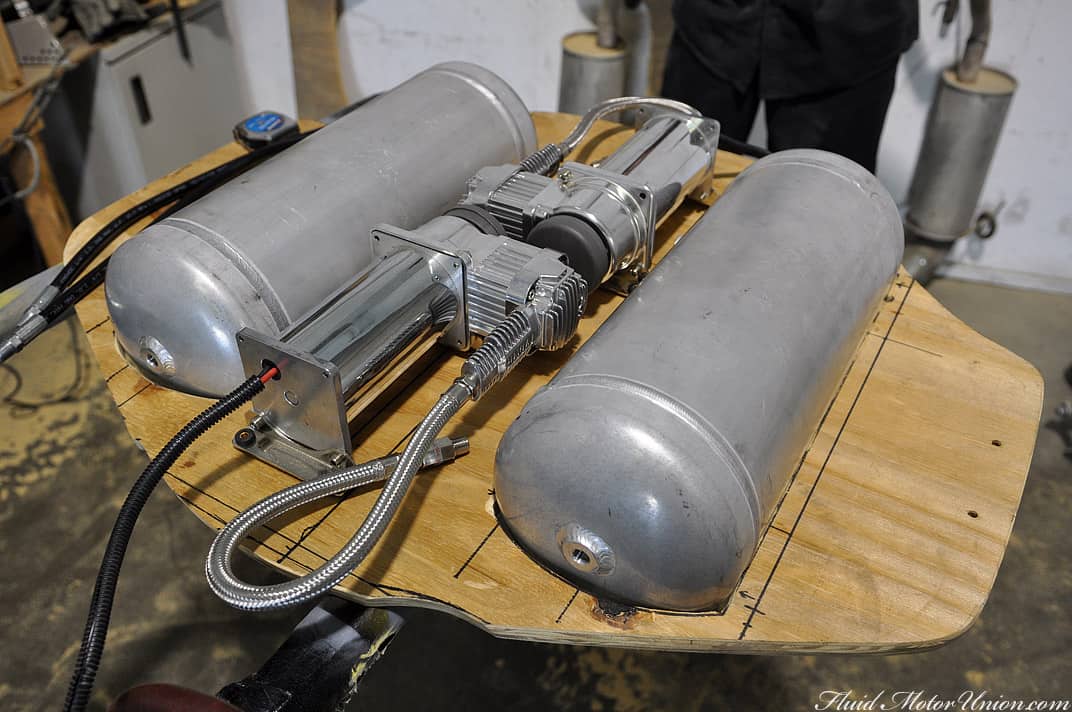
After the floor�s dimensions had been finalized, we once again took it back to the rack and began plotting out where to put the tanks and compressors. This setup will be utilizing two air tanks and two compressors, so symmetry is a must. After plenty of T-square and ruler plotting, we centered everything along the proper axes and went about cutting the holes and mounting points. We�ve got the rough shape for the tanks cut out, and we�re working on securing them to the floor at the moment, so we should have plenty more development for you in a day or two.
See you tomorrow! We�ve had quite the array of body work roll through the shop lately, so once again, we must stress to you how important it is that you drive safely and remain aware of your surroundings. It could save you some serious coin.
By the way, if you�re worried, these aren�t our artistic side projects. No, we�re working on a different kind of art entirely � our handmade FMU E39 M5 Rear Section! Another order came in, so after assembling all the necessary parts, we broke out the jig and got to work.
First order of building an E39 M5 Rear Section setup is to slice the long edges off the Vibrant pass-through resonators, then place them in the correct orientation in the jig.
After the resonators are in the jig, it�s time to start construction the various metal pieces that comprise the exhaust itself � both the pipes going from the rest of the exhaust, as well as the pipes that comprise the four exhaust tips. Since this isn�t our first axle-back rodeo, we�ve got a good routine down for getting these parts cut and assembled before we start assembling and welding. First, we take our Y-pipe components, assembled in halves. From there, we slice them at the right angle and tack them together using a system that we�ve found gives us the correct angle every time we cut. Once tacked together, we slice off the tops, and there you have it � Y-pipes that look a bit like pants.
At the same time, we also start preparing the piping that will comprise the exhaust tips. While all this is going on, we�re also polishing the living hell out of the steel, inside and out, to give us that exposed-yet-still-very-pretty aesthetic that we champion with our custom exhaust setups. Now, this is as far as we�ve gotten on the E39 M5 Rear Section for the time being, so next time you see this, we�ll have some quality welding to show off.
Moving away from the art and over to the crafts table, Zak is currently working on finishing up the trunk�s new flooring for the newly-bagged Audi A4. The original fake floor included with the car wasn�t thick enough to withstand the weight of the tanks and compressors as the owner had envisioned it, so we set about creating a fake trunk floor with the proper thickness. This, of course, means it�s time to shoot sawdust all over the damn place as we cut out the basic shape of the floor.
With the main floor piece cut out, we went about test-fitting it inside the car to see where it would need to be shaved down. We mark our areas to shave with a black Sharpie, and then we bring it back to the rack to sand down and smooth out the floor�s curves. Splinters are not very fun, so we�re trying to minimize that occurrence.
After the floor�s dimensions had been finalized, we once again took it back to the rack and began plotting out where to put the tanks and compressors. This setup will be utilizing two air tanks and two compressors, so symmetry is a must. After plenty of T-square and ruler plotting, we centered everything along the proper axes and went about cutting the holes and mounting points. We�ve got the rough shape for the tanks cut out, and we�re working on securing them to the floor at the moment, so we should have plenty more development for you in a day or two.
See you tomorrow! We�ve had quite the array of body work roll through the shop lately, so once again, we must stress to you how important it is that you drive safely and remain aware of your surroundings. It could save you some serious coin.


