Page 1 of 3 123 LastLast
Results 1 to 25 of 65

Thread: DIY three piece wheel assembly / installation bbs, fikse, ccw, kinesis, etc

  1. #1

    Default DIY three piece wheel assembly / installation bbs, fikse, ccw, kinesis, etc

    www.independentwheel.com/install

    Step 1: Make sure all surfaces are clean and free of any old silicone before mating them together. To strip silicone, you first use a razor blade, then a wire brush attachment on a cordless drill or drill press. There are other methods of stripping old silicone, feel free to get creative.

    Step 2: Assemble the wheel. With most three piece wheels, you mate the outer lip and inner barrel together first, then drop the center in from the backside or front side, line up the hardware holes, and put in the hardware by hand.

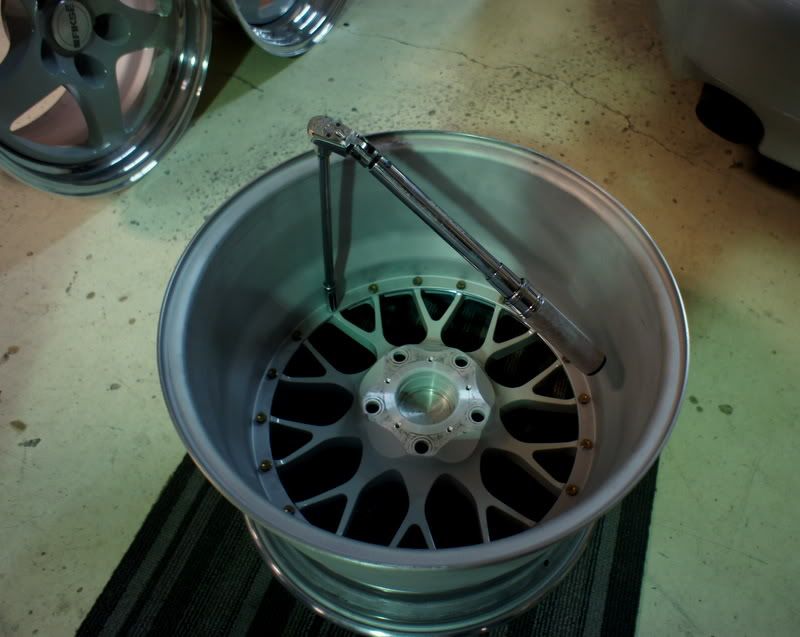
    Step 3: Torque down the hardware (you may also choose to torque down the hardware at the very end, this helps with not having a bubble form in the silicone). With Fikse and Kinesis wheels, which use relatively small, M6 hardware, torque spec is 15 ft lbs. Fikse should be torqued to 14 ft lbs. Do not over-torque. With wheels that use larger M8 hardware, torque spec is usually around 18 ft lbs. Torque in a star pattern, rather than just one after another in a row. Do not use a cheap, autozone style torque wrench. Borrow a good torque wrench from a friend if you have to.


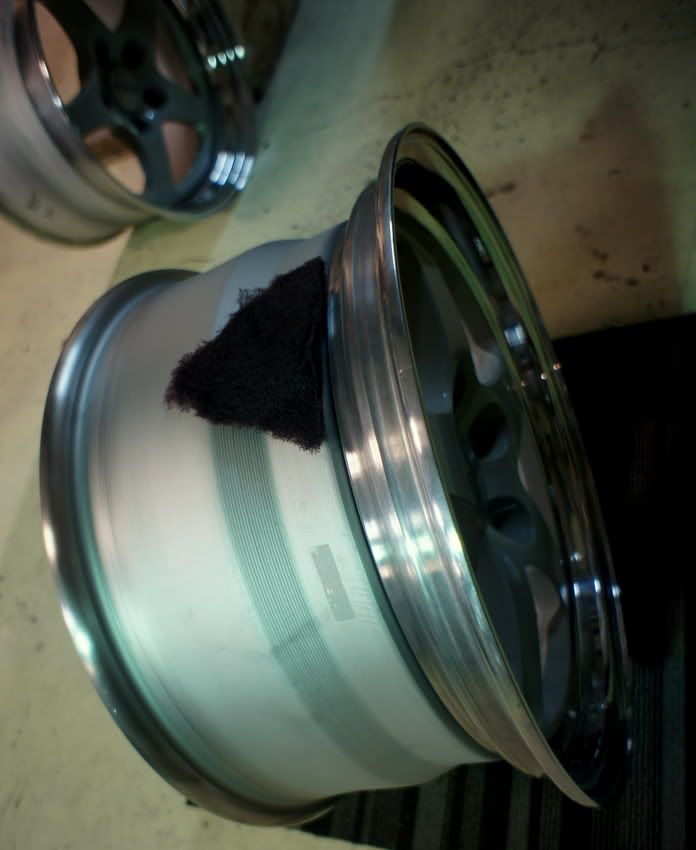
    Step 4: Lightly scuff up the mating surfaces of the outer lip and inner barrel with scotch-brite or light sandpaper.


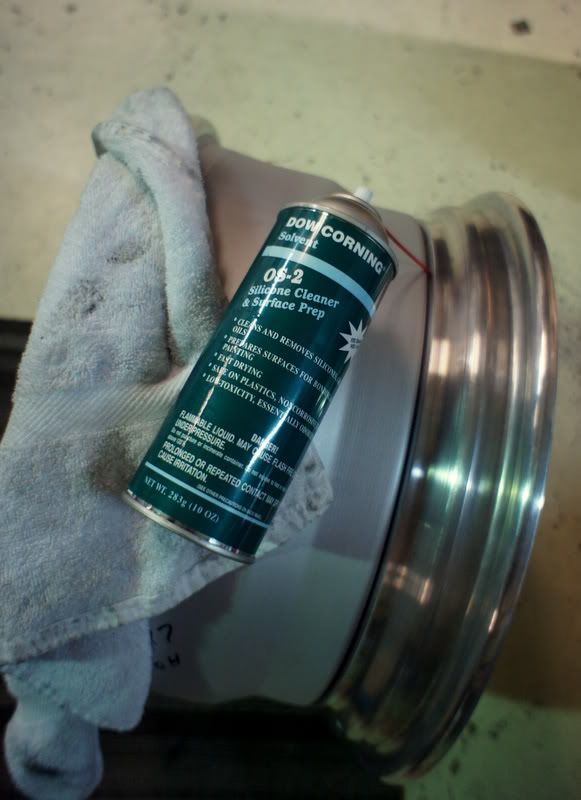
    Step 5: Clean the mating surfaces with some rubbing alcohol on a rag, or surface prep.


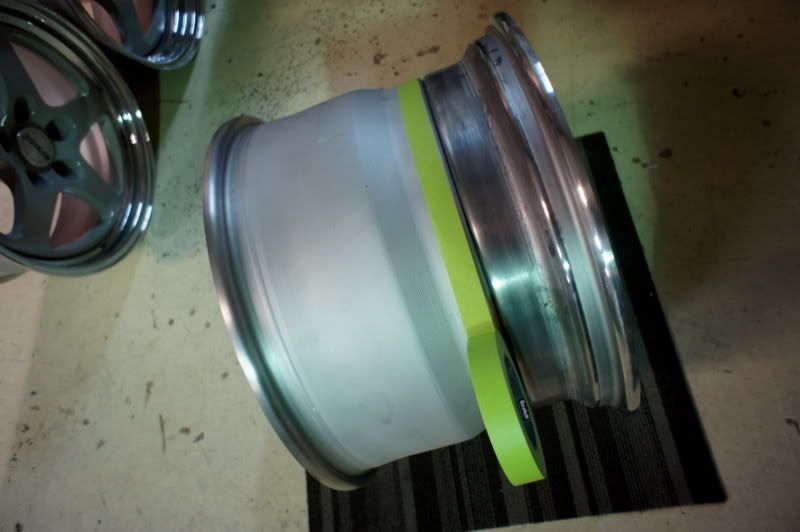
    Step 6 (optional): Mask off the mating surfaces so that you'll end up with a clean silicone line on the barrel and the lip.
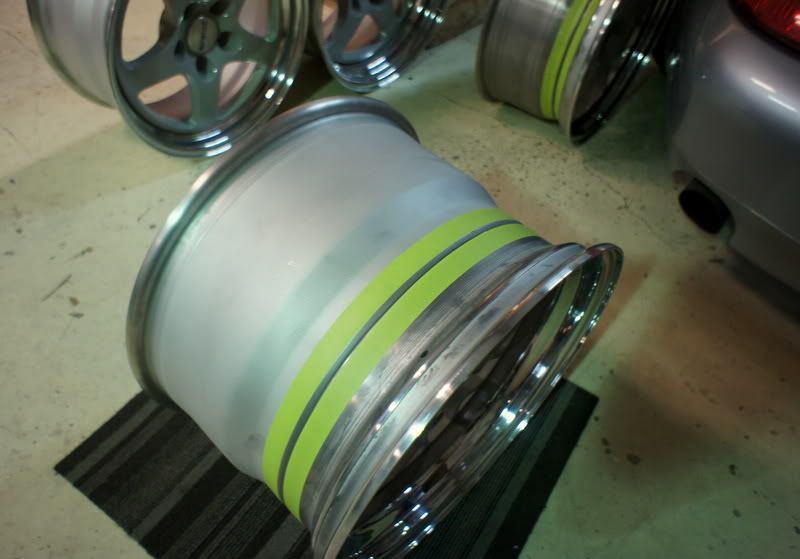


    Step 7: Seal with a non-acid curing, adhesive RTV silicone. Slowly lay down an even bead all the way around, with the angled cut tip of the tube facing down.

    *Note: I buy this stuff by the case, so if any of you guys need a tube of it, just email me. thatcher.shultz@gmail.com *
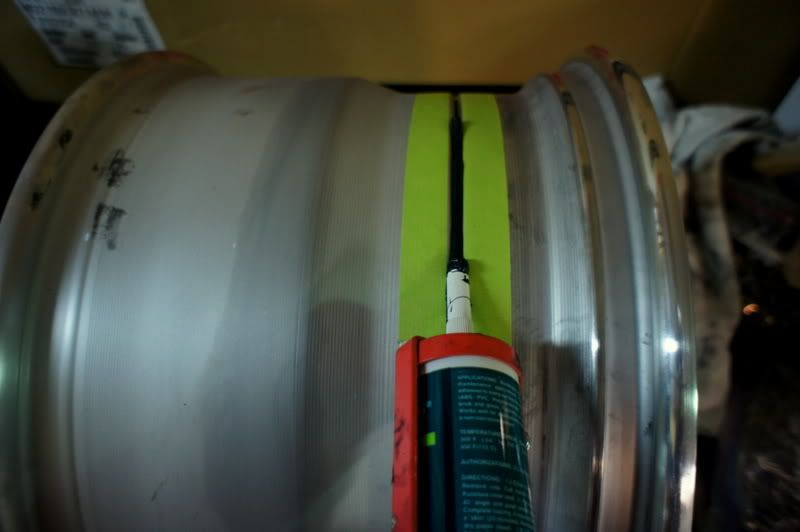


    Step 8: Carefully smooth the bead with your finger, applying just the right amount of pressure so that it correctly seals the mating surfaces; you want a smooth, even amount of silicone. Make sure you don't have a bubble in the silicone. Often times, a bubble forms because the trapped air has nowhere to go. One way to combat this problem is to not torque down the hardware until after the wheels are sealed & cured. If a bubble forms, just pop it with a razor blade or something sharp laying around, and smooth back over it with your finger.

    Step 9: Remove masking tape before the silicone cures.
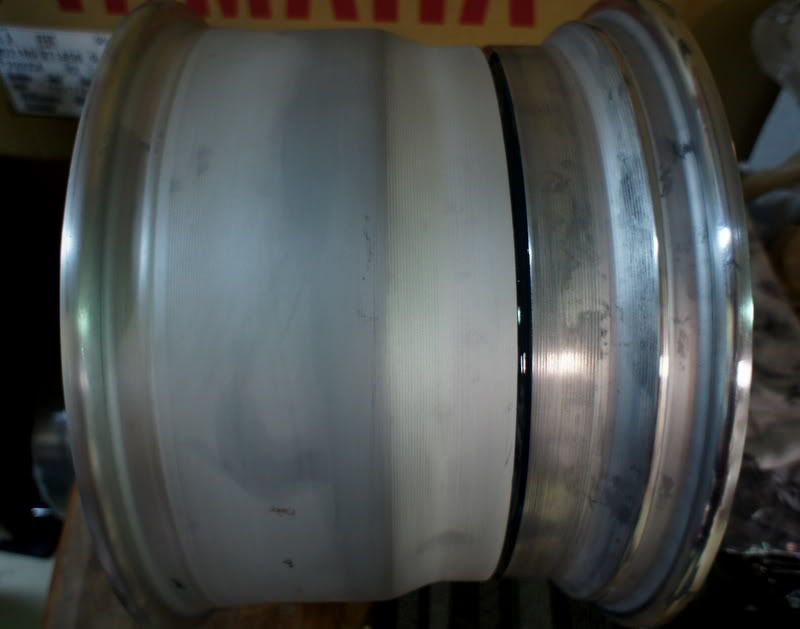


    Step 10: Allow at least 24 hours of cure time before mounting a tire.
    Last edited by Thatcher; 11-17-2012 at 04:28 PM.
    @Thatcher
    BMW Z3 M coupe
    '93 Defender 90 200tdi . '94 Defender 90 300tdi

    independentwheel.com
    thatcherindustries.com

  2. #2

    Default

    Nice write up. I have never done this and I want to eventually get nice 3 piece wheels(when I find a job) I'm glad I checked this out because I thought the silicone had to go in between the wheel pieces and not just on the inside like that. Thanks for the information and advice!

  3. #3
    Join Date
    Jun 2010
    Location
    California
    Posts
    5,489

    Default

    would be nice to have this stickied.

    those fm5/10's are gorgeous by the way!

  4. #4
    Join Date
    Jun 2011
    Location
    CGN, GRMNY
    Posts
    991

    Default

    Great write up! I'll be reassembling my 3 piece Compomotives in a few weeks probably. Any advice on sandwhich mounted wheels except for obviously having to lay two beads?
    slamburglars.com

  5. #5

    Default

    Nothing special about doing a sandwich mount, just lay two beads or one wide bead, try to make it as clean as possible
    @Thatcher
    BMW Z3 M coupe
    '93 Defender 90 200tdi . '94 Defender 90 300tdi

    independentwheel.com
    thatcherindustries.com

  6. #6
    Join Date
    Oct 2011
    Location
    La Mirada, CA
    Posts
    4,087

    Default

    Very nice, never even thought about masking it like that. I normally just laugh after I am done and look at my "sweet" seal.

    I will definitely be using that technique from now on, thanks for sharing!

  7. #7

    Default

    not a problem!
    @Thatcher
    BMW Z3 M coupe
    '93 Defender 90 200tdi . '94 Defender 90 300tdi

    independentwheel.com
    thatcherindustries.com

  8. #8
    Join Date
    Jun 2011
    Location
    CGN, GRMNY
    Posts
    991

    Default

    Quote Originally Posted by Thatcher View Post
    Nothing special about doing a sandwich mount, just lay two beads or one wide bead, try to make it as clean as possible
    Aight. What about the torquing? I hear you can do it not following a star pattern but skip every second bolt (advice came from a guy who owns a top notch MK3 on RSs)...

    Also what color are the centers of the Fikses? Looks great.
    slamburglars.com

  9. #9

    Default

    -nice write up. ive got to learn to disassemble and reassemble my wheels.


    ive seen that people sometimes put the silicon on the back on the nuts? is that a must a just extra precaution?

  10. #10

    Default

    Putting silicone on the hardware, or in between the hardware holes where the lip mates with the barrel is not only a waste of time, but creates a huge headache for whoever has to take apart and put the wheel back together.

    G535 - yes, I suppose you could go around the circle doing every other bolt. What's the point though? That would take just as much time as start pattern. Either way will work. I personally prefer the star pattern
    @Thatcher
    BMW Z3 M coupe
    '93 Defender 90 200tdi . '94 Defender 90 300tdi

    independentwheel.com
    thatcherindustries.com

  11. #11
    Join Date
    Dec 2009
    Location
    Brolando, Florida.
    Posts
    1,097

    Default

    Awesome writeup!


  12. #12
    Join Date
    Aug 2010
    Location
    Malinwa
    Posts
    22,865

  13. #13
    Join Date
    Oct 2010
    Location
    Boulder, CO / Chicago, IL
    Posts
    663

    Default

    There should be a sticky on wheel painting.

  14. #14

    Default

    IIRC when u torque down CCW wheels u do 30ft correct? I think I saw that on their website....

    great write up btw.
    04 .:R32DBP jawn on CCWs with a HPA FT450 kit.

  15. #15

    Default

    How many coats of sealant do you usually apply? I'm trying to piece back together 17" TH-Lines and I've seen people do 1 coat, and some do 2 coats.

    Also, if I'm going to do 2 coats, how long should I allow the first coat to dry for before applying?

  16. #16

    Default

    I followed your DIY and really appreciate you putting this out here.

    How's this for a first try? I didnt put masking tape on top because it was a little awkward, but I wish I did. The bottom came out a lot better. I played with it for like 30 minutes to try to keep smoothing it out and ensure that I covered every crevice of the lip/barrel interface.


  17. #17
    Join Date
    Mar 2010
    Location
    Campbell CA
    Posts
    607

    Default

    Quote Originally Posted by prospal View Post
    I followed your DIY and really appreciate you putting this out here.

    How's this for a first try? I didnt put masking tape on top because it was a little awkward, but I wish I did. The bottom came out a lot better. I played with it for like 30 minutes to try to keep smoothing it out and ensure that I covered every crevice of the lip/barrel interface.
    [/IMG]
    that kinda looks like doo doo. not trying to be mean but the smoothing part was easy, just touch the bead gently and run your finger around a couple times with the same pressure leads to a perfectly smooth line... wearing latex gloves helps especially cuz rtv is a pita to get off if you dont have latex gloves then just wrap some duct tape around your finger.

  18. #18

    Default

    Yeah I understand the top didn't come out so well, but like I said I didn't tape off the top side before I did it because at the time I didn't realize the rtv would smear out that far as I ran my finger over it. It started to accumulate on my finger as I was smoothing it out and just worked its way up the lip.

    I mean, given that it may not look the prettiest, it should still get the job done, no?

  19. #19

    Default

    The best tip to make a smooth sealing is to spit(or just make it wet with water) on your finger, when you ran your finger over the sealing!

    That will give you a smooth and really good sealing

  20. #20
    Join Date
    Mar 2010
    Location
    Campbell CA
    Posts
    607

    Default

    Quote Originally Posted by prospal View Post
    Yeah I understand the top didn't come out so well, but like I said I didn't tape off the top side before I did it because at the time I didn't realize the rtv would smear out that far as I ran my finger over it. It started to accumulate on my finger as I was smoothing it out and just worked its way up the lip.

    I mean, given that it may not look the prettiest, it should still get the job done, no?
    cant say for certain without looking at all the wheels in person but from the pictures you showed looks like you got more than enough rtv on there so lets hope so!

  21. #21

    Default

    Quote Originally Posted by prospal View Post
    How many coats of sealant do you usually apply? I'm trying to piece back together 17" TH-Lines and I've seen people do 1 coat, and some do 2 coats.

    Also, if I'm going to do 2 coats, how long should I allow the first coat to dry for before applying?
    Just one coat, then wait 24 hrs before mounting tires

    Quote Originally Posted by prospal View Post
    I followed your DIY and really appreciate you putting this out here.

    How's this for a first try? I didnt put masking tape on top because it was a little awkward, but I wish I did. The bottom came out a lot better. I played with it for like 30 minutes to try to keep smoothing it out and ensure that I covered every crevice of the lip/barrel interface.
    Not bad, doesn't look too pretty but it should get the job done
    @Thatcher
    BMW Z3 M coupe
    '93 Defender 90 200tdi . '94 Defender 90 300tdi

    independentwheel.com
    thatcherindustries.com

  22. #22
    Join Date
    Oct 2009
    Location
    Houston, Texas
    Posts
    442

    Default

    Great job documenting this...thanks for sharing!
    IG:uvebeenrobd
    --------------------------------------------------------------------

  23. #23

    Default

    What do you recommend for RS's? I have been told 14 ft/lbs, 17, 18, even 24

  24. #24
    Join Date
    Sep 2009
    Location
    Miami
    Posts
    162

    Default

    Should you use silicone on the bolts as well?

  25. #25

    Default

    Quote Originally Posted by D-rock View Post
    Should you use silicone on the bolts as well?
    Quote Originally Posted by Thatcher View Post
    Putting silicone on the hardware, or in between the hardware holes where the lip mates with the barrel is not only a waste of time, but creates a huge headache for whoever has to take apart and put the wheel back together.

    that being said, should you put some type of threadlocker on the bolt threads to keep the nuts from backing off?

Posting Permissions

  • You may not post new threads
  • You may not post replies
  • You may not post attachments
  • You may not edit your posts
  •