If this is your first visit, be sure to
check out the FAQ by clicking the
link above. You may have to register
before you can post: click the register link above to proceed. To start viewing messages,
select the forum that you want to visit from the selection below.
alright, just a few small updates... since i am awaiting a stupid brake line fitting in order to drive the car (ridiculous) i decided to undertake a few small projects on the car. like finishing up the spare, and shaving a new intake manifold that I had ported again and hot tanked.
spare is pretty simple idea. I build BBS rs sets as a side hobby (built about 10 sets this year) and i have quite a few parts left over. so i built myself a spare. The stock spare with the car wont ever even come close to clearing my stoptechs, so i needed a 4" or 5" wheel with a very low offset (-40 to -50) so i assembled one and used my 125/90/16 tire from the original spare.
5x114.3 center high pad height which clears my bbk, 3" forged stepped lip, pearlescent white powdercoated center to match the VIP modular wheels, 24k gold 1/2 ht hex cap, 24k gold spike bolts, 1.5" slant inner that is shotpeened
here is a pic of the finished product in my trunk under the false floor.
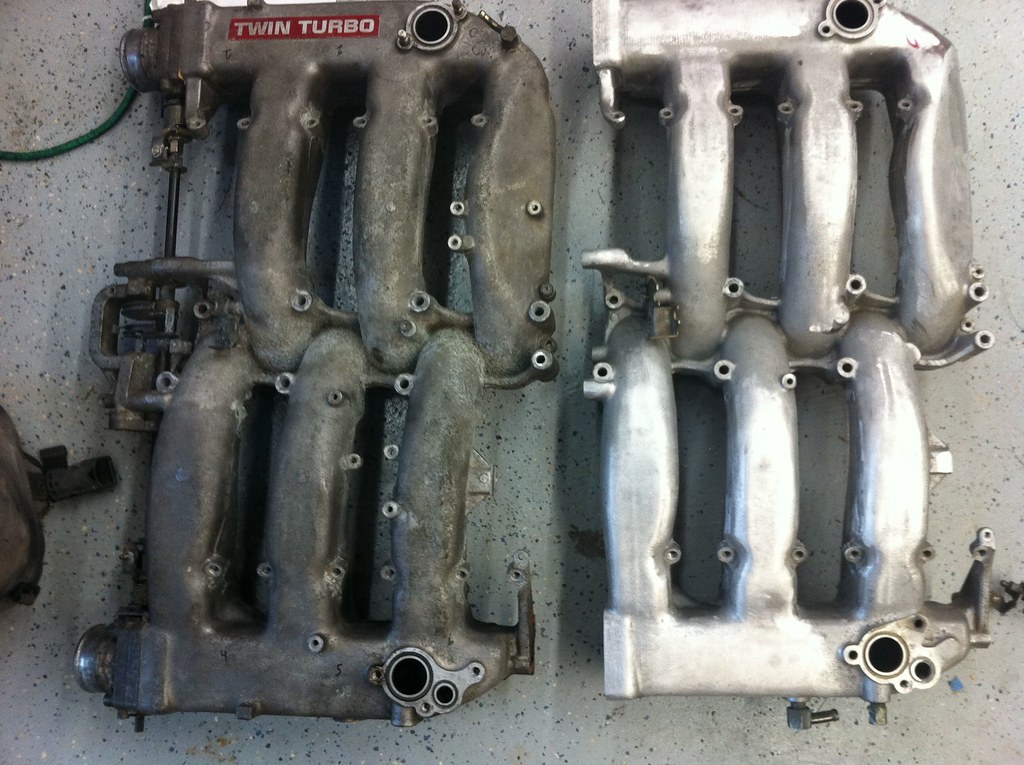
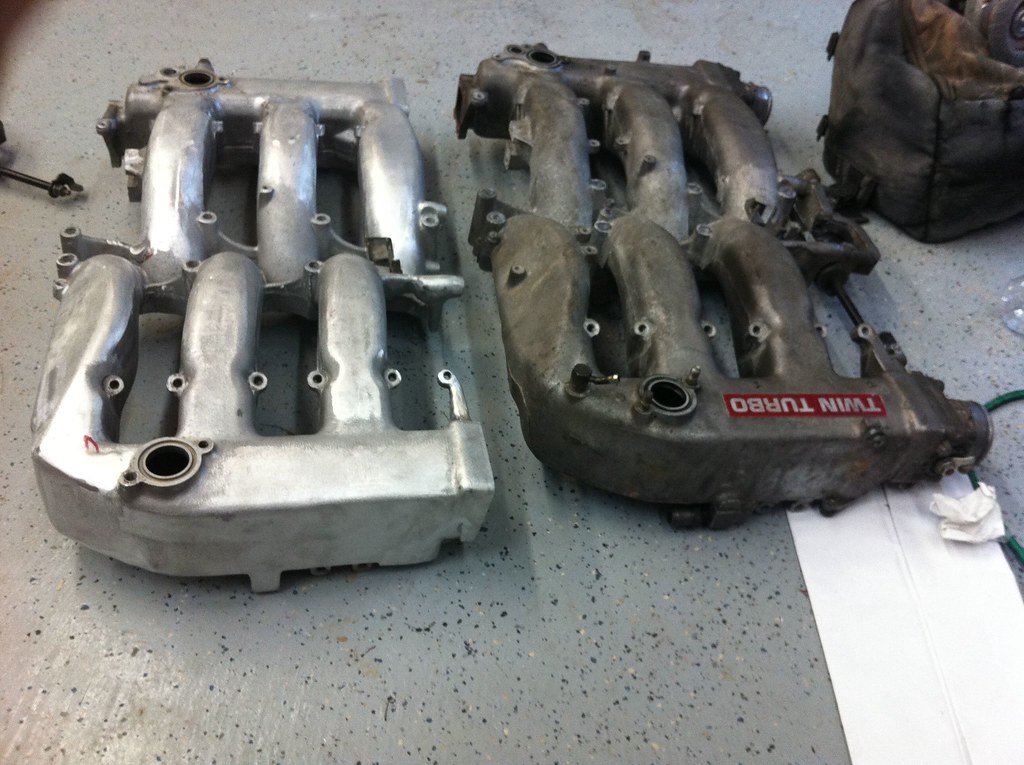
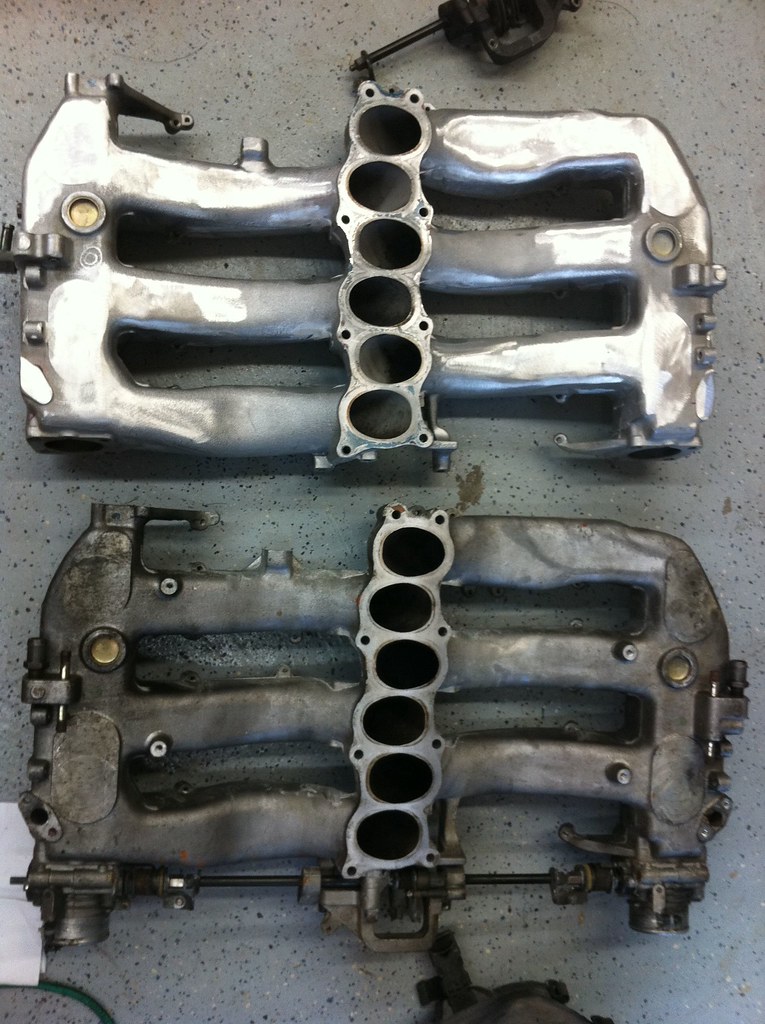
Then the intake manifold. i spent a few hours 2 or 3 years ago shaving the plenum of its casting marks, and some brackets. well now that i have a dual feed stainless fuel system, i had like 8 brackets on the top of the intake manifold that were no longer used. so i sold the intake manifold, and got a new tt one, had the runners honed to 58mm, and hot tanked. then comes the fun part. about 7 hours into it so far, removed all the brackets, all the casting marks, welded shut all the aluminum holes for items and systems no longer on the car, and here is the manifold. Its off at the powdercoaters getting finished as we speak. valve covers in mirror gloss black, and intake manifold in wrinkle black like the original one i did.
here are comparison shots of the before and after. stock tt manifold vs the one i shaved pre powder
pics of the installed products this weekend
sigpic
1990 Nissan fairlady Z32 - long term build
1982 euro porsche 930 turbo
"A less- assuming enthusiast probably wouldnt even think that this Z ran because of how naked the engine compartment was. The motor looks as if it just floats there, with nothing else in sight." Super Street 9/2012
there was quite a bit of time in relocating the wires... part are tucked into frame rails, fuse boxes are mounted to the frame rail inside the front fascia, and the other part of the wires were removed as i no longer have half of the systems in the car. With that said, there is a section of the harness thats still exposed and can be seen in the engine bay, its just really low and runs along the subframe. and once i extent two more wires, it too will be almost invisible. but thats in the coming weeks.
powdercoated parts should be in tonight, and the brake line parts are finally in my possession. shocking how hard they were to find new. so this weekend, should end with a complete car! for now...
sigpic
1990 Nissan fairlady Z32 - long term build
1982 euro porsche 930 turbo
"A less- assuming enthusiast probably wouldnt even think that this Z ran because of how naked the engine compartment was. The motor looks as if it just floats there, with nothing else in sight." Super Street 9/2012
 Tweet
Tweet


Comment