 Tweet
Tweet
Thanks for all the compliments, guys, I think it's gonna look killer once it's bagged. I'm finally on vacation, but I'm going camping for the next week. When I get back, Michel and I will get cracking on the install. A fortunate bit of news, it turns out Michel is on vacation too! I figured we'd be working on it evenings and late nights, but we'll be able to do it during the day. Can't wait!
-
-
killer lookin vert! That thing needs a KB or a whipple =D GL on the build, gonna look sick layed outComment
-
awsome build , make sure to make a build thread on Airsociety forum too Last edited by Sam_bmw; 07-23-2011, 05:41 PM.
Comment
-
wow, lots of parts! can't wait to see the outcome.4 Cars, 0 Cupholders

Comment
-
i drive a mustang myself and been thinking about going air, cant wait to see how your cobra turns out, good luck and keep us updatednow take it home and f*** with it- deftonesComment
-
I'm back from camping, a day earlier than predicted because of unfavorable weather. Anyways, we'll be starting the install on the weekend, not sure exactly when yet. In any case you'll be the first to be updated on progress, mainly because I haven't posted this anywhere else, and nobody in my personal life really cares about this project.
Comment
-
I got to mess up the nice new boxes today......Comment
-
I'm guessing Ratfink is my cohort Michel. Hey man, long time no see!Originally posted by Ratfink View Post
I'm working on an update for today's first day of work, keep posted!Comment
-
Very excited to see this.. way to go for being willing to try new things. Mike@AccuAir is some of the best we know.Comment
-
Got to tell you, I was impressed with the quality of the stuff, even the plastic bags they wrap thing in it are quality.
This is going to be nice.Comment
-
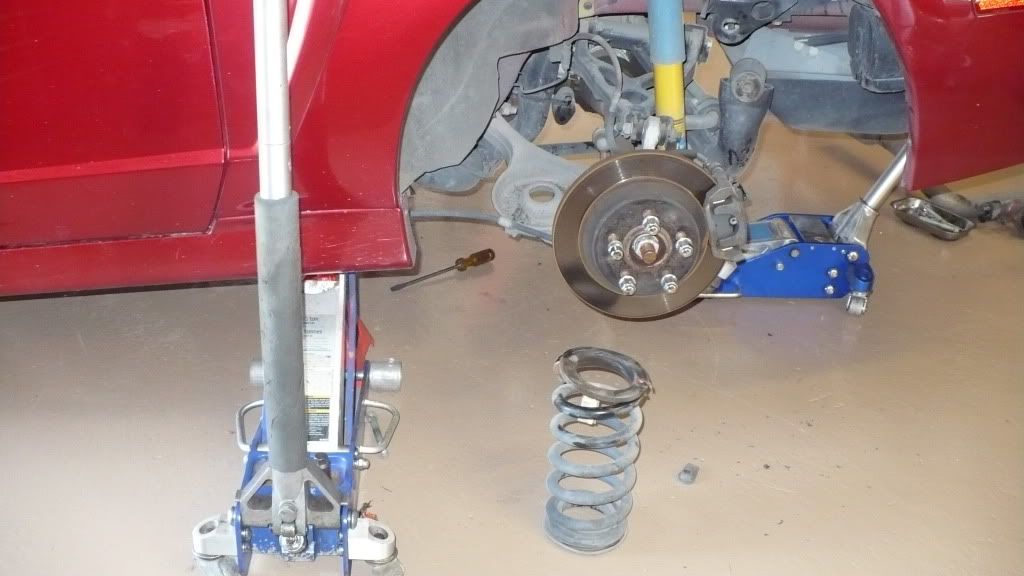
Today we started on the install, yay! Michel felt it necessary to repaint the garage floor before we embarked on this project, so that's why it's all nice and shiny. We made an effort to clean up and maximize workspace before we even moved the car into the garage. I had made a mental plan to do things in a certain order, but that went out the window once we actually got working.
The first thing we did was ditch the archaic coil springs. We then quickly installed an air spring se we could get a feel for things and get in the air suspension project mood. It actually did help to have an airbag installed!
We then removed the rear seat cushions to have better access to the forward end of the trunk. The car being a convertible made it somewhat easier to get into and out of the car, but we also had to keep putting the top up and down to make sure our installation wouldn't interfere with the space the top takes up when it is open.

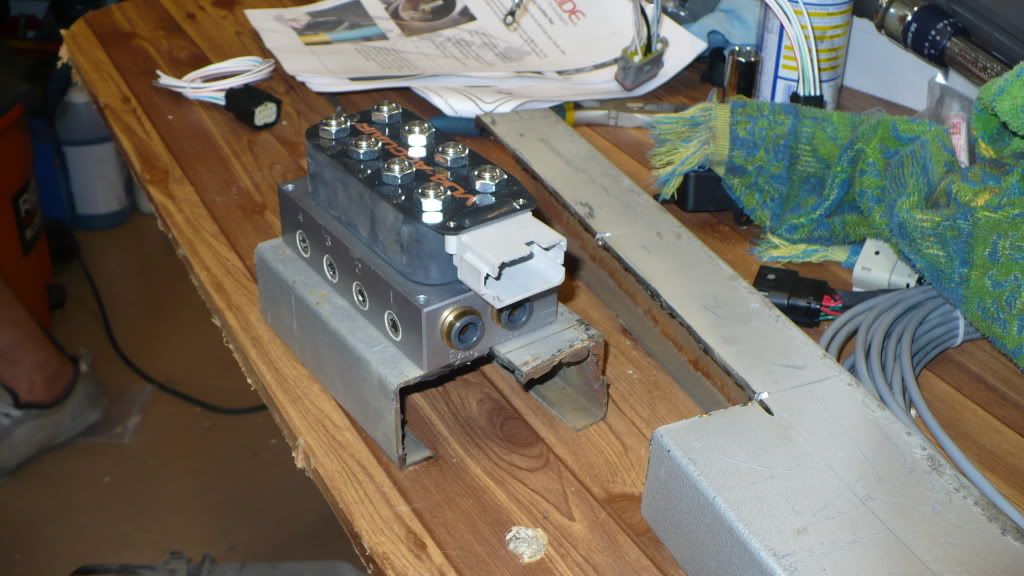
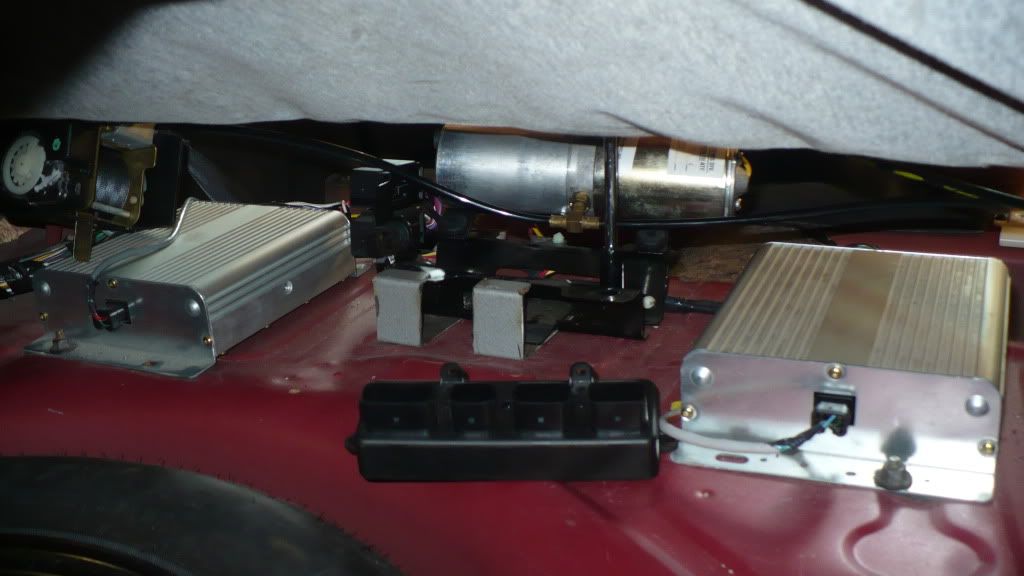
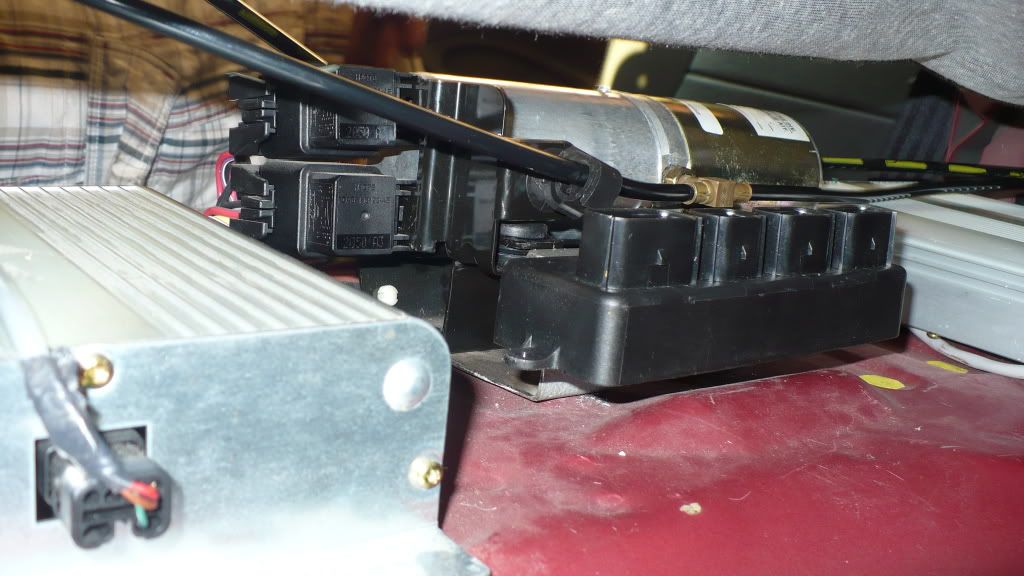
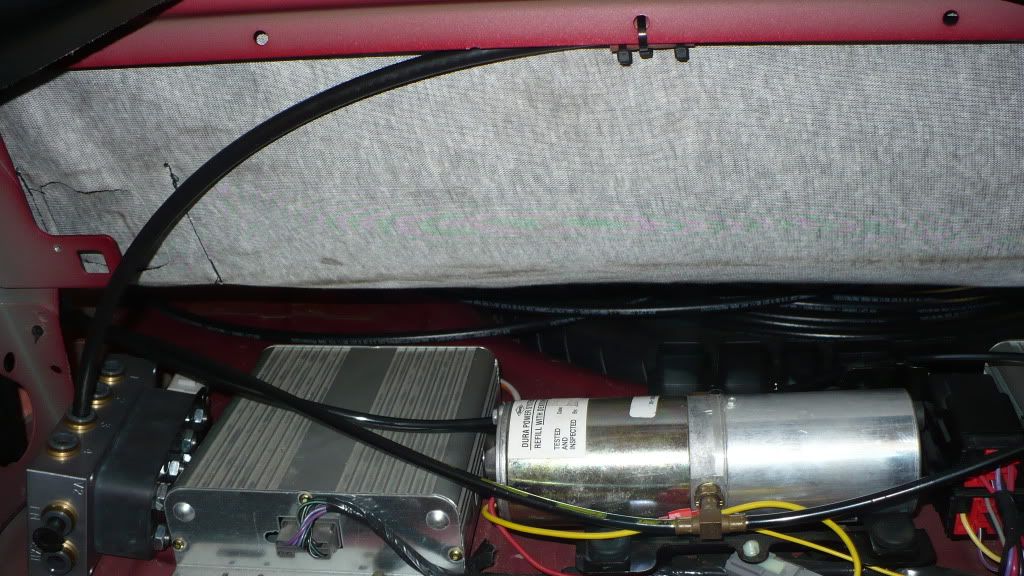
I was aiming for a clean setup, with minimal visible components. So far, we've managed to keep the VU4 manifold and the ECU out if sight, mounting them on custom brackets between the forward panel of the trunk and the back of the rear seat cushion. It's a real tight fit in that area, what with the pair of amplifiers for the stock sound system and the hydraulic motor for the convertible top.
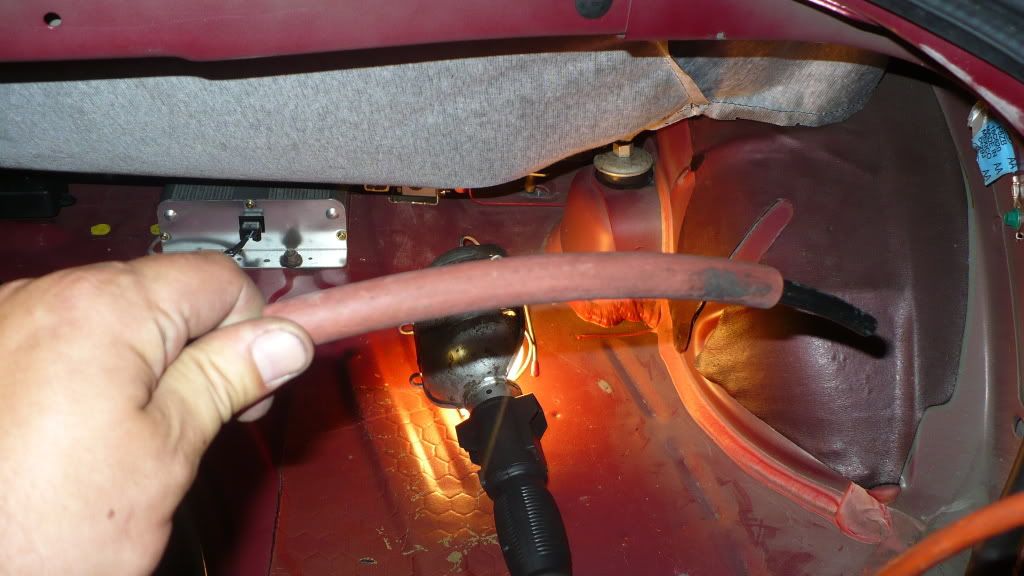
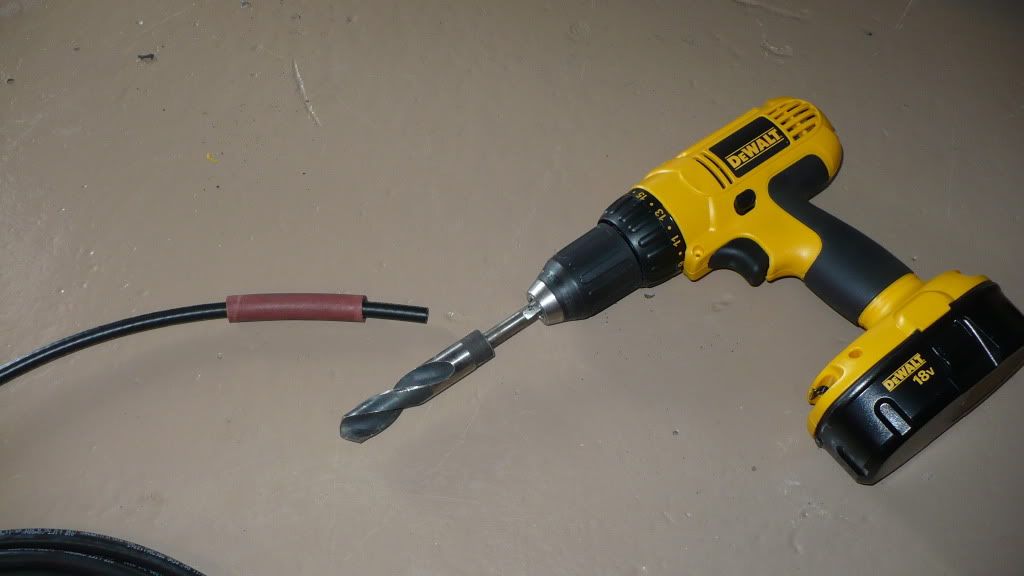
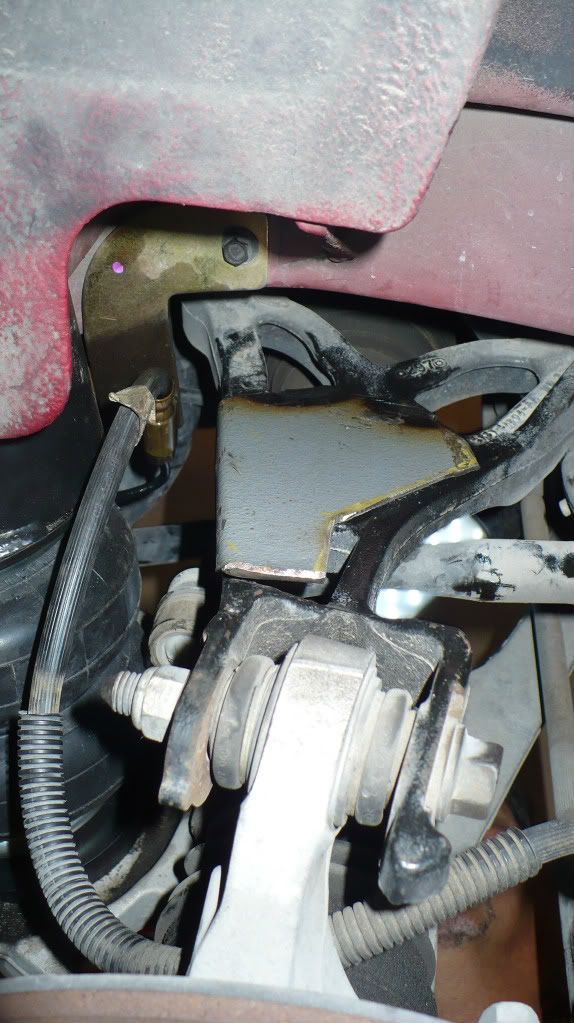
The rear seatbelt reels were also a big obstacle to work around. We determined that the best option for routing the air lines for the rear bags was to drop them directly down onto the top of the spring cup. The top of the rear spring cup is almost directly below the seatbelt reel location, so we had to drill careully from the bottom, aiming blindly for a narrow gap between the reel and the wheelwell. You can see the pilot hole just below the thickest part of the caulking.

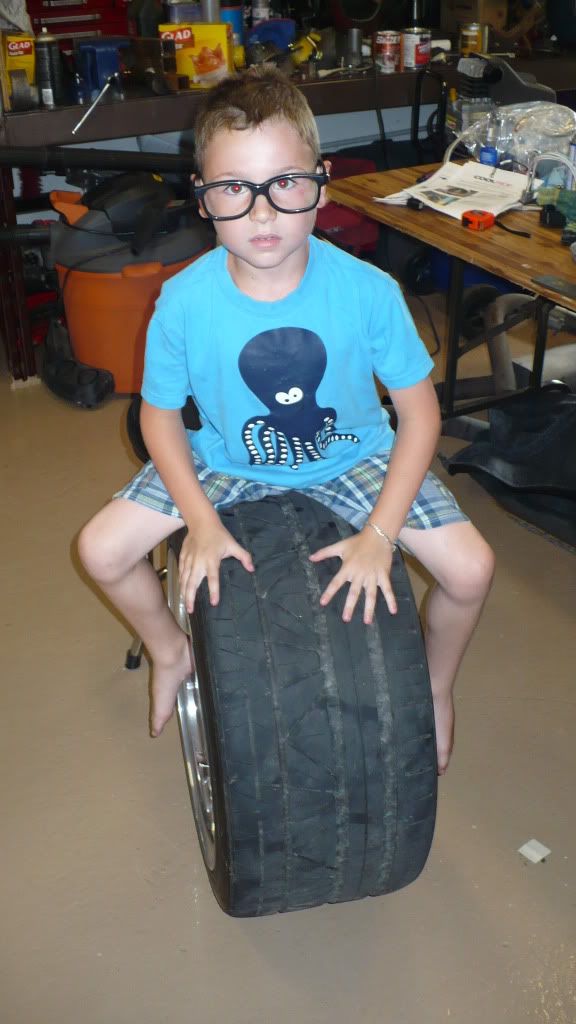
Neighbor kid came by because we were working with the garage door open, and he thought my car looked cool, so we sat him down on one of the 295s just for kicks.
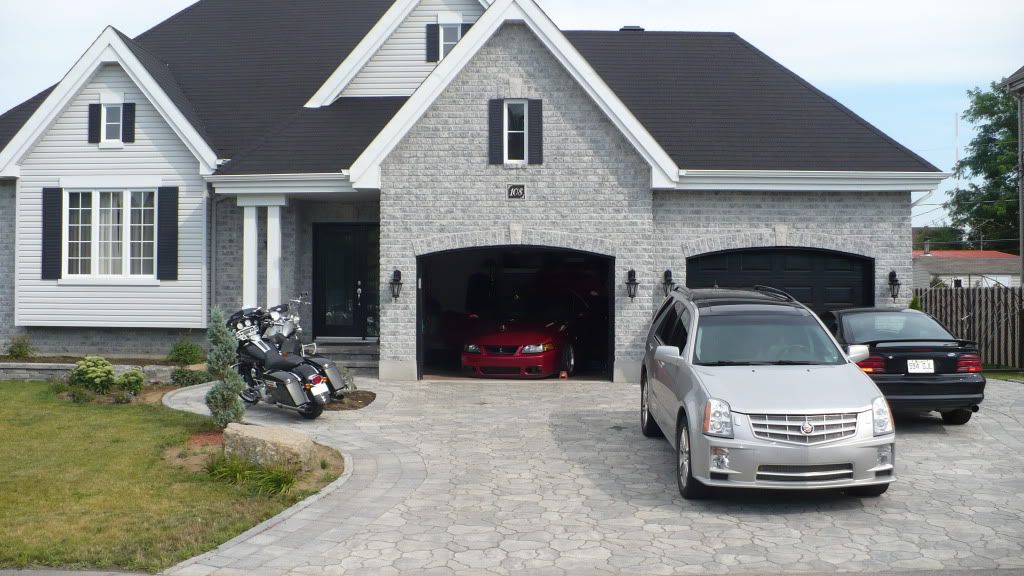
The view from outside the garage (note, this isn't my house, it's Michel's, all the nice motorized machinery is his and his wife's).
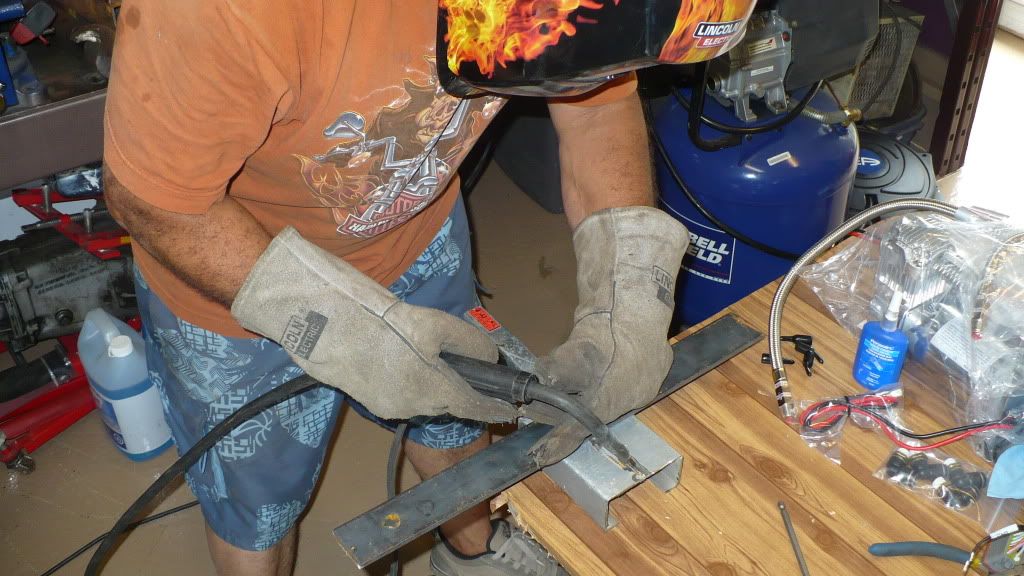
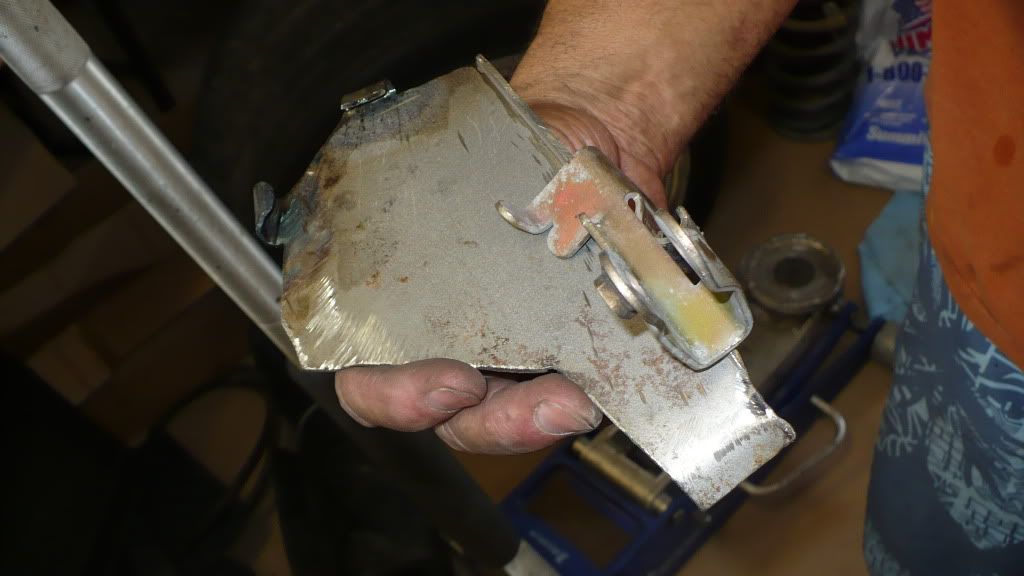
We (meaning Michel) spent about 45 minutes using his fabrication skills to build a bracket to mount the VU4 manifold, and in the end we changed our minds. We then modified the same bracket for the new layout we had chosen, seen in the last pic. We're still in the mockup stages for the most part, so some final adjustments will be made to improve looks and/or functionality.
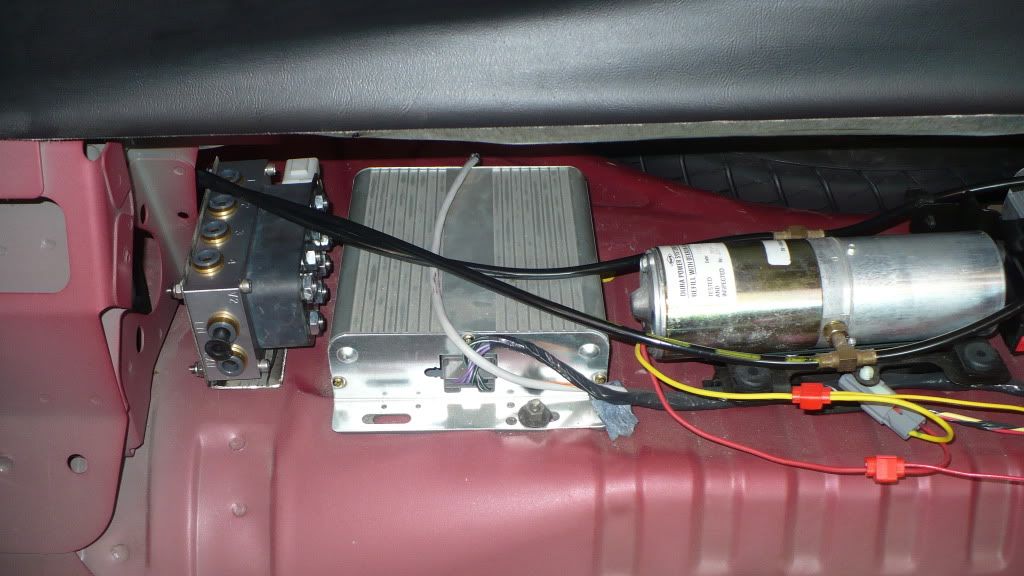
From there, we could find a place to mount the ECU. We chose to mount it directly behind the top motor, using a couple of custom made brackets. We used a couple of self-tapping screws on the two bottom tabs of the ECU to attach it to our brackets. The length of the VU4-to-ECU wiring harness is pretty restrictive, so we will extend it tomorrow to allow for the mounting locations we chose.
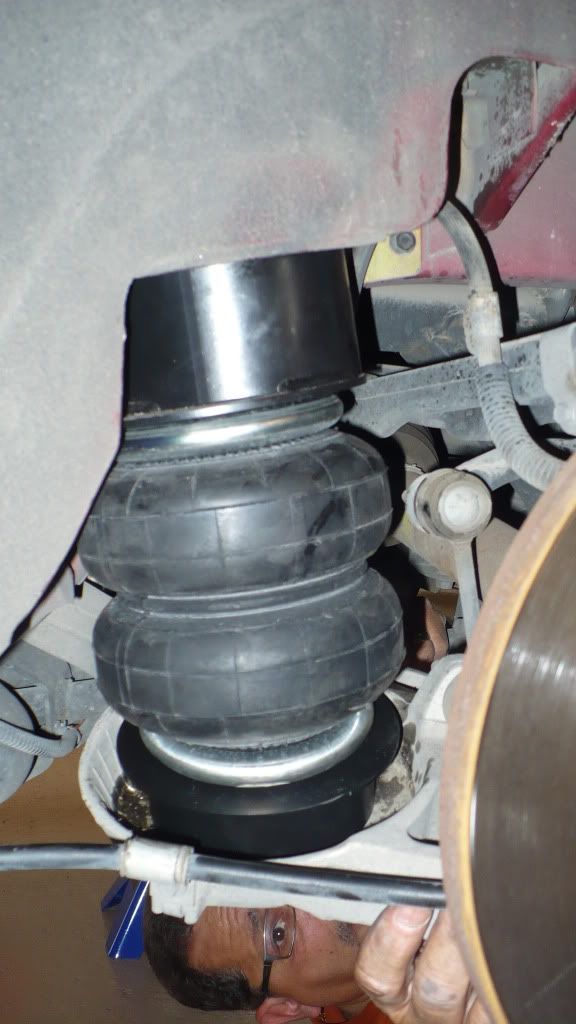
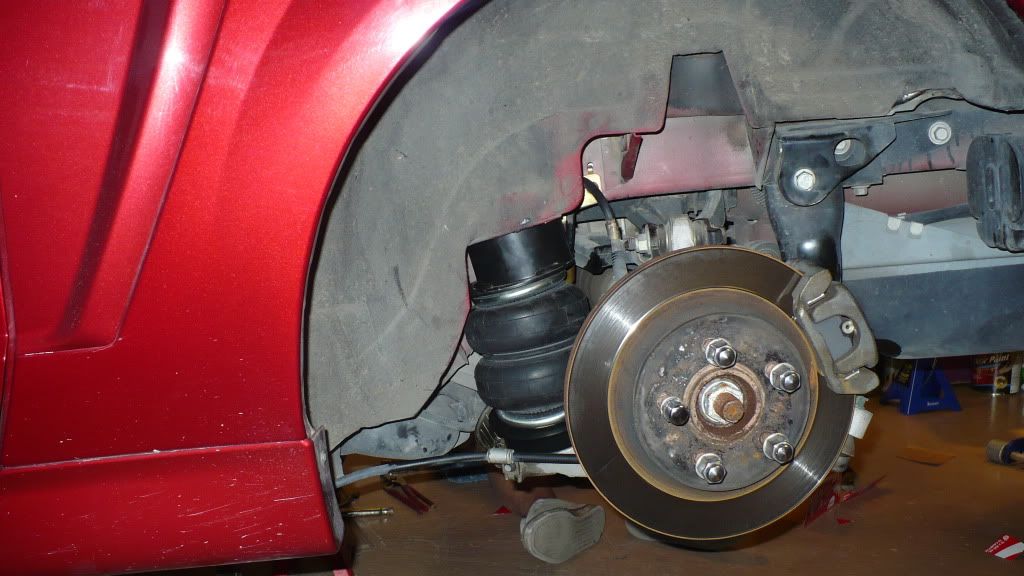
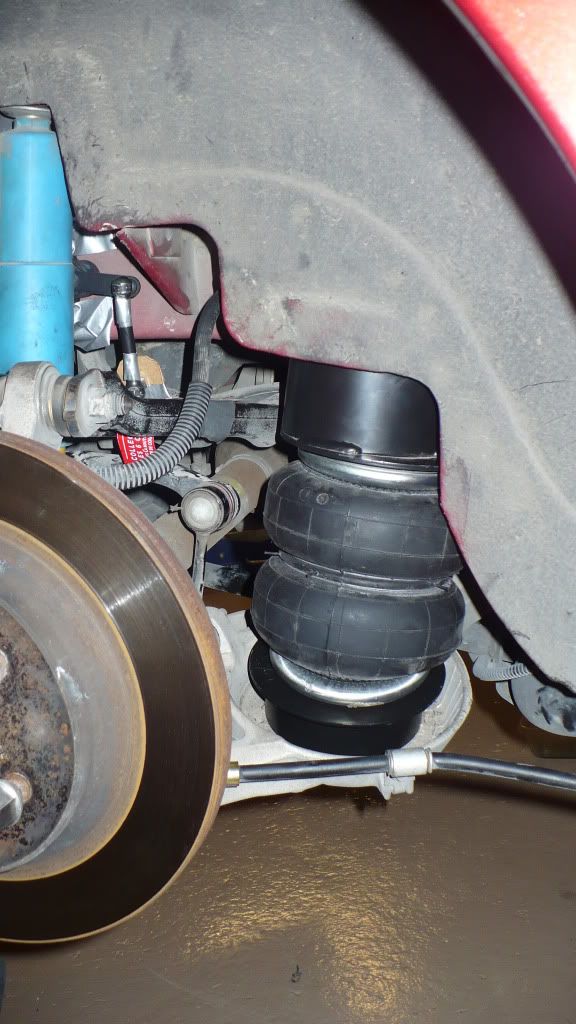
Here is the driver side rear bag essentially completely installed. The shock absorber has been removed to acces the area we will be using to install the ride height sensors.
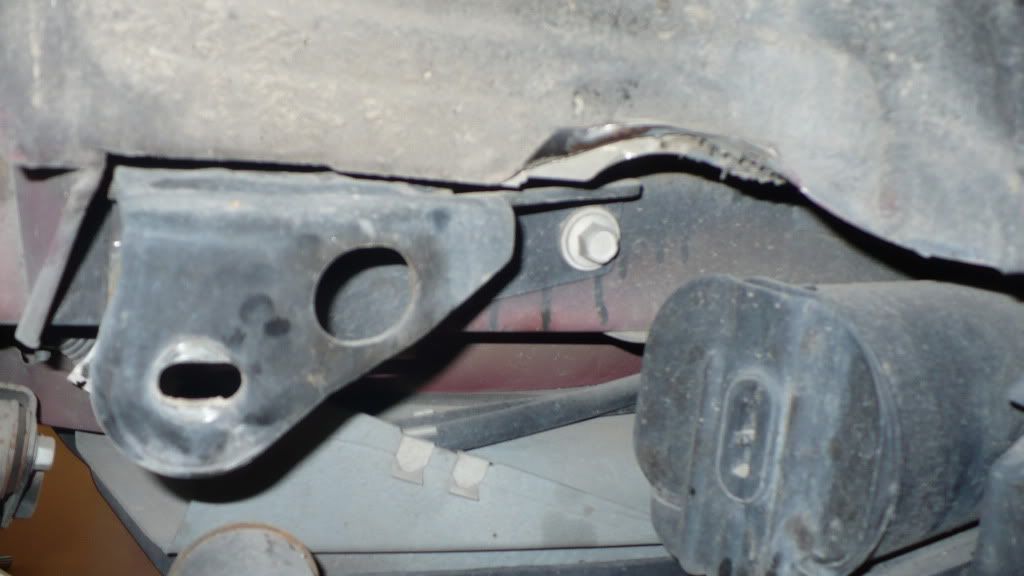
Meanwhile, Michel was again impressing me with his fabrication skills by using a cardboard Coca-Cola carton to make a template for the lower bracket of the ride height sensor.
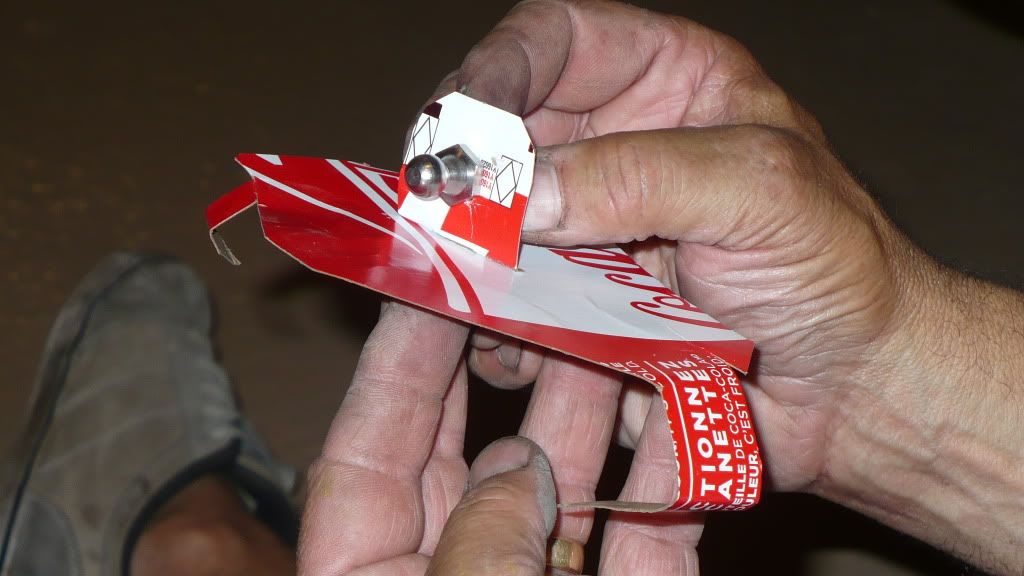
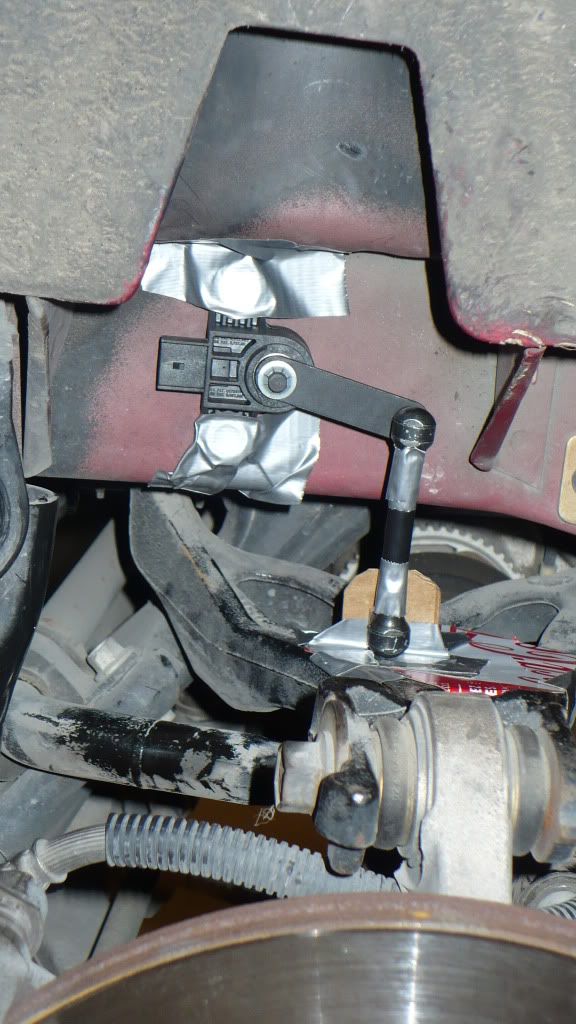
The bracket seems like overkill to me, but Michel is happy to do this kind of work, and I think it will look and work great once it's done. Here is a shot of the rear passenger side suspension fully compressed. Once the car is on the ground, it probably will never get this low, so we will be making some more minor adjustments to pushrod length and sensor positioning. The template is also not the final version.
We are using an old length of shop-style air line to protect the suspension's air line wherever it will pass through or rub on anything.
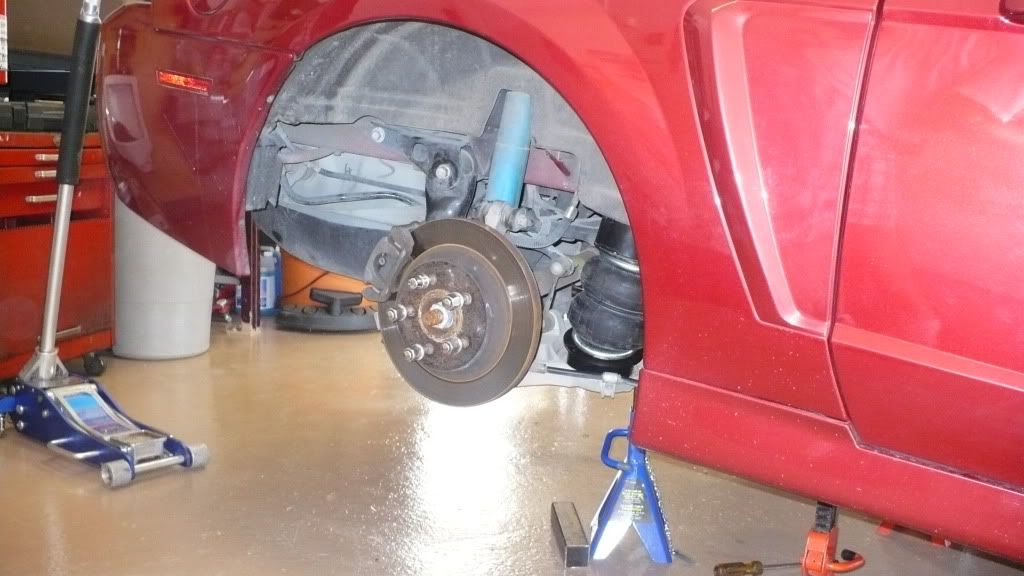
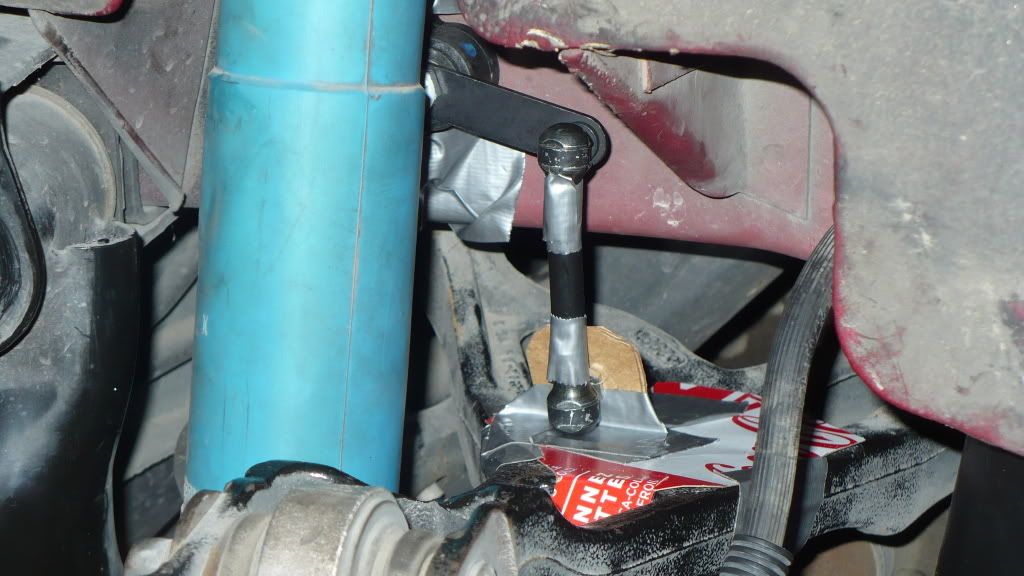
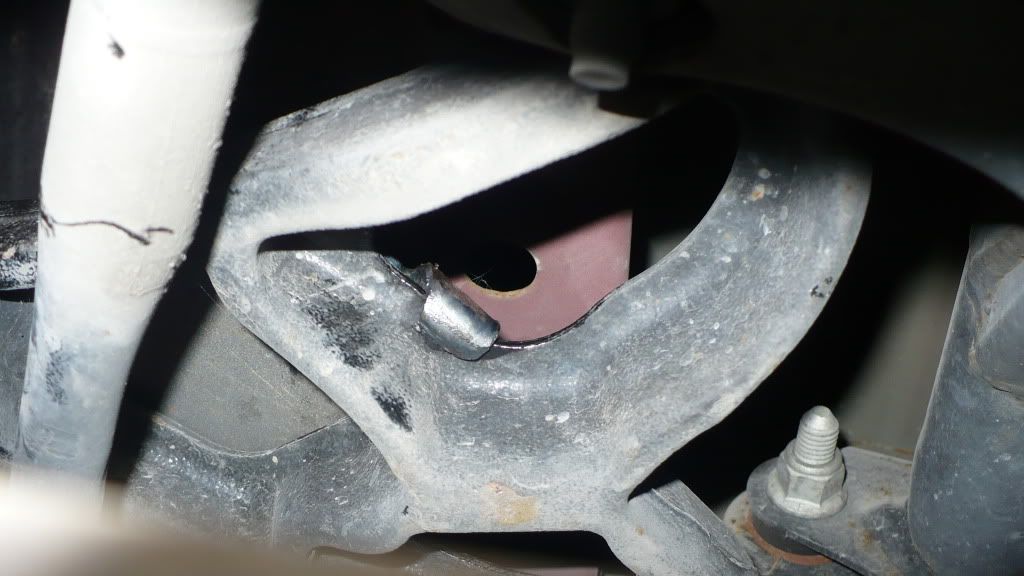
Right rear suspension with the bag fully installed, and the ride height sensor mocked up.
Here is a bonus shot of the inner fender on the left rear. You can see that the metal has beel folded upwards from the tire rubbing on it. I didn't even know this had happened until today. I thought I was just rubbing on the fender lip, but even that is not what I was expecting. We will resolve these problems before the car goes back on the road.
Tomorrow we will extend the harness to the ECU, finish up the mounting of the rear ride height sensors, permanently mount the custom manifold bracket, and then get started on the front suspension. We worked 12 hours today at a leisurely pace, and we are both happy with the progress, so now I'm off to bed for some rest before we start all over again!Comment
-
Nice work! I like those brackets!"on our way back i hit a bump and both of the springs slip off of their seats and slashed both of my front tires."
-Dane M
If your not doing this, your doing it wrong.Comment
-
Looking good so far!
- www.bagriders.com - Email us at: sales@bagriders.com -
- Did you find a lower price? We Price Match! -
Comment
-
I have time for a quick midday update. Michel started working on fabricating the metal plate that we will mount the bottom end of the ride height sensor pushrod on. He bent a couple of tabs to secure the plate to the upper A-arm, and incorporated the stock brake line bracket into the plate to bolt the plate to the arm using one factory bolt in the stock location. Awesome! (There are still a couple of adjustments to be made.)
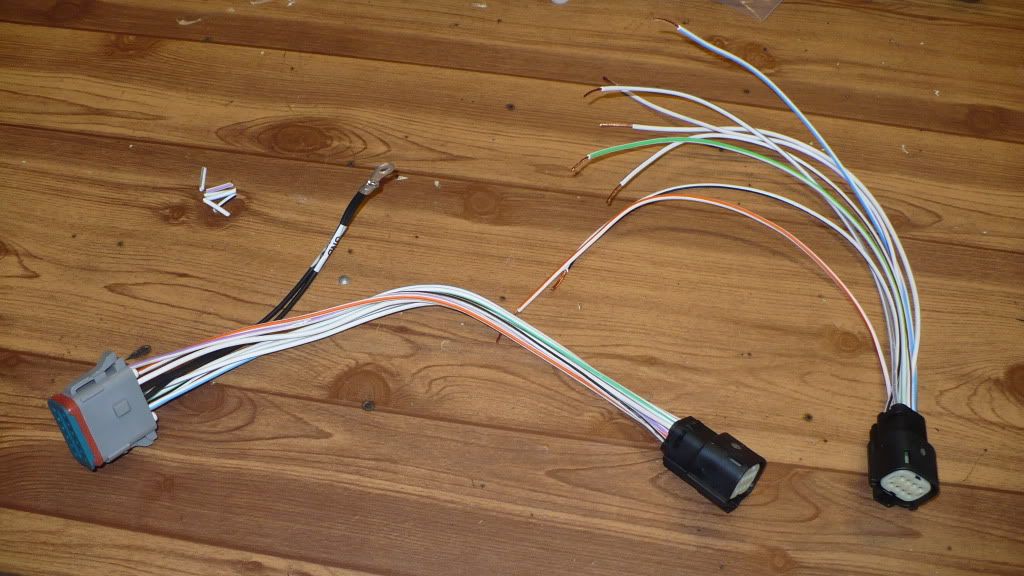
Meanwhile, I got to work extending the wiring harness that goes from the VU4 manifold to the ECU. Accuair supplies a completed harness, and a half harness for use with other manufacturers' manifolds. The wire sequence is the same for both, so it was just a matter of cutting off the black connector on the first harness and splicing together same-colored wires from the half harness. And just like that, there's about 3 more inches of harness to help you relocate components!
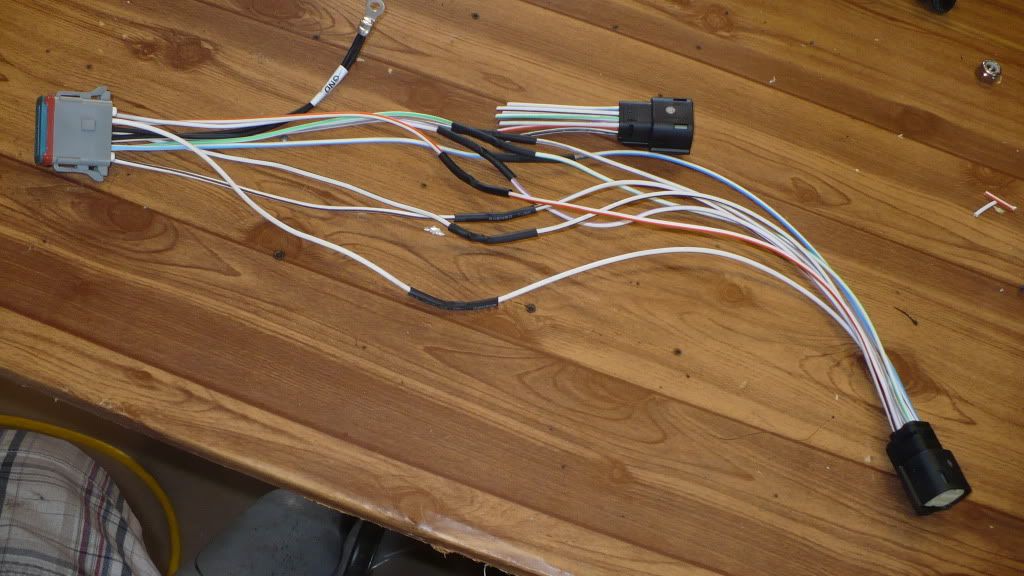
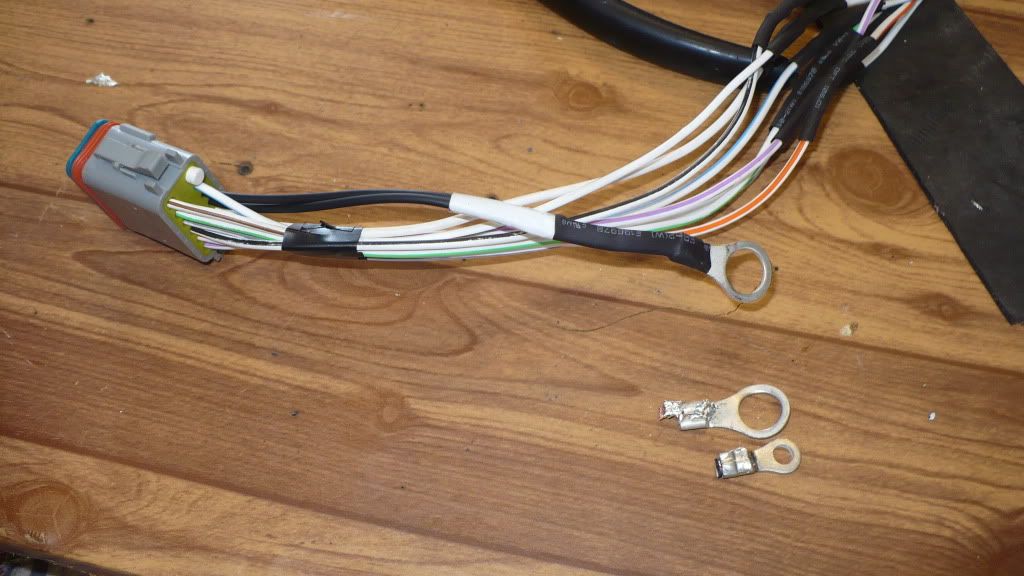
Afterwards, I decided to swap out the ground ring on the same harness for one with a bigger-diameter hole, so that I could put it on the stud that the amplifier is secured to. It took me a couple tries, but I got it done and looking pretty good.
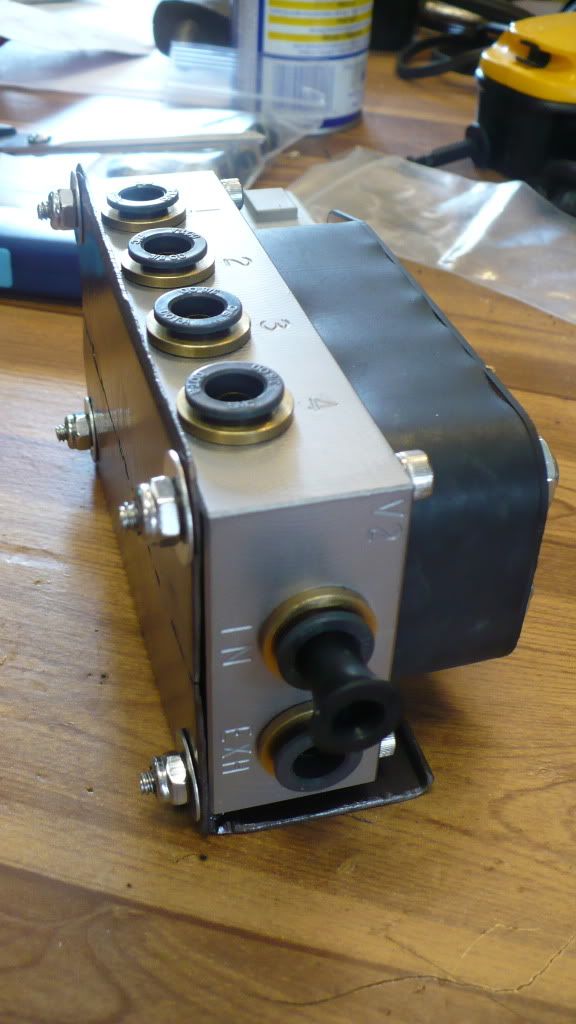
I then cleaned up and painted the manifold bracket that Michel fabricated yesterday. I just used some hammered-finish brown paint that was kicking around in the garage. I also painted the two brackets for the ECU in the same color, just because.
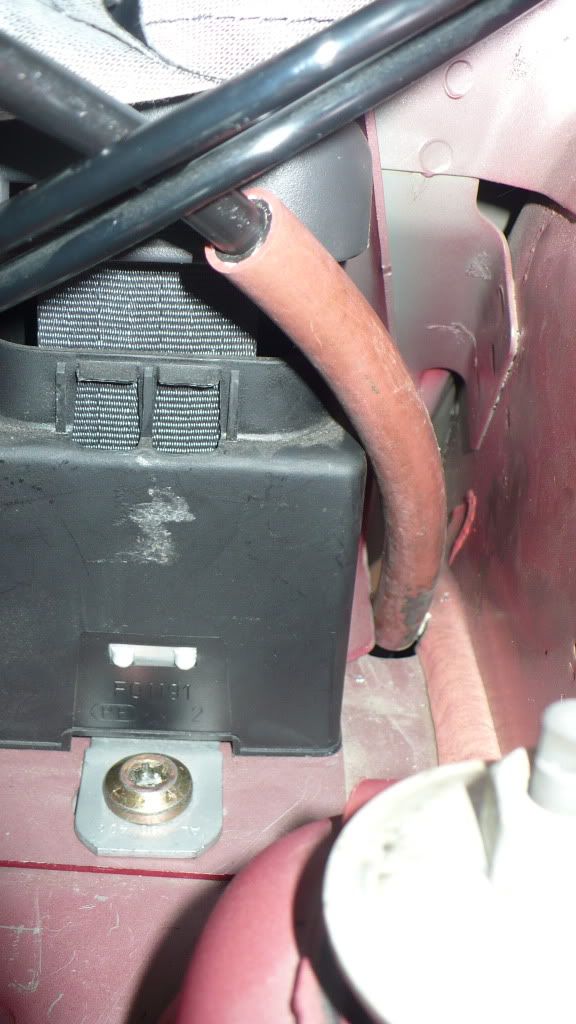
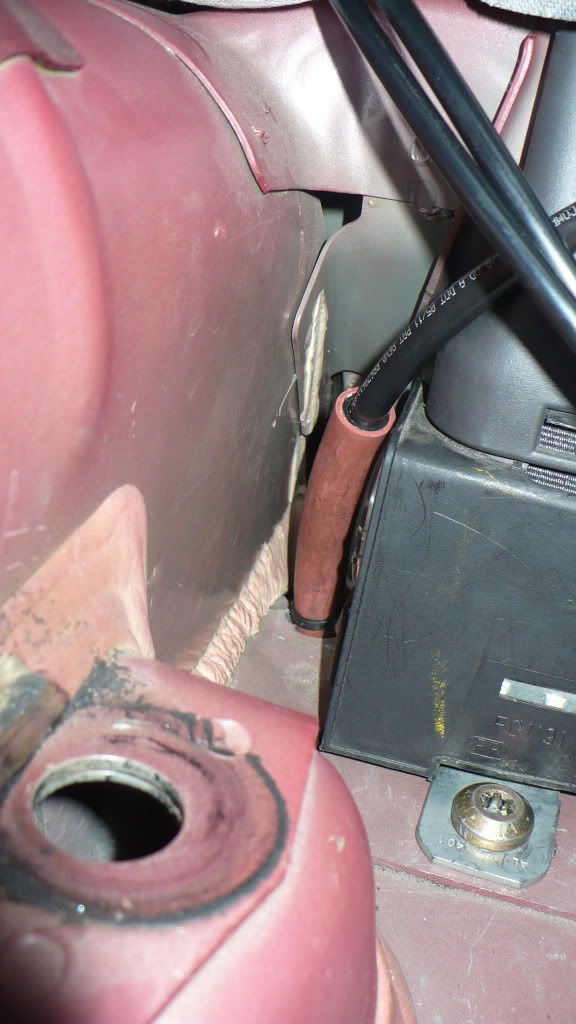
I also routed the air hose for the left rear bag to the manifold and attached it to the underside of the parcel shelf, using the red air hose to protect it. We still need to finalize the location and installation of the manifold. We plan to epoxy the bracket to the floor of the trunk next to the amplifier. Until then, I can't finalize the routing or the right rear bag. The proximity of the manifold to where the air line comes out of the floor makes it difficult to route the line directly. We will have to loop it around somehow to get the right angles without kinking the line.
Here are a couple pics of the rear bag lines disappearing into the floor next to the seatbelt reels.
That's all for now. We'll be working this afternoon and evening, so there may be another update tonight.Comment
-
The above post was done by me, forgot to log Michel out before.Comment
Comment