Originally posted by NorCalFocus
View Post
-
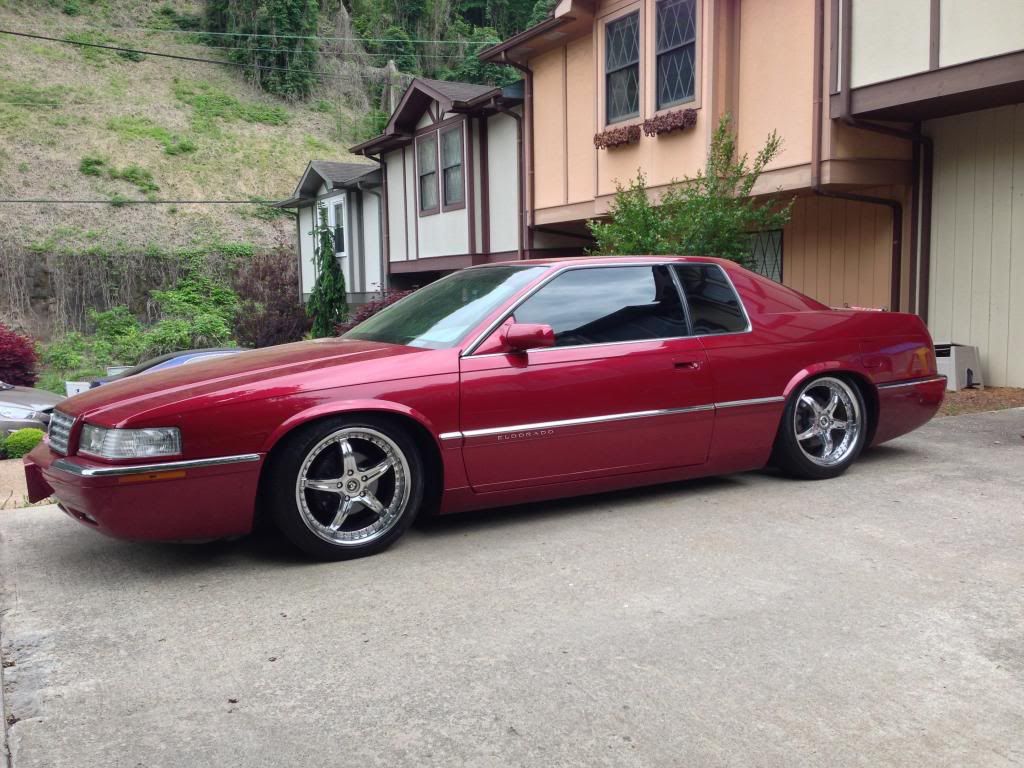
aired down already, didnt go all out this time around...gotta drive it daily for a while, so cant get too low with the east ky roads...coal trucks literally wear trenches in the pavement... planning on buying a truck later this year, and will drop this one down more at a later date... -
yeah...the wheelwells are huge...plnty of room, trying to decide on going with some 18" late model factory chrome caddy wheels and spacers or something else...I like factory chrome cause I **** polishing, and aftermarket ones tend to rust if you dont, especially with salty roads... and the car just screams for chrome wheels...black or painted just wouldnt fit it as well....Originally posted by Rob&co View PostLeave a comment:
-
The front turned into a bit of a pain... while everything was taken apart, I overextended the halfshaft... which ended up messing up one of the bearings when I finally got it back in...I wouldnt have even found the bad bearing except after getting everything back together, I noticed grease in the wheelwell, I had cracked/split the boot...so after checking on boots($30 for the inner and $20 some for the outter) I pulled the joint and it felt rough...so I checked on a new halfshat...it was $49...cheaper than buying the boots...lol
As far as the install, I am running the aero power house bag over struts...I decided to run the thrust bearing rather than use the factory strut bearing, mainly because the staock setup rubbed on the bolts for the top plate for the bags...also to get more drop, the factory setup is crazy thick, but had the bearing riding on a 2-3 inch thick rubber bushing...I used set of monroe struts to replace the electric struts that came factory... I torched off the coil mount, leaving the part that was welded to the strut, after a few hours of work, I had a nice level ring left on the struts to mount the lower plate to..., I used the tubing that came with the plates to make sure the plates were mounting level on the struts...and after a few mig melds followed by cooling it with a water hose, they were mounted...that was the extent of my fab work up front...I did go ahead and swap out one wheel bearing the had began making a little noise and swapped in two new sway bar links... All in all it was a lot simpler than I made it, and I am happy with the install, but later I plan on swapping the ss-5 bags on the rear for some larger ones...maybe the ss8 for a more cushy ride...I wasnt sure if they would fit...when I go back into it, I may pull the rear arms and cut them some more to get a bit more drop in the rear...and up front I may try to find a shorter pair of struts or possibly go with the universal air strut bag drop in struts to get more drop up front...but for now, It is my daily driver and I dont need to lay the rockers, the roads are too rough, but this summer of fall I will be buying a new ride and may just drop this one on down... one advantage I had was the caddy already had ride height sensors, so I was able to use some of the mounting points and bracketry for the e-level sensors...Leave a comment:
-

Air it out more! Lol Looks pretty good so far.
Please start posting pictures and not just the link. Click the little chain image above the pic on photobucket, then click the IMG code and it will copy it, then simply paste it in your post. Many people won't click the links to view your pictures.Leave a comment:
-
here are some pics...Leave a comment:
-
curious to what this looks like
my dad used to drive a cutlass supreme, somewhat the same body styleLeave a comment:
-
I am obviously bad at doing write ups...I finished the install a week and half ago, everything went along fine, but slow... seeing how I did it solo, it took me a week of evenings working on jack-stands, but it is finished now, except tracking down a leak... I took way too much time double and triple checking clearances and cycling the suspension thru its range to make sure everything cleared and the lines didnt bind up or anything... The rear bags went in to replace the factory coils, the lower spring mounts which are molded into the a-arms were cut down with an angle grinder so the bags would sit straight, and not be angled... seems like it took two evenings to fit the rear drivers side, but I made, or sat aside two of everything that went in, so the passenger side went quicker, it was complete, start to finish in under 2 hours including removing the factory compressor and lines that went to the "load leveling" shocks... The install would have likely gone quicker, but I decided to run the lines thru the interior of the car and had to work to run the air lines, sensor cables and a 4 gauge power cable from one end to the other...I went ahead and bought two distribution blocks, one for positive and one to ground everything...I will likely do some stereo work in the future, so I got that out of the way...I also fumbled around for most of a day trying to figure out where/how to mount the tank and other components, I ended up getting an 8' strip of aluminum bar and bending two brackets to hang evrything under the rear package tray in the trunk, I did mount the I-level in the rear window after it didnt seem to connect well while in the car, I guess the tank and other things interfered with getting a good signal from the drivers seat...I left a lot of slack in the lines and cables to allow me to move anything if I change my mind...I am seriously thinking of dropping the tank under the car, behind the bumper and sticking the compressor down there too...it is a 400c and it is way louder than i imagined...combine that with my unfindable(for now) air-leak and I need it quieter and also more airflow if I play with it much... the front had more problems...Leave a comment:
-
Bad karma...
I must have done something pretty bad somewhere along the way.... My e-level rocker setup finally shipped today, the same day that my air fittings for my bag arrived via the USPS. The envelope had been torn open and the nearly $50 worth of fittings are gone, but it was sealed nicely with USPS arrived damaged tape...so in the last 18 days I have sent a ton of money and only have a tank and compressor mounted in my trunk to show for it...Maybe this weekend I will be able to start installing the i-level and run some air lines...Leave a comment:
-
slight delay...the e-level with the rocker switch was on back-order, but hey, it happens plus Will at bagriders.com threw in a free shirt, which made it a lot less painful...lol...I have talked to a couple of different people there(Rali, Taylor and John) and have gotten great answers, advice and service... they went ahead and shipped the compressor and other goodies so I will try throw some of that in this weekend...Leave a comment:
-
Yeah great mileage I have known the car since my neighbor bought it new. It came with rear air shocks just works to keep it level with a load and the front is electronic damping. I am hoping the head gaskets live a long life. My mom has a black '94 STS she bought new and it is still all good. I guess it is bad when your moms car is meaner than yours .lolOriginally posted by white out View PostLeave a comment:
-
1. WOW! Super low mileage.
2. Keep an eye on your headgaskets.
3. These aren't air from the factory?
Looks good, and will be watching the build.Leave a comment:
-
different. These can look good though.
You should use the IMG tag for your pictures.Leave a comment:


Leave a comment: